

10 Easy Last-Minute Halloween Costumes From Your Closet
Halloween has a way of sneaking up on perfectly responsible people. One minute you’ve got all the time in the world. The next, somebody needs a costume for school tomorrow, or you remember that party you said yes to is a costume party. So there you are in the store, staring at a $40 polyester getup that looked a whole lot better online. Put it down. Go home and open the closet.

A good last-minute Halloween costume doesn’t require a sewing machine, a glue gun or a level of craftiness you simply do not possess at 9 p.m. What it needs is something you already own, plus one detail that makes the whole thing click.
Jeans and a plaid shirt? That’s a costume waiting to happen. All black? You’re halfway to several. A scarf, an old hat, sunglasses or a cardboard box headed for recycling might be all that stands between you and Halloween glory.
Here are 10 you can pull together right now.
1. The classic bedsheet ghost

What you need: An old white sheet and scissors.
Sometimes the obvious answer is the best one. Cut two eye holes, drape it over your head, and congratulations. You’re a ghost. Not a complicated ghost. Not a historically accurate ghost. A ghost.
And somehow, after all these years, it’s still funny. Especially on an adult who commits to it completely.
No white sheet? Any light-colored one will do. This is Halloween, not a ghost certification exam.
2. Cowboy or cowgirl

What you need: Jeans, a plaid or denim shirt, belt and boots or sturdy shoes.
Chances are most of this is already hanging in your closet. Tuck in the shirt, cinch the belt, roll up the sleeves. Done.
A bandana or cowboy hat makes the idea obvious, but you don’t need either. A scarf tied around your neck works just fine.
Want to turn your cowboy into an outlaw? Darken a little stubble with makeup or eyebrow pencil and give your best “this town ain’t big enough for the both of us” stare.
3. Tourist

What you need: Shorts, loud shirt, sunglasses, sneakers or sandals and every travel accessory you can scrounge up.
This one gets better the more ridiculous you make it. Add a camera, fanny pack, floppy hat, backpack, folded map or sunscreen on your nose. Pull your socks up higher than good judgment would normally allow.
Then spend the evening asking people where the nearest gift shop is.
4. Scarecrow

What you need: Jeans, plaid shirt, boots or sneakers and a floppy or straw hat if you have one.
This may be one of the easiest costumes in the entire Halloween universe. Roll up your jeans, leave your shirt untucked and use eyeliner or an eyebrow pencil to draw a few stitches across your cheeks and nose.
No straw hat? Skip it. No actual straw? Even better. I don’t want you shedding hay all over someone’s living room anyway.
5. Cat burglar

What you need: Black clothes, dark beanie or stocking cap and a pillowcase.
Dress in black from head to toe. Draw a simple mask around your eyes with eyeliner. Then grab an old pillowcase and draw a giant dollar sign on it. That’s your loot bag.
If this is for a school event, keep it firmly in cartoon territory and skip anything that looks like a weapon. The pillowcase gets the joke across just fine.
6. Rosie the Riveter

What you need: Jeans or work pants, blue or denim button-up shirt and a red scarf or bandana.
Roll up those sleeves, tie the scarf around your head and flex. Rosie is instantly recognizable, comfortable and about as easy as it gets.
No red bandana? Check the scarf drawer. Any strip of red fabric will do. We’re going for Rosie, not a museum reproduction.
7. Mime

What you need: Black pants, a black-and-white striped shirt if you have one, dark shoes and a little makeup.
A striped shirt makes this costume nearly instant, but a plain black or white shirt works in a pinch.
Use makeup you already own to add dark eyebrows and a few simple eye details. Suspenders, a scarf or a black hat are nice extras if they’re lying around.
The best accessory is free. Don’t talk. Depending on your household, that alone may qualify as a Halloween miracle.
8. Athlete or coach

What you need: Team jersey or T-shirt, athletic pants or shorts, sneakers and whatever sports gear is hiding in the garage.
Got a jersey? You’re practically finished.
Add a baseball cap, whistle, clipboard, ball, glove or gym bag. No jersey? Wear sweats and go as the coach instead.
This is an especially great emergency costume for kids because there’s a good chance you already own every single piece.
9. Artist

What you need: Colorful outfit, scarf and something that can pass for a paint palette.
Wear something bright, tie the scarf around your neck and cut a palette out of cardboard. Add a paintbrush if you have one.
A few smudges of washable paint on an old shirt sell it even faster, but please don’t sacrifice a perfectly good shirt in the name of Halloween.
Bonus points for carrying a sketchbook and gazing thoughtfully at everyone as though you’re deciding whether to paint their portrait.
10. Cat, mouse or other assorted household animal

What you need: Black, brown or gray clothes, eyeliner and homemade ears.
This costume has rescued generations of people who remembered Halloween approximately 45 minutes before they had to leave the house.
Dress in one color. Draw on a nose and whiskers with eyeliner. Cut ears from cardboard and attach them to a headband, hair clips or even a hat. For a tail, use an old pair of tights, a long sock or a strip of fabric.
Cat? Mouse? Dog? Some previously undiscovered woodland creature? Your call.
Need a group costume? Start with what everyone owns
Group costumes don’t have to mean ordering matching outfits and praying everyone’s package shows up on time.
Pick a theme built from things everybody already has.
- Tourists: Loud shirts, sunglasses, hats, backpacks and cameras.
- Sports team: Jerseys, team colors or athletic clothes.
- Decade night: Pick the ’70s, ’80s or ’90s and let everyone raid their own closets. The interpretation is half the fun.
- Pajama party: Pajamas, robes, slippers and sleep masks. So comfortable you may never go back to regular costumes.
The goal isn’t perfect coordination. It’s getting everyone out the door without spending $200.
My 30-minute rule
Here’s where I draw the line. If your “last-minute costume” needs three craft-store aisles, an online tutorial and a glue gun heating up on the kitchen counter, we’ve wandered off the assignment.
Give yourself 30 minutes. Start with the clothes you own, then look for one or two things that tell the story. Sunglasses turn ordinary clothes into a tourist. Eyeliner makes a cat. A scarf and rolled sleeves give you Rosie. That’s usually all it takes.
And before you run out to buy the one accessory you’re sure you’re missing, give yourself five minutes to improvise. Cardboard becomes ears. An old scarf becomes a bandana. A pillowcase becomes a loot bag.
Halloween is one night. You don’t need another plastic thing taking up space in the closet for the other 364.
Besides, some of the best costumes I’ve ever seen weren’t the expensive ones. They were the ones that made me think, Why didn’t I think of that?
Question: What’s the best last-minute Halloween costume you’ve ever pulled together? Leave it in the comments. Your idea might rescue someone reading this at 4:30 on October 31.
What Temperature Should a Refrigerator and Freezer Be?
Some things in my kitchen I manage quite well by guesswork. How much cinnamon goes in the apple pie? A little extra never hurt anybody. How much cheese goes in a casserole? More. Obviously. Refrigerator temperature is not one of those things. A few degrees can be the difference between safely chilled groceries and food hanging out in bacteria-friendly territory. And at today’s grocery prices, I’d rather not find out the hard way.
Here’s the number to remember: 37°F in the refrigerator and 0°F in the freezer.
The USDA says 40°F or below is the food-safety line. So why am I telling you 37? Glad you asked.
What temperature should a refrigerator be?
Aim for 37°F. Keep it at 40°F or below.
The USDA and FDA both put the food-safety limit at 40°F, because bacteria that make people sick multiply faster once food gets warmer than that. That’s the upper limit you don’t want to cross, not necessarily the temperature I’d aim for day after day.
Consumer Reports recommends 37°F based on its refrigerator testing. That gives you a few degrees of breathing room for real life, because refrigerator temperatures don’t sit perfectly still. We open the door. We put away groceries. Someone stands there staring inside as though dinner might announce itself.
So I wouldn’t set mine at 40°F on purpose. Why live right on the edge when 37°F is just as easy to set?
Don’t get carried away watching the thermometer, though. Refrigerators cycle on and off, so the number wobbles a little. That’s normal.
| Appliance | Temperature to Aim For |
|---|---|
| Refrigerator | 37°F |
| Freezer | 0°F |
Think 37, 40, 0.
What temperature should a freezer be?
This one’s easier: 0°F. At that temperature, food stays safely frozen, although quality will gradually decline the longer it’s stored.
And no, colder isn’t necessarily better. If your freezer is already holding 0°F, there’s no need to turn it into Antarctica.
Can a refrigerator be too cold?
Yes. Cold is good. Frozen lettuce is not.
Once refrigerator temperatures start getting close to 32°F, foods in colder areas may begin to freeze. Produce can be especially unhappy about this. That’s another reason I like 37°F. It sits comfortably under the 40°F limit without flirting with freezing.
If you’re finding ice crystals on the lettuce or milk that’s gone slushy, don’t give the refrigerator a gold star for enthusiasm. Check the actual temperature and adjust.
Why you can’t trust the dial
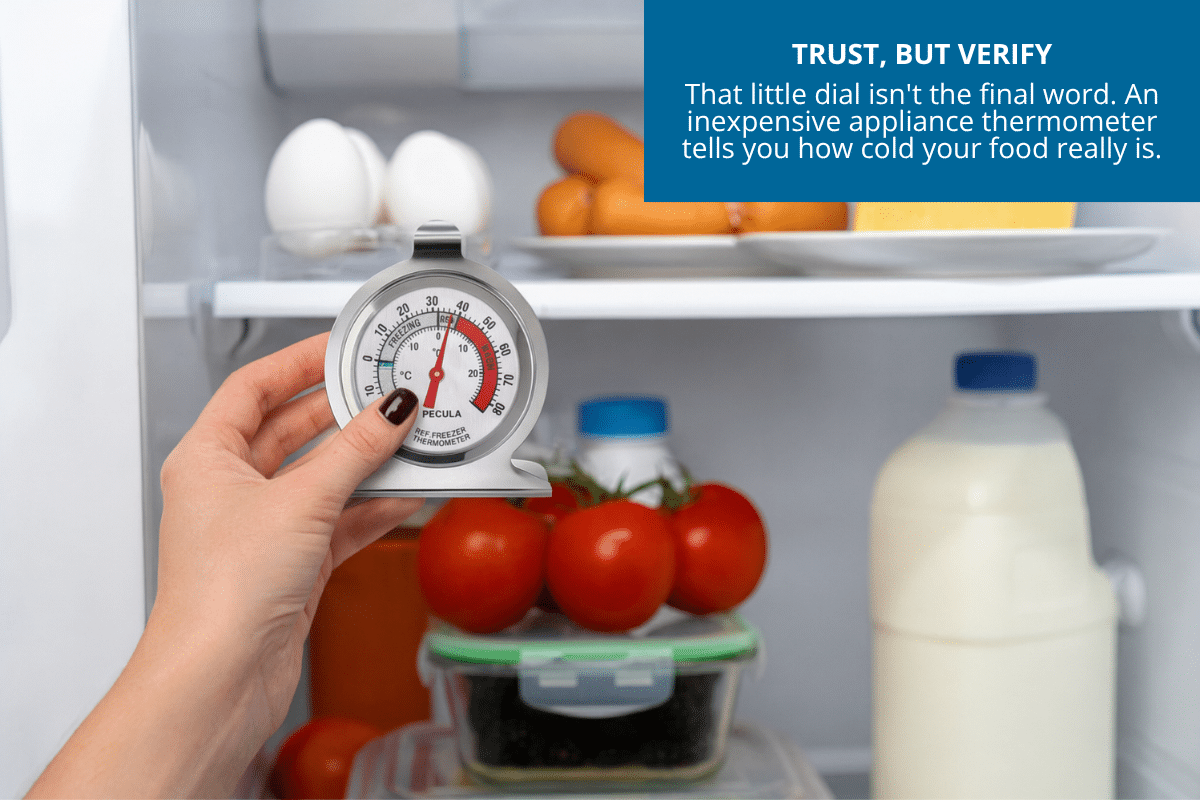
Some refrigerators have a numbered dial. Others say “cold,” “colder” and “coldest.” Newer ones may show an actual digital temperature. That doesn’t mean the food inside is necessarily sitting at that temperature.
Consumer Reports has found refrigerators in its testing that were off by as much as 5°F from the indicated setting. When 40°F is the line you’re trying to stay under, that’s a big miss.
So I like a wonderfully low-tech fix: an appliance thermometer.
The USDA recommends keeping one in both your refrigerator and freezer so you know the temperature the food is actually experiencing. For a few dollars, that’s cheap insurance for a refrigerator full of groceries.

How to check your refrigerator temperature
Put one appliance thermometer in the refrigerator and another in the freezer where you can easily read them. Then leave everything alone for a while before adjusting the controls.
If the refrigerator reads above 40°F, nudge the setting a little colder and give it time to settle before you check again. Your owner’s manual can tell you how long your particular model needs after a temperature adjustment.
If one spot seems suspiciously warm or cold, move the thermometer around. Temperatures aren’t the same top to bottom or front to back.
Once you’re consistently at or below 40°F, ideally hovering around 37°F, congratulations. You may now return to more interesting pursuits. Like finding out who put the empty milk carton back.
What if your refrigerator is too warm?
Don’t panic. One warm reading doesn’t mean the appliance is headed for the graveyard.
Start with the obvious.
- Adjust the temperature setting. Nudge it colder, wait, and check again.
- Check the vents. Cold air needs room to circulate. If containers and packages are jammed against the vents, rearrange things.
- Look at how full the refrigerator is. Full is fine. Packed tighter than a suitcase five minutes before leaving for the airport is another matter.
- Check the door seal. Is it closing all the way? Is the gasket dirty or damaged?
And yes, think about how often that door is being opened. Standing there contemplating your life choices may be a time-honored tradition, but it isn’t helping the temperature.
If you’ve adjusted the controls, cleared the vents and checked the door and the refrigerator still can’t maintain 40°F or below, that’s when I’d start looking at the owner’s manual or call a qualified appliance technician.
Is a full refrigerator okay?
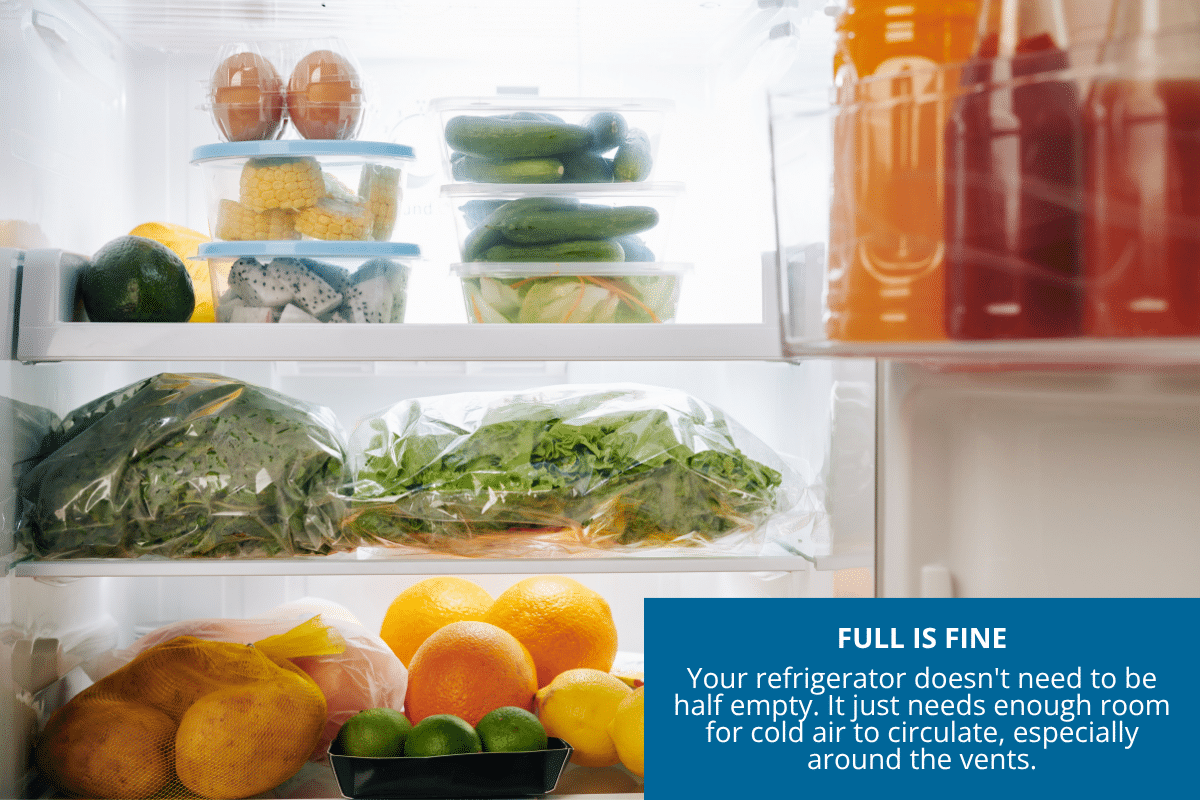
The FDA specifically advises against packing a refrigerator or freezer so tightly that air can’t circulate. So go ahead and stock up when there’s a good sale.
Full is fine. Packed is the problem. Cold air has to move around the food, so don’t wedge everything in like you’re competing for the last overhead bin on an airplane.
Keep the vents clear and leave a little room around containers.
And if you’re wondering whether the milk belongs on the door, where to put raw meat or what those crisper drawers are actually supposed to accomplish, that’s a different conversation.
Does it matter how fast food goes in the refrigerator?
It does. The USDA says perishable foods and leftovers should generally be refrigerated within two hours. If the air temperature is above 90°F, that drops to one hour.
So the giant pot of chili shouldn’t spend the evening cooling on the counter. Divide large amounts of food into shallow containers so they’ll cool more quickly, then get them refrigerated promptly.
And please don’t rely on the sniff test. Harmful bacteria don’t always have the courtesy to smell terrible.
What about a power outage?
If the power goes out, keep the doors closed.
An unopened refrigerator will generally keep food cold for about four hours. A full freezer can maintain an adequate temperature for about 48 hours, while a half-full freezer is closer to 24 hours, provided you leave the door closed.
Every peek lets the cold out, so resist the urge to check. When the power comes back, use your thermometers and current USDA guidance to decide what stays.
Keep an eye on it
Once you’ve got the temperature right, keeping it there takes very little.
Check the thermometer after a big grocery haul and whenever you clean out the refrigerator.
37, 40, 0. Three numbers. That’s it. A cheap thermometer and a quick glance now and then buy you safer food and fewer wasted groceries.
Now, if only the refrigerator could tell me what’s for dinner, wash the dishes and explain what happened to the leftovers I was saving for tomorrow.
One can dream.
Quick temperature check: Do you know what your refrigerator is actually running at right now? Share in the comments below.
EverydayCheapskate™ is reader-supported. We participate in the Amazon Services LLC Associates Program and other affiliate advertising programs, designed to provide a means for us to earn from qualifying purchases, at no cost to you.

Got Leftover Mashed Potatoes? Try These 5 Smart Ideas
Leftover mashed potatoes have a sneaky habit of going from “I’ll use those tomorrow” to “How long has that been in there?” before you know it. Before you warm them up one more time, give them a new job. Crispy potato cakes. A casserole. Doughnuts (yes, really). Or a spot in the freezer for later.

Leftovers and I have a complicated relationship.
I cannot stand the thought of throwing perfectly good food in the trash, so into the refrigerator it goes. Covered. Labeled if I’m feeling particularly accomplished. Then it sits there, waiting for me to forget about it.
A few days later, that good food looks a lot less good, and tossing it gets easier. Funny how that works.
Here’s what I’ve learned: leftovers need a job. And mashed potatoes have plenty of options.
What can you make with leftover mashed potatoes?
Cold mashed potatoes can become crispy potato cakes, the topping for a whole different dinner, a creamy casserole layer and, believe it or not, even doughnuts.
Of course, you can always warm them up and add gravy. Nothing wrong with that. But if nobody is particularly excited about Mashed Potatoes: The Sequel, here are some better options.
First, how long are leftover mashed potatoes good for?
Before we get clever, let’s make sure those potatoes are still fit for company.
The USDA says refrigerated leftovers should be eaten within three to four days, and they should go into the refrigerator within two hours of cooking. Reheat them to 165°F.
If you know you’re not going to use your mashed potatoes within that window, freeze them instead.
Now for the fun part.
1. Make crispy mashed potato cakes

This may be my favorite reason to make too many mashed potatoes in the first place.
Cold mashed potatoes are already halfway there. Stir in an egg and enough flour or breadcrumbs to hold things together. Shape patties, then cook them in a lightly oiled skillet until they’re browned on both sides.
But don’t stop there. Chopped onion? Absolutely. Shredded cheese? Of course. Bits of leftover ham, corned beef or cooked bacon? Now we’re talking. I’ve even stirred in flaked leftover fish.
Serve your potato cakes with eggs for breakfast, alongside a salad for lunch or as a side dish with dinner. Nobody needs to know they’re eating leftovers.
Why are my potato cakes falling apart?
Because not all mashed potatoes are alike.
Some are thick enough to stand at attention. Others are loaded with milk, cream and butter, and are much softer.
Start with cold mashed potatoes and add your binder gradually. You want a mixture firm enough that you can shape it into a patty without it slumping into a puddle in your hand. Too soft? Add more flour or breadcrumbs.
And don’t rush the flip. Let the first side develop a good crust before you turn it over.
2. Use them to top another dinner
Have a cup or two of mashed potatoes but not enough to feed the family again? Perfect.
Use them as the topping for individual shepherd’s pies or little pot pies. Spoon leftover beef stew, pot roast with vegetables, chicken and gravy or another savory filling into oven-safe ramekins. Spread the potatoes on top and bake until the filling is bubbly and the potatoes start to brown.
Suddenly two containers of leftovers have become an entirely new meal. That’s the kind of math I like.

3. Put them to work in a casserole
Mashed potatoes and casseroles were practically made for each other. The potatoes can become the starchy part of the meal, a creamy layer or that glorious browned topping everybody tries to scoop first.
Start with ingredients that already make sense together. Leftover chicken plus vegetables and gravy, topped with mashed potatoes. Ham, broccoli and cheese with a potato layer. Ground beef, corn and mashed potatoes. You get the idea.
And this is where leftovers can really start earning their keep. A cup of chicken isn’t enough for dinner. Neither is a handful of vegetables or that lonely container of mashed potatoes. Put them together properly, and suddenly they are.
If staring into the refrigerator and figuring out what goes with what isn’t your particular gift, use my 5-Step Casserole Formula. It shows you how to build a casserole from the protein, vegetables, starches and other odds and ends you already have, without hunting down a recipe or making a special trip to the store.
One caution: mashed potatoes are already cooked, so don’t simply swap them cup-for-cup for the uncooked rice, noodles or pasta called for in the basic formula. Use them as a ready-made layer or topping instead.
And yes, restraint is still required. Just because three things need to be used up doesn’t mean they belong in the same casserole.
4. Yes, mashed potatoes can become doughnuts

I know. I had the same reaction.
But potato doughnuts are very much a thing. The starch in the potato helps hold moisture, giving old-fashioned cake doughnuts a tender interior. And you don’t need a mountain of leftovers to make them.
King Arthur Baking has a tested Mashed Potato Doughnuts recipe that uses just 3/4 cup of mashed potatoes and makes about two dozen doughnuts, plus the holes. They’re old-fashioned cake doughnuts flavored with nutmeg, fried until golden and finished with plain or cinnamon sugar.
This is one for fairly plain leftover mashed potatoes. If last night’s batch is loaded with roasted garlic, cheddar and chives, let’s allow those potatoes to fulfill their destiny as potato cakes.
But plain mashed potatoes left from Thanksgiving, Christmas or Sunday dinner? Absolutely.
Rather than improvise the proportions, follow King Arthur Baking’s Mashed Potato Doughnuts recipe.
5. Freeze them before you’re sick of them
Sometimes the best plan for leftovers is not eating them again tomorrow. If you’ve already had mashed potatoes twice this week, give yourself a break. Freeze them.
And do it early. Don’t wait until Day Four, when you’ve finally admitted nobody is going to eat those potatoes. Get them into the freezer while they’re still fresh.
Creamy mashed potatoes tend to freeze best
Mashed potatoes made with a good amount of fat from butter, cream, sour cream or cream cheese tend to hold their texture better through freezing and reheating. Very lean mashed potatoes can come back a little watery or grainy.
Freeze the amount you’ll actually use
Spoon cooled or chilled potatoes into freezer-safe containers, or use freezer bags and press out as much air as you reasonably can. Flattening the bags makes them easier to stack and helps the potatoes freeze and thaw more evenly.
You can also freeze individual scoops on a lined baking sheet until firm, then transfer them to a freezer bag. Now you can pull out one or two servings instead of defrosting the entire batch.
The USDA says frozen leftovers can be kept for three to four months for best quality. Mashed potatoes are one of those foods where quality matters, though. The longer they sit, the more likely you’ll notice changes in flavor and texture.
How to bring frozen mashed potatoes back to life
Thaw them overnight in the refrigerator, then reheat gently on the stovetop, in the microwave or covered in the oven.
If they look a little watery or grainy at first, don’t panic. Give them a good stir as they heat. A little butter, cream, sour cream or cream cheese can help bring back that creamy texture.
And remember: reheated leftovers should reach 165°F.
The trick isn’t saving leftovers
For years I figured I was being frugal because I couldn’t bear to throw good food away. Into the refrigerator it went.
But moving food from the serving bowl to a storage container doesn’t save a dime if it lands in the trash four days later.
What works better is deciding what a leftover is for before I put it away. Those potatoes are Tuesday’s potato cakes. Tomorrow night’s shepherd’s pie topping. Or they’re headed straight for the freezer, because we’ve had enough mashed potatoes for one week, thank you very much.
Give your leftovers a job. They’re much more likely to get one done.
Question: What do leftover mashed potatoes become at your house? Tell me in the comments below.
EverydayCheapskate™ is reader-supported. We participate in the Amazon Services LLC Associates Program and other affiliate advertising programs, designed to provide a means for us to earn from qualifying purchases, at no cost to you.

Sweet Pepper Onion Relish (Perfect Over Cream Cheese)
Years ago, a Harry & David gourmet food gift showed up with a small jar of Sweet Pepper & Onion Relish inside. My husband and I spooned it over cream cheese, piled it on crackers and finished the jar fast. Then I saw what a replacement would cost. So I spent a couple of days in the kitchen working out my own. Here’s the recipe, plus everything I’d want to know before making it.

Have you ever tasted something from a fancy little jar and immediately thought, I need more of this? That was me with sweet pepper and onion relish.
Years ago, I received a beautiful Harry & David gift filled with gourmet goodies. Tucked among them was a small jar of Sweet Pepper & Onion Relish. I didn’t think much of it at first. Then we opened it.
My husband and I spooned it over cream cheese, piled it onto crackers and proceeded to make that little jar disappear at a speed that was frankly embarrassing.
No problem, I thought. I’ll just order more. And that’s where this story took a turn.
Delicious, but not that delicious
I went online to order another jar and found out it would cost far more delivered than I was willing to pay for a small jar of relish.
Was it good? Oh, yes.
Was I willing to keep paying gourmet-gift prices every time we inhaled another jar? Absolutely not.
So I did what any reasonably determined cheapskate with a kitchen would do. I studied the ingredient label and decided to make my own.
It took some experimenting the following summer, but eventually I came up with a sweet pepper and onion relish my husband declared every bit as good. I’ll take that.
What it tastes like
Sweet first, tangy second, with a little warmth from the jalapeños. It’s thick and glossy and spoons easily.
Spoon it over cream cheese and suddenly you’ve made an appetizer. Serve it alongside grilled chicken or beef and dinner gets more interesting. Put it into small jars and you’ve got a homemade food gift people will actually use.
It also makes a lot. About 5 quarts, so you’re not rationing it by the teaspoon.
What you’ll need
Sweet red and yellow peppers
You need 20 to 25 medium sweet peppers, red, yellow or a mix. That sounds like a lot because it is. Make this when peppers are plentiful and cheap. Red and yellow give you the color and the sweetness. Green peppers are more bitter and the finished relish gets muddy, so I’d skip them.
Sweet white onions
Sweet white onions cook down soft and almost jammy. They’re milder than regular onions, which keeps them from bossing the peppers around.
Jalapeño peppers
Three or four jalapeños gives it some zip without drowning out the peppers and onions. Much of the heat is concentrated in the white ribs inside the pepper, so scrape those out, along with the seeds, for less kick.
Remember that individual jalapeños can vary quite a bit in heat. Taste and proceed accordingly.
Granulated sugar
Four cups looks alarming. But it’s balancing 3 cups of vinegar and a very large pot of vegetables, so leave it alone.
Apple cider vinegar
Use apple cider vinegar with 5% acidity on the label. The vinegar is doing real work in here, so measure it and don’t cut it back.
Salt
Two tablespoons season a very large pot of vegetables and help bring all those flavors together.
Chop it fine

I’m not going to mislead you: there’s some chopping involved here. Twenty-plus peppers and several onions don’t chop themselves, much as I wish they did.
Aim for pieces about pea-sized or smaller so you get a little of everything in each spoonful, not one giant chunk of onion.
A vegetable chopper or food processor helps. Pulse in batches and stop while you can still see individual pieces. You want relish, not pepper soup. Any juice that collects goes in the pot with everything else.
How to make sweet pepper and onion relish
Put everything in a very large pot
And when I say very large, I mean it. Combine the chopped sweet peppers, onions and jalapeños with the sugar, apple cider vinegar and salt. Give everything a thorough stir.
At first it may look as though there isn’t enough liquid. Don’t panic. As the vegetables heat, they’ll release moisture and the whole mixture will settle down considerably.
Bring it to a gentle boil
Heat the mixture until it reaches a low boil, stirring occasionally.
Once it’s bubbling, reduce the heat and let it simmer. This isn’t something you want furiously boiling all over your stove. Gentle is good.
Let it cook down
Once it’s simmered for 30 to 40 minutes, the vegetables should be soft and shiny, the onions slightly translucent and the liquid thick and syrupy. It’ll look looser while it’s hot and thicken more as it cools.
Drag a spoon across the bottom of the pot. If the trail holds for a second before it closes, you’re there. If it still looks like vegetables swimming in vinegar, keep simmering a few more minutes and stir more often so the bottom doesn’t scorch.
Spoon into clean jars
Carefully ladle the hot relish into clean jars. Let it cool, cover and refrigerate.
And now comes the difficult part. Trying not to eat it all.
The easiest appetizer I know

Set a block of cream cheese on a plate. Spoon relish over the top. Put out crackers. That’s it. It looks pretty, it tastes great and it takes about as much skill as opening a package.
Once you’ve got a jar in the refrigerator, you’ll start finding excuses to use it.
Spoon it alongside grilled chicken, pork or beef. Add a little to a turkey or roast beef sandwich. Put it on a burger or grilled sausage.
It’s also surprisingly good added to a cheese board because the sweet-tangy flavor cuts through rich cheeses beautifully.
And yes, eating it directly from the jar while standing in front of the refrigerator remains an option. I’ve done the research.
Give a jar away
I’ve always liked gifts people can use up. Nobody has to figure out where to display relish, and it’s always the right size and color.
A full batch fills roughly 20 half-pint jars. Label each one with the date you made it and “Keep refrigerated, use within a month.” If you’re delivering locally, tuck in a box of crackers and a block of cream cheese, and keep the cream cheese cold.
Want a smaller batch?
Cut everything in half: 10 to 12 peppers, 2 to 3 onions, 2 jalapeños, 2 cups sugar, 1½ cups vinegar and 1 tablespoon salt. Use a smaller pot and start checking for doneness a little earlier.

Mary's Sweet Pepper and Onion Relish
Equipment
- Very large stockpot
- Cutting board
- Sharp chef's knife
- Food processor optional
- Clean pint or half-pint jars with lids
Ingredients
- 20 to 25 medium sweet red and/or yellow bell peppers seeded and finely chopped
- 4 to 6 large sweet white onions finely chopped
- 3 to 4 jalapeño peppers finely chopped, or more to taste
- 4 cups granulated sugar
- 3 cups apple cider vinegar
- 2 tablespoons salt
Instructions
- Add the chopped bell peppers, onions and jalapeños to a very large stockpot.
- Add the sugar, apple cider vinegar and salt. Stir thoroughly to combine.
- Bring the mixture to a gentle boil over medium-high heat, stirring occasionally.
- Reduce the heat and simmer, uncovered, for 30 to 40 minutes, stirring occasionally, until the vegetables are soft and glistening and the liquid has reduced and thickened.
- Carefully ladle the hot relish into clean jars. Allow to cool, cover and refrigerate.
- Serve over cream cheese with crackers, alongside beef, pork or poultry, or use it on sandwiches, burgers and sausages.
Notes
Nutrition
Question: What’s one store-bought favorite you’ve figured out how to make at home? Share it in the comments below.
EverydayCheapskate™ is reader-supported. We participate in the Amazon Services LLC Associates Program and other affiliate advertising programs, designed to provide a means for us to earn from qualifying purchases, at no cost to you.

Do You Really Need Unlimited Data? Check Before You Pay
Unlimited data is wonderfully convenient. It also makes it wonderfully easy to stop paying attention to how much cellular data you actually use. Before assuming you need the biggest plan your carrier offers, spend 10 minutes checking your own numbers. You may discover unlimited is worth every penny. Or you may find you’ve been paying for a whole lot of data you never touch.

Quick question. You may have to dig out your phone bill to answer it:
How much cellular data do you actually use in a month?
Not how much your plan gives you. Not what the guy at the store swore you’d need. What you actually use.
If your answer is somewhere between “I have no idea” and “Isn’t that why I have unlimited?” you’re in good company. Unlimited data has become the comfortable choice. No counting gigabytes, no sweating over watching a video in the grocery store parking lot.
I understand the appeal.
I get it. But unlimited data can also make it very easy to pay month after month for a giant bucket of something you never come close to using. Ka-ching.
Before you change plans, however, don’t guess. Let’s find out.
Wait, don’t I use my phone all day?
Probably. But using your phone a lot and using a lot of cellular data are two different things.
Every minute you’re on Wi-Fi at home, at work, at your sister’s house, none of it comes out of your cellular allowance. And Wi-Fi is doing a lot more of the work than you might think. An Opensignal study of customers from five major U.S. mobile providers found that 82% to 89% of smartphone data usage occurred over Wi-Fi rather than cellular networks.
That helps explain something else. In a 2026 look at anonymized usage among its unlimited-plan customers, US Mobile found the median customer used just 14.5 GB of cellular data a month. (Median is the number smack in the middle. A few heavy users drag the average way up, so the middle tells you more.) Thirty-six percent used less than 10 GB, and 51% used less than 15.
That’s not a representative sample of every American cellphone user, so I wouldn’t use 14.5 GB as some magic number for choosing your plan. Your number is the one that matters.
And fortunately, it’s not hard to find.
Do a 10-minute cell phone data audit
Before shopping for another plan (or congratulating yourself for already having the perfect one), take a few minutes to investigate. You may be surprised.
1. Start with your carrier
Your carrier knows exactly how much cellular data it’s billing to your account, so start there. Sign in to your carrier’s website or app and look for Usage, Data Usage or Billing History.
Then look at several completed billing cycles, not just this month. One month tells you almost nothing. Maybe you spent July at home on Wi-Fi. Maybe September was a road trip, and your phone handled the maps, the movies and a hotspot for somebody’s laptop.
What you’re looking for is your normal range, plus the odd month when normal went out the window.
2. Check your phone, too

Your phone knows something your bill doesn’t: which apps are using the data.
On an iPhone, open Settings > Cellular. (Depending on where you live, it may say Mobile Data or Mobile Service.) Scroll down and you’ll see how much cellular data each app has used.
There’s one important catch. “Current Period” does not mean your current billing period. Those numbers keep piling up until you reset them by hand. Scroll to the very bottom to see when they were last reset. If you want to track monthly, reset them when your new billing cycle starts.
On many Android phones, go to Settings > Network & internet > Internet or Data Usage. Samsung Galaxy users will typically find it under Settings > Connections > Data usage > Mobile data usage. The wording varies by phone and Android version, but you’re hunting for mobile data usage and the per-app breakdown. Many Android phones also let you match the tracking period to your billing cycle and set a data warning.
3. Find the data hogs
Now things get fun. Scroll through the apps and see who’s eating the most. One or two usually dominate.
Video is the obvious suspect. Social media apps are close behind, since so many feeds now play video all on their own. Navigation, video calls, photo backups and music streaming add up, too.
And don’t forget your hotspot. US Mobile’s 2026 analysis found that customers who used their phones as hotspots burned through a good deal more cellular data than those who didn’t. Makes sense. Once your phone starts supplying internet access to a laptop or another device, it’s doing a whole different job.
Resist the urge to start switching things off. Right now you’re just a detective.
When unlimited data is worth every penny
I’m not about to tell you to dump unlimited data and race to the cheapest plan out there. That’s not smart frugality. The cheapest plan isn’t a bargain if it doesn’t do what you need it to do.
Unlimited data may be exactly right for you if you regularly stream video away from Wi-Fi, travel frequently, use your phone as a hotspot, work from places without dependable Wi-Fi or rely on cellular service because home broadband isn’t practical. A household with several lines may find that unlimited pricing and multi-line discounts make sense even if nobody is setting data records.
If that’s you, wonderful. Keep it. Now at least you know why you’re paying for it.
What if you’re paying for data you never use?
Suppose you check six months of bills and discover you’re on unlimited, but you routinely use 6 GB. Or 9. Even your busiest month stayed well below what a cheaper plan would give you.
Now you have something worth investigating. Notice I didn’t say, “Switch immediately!”
First, compare what you have with realistic alternatives, and leave yourself some breathing room above your usual use. You don’t want a plan that has you watching every megabyte like a hawk.
“Unlimited” doesn’t always mean unlimited everything
Cell plans have their own peculiar dialect, and “unlimited” sometimes needs a few paragraphs of translation.
Generally, it means you won’t be charged extra just for passing a certain number of gigabytes.
It doesn’t necessarily mean every kind of data gets full speed and top priority forever. Depending on the plan, there may be separate rules for premium or high-speed data, mobile hotspot use, video quality or what happens when the network is congested.
You may run into two fancy words. Deprioritization means your connection can get bumped to the back of the line when the network is jammed. Throttling means the carrier deliberately slows you down under certain conditions.
Don’t let the vocabulary scare you. Before you change plans, read the fine print and ask one simple question: What happens after I use the included amount?
Compare the whole plan, not just the data
Here’s where a perfectly good money-saving idea can backfire. You find a plan with fewer gigabytes and a lower advertised price. Sold!
Not so fast. Compare the total monthly cost and the features you actually use: multi-line pricing, taxes and fees, hotspot allowances, international service and roaming, autopay discounts, and any device credits or perks you’d lose by switching.
And, of course, coverage matters. Saving $15 a month loses some of its charm if your new carrier turns your kitchen into a dead zone.
The point isn’t to buy the smallest data plan available. It’s to buy the plan that fits your household at the best reasonable price.
Want to use less cellular data? Go after the big stuff

Maybe your audit reveals that you could drop to a cheaper plan if you trimmed a little. Please don’t spend your days closing apps and fretting over a few megabytes. Go after the big stuff.
- Use Wi-Fi where it makes sense. At home and on trusted networks, make sure your phone is really on Wi-Fi and not quietly using cellular. Trusted is the operative word. Saving a little cellular data is not a good reason to conduct sensitive business over any random public Wi-Fi network you happen to find.
- Download before you go. Going on a trip? Download music, podcasts, maps and entertainment while you’re connected to Wi-Fi rather than streaming everything over cellular. That’s especially useful when you’ll be traveling through places with spotty service anyway.
- Check the video settings. If one of your biggest cellular-data users is a video or social-media app, check its settings. Many have a data saver mode or let you lower the quality over cellular or turn off autoplay. You can keep watching your cat videos. They just don’t need to arrive in maximum quality when you’re nowhere near Wi-Fi.
- Watch automatic uploads and background use. Photo backups, cloud syncing and other background activity sip data quietly. Snap now, upload later. Both iPhone and Android let you restrict cellular use or background data for individual apps. Don’t turn things off indiscriminately. Start with the apps your own usage report identifies as the problem.
One more thing
There’s something rather funny about the way we use smartphones. A 2026 Pew Research Center survey found that just over half of U.S. adults believe they spend too much time on their smartphones. About one in four said they use their phones almost constantly.
So apparently we’ve managed to pull off something impressive:
We can spend too much time on our phones and still pay for more cellular data than we use. Thank Wi-Fi. And perhaps there’s another audit hiding in there for another day.
Here’s your homework
It’s the easy kind. Pull up several months of cellular usage. Find your high and low months. See which apps are responsible. Then look at what you’re paying for.
You may find unlimited is worth every penny. Or you may find you’ve been paying for a very large bucket simply because nobody ever suggested you check how empty it usually is.
Either way, you’ll know. And knowing what you’re actually paying for is a pretty good place to start.
Go get that bill. I’ll wait.
Question: Do you know how much cellular data you actually use each month, or are you about to go check? Tell me in the comments below.

Stop Chasing Pennies on Your Electric Bill. Do This
I know the feeling. The electric bill shows up, or these days, an email saying your statement is ready. You let it sit a day or two. (Don’t pretend you haven’t.) Then you open it, lock eyeballs with the amount due and think, Seriously?

Before you start blaming every light left on in an empty room, know this: electricity itself has gotten more expensive. The average residential price in the U.S. was 4.9% higher in July 2026 than it was a year earlier, according to the U.S. Energy Information Administration
You may not have much control over the rate your utility charges. But you can lower your electric bill by changing how much electricity your household uses.
Here’s the catch. Not every energy-saving trick is worth the trouble. So no sitting in the dark, no cold showers, and my rule stays the same: don’t spend a lot of money trying to save a little money. We’re going after the biggest energy hogs first.
Heat with gas? Some of this will show up on your gas bill instead. Same idea, different envelope.
Start with the big stuff
Before you crawl behind the television looking for a plug, take a look at the thermostat.
Heating and cooling eat more electricity than almost anything else in your house. There’s no prize for saving pennies on a phone charger while the air conditioner cools an empty house.
Get heating and cooling under control
I’ve handed out the 78-in-summer, 68-in-winter rule before. Some of you groaned, and fair enough. Your house, your climate and your tolerance for sweating are your own business.
The better strategy is to avoid heating or cooling your house more than you have to, especially when you’re asleep or out. The U.S. Department of Energy says you can save as much as 10% a year on heating and cooling by turning your thermostat back 7° to 10°F for eight hours a day.
A programmable or smart thermostat can do that automatically, but don’t assume you need to buy one. If you already have a programmable thermostat, use it. If you’re perfectly capable of making the adjustments yourself, that’s free.
Then give your HVAC system a fighting chance. Check the filter regularly and replace it when it’s dirty. ENERGY STAR recommends checking monthly, especially during heavy-use seasons, and changing it at least every three months. Keep supply and return vents clear of furniture and rugs, and keep leaves and debris away from the outdoor unit.
And don’t forget fans. A ceiling or portable fan can’t change the temperature of a room, but it makes you feel cooler, which lets you set the thermostat a little higher in summer. Just remember: Fans cool people, not empty rooms. When you leave, turn the fan off.
Your ceiling fan also has a little switch that reverses its direction, and it matters in both seasons. I laid out exactly which way to set it in Ceiling Fan Direction: Optimize Your Fan for Summer and Winter Comfort.

Stop paying to heat water you don’t need
Where does all that hot water come from? Turn the faucet and it just appears. Wonderful invention. Not free.
If you have an electric water heater, check the temperature setting. The Department of Energy generally recommends 120°F. If yours is set higher, turn it down. Not sure how? Check the manual or ask a qualified professional.
Then head for the laundry room. ENERGY STAR says about 90% of the energy a washing machine uses goes toward heating the water. That makes washing most clothes in cold water one of those rare money-savers that asks almost nothing of you.
Stop conditioned air from escaping
Heating or cooling your house is expensive enough. Heating or cooling the great outdoors is just rude.
Before you start pricing replacement windows, hunt for the cheap leaks. Check around doors and windows for drafts, replace worn weatherstripping and caulk the gaps. It’s a couple of hours and a few dollars. That’s my kind of project.
If rooms are still drafty or difficult to keep comfortable after you’ve handled the obvious leaks, then it may be time to investigate insulation, ductwork or other problems.

Smaller savings that are actually worth your time
Once the big stuff is handled, a few smaller changes are worth picking up. The operative word here is worth. I’m all for saving electricity. I’m not interested in making it a full-time job.
Make laundry more efficient
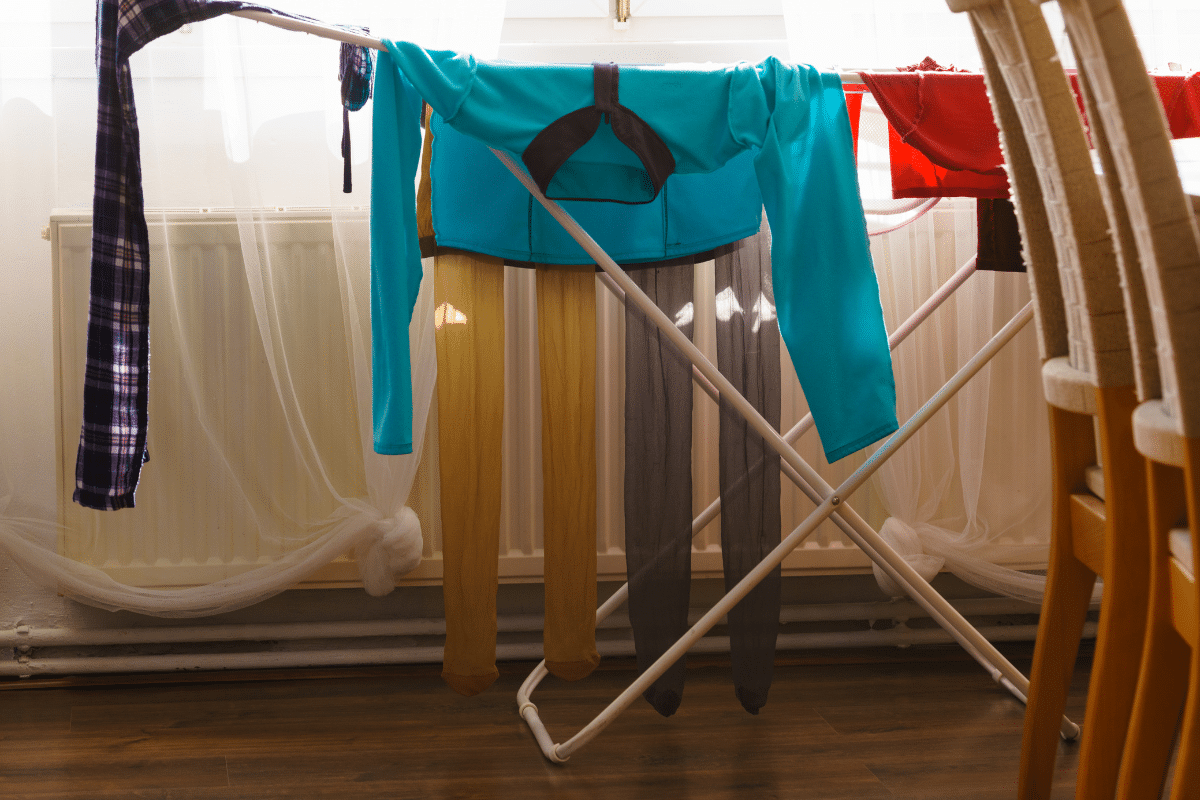
When’s the last time you cleaned the lint filter? Do it after every load, and make sure the dryer vent isn’t clogged or restricted, too. That’s an efficiency issue and, more importantly, a safety issue.
If your dryer has a moisture sensor, use it rather than continuing to tumble clothes that are already dry. Dry similar fabrics together when practical, and air-dry things when it’s convenient.
Let the dishwasher do its job
Here’s one place where our thrifty instincts can lead us astray.
You do not need to stand at the sink washing every plate by hand to prove your frugal credentials. An efficient dishwasher can use less water and energy than hand-washing the same load.
Wait for a full load. Scrape the plates instead of pre-rinsing under running water, and use the air-dry or no-heat setting if your machine has one. Then walk away and let the dishwasher earn its keep. Less work. I could get used to this.
Use your window coverings
Before buying special energy-saving curtains, look at what’s already hanging on your windows.
During hot weather, close blinds, shades or curtains where strong sunlight is heating the room. During colder weather, open them when the sun can warm things up and close them when it can’t.
If one particular window turns a room into an oven every afternoon, better shades or curtains may be worth considering. But use what you own before shopping for something you’re told you need.
Replace the incandescent bulbs that matter
LED bulbs use dramatically less electricity than old-fashioned incandescent bulbs and last much longer. But plenty of homes are already filled with LEDs. If that’s you, congratulations. Move along. There’s nothing to save here.
Still have incandescents? Start with the fixtures you use most and swap those as you can. The closet bulb you flip on twice a year can wait. And yes, turn the lights off when you leave a room. It’s free and takes approximately one finger.
Cut standby power without chasing plugs
“Unplug everything you’re not using.” Sounds like great advice until you picture yourself crawling behind the entertainment center twice a day. No, thank you.
Standby power is real, but it’s small potatoes plug by plug. Look instead for clusters of electronics that don’t need to stay powered all the time, like the entertainment center or the home office. Plug them into a switched power strip and shut them all down at once.
One switch. Done.
Know how your electric bill works
Before you start running the dishwasher at midnight because somebody said electricity is cheaper then, check your rate plan.
Some utilities charge different rates at different times of day. Others don’t. Moving laundry or dishwashing to off-peak hours only saves money if your plan rewards you for it.
And when a bill suddenly makes your eyes pop, compare kilowatt-hours used, not just dollars owed. If your usage stayed about the same but the bill jumped, your rate or other charges may have changed. If your usage jumped, now you know to start looking around the house for what changed.
One more thing: Budget billing can make monthly bills more predictable, but don’t confuse predictable with cheaper. It smooths out the payments. It doesn’t reduce the electricity you use.
Think before you spend
This is where saving electricity can get expensive. A smart thermostat, more insulation, replacement windows and new appliances can all lower your energy use. That doesn’t automatically make any of them a good deal.
Before spending serious money, ask two questions:
- What problem am I solving?
- How long will the savings take to pay for it?
Don’t spend $1,200 to solve a $40 problem.
Smart thermostat
A smart thermostat makes sense if it solves your problem of forgetting to adjust the temperature. If you already have a programmable one and use it faithfully, another gadget probably won’t save enough to matter.
Insulation
Insulation can be an excellent investment if your home actually needs it. But don’t diagnose the problem from one peek into the attic. What you need depends on your climate, what’s already up there and how your house was built. A home energy assessment can show you where you’re actually losing energy before you spend a dime.
Replacement windows
Same goes for replacement windows. A high bill alone shouldn’t sell you thousands of dollars’ worth. Fix the cheap leaks first. If the windows are damaged, failing or need replacing anyway, energy efficiency should certainly factor into what you buy.
New appliances
The same goes for appliances. If the refrigerator needs replacing anyway, compare the yellow EnergyGuide labels and consider ENERGY STAR-certified models. But don’t toss a perfectly good appliance solely because a new one uses less electricity without comparing the purchase price with the expected savings.
Sometimes the cheapest appliance is the one you already own.
If my bill shot up, here’s where I’d start
Feeling overwhelmed? Don’t try to do it all this weekend.
I’d start with the thermostat and HVAC filter. Check the water-heater temperature. Start washing most laundry in cold water. Look for obvious drafts around doors and windows.
Then pull up the bill and compare your kilowatt-hours with the same period last year. If usage is up, hunt for what changed. If usage is flat but the amount due isn’t, take a closer look at your rate and other charges.
Do the free and inexpensive things first. Give them time to show up in your usage. Then decide whether the bigger fixes deserve your money.
That’s a lot more likely to lower your electric bill than spending Saturday on the floor unplugging everything in sight.
Question: What’s one thing that has actually made a noticeable difference in your electric bill? Share your suggestions in the comments below.
EverydayCheapskate™ is reader-supported. We participate in the Amazon Services LLC Associates Program and other affiliate advertising programs, designed to provide a means for us to earn from qualifying purchases, at no cost to you.

Christmas Shopping in October? These Prime Day Gifts Make Sense
Christmas is coming. There, I said it. I know nobody wants to hear that in October, but your December self is going to be very glad we had this little talk. Prime Big Deal Days gives you a nice excuse to get ahead. I went back through our EC gift guides and pulled together gifts we’ve already recommended. If you find one at a price you like, you can cross a name off your list now and tuck that gift away until Christmas.

Think about it: no last-minute shipping. No crowded stores. No standing in an aisle on December 23 wondering what on earth Uncle Bob could possibly want.
One little warning from someone who’s learned this the hard way: keep a list. Write down what you bought, who it’s for and where you put it. Then label the hiding place.
Because buying a gift twice is wasteful. Finding the first one in March is worse.
Don’t Miss a Better Deal!
-
- Some discounts are Prime-exclusive and run even deeper than what shows here. Always click through to see the real-time price. You might be pleasantly surprised.
Shop by Category:
For Him
The trick with gifts for men is often finding something he’d use but wouldn’t necessarily buy for himself.

A small tool that takes the guesswork out of tire pressure. Practical, inexpensive and exactly the sort of thing that's handy when you need it.

Wireless headphones with a long battery life for music, calls, travel or simply creating a little peace and quiet.

A magnetic portable battery that doubles as a kickstand. For the guy whose phone battery always seems to hit single digits at exactly the wrong time.
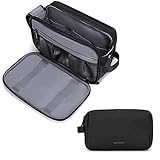
Keeps toiletries organized instead of rolling loose around the suitcase. A small travel upgrade that makes packing noticeably easier.

A long-range wireless thermometer for grilling and cooking without standing over the food every second. Great for the guy who takes dinner seriously.
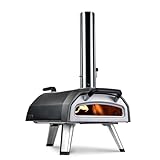
For the pizza enthusiast who wants to take homemade pizza seriously. This outdoor oven works with wood or gas and turns pizza night into an event.
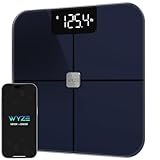
A smart scale that tracks more than just weight and connects to an app. A useful pick for someone who likes having data at their fingertips.

The kind of tool that earns its spot in the garage because it handles a variety of nuts and bolts without requiring a drawer full of individual sockets.

A fun little photography accessory for someone who likes experimenting with phone photography and retro-looking effects.
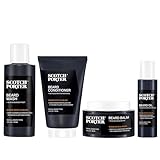
A complete grooming set for the bearded guy who likes keeping things neat without making a production out of it.

A practical grooming gift that feels a little more special than handing someone a bar of soap from the grocery store.
For Her
For moms, daughters, sisters, friends or that person on your list who deserves something nice.

Soft, comfortable slippers for mornings, evenings and all those quick trips around the house that somehow turn into half the day.

A pretty assortment of individual loose-leaf tea servings. Easy to use and just fancy enough to feel like a treat.

A quick little self-care gift for mornings when looking more awake would be helpful, even if the coffee hasn't kicked in yet.

An overnight skincare treat that makes a lovely stocking stuffer or addition to a larger self-care gift.

Reusable makeup-removing cloths that work with water alone. A practical beauty gift that cuts down on disposable wipes, too.

Set it, walk away and come back to dinner. Especially handy during the holidays when the kitchen already has enough going on.

A useful gift for music, podcasts, travel and everything in between. If they're already on her wish list, a good sale can make this one worth checking off early.

For the puzzle lover who has already conquered the easy ones. A colorful challenge for a quiet afternoon or a holiday weekend.

A simple, wearable necklace that works on its own or layered with other pieces. Easy gift, no sizing required.

A compact massage device for post-workout recovery or simply relaxing tired muscles at the end of the day. Small enough to take along, too.

Three jars of sauce for the person who would rather eat a great bowl of pasta than receive another decorative object. I'm with them.
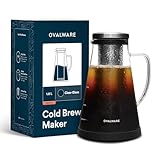
Makes cold brew at home and keeps it ready in the refrigerator. A practical gift for the coffee lover who doesn't want to pay coffee-shop prices every morning.

A gentler way to wake up with sunrise lighting, sound and routines. A thoughtful gift for someone trying to make mornings a little less jarring.
For Teens
Teenagers can be tough. These picks lean toward things they’ll actually use rather than gifts destined for the back of a closet.

A multitasking hair product for teens who like their hair looking good without a bathroom counter full of bottles.

A stylish little crossbody with room for the essentials. Practical enough for everyday use and cute enough that it won't feel like a practical gift.

For the teen who enjoys a little sparkle. Easy to use for parties, concerts, costumes or simply making an ordinary day less ordinary.

A useful setup for homework, drawing, gaming or scrolling from the couch. Sometimes the best gift is the thing that makes their everyday routine easier.

Wireless headphones for music, schoolwork, travel and tuning out the rest of the household. A gift most teens won't need much convincing to accept.
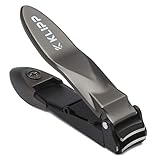
Not glamorous, but useful. A sturdy little upgrade for anyone who has been attacking their nails with whatever pair of clippers happens to be in the bathroom drawer.
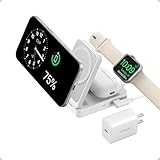
One spot for charging multiple devices instead of three cords tangled across the nightstand. A gift for the teen whose battery is somehow always at 12%.

Reusable makeup-removing cloths that use water instead of disposable wipes. Practical, colorful and easy to toss in a stocking.

A practical stocking stuffer for teens dealing with the occasional breakout. Small enough to tuck into a gift bag, useful enough to actually get used.

A little self-care treat that makes a fun addition to a teen's gift box or stocking.

A hands-free phone holder that sticks to smooth surfaces. Useful for watching videos, taking photos or following a recipe without balancing the phone against a coffee mug.

A simple phone upgrade that makes holding, carrying and propping up a phone easier. Small enough for a stocking, too.

An easy way to turn a table into a ping-pong setup. Great for teens who need an excuse to get off the couch and move around.

Yes, dental floss can be a gift. This one makes the daily chore a little more fun, which is about as much excitement as we're asking from floss.
For Kids
Fun gifts that don’t need a Wi-Fi password to be entertaining.

Four books where the reader gets to decide what happens next. A screen-free gift that turns reading into an adventure.

Four-way racing chaos with Hot Wheels cars flying around the track. It's the kind of gift that can keep kids occupied long after the wrapping paper hits the trash.

A creative afternoon in a box. Kids paint the rocks, charge them up and watch their creations glow after dark.

A hands-on activity board packed with things to touch, twist, press and fiddle with. Good for keeping little hands busy without handing over a screen.

A family game that gets everyone around the table planning routes, claiming trains and trying not to block each other. Good for kids and grown-ups alike.

A classic ride-on toy that gives little ones their own set of wheels. Expect it to become the favorite vehicle in the house.

The classic cube gets a modern upgrade with connected features and challenges. A nice pick for kids who like puzzles and technology.

A fast-moving bingo game designed for younger players. Easy to learn, quick to play and a good excuse to put the tablet down.

A quick card game that's easy to learn and fun enough that adults won't mind playing another round.

Draw, erase and start over without a pile of paper or a marker rolling under the couch. A wonderfully simple gift for creative little ones.
For Grandparents & Seniors
These are gifts chosen for comfort, hobbies and little things that make everyday life nicer.

For the card-game enthusiast who appreciates a little help with the setup. Less shuffling, more playing.

Compact binoculars for hiking, travel, sporting events, birdwatching or simply getting a closer look at what's happening across the yard.

Solar-powered lights that add a little movement and glow to a garden or walkway without running another cord or adding to the electric bill.
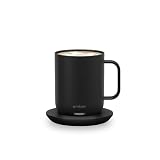
Keeps coffee or tea at the temperature you choose instead of letting that first cup go cold while you answer one more email. A particularly good gift for the person who reheats the same drink three times.

A cozy gift for cold mornings, chilly evenings or anyone who considers a blanket an essential piece of furniture.

Keeps butter soft and spreadable on the counter without leaving it sitting in an open dish. A small kitchen upgrade that gets used every day.

A practical home gift for bedrooms, living spaces or anyone who appreciates cleaner-feeling air without adding another complicated gadget to the house.
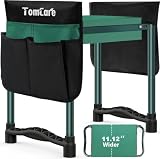
A kneeler that flips into a garden seat, with storage for tools. Because loving to garden and loving what it does to your knees are two very different things.

A simple way to give the pickleball players on your list something they'll actually use. The carry bag makes it easy to take the fun along.
The Best Gift Is the One Already Bought
Why wait until December to do something you can get off your plate today? If you find a gift on this list for someone you already need to shop for, and the price is right, buy it.
Then write down who it’s for and where you put it. Ask me how I know.
That’s it. You’re done.
One less person on your Christmas list. One less package to chase. One less thing competing for your attention when December gets crazy.
And come Christmas morning, you’ll be very glad October-you was thinking ahead. Now go enjoy that little win.
Question: Who’s the hardest person on your Christmas list to shop for this year? Tell me in the comments!
EverydayCheapskate™ is reader-supported. We participate in the Amazon Services LLC Associates Program and other affiliate advertising programs, designed to provide a means for us to earn from qualifying purchases, at no cost to you.

EC’s Top Picks from Amazon Prime Big Deal Days 2026
Deals last updated: October 7, 2026 • 9:02 AM
Check back! We update throughout the day.
Prime Big Deal Days is here. Two days, October 6 and 7, and I’m watching it so you don’t have to. I’ll be updating this page with the deals worth your money and nothing else. No fluff, no filler, no “deals” that aren’t actually deals.

New deals go live all through the event, plus three daily “Today’s Big Deals” drops at midnight, 8 a.m., and 1 p.m. PT. They’re limited quantity and gone when they’re gone. If something on your list shows up, don’t sit on it.
One quick reminder before you click anything. Tap “Price History” on the product page, or check CamelCamelCamel.com, to see what the item has really cost over the past year. Some “discounts” are just prices drifting back to where they should have been all along. The real wins are things you need, at prices you checked.
Just getting started? Read my game plan first: Prime Big Deal Days 2026: Your Cheapskate Game Plan →
Don’t Miss a Better Deal!
-
-
- Some discounts are Prime Exclusive and even deeper than what appears here. Click through each item to see the real-time price. You might be pleasantly surprised.
-
Shop by Category
- Today’s Big Deals
- My Top Picks Right Now
- Home Essentials
- Kitchen
- Fall Fashion & Cozy Things
- Beauty & Personal Care
- Halloween & Fall Fun
- Toys, Sports & Outdoors
- Books & Puzzles
- Electronics
- Lawn, Garden, & Tools
- Automotive
- Baby & Children
(Disclosure: This post includes an Amazon Creator Connections product. I may earn a small commission if you purchase through the link, at no additional cost to you.)
Today’s Big Deals: Limited-Time Drops
These are timed, limited quantity, and they move fast. If you’ve been waiting on something, this is where it might show up.





My Top Picks Right Now
Updated throughout the event. These are the deals I’d grab first.
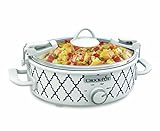


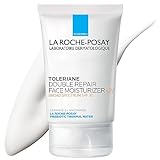
Home Essentials
Cleaning supplies, laundry products, pantry staples, and that refrigerator water filter you keep forgetting about. This is stuff you’d buy anyway, so it’s the easiest place to save. Cold and flu medicine goes in this cart too. Buy it now, not at 2 a.m.




Extra 10% Off Select Tineco Deals
Got your eye on a Tineco? Here’s a little Prime Day bonus: use code TINAMZPBDD for an extra 10% off select Tineco deals. Yes, it stacks! Valid October 6–7, 2026. Limited redemptions.
At checkout, choose Payment method, enter TINAMZPBDD, and click Apply. Make sure the discount appears before completing your order.
Kitchen Deals
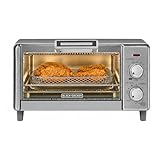
Cookware, bakeware, and tools that last for years, not gadgets that end up in a drawer. That’s the filter I use here. It’s also a good time to look at a slow cooker if the holidays at your house involve feeding a crowd.





Fall Fashion & Cozy Things
Bedding, blankets, boots, sweaters, and outerwear. If you were going to buy something warm this winter anyway, this is the time to look.





Beauty & Personal Care
Stock up on what you’re already buying. Beauty runs some of the deepest discounts in any Amazon sale, so check the price history before you get carried away.


Halloween & Fall Fun
Candy, party supplies, and decorations. Here’s my rule: skip the costume you’ll wear once and buy the things you’ll use again next year.


Toys, Sports & Outdoors
A good time to get a head start on holiday gifts. Buy for the people on your list, then stop. Tailgating gear is in here too.





Books, Games & Puzzles
Books and puzzles make great gifts, and they’re easy to stash away until December. Stock up if you’re a reader.




Electronics
Check the price history before you buy anything in this category. Genuine deals exist. Just make sure you’re looking at one.


Lawn, Garden & Tools
Fall cleanup season is here. Leaf blowers, fire pits, and power tools all show up in this category.





Automotive



Baby & Children

Keep Checking Back
I’m updating this page throughout the event with new deals, price checks, and anything that rises to the top. Bookmark it and come back often. With only two days, the best deals won’t stick around.
What’s at the top of your list this time? Something practical you’ve been putting off, or a holiday gift you want to cross off early? Tell me in the comments!
EverydayCheapskate™ is reader-supported. We participate in the Amazon Services LLC Associates Program and other affiliate advertising programs, designed to provide a means for us to earn from qualifying purchases, at no cost to you.

How to Reduce Healthcare Costs With 3 Free Daily Habits
Have you looked at your health insurance premium lately? Go ahead. I’ll wait. Between climbing deductibles, bigger co-pays and prescription prices that make my eyes water, healthcare costs can raise your blood pressure all by themselves. But there’s good news. You can’t fix the whole system, yet a few daily habits can help you reduce healthcare costs by keeping you out of the doctor’s office in the first place.

You’re not imagining it. In a KFF poll taken this summer, about 27 percent of adults said they’re very worried about affording health care for themselves and their families. That’s ahead of rent or mortgage (21 percent) and groceries (20 percent).
And the worry doesn’t stay in your head. About 28 percent of adults say they skipped or postponed care in the past year because of the cost. Another 22 percent had trouble paying a medical bill. Back in 2022, about half of adults told KFF they couldn’t pay a surprise $500 medical bill in full.
Then there are prescriptions. KFF found that 43 percent of adults didn’t take a medication as prescribed in the past year because of the price. Some never filled it. Others split pills or skipped doses. If that’s you, please talk to your doctor or pharmacist before you change anything. There may be a cheaper option nobody has mentioned.
I’m no doctor, and I’d never tell you to skip care you need. But the cheapest medical bill is the one you never get. That’s where these habits come in.
Is sitting really that bad for you?

Stand up. Seriously.
We sit at work, at school, in the car, on the sofa in front of the TV. It adds up. Geisinger family medicine physician Joseph Hines, MD, says prolonged sitting is linked to heart disease, type 2 diabetes, obesity and even a shorter lifespan. Research suggests that more than 8 hours a day of inactivity carries risks similar to obesity and smoking.
Part of the problem is circulation. Long stretches in a chair slow the blood flow in your legs, which can lead to swelling and blood clots. Your muscles get lazy, and your metabolism slows down.
The fix doesn’t require a gym membership. Dr. Hines says short bursts of movement add up, and about 30 minutes a day makes a real difference.
Make it easy: pick one daily activity you’ll no longer do sitting down. Phone calls, texting, reading. I love to knit, so guess what? I now stand and knit. It’s not bad. In fact, I’m more alert and I make fewer mistakes. If you’re stuck at a desk, set a timer for every 30 minutes and spend a minute or two marching around the room.
Are you really drinking enough water?

Yeah, yeah, yeah. Water. We’ve heard it a million times. But do you actually do it?
Mayo Clinic says the average healthy adult needs roughly 11.5 to 15.5 cups of total fluid a day. That includes everything you drink plus the water in your food, which supplies about 20 percent of it. And yes, coffee, tea and milk count.
Water is still the best choice, though. Sodas, sports drinks and juices come with sugar, salt and calories, and they hit your grocery bill, too. Swapping them for water may even help with weight loss. Tap water is practically free.
Your body uses water for just about everything. It regulates your temperature, flushes out waste, keeps digestion moving and helps your brain and muscles work. Plenty of water may also lower your risk of kidney stones and urinary tract infections. Even mild dehydration can leave you drained and foggy.
How do you know if you’re getting enough? Check your urine. Colorless or light yellow means you’re probably fine. Dark means drink up. Not glamorous. Very effective. (Needs vary with your health, how active you are and the weather, so ask your doctor what’s right for you.)
Make it easy: commit to water as your go-to beverage. Then get yourself a great water bottle. Mine is from Contingo. It’s easy to use, it helps me keep track of what I’ve had, and it’s just the right size that I don’t misplace it. It has made all the difference for me.
Is sleep really that important?

I know, I know. You’re busy. But sleep is when your body does its maintenance work.
University of Utah Health neurologist Kathleen Digre, MD, says sleep helps keep your body temperature, blood pressure and energy steady. It’s also when your brain clears out waste that builds up during the day. Skimp on it, and nearly any health condition gets harder to manage.
One in three U.S. adults gets less than seven hours a night. Most of us need at least seven. Imagine how much money goes toward health problems that a decent night’s sleep might help keep in check.
Make it easy: set your alarm to remind you to go to bed. Yes, really. Make seven hours non-negotiable. Dr. Digre also recommends the same bedtime and wake-up time every day (weekends included), a dark and quiet bedroom, and no TV, tablets or phones for an hour before bed. Go easy on alcohol and caffeine late in the day.
Start with one
You don’t have to overhaul your life. Stand up for one phone call. Fill one water bottle. Small changes compound, and so do the savings.
Question: Which one will you try first? I’d love to hear in the comments.
EverydayCheapskate™ is reader-supported. We participate in the Amazon Services LLC Associates Program and other affiliate advertising programs, designed to provide a means for us to earn from qualifying purchases, at no cost to you.

She Lived in a Basement for $100 a Month. Here’s Why.
My friend Sally never planned on living in a basement for a hundred bucks a month. But she did plan on owning a house, and the first led straight to the second. Her story is the best argument for financial planning I know. It also has a few bumps, which is exactly why I trust it.

Sally (not her real name) was in her early thirties when she moved from Arizona to Florida, chasing a better job and a fresh start. A few months later she figured out that a change of scenery wasn’t the fix she’d hoped for. So she moved back.
What she really wanted, it turned out, was to settle down and buy a house.
One problem. The year before, she’d had surgery. The recovery was easy. The bills were not. Some poor choices during her employee benefits enrollment left her on the hook for a big share of the cost.
Back in Arizona, Sally was working two jobs just to put a dent in the medical bills. Then there was the rent, the credit-card debt and the car loan. And right about then, she decided it was time to take on a mortgage. For some reason I’ve never quite understood.
But here’s the thing about Sally. She didn’t just daydream about it.
How she made it happen
She packed up again and moved into the basement of some friends. Rent: a hundred dollars a month. Not exactly the dream setup for a thirty-something professional. But it cleared her path.
She lived cheaply. She paid down her debt. She put cash in the bank for a down payment.
Two and a half years later, ironically on April Fool’s Day, she got pre-approved for a mortgage. Two months after that, she had the keys to a quaint starter home.
That’s what financial planning looks like. You pick a goal, then you do whatever it takes. Two and a half years is a remarkably short stretch of hard work for a first-time homebuyer, and the sacrifices were nothing out of the ordinary.
The plot twist
Affordability and availability led Sally to buy in a different city than she’d first planned. Bonus: her commute got cut in half.
She also chose an adjustable rate mortgage (ARM) with a low introductory rate, hoping to land a better house. In all the excitement, she forgot the word “introductory.” A year later her rate jumped, and her payment went up by more than four hundred bucks.
Ouch.
If you’re ever offered an ARM, ask what the payment looks like after the intro period ends. Ask before you sign. Sally would tell you the same thing.
But that increase gave her one more planning opportunity, and that’s the point. A plan doesn’t have to be perfect. It has to be solid enough that you can adjust when life hands you a surprise.
Does planning really work?
Fair question. Is all this goal-setting worth the trouble?
A plan is a set of steps worked out ahead of time to reach a specific goal. Not a wish. Not a hunch. And the numbers back it up. Companies with a written business plan grow 30 percent faster, and 71 percent of the fast-growing ones have some kind of long-range plan in place.
Okay, those are businesses. But your household runs on the same rules.
Here’s the part I like even better. The plan usually isn’t what trips people up. Carrying it out day after day is. Sixty percent of organizations don’t even tie their budgets to their priorities.
Sound familiar? A goal with no money behind it is just a wish with good posture.
So the plan matters. The doing matters more.
Four planning tools you can borrow
Sally picked up a few tools along the way. Maybe they’ll help you with whatever dream you’re chasing.
1. Write it down
No matter how goofy it sounds, put your goal on paper. You have to own it before it has any chance of coming true.
In one goal-setting study, fewer than 20 percent of people said their goals were always written down in vivid detail. The ones who did describe their goals that clearly were 1.2 to 1.4 times more likely to reach them. Not bad for a pen and an index card.
Then stick it somewhere you’ll see it. The fridge works.
2. Say it like you mean it
Skip the wishy-washy stuff. “I hope I can buy a house” and “I’d love to pay off my debt” won’t cut it. Try “I will buy a house.” “I will pay off my credit-card debt.” Hear the difference?
3. Set a date
No deadline, no goal. Just be reasonable about it, and go easy on yourself if you miss it.
Then work backward. Say you need $6,000 and you give yourself 24 months. That’s $250 a month. Suddenly it’s not a dream, it’s a line in your budget.
4. Stay focused
Keep visual reminders where you’ll see them. Make a chart so you can mark each milestone and honestly judge how you’re doing. Celebrate lightly, then keep going.
What Sally remembers
Even now, when Sally is tempted to charge up the cards and slide back into her old ways, she thinks about the cold, damp floor of that basement.
That’s one powerful motivator.
Question: So what’s your goal? Pick one. Write it down today and put a date next to it. Then tell me about it in the comments. I’d love to cheer you on.

News You Can Use • October 2026
Welcome to October’s News You Can Use! This month, we’re looking at the surprising ways inflation is changing retirement plans, where to find a less expensive appliance without giving up the basics, and the Halloween candy preferences that vary wildly from state to state. A little useful information, a little “well, I didn’t know that,” and plenty to keep you in the know as fall rolls along.

Your iPhone May Soon Double as Your Car Key
One less thing to dig through your purse or pockets for: GM is expanding support for digital car keys stored in Apple Wallet. Before the end of the year, select newer Cadillac, Chevrolet and GMC models, including the Tahoe, Suburban and Yukon, are expected to let owners use a compatible iPhone or Apple Watch as a car key. The rollout covers nine vehicle models initially, with GM saying more will follow over time. If your vehicle becomes eligible, GM says you’ll get a notice through its app. Handy? Absolutely. Just don’t toss the physical key quite yet.
Read more →
The Cheapest Store for Halloween Candy May Surprise You
You’d think the dollar stores would be the obvious place for bargain Halloween candy. Not this time. A same-day price check at Walmart, Target, Publix, Dollar General and Dollar Tree stores in South Florida found Walmart generally had the lowest prices on popular fun-size candy, while the two dollar stores offered little that beat the bigger chains. Publix was pricier overall, although a couple of BOGO deals changed the math. Prices vary by location, of course, but there’s a useful lesson here: compare the cost per piece, not the name on the storefront. And don’t burn $5 in gas to save 50 cents on Snickers.
Read more →
Could More Daily Steps Help You Stay Focused?
Your daily step count may say something about more than how much you move. Researchers studying more than 3,000 U.S. adults found that people averaging about 8,900 or 14,200 steps a day performed slightly better on tests of attention, resisting distractions and choosing longer-term rewards than those averaging about 5,100. The differences were small, and this study does not prove that walking more makes you sharper or establish a magic number of steps. Still, it adds an interesting possibility to the already-long list of reasons to get up and move: your attention may appreciate it, too.
Read more →
Build This Box Before Someone Gets Sick
The worst time to discover you’re out of fever reducer, tissues or anything remotely hydrating? When you’re already sick. Pharmacists and pediatricians suggest assembling a simple “sick day” kit now, while everyone is still upright and functioning. Start with the basics your household actually uses: a working thermometer, single-symptom medications, saline spray, honey for anyone over age 1 and a few favorite hydrating drinks. Check expiration dates and dosing instructions while you’re at it. No need to buy the entire drugstore. The point is simply to have what you’ll need before 2 a.m. arrives with a fever.
Read more →
Charmin’s New Roll Is Wider, but There’s a Catch
Charmin is making its toilet paper wider and says the extra coverage could mean using less. Before you start calculating bathroom savings, though, read the fine print. The company’s claim of using 50% less toilet paper compares the new Ultra Strong with Wider Sheets to bargain 1-ply brands, not the current Charmin Ultra Strong. And while each sheet is wider, one comparison found fewer sheets per roll: 297 versus 330. The new rolls may not even fit every holder, although Charmin is offering a free extender and a 60-day fit guarantee. Wider? Yes. Better value? That deserves a closer look.
Read more →
The Artwork Hiding in Plain Sight at Dodger Stadium
Millions of fans have walked past them for decades without knowing what they were looking at. Tucked around Dodger Stadium are abstract concrete reliefs dating back to the ballpark’s 1962 opening, some several stories tall and so well camouflaged they practically disappear into the building. A reporter finally tracked their origins to artists George Nocito and Bert Schwartz, who created 18 relief sculptures covering more than 6,000 square feet, along with fountains and other artwork. Some pieces have disappeared or been damaged, but about a dozen reliefs appear to remain. Even the Dodgers had little information about who made them. Not bad for a 64-year-old mystery hiding beside the hot dog line.
Read more →
Microsoft Will Pay MacBook Owners to Switch Sides
Microsoft is putting some serious money behind its attempt to woo MacBook Pro owners. Buy its new $2,599.99 Surface Laptop Ultra, trade in an eligible MacBook Pro, and you could get up to $1,000 in promotional cash back on top of the laptop’s regular trade-in value. There are strings attached, of course. The bonus depends on your MacBook model, condition and trade-in value, and you’ll need to submit a claim and mail in the old computer on time. The offer runs through Nov. 23 in the U.S. and Canada. If you’ve already been thinking about switching from Mac to Windows, this is one trade-in offer worth doing the math on.
Read more →
Could a Flip Phone Give You More Time?
What if your smartphone isn’t saving nearly as much time as you think? Artist August Lamm ditched hers for a basic flip phone in 2022 and says something unexpected happened: She got more free time, became more intentional with friends and stopped feeling like part of her attention was always somewhere else. Yes, life without apps means a few inconveniences. Directions, tickets and QR codes take more planning. But Lamm argues those extra minutes are small compared with the time reclaimed from dozens of quick phone checks that quietly pile up throughout the day. Her suggestion? Try it for a month before deciding you couldn’t possibly live without one.
Read more →
Sweden Just Made a Vacation for People Who’d Rather Not Mingle
Ever come home from vacation feeling like you need a vacation? Sweden may have your number. Its tourism organization has launched the Introvert Travel Agency, built around a wonderfully simple idea: being social is optional. Think peaceful nature stays, island escapes, self-guided city outings and accommodations where personal space isn’t considered a problem to be solved. And apparently there’s an audience for this. In a survey commissioned by Visit Sweden, half of Americans said they need time to recover after a trip. Perhaps the best vacation isn’t about packing more in. Maybe it’s about leaving a little more out.
Read more →
The 194-Year-Old Tortoise Whose DNA Could Hold Clues to Longer Human Lives
What if one of the biggest clues to healthy aging came from a tortoise who was alive before Abraham Lincoln was born? Jonathan, believed to be about 194 years old, has genes linked to DNA repair and reduced inflammation, two processes that may help protect cells from age-related damage. Researchers also found that his energy-producing mitochondria appear to be in surprisingly good shape. Could these discoveries eventually help humans age more healthfully? Scientists are hopeful, but they need to study more tortoises before drawing firm conclusions.
Read more →
Is Screen Time Really Bad for Kids? Science Has a More Surprising Answer
Not all screen time is created equal. One eight-year study found that kids who reported more screen time also performed better on certain memory and thinking tests, although that doesn’t prove screens made them smarter. The bigger question may be what kids watch and what screens crowd out. Pediatric experts recommend paying attention to content, mood, sleep, real-world activity and communication. And there’s a lesson for grown-ups, too: if your phone keeps stealing time from sleep, exercise or people you love, it may be time to put it down.
Read more →
The Woman Behind the Moon Landing Code You’ve Probably Never Heard Of
Before astronauts could walk on the moon, someone had to make sure their computer knew what to do when things went wrong. Margaret Hamilton led the MIT team that developed Apollo’s onboard flight software, including the clever system that prioritized critical tasks when the computer became overloaded during Apollo 11’s lunar landing. Her work helped establish software engineering as a discipline, and her legacy reaches far beyond that historic mission.
Read more →
Has Inflation Killed the Early Retirement Dream?
The FIRE movement promised a shortcut to freedom: save aggressively, spend carefully and retire decades early. But with prices up 27% since 2021, many Americans now say early retirement feels out of reach. There’s a twist, though. Some FIRE savers are actually weathering inflation better because they’ve already built their lives around spending less.
Read more →
The Budget Appliance Brand Hiding Inside Whirlpool
If Whirlpool is the name you know, Amana may be the money-saving brand you’ve overlooked. Both belong to the same corporate family, but Amana appliances typically cost less because they skip some of Whirlpool’s pricier bells and whistles while still handling the basics. In a recent comparison, similar Amana models were $60 to $155 cheaper.
Read more →
Your State’s Favorite Halloween Candy Might Surprise You
Reese’s Peanut Butter Cups may rule Halloween nationwide, but candy preferences get wonderfully strange once you cross state lines. Californians favor Red Vines, five Midwestern states choose Laffy Taffy, and seven Southern states reach for an inexpensive candy assortment. And that supposedly hated candy corn? Orders are up 30% from last year.
Read more →
- MORE: News You Can Use • September
- MORE: News You Can Use • August
- MORE: News You Can Use • July
Check back regularly for updates! We’ll be adding new top news articles throughout October 2026.

Sandwiched Between Aging Parents and Adult Children
A lovely new assisted living community is going up near my house. It’s gorgeous. It’s also a daily reminder of how hard it is to talk with aging parents about their health and what comes next. If you’re part of the sandwich generation, caught between your parents and your grown kids, this one’s for you. Let’s talk about who’s in the sandwich and how to start that conversation.

Ever hang up with your mom about her doctor’s appointment, then pick up a call from your grown daughter who’s panicking about a job interview? Same afternoon. Same you.
If that sounds familiar, there’s a name for what you’re doing. And you’ve got a lot of company.
What is the sandwich generation?
It’s the name for middle-aged adults who are pulled two ways at once, supporting aging parents on one side and their own children on the other. And it’s a big crowd. According to Mental Health America, nearly a third of all caregivers (29%) are part of it.
Not every sandwich is built the same. Which one are you?
The traditional sandwich
You’re squeezed between the needs of aging parents (or other relatives or friends) and the demands of your own kids, spouse, and career. Something is always on fire. Usually more than one thing.
The club sandwich
Add a layer. You’re in your 50s or 60s with aging parents, grown children, and grandchildren all in the mix. Or you’re in your 30s or 40s with little ones, aging parents, and grandparents. Stacked high.
The double stuff sandwich
Your adult, post-college kid has moved back home because the job hasn’t shown up, or the money hasn’t. The boomerangs, we call them. If that’s your house, you’ll want to read House Rules for Adult Children Living at Home.
The open face sandwich
You’re helping an elder on one side and somebody else who needs support on the other. No top slice. Just a lot of filling.
My husband and I have a lot of friends in this boat. I’d guess at least half are caring for elderly parents or supporting adult children and grandchildren. In plenty of cases, those folks have moved in. Permanently.
How common is it, really?
More common than you’d think, especially in your 40s. Mental Health America reports that 54% of Americans in their 40s have a living parent age 65 or older and are either raising a child under 18 or have helped an adult child financially in the past year. Men and women are about equally likely to land here.
Here’s the surprising part. Sandwich generation adults are somewhat more likely than other adults to say they’re very satisfied with their family life. Exhausted, yes. Stretched thin, absolutely. But not miserable.
Which brings me back to that assisted living community down the road. The best time to talk about what comes next is long before anyone needs to. Awkward? Sure. Worth it? Absolutely.
How do you talk to aging parents about the future?
Think of it this way. A trip to the dental hygienist can save you from a painful procedure down the road. A conversation with your parents about aging does the same thing. It helps preserve a future you can both handle.
Wait too long and you’ll have fewer choices. It may cost more, too, to get them the care they need.
How you bring it up matters a lot. It can decide whether your parents accept your help at all. Here’s how I’d start.
Listen
Don’t miss a chance to talk about the future. Listen to your parents and ask questions. Resist telling them what to do, no matter how tempting. And start earlier rather than later.
Be patient
Your parents spent years biting their collective tongues while they raised you. Now it’s your turn. Give them time to think over their options, because big decisions won’t get made in one casual phone call.
Expect silence
You may not get quick answers. This could be one of the hardest seasons of their lives. Let them process, think, and ponder. Silence isn’t a no.
Don’t assume
Above all, don’t mistake indecision for a lack of interest. I’d bet good money they’ve been thinking about this a lot longer than you have. It’s just easy to put off when the future looks far away.
Get help
It’s okay if you have no idea what you’re doing. Wanting to help your parents is a big first step. Now dare to ask for help.
Laugh
Keep your sense of humor. It’ll keep you sane for the years ahead.
What about the person in the middle?
That would be you. And yes, you’re allowed to be tired.
Here’s the funny thing about being the filling in the sandwich. Everybody else’s needs get handled first. Yours slide to the bottom of the list. Then somebody loses the list.
Mental Health America has some good advice for the rough spots, and I agree with all of it.
- Your time disappears. Get organized. Hold regular family meetings to divide up the tasks, and ask friends and neighbors for a break. They’re often glad to help and just don’t know what you need. Got siblings? Put them to work. Costs, hands-on care, visits. Nobody gets to coast.
- Family tension flares up. Caregiving stirs up big emotions, and old childhood disputes love to crash the party. Be honest about how you feel and clear about what you expect from each other. If things get tense, bring in a neutral third party.
- You feel like a failure. You’ll fall short on some things. Everybody does. Try not to think in extremes. A day that didn’t go as planned isn’t a day that didn’t count.
- The feelings get complicated. Guilt, resentment, sadness, and dread are all normal when you’re watching your parent need you in a new way. Talk with a friend, find a support group, or write it all in a journal nobody will ever read.
And if you feel like you can’t stay afloat, Mental Health America offers a free mental health screen at mhascreening.org. It’s a good place to start.
You’re doing better than you think
The sandwich is heavy. I won’t pretend otherwise.
But look at what you’re doing. You’re showing up for people you love, and you’re doing it while tired. You’re reading about hard conversations instead of avoiding them. That’s no small thing.
You won’t do this perfectly. Nobody does. Some days you’ll nail it. Other days dinner will be cereal. Both kinds of days count.
So be as kind to yourself as you’d be to a friend in your shoes. Then pick up the phone and start that conversation. Today is a perfectly good day.
Question: Now tell me, which sandwich are you? Leave a comment and let me know. I read every one.

Cake Mix Chocolate Chip Cookies That Taste Homemade
Cake mix cookies are one of my favorite shortcuts when I want homemade cookies without starting from scratch. Grab a box of cake mix, add a few simple ingredients, and you’ll have soft, chewy chocolate chip cookies in no time.

Have you ever stood in the baking aisle, spotted a sale on cake mix and thought, I should buy a few of those?
I have. In fact, I once counted 18 boxes of cake mix in my pantry. Eighteen. Apparently, I was preparing for either a very large birthday party or the end of civilization.
But there’s a good reason to stock up. Cake mixes go on sale regularly, and they’re handy for far more than making the cake pictured on the box.
This recipe turns a simple yellow cake mix into soft, chewy chocolate chip cookies with just a handful of ingredients. Nobody needs to know you started with a box.
And I’m certainly not telling.
Why you’ll love cake mix cookies
The beauty of cake mix cookies is the shortcut. The dry ingredients are already measured and mixed, so you can go from I want cookies to a bowl of cookie dough in just a few minutes.
They’re also wonderfully flexible. Use yellow cake mix for a classic cookie, chocolate cake mix for something richer, or try carrot cake mix with white chocolate chips. Once you start looking at cake mix as a cookie shortcut, the possibilities get pretty fun.
And because cake mix is often inexpensive when it’s on sale, these cookies can be a budget-friendly way to make a homemade treat.
What You’ll Need
Yellow cake mix
A standard-size box works best. Yellow cake mix gives these cookies a classic buttery-vanilla flavor, but white, chocolate, spice or carrot cake mix can also work. Cake mixes vary by brand and formulation, so the finished dough may need a small adjustment in consistency.
Butter
Use regular salted or unsalted butter, softened but not melted. Butter gives the cookies a richer flavor and tender texture. In a pinch, vegetable oil works, although the cookies will have a slightly different texture.
Milk
Whole milk adds a little richness and helps bring the dough together. Evaporated milk works well, too. If you’re out of dairy milk, an unsweetened, unflavored plant milk such as oat or soy can be used.
Vanilla extract
Pure vanilla extract or imitation vanilla both work here. Since vanilla is one of the flavors that makes a basic cake mix taste more homemade, use what you have rather than skipping it.
Egg
A large egg provides structure and helps hold the cookies together. If you prefer a softer cookie, using two eggs and leaving out the milk will give you a more tender result.
Chocolate chips
Semisweet chips are my favorite because they’re sweet enough without making the cookies overly sugary. Milk chocolate, dark chocolate, mini chips or even chopped chocolate will work. This is a good place to use whatever is hiding in the back of the pantry.
Nuts
Walnuts are my first choice, but pecans or almonds are delicious, too. You can leave them out entirely for a nut-free cookie.
A Little Cake Mix Know-How
Not all cake mixes behave exactly the same way. Some contain pudding or other ingredients that make the finished cake especially moist, and those differences can affect cookie dough, too.
If your dough seems too stiff to scoop easily, add water a little at a time until it reaches a soft, workable consistency. If you’re using a different flavor or brand of cake mix, don’t be surprised if it needs a tiny adjustment.
That’s the beauty of this recipe. It doesn’t require a laboratory coat. Just a bowl, a spoon and a little common sense.
How to Make Cake Mix Chocolate Chip Cookies

The recipe itself is wonderfully simple. The trick is knowing what you’re looking for along the way. A few small details can be the difference between soft, chewy cookies and cookies that could double as hockey pucks.
Start With the Right Oven Temperature
Preheat the oven to 350°F. If you’re using dark or nonstick baking sheets, lower the temperature to 325°F because those pans tend to brown cookies more quickly.
For the most even results, let the oven fully preheat before the first batch goes in. An oven that runs hot can turn a soft cookie into a dry one before you even realize what’s happening.
Mix Just Until the Dough Comes Together
Beat the cake mix, softened butter, milk, vanilla and egg until the mixture is smooth and the ingredients are well combined.
Don’t worry if the dough is thicker than traditional chocolate chip cookie dough. That’s exactly what you want. It should be soft enough to scoop but firm enough to hold its shape on the baking sheet.
If it seems dry or difficult to scoop, add a little water, a tablespoon at a time. Different cake mixes can produce slightly different doughs.
Fold in the Chocolate Chips and Nuts
Once the base dough is mixed, stir in the chocolate chips and chopped nuts by hand. This keeps the add-ins from getting beaten into the dough and gives you a more even distribution in every cookie.
And yes, sampling a chocolate chip or two is part of the process. At least that’s my story.
Give the Cookies Some Room
Drop the dough onto an ungreased baking sheet, leaving about 2 inches between portions. These cookies spread as they bake, and crowded cookies tend to run into each other.
For cookies that look more uniform, use a cookie scoop. It isn’t necessary, but it makes quick work of portioning and helps the cookies bake at about the same rate.
If you’re working with a particularly sticky dough, lightly chilling it for a short time can make scooping easier.
Watch the Centers, Not Just the Clock
Bake the cookies for about 10 to 12 minutes, but don’t rely on the timer alone. Look for edges that are set while the centers still appear soft and the cookies remain fairly light in color.
This is one of those times when slightly underdone is exactly right. The cookies will continue to firm up as they cool, so pulling them from the oven while the centers are still soft is how you get that tender, chewy texture.
If you wait until the centers look completely baked, you’ve probably waited too long.
Let Them Finish on the Baking Sheet
Leave the cookies on the hot baking sheet for about a minute after they come out of the oven. That brief rest lets them firm up enough to move without falling apart.
Then transfer them to a wire rack to finish cooling. Once they’re completely cool, store them in an airtight container.
And there you have it: cookies that started with a box of cake mix but look and taste like you put in considerably more effort.
I won’t tell if you won’t.
Easy Ways to Change Up Cake Mix Cookies
This is where the fun starts.
- Try different cake mixes. Yellow cake mix is my go-to, but chocolate, white, spice and carrot cake mixes all make interesting cookies.
- Switch the chips. Semisweet chocolate chips are classic, but try milk chocolate, white chocolate, peanut butter or butterscotch chips.
- Add nuts. Walnuts, pecans or chopped almonds all work beautifully. Or leave them out if you’re baking for someone with a nut allergy or simply don’t have any in the cupboard.
- Make them softer. For an especially soft cookie, use 1/3 cup butter and 2 eggs instead of 1/2 cup butter, milk and 1 egg. Omit the milk.
- Need a bigger batch? Start with two boxes of cake mix and double the remaining ingredients.
How to Store Cake Mix Cookies
Once the cookies have cooled completely, store them in an airtight container. Here’s an old-fashioned trick I still love: Put a small piece of bread in the container with the cookies. The bread helps keep the cookies soft and moist. Replace it when it gets stale. It’s a little odd. It works.
Cake Mix Cookie Flavor Ideas
Once you have the basic method down, you don’t have to make the same cookie twice.
Try these combinations:
- Carrot cake mix + white chocolate chips
- Chocolate cake mix + peanut butter chips
- Spice cake mix + butterscotch chips
- Yellow cake mix + chocolate chips + walnuts
- Chocolate cake mix + white chocolate chips + pecans
That’s one of the reasons I keep cake mix in the pantry. It’s not just a cake waiting to happen. It’s a head start.
A Box of Cake Mix Is Just the Beginning 

I love a shortcut that doesn’t taste like a shortcut.
These cake mix chocolate chip cookies are proof that you don’t need a long ingredient list or an afternoon in the kitchen to turn an inexpensive pantry staple into something special. Keep a few boxes of cake mix tucked away when they’re on sale, and the next time you need a quick dessert, you’ll be ready.
Nobody has to know where you started. And I’m not telling.

Cake Mix Chocolate Chip Cookies
Equipment
- Large mixing bowl
- Electric mixer
- Measuring cups and spoons
- Cookie scoop or spoon
- Baking sheets
- Wire cooling rack
Ingredients
- 1 15.25 ounce box yellow cake mix, or another flavor
- 1/2 cup butter softened
- 2 tablespoons whole milk
- 1 teaspoon vanilla extract
- 1 large egg
- 1/2 cup chopped nuts optional
- 1 cup semisweet chocolate chips
Instructions
- Heat oven to 350°F. For dark or nonstick baking sheets, use 325°F.
- In a large bowl, beat cake mix, softened butter, milk, vanilla and egg with an electric mixer on medium speed until smooth.
- Stir in chopped nuts and chocolate chips.
- Drop dough by spoonfuls onto ungreased baking sheets, leaving about 2 inches between cookies.
- Bake for 10–12 minutes, or until the edges are set while the centers remain soft and the cookies are still fairly light in color.
- Let cookies cool on the baking sheet for 1 minute, then transfer to a wire rack to cool completely.
Notes
Nutrition
Question: What’s your favorite “nobody needs to know it started with a mix” baking shortcut? Share in the comments below
EverydayCheapskate™ is reader-supported. We participate in the Amazon Services LLC Associates Program and other affiliate advertising programs, designed to provide a means for us to earn from qualifying purchases, at no cost to you.

These Cheap Halloween Snacks Are Almost Too Easy to Make
Halloween party food has a funny job description. It needs to look impressive enough to make kids squeal, taste good enough that they’ll actually eat it, and cost little enough that you don’t mind when some of it ends up on somebody’s costume.

And no, you don’t need to spend your evening sculpting fondant eyeballs.
The trick to great Halloween food isn’t complicated cooking. It’s presentation. Give ordinary food a spooky name, arrange it in a fun shape and add a couple of simple details. Suddenly, carrots are witch’s fingers, bananas are ghosts and hot dogs are mummies.
Magic? Pretty much.
These 15 cheap Halloween party snacks start with ordinary grocery-store ingredients and turn into something kids will remember. Most are simple enough to make while you’re juggling the rest of the party, too.
5-Minute Halloween Snacks
1. Ghost Bananas

Need a Halloween treat you can make before the doorbell starts ringing? Peel bananas, cut them in half crosswise and add two mini chocolate chips for eyes and one for the mouth. That’s it.
They’re cute, naturally sweet and inexpensive. Just make these shortly before serving so the bananas don’t have time to turn brown and sad-looking.
2. Witch’s Fingers With Warty Dip

Baby carrots already have the perfect finger shape. Arrange them on a platter with the narrow ends pointing outward and tuck a thin slice of green bell pepper onto the tip of each one for a “fingernail.”
Put ranch dressing in a bowl for dipping. If you really want to commit to the bit, tint the ranch a pale green with a tiny drop of food coloring. Call it “Witch’s Fingers with Warty Dip.”
3. Eyeball Mozzarella

Want your party guests to do a double take? These creepy little eyeballs are made with slices of ham wrapped around mozzarella, then finished with olives with red pimentos for the bloodshot details.
They look wonderfully complicated. They aren’t. Arrange them on a platter with toothpicks and watch them disappear.
4. Bloody Breadsticks

Warm soft breadsticks and dip one end into pizza sauce so it looks like a bloody fingertip.
Serve them standing upright in a glass or lined up on a platter. A little pizza sauce goes a long way here. It’s silly. It’s easy. It’s Halloween.
5. Pumpkin Patch Veggie Tray

A vegetable tray doesn’t have to look like a vegetable tray. Arrange orange vegetables such as baby carrots and orange bell pepper strips into a pumpkin shape on a large platter. Use celery for the stem and add a small bowl of ranch or hummus for dipping.
Want a jack-o’-lantern face? Cut a few pieces of cucumber, pepper or black olives into simple shapes and arrange them on top.
Quick Wins: 10 to 15 Minutes
6. Mummy Dogs

This one is an oldie because it works. Cut refrigerated crescent dough into thin strips and wrap them around hot dogs, leaving a little space near one end for the mummy’s face. Bake according to the dough package directions until golden brown.
Add two tiny dots of mustard for eyes after baking. Serve with ketchup or mustard for dipping.
They’re inexpensive, filling and considerably more exciting than a tray of plain hot dogs.
7. Spider Deviled Eggs

Make your favorite deviled eggs. Then turn each one into a spider.
Cut black olives into pieces. Use one larger piece for the body and thin strips for the legs. Arrange them on top of each egg.
If your spiders look a little wonky, congratulations. They’re homemade.
8. Witch’s Broomsticks

Cut string cheese sticks in half and gently pull or slice the bottom portion into thin strips to create the bristles. Insert a pretzel stick into the uncut end. That’s it. You’ve made a broomstick.
If you want extra color, tie a narrow strip of parsley around the top. Otherwise, don’t. These are cute without the craft project.
9. Pumpkin Cheese Ball

Start with a simple homemade cheese ball or use a store-bought one if that’s what keeps your sanity intact.
Shape it into a round pumpkin and press a few shallow vertical grooves into the outside with a butter knife. Cover the outside with shredded orange cheddar, crushed cheese crackers or another orange-colored topping.
Add a small piece of green bell pepper for the stem and serve with crackers. Nobody needs to know how little work went into it.
10. Boo-nana Pops

Cut bananas in half and insert popsicle sticks. Freeze until firm, then dip them in melted white chocolate or white candy coating.
Add edible candy eyeballs before the coating sets. Return them to the freezer until firm.
These take a little longer than ghost bananas, but they’re still wonderfully simple. And anything served on a stick automatically feels more festive.
Party Centerpieces That Get Attention
11. Jack-o’-Lantern Stuffed Peppers

Small orange bell peppers make adorable edible pumpkins.
Cut off the tops, remove the seeds and carefully cut simple jack-o’-lantern faces into the front. Fill them with a cooked mixture such as taco meat and rice, seasoned rice and beans, or macaroni and cheese. Place the tops back on and bake until the peppers are tender and the filling is hot.
The important word here is cooked. Don’t stuff these with raw meat and hope the oven sorts everything out.
12. Monster Sandwiches

Take ordinary sandwiches and make them party food.
Cut sandwiches into small triangles or use a cookie cutter to make simple shapes. Add an olive slice for an eye and a strip of red bell pepper for a mouth.
You can make one big platter of “monsters” using whatever sandwiches your guests already like.
That’s the beauty of this idea. You’re not making a special recipe. You’re making lunch wear a costume.
13. Graveyard Taco Dip

Layer your favorite taco dip in a rectangular dish: refried beans, sour cream, guacamole, salsa, cheese and olives all work beautifully.
For tombstones, cut sturdy tortilla chips into simple rectangles or use crackers that are large enough to decorate. Write “RIP” or silly names on them with an edible food marker and stand them upright in the dip.
Skip putting plastic decorations directly into the food. A spooky decoration beside the dish gives you the same effect without making anyone wonder whether that hand belongs in the appetizer.
14. Halloween Snack Board

You don’t need an expensive charcuterie board to make a Halloween snack board.
Use grocery-store favorites: cheese cubes, sliced salami, crackers, grapes, olives, nuts and fruit. Arrange the food in a pumpkin shape, a spiderweb pattern or simply in dramatic little groups.
Add a few candy corns around the edges if you like.
The secret is contrast. Put dark olives next to pale cheese, red fruit beside crackers and green grapes around orange cheese. Suddenly, your ordinary snack board has a Halloween costume.
15. Frozen Ice Hand Punch

Here’s one that’s worth the tiny bit of planning.
Fill a clean, food-safe, latex-free glove with water, tie it securely and freeze it flat or upright on a tray. Once frozen solid, carefully remove the glove and place the ice hand in a large bowl of punch or lemonade.
Add gummy worms or other edible decorations around the bowl.
A quick safety note: don’t use a random household or medical glove unless its packaging specifically says it’s appropriate for food contact. And skip dry ice in anything guests will be drinking. The spooky effect isn’t worth the safety headache.
Drinks Worth Naming
You don’t need a special Halloween punch recipe. Sometimes the name does most of the work.
- Green lemonade or Kool-Aid: Swamp Juice
- Red fruit punch: Vampire’s Delight
- Lemon-lime soda with lime sherbet: Ghost Foam
- Apple cider: Witch’s Brew
- Chocolate milk: Werewolf Fuel
- Orange soda: Pumpkin Potion
Put the names on little cards beside the drinks. Suddenly everybody’s having a Halloween party.
How Much Food Do You Really Need?
Here’s where I think we sometimes make parties harder than they need to be.
For 10 to 15 kids, you don’t need 15 different foods. Pick one or two filling foods, two or three easy snacks, a dip with something crunchy to dunk and one fun drink.
Then put out a bowl of candy. Because let’s be honest. It’s Halloween.
For example, you might serve mummy dogs, a pumpkin cheese ball, ghost bananas, a veggie tray, graveyard taco dip and Swamp Juice. That’s plenty of food without turning your kitchen into a Halloween-themed restaurant.
And don’t feel obligated to make every item from scratch. A store-bought cheese ball can become a pumpkin. A vegetable tray can become a jack-o’-lantern. Plain sandwiches can become monsters. The presentation is doing the heavy lifting.
The Real Halloween Trick
The best Halloween party food isn’t necessarily the cleverest recipe. It’s the food that makes kids stop, point and say, “Look!”
That’s why these ideas work. You’re starting with ordinary food you were probably going to buy anyway and giving it a little Halloween personality.
So don’t let Pinterest convince you that you need six hours, seventeen specialty ingredients and the steady hand of a professional cake decorator.
Grab the carrots. Cut the cheese. Put googly eyes on something edible. You’ve got this.
Question: What’s the party snack that always gets the biggest reaction from kids at your Halloween gathering? Share in the comments below.
EverydayCheapskate™ is reader-supported. We participate in the Amazon Services LLC Associates Program and other affiliate advertising programs, designed to provide a means for us to earn from qualifying purchases, at no cost to you.

Prime Big Deal Days 2026: Your Cheapskate Game Plan
Amazon’s second big sale of the year is almost here. Prime Big Deal Days runs October 6 and 7, and it’s built to make you feel like you’re losing if you close the tab. You’re not. Here’s my plan for buying what’s on my list at a price I checked, then closing the laptop. No regrets, no December surprises.

Amazon just can’t help itself. The summer sale wasn’t enough, so here comes round two.
Prime Big Deal Days runs Tuesday, October 6 through Wednesday, October 7. Forty-eight hours of deals, and every one of them is built to make you feel like you’re losing if you walk away.
You’re not. Here’s how I’m approaching it.
Why this one’s worth your attention
Because it lands right before the holidays. You’re going to buy gifts, stock the pantry, and replace that one thing that’s been limping along since spring. Why not do it at a price you’ll like better than what you’d see in December?
Amazon says most of the deals are at its lowest prices of the year “so far.” Notice those last two words. Black Friday is still out there, waiting.
So this isn’t a free-for-all. It’s a chance to knock out the things you already planned to buy.
How it works
The sale starts at 12:01 a.m. Pacific on October 6. Fresh deals, which Amazon calls “Today’s Big Deals,” drop three times a day: midnight, 8 a.m., and 1 p.m. Pacific. They run up to 55% off or more, in limited quantities, and they go fast.
I’m in Colorado, so that’s 1 a.m., 9 a.m., and 2 p.m. for me. Do the math for your own time zone now, not at 12:55 p.m. when something on your list is about to vanish.
Some early deals are already live, so you can start poking around today.
Not a Prime member yet?
Prime Big Deal Days is for members only. If you’re eligible, you can start a free 30-day trial. Put a reminder on your phone the day you sign up, because the regular price is $14.99 a month or $139 a year and Amazon won’t remind you for free.
If you’re a college student or between 18 and 24, Prime for Young Adults starts with a six-month free trial, then $7.49 a month or $69 a year. Qualifying government assistance recipients and income-verified customers can try Prime Access free for 30 days, then pay $6.99 a month.
Before Tuesday, do these three things
1. Make your list.
A real one, not a wish list. What have you been waiting to buy until the price came down? What will you actually need before winter? Write it down before you open a single deal page.
2. Put those items on an Amazon List.
Alexa for Shopping can then tell you when something on your List drops in price. Set a target price on anything you’ve been stalking, and you’ll get an alert when it hits.
There’s also an Auto-Buy setting that purchases the item for you at your target price. If you know exactly what you’ll pay, it works. If you’re not sure, stick with the alerts and keep your finger on the button.
3. Check the price history.
Tap “Price History” on any product page and you’ll see up to 365 days of pricing. I still like CamelCamelCamel.com as a second opinion. “$2,000 off” is a number. It’s not a deal until you know what it’s off of.
Where’s the money coming from?
Here’s the question nobody on Amazon’s end wants you asking.
If you’ve been putting money into a Freedom Account for holiday spending, this is the moment that pays off. Shop from that, in cash. If you haven’t started one yet, start one this month. Saving a little every month toward the expenses you know are coming is how you keep December from ambushing you.
And if the money isn’t there, the deal isn’t a deal. Close the tab.
What I’d shop for
- Everyday stuff you’d buy anyway. Cleaning supplies, laundry products, pantry staples, and the refrigerator water filter you keep forgetting to change. Cold and flu medicine belongs here too. I’d rather buy it now than at 2 a.m. when somebody’s sniffling.
- Cookware and bakeware. A good pan or baking dish is something you buy once and use for the next twenty years. If you’ve been cooking with something warped and scratched, this is your moment.
- A slow cooker, if you don’t have one. If you host the holidays, a slow cooker on the counter takes a lot of pressure off. Check the price history first, then decide.
- Gifts you already know you’ll give. Toys, building sets, and books are all fair game. Buy for the people on your list and stop there.
- Warm things. Bedding, blankets, sweaters, and outerwear. If you need boots this winter, add them to the list now.
What I’d skip
- Big-ticket tech, unless you’ve been researching it for months and you know the fair price. Otherwise you’re relying on Amazon’s math.
- A costume you’ll wear once. A plastic skeleton that will live in your closet for eleven months.
- Anything in your cart because of a “customers also bought” sidebar. That’s not a deal. That’s Amazon being very good at its job.
- And anything you’d have to return. Returns are a hassle, and a hassle costs you more than the coupon saved.
The only rule that matters
The best shoppers I know buy what’s on their list, at a price they checked, and then close the laptop. That’s the win. Everything else is Amazon’s.
Team EC will post verified deals right here on October 6 and 7. Bookmark this page, and if you’re not on the daily newsletter yet, subscribe so the good stuff reaches you before it sells out.
Question: What’s at the top of your list this time? A household staple you want to stock up on, or a holiday gift you’ve been waiting to find at the right price? Tell me in the comments.
EverydayCheapskate™ is reader-supported. We participate in the Amazon Services LLC Associates Program and other affiliate advertising programs, designed to provide a means for us to earn from qualifying purchases, at no cost to you.

Impossible Lasagna Pie: All the Flavor, None of the Noodles
Craving lasagna on a weeknight? Then you know the drill. Boil the noodles, layer everything, fight with a floppy noodle, wash every dish you own. Or you could make this. Impossible Lasagna Pie has the cheesy, meaty, saucy goodness of the real thing, and it makes its own golden crust as it bakes. No noodles. No boiling. Cleanup is one skillet and a bowl, plus the pie pan.

Here’s the “impossible” part. You layer cheese and seasoned beef in a pie pan, then pour a thin batter over the top. It looks like it can’t possibly work. Then it goes into the oven and comes out a tender, golden pie you can slice like, well, a pie.
The batter is made with my homemade Master Mix. A half cup does the job. Pennies. The whole pie runs about $8 to $10 and feeds six, so you’re looking at roughly $1.35 to $1.70 a plate. Try getting that from the freezer aisle.
And the cottage cheese? It stands in for the ricotta you’d normally buy for lasagna, at a lower price. Layered with Parmesan on the bottom, it turns creamy and rich. Nobody at your table will miss the noodles. I promise.
What you’ll need
The full ingredient list with measurements is in the recipe card below. Here’s what each one is doing in there, and what to do if your pantry has other ideas.
Ground beef
Any grind works. I like 80/20 for flavor, since you’re draining the fat anyway. Ground turkey is fine. Italian sausage is even better if you want more punch, but go easy on added salt because sausage brings its own.
Cottage cheese
Small curd, whole milk if you can. It gives you the creamiest layer. Low-fat will work in a pinch. Ricotta swaps in one for one.
Parmesan
Grated from a wedge is best, but the shaker-can kind is fine here. It’s a supporting player.
Mozzarella
You’ll use two cups total, one inside and one on top. Low-moisture mozzarella melts best. If you have a block, shred it yourself, because pre-shredded cheese wears a coating that keeps it from melting as smoothly. Out of mozzarella? Provolone or Fontina are lovely, or use a mix of whatever cheese ends are hiding in your fridge.
Tomato paste
This is your sauce. Because it’s concentrated, it flavors the beef without making the pie soggy. A 6-ounce can is the right amount, so keep it in mind at the store.
Italian seasoning, salt, and pepper
Nothing fancy. If your Italian seasoning has been in the cabinet since the last decade, buy a fresh jar. Old herbs taste like dust.
Master Mix or Bisquick
This forms the crust. Here’s the one thing to get right. My Master Mix already has dry milk in it, so you mix it with water. Bisquick doesn’t, so use milk instead. Gluten-free? A gluten-free baking mix should work in the same amounts, with milk.
Eggs
Two of them. They set the batter and hold everything together.
Fresh parsley
Optional, but it makes the pie look like you tried harder than you did.
One more thing on equipment. Your pie pan needs to be at least 1 1/4 inches deep. A shallow one will bubble over and you’ll be scraping your oven floor. Slide a baking sheet underneath while it bakes, just in case. Grease happens.
How to make impossible lasagna pie
Preheat and grease the pan
Turn the oven to 400°F and grease your pie pan really well. The batter is going to bake right up against it, so don’t skimp. Butter, shortening, or cooking spray all work.
Brown the beef
Cook the beef in a skillet over medium-high heat, breaking it up as it goes. When it’s browned, drain the fat. Then blot the meat with a paper towel if it still looks glossy. Extra grease is the fastest way to a sloppy pie.
Layer the cheeses
Spoon the cottage cheese into the pie pan and spread it to the edges. Sprinkle the Parmesan on top. It doesn’t have to be pretty. It’s going to be covered up.
Build the beef layer
Stir 1 cup of the mozzarella, the Italian seasoning, and the tomato paste into the warm beef until it’s evenly coated and reddish-orange. Spoon it over the cheese. Spread it gently and don’t press down, or you’ll squish the creamy layer beneath.
Mix and pour the batter
Whisk the eggs and water (or milk, if you’re using Bisquick) together first, then add the Master Mix, salt, and pepper and stir until smooth. It will be thin. That’s normal. Pour it slowly over the beef, and trust the process.
Bake until set
Bake 30 to 35 minutes. Slide a knife into the center. If it comes out clean, you’re done. If there’s wet batter on it, give the pie another few minutes. Ovens vary, and this is the one step where the timer is a suggestion and the knife is the boss.
If the top is browning too fast, loosely tent it with foil.
Add the last cup of cheese and let it rest
Sprinkle the remaining cup of mozzarella over the top and pop it back in for 1 to 2 minutes, just until it melts. Then walk away for 5 minutes. I know. It smells amazing. But the rest lets everything firm up so your slices hold together instead of sliding into a puddle. Sprinkle with parsley if you have it.
Leftovers, make-ahead, and what to serve with it
This pie is even better the next day, which makes it a friend to anyone with a busy week. Cover leftovers and keep them in the fridge for 3 to 4 days. Reheat a slice in the microwave for 60 to 90 seconds, or in a 350°F oven for about 15 minutes if you want the edges crisp again.
You can freeze individual slices, too. Wrap each one tightly and they’ll keep about 2 months. The texture will be a bit softer after thawing, but the flavor is all there.
Want to get ahead? Layer the cottage cheese, Parmesan, and beef mixture in the pan, cover it, and refrigerate it. When it’s time to eat, whisk up the batter and pour it over, then bake, adding a few extra minutes since everything’s coming in cold. The batter is best fresh.
As for what to serve with it, keep it simple. A big green salad with a sharp vinaigrette is my go-to. Garlic bread never hurts. Steamed broccoli or green beans round out the plate. And if you have leftover spaghetti sauce, warm it up and pass it at the table for anyone who likes their lasagna extra saucy.
Scroll down for the printable recipe card. Then go make a pie that’s a lot less work than it looks.

Impossible Lasagna Pie
Equipment
- 9-inch pie pan (at least 1 1/4 inches deep)
- Skillet
- mixing bowl
- Baking sheet (optional, to catch drips)
Ingredients
- 1 pound ground beef
- 1/2 cup small curd whole cottage cheese
- 1/4 cup grated Parmesan cheese
- 2 cups shredded mozzarella cheese 8 oz, divided
- 3/4 teaspoon Italian seasoning
- 1 6 oz can tomato paste
- 1/2 cup Master Mix or Bisquick
- 1 cup water use milk instead if using Bisquick
- 1/2 teaspoon salt
- 1/4 teaspoon black pepper
- 2 large eggs
- Chopped fresh parsley for garnish (optional)
Instructions
- Preheat the oven to 400°F. Grease a 9-inch pie pan that's at least 1 1/4 inches deep.
- Cook the ground beef in a skillet over medium-high heat, stirring occasionally, until browned. Drain the excess fat.
- Spread the cottage cheese in the pie pan, then sprinkle the Parmesan over it.
- Stir 1 cup of the mozzarella, the Italian seasoning, and the tomato paste into the cooked beef until well combined. Spoon evenly over the cheese layer.
- In a bowl, stir together the Master Mix, water, salt, pepper, and eggs until smooth. Pour over the beef layer.
- Bake 30 to 35 minutes, until a knife inserted in the center comes out clean.
- Sprinkle the remaining 1 cup mozzarella over the top and bake 1 to 2 minutes more, until melted.
- Let the pie rest 5 minutes before slicing. Garnish with parsley if desired.
Notes
Nutrition
Question: What’s your favorite from-scratch comfort food that beats the store-bought version? Tell me in the comments.
EverydayCheapskate™ is reader-supported. We participate in the Amazon Services LLC Associates Program and other affiliate advertising programs, designed to provide a means for us to earn from qualifying purchases, at no cost to you.

Confessions of a Woman Who Preflights Her Own Escape
You know I fly a lot, and what you probably don’t know is that I have a strict little routine I follow every single time I board. It started after I heard flight attendants describe what really happens in an inflight emergency, and it changed how I dress, where I sit, and how I think about every flight. Here are my airplane safety tips, quirks and all.

You know I fly a lot. What you probably don’t know, because I’ve told maybe three people, ever, is that I have a routine. A strict one. And unless I told you, you’d never spot it, even sitting right next to me.
It started after I watched a TV interview with flight attendants talking about what actually happens in an inflight emergency. Turns out my “weird” habits weren’t so weird after all. Here’s what I do, and why.
Cotton, linen, wool. That’s it.
The European Transport Safety Council’s own research on “survivable” crashes, meaning ones people could have walked away from, found that nearly half of the deaths that follow come down to fire, smoke, and getting stuck, not the impact itself. So I fly assuming I might meet fire and smoke before I meet my destination, and I dress accordingly.
Polyester, rayon, nylon? They don’t burn. They melt. At a fairly low temperature, too, which is exactly the problem. I have zero interest in synthetic fabric fusing to my skin. Cotton, linen, and wool resist catching fire long enough to matter. That’s the whole pitch.
Cover your skin
Exposed skin is a liability in a fire. Seconds count, and burned skin slows you down right when you can’t afford it. So: long cotton pants, long sleeves, real shoes, cotton socks. Every flight, no exceptions. If the jacket has a hood, that’s a bonus.
Call it armor. I do.
Aisle seat, every time
You saw this one coming. I want out, fast, and planes are packed tighter than ever. So I book an aisle seat near an exit, period. I’m not interested in being wedged against the window with a stranger’s knees between me and freedom. Options matter more than the view.
Being short finally pays off
I’m short. Most days that’s a disadvantage. In a crash, I think it’s an asset.
I actually tested this once, boarding early with nobody watching: the tops of aisle seatbacks make surprisingly good stepping stones. I’m short enough to crouch-walk across them, and I’d bet money it’s faster than fighting through a jammed aisle. If I can move quickly and I’m not on fire, I can actually help other people get out. That’s my logic, anyway, and I’m sticking with it.
I know my plane better than my seatmates know their own phone
I actually pay attention during the safety briefing. I mostly fly Southwest, so I know their planes well.
I clock my seat. I memorize the exits the second I sit down. I run the evacuation in my head before we’ve even pushed back from the gate. I watch those little floor lights, mostly white until they turn red near an exit, and wonder how many bulbs are burned out.
When I land an exit row, I read the door instructions on the wall, confusing as they are, and I mentally rehearse how I’ll talk the guy at the window through it, because I assume he hasn’t read a word of it.
No! PULL the latch… PULLLLLL! Now throw it out! NO — THROW THE DOOR OUT!
Honestly, imagining that conversation is half the fun of the flight.
Build your own version
You don’t have to copy my exact routine. Please don’t crouch-walk across seatbacks; mine is a very specific kind of bold. But you can steal the bones of it:
- Wear natural fibers when you can (cotton, linen, wool)
- Book an aisle seat close to an exit, every time.
- Count the rows between you and your nearest exit.
- Pick your exit, and walk through it in your head before you even take off.
That’s four things and about thirty seconds of thought. It’s the difference between hoping for the best and actually having a plan.
None of this is about being scared
Here’s the thing. I don’t do any of this because I’m anxious about flying. I do it because I like having a plan more than I like feeling helpless. I can’t control turbulence, or weather, or what happens if something goes wrong at 30,000 feet. I can control what I’m wearing, where I’m sitting, and whether I know where the exits are.
So go ahead, call me the weird lady in cotton pants and closed-toe shoes. I’ll be the one who knows exactly where she’s headed if things go sideways. And honestly? I hope you never need any of this. But if you do, you’ll be glad you read it.
Question: Would you rather know exactly where the exits are, or just not think about it at all? Share in the comments below.
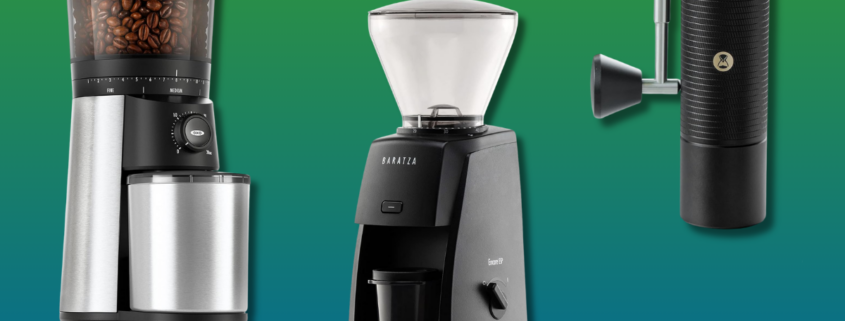
The Best Coffee Grinder Upgrade That’s Actually Worth It
Here’s something your favorite coffee shop will never tell you: it’s not the beans. It’s not the machine. It’s not even the barista with the sleeve tattoos and the strong opinions about oat milk. It’s the grind. Specifically, how fresh it is.

Pre-ground coffee starts dying the second it’s ground. Not dramatically… it doesn’t go bad, exactly. It just goes flat. Quietly. While you’re not looking. By the time that can’s been open a week, you’re drinking the ghost of what could’ve been a good cup.
I roast my own green beans at home (yes, really, I import them from a farm in Costa Rica, don’t ask), so I’ve made my peace with being a coffee snob a long time ago. But you don’t need to go that far to taste the difference a good grinder makes. You just need one that isn’t garbage.
And the good news? A grinder that’ll make you genuinely happy doesn’t have to cost what a fancy stand mixer costs. Let’s talk about what actually matters, and then I’ll hand you three I’d buy myself.
Burr vs. blade: this is the whole ballgame
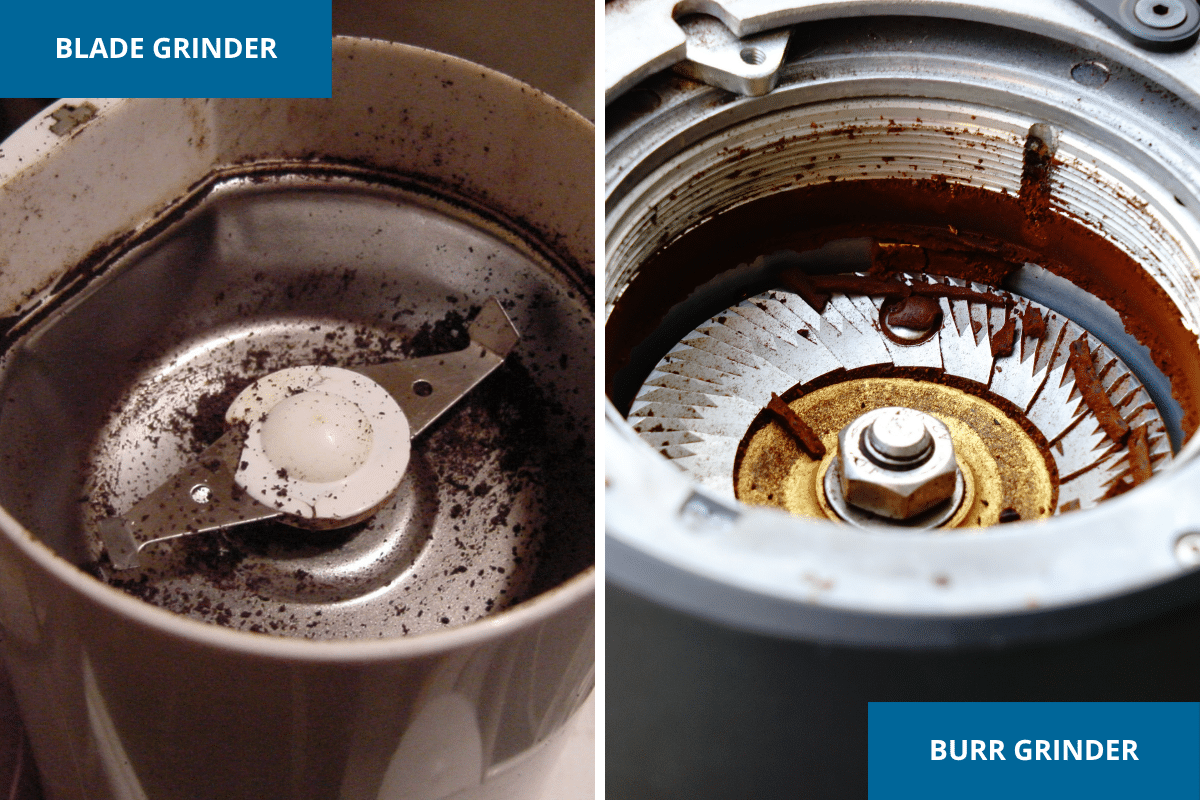
Coffee grinders come in two camps, and only one of them is worth your money.
Blade grinders
Blade grinders chop beans with a spinning propeller, basically a tiny food processor. They’re cheap, $15 to $30, and they’re also a mess. Some grounds come out fine as flour, some come out chunky as gravel, and your coffee tastes uneven because it is uneven.
Burr grinders
Burr grinders crush beans between two textured surfaces to a consistent size. Better extraction, better flavor, no exceptions. A decent burr grinder gives you a much more consistent grind than a blade grinder, and that’s what you’re paying for.
So: buy a burr grinder. That’s really the whole tip.
Manual or electric?
Manual, hand-crank burr grinders run $30 to $110ish. They’re silent, portable, and produce a lovely consistent grind, but you’ll spend a minute or so cranking by hand. Honestly? I kind of like that part. It’s the only exercise I get before 7 a.m.
Electric burr grinders are faster and easier, though some are louder than you’d want at 6 a.m. while everyone else is asleep. For most households, this is where you’ll land.
Grind size actually matters, and here’s why
Different brewing methods want different textures, and getting this wrong is why your pour-over tastes bitter or your French press tastes like dishwater.
- Coarse, like kosher salt, for French press and cold brew
- Medium-coarse for a Chemex
- Medium for drip machines and standard pour-over
- Medium-fine for an AeroPress
- Fine for espresso
- Very fine for Turkish coffee, if you’re feeling ambitious
Look for a grinder with clear, labeled settings across that range. Most budget models offer 10 to 40-plus, which is plenty. You won’t use all of them, but you’ll be glad they’re there.
Hopper size and easy cleanup
The hopper holds your unground beans, match it to how much coffee your household actually drinks in a week so beans aren’t sitting around going stale before their turn. And check whether the grinder disassembles easily for cleaning. Coffee oils build up on burrs fast, and a grinder you can actually clean will outlast one you can’t by years.
The best coffee grinders for your money
I didn’t pick these because a spec sheet told me to. I picked them because they do the one job well: turn whole beans into consistent grounds without babysitting them or breaking down on you in year two.
How I chose these: I’m admittedly picky about coffee. I roast my own beans and brew with everything from an AeroPress and Chemex to my trusty BUNN, so I’ve had plenty of practice learning what a good grind should look (and taste) like. I tested these grinders across the brewing methods I actually use, paying attention to grind consistency, ease of adjustment, noise and cleanup. I wasn’t after the longest feature list. I wanted grinders I’d happily use every morning before I’ve had enough coffee to tolerate anything complicated.
Jump to:
- Best inexpensive: OXO Brew Conical Burr Grinder
- Best upgrade: Baratza Encore ESP
- Best manual: Timemore C5 Pro


Best inexpensive: OXO Brew Conical Burr Grinder
OXO Brew Conical Burr Grinder
This is the one I’d point a friend toward if she just wants great coffee without a learning curve. Stainless steel conical burrs, 15 grind settings plus micro-adjustments, and a one-touch button that remembers your last setting, so it’s not fussing with dials every single morning before you’ve had coffee (the irony of that would not be lost on me). The hopper’s UV-blocking, which matters more than people think if your kitchen gets sun. Quiet, consistent, and it just works.
Best upgrade: Baratza Encore ESP
Baratza Encore ESP
If you want to spend a little more once and be done thinking about it for a decade, this is it. Baratza’s the brand actual coffee professionals reach for, and the Encore ESP earns that reputation with hardened steel burrs built in Europe and a quick-release system that makes cleaning painless. It handles everything from espresso to drip with one twist of the hopper. This is the “buy it for life” option, the kind of purchase that stops being an expense and starts being a decision you made once.
Best manual: Timemore C5 Pro

Timemore C5 Pro
For the slow-morning crowd, or anyone who wants dead-silent grinding, this one’s a beauty. Forty-two millimeter steel burrs, 48 adjustable settings, and a 30-gram chamber that’s just right for a Chemex pour-over for two. It grips well, it’s built like it means it, and yes, you’ll crank it by hand. I don’t mind that trade-off. Some mornings, a minute of quiet cranking is the calmest part of my whole day.
Grinders to skip
Any blade grinder, especially the “coffee/spice combo” ones sold at every grocery store. They can’t do what a burr grinder does, full stop.
Be wary of bargain-basement burr grinders, too. A cheap grinder that produces an inconsistent grind or gives up after a short run isn’t much of a bargain. Manual grinders under $25 often skip the “consistent grind” part entirely, which defeats the purpose. And grind-and-brew combo machines almost always hide a cheap grinder you can’t replace without replacing the whole machine.
Getting the best coffee out of whatever grinder you own
Grind right before you brew.
Not the night before, not while your coffee’s brewing on autopilot, right before.
Grind only what you need for that pot.
Store your whole beans in an airtight container at room temperature, away from light, and no, not the freezer, that just invites moisture in.
Buy beans with a roast date
Not just a sell-by date, ideally within two to three weeks of purchase. And clean your grinder monthly.
Is the difference really that noticeable?
Here’s the test I’d give anyone on the fence. Buy the same brand of coffee both ways, one bag pre-ground, one bag whole bean. Brew them identically. Taste them back to back.
You’ll know within one sip. The fresh-ground cup has an aroma and depth the pre-ground version just doesn’t, because it lost that battle days ago. If you taste them side by side and genuinely can’t tell the difference, save your money. But most people can. Easily.
What this upgrade actually costs you
A grinder runs $50 to $200, one time. Whole beans may cost about the same as pre-ground coffee from the same brand, although it varies. Check the unit price rather than assuming one is cheaper. The only real “cost” is 60 to 90 seconds added to your morning.
Will a coffee grinder save you money? Maybe not. That’s not really the point. If you’re already buying decent coffee, a good grinder can make the coffee you’re paying for taste noticeably better.
And that’s my favorite kind of upgrade: not buying something fancier over and over, but getting more enjoyment out of something I’m already buying.
Question: Did switching to fresh-ground coffee change your morning routine? Or are you still loyal to the can? Tell me where you land in the comments.
EverydayCheapskate™ is reader-supported. We participate in the Amazon Services LLC Associates Program and other affiliate advertising programs, designed to provide a means for us to earn from qualifying purchases, at no cost to you.

Slow Cooker Chinese Chicken That Beats Takeout
You know that moment when you’re staring into the fridge at 4:30, dinner is nowhere close to happening, and the delivery app is looking real friendly? I used to live there. Then I started making this chicken, and I haven’t looked at a takeout menu the same way since.

Seven ingredients. One bowl. A slow cooker that does the actual work while I do literally anything else. What comes out the other end tastes like something you’d pay $14 a plate for at a restaurant, except it cost me a fraction of that and I didn’t have to put on real pants to get it.
What you’ll need
Chicken thighs, bone-in, skin removed
This is not the place to swap in breasts. Thighs have enough fat and connective tissue to survive five or six hours of low heat and come out tender instead of stringy. The bone adds flavor while it cooks, and skinning it first keeps things from turning greasy. If all you’ve got is boneless thighs, use them. Just check things around the four-hour mark since they’ll cook faster.
Hoisin sauce
This is your sweet, salty backbone. Look for it in the Asian foods aisle, usually near the soy sauce. No real substitute here. It’s what makes this taste like Chinese chicken instead of just chicken with soy sauce dumped on it.
Plum chutney or plum sauce
Adds fruitiness and a little tang. In a pinch, apricot preserves whisked with a splash of rice vinegar gets you close enough that nobody will know the difference.
Low sodium soy sauce
Regular soy sauce works too, just cut back slightly so the whole thing doesn’t turn into a salt lick. Need it gluten-free? Tamari is a one-for-one swap.
Fresh ginger
Please, not the jarred stuff. Fresh ginger brings a brightness the powdered version can’t fake. If you’re truly stuck, ground ginger works at about a quarter of the amount, but it’s a downgrade and you’ll taste the difference.
Lime juice
Freshly squeezed, not from the little plastic lime. This is what keeps the whole dish from tasting flat and sweet. Rice vinegar can stand in if you’re out, but it won’t be quite as bright.
Cornstarch
This thickens the sauce into something you actually want spooned over rice instead of a thin, watery puddle. Flour works in a pinch, though you may need slightly more of it.
How to make it
Skip the skin, keep the bone
Pull the skin off before anything else touches the chicken. Skin-on chicken in a slow cooker turns rubbery and floats a layer of grease on top of your sauce, and nobody wants that. The bone stays in, though. It’s quietly doing the flavor work the whole time it cooks.
Whisk the sauce before the chicken goes anywhere near it
Mix the hoisin, plum sauce, soy sauce, ginger, lime juice, and cornstarch together first, in a bowl, before the chicken enters the picture. This keeps the cornstarch from clumping and gives you an actual sauce instead of chalky streaks running through your dinner.
Coat, don’t drown
Add the chicken to that bowl and turn every piece until it’s covered. You want a full coat, not a chicken swimming in a pool of sauce with dry patches on top. A good toss with tongs gets every piece evenly covered in under a minute.
Seal it up tight
Dump everything, chicken and marinade both, into the slow cooker. If your lid doesn’t sit flush, and a lot of them don’t after a few years of use, seal the gap with foil or heat-safe plastic wrap before setting the lid on top. A loose-fitting lid lets steam escape, and steam is what’s doing half the cooking in there.
Walk away for five to six hours
Set it to low and do not, under any circumstances, lift that lid to check on things. I know it’s tempting. I’ve been tempted plenty of times myself. But every time you peek, you let out heat and steam the slow cooker has to work to build back up, which just adds to your cook time. Set a timer and go live your life instead.
Serve it over rice and take the compliments
Once it’s done, the chicken should pull apart with barely any effort. Serve it over rice with the sauce spooned generously on top. If you want to get fancy, a scattering of sliced green onion or sesame seeds on top makes it look like you tried harder than you did.
Storing and reheating leftovers

This chicken keeps beautifully, which is half the reason I make a full batch even for two people. Refrigerate leftovers in an airtight container for up to four days. Reheat gently on the stovetop or in the microwave, adding a splash of water if the sauce has thickened up too much overnight.
It also freezes well. Let it cool completely, then freeze in a freezer-safe container or bag for up to three months. Thaw overnight in the fridge before reheating. I like to portion it out into single servings before freezing, so future-me can grab exactly what I need on a night when cooking feels like too much to ask.
A few swaps worth knowing
Rice is the classic pairing, but this sauce is forgiving. Cauliflower rice keeps things lower carb without losing the appeal. Noodles work in a pinch too, if that’s what’s in the pantry. And if you’re feeding a crowd, this recipe doubles easily. Just don’t overcrowd the slow cooker, or things won’t cook evenly.
Watching what you spend on groceries doesn’t mean eating boring food. It means having a few recipes like this one in your back pocket, the kind that stretch a modest handful of ingredients into a dinner that tastes like you fussed over it for hours. You didn’t. The slow cooker did.
That’s really the whole secret behind this one. Make it once and you’ll understand why it’s become one of my go-to weeknight dinners. Give it a try this week and let me know in the comments how it turned out at your house.

Slow Cooker Chinese Chicken
Equipment
- Slow cooker (crockpot)
Ingredients
- 3 pounds chicken thighs bone-in, skin removed
- 1/4 cup hoisin sauce
- 1/4 cup plum chutney or plum sauce
- 1/4 cup low sodium soy sauce
- 1 medium piece about 2 inches fresh ginger root, peeled and thinly sliced or grated
- Juice of 1 whole fresh lime
- 3 tablespoons cornstarch
Instructions
- In a bowl, whisk together the hoisin sauce, plum sauce, soy sauce, ginger, lime juice, and cornstarch.
- Add the chicken thighs and turn to coat well in the sauce.
- Transfer everything, chicken and sauce, to the slow cooker.
- Cover tightly. If your lid doesn't seal well, cover the opening with foil or heat-resistant plastic wrap before adding the lid.
- Cook on Low for 5–6 hours. Do not lift the lid during cooking.
- Serve over rice, spooning the sauce generously over the top.
Notes
Nutrition
Question: Has a homemade recipe ever made you swear off takeout for good? Tell me about it in the comments!

Small Money Mistakes: How to Fix Them Before They Grow
I could watch home remodeling shows all day. They make me believe I could gut a kitchen or build a shed all by myself. (The feeling passes. My love of a good home improvement store doesn’t.) Recently, the host of one house rescue show said something so true I wrote it down: “Lots of minor things become major problems.”

There he was on a roof, worn out by one surprise after another. Previous owners and contractors had left a trail of shortcuts, and he had to fix every one before the real work could even start. No single problem was a killer. Stacked together, they were sending the whole job way over budget.
I got to thinking about where else that’s true. Turns out, just about everywhere.
Why do little mistakes pile up so fast?
Take knitting, which I do whenever I can carve out the time. Get off by a quarter of an inch at the start, then keep going. Row after row after row, that tiny error grows into a sweater big enough for King Kong.
Quilting works the same way. Ami Simms, the master quilt maker, showed what happens back in the 1990s with her Worst Quilt in the World Contest. Repeat a slightly crooked seam or a corner piece that’s a little off square, and you get a disaster. I’ll admit it’s not nice to laugh at other people’s mistakes. But these folks entered on purpose, so I’m making an exception.
Here’s how Cambridge Dictionary defines a mistake: a decision or action that leads to a result you didn’t want or didn’t intend. Notice that last part. Nobody plans a crooked seam. Nobody sets out to make a mess.
The money version of a crooked seam
Personal finance has its own crooked seams. One shopping binge 18 years ago probably didn’t send you down the path to financial devastation. Neither did that horrible auto lease you jumped into before you were mature enough to know better.
But what if those two slips were followed by routine overspending, a growing credit card balance, a few refinances of your mortgage, and more car leases piled on top? Now the minor problems have become major ones.
So how does a slip turn into a slide? It stays put. A small mistake you leave alone becomes the foundation for the next one.
Say you let a small credit card balance roll over one month. The interest might be a couple of bucks. Annoying, sure. Pay the whole balance the following month and you’re back to $0. That mistake is history. Case closed.
But leave it sitting there and it invites company. One more slip, then another, and in what seems like no time at all you’re drowning in debt. (I can see you nodding.)
Fix it fast, then move on
The antidote is boring, and it works. Correct small mistakes as they happen, while they’re still small.
A performance coach named Graham Betchart has a great term for this: next-play speed. It’s how quickly you can move on from a mistake to the next thing that needs doing. A surgeon and a performance psychologist (Drs. Naples and Doorley) wrote about it for Harvard Medical School’s corporate learning site. Their point? Stewing over a missed layup leads to more missed layups. Money works like that too. The overspend on Saturday isn’t the real trouble. Shrugging it off for a month is.
They also talk about pre-loaded routines. After a double fault, tennis players step back, breathe, and reset, and they practice that routine when nothing’s on the line so it’s there when it counts. Steal the idea. Decide right now what you’ll do the moment you catch an overspend. Maybe you pull up your spending plan and see where the money slipped out, then adjust that category so it doesn’t happen again. Write it on a sticky note if you have to.
Then ask the question: What’s the next important action? It doesn’t matter whether the last play was a win or a flop. Answer it and do that thing.
Whose fault is it, anyway?
Here’s where I’d pump the brakes. Some people respond to a money mistake by taking every ounce of the blame and sinking into a funk that helps exactly nobody.
The doctors suggest picturing responsibility as a pie chart. Claim your slice. Then look at the other slices (the slick salesperson, the surprise repair bill, the sale that was too good to pass up) and focus on what’s yours to control next time. An honest slice is plenty.
And go ahead and feel something about it. I know, that sounds backward.
Researchers dug into this in a study called Emotions Know Best, published in the Journal of Behavioral Decision Making. They found that when people are left to their own devices after a failure, their thinking mostly turns into justifying.
In other words, we explain it away. You know the lines. “It wasn’t a big deal.” “It’s only forty bucks.”
Here’s the twist. Those justifying thoughts don’t teach you anything, and focusing on them can keep you from improving. People who paid attention to their feelings about the failure learned from it and put more effort into the next task.
That sting you feel is useful. It’s your nudge to pause and do better.
Make your deposits before you need them
Here’s where the Contingency Fund earns its keep. You make small deposits, a little at a time, for the surprises nobody can predict, aiming for three to six months’ worth of expenses. The Freedom Account covers the ones you can see coming by setting aside a bit every month for each annual expense.
Why bring them up here? Because so many small money slips start the same way. A bill shows up, expected or not, and there’s no cash to meet it. That’s the first crooked seam.
One more habit worth borrowing is the debrief. Surgeons and military leaders do it while everything’s still fresh. Once a month, sit down with your spending plan for ten minutes and ask what went well, what didn’t, and what you’ll change. Pick one or two things to fix and decide how you’ll know they’re fixed.
Go ahead and rip out that row
Here’s my encouragement. Unravel that sweater, correct your gauge, and start over. It’s going to fit beautifully.
That quilt? Do yourself a favor. Take out that first row of wonky stitching and fix the errors before you go any farther. You’ll be winning real quilt contests before you know it.
Your money works the same way. Catch the small stuff early, fix it, and get on with the next thing.
Question: Caught a little mistake before it got big? Tell me about it in the comments. I’d love to hear it.

The Best Inexpensive Air Purifiers for Small Homes
Air purifiers went from a specialty item to something most of us feel like we should own, and the market makes it confusing on purpose. Fifty-dollar units that do nothing, six-hundred-dollar ones charging you for looks. Here’s the truth: you don’t need to spend a fortune to breathe cleaner air, you just need to know what you’re actually paying for. I’m walking you through exactly what matters, and the two I’d buy.

Somewhere in the last five years, air purifiers went from “thing my sister with allergies has” to “thing everyone’s supposed to own.” Wildfire smoke, pet dander, pollen season lasting eight months instead of two… indoor air quietly got worse, and we all quietly noticed.
So now you’re standing in front of a wall of options. Some cost $50 and do basically nothing. Some cost $600 and mostly charge you for looking good on a shelf. What actually matters is a lot simpler than the marketing wants you to believe, and it doesn’t take $600 to get it right.
For a bedroom or small space, a solid unit runs under $100. Need to cover a real living room or an open floor plan? You’ll spend more, closer to $270, but you’re paying for coverage, not a gimmick. Let me walk you through what’s worth that money and what isn’t.
What an air purifier actually is
Strip away the glowing lights and the app, and it’s a fan pushing air through a filter. That’s it. What separates the good ones from the junk is what the filter catches, how much air it moves, and how quiet it is while doing it.
Most homes do well with one in the bedroom, for sleep, and ideally one in the living room too. The size and type you need depend on your room. Not on how big the brand’s ad budget is.
What actually matters when you’re shopping
CADR rating
This is the one number worth paying attention to. It stands for Clean Air Delivery Rate, and it tells you how much clean air the unit puts out per minute. Higher is better, full stop.
For a typical bedroom (150 to 250 square feet), look for a CADR of at least 100 for dust and 100 for smoke. Bigger room? Go for 150 or more. And if a product won’t tell you its CADR number, walk away. Brands that trust their product publish the number. Brands that don’t, hide behind vague words like “powerful.”
True HEPA, not “HEPA-type”
This is where a lot of cheap purifiers quietly cheat you. True HEPA (look for “True HEPA” or “H13”) traps 99.97% of particles down to 0.3 microns. “HEPA-type” or “HEPA-style” sounds close enough, but it isn’t. It’s a cheaper filter wearing a HEPA costume. Skip it. (H14, by the way, is more filtration than most of us need. Save your money.)
Room size match
A purifier built for a 150-square-foot room isn’t going to do a thing in your 400-square-foot living room. It just can’t move enough air. Match the unit to the room:
- Up to 200 sq ft: $60–$100
- 200–400 sq ft: $100–$180
- 400+ sq ft: $180–$300
Noise, especially in the bedroom
You need this thing quiet enough to actually sleep next to. Look for 25 to 40 decibels on the lowest setting. Anything past 50 decibels and you might as well be sleeping next to a box fan.
Filter cost, the sneaky one
Some companies sell you a cheap machine and then quietly bleed you dry on replacement filters. Do the math before you buy, not after. A reasonable filter should run you $20 to $40 a year, replaced every 6 to 12 months.
The two worth your money
Best inexpensive: Levoit Core 300-P

Levoit Core 300-P
This is the one I point people to first, no hesitation. It’s AHAM VERIFIDE, which matters more than it sounds. That’s an independent lab confirming the performance claims instead of just taking the company’s word for it. A CADR of 143 for smoke and 153 for dust means it’ll refresh a 222-square-foot room almost five times an hour, and it’ll still make a dent in a room four times that size.
Run it on Sleep Mode and you genuinely forget it’s there… 24 decibels, lights off if you want them off, and it still filters at HEPA-grade the whole time. Filters run about $25 and last 6 to 8 months, which is the kind of ongoing cost that doesn’t make you resent the purchase later. It just does the job and gets out of your way. That’s all I ever want from an appliance.
Best upgrade for larger rooms: Coway Airmega Mighty2

Coway Airmega Mighty2
This is the one for a real living room or an open-concept space. It’s rated for up to 1,800 square feet, which is a lot of air for one machine to keep up with, and it pairs a True HEPA filter with activated carbon so it’s handling odors and VOCs along with the usual dust and pollen. If you’ve got a big open floor plan and pets, this is the size you actually need.
It runs quieter than you’d expect for something this size, and it makes a real difference with pet allergies specifically. One heads-up worth knowing: a handful of reviews mention a lingering smell out of the box. New filters sometimes carry a manufacturing scent for the first few days. Give it a little time to air out before you write it off.

What it actually does (and what it won’t)
Let’s be honest about what you’re buying, because the marketing loves to blur this line.
An air purifier is genuinely good at pulling pollen, dust, and pet dander out of the air you’re breathing. It catches smoke particles too, whether that’s from cooking or wildfire season. And it’ll cut down on airborne allergens enough that you’ll probably notice.
What it won’t do is fix every smell in your house. It won’t purify your whole home from one room, no matter how good the unit is. It won’t cure your allergies outright. And here’s the one people forget: it does nothing sitting in an empty room with the door closed. It needs air moving through it to work.
Where to put it
This part trips people up more than you’d think, because placement matters almost as much as the unit itself.
In the bedroom, put it on a nightstand or a low dresser, not shoved right up against the bed. Run it on low, all night, every night. In the living room, look for a spot where air already circulates, ideally near an HVAC vent. Nursery placement follows the same logic as the bedroom, just keep it on the lowest setting. And if you’ve got pets, put it near wherever they sleep most.
One rule covers all of it: skip the corners, skip under the furniture. If the air in the room can’t reach the machine, the machine can’t do a thing about that air.
What it’ll actually cost you
Running it on low, continuously, you’re looking at $30 to $70 a year in electricity. Filters add another $25 to $50. All in, that’s roughly $55 to $120 a year. Not nothing, I’ll grant you. But stack that against what a lot of us already spend on allergy pills and air freshener sprays that never actually fix the problem, just cover it up for a few hours. Suddenly $120 a year looks pretty reasonable.
Try this first, for free
Before you spend a dime, a few things are worth trying:
- Bump your HVAC filter up to a MERV 11–13
- Vacuum more often, with a HEPA vacuum if you’ve got one
- Wash bedding weekly in hot water
- Clear out clutter (less stuff, less dust)
- Deal with any moisture or mold issues
Honestly? These free fixes often get you 60 to 70% of the way there on their own. If you’re still not satisfied after that, then it’s purifier time.
Question: Did one of these actually change things for you, or is yours sitting unplugged in a closet somewhere right now? Tell me in the comments. I promise I won’t judge. Much.
EverydayCheapskate™ is reader-supported. We participate in the Amazon Services LLC Associates Program and other affiliate advertising programs, designed to provide a means for us to earn from qualifying purchases, at no cost to you.

Is an Extended Warranty Ever Worth It? The Truth for 2026
You know that moment when someone tries to upsell you on something so small it’s almost insulting? I had one of those recently, and it’s exactly why I’ve never trusted extended warranties. There’s real money behind that pitch. Just not the kind that ends up in your pocket.

I was in a toy store with one of my grandsons (yes, I’m that grandmother) picking out a little something just because. We landed on a toy shaving kit. Adorable. Perfect for bath time. Under $10.
At checkout, without missing a beat, the clerk asked if I’d like to add an extended warranty. For $4.79. On a $10 toy.
I laughed. Out loud. She winced. I apologized, but honestly? I couldn’t help it.
Here’s the thing about extended warranties: they sound smart. That’s not an accident. That’s the whole design.
I can’t promise you every single extended warranty is a scam. But I want you to start treating each one like it might be, until it proves otherwise. Every time a clerk, a checkout screen, or a pop-up ad offers you one, your first thought should be: Rip-off. Prove me wrong.
Start With These Questions
Before you say yes to anything, make the warranty earn it.
- Who’s actually standing behind this thing? The manufacturer, the store, or some third party you’ve never heard of?
- If something breaks, does someone come to you or are you tracking down a repair shop, paying out of pocket, and hoping for reimbursement?
- What happens to your coverage if that third-party warranty company folds? (It happens more than you’d think.)
- Can you find real, current reviews of the company actually backing this warranty, not just the store selling it?
If you can’t answer these easily, that’s your answer.
You Already Have a Warranty. It’s Just Free.
Every product that comes with an extended warranty option already comes with a manufacturer’s warranty. And here’s the part the clerk won’t mention: when products fail, they tend to fail early, right out of the gate, not months after the original warranty runs out.
That’s still true. Manufacturer reliability data and consumer research have shown for years that most defects show up in the first weeks or months of ownership, well within standard coverage. So the extended warranty is often betting against a failure window that’s already closed by the time it kicks in.
My rule hasn’t changed: lean on the warranty that came in the box. Do your own homework on the brand before you buy. Skip the add-on.
Follow the Money
Ever wonder why every single retailer, from the big-box electronics store to the toy shop, is so eager to sell you a warranty? I’ll save you the wondering. It’s money. Shockingly.
Retailers typically pocket somewhere between 50 and 80 percent profit on extended warranties, depending on the category and who you ask. Compare that to the 15 to 20 percent margin a store makes on the appliance itself, and you can see why the warranty pitch is so relentless. At one point, extended warranties reportedly made up the majority of profit at a major electronics chain, not from selling gadgets, but from selling peace of mind about the gadgets.
And if they can talk you into financing the warranty along with your purchase? Even better for them. Say you buy a $750 extended warranty on a car and roll it into your loan. After interest and the roughly 30 percent the industry actually pays out in claims, the dealer can walk away having made more off the warranty than off a fair chunk of the car itself.
That’s not a coincidence. That’s the business model. The global extended warranty market is worth well over $140 billion and climbing, because it works, on us, not for us.
What the FTC Wants You to Know
The Federal Trade Commission has a plain-English warning about these: an extended warranty or service contract isn’t worth the extra cost if the product isn’t likely to need repairs in the first place, and it’s a bad value if it doesn’t cover anything more than what you already get for free.
Before you ever say yes, the FTC says to dig into:
- The real cost. Not just the sticker price… deductibles, shipping fees to a repair center, fees to transfer the contract, and caps on what they’ll actually reimburse.
- Who’s behind it. Not always the manufacturer. Look them up. Search the company name with “complaints” and see what surfaces.
- What’s actually covered. If it’s not spelled out in the contract, assume it’s not covered. Accidental damage? Routine maintenance requirements that could void your claim? Read it.
- How claims actually work. A warranty that’s a nightmare to use isn’t worth much, no matter what it costs.
The FTC also flags something worth knowing: if you start getting calls or mail years after a purchase pushing an “expiring warranty,” be suspicious. Those pitches often come from companies with zero connection to your original purchase, and the high-pressure “act now” tactics are a red flag on their own.
Here’s a Better Idea
Skip the extended warranty. Build your own instead.
This is where I bring out one of my favorite tools: the Freedom Account. Instead of handing a retailer money for a promise, open a dedicated savings account… your own personal repair-and-replace fund and feed it a little every month. Cars, appliances, the occasional toy shaving kit. All of it.
When something breaks after the manufacturer’s warranty runs out, the money’s already there. No claims process. No fine print. No waiting on hold with a company you’ve never heard of.
And if nothing breaks? Even better. Statistics are on your side there. That money doesn’t vanish into a retailer’s profit margin. It stays exactly where it belongs. In your pocket.
Where I Break My Own Rule
I’m not immune to nuance, and I’ll admit it: there are exactly two categories where I still buy the extended warranty, because my own experience and the data both back me up.
Apple products. iPhones, iPads, MacBooks… I’m hard on my devices, and Apple hardware has a well-earned reputation for expensive-to-fix failures once the standard warranty expires. For me, the math works.
Treadmills. Mine and every other one I’ve owned or researched. Motors, belts, electronics. They take a beating, and repairs aren’t cheap. This is one of the rare cases where extended coverage has paid for itself.
That’s it. Two items. Not a whole shopping list.
Your Turn
Don’t take my word for it and don’t take the clerk’s word for it either. Sit down and make your own short, honest list… the handful of things you own that are genuinely prone to breaking down and expensive to fix. Everything else? Rip-off, until proven otherwise.
Start your Freedom Account. Say no to the upsell. Keep the money.
Qustion: What’s the one item you’d actually buy an extended warranty for and what’s talked you out of one? Share in the comments below.

Fall Cleaning Checklist: 15 Overlooked Spots to Clean
Spring cleaning gets the glory, but fall cleaning is the one that actually matters. You’re about to spend six months indoors with the windows shut, and whatever’s hiding in your house right now is going to be your roommate until March. This fall cleaning checklist covers the 15 spots regular cleaning always skips, so you can breathe easier all winter long.

Weekly cleaning handles the obvious stuff. Counters, bathrooms, floors, laundry. But there’s a whole second layer of your house that never makes it onto that list and only gets touched once or twice a year, if you’re being honest with yourself.
In summer, with doors and windows open, you don’t notice. Come winter, it all settles in and sits there.
I’ve made this list the same way I make every list around here: by finding out the hard way what I’d been ignoring. Fifteen spots, tackled in order, and by dinner the whole house feels lighter. Not spa-different. Just… like it can finally exhale.
1. Refrigerator coils
Nobody thinks about the back of the fridge until the fridge makes them think about it. Dusty coils force the compressor to work overtime, which means higher bills and a shorter life for an appliance you really don’t want to replace this year.
Pull the fridge out, vacuum the coils with a brush attachment, wipe down the grill. Ten minutes. I do this every October and every October I’m shocked by how much comes off.
2. Behind and under the big appliances
Same principle. The floor behind the fridge, oven, washer, and dryer collects an alarming amount of dust, lost socks, and general lint. Once a year, pull each appliance out, vacuum thoroughly, mop.
While you’re back there, check the dryer vent hose. Lint buildup is one of the leading causes of house fires, and it’s the kind of thing that’s easy to fix and easy to forget.
3. Baseboards and trim
Baseboards accumulate a fine layer of dust that only becomes noticeable when the sunlight hits at the right angle. Wipe down all baseboards with a microfiber cloth dampened with warm water and a drop of Dawn.
Don’t stop at the baseboards. Window trim, door frames, and the tops of doors are shockingly dusty and shockingly ignored.
4. Light fixtures and ceiling fans
Light fixtures collect dust and dead bugs. Ceiling fan blades accumulate a thick layer of dust that gets flung around the room every time you turn them on.
Wipe both down with a damp cloth. For the fan blades, slide an old pillowcase over each one, pull it off, and the dust comes with it instead of raining down on your couch.
5. Vents and return registers
Every heating and cooling vent in your house is pulling air across a layer of dust that’s been building for months. Pop off the covers, wash them in warm soapy water, vacuum what you can reach behind them.
The return-air grille, that big vent in a wall or ceiling somewhere, is the dustiest spot in your entire HVAC system. Clean it thoroughly.
6. Window tracks and sills
Window tracks are miniature graveyards for dust, dead insects, spider webs, and pollen. Vacuum first with a crevice attachment. Then wipe with a damp cloth. For truly gross tracks, a foam brush and a spray bottle of white vinegar water cleans them without damage.
7. Curtains and blinds
Curtains hang there quietly absorbing months of dust and pollen while you never once think about them. Machine-wash the washable ones on gentle. Dry-clean-only? Take them outside, shake them like you mean it, then vacuum.
For blinds, wipe each slat with a microfiber cloth or a dedicated blind tool. Or do what I do and just pull an old sock over your hand.
8. Under and around the furniture
Move every piece of moveable furniture. Vacuum underneath. This is where the “surprise” dust bunnies live.
Pay special attention to the couch. Pull the cushions, vacuum the frame, vacuum under the whole thing. The improvement in air quality is genuinely noticeable.
9. Mattresses
Vacuum both sides with the upholstery attachment, sprinkle on some baking soda, let it sit an hour, vacuum again. This pulls out dust mites, dead skin, and whatever faint smell has been quietly building for months.
If it’s been over a year since you’ve done this, brace yourself. It’s humbling.
10. Washing machine and dishwasher
Here’s the irony nobody warns you about: the appliances whose whole job is washing things need to be washed themselves. Detergent residue and hard water minerals build up in both, quietly, for months.
Washing machine: run it empty on hot with 2 cups of white vinegar, then a second empty hot cycle with half a cup of baking soda.
Dishwasher: empty it out, set a cup of white vinegar upright on the top rack, run a hot cycle, then sprinkle baking soda in the bottom and run a short cycle after that.
11. Garbage disposal
Skip the citrus trick, no matter what the internet tells you. I’ve said it before: lime and lemon peels do more harm than good down there. Ice and salt, on the other hand, actually work.
Toss in a handful of ice and about half a cup of coarse salt, run cold water, and flip the disposal on for a minute or two. The ice knocks gunk off the blades, the salt scours the inside. Ten seconds of noise, a noticeably fresher kitchen.
Want the real deep clean, splash guard and all? I’ve got a full step-by-step for that.
12. Trash cans, inside and out
Liners help, but they don’t stop residue from building up in kitchen cans over time. Take them outside, hose them down, spray with a vinegar-water solution, let them dry in the sun.
Outdoor bins get the same treatment, just more of it. If particularly bad, sprinkle with baking soda and scrub with a stiff brush before rinsing.
13. The fridge, properly this time
Not the weekly wipe-down. The full empty-and-clean:
- Take everything out
- Toss whatever’s expired or unidentifiable
- Pull the shelves and drawers, wash in the sink with warm soapy water
- Wipe the interior walls and door seals
- Dry it all, put it back
- Restock with a one-in, one-out rule you’ll keep for about three weeks
14. Kitchen cabinets, the inside
Empty one or two cabinets at a time. Wipe the interior with a damp cloth. Check expiration dates on anything that’s been sitting in there since you can’t remember buying it.
Pay extra attention to the cabinet under the sink. That’s where dampness collects and mildew gets ideas.
15. Every filter in the house
The ones everybody forgets exist:
- Furnace filter (change it now, mark your calendar for monthly checks)
- Bathroom exhaust fan (vacuum and wipe)
- Kitchen range hood filter (dishwasher-safe if it’s metal)
- Window AC filter, if it’s still in for late-season use
- Portable air purifier filter, if you’ve got one
- Vacuum filter (wash or replace)
- Dryer lint trap (a real cleaning with a brush and water, not just a swipe)
Every clean filter improves air quality and appliance efficiency at the same time.
The one-day version
If you want to knock this out in a single focused Saturday, here’s how I’d time it. About six to seven hours, start to finish.
Morning, roughly three hours: fridge coils, behind the appliances, baseboards, light fixtures, vents, window tracks.
Take a real lunch break. You earned it.
Afternoon, roughly three hours: curtains and blinds, under the furniture, mattresses, washer and dishwasher, disposal, trash cans, the deep fridge clean, cabinets, every filter you own.
By dinner, the house genuinely feels different. Fresher air, less dust, a clean baseline heading into winter instead of six months of slowly losing that battle.
Keeping it that way
Here’s the part nobody tells you: the deep clean is the hard part, but keeping it is easy. Every two weeks, give yourself twenty minutes:
- Quick dust of baseboards and light fixtures, 5 minutes
- Vacuum under the couch and behind furniture, 10 minutes
- Check the filters, 2 minutes
- Wipe out the fridge produce drawers, 5 minutes
Twenty minutes, every two weeks, and you coast into spring already ahead of the game.
Question: Which spot on this list did you forget existed until it became a problem? Tell me in the comments. I promise I won’t judge, mostly because my own list before I started writing this was embarrassingly long.
EverydayCheapskate™ is reader-supported. We participate in the Amazon Services LLC Associates Program and other affiliate advertising programs, designed to provide a means for us to earn from qualifying purchases, at no cost to you.

Impossible Oktoberfest Pie: All the Beer Hall Flavor, None of the Fuss
Oktoberfest is in full swing in Munich, and you don’t need a plane ticket to join in. This Impossible Oktoberfest Pie layers bratwurst, sauerkraut, and Swiss cheese under a simple batter that magically forms its own crust while it bakes. No rolling pin, no fuss, just a beer hall classic ready for your table in under an hour.

Ever notice how the second the calendar flips to September, you start craving pretzels the size of steering wheels and a mug of something cold and malty? That’s Oktoberfest talking. Munich’s already deep into it… millions of people, rivers of beer, enough bratwurst to circle the globe. You don’t need an ostrich-feather hat or a flight to Bavaria. What you do need is a pie pan and about ten minutes of prep. Let’s talk.
This one’s a classic around here: an “Impossible” pie, the kind that magically forms its own crust while it bakes. No rolling pin. No pie dough anxiety. Just bratwurst, sauerkraut, and Swiss cheese, blanketed in a simple batter and baked until it sets up like a savory custard with a golden top. It tastes like a beer hall. It behaves like a weeknight dinner.
I fell for this style of pie because it solves the one problem that keeps people out of the kitchen: crust. Rolling, chilling, patching that one spot that always tears… no thanks. This batter does the crust’s job without any of the crust’s drama.
What You’ll Need
Before we get into steps, let’s talk ingredients.
Bratwurst
Fully cooked is the move here. You’re not simmering raw sausage, just warming it through while the batter sets around it. Precooked brats show up in most grocery meat cases, often labeled right on the package. No brats on hand? Kielbasa works, and so does leftover ham or cooked Italian sausage. Keeping it meat-free? Plant-based sausage links hold up just fine.
Sauerkraut
This is doing double duty: tang and texture. Drain it well, or you’ll end up with a soggier pie than you bargained for. Not a fan of sauerkraut (it’s a divisive vegetable, I know)? Diced apple sautéed with a splash of vinegar gets you a similar sweet-tart contrast, minus the fermented funk.
Swiss cheese
Nutty, melty, and it plays nice with everything else in the pan. Gruyère is the fancier cousin and works beautifully if you’ve got it on hand. In a pinch, provolone or a mild white cheddar still gets you a good melt, just a different flavor lean.
Master Mix or Bisquick
This is your batter base, and it’s the reason there’s no rolling pin anywhere in this recipe. If you’ve made my homemade Master Mix, this is a great excuse to use it. Store-bought Bisquick works too. Just swap in milk for the water so you get that same richness.
Beer
This is what gives the batter its beer hall soul: lightly bready, a little bitter, and it plays beautifully against the salty pork and sharp kraut. A lager or amber ale is your safest bet. Don’t drink beer, or cooking for a crowd that includes kids? Nonalcoholic beer does the job just as well.
Eggs
The glue. They’re what hold this whole “impossible crust” trick together, so don’t skip or swap them unless you’re working around an allergy. A flax egg (1 tablespoon ground flaxseed plus 3 tablespoons water, per egg) will get you there, just with a slightly denser texture.
How to Make It
Get the Pan Ready
Grease generously. This batter forms its own bottom crust, and it needs a little help releasing later. A 9-inch pan that’s at least 1 1/4 inches deep matters more than it sounds like it would… too shallow, and you’ll have batter creeping over the sides partway through baking. Ask me how I know.
Build Your Layers
Resist the urge to stir everything together like a casserole. Layer it instead: bratwurst first, sauerkraut next, cheese on top and let the batter do the mixing for you as it bakes. Layering is what gives you distinct bites of meat, tang, and melt, instead of one indistinguishable savory mush.
Whisk Until It’s Smooth, Not Perfect
Your batter should look like thin pancake batter, no lumps. A whisk gets you there fastest, but a fork and a little patience works too. Don’t overthink this step. The eggs and Master Mix are doing the heavy lifting. You just need everything evenly distributed.
Pour, Don’t Panic
Pour the batter slowly over your layered ingredients so it settles down through the gaps instead of pooling on top. A few brat pieces poking through the surface is normal, and honestly, kind of charming. This isn’t a recipe that needs to look perfect to taste incredible.
Bake Until It Sets
You’re looking for a golden top and a clean knife when you test the center. That’s your sign the “crust” has set. Ovens vary, so start checking at the 30-minute mark. If the top’s browning faster than the center is setting, a loose foil tent buys you a few extra minutes without scorching anything.
Let It Rest
Five minutes. No exceptions. This isn’t a suggestion to make you wait longer than necessary. It’s what lets the pie firm up enough to slice into clean wedges instead of a savory soup. Patience now, prettier plate later.
Make It Yours

This is one of those recipes that shrugs off substitutions, so don’t be afraid to make it your own. Short on time on the day of? Assemble it the night before and bake it straight from the fridge. Just tack on 5 to 10 extra minutes since it’s starting cold. Feeding a crowd? A crisp green salad or some roasted vegetables round it out into a full meal without much extra effort.
Whether you’re throwing an Oktoberfest spread or just want something different for Tuesday dinner, this pie delivers big flavor for not much work. That’s kind of my whole philosophy in a nutshell.
Prost… and happy baking!

Impossible Oktoberfest Pie
Equipment
- 9-inch pie pan (at least 1 1/4 inches deep)
- mixing bowl
- Whisk or spoon
Ingredients
- 1/2 pound fully cooked bratwurst about 3 links, cut into 3/4-inch pieces
- 1 8-oz can sauerkraut, drained (about 1 1/3 cups)
- 1 cup 4 oz shredded Swiss cheese
- 3/4 cup Master Mix* or Bisquick
- 1/2 cup water or milk, if using Bisquick
- 1/2 cup regular or nonalcoholic beer
- 2 large eggs
Instructions
- Preheat oven to 400°F. Grease a 9-inch pie pan that's at least 1 1/4 inches deep.
- Layer the bratwurst, sauerkraut, and Swiss cheese evenly in the pie pan.
- In a mixing bowl, whisk together the Master Mix, water, beer, and eggs until smooth.
- Pour the batter evenly over the layered ingredients.
- Bake for 30–35 minutes, or until the top is golden and a knife inserted in the center comes out clean.
- Let the pie rest for 5 minutes before slicing and serving.
Notes
Nutrition
Question: Sauerkraut on this pie: love it, or would you leave it out? Share in the comments below.
EverydayCheapskate™ is reader-supported. We participate in the Amazon Services LLC Associates Program and other affiliate advertising programs, designed to provide a means for us to earn from qualifying purchases, at no cost to you.

How to Stop Overspending Habits for Good, Starting Today
Consumption used to mean something else. A disease that ate you alive from the inside, one bloody cough at a time. Funny thing about words. They come back around. These days it’s not TB draining us. It’s the subscriptions, the impulse buys, the habit of paying someone else to do what we could just as easily do ourselves. Same slow wasting. Different symptoms.

I’ve been writing about money for more than 30 years, and I keep coming back to this one uncomfortable truth: we didn’t get into debt because we’re bad at math. We got into debt because somewhere along the way, we forgot how to produce anything. We just consume. And consuming, taken far enough, doesn’t just empty your wallet. It empties you.
Stick with me. This one gets a little philosophical before it gets practical. But I promise it lands somewhere useful.
Two kinds of people: consumers and producers
Think about food for a second. When you buy a rotisserie chicken and eat it in the car, you’re consuming. When you grow it, raise it, preserve it, cook it from scratch, you’re producing. Both feed you. Only one of them builds something.
That’s the whole spectrum, really. Consumption on one end, production on the other. And most of us have quietly slid toward the consuming end without ever deciding to. Nobody wakes up and says, “Today I choose to stop making things and start only buying them.” It just happens, purchase by convenient purchase.
How the whole country caught it too
Here’s the part that stings a little. The United States used to be a major creditor nation. We made things. We exported goods. We accumulated wealth and invested heavily overseas. As recently as 1980, the U.S. had a positive net international investment position of about $361 billion. By 1986, that position had turned negative.
Over the decades that followed, the equation changed. Manufacturing became increasingly globalized, with more production moving overseas, while the U.S. economy shifted heavily toward services. At the same time, the country began running persistent current-account deficits, meaning we were buying more goods, services and foreign income than we were selling abroad.
Today, the U.S. is a substantial net debtor nation. At the end of the first quarter of 2026, Americans held about $43.4 trillion in foreign financial assets while foreign investors held about $64.6 trillion in U.S. assets, leaving the country with a net international investment position of negative $21.3 trillion.
That’s a long way from where we started.
I’m not telling you this to be gloomy or to turn you into an armchair economist. I’m telling you because the larger pattern is worth noticing: a nation, like a household, can’t endlessly consume more than it produces without eventually feeling the strain.
It’s the same basic lesson, just with a much bigger patient.
The prodigal son had a spending problem
You know the story. A father has two sons. The younger one asks for his inheritance early, takes the money, and leaves. He doesn’t save a dime. He blows through his fortune fast, and if I’m allowed a little literary license here, he probably opens a line of credit or two along the way. He borrows from friends. From neighbors. From anyone who’ll float him. Eventually nobody will, and he’s out of options.
So he takes the only job he can get. Feeding pigs. And it gets so bad that he starts eyeing the pig slop, because at least the pigs are eating. That’s rock bottom. That’s the moment he finally comes to his senses, crawls home, and admits he was wrong. His father takes him back with open arms, because the son who was lost has been found.
Some of you reading this took your own version of that early inheritance. A home equity loan. Credit cards. Student loans. A withdrawal from the retirement account you swore you’d never touch. You told yourself you were building something. You were actually just spending it.
Here’s the part where the story stops being comforting, though. Because for most of us, there’s no wealthy father waiting with open arms and a bailout. There’s just you, the bills, and a decision to make.
What actually stifles you isn’t the debt. It’s the habit.
A life built around consuming crowds out everything else you could be producing. Objects, sure, but also experiences, relationships, skills, know-how. Every hour you spend consuming what someone else made is an hour you didn’t spend making something of your own. And here’s the sneaky part: the more you consume, the lazier the muscle gets. Producing anything starts to feel like a chore instead of a habit.
I’m not saying torch your credit cards and grow all your own vegetables. Consumers are a legitimate part of the economy. The problem shows up specifically when you’re consuming more than you produce, month after month, and calling it normal. That’s when it stops being a lifestyle and starts being an addiction.
Three ways to flip from consumer to producer
Here’s where I get practical. You don’t need a five-year plan. You need three moves you can start this week.
Downsize something
Shop a cheaper store. Make the gift instead of buying it. Cook the meal instead of ordering it. Pick one thing and downsize it on purpose, this week, not “eventually.” Get up off the couch and get busy. That’s it. That’s the whole instruction.
Save something, even if it’s small
Stop telling yourself you don’t have enough to save. Pull $50 from your next paycheck and put it away before you see it. If that means riding your bike to work instead of driving, even better. You’ll save the gas money and produce a little energy while you’re at it.
Produce something
What can you make instead of buy? What skill have you got sitting dormant because it’s easier to just order it online? Where could you give your time instead of your credit card? You don’t have to answer all of that today. Just pick one and start.
The scoreboard that actually matters
You’ll know you’ve made the shift from consumer to producer on the day your exports finally outnumber your imports. Not because a headline told you so. Because you’ll feel it, in your bank account and in your own two hands.
Consumption nearly took this whole country down. It can take a household down just as easily. But production, real, boring, unglamorous production, is the cure. It always has been.
Question: Be honest… are you more of a consumer or a producer these days? Share in the comments below.

The 10/10/10 Rule Every Overthinker Needs to Try Today
I nearly ran out of gas because I didn’t want to be late for a meeting. Ten miles from home, my tank hit empty, and I had a decision to make: stop and risk showing up a few minutes late, or keep driving and risk needing a tow truck. Here’s the three-question trick that got me to the meeting on time, and why I now use it for practically everything else too.

Here’s something I’ve noticed about my worst decisions, financial and otherwise. They almost never happen when I’m calm. They happen when I’m mad, anxious, or wanting something so bad I can’t see straight.
The good news? Those feelings fade fast. The bad news? The decisions we make while feeling them don’t fade nearly as quick. Our grandparents had the right idea with “sleep on it.” But sleeping on it only works if the decision can wait until morning. Mine couldn’t. I needed something I could use on the spot, standing at a gas pump with the clock ticking.
What is 10/10/10, anyway?
A business writer named Suzy Welch figured this one out before I did. She’s written for Bloomberg Businessweek, and a while back she turned her whole decision-making system into a book called 10-10-10: A Life-Transforming Idea.
The idea is almost embarrassingly simple. Before you act on a decision, ask yourself three questions:
- How will I feel about this 10 minutes from now?
- How about 10 months from now?
- How about 10 years from now?
That’s it. No spreadsheet. No pro-con list. Just three questions that pull you out of whatever emotion is running the show and hand you a little distance.
The night my gas gauge hit empty
Picture it: I’m ten miles from home, on my way to a meeting, and the fuel gauge is sitting on E. The “miles to empty” readout says 26 miles left, which sounds like plenty until you remember that number is a guess, not a promise.
Stop for gas, and I’m probably late. Don’t stop, and I might be stuck on the shoulder waiting an hour for AAA to show up with a gallon of gas while traffic rolls past. Neither option was appealing. So I ran both through the three questions.
If I stop for gas: 10 minutes from now: relieved, already rehearsing my “sorry I’m late.” 10 months from now: I won’t even remember this happened. 10 years from now: What gas station? I won’t have a clue what I’m talking about.
If I don’t stop: 10 minutes from now: anxious, watching that mileage number drop, arguing with my own gas tank. 10 months from now: annoyed I let something so avoidable turn into a whole ordeal. 10 years from now: still shaking my head at how dumb it was to leave the house on fumes.
I stopped for gas. Walked into that meeting five minutes late, apologized once, and nobody even blinked. I knew I’d made the right call before I’d even turned the key back on.
Why this works, even when you’re not running on fumes
Why does asking three questions do so much? Because it drags you out of whatever’s happening in your body right now, the adrenaline, the irritation, whatever it is, and makes you check in with the person who’ll actually be living with this decision later.
Most of my bad money decisions came from skipping that step entirely. I bought something because I was tired of feeling broke, not because I needed it. I fired off an email because I was mad, not because it was smart. In the moment, ten minutes felt like forever. Ten years later, I couldn’t tell you what I was even upset about.
These days, when an unplanned expense shows up, an urge to eat out because I’m frustrated, an “emergency” that’s really just impatience, I run it through 10/10/10 before I touch my Contingency Fund. Half the time, the urge to spend disappears before I even get to question three.
Where I use this the most
Where does this actually show up in a regular week? Practically everywhere, once you start looking.
- Deciding whether tonight’s dinner is worth a restaurant bill or a pantry raid.
- Weighing a big house project, like the remodel I keep threatening to start.
- Cooling off before I send a reply I’d regret.
- Deciding if a “sale” is a real deal, or just a feeling.
Nothing here is life-or-death. That’s the point. It’s the small, everyday decisions, made a dozen times a day, that quietly shape a budget or a mood far more than the rare big one ever does.
How to try it yourself
- Catch yourself mid-decision when you notice a strong feeling attached to it.
- Ask the three questions. Out loud, if you have to.
- Notice which answer actually changes your mind. Usually it’s the ten-year one.
- Act on that answer, not the one your mood is pushing for.
Next time a decision has you all worked up, try it. Ask yourself how you’ll feel in 10 minutes, 10 months, and 10 years. You might just save yourself a phone call to AAA. Or worse.

Question: What’s the last decision you wish you’d slept on a little longer? Share in the comments below.
EverydayCheapskate™ is reader-supported. We participate in the Amazon Services LLC Associates Program and other affiliate advertising programs, designed to provide a means for us to earn from qualifying purchases, at no cost to you.

The Complete Guide to Winterizing Your Home This Fall
Every fall, I make the same list. Every winter, I find out what I skipped. This year, I’m not risking it, and neither should you. Here’s my complete checklist for how to winterize your home, in the order it actually matters, so you skip the January repair bill and keep that money in your own pocket.

I know exactly which hose I forgot to disconnect last November. It sat there, full of water, attached to the spigot like nothing bad could ever happen to it. Then came the first hard freeze. Then came the phone call to a plumber. Then came a repair bill that made me sit down.
That’s the thing about winterizing your house. None of it is hard. None of it takes very long. And every single year, somebody skips a step and pays for it in January, usually more than they would’ve paid to just do the thing in October.
So let’s not be that somebody this year. Here’s the full list, in the order that actually matters: the stuff that saves you real money first, the nice-to-haves last. Give yourself one weekend. I promise it’s cheaper than the alternative.
Priority 1: The weekend before first freeze
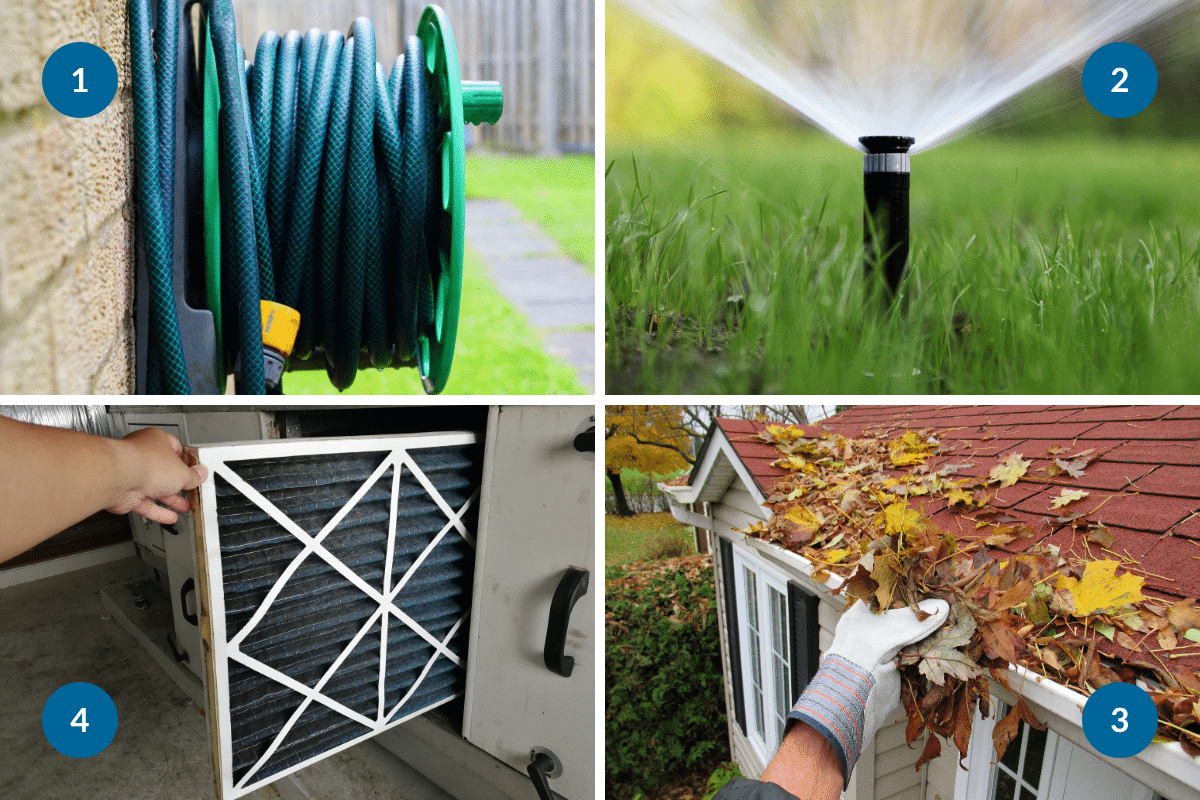
These four things prevent the damage that actually hurts. Do these before anything else on this list.
1. Drain and disconnect your outdoor hoses
A hose left connected to the spigot freezes solid, and that ice has nowhere to go but back into the pipe in your wall. I’ve seen the repair bills. They run $500 to $3,000. The fix costs you ten minutes: disconnect, drain, coil, store. While you’re out there, turn off any interior shutoff valves for exterior spigots, and slap on a $5 foam cover for good measure.
2. Winterize the sprinkler system
Water sitting in irrigation lines freezes and splits the pipe and you won’t find out until spring, when your yard turns into a swamp. Blow out the lines with an air compressor set between 40 and 80 PSI. Not your thing? An irrigation company will do it for about $75. Compare that to a $2,000 repair and it’s not even a decision.
3. Clean the gutters
Twice. Once in early October, and again after the last leaves come down. Clogged gutters send water behind the fascia, where it freezes into an ice dam and works its way into your roof, your walls, and eventually your ceiling. That’s a $2,000 to $10,000 repair, versus an afternoon with a ladder or $75 to $150 if you’d rather someone else be the one up there. Run a hose through the downspouts afterward to make sure everything actually flows.
4. Change the furnace filter, and book the tune-up
A dirty filter makes your whole system work harder, and “harder” translates directly into a heating bill that’s 10 to 20 percent higher all season. Filters run $5 to $20. Change one every one to three months and just put it on your calendar so you stop forgetting. And schedule the professional tune-up now while HVAC companies still have room on the schedule and aren’t charging emergency rates. Nobody wants to find out their furnace is dying at 2am on Christmas Eve. Trust me on this one.
Priority 2: The next weekend
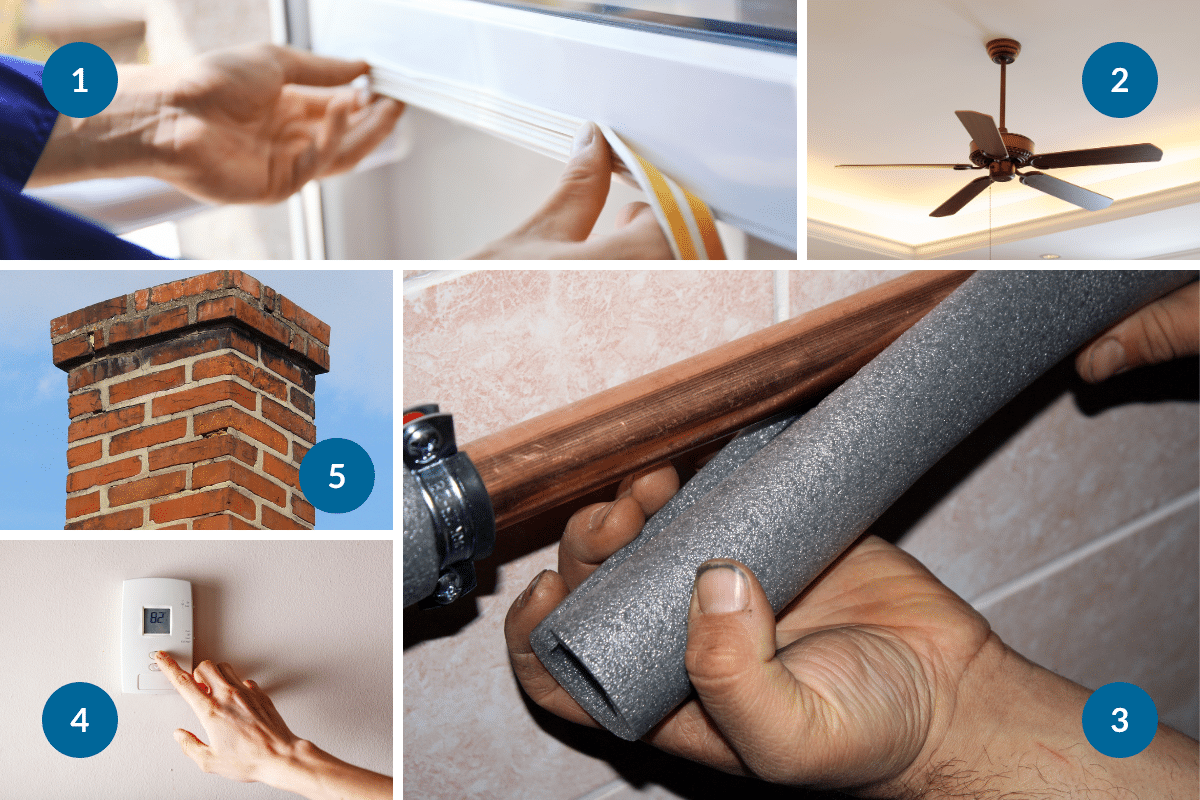
Not urgent. Still worth real money.
1. Seal the drafts
Leaky windows and doors can account for a quarter to a third of your heat loss which is wild when you think about how cheap the fix is. Hold a lit stick of incense near your window and door frames on a breezy day. Wherever the smoke wobbles, that’s your leak. Weatherstripping, caulk, window film, a door sweep… none of it costs more than $80 total, and you’ll get $100 to $300 back over the season.
2. Flip your ceiling fans
There’s a little switch on the base. In winter, you want the blades turning clockwise on low. That pushes the warm air that’s pooled up near your ceiling back down where you’re actually sitting. Free. Thirty seconds. Do it today.
3. Wrap your pipes
Any pipe running through an unheated space (think: basement, crawl space, garage) should get a foam sleeve. They’re a couple dollars for a six-foot piece at the hardware store. Slit it, snap it over the pipe, tape it shut. This is the difference between a normal Tuesday and a burst pipe during a cold snap.
4. Program the thermostat
Aim for 62 to 65°F while you’re out or asleep, and 68 to 70°F while you’re home and awake. Letting the house coast a little cooler when nobody’s there to feel it isn’t deprivation. It’s just money you don’t have to spend. A programmable or smart thermostat can shave 10 to 15 percent off your heating bill without you thinking about it again.
5. Check the chimney
If you use it, get it inspected and cleaned ($150 to $250) once a year, no exceptions. Creosote fires happen more than people realize, and this isn’t the place to gamble. Don’t use the fireplace? Close the damper anyway. An open damper is basically a hole in your roof.
Priority 3: Nice-to-have
Not urgent. Worth doing if you’ve got the time and the itch to keep going.
- Weatherproof the rim joists in the basement or crawl space. That’s where a shocking amount of cold air sneaks in.
- Insulate the attic hatch. A $10 piece of foam board on the back of it stops more heat loss than you’d guess.
- Start the snow blower now. Check the oil, add fuel stabilizer, and find out today whether it runs… not during the first storm, when every repair shop in town is backed up for a week. Sharpen the shovels and stock the ice melt while you’re at it.
- Test every smoke and CO detector, and replace the batteries. Winter is peak season for carbon monoxide poisoning, thanks to furnaces and fireplaces running nonstop. If any detector is past its tenth birthday, replace the whole unit.
- Walk the perimeter and look up. Missing shingles, sagging spots, damaged flashing… catch it now. Not confident doing this yourself? A roofer will look for $100 to $200. Cheap insurance against a much worse conversation later.
What to leave to the professionals
I love a good DIY project as much as anyone, but some of this isn’t the place to save five bucks and lose five hundred:
- The annual furnace inspection
- Chimney cleaning
- Any major roof repair
- Ice dam removal after the ice has already formed (This is a job for a professional, because a DIY attempt can do more damage to your roof than the ice dam itself.)
- Pipe insulation in a crawl space you genuinely can’t get into safely
Here’s the math that convinced me a long time ago: a $150 preventive visit versus a $2,500 emergency one. The only difference is timing.
Question: So tell me… what’s the one winterizing task you mean to do every single year and somehow never get to? Confess in the comments. Maybe admitting it here is what finally gets it done this year.
EverydayCheapskate™ is reader-supported. We participate in the Amazon Services LLC Associates Program and other affiliate advertising programs, designed to provide a means for us to earn from qualifying purchases, at no cost to you.

Best Sound Machine for Better Sleep: 3 Honest Picks
You know the moment. It’s 3 a.m., the house is dead silent except for the one sound that matters… the neighbor’s dog, the HVAC clicking on, your husband doing his nightly impression of a diesel engine and you’re wide awake staring at the ceiling doing math on how many hours of sleep you have left. Spoiler: not enough.

I’ve been there more nights than I’d like to admit. And for a long time I figured that was just… life. Something you white-knuckle through with coffee.
Turns out there’s a cheap fix for a big chunk of that problem, and it’s been sitting in plain sight since 1962.
What a sound machine is actually doing for you
Here’s the simple version. A sound machine creates one steady, unchanging sound, a “floor” of noise, so your brain has something predictable to hold onto. Instead of jolting awake every time a car passes or the fridge cycles on, your brain hears the one steady sound and mostly tunes the rest out.
Does it work for everybody? No. Sleep researchers will tell you the evidence is honestly a little mixed. A recent review of the science called for more research before anyone declares white noise a cure-all, and it noted that for a small number of people, it can actually make sleep worse. But other studies have found real results: newborns falling asleep faster with white noise playing, adults falling asleep close to 40% faster in one trial, and people living in noisy parts of New York City sleeping better with it running than without.
So… not magic. But for a lot of people dealing with a snoring partner, a barking dog, or a house that creaks, it’s worth the fairly small gamble. And if you’re one of the 1 in 6 adults who struggles to fall asleep most nights, or the nearly 1 in 5 who can’t stay asleep once they’re there (real numbers from a national health survey) you are absolutely not the only one lying awake), a $50 gadget is a pretty low-risk thing to try before you spend real money on anything else.
What actually matters when you’re shopping for one
I’ve tested more of these than I care to admit, so let me save you some trial and error.
Mechanical versus digital
A mechanical machine, like the classic Dohm, has a real fan spinning inside it, pushing air through a chamber. That’s it. No recording, no loop, just actual moving air. It sounds the most natural of anything on the market, and there’s no repeating pattern for a light sleeper’s brain to latch onto. The trade-off is you only get two dials to play with: volume and tone.
Digital machines play a recorded sound file instead. You get way more options (think: rain, ocean, brown noise, a dozen fan variations) in a smaller, usually cheaper package. The catch: most of them loop every 30 to 60 seconds, and some people notice that little repeat and find it maddening. If that’s you or your spouse, skip digital and go mechanical. Otherwise, digital gets you more bang for your buck.
Not all noise is the same noise
White noise is the hiss-y, TV-static sound most of us picture. Pink noise is softer, deeper, closer to a waterfall. Brown noise goes deeper still. Think steady rainfall or a shower running. There’s also green noise now, tuned to sound like ocean waves, though the research on it is thinner. If white noise doesn’t do it for you, don’t give up on the whole idea. Try pink or brown before you write off sound machines entirely.
Volume you can actually control
You want fine adjustment, not just low-medium-high. And be careful with the top end. Anything hitting 70 decibels or louder, night after night, starts to be a real hearing concern. Put the machine across the room, not on the nightstand six inches from your ear, and aim for something around the volume of quiet background conversation.
No forced shutoff
Some machines cut off after 30 or 60 minutes. Great, so you wake up at 2 a.m. to dead silence and the exact noise you were trying to block. Make sure continuous all-night play is an option. A timer’s fine to have, just not as your only setting.
My three picks
- Best Inexpensive: Yogasleep Dohm Classic
- Best Upgrade: LectroFan Classic
- Best Portable: Yogasleep Rohm
Best Inexpensive: Yogasleep Dohm Classic

Yogasleep Dohm Classic
This is the original. Been around since 1962, and it’s the machine that basically invented the category. Real fan, real moving air, two dials for tone and volume, nothing fancier than that. Owners report running these for a decade or more without a hiccup, which tells you something about the design.
I won’t pretend it’s flawless. Some buyers have had units die on them after just a few months, and the “loud” setting isn’t actually all that loud for anyone dealing with real street noise. But if you want the sound that started it all, and you’re the type who buys once and keeps a thing forever, this is the one.

Best Upgrade: LectroFan Classic

LectroFan Classic
This is the digital machine that finally cracked the loop problem. It runs a clever little algorithm so the white noise never obviously repeats, which means it fools your brain almost like a mechanical machine would. Twenty sound options, a timer you can skip entirely, USB powered, small enough to disappear on a nightstand.
If you’ve tried a cheap digital machine before and hated the looping, this is the one that fixes exactly that complaint. It’s my go-to recommendation for most people who want options without sacrificing sound quality.

Best Portable: Yogasleep Rohm

Yogasleep Rohm
Genuinely pocket-sized (about the footprint of a hockey puck) with a lanyard, USB rechargeable, three sound choices. This is the one that lives in my carry-on for hotel rooms with paper-thin walls.
Here’s my honest caveat: reliability is a mixed bag. Some owners get years out of theirs, others report the battery not lasting the night or the unit just quitting after six months. At $20, I still think it’s worth having as a travel backup. Just don’t expect Dohm-level durability out of it.

What to skip
- Anything under $20 from a brand you’ve never heard of. Tinny speakers, obvious loops, usually dead within a year.
- “Smart” machines over $80 with an app and WiFi. You’re paying for features that have nothing to do with sleep quality.
- Combo machines with lights, aromatherapy, and a sound function bolted on. A machine that does five things rarely does any of them well. Give me one job, done right.
- Your phone as your only sound source. Which brings me to…
What about the free sleep apps?
Calm, Rain Rain, whatever’s free in the app store… they work, technically. But your phone speaker isn’t built for this, your battery drains all night, and now your phone is sitting on your nightstand where every notification and screen flash can wake you back up. That last part alone is bad sleep hygiene, sound machine or not.
An inexpensive, dedicated machine sidesteps every one of those problems. It’s a small enough purchase that I don’t think twice about recommending it over the free option.
How to actually use the thing
Turn it on before you get into bed, not after you’re already lying there frustrated. Let your brain settle into it as you wind down. Keep the volume just above whatever you’re trying to block, not louder than it needs to be. Set it across the room, not right next to your head. And give it a full week before deciding it isn’t working. Your brain needs a little time to learn the new normal.
For the babies and littles in your life
Sound machines are a solid tool for infants and toddlers too, with a couple of adjustments: keep the volume under about 50 decibels (roughly a quiet conversation), and place the machine at least 7 feet from the crib, not right up against the bars. All-night play is fine. There are baby-specific machines out there, but honestly, a regular one turned down low does the same job.
Question: So, do you already sleep with some kind of background noise? A fan, a machine, the TV droning in the background? Tell me your setup in the comments. I’m always curious what’s working for everyone else at 3 a.m.
EverydayCheapskate™ is reader-supported. We participate in the Amazon Services LLC Associates Program and other affiliate advertising programs, designed to provide a means for us to earn from qualifying purchases, at no cost to you.

5 Cooking Mistakes That Are Quietly Wrecking Your Dinner
Ever wonder why the chicken you cooked for company came out rubbery, while the same cut at your favorite restaurant practically melts? I used to blame my pans. Turns out, I was making the same five mistakes almost every home cook makes. Mistakes that have nothing to do with talent and everything to do with habits nobody ever taught us. Here’s what the pros know that we don’t.

I’ve been cooking for my family for longer than I care to admit, and I still catch myself doing at least one of these on a bad night. The good news? None of them cost a dime to fix. They just take a little unlearning.
So before you write off another meal as “not my best work,” let’s walk through the five habits that quietly sabotage good cooks everywhere and what to do instead.
1. You’re reading the recipe as you go

Be honest. You skim the ingredient list, maybe glance at step one, and dive in. Then somewhere around step four you discover you were supposed to marinate the chicken four hours ago.
Read the whole recipe before you touch a single pan. Every time. Think of it as your instruction manual, and instruction number one is to read the instructions. A two-minute read tells you what needs to come to room temperature, what needs to marinate, and whether you actually own a food processor big enough for this nonsense.
2. You’re starting in a cold pan
Here’s the thing nobody explains: heat is what seals food shut. A hot pan creates an instant crust around whatever you’re cooking, locking the moisture and flavor inside. A lukewarm pan does the opposite. It slowly cooks the moisture out, and now your chicken breast or your mushrooms are just sitting there stewing in their own juice instead of browning.
That’s why restaurant food sears and yours steams.
The fix is simple: give your pan real time to heat up before anything touches it. You should hear a sizzle the second food hits the surface. No sizzle? Pull the food back out and wait. It feels wasteful to stand there watching an empty pan, but it’s a lot less wasteful than choking down gray, waterlogged chicken you paid good money for.
Not sure your pan’s actually ready? Skip the guesswork. Flick one drop of water into it. If the drop skitters around and disappears in under a second, you’re good to go. If it just sits there hissing, give it another minute.
As for the dial itself: medium-high gets you a proper sear, medium is where most sautéing wants to live. If you’re burning the outside before the inside catches up, you’re running too hot. Turn it down a notch and give it a few more minutes instead.
3. You’re hovering over the food

This is the one that gets even good cooks. You add the food to the pan, and then you can’t leave it alone. Flip it, poke it, shuffle it, flip it again.
Unless your recipe specifically calls for constant stirring, put the spatula down and step back. Not out of the room… just off the food. Every flip resets the browning process and drags out your cooking time, which means you’re more likely to overcook the inside while you’re chasing color on the outside. Let it sit. Let it work.
4. You’re not tasting as you go

If the only time you taste your food is at the table with everyone watching, you’re doing it backwards. Season, taste, adjust, repeat. That’s the whole secret. It’s not glamorous, and it’s not a “technique” so much as it’s just paying attention.
Do one more taste right before you serve, too. Salt behaves differently once everything’s hot and combined, and a dish that tasted perfect at the stove can go flat by the time it hits the table.
5. You’re following the recipe like it’s the law

Unless you’re baking (baking actually is a science, and I will die on that hill), cooking is closer to a suggestion than a formula. Your oven runs hot. Your electric cooktop doesn’t heat like the gas range the recipe writer used. Your pan is a different size than theirs.
Recipe writers can’t account for your kitchen. You can. So check your food as you go. If something’s browning faster than the recipe says it should, turn it down. If your “10 minutes” is clearly done at 7, take it off. A recipe is a map, not a set of handcuffs.
The bottom line
Cooking well isn’t about talent. It’s about paying attention, and about giving yourself permission to trust what’s actually happening in the pan over what the recipe says should be happening. Fix these five habits and you’ll waste less food, spend less on takeout, and actually enjoy the hour you spend in the kitchen instead of white-knuckling it.
Now go read your recipe, heat your pan, and get out of your own way.
Question: Which of these five is your kitchen confession? Be honest.
EverydayCheapskate™ is reader-supported. We participate in the Amazon Services LLC Associates Program and other affiliate advertising programs, designed to provide a means for us to earn from qualifying purchases, at no cost to you.

Annualize Your Spending: See What It Really Costs You
You know that little splurge that doesn’t “count” because it’s only five bucks? I used to believe that too. Then I did the math on my own habits and didn’t love what I found. Turns out the sneaky money drains in your life aren’t the big purchases. They’re the small ones you never bother to add up. Here’s the two-second trick that fixes that.

I’m not here to shame anyone’s coffee order or their gel manicure. Lord knows I’ve got my own version of this. (Hello, home-roasted coffee beans imported from a farm in Costa Rica. I’m not above judgment, I just judge myself on a different line item.) There’s a real difference between spending money on purpose and spending it on autopilot. Most of us are doing a lot more of the second one than we’d like to admit.
The good news: you don’t need a budget app or an accounting degree to catch it. You need one dumb little trick and about ten seconds.
Add a zero. Then add a little.
Here’s the whole system. Take any expense you pay monthly, add a zero, then toss in a bit more for good measure. That gets you to roughly a year’s worth, no calculator required.
Why does that work? A zero turns a monthly number into ten months’ worth. The “little extra” covers the other two. It’s not exact, but it’s close enough to make you sit up straight.
Let’s test it. Say you’re feeding the office vending machine $5 a week. That’s about $20 a month. Add a zero: $200. Add a little: $250. Just to keep me honest, the real math is $5 a week times 52 weeks, which lands at $260. See? Close enough to make the point. That “harmless” snack habit is running you a couple hundred bucks a year. Easy money, gone.
The little stuff you never add up
Howard Schultz built Starbucks into the empire it is today, and even he admitted this blind spot in his book Pour Your Heart Into It. Back then, the average customer spent $3.50 a visit and came back eighteen times a month. That’s not a coffee habit. That’s a relationship. Fast-forward to today, and a $5 ticket with a regular’s frequency of fifteen or twenty visits a month isn’t unusual either. Nobody signs up to spend hundreds of dollars a year on coffee. They just sign up for “one cup, one time,” over and over, until it adds up to something else entirely.
Now let’s look at our friend Helena. She gets her nails done, filled, and repaired once a month for $80 a pop (current U.S. average, not just Helena being fancy). Multiply by 10, add a little, and she’s staring down close to $960 a year. Maybe pushing $1,000 once you factor in a repair or two.
If your gut reaction is “but it’s just a little something I do for myself,” I hear you. I’m not the manicure police. But knowing the real number matters, especially if this is one of those things you’re paying someone else to do that you could just as easily learn yourself. (I’ve got thoughts on that one, in case you’re curious.) This is exactly the kind of number that belongs in a Freedom Account, my system for setting aside money monthly for the expenses you know are coming, instead of getting ambushed by them once a year. Once you know a habit costs $960 a year instead of “just $80 a month,” you get to decide on purpose whether it stays.
Your paycheck has the same blind spot
It’s not just spending that gets the rosy treatment. We do the same thing with our income, because it hurts less that way.
Take Tom and Susan. They think of themselves as a $100K-a-year household, and honestly, who wouldn’t want to? “We make six figures,” they tell each other, “so why not enjoy a few luxuries?”
Here’s the reality check. Tom actually earns $96,500, which is close to that magic number but not quite there. After taxes and other deductions, his take-home pay is closer to $78,000. Once you factor in the essentials, food, shelter, insurance, transportation, clothing, utilities, property taxes, and yes, some entertainment, they’re left with somewhere around $5,000 a year in true discretionary income. That’s a long way from the carefree $100,000 they picture in their heads.
Run the numbers a different way and it gets even more sobering: that $5,000 a year works out to about $400 a month in actual spending money. Suddenly a hundred bucks here and five bucks there stops feeling so small, doesn’t it?
Try this on your own numbers
You don’t need to annualize your entire life this weekend. Start with one habit that feels harmless and see what it actually costs you.
- Pick one recurring expense. Coffee, takeout lunch, a subscription, a standing hair appointment.
- Add a zero to the monthly amount.
- Add a little extra to round it up toward a full year.
- Decide, now that you can see the real number, whether it’s still worth it.
That’s it. No spreadsheet, no shame spiral. Just information you didn’t have five minutes ago.
The payoff
Start annualizing your spending, and start thinking about your take-home pay in terms of what’s actually left over, not what looks good on paper. Yes, it stings a little at first. But once you get past the initial wince, you’ll be standing on much more solid ground. And the best part? Money stops slipping through your fingers like sand through a sieve, because you’ll finally be able to see where it’s going.
Question: What’s one small expense you’ve never bothered to add up? Go do the math right now, I’ll wait.
EverydayCheapskate™ is reader-supported. We participate in the Amazon Services LLC Associates Program and other affiliate advertising programs, designed to provide a means for us to earn from qualifying purchases, at no cost to you.

How to Train a Puppy Not to Bite (Without Buying a Single Thing)
Puppy teeth are tiny, sharp, and somehow everywhere at once. If your new puppy has decided your fingers, ankles, and shoelaces are all fair game, take a breath. It’s normal, and it’s fixable. No special training system required, just consistent timing and a little patience. Today I’m walking through the exact method that teaches a puppy to keep those teeth to themselves for good.

Nobody warns you about the teeth.
You bring home eight pounds of fluff, and within about six hours, that fluff has locked onto your finger like a tiny, determined alligator. Ankles, sleeves, shoelaces, the hem of your favorite bathrobe… nothing is safe. It’s alarming the first time. It’s still a little alarming the fortieth time.
Here’s the part nobody tells you at the shelter: this is completely normal. Puppy mouthing isn’t a character flaw. It’s just what puppies do. Your job isn’t to break the habit through sheer force of will. It’s to teach your puppy, patiently and consistently, that human skin is off the menu.
The good news? You don’t need an expensive trainer, a “correction collar” or special equipment. You need consistency, timing, patience and a plan that makes sense to your puppy.
Why puppies bite in the first place
Puppies use their mouths to explore the world, play and communicate. Teething adds another reason to chew, and an excited or overtired puppy can turn into a little land shark in a hurry.
Three common reasons:
- Play and exploration. Puppies use their mouths to interact with almost everything, including you.
- Teething. As permanent teeth begin coming in, generally between about 3 and 6 months, chewing can become especially appealing.
- Overstimulation. An excited or overtired puppy may nip harder, faster and more often.
None of that makes your puppy bad. It makes your puppy a puppy. The goal isn’t punishment. It’s teaching the difference between what’s fine to bite (toys, appropriate chews) and what isn’t (you, your kids, the couch cushion, your favorite shoes).
The one lesson that changes everything
This is the big lesson you want your puppy to learn:
Biting people makes the fun disappear. Appropriate behavior makes good things happen.
When your puppy puts teeth on your skin or clothes:
- Stay calm. Don’t squeal, yell or push the puppy away. Some puppies find a squealing human even more exciting.
- Stop the interaction immediately. Freeze and remove your attention.
- Turn away or briefly step behind a baby gate if the puppy keeps coming after you. Ten to 30 seconds is plenty.
- Return calmly.
- Offer an appropriate toy or chew and praise the puppy for choosing it.
If the biting starts again, repeat the process. That’s it. No drama. No wrestling match. No lecture.
Teeth on people, game over. Puppies figure this out faster than you’d think.
Why it actually works

Puppies quickly learn which behaviors get them what they want. If biting makes your attention and play disappear, while sitting calmly or grabbing a toy keeps the good stuff coming, you’re giving your puppy a pretty obvious choice.
You aren’t trying to scare the puppy into obedience. You’re teaching cause and effect.
Everyone in the house has to play along
Consistency isn’t just important here. It’s the whole ballgame.
If one person in the family laughs off hand biting because “he’s just playing” while everyone else shuts the game down immediately, your puppy gets a confusing, mixed message. And puppies are smart enough to know exactly who lets them get away with it.
Sit everyone down. Agree on the plan. Stick to it, even when the puppy is being extra cute about the whole thing.
Keep a toy within arm’s reach

Don’t wait for the puppy to become a full-blown ankle shark.
Keep a few appropriate toys within easy reach. When your puppy starts getting mouthy, offer a toy and encourage the puppy to bite that instead. A rope toy, rubber toy or appropriate puppy chew can all work. The point isn’t which toy you buy. The point is teaching, “This is what you can put your teeth on.”
And when your puppy takes the toy instead of your hand? That’s the moment. Praise it like they just did something amazing. Because in puppy terms, they kind of did.
Notice the good behavior, not just the bad
Here’s the part most people skip entirely: you can’t spend all your energy correcting what you don’t want and expect your puppy to figure out what you do want.
When your puppy approaches you without nipping, settles down beside you, licks instead of bites, or picks up a toy on their own, give them attention, praise, play or a little piece of their regular kibble.
You’re teaching more than “don’t bite.” You’re teaching what to do instead.
If the biting keeps happening, walk away
Sometimes puppies don’t get the memo the first 47 times.
If your puppy keeps biting after you’ve redirected to a toy, calmly remove yourself from the game. Step behind a baby gate or leave the room briefly. Then return and try again.
An exercise pen can also be useful if your puppy already views it as a pleasant, familiar space.
One thing I wouldn’t do: use the crate as a punishment. A crate needs to stay a place your puppy actually wants to go. Turn it into a timeout spot, and you’ve just made bedtime a lot harder on both of you.
And don’t worry about saying “Time out.” Your puppy doesn’t need a vocabulary lesson. The disappearing human is the message.
A tired puppy is a bitey puppy
A puppy who has had appropriate exercise, play, mental stimulation and sleep is generally easier to live with. But there’s an important wrinkle: overtired puppies can become extremely mouthy.
Sometimes the “wild puppy” you think needs more exercise actually needs a nap.
One commonly used rule of thumb for leash walks is about five minutes of walking per month of age, once or twice a day. But that’s only a starting point. Puppies vary by age, breed, size, health and the type of activity they’re doing.
Don’t focus only on tiring your puppy out physically. Sniffing, exploring, training and simple food puzzles provide valuable mental stimulation, too.
Give teething teeth something better to do
The puppy will chew during teething. That’s not a failure of training. It’s a puppy being a puppy.
Give your dog appropriate things to chew and supervise.
- A clean, damp washcloth that has been chilled or briefly frozen can feel soothing on sore gums if your puppy doesn’t shred or swallow fabric. Remove it if pieces begin coming loose.
- If you use a stuffed rubber toy with peanut butter, make sure the peanut butter is xylitol-free. Xylitol is toxic to dogs.
- Bully sticks and other edible chews can be options, too, but they’re not automatically risk-free. Supervise your puppy and remove a chew when it becomes small enough to swallow or break into large pieces.
The goal is simple: Give the puppy something appropriate to chew before your favorite chair starts looking like a chew toy.
End playtime before things go full land shark
Puppies often become extra mouthy when they’re overstimulated.
Watch for signs such as:
- Play becoming rougher
- Running around wildly
- Nipping harder or faster
- Having trouble settling down
When you see the escalation, don’t try to squeeze another 20 minutes of play out of the puppy. Calmly switch to a chew, quiet activity or nap.
Sometimes the best training tool in the house is a sleeping puppy.
What not to do, no matter how tempting

Some old-school puppy advice deserves to stay in the old school.
- Don’t hit, tap or squeeze the puppy’s mouth. Physical punishment can create fear and may make defensive behavior worse.
- Don’t hold the puppy’s mouth closed. It doesn’t teach the lesson you want, and it can make handling unpleasant or frightening.
- Don’t use your hands as chew toys. I get it, wrestling a puppy with your bare fingers is adorable for about five minutes. It’s also teaching your puppy that skin is fair game. Put a toy between you instead.
- Don’t yell. An angry voice can frighten or further excite an already wound-up puppy.
- Don’t shake or bop the nose. Physical intimidation doesn’t teach the behavior you actually want.
- Don’t use shock, prong or other aversive corrections for puppy biting. You want your puppy to learn that people are safe and predictable, not that people are something to fear.
And don’t worry about whether you need to ban tug-of-war. You don’t. Tug can be a perfectly good game when played appropriately. Just keep a toy between your hands and those little teeth.
The timeline: what to expect
Here’s where I want to save you some frustration: Don’t put your puppy’s progress on a stopwatch.
Some puppies improve noticeably within a few weeks. Others continue to mouth for months, especially during teething or when they’re excited.
- First few weeks: You’re teaching the basic rule: Human skin ends the game. Appropriate toys keep it going.
- 1–3 months: With consistent responses, many puppies become easier to redirect and their biting becomes less frequent or less intense.
- 3–6 months: Teething and excitement can still trigger plenty of chewing and mouthing. That’s not necessarily a training failure.
- Around 6 months and beyond: Many puppies are substantially easier to manage, but occasional mouthing can continue, particularly during excitement.
The goal was never perfection by a certain date. It’s steady, boring, unglamorous improvement. If you’re seeing no improvement after several weeks of consistent training, or the biting is becoming more intense, that’s your cue to call in professional help rather than crack down harder on your own.
When to call in backup
Puppy mouthing is normal. But some behavior deserves a closer look.
Seek professional guidance if:
- Bites regularly break skin or cause significant bruising
- Biting is escalating rather than improving
- Your puppy stiffens, freezes, growls, snarls or shows other signs of fear or discomfort before biting
- Biting occurs during handling or appears related to pain
- Your puppy guards food, toys or other resources
- The behavior seems directed toward particular family members
- You’re simply concerned and aren’t sure what’s normal
If biting may be connected to pain, fear, guarding or another behavior problem, start by talking with your veterinarian. For more complex behavior issues, your veterinarian can help you find a qualified behavior professional.
When choosing a trainer, look for someone who uses reward-based methods and can clearly explain how they’ll address the behavior. Credentials such as CPDT-KA or KPA-CTP can be useful, but the training methods matter, too.
You’re not looking for someone who promises to dominate your puppy into submission. You’re looking for someone who knows how to teach.
The long view
Puppy biting is temporary, even when it feels like you’re living with a tiny, furry crocodile.
Your puppy isn’t trying to be bad. They’re learning how to live in a human household, and you’re teaching them the rules. Calm, consistent responses, appropriate things to chew, plenty of sleep and lots of reinforcement for good behavior will take you a long way.
You don’t need to buy anything special. You don’t need a complicated training system. You need a plan and everybody in the household needs to stick with it.
A few months from now, you’ll look at those little teeth and wonder how something so small could possibly have caused so much commotion. But you’ll also be glad you taught the lesson.
Question: What finally worked when your puppy went through the biting phase? Share what did or didn’t work for you in the comments below.
EverydayCheapskate™ is reader-supported. We participate in the Amazon Services LLC Associates Program and other affiliate advertising programs, designed to provide a means for us to earn from qualifying purchases, at no cost to you.
The Best Can Openers That Actually Work (And Won’t Quit on You)
A can opener should be one of the simplest tools in your kitchen. Yet somehow, finding one that actually works and keeps working can feel like a full-time job. I’ve tried more than my share of duds, from rusty cutters to lids sharp enough to require a Band-Aid. So I went looking for the best can openers that won’t leave you wrestling with dinner.
A can opener is one of those things you don’t think about until it fails you. And it always fails you at the worst possible moment… hands full, dinner half-made, that one gadget standing between you and a can of beans.
Why is this still a problem? We’ve put a man on the moon. We’ve got phones that unlock with our faces. And yet most can openers on the market today can’t reliably do the one job they were built for.
I’ve owned more can openers than I care to admit. Some worked great for a month, then started slipping. Some rusted shut. One left a lid edge sharp enough to draw blood. So I went looking, again, for the ones that actually hold up. Here’s what I found.
A little history, because I find this stuff fascinating
In 1810, an Englishman named Peter Durand patented the tin can. Great idea. One problem: those early cans were so thick, you needed a hammer and chisel to get into them. Practical for the home cook? Not even close.
It took until 1858 for Ezra Warner to patent the first can opener. It was crude… basically a bayonet that stabbed the lid, paired with a blade you dragged around the rim, leaving a jagged edge behind. It wasn’t exactly kitchen-safe. But it worked, in the sense that it got the can open, and that’s more than I can say for a few “modern” openers that have crossed my counter.
Jump to:
- Best Inexpensive: Starfrit MightiCan Can Opener
- Best Budget: EZ-DUZ-IT Deluxe Can Opener
- Best Electric: Hamilton Beach Smooth Touch
- Best Luxury: Rösle Stainless Steel Can Opener
My one non-negotiable rule
Here’s the thing that changed everything for me, and I mean everything: never put a can opener in the dishwasher. Not the manual ones. Not the fancy stainless models. Not the removable cutting parts of an electric one. Doesn’t matter what the box says about being “dishwasher safe.” It’s lying.
The dishwasher’s heat and moisture will rust that cutting wheel faster than you’d believe, and once it rusts, it’s done. The gears seize. The blade drags instead of cuts. You end up hacking at a can of tomatoes with a butter knife, which, ask me how I know.
Wash it by hand. Hot water, a little soap, a quick dry so it doesn’t sit wet. That’s it. Do that, and a good can opener will outlast your microwave.
Alright. On to the openers themselves.
Best Inexpensive: Starfrit MightiCan Can Opener
Starfrit MightiCan Can Opener
A reader named Tara is the reason this one’s on the list at all. She mentioned it in a comment, I’d never heard of it, and I figured I’d look into it out of curiosity more than anything. Big mistake, in the best way. I ordered one, and it’s been the only opener in my drawer ever since.
It’s mostly plastic, with just the blade and its housing in metal, so it’s light in your hand. It sits on top of the can rather than gripping the side, separates the lid cleanly, and holds onto that lid until you’re ready to let go. No fishing a sharp disc out of your soup. Works just as well whether you’re left-handed or right-handed, which is rarer than it should be.
Tara says hers has held up for 30 years. Mine’s newer, but I believe her completely, because this thing feels built to last, not built to sell you a replacement in six months. And it’s the least expensive of everything on this list. Comes in black, red, and blue.
Why I like it:
- Lightweight, mostly plastic body
- Sits on top of the can and separates the lid cleanly… no falling into the food
- Smooth edges, no sharp lid to deal with
- Works for lefties and righties
- Non-slip comfort grip and knob
- 3-year warranty
- The price. Seriously.
Best Budget: EZ-DUZ-IT Deluxe Can Opener
EZ-DUZ-IT Deluxe Can Opener
If you want something with a little more muscle, this is it. Heavy gauge chromed steel, a carbon steel cutting blade, and thick rubberized handles that actually stay put in your hand. It takes a touch more elbow grease to work it around the can than the Starfrit does, but for most people, that’s a minor trade for how solidly it’s built.
It’s made in the USA. Wash it by hand (ee above, I’m not repeating myself again) and it’ll keep going for years.
Why I like it:
- Heavy gauge chromed steel construction
- Carbon steel cutting blade
- Thick rubberized grips
- Gear-driven for smooth operation
- Made in the USA
- Long service life, hand-washed only

Best Electric: Hamilton Beach Smooth Touch
Hamilton Beach Smooth Touch Electric Can Opener
Not everyone wants to crank a handle, and that’s fair. Arthritis, hand strength, or just plain preference. An electric opener earns its counter space for a lot of people, and this one’s it.
It cuts along the side of the can instead of across the top, so the lid comes off smooth, not jagged. That means you can toss it right back in the can to store leftovers in the fridge, no transferring to a container required. It handles regular cans and pop-tops both, and opens with one light touch of a lever… genuinely one-handed. It’s also the best-selling can opener brand in the country, which tells you I’m not the only one who’s noticed.
Why I like it:
- Cuts along the side for smooth, safe, reusable lids
- One-handed, easy-touch lever
- Opens regular and pop-top cans
- Retractable cord
- Sleek chrome and black design
- 1-year warranty… as long as you never, ever run it through the dishwasher

Best Luxury (and yes, I know): Rösle Stainless Steel Can Opener
Rösle Stainless Steel Can Opener
I’ll be honest, this one feels a little fancy for a cheapskate roundup. A German-engineered can opener with pliers-style grips and an 18/10 stainless steel body isn’t exactly where you’d expect to find me. But here we are, and I’m not sorry.
It clamps onto the top of the can like a pair of pliers, lifting the lid clean off without your hands ever touching the food. No sharp edges, and the lid can go right back on the can to store what’s left. It’s smooth to operate and genuinely satisfying to hold, which is not something I say about kitchen tools often.
Why I like it:
- Durable 18/10 stainless steel
- Pliers grip lifts the lid without touching the food
- Works for lefties and righties
- Ergonomic thumbscrew for smooth turning
- Lateral cutting wheel avoids sharp edges entirely
- Lid can be reused to store leftovers
The bottom line
You don’t need to spend a fortune to open a can without a fight. Start with the Starfrit if you want the best value, hand it off to the EZ-DUZ-IT if you want something heavier duty, go electric if that’s what your hands need, or splurge on the Rösle if you feel like treating your kitchen drawer to something nice. Just promise me one thing: keep it out of the dishwasher.
Question: What’s the best can opener you’ve ever owned and how long has it lasted? Share your favorite in the comments below.
EverydayCheapskate™ is reader-supported. We participate in the Amazon Services LLC Associates Program and other affiliate advertising programs, designed to provide a means for us to earn from qualifying purchases, at no cost to you.

The Best Homemade Hot Fudge Sauce (So Easy, So Rich)
Forget scrolling through taste-test rankings of grocery store hot fudge. The best one isn’t sitting on a shelf. It’s the one you make yourself, in one saucepan, in about 13 minutes. This homemade hot fudge sauce is glossy, rich, and pours like it belongs at a real sundae shop, not squeezed from a plastic bottle. Better yet, it keeps in the fridge for a month, so one batch covers a lot of sundaes. Here’s exactly how to make it.

There are entire articles out there ranking store-bought hot fudge sauce. Taste tests. Rating scales. Serious debate over which squeeze bottle deserves a 10 out of 10.
I say: why debate it? The best hot fudge sauce isn’t sitting on a shelf waiting for someone to crown it. It’s the one you make yourself, in one saucepan, for a fraction of what you’d pay for the “winner” of some grocery store taste-off.
This one takes about 13 minutes, start to finish. It uses ingredients you probably already have. And once you’ve made it, I promise you won’t be reading any more chocolate sauce rankings. You’ll just be making your own.
If you’ve got a saucepan and a spoon, you’ve got everything you need. Let’s get into it.
What You’ll Need
Cocoa powder
This is the whole point, so don’t skimp. Plain unsweetened cocoa powder is what you want… not hot cocoa mix, not Dutch-process if you can help it (regular natural cocoa gives you that classic fudgy edge). If all you’ve got is Dutch-process, it’ll still work, just slightly milder and less tangy.
Granulated sugar
Does the sweetening and helps the sauce set up with that glossy, pourable texture. Don’t swap in a sugar substitute here. This isn’t the recipe to experiment on, since sugar substitutes behave differently at boiling temperatures and can turn grainy or refuse to thicken.
Light corn syrup
This is your texture insurance. Corn syrup keeps the sauce smooth and prevents sugar crystals from forming, which is what gives you that velvety pour instead of a gritty mess. Don’t have corn syrup? Lyle’s Golden Syrup works beautifully and is easy to find in the baking aisle these days. In a pinch, honey or agave will get you into the ballpark, though the flavor will lean a little different… honey especially.
Heavy cream or evaporated milk
This is where the richness comes from. Heavy cream gives you a slightly more luxurious, thicker sauce. Evaporated milk is the more budget-friendly option and honestly, most people can’t tell the difference once it’s poured over ice cream. Either one works. Pick based on what’s already in your fridge.
Kosher salt
Just a pinch, but don’t skip it. Salt is what keeps chocolate desserts from tasting flat and one-dimensional. If all you’ve got is table salt, use about half as much. It’s more concentrated than kosher salt, tablespoon for tablespoon.
Unsalted butter
Adds shine and a silky finish. If salted is all you have, that’s fine. Just know your sauce will be a touch saltier, and you can skip adding extra.
Vanilla extract
Added at the very end, off the heat, so the flavor stays bright instead of cooking off. Real vanilla extract is worth it here. Imitation vanilla works in a pinch, but you will taste the difference in something this simple.
For a dairy-free version, coconut cream stands in nicely for the heavy cream, and a plant-based butter works for the butter. The sauce will taste subtly different, a little more coconut-forward, but it still delivers that same glossy pour.
How to Make It (Without Ending Up With a Scorched Pan)

Combine everything except the vanilla
Dump the cocoa, sugar, corn syrup, cream, and salt into a saucepan together. The butter goes in now too. Vanilla sits this part out. It goes in later, off the heat.
Stir constantly as it heats
This is the step people rush, and it’s the one that actually matters. Keep the heat at medium and stir the whole time… not just occasionally. Cocoa powder loves to sink to the bottom and scorch the second you look away, and a scorched sauce means starting over. Stick with it until the mixture reaches a full, rolling boil.
Let it boil and actually time it
Once it’s boiling, set a timer for 3 minutes and let it boil briskly, stirring occasionally. This is where the magic happens: the sugar and corn syrup are working together to build that glossy, thick texture. Resist the urge to pull it early. Three minutes is what gets you sauce instead of chocolate milk.
Stir in the vanilla off the heat
Take the pan off the burner before adding the vanilla. Adding it while the mixture is still boiling burns off the flavor you just went to the trouble of including. Stir it in, and you’re done.
Let it cool slightly, then go to town
The sauce thickens as it cools, so give it a few minutes before pouring it over anything. It’ll still be warm and pourable… just not lava-hot.
Storing It (So You Always Have Some On Hand)
This is where homemade hot fudge sauce really pulls ahead of the jarred stuff: it keeps beautifully. Store it in an airtight container in the fridge for up to a month, which means one batch covers a lot of ice cream sundaes.
When you’re ready for more, microwave it in 30-second bursts, stirring between each, until it’s pourable again but still thick. Don’t try to rush it with one long blast.
A Few Ways to Use It (Beyond the Obvious)

Ice cream sundaes are the obvious move, and a very good one. But don’t stop there:
- Warm it slightly and drizzle it over brownies or a slice of pound cake
- Swirl it into milk for the world’s best hot chocolate
- Pour it into small jars and give it away as a homemade gift. It looks fancy, costs almost nothing, and nobody has to know how easy it was.
That last one is a personal favorite of mine. A jar of homemade fudge sauce with a ribbon tied around it looks like you spent hours in the kitchen. Our little secret.
Thirteen minutes, a handful of ingredients you probably already have, and you’ll never look at a jar of store-bought hot fudge the same way again.
Make a batch this weekend. Your ice cream will thank you.

Homemade Hot Fudge Sauce
Equipment
- Whisk or wooden spoon
- Airtight jar or container
Ingredients
- ¼ cup unsweetened cocoa powder
- ½ cup white granulated sugar
- ½ cup light corn syrup like Karo, or Lyle's Golden Syrup (see Notes)
- ¼ cup heavy cream or evaporated milk
- ⅛ tsp coarse kosher salt
- 1 ½ tbsp unsalted butter
- ½ tsp vanilla extract
Instructions
- Combine the cocoa powder, sugar, corn syrup, cream, salt, and butter in a saucepan. Everything except the vanilla. Heat over medium, stirring constantly, until it reaches a full boil.
- Let it boil briskly for 3 minutes, stirring occasionally. Remove from heat and stir in the vanilla.
- Let cool slightly before serving. Store in an airtight container in the fridge for up to 1 month. To reheat: microwave in 30-second bursts, stirring between each, until pourable but still thick.
Notes
Nutrition
Question: Sundae, brownie, or straight off the spoon? Where’s your hot fudge sauce landing first? Share your vote in the comments below.
EverydayCheapskate™ is reader-supported. We participate in the Amazon Services LLC Associates Program and other affiliate advertising programs, designed to provide a means for us to earn from qualifying purchases, at no cost to you.

Should You Bail Your College Kid Out of Credit Card Debt?
A reader named Millie wrote in with a story I bet more of you are living than you’d admit out loud: her college daughter racked up over $2,500 in credit card debt, hid it until the collection calls started, and now Millie’s wondering if she should step in and fix it. My answer might not be the one she was hoping for. If you’ve got a kid with a credit card, or you’re about to hand one over, you’ll want to read this.

Ever gotten a call from a collections agency about debt you didn’t even know your kid had? That’s exactly how one mom found out her daughter was in over her head. And “in over her head” was putting it mildly.
Here’s her letter, lightly trimmed:
Dear Mary: My daughter, who’s in college, got a credit card and now she’s in over her head. She works part-time for a small paycheck, and between the interest and the late fees, her balance is over $2,500. I’ll have to step in and handle this. How do I negotiate with the credit card company to settle for less? She kept quiet about missing payments until we started getting collection calls.
— Millie
Dear Millie: First, the practical part. The credit card company almost certainly won’t talk to you. You’re not on the account. If your daughter wants to add you, that’s an option, and the company might even welcome it. They’ve probably had their fill of chasing her down.
Now here’s the part you didn’t ask about, but need to hear.
How your daughter got here
Card issuers can’t legally hand a credit card to anyone under 21 without proof of income or a cosigner. That’s been federal law since 2010. But “proof of income” is a laughably low bar. A part-time paycheck clears it and the marketing floodgates open the day a kid turns 18. A new survey of 1,200 college students backs this up in a way that made me put down my coffee: 89% now carry a credit card balance, up from 42% just three years ago. Food, rent, and “I didn’t have enough in checking” are the top reasons why. Only 20% could tell you what a credit score even measures.
Reckless doesn’t quite cover it. These are kids getting handed grown-up financial tools with zero instructions, at exactly the age when marketers are circling hardest.
Why I’m telling you not to bail her out
May I offer some advice you didn’t ask for? Don’t bail her out. Not even if you can easily afford it.
Unless your daughter feels the actual weight of what she owes, she won’t learn a thing from it. I’ve been doing this a long time, and I can tell you the pattern: rescue a kid from credit card debt once, and it’s almost never a one-time thing. It becomes the plan.
The one question to ask yourself first
Before you reach for your checkbook, ask yourself the one question that matters: can I actually afford it? Not “can I scrape it together.” Afford it as in, my own retirement is funded, my Contingency Fund is intact, and this wouldn’t set me back a step.
If the answer’s no, that’s the end of the conversation. Social Security isn’t going to stretch the way it did for your parents, and nobody else is coming to fund your retirement for you. Your daughter has decades to recover from a $2,500 mistake. You have a lot fewer to recover from raiding your own future to fix it.
What to do instead of writing a check
1. Stay off the account.
Let her call the issuer herself and work out a payment plan or hardship program. That call is part of the lesson.
2. Point her to NFCC.org.
The National Foundation for Credit Counseling has been matching people with certified, nonprofit credit counselors since 1951. Think of it as a personal trainer for her finances… someone in her corner who isn’t you, and isn’t a debt-settlement company charging her to make it “disappear.”
3. Let the consequences land.
That might mean picking up more work hours, or even a semester off. If she’s serious about school, she’ll find her way back to it.
4. Show up emotionally, not financially.
She needs a soft place to land, not a rescue.
5. Have the bigger conversation once the dust settles.
Not about this one card, but about how money actually works. That’s the conversation that sticks.
One more thing
Watching your daughter dig herself out of this on her own is going to teach her more about money than anything you or I could say. That’s not a consolation prize. That’s the whole point.
If this hits close to home, my book Raising Financially Confident Kids digs into exactly this: how easy credit and a culture that’s chummy with debt set kids up to fail, and what you can do at every age to change that before the collection calls start.
And if your daughter’s willing to read anything right now, hand her The Financially Confident Woman. Being in debt isn’t a money problem… it’s an attitude problem, and that’s a truer thing to hand a 20-year-old than a spreadsheet.


Question: Would you bail your kid out of credit card debt, or make them dig their own way out? Share your thoughts in the comments below.
EverydayCheapskate™ is reader-supported. We participate in the Amazon Services LLC Associates Program and other affiliate advertising programs, designed to provide a means for us to earn from qualifying purchases, at no cost to you.

The Secret to Ribs That Really Do Fall Off the Bone
If burgers are your go-to at every cookout because ribs feel like too big a risk, I’ve got news for you. Here’s the method that finally gets you off burger duty. No rib expertise required.

Ribs had a bad rap in my book for years. Then I had them at Houston’s, a Hillstone Restaurant Group spot, and that changed everything. If you’ve got one near you and you’ve eaten there, you already know what I’m talking about. Fall-off-the-bone tender, cooked exactly right, ridiculously good. Not everyone has a Houston’s nearby, but trust me on this one. Those ribs set the bar.
Ribs have a reputation, and it’s earned. Fall-off-the-bone perfection on one end, sad rubbery strips of regret on the other, and you never quite know which one you’re going to get. So you play it safe. Burgers again. Everybody’s happy, nobody’s impressed.
Here’s the thing nobody tells you: the kind of ribs that made me a Houston’s regular? Most of that magic happens in the oven, not on the grill. The grill just finishes the job and makes it pretty. Once I figured that out, I could finally get close to that same result at home, and ribs went from “special occasion, maybe” to “sure, why not, it’s Tuesday.”
This is the method I use every single time. Low, slow oven first. Quick, hot grill second. No basting every twenty minutes, no standing guard over flare-ups, no thermometer anxiety. Just ribs that turn out right, even for people who’ve never done this before.
What you’ll need
Skip straight to the recipe card at the bottom for exact amounts. Here’s what actually matters about each ingredient, and what to do if your pantry doesn’t cooperate.
Baby back ribs
These are the smaller, more tender cut, and they’re what makes this whole “easy” claim possible. Spareribs will work in a pinch, but they’re bigger, fattier, and need more time in the oven, so don’t swap them in without adjusting your bake time.
The dry rub (salt, pepper, garlic powder)
This is deliberately plain, and that’s the point. You want the meat to taste like meat, not like a spice cabinet exploded. If you’re out of garlic powder, onion powder works. Want a little heat? A pinch of cayenne or smoked paprika won’t hurt anything.
Barbecue sauce
Use the one you already love. Mine is Montgomery Inn, the Cincinnati sauce that’s been famous for ribs since forever, made from a recipe so guarded that only the owner’s family knows what’s actually in it. I don’t know the secret. I just know it’s on Amazon, it ships, and I keep a stash in my pantry at all times. Bottled is completely fine. This isn’t the hill to die on.
Step-by-step

Start by removing the membrane
That thin, papery layer on the back of the rack? It has to go, and this is the step people skip and then regret. Leave it on and it turns into a chewy, gristly barrier between you and tender meat. Slide a knife under one edge, grab it with a paper towel for grip, and peel it off in one motion if you can. It’s a little unpleasant. It takes ten seconds. Do it anyway.
Season generously, then walk away
Rub the salt, pepper, and garlic powder mixture into the meaty side and don’t be shy about it. This isn’t a delicate French sauce where restraint matters. More rub means more flavor once that low oven bake pulls the seasoning into the meat. Cutting the racks in half just makes them easier to handle in the pan, so do that if your roasting pan is on the smaller side.
The oven is doing the real work here
Three hours, covered tightly with foil, at 300°F. This is the part that scares people off ribs entirely, because it feels like it should be harder than this. It isn’t. The low, slow heat breaks down the connective tissue until the meat practically falls apart on its own, and the foil traps in the moisture so you don’t end up with dry, sad ribs. Set a timer and go live your life. Nothing to baste, nothing to check.
Let them rest before the grill
Give the ribs fifteen minutes uncovered once they come out of the oven, and drain off the liquid that’s collected in the pan. This matters more than it sounds like it should. Ribs straight from the oven are fragile and steaming hot, and they’ll actually hold together better on the grill once they’ve had a minute to firm up.
The grill is for flavor, not for cooking
By the time these hit the grill, they’re already done. You’re not cooking raw meat anymore, you’re building char and caramelizing sauce on ribs that are already tender. That’s why medium-high heat and just ten to twenty minutes total gets the job done. Baste generously, flip, baste again, and watch for that sauce to really cling and start to darken at the edges. That’s your sign to pull them off.
The payoff
This is the recipe that finally gets you off burger duty. Serve it up with coleslaw, baked beans, and grilled peaches, and you’ve got a full summer spread that looks like it took all day, when really, the oven did most of the work while you did whatever you wanted with your afternoon.
Try it once, and I promise you’ll wonder why you ever thought ribs were complicated.

Easy Baby Back Ribs
Equipment
- Large roasting pan
- Aluminum foil
- Grill
- Basting brush
- Paper towels (for membrane removal)
Ingredients
- 5 ½ lbs baby back pork ribs 3 slabs
- 2 tsp salt
- 2 tsp garlic powder
- 1 ½ tsp ground black pepper
- 1 18-oz bottle favorite barbecue sauce
Instructions
- Preheat oven to 300°F.
- Remove the thin membrane from the back of the ribs. Slide a knife under one edge, then grip it with a paper towel and pull it off.
- Combine the salt, garlic powder, and pepper. Rub the mixture all over the meaty side of the ribs. Cut racks in half, if desired, for easier handling.
- Arrange the ribs in a large roasting pan and cover tightly with foil. Bake for 3 hours, or until very tender.
- Uncover and let cool for 15 minutes, then drain off the liquid in the pan.
- Preheat the grill to medium-high heat (about 350°F).
- Rub the grill rack with oil and place the ribs meaty side up. Generously baste the meaty side only with barbecue sauce.
- Grill, covered with the grill lid, for 10 minutes.
- Baste again and grill 5 to 10 minutes longer, or until the sauce clings to the ribs and starts to caramelize.
- Serve immediately and enjoy.
Notes
Nutrition
Question: What’s the one dish you keep avoiding because you’re scared of ruining it? Share in the comments below.
EverydayCheapskate™ is reader-supported. We participate in the Amazon Services LLC Associates Program and other affiliate advertising programs, designed to provide a means for us to earn from qualifying purchases, at no cost to you.

News You Can Use • September 2026
Hello, September! The days are getting shorter, the mornings a little crisper, and pumpkin spice is officially everywhere. But there’s plenty more going on than seasonal lattes and changing leaves. This month, we’re looking beneath a cemetery, into the earth’s shifting crust, and all the way to the French countryside. Strange, surprising and usefuljust the way I like my news.

Why Fun Is Getting Pricier… and We’re Still Paying
Having fun is getting more expensive, but Americans aren’t exactly putting their hobbies on ice. Spending on everything from crafts and camping gear to video games is climbing, even as travel gets pricier. One interesting twist: some people may be swapping expensive outings for hobbies they can enjoy closer to home.
Read more →
This Pumpkin Weighs More Than a Small Car
Forget the pumpkin on your front porch. Farmers at Altoona’s annual Ginormous Pumpkin Festival brought out pumpkins weighing more than 2,000 pounds, with the winning gourd tipping the scales at a whopping 2,212 pounds. But the real attraction may be what happens after the judging: a giant pumpkin drop that turns a simple fall tradition into a community-wide celebration.
Read more →
The $1.46 Million Retirement Number Isn’t What You Think
The amount Americans say they need to retire comfortably has jumped to $1.46 million, but that number can make retirement planning feel more intimidating than it needs to be. A better place to start is with what you actually expect to spend, where your income will come from and how long your money may need to last.
Read more →
Look Up: The Harvest Moon Has Company
This weekend’s full moon comes with a bonus: Saturn will appear nearby, giving sky-watchers a two-for-one celestial show. The moon will look especially striking near the horizon, where Earth’s atmosphere can give it that familiar golden-orange glow. And if clouds get in the way, you’ll still have a few good viewing opportunities.
Read more →
The Estate-Planning Choice That Can Split a Family
Want to leave your family an inheritance without leaving them a mess? A study of 640 contested trust cases found one arrangement especially prone to conflict: putting one child in charge of a trust while siblings also stand to benefit. The cases also show why clear communication, independent oversight and mediation can matter just as much as the legal documents themselves.
Read more →
The $10 Garden Trick That Can Cool Your House
What if part of your summer cooling system could grow in the garden? Strategically placed plants can shade hot walls, release moisture that cools the surrounding air and even reduce wall temperatures dramatically. The trick is choosing the right plants and giving them a little breathing room from the house. Plant now, enjoy the payoff next summer.
Read more →
The Fed Just Raised Rates: What Retirees Need to Know
A higher Fed rate can be a mixed bag for retirees. Savings accounts, money market funds and short-term CDs could pay more, while credit cards and HELOCs may get more expensive. Mortgage rates probably won’t move much because they’re driven by different factors. Where your money lives matters more than the headline rate hike.
Read more →
Your Brain May Actually Be Two Brains Working as One
For centuries, we’ve treated the brain as one unified organ. New research suggests that’s not quite right: the front and back of the brain develop from two completely different sets of cells that evolved separately hundreds of millions of years ago. The discovery could finally help scientists grow hard-to-study hindbrain cells in the lab, opening new ways to investigate conditions such as ALS and SMA.
Read more →
The Shingles Vaccine May Have a Surprising Heart Benefit
The shingles vaccine is designed to prevent a painful viral infection, but researchers are finding that its benefits may extend beyond shingles. In a study of more than 72,000 adults age 60 and older, people who received Shingrix had a lower risk of several cardiovascular problems than those who received the older shingles vaccine. The biggest differences showed up with heart disease and heart failure.
Read more →
Apple’s New $2,000 iPhone Has a Big Fold
Apple has finally gone foldable, introducing the iPhone Duo with a 7.6-inch inner display that opens like a book and a smaller screen on the outside. It’s packed with clever touches, including a hinge designed to minimize the crease, two-app multitasking and cameras that can capture from both sides. The catch? This pocket-sized phone starts at a very un-pocket-sized $1,999.
Read more →
The Surprising Time Music Helps Your Brain Most
Had a rough day? Your favorite music may do more than put you in a better mood. In a study of 120 adults, relaxing music helped people recover from stress faster than soothing water sounds, with quicker improvements in heart rate, sweating, mood and cortisol levels. The most interesting part? When you listen may matter as much as what you listen to.
Read more →
Your Personality May Be in Your DNA
Are you naturally outgoing, organized, curious or prone to worry? Scientists have identified more than 1,200 genetic variants linked to the Big Five personality traits, and some of those same genetic patterns are connected to health, careers, income and even sleep habits. But don’t blame everything on your DNA. Your environment still has plenty to say about who you become.
Read more →
Millions of Bees Are Living Under This Cemetery
What looks like an ordinary cemetery in upstate New York is hiding something extraordinary beneath the grass: an estimated 5.5 million wild mining bees living in underground burrows. These solitary bees don’t make honey or live in hives, but they may be doing an important job nearby… pollinating apple trees, sometimes more effectively than honeybees. And the discovery raises a fascinating question: How many other hidden bee communities are quietly thriving right under our feet?
Read more →
Scientists May Be Able to Pinpoint Where the Next Big Earthquake Hits
Scientists have developed a new method that could identify where major earthquakes are most likely to happen by measuring tiny movements in Earth’s surface and spotting areas where tectonic stress is building. The method successfully identified the section of the Kamchatka fault that ruptured in the massive 2025 earthquake but there’s a big catch: it can’t say when the earthquake will happen. Still, knowing where danger is accumulating could give communities a valuable head start on long-term preparedness.
Read more →
The Cheese Crisis: Why France’s Most Beloved Cheeses Are in Trouble
France’s famous cheeses depend on something surprisingly fragile: grass. Repeated heat waves and drought are leaving pastures parched, stressing dairy cows, cutting milk production and forcing cheesemakers to make difficult choices about how they feed their animals. For cheeses with strict rules about where and how they’re made, changing the cows’ diet isn’t a simple fix and it could even change the flavor.
Read more →
Check back regularly for updates! We’ll be adding new top news articles throughout September 2026.

Homemade Pumpkin Spice Latte Recipe (Cheaper, Better, Faster)
Starbucks rolled out pumpkin spice before Labor Day again, and a grande will run you $6.75 this year. I got tired of paying for it, so I started making my own… real pumpkin, a spice mix I keep stocked all fall, and a whisk. Twenty minutes, most of it hands-off, and honestly? Better than what’s in the cup with your name spelled wrong on it.

Is it just me, or does Starbucks roll out pumpkin spice earlier every single year? It’s not even Labor Day and my local store already looks like a Hallmark movie set.
I fall for it every time. Not the actual latte, mind you. Just the smell of it wafting through the drive-thru while I’m sitting there doing math I don’t want to do. A grande Pumpkin Spice Latte will run you about $6.75 this year. For coffee, milk, and a few spices you probably already own.
So a few years back I started making it myself. Turns out the “secret” to a great PSL isn’t a secret at all. It’s a spice blend, some real pumpkin, and a whisk. That’s it. No barista required, no espresso machine required, no standing behind twelve people who all ordered something with seventeen modifications.
Why bother making your own
Here’s what nobody tells you about pumpkin spice: there’s no actual pumpkin in it. It’s cinnamon, ginger, allspice, cloves, nutmeg, and mace, doing all the heavy lifting while pumpkin gets the credit. Real pumpkin is what you add separately, and it’s the one ingredient most homemade versions skip. Skip it and you get a fine spiced latte. Add it and you get the real thing.
Once I figured that out, the coffee shop version stopped feeling special. It just felt like I was paying $75 for something I could make better, in my own kitchen, in about the time it takes to microwave a bowl of milk.
What you’ll need
- 2 tablespoons canned pumpkin puree (not pumpkin pie filling… more on that below)
- ¼ teaspoon homemade pumpkin pie spice, plus a little extra for garnish
- A pinch of freshly ground black pepper
- 2 tablespoons white sugar (Splenda or Stevia work fine too)
- 1 cup half and half (whole, reduced-fat, or skim milk all work)
- ½ teaspoon pure vanilla extract
- ¼ cup hot espresso or strong brewed coffee
- Sweetened whipped cream, for the top
That pepper is not a typo. A single pinch does something wonderful to pumpkin spice. It wakes the other flavors up instead of letting them sit there being polite. Leave it out if you must, but try it once before you decide.
How to make it
In a microwave-safe bowl, combine the half and half, pumpkin, sugar, spice mix, pepper, and vanilla. Cover loosely, venting a small spot for steam.
Microwave until hot, about 1 to 2 minutes.
Whisk hard for 30 seconds, until it’s foamy. This is the whole trick to that coffee-shop texture, so don’t shortcut it.
Pour your hot espresso or strong coffee into a big mug, then pour the foamed milk right on top.
Finish with whipped cream and a dusting of spice. Done.
Twenty minutes, most of it hands-off, and you’re drinking your PSL before the drive-thru line would’ve even moved.
Homemade pumpkin pie spice mix

Store-bought pumpkin pie spice is one of those small purchases that adds up for no good reason, especially since you likely have every ingredient in your spice cabinet right now.
- 1 tablespoon ground cinnamon
- 2 teaspoons ground ginger
- ½ teaspoon allspice
- ½ teaspoon ground cloves
- ½ teaspoon ground mace (or another ½ teaspoon nutmeg if you don’t have mace)
- ½ teaspoon ground nutmeg
Stir it all together and store it in an airtight container. It’ll keep a full year, and this recipe multiplies beautifully, so double or triple it once and you’re set for the whole season. Use it for lattes, sure, but also oatmeal, roasted sweet potatoes, and any baking recipe that could use a little fall.
A few things that’ll make it better

- Use real pumpkin puree, not pumpkin pie filling. The filling comes pre-sweetened and pre-spiced, which throws off your ratios and makes the whole thing taste muddy instead of layered.
- If half and half feels too rich, swap in whatever milk you keep on hand. Just know the latte will be thinner and less luxurious the lighter you go. That’s a trade-off, not a failure.
- Whisk like you mean it. The foam is doing real work here, texture-wise, so don’t just stir.
- And don’t stop at whipped cream. A drizzle of caramel or an extra sprinkle of spice on top turns this from “good homemade coffee” into “why would I ever pay for this again.”
Common questions
Can I make this without an espresso machine?
Yes. Strong brewed coffee works just fine.
How long does homemade pumpkin pie spice last?
A year, stored airtight in a cool spot.
Can I use non-dairy milk?
You can. Almond and soy both work, though the texture and richness will shift a bit depending on what you use.
What else is the spice mix good for?
Oatmeal, baking, roasted vegetables... anywhere you'd want that warm fall flavor.

Homemade Pumpkin Spice Latte
Ingredients
- 2 tablespoons canned pumpkin puree not pumpkin pie mix
- ¼ teaspoon Pumpkin Pie Spice see Notes
- 2 tablespoons white granulated sugar or substitute with Splenda or Stevia
- Pinch of ground black pepper
- ½ teaspoon pure vanilla extract
- 1 cup half and half see Notes
- ¼ cup hot espresso or strong brewed coffee
- Sweetened whipped cream for topping
Instructions
- In a medium microwave-safe bowl, combine the half and half, pumpkin puree, sugar, pumpkin pie spice, black pepper, and vanilla extract. Cover the bowl with plastic wrap, leaving a small vent.
- Microwave the mixture until the half and half is hot, about 1 to 2 minutes.
- Whisk the heated mixture vigorously until it becomes foamy, approximately 30 seconds.
- Pour the hot espresso or coffee into a large mug. Add the foamed mixture, stirring gently to combine.
- Top with a dollop of sweetened whipped cream and a sprinkle of pumpkin pie spice.
- Enjoy your homemade Pumpkin Spice Latte!
Notes
Nutrition
EverydayCheapskate™ is reader-supported. We participate in the Amazon Services LLC Associates Program and other affiliate advertising programs, designed to provide a means for us to earn from qualifying purchases, at no cost to you.

3 Homemade Dog Treats Recipes Your Dog Will Love Most
Store-bought dog treats can be surprisingly expensive. Ten dollars for a bag of dog treats that’s gone in a week. Fifteen for the “premium” bag that lasts maybe two. And your dog doesn’t care one bit that it said premium on the label. If you’re handing out treats every day, that little expense can add up to a whole lot over the course of a year.

Here’s the fix: you can make simple, dog-safe treats at home with stuff that’s probably already in your kitchen. These three recipes are cheap, easy, and freeze beautifully. Make a batch now, and you’ll have treats on hand the next time your dog gives you that look.
And let’s be honest: Dogs don’t care if their treats look like tiny works of art. They care about taste, texture and whether the person holding the treat is about to hand it over.
All three recipes below check the same boxes: simple, affordable, made with ingredients you already recognize, freezer-friendly, easy to portion. No special equipment. Just a baking sheet and a little patience.
Safety first… read this before you start
Dogs can eat a lot of the same simple foods we do. But a few common kitchen ingredients have no business in a dog treat, ever.
Skip these completely:
- Xylitol (sometimes labeled birch sugar)
- Chocolate
- Coffee or anything caffeinated
- Grapes and raisins
- Onions
- Garlic
- Chives
- Leeks
- Macadamia nuts
- Alcohol, and
- Raw yeast dough.
Go easy on anything heavily salted, sugary, or fatty, too.
Using peanut butter? Check the label every single time. Xylitol shows up in “healthier” peanut butters more than you’d think, and it can cause a rapid and potentially life-threatening drop in a dog’s blood sugar.
And never, ever give a dog a cooked bone. They can splinter and cause serious injury or intestinal blockage.
These recipes are intended as occasional treats, not as a replacement for a complete and balanced dog food. If your dog has diabetes, pancreatitis, kidney disease, food allergies, is overweight or eats a prescription diet, check with your veterinarian before adding homemade treats.
Recipe 1: Peanut butter oat bites

The all-purpose treat. Simple, chewy and a favorite with many dogs.
Ingredients
- 1 cup rolled oats
- 1/4 cup natural peanut butter (no xylitol)
- 1 ripe banana, mashed
- 1 to 2 tablespoons water, as needed
Instructions
Preheat your oven to 350°F and line a baking sheet with parchment.
Mix the oats, peanut butter, and mashed banana in a bowl. If the dough feels too dry to hold together, add water a tablespoon at a time until it’s soft and workable.
Roll into balls about a teaspoon each (dog-treat size, not cookie size.) Flatten slightly and set them on the baking sheet.
Bake 12 to 15 minutes, until the edges turn lightly golden and the treats have set. Let them cool completely before you serve or store them.
Yield: About 30 small treats
Calories: Roughly 25 per treat, depending on your banana and peanut butter
Storage: Fridge, airtight, up to a week. Freezer, up to 3 months for best quality.
Freeze them in a single layer on a sheet pan first, then dump them into a freezer bag. They won’t clump together into one giant treat popsicle, and you can grab exactly as many as you need without a wrestling match.
Recipe 2: Sweet potato chews

The one-ingredient wonder. Basically like homemade jerky for dogs, minus the ingredients you can’t pronounce.
Ingredients
- 2 medium sweet potatoes
That’s the whole list. I told you it was simple.
Instructions
Preheat your oven to 250°F and line two baking sheets with parchment.
Wash and peel the sweet potatoes, then slice lengthwise into strips about 1/4 inch thick. Rounds work fine too, if that’s easier for you.
Lay the pieces in a single layer, leaving a little breathing room between them.
Bake 2 1/2 to 3 hours, flipping once halfway through, until the pieces are dried out and a little leathery. Want a firmer chew? Keep going until they feel dry all the way through. Cool completely before storing.
Yield: 30 to 40 pieces, depending on the size of your potatoes
Storage: Fridge, airtight, up to a week. Freezer, up to 3 months for best quality.
Sweet potatoes bring fiber and other good stuff to the table, and most dogs do fine with them. First time trying it with your dog? Start with one small piece and watch how he does before you go all in.
Cut these to a size that fits your dog, and stick around while he eats them. If your dog is a gulper rather than a chewer, go smaller. Big leathery strips and gulpers are not a good combination.
Keep these in the freezer. Pull out a few, let them thaw, done.
Recipe 3: Frozen yogurt paw pops

The summer treat and hot-weather favorite. Great for a warm afternoon or any dog who likes a lickable snack.
Ingredients
- 2 cups plain, unsweetened Greek yogurt
- 1/4 cup natural peanut butter (no xylitol)
- 1 ripe banana
- 1/4 cup blueberries, optional
Pick plain yogurt with no added sugar or sweeteners of any kind. If your dog doesn’t do well with dairy, this one’s not for him.
Instructions
Blend the yogurt, peanut butter, and banana until smooth. Tossing in blueberries? Pulse them in briefly, or fold them in whole for a little texture.
Spoon the mixture into silicone molds, ice cube trays, or small silicone cupcake liners. Freeze at least 4 hours, or overnight if you can wait that long.
Pop them out of the molds and store in a labeled freezer bag or airtight container.
Yield: About 24 small pops, depending on your mold
Storage: Freezer, up to 3 months for best quality.
These are a treat, not a water substitute. Don’t let a hot dog fill up on frozen yogurt instead of drinking. If your dog gulps his food, let the pop soften a minute before handing it over, and keep an eye on him while he enjoys it.
A note about portions: These treats contain yogurt, peanut butter and banana, so their calories can add up quickly. The appropriate serving depends on the size of the mold and the individual dog’s calorie needs.
How many homemade treats can your dog actually have?
Veterinary nutrition guidance generally recommends keeping treats and other extras to no more than about 10% of your dog’s daily calories. The remaining 90% should come from a complete and balanced diet.
Because homemade treats vary so much in size, don’t count them by the piece. Count them by the calorie. For example, if your dog is allowed 50 calories a day in treats, two 25-calorie Peanut Butter Oat Bites would use that entire allowance.
And remember: smaller treats aren’t a disappointment to a dog. In fact, when you’re rewarding behavior, the frequency of the reward often matters more than the size.
If you’re unsure how many calories your dog should eat each day, or your dog needs to lose weight, ask your veterinarian for an appropriate daily calorie target.
Bonus: Frozen broth cubes
Want an even easier summer treat? Freeze small amounts of dog-safe, low-sodium broth in ice cube trays. Read the label carefully. Choose broth with no onion, garlic or added seasonings. Remember that ingredients such as onion and garlic can be harmful to dogs.
If you make your own broth, use plain meat and dog-safe vegetables, avoid onions and garlic, and remove every bone before serving. After cooking, chill the broth and skim off excess fat before freezing.
For dogs that tend to gulp, let a frozen cube soften slightly before serving.
These little cubes add some extra moisture to a hot day and give your dog something to look forward to. Just remember: they’re a treat, though, not a substitute for fresh drinking water.
Storage tips for homemade dog treats
Homemade treats skip the preservatives that make store-bought bags last forever on a shelf. That means you’ve got to treat them like the fresh food they are.
- Refrigerator: Store softer homemade treats in airtight containers and use within about a week.
- Freezer: For best quality, freeze treats in airtight freezer bags or containers and use within about 3 months.
- Label everything: Write the recipe and date on the freezer bag. Future-you will appreciate not having to play “What on earth is this?” with the contents of the freezer.
For convenience, freeze treats in small portions. That way you can take out a few at a time instead of repeatedly opening and closing one large container.
If a treat develops an unusual smell, mold, discoloration or other signs of spoilage, throw it out. When in doubt, don’t feed it to your dog.
Getting started
Never made a dog treat before? Start with the peanut butter oat bites. They’re cheap, they’re fast, and they come together quick enough that you won’t have time to talk yourself out of it.
Once you see how simple it is, and how excited your dog gets when you open the freezer, you may wonder why you ever paid $15 for a bag of treats.
But here’s the real trick: make them small. Your dog doesn’t need a giant cookie to know he’s loved. Sometimes one little bite is enough to make his whole day.
Question: What’s your dog’s go-to homemade treat? Tell me the recipe, the secret ingredient, or the story behind it in the comments.
EverydayCheapskate™ is reader-supported. We participate in the Amazon Services LLC Associates Program and other affiliate advertising programs, designed to provide a means for us to earn from qualifying purchases, at no cost to you.

Homemade Sloppy Joe Mix: Skip the Store-Bought Packets
Turn over a packet of Sloppy Joe seasoning and read the ingredient list. Go ahead, I’ll wait. Dried onion, salt, a little cornstarch to thicken things up, some garlic and mustard. That’s the whole “secret recipe.” I noticed that years ago and thought, well, I have all of this in my pantry already. So I mixed up a batch, and I haven’t bought a packet since.

One packet makes one dinner. This recipe makes eight packets’ worth in the same five minutes it’d take you to open one. It sits in an airtight container until you need it, which means no more digging through the seasoning aisle at five o’clock wondering if you have time to make Sloppy Joes tonight. You already do.
Here’s how I make it, and how I use it, so dinner shows up in fifteen minutes flat.
What you’ll need
This mix is naturally gluten-free as written, but double-check your specific brands of cornstarch and chili powder, since cross-contamination sneaks in more than you’d think.
Dried minced onion
Dried minced onion is your flavor base. It’s what makes this taste like Sloppy Joe and not just spiced ketchup. If you’re out, dried onion flakes work in a pinch, though minced gives you a better texture.
Dried green bell pepper pieces
Dried green bell pepper pieces add that classic Sloppy Joe bite. No dried pepper on hand? Leave it out entirely. The mix still works. Or toss a small handful of fresh diced green pepper in with your ground beef while it browns.
Sea salt
Sea salt is doing exactly what it sounds like. Regular table salt is fine here. Just don’t use a salt substitute unless you like surprises.
Cornstarch
Cornstarch is the thickener, the thing that turns “meat soup” into “Sloppy Joe filling that stays on the bun.” Arrowroot powder or flour will thicken in a pinch, though I’d stick with cornstarch if you have it. It gives the cleanest result.
Minced garlic
Minced garlic brings the punch that plain garlic powder can’t quite deliver. If all you have is garlic powder, use it. Your Sloppy Joe won’t file a complaint.
Dry mustard
Dry mustard is the ingredient people forget and then wonder why their homemade version tastes flat. It’s what gives Sloppy Joe that little tang under the sweetness. Don’t skip this one if you can help it.
Celery seed
Celery seed is subtle, almost sneaky. You won’t taste it directly, but you’ll miss it if it’s gone. No substitute really replicates it, so if you don’t have it, just move on without.
Chili powder
Chili powder brings warmth, not heat. If your family likes a kick, this is your spot to add a pinch of cayenne or red pepper flakes when you’re cooking, not when you’re mixing.
Mix it once, use it for months
Grab a bowl and dump everything in. Onion, pepper, salt, cornstarch, garlic, mustard, celery seed, chili powder. Stir until it’s evenly distributed. That’s it. That’s the whole “recipe” part of this recipe.
Store it in an airtight container somewhere cool and dry. I use an old spice jar, because I already have forty of them and no self-control at the container store. This batch will hold for months, easy.
Know your ratio before you’re standing at the stove
Three tablespoons of this mix equals one store-bought packet. Write that on the container if you have to.
This batch makes about eight packets’ worth. That’s eight dinners from five minutes of stirring. I don’t know many things in life with a better return on effort.
Brown your beef like you mean it

Brown one pound of lean ground beef in a large skillet, then drain the fat. Don’t skip the draining. Nobody wants a greasy Sloppy Joe, and greasy Sloppy Joe is how you end up with a shirt you have to throw away.
Add 3 tablespoons of your mix, along with 1/2 cup water and 1 cup ketchup or crushed tomatoes. I go back and forth between the two depending on my mood and what’s already open in the fridge. Ketchup gives you that classic sweet-tangy diner flavor. Crushed tomatoes lean a little more grown-up. Both are right.
Bring everything to a boil, then reduce the heat, cover the pan, and simmer for 5 to 10 minutes until it thickens up. This is the part where you set the table, or ignore the table and just hand everyone a plate. No judgment here.
The part where I tell you this is a bigger deal than it sounds
I know a homemade seasoning mix isn’t exactly breaking news. But swap this in for one purchased habit, and you start noticing how many of those little “convenience” purchases add up over a year.
A three-dollar seasoning packet isn’t going to sink anybody. A dozen of them a month, times every “just this one thing” purchase in your cart? That’ll sink you slow, and you won’t even see it happening.
Make the mix. Keep it in your pantry. Next time a Sloppy Joe craving hits, you’ll already be ahead of it.

Homemade Sloppy Joe Mix
Equipment
- mixing bowl
- Airtight container or jar
Ingredients
For the seasoning mix:
- 1 cup dried minced onion
- 3 tablespoons dried green pepper pieces
- 4 teaspoons sea salt
- 3 tablespoons cornstarch
- 4 teaspoons minced garlic
- 2 teaspoons dry mustard
- 2 teaspoons celery seed
- 2 teaspoons chili powder
To make one dinner:
- 1 pound lean ground beef
- 3 tablespoons Sloppy Joe Mix
- 1/2 cup water
- 1 cup ketchup or crushed tomatoes
Instructions
Make the mix:
- Combine dried minced onion, dried green pepper, sea salt, cornstarch, minced garlic, dry mustard, celery seed, and chili powder in a bowl. Stir until evenly combined.
- Store in an airtight container in a cool, dry place. Keeps for months.
Use the mix:
- Brown ground beef in a large skillet over medium heat. Drain the fat.
- Add 3 tablespoons of Sloppy Joe Mix, water, and ketchup or crushed tomatoes. Stir to combine.
- Bring to a boil, then reduce heat, cover, and simmer 5 to 10 minutes, until thickened.
- Serve on buns.
Notes
Nutrition
Question: Ketchup or crushed tomatoes for your Sloppy Joes? Which side are you on? Share in the comments below.
EverydayCheapskate™ is reader-supported. We participate in the Amazon Services LLC Associates Program and other affiliate advertising programs, designed to provide a means for us to earn from qualifying purchases, at no cost to you.

10 Fall Yard Tasks to Complete Before First Frost Hits
Every fall the yard hands out a small checklist that most homeowners skip. And every spring the yard hands out the bill. Dead patches in the lawn. A split garden hose that has to be replaced. Perennials that didn’t come back. Pavers heaved by frost. Almost all of it preventable with a Saturday or two of specific fall tasks done in the right order. Here are the 10 that actually matter… the ones that save real money in the spring, plus the timing for each so nothing gets missed before the first frost hits.

Fall yard work is one of those household jobs that quietly determines what next spring looks like. Do it right and April arrives with a lawn that greens up fast, perennials that come back thicker, and outdoor equipment ready to go. Skip it and you spend April dealing with problems that would have been ten-minute fixes in October.
Below is the 10-task list, roughly in the order to do them as fall progresses toward first frost. In most northern climates that’s October to mid-November. In southern climates the same tasks shift to November-December.
1. Rake leaves in small batches (not one heroic weekend)
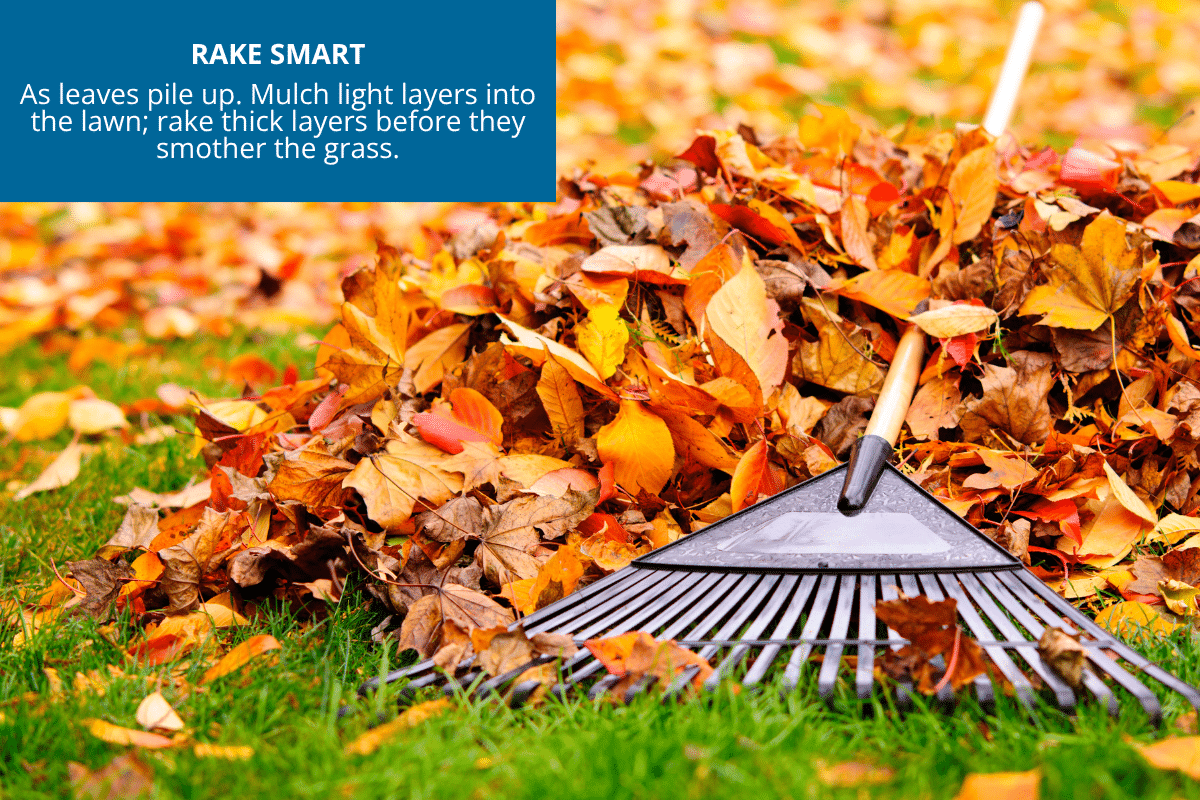
When: As leaves accumulate, especially before they become wet and matted.
You don’t have to wait until every tree has dropped its last leaf and then spend your entire Saturday wrestling with a mountain of them. A quick cleanup every week or two, or whenever the leaves start getting thick, can keep the job manageable.
Better yet, if the layer is light, mow right over it and let the mower chop the leaves into tiny pieces. Those bits break down and return nutrients to the soil, giving your lawn a little free fertilizer without hauling a single bag to the curb. If the leaves are thick enough to hide the grass, though, rake them up. A heavy layer can block sunlight and air and leave your lawn struggling underneath.
And here’s the part I wish someone had told me years ago: you don’t need to remove every leaf from your yard. Leave a light layer in garden beds and around trees and shrubs. It can provide natural protection for the soil and plant roots over winter.
2. Aerate and overseed the lawn

When: Early fall, September through mid-October, when your grass is actively growing and temperatures are cooling.
If your lawn feels hard and compacted underfoot or looks thin and patchy, fall is a good time to give it a fresh start. Aeration pulls small plugs of soil from the lawn, opening the ground so water, air and nutrients can reach the roots. Then overseeding fills in thin areas with new grass.
Rent a motorized aerator from a hardware store for a Saturday ($60 to $100), buy a manual aerator ($30-$50), or hire a service ($100 to $200 for an average yard). Immediately after aerating, spread grass seed suited to your climate and keep the soil consistently moist until the new seed is established.
One important detail: Cool-season grasses generally do best when overseeded in early fall. Warm-season grasses have a different schedule, so check the recommended timing for your grass type before you start.
Done at the right time, fall aeration and overseeding can leave you with thicker, healthier grass going into winter and a better-looking lawn next spring.
3. Give the lawn one last feeding
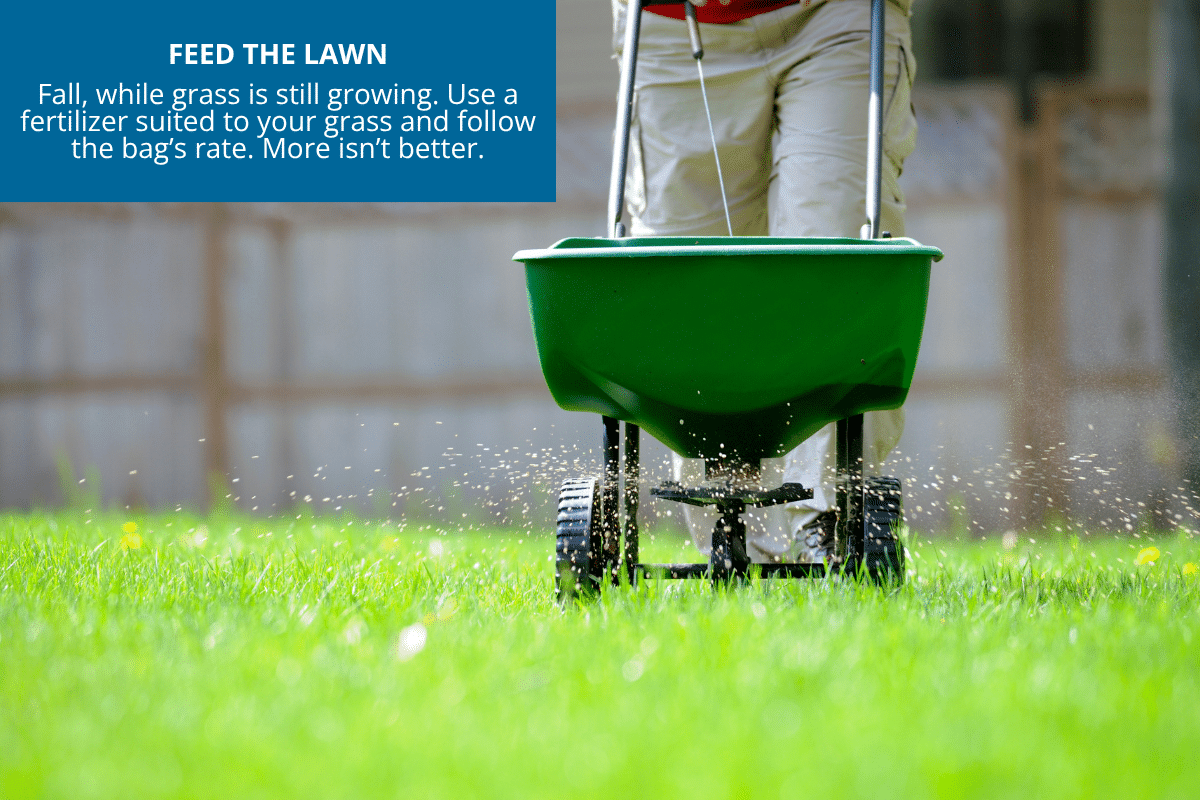
When: October into early November, before the ground freezes solid.
Fall is an important time to fertilize, especially for cool-season lawns. The grass can use those nutrients to build strong roots and store energy for winter, helping it come back healthier in spring.
Choose a fertilizer formulated for your type of grass and follow the application rate on the bag. More is not better. Overfertilizing can burn your lawn, waste money and send excess nutrients where they don’t belong.
If you’re not sure what your lawn needs, a local garden center or county extension office can help you choose the right product. A little homework here can save you from buying and spreading the wrong stuff.
4. Drain your hoses before you forget
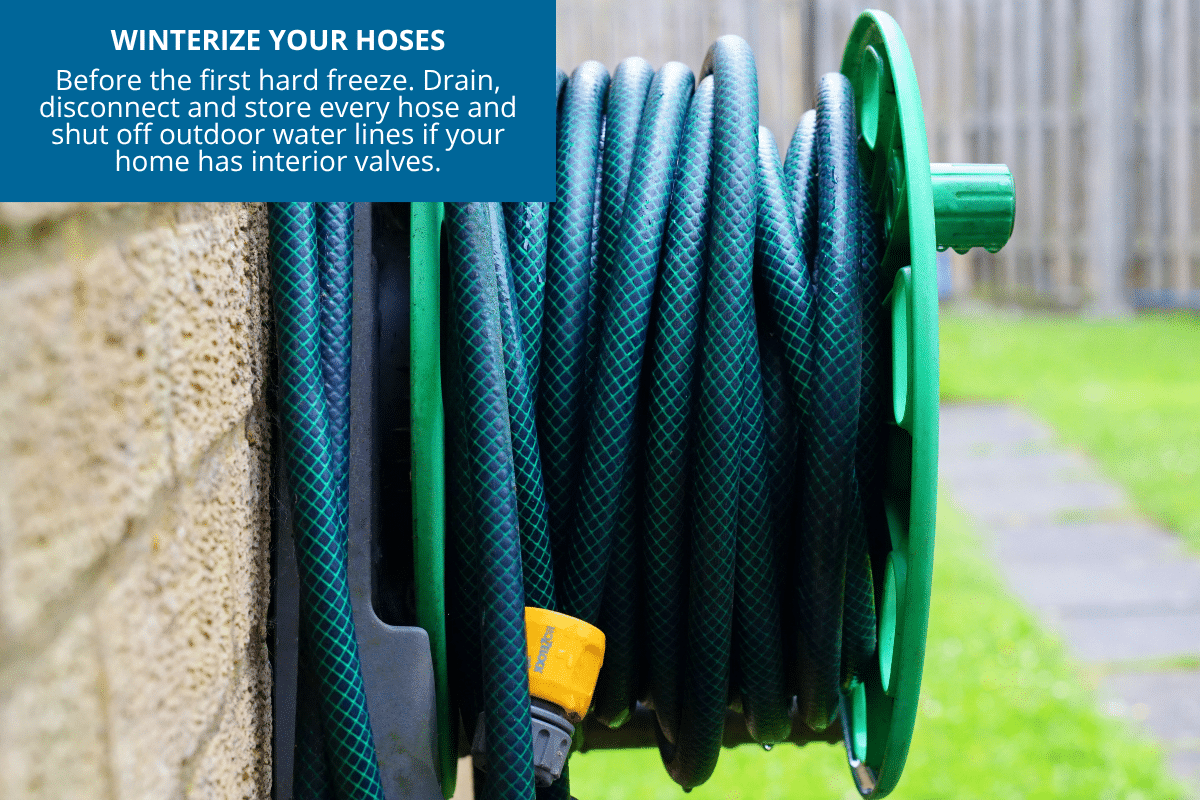
When: Before the first hard freeze. Don’t wait for the news to warn you.
Water left inside a garden hose can freeze, expand and damage the hose, and potentially put stress on the faucet and connected plumbing. It’s a cheap problem to prevent.
- Disconnect every hose from its spigot.
- Stretch hoses out so the water can drain completely.
- Remove nozzles and other attachments.
- Coil loosely and store hoses in a garage, shed or other protected space.
- If your home has interior shutoff valves for outdoor faucets, turn them off and drain the outdoor lines.
- Add insulated spigot covers for an extra layer of protection.
One small chore now can save you from a very expensive plumbing surprise later.
5. Clean and stash the outdoor furniture
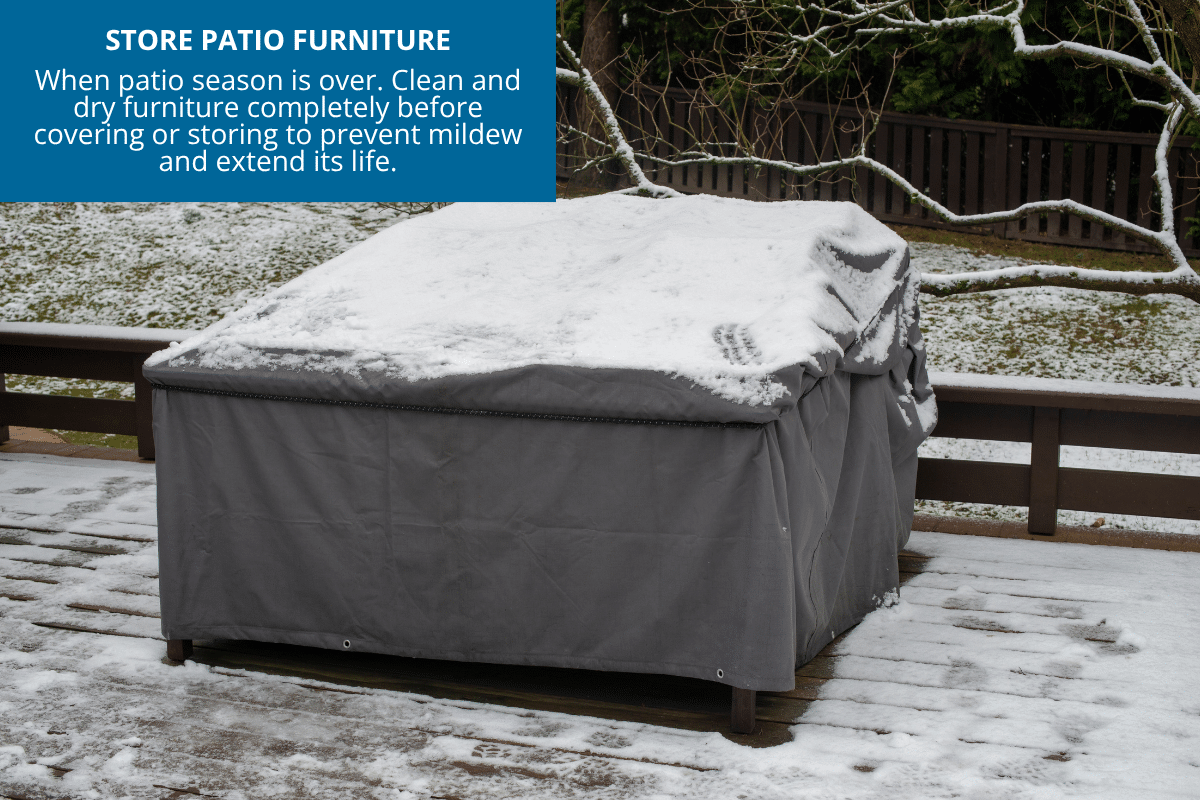
When: As soon as you’re done using it for the season.
Leave patio furniture out all winter and sun, rain, snow and moisture will shorten its life. A little cleanup now can buy you years before you need to replace anything.
Wash furniture with warm water, a squirt of dish soap and, for most materials, a splash of white vinegar. Scrub off dirt, pollen and mildew, rinse well, and let everything dry completely before covering or storing. Trust me on that last part. Skip it and you’re storing mildew, not furniture.
If you have room, move furniture into a garage, shed or basement. No space? Tuck it under a covered porch and use a weather-resistant cover. Bring cushions indoors or store them in a deck box if you can. They’re often the first thing to wear out.
6. Cut back the right perennials (and only the right ones)
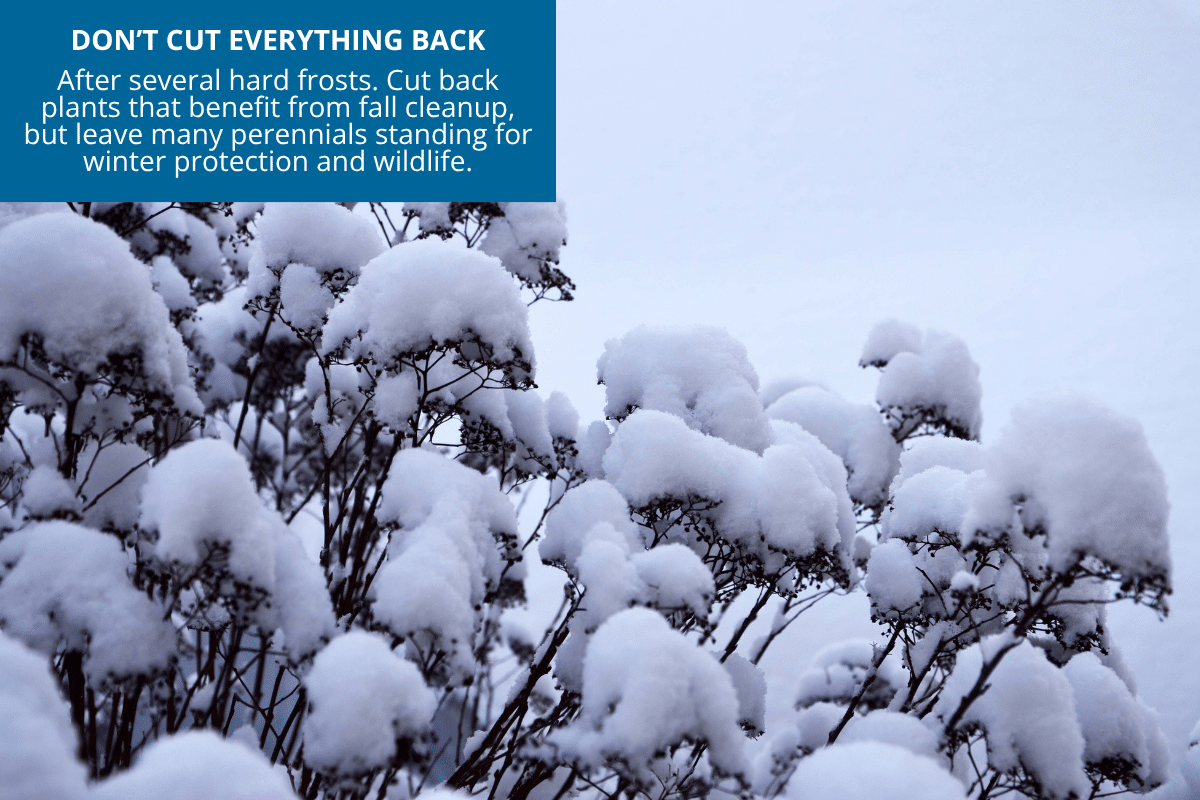
When: After several hard frosts.
Fall cleanup doesn’t mean cutting every perennial down to the ground. Some plants benefit from being cut back, while others are better left standing through winter to protect the crown, feed birds and give beneficial insects a place to shelter.
Peonies, hostas, daylilies and bearded iris are among the perennials that can benefit from a fall cleanup. On the other hand, coneflowers, black-eyed Susans and many ornamental grasses can stay right where they are until spring.
Always remove diseased or pest-infested foliage and dispose of it rather than adding it to your compost pile.
Not sure what stays and what goes? Check the needs of each plant before you start snipping. A few minutes of research can save you from accidentally cutting back something that would rather spend winter standing tall.
7. Divide overgrown perennials

When: Late summer to early fall, while there’s still time for new roots to establish before the ground freezes.
If a perennial has gotten crowded or the center has stopped blooming like it used to, it may be telling you it’s time for a little division. Dig it up, split the root ball into healthy sections, and replant. You get free plants, a healthier bed and often better blooms next year. That’s about as good a trade as gardening offers.
Good candidates include hostas, daylilies, bearded iris, ornamental grasses and other clump-forming perennials. Water the plant well a day or two before dividing, use a sharp spade or shovel, and give each new section plenty of roots. Water the divisions well after replanting and keep the soil consistently moist while they get established.
One caution: Not every perennial likes to be divided in fall. Check the specific plant before you start digging, especially if you’re unsure when it flowers or how it overwinters.
8. Get the spring bulbs in the ground

When: Generally 6 to 8 weeks before the ground freezes.
Tulips, daffodils, crocuses, hyacinths and other spring-blooming bulbs go into the ground in fall so they have time to establish roots before winter. Many also need a period of cold to bloom properly in spring.
The exact timing depends on where you live and what you’re planting. In colder areas, that may mean October; in warmer areas, November or even later. Check the planting instructions for your bulbs and get them in while the soil is workable.
Look for bulbs in bulk or end-of-season sales, and plant them in clusters rather than scattering them one by one. A generous grouping makes a much bigger springtime splash for your money.
Plant at the depth recommended on the package, pointy side up, and water them in. Then leave them alone. The bulbs will do their winter work underground while you wait for the show.
9. Winterize the sprinkler system before it winterizes itself
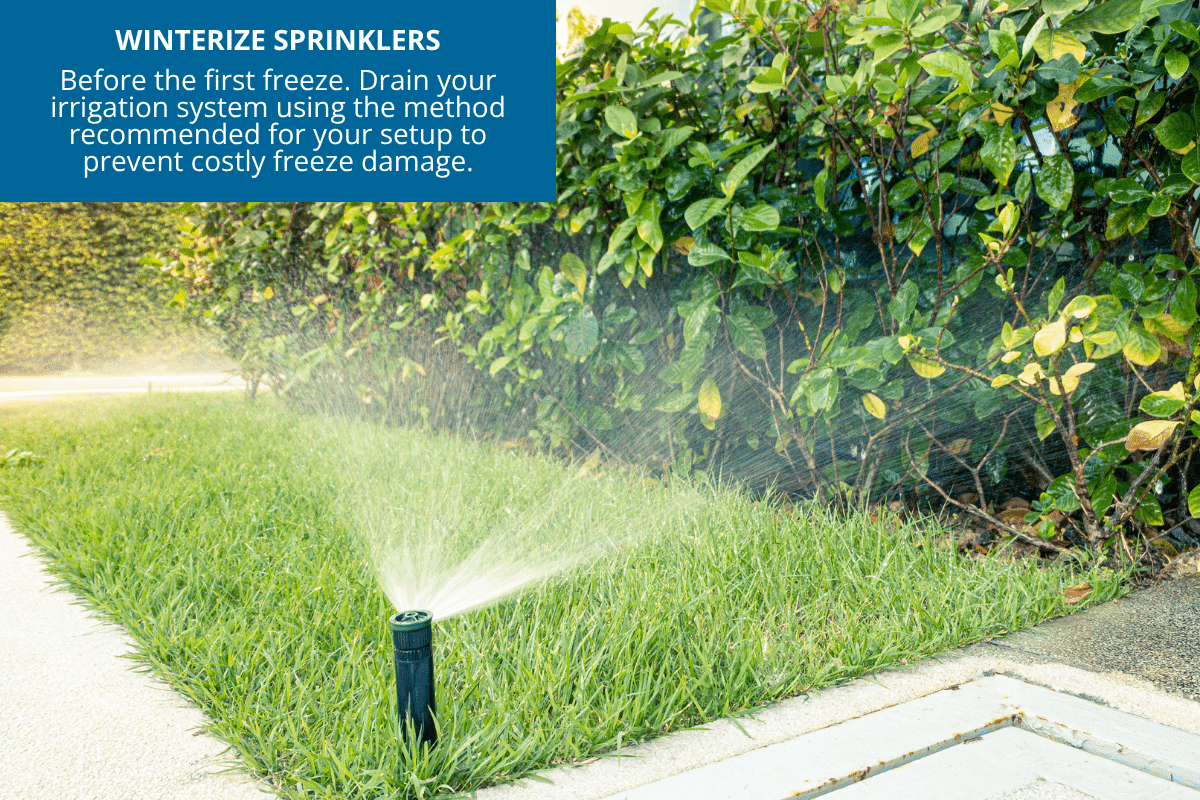
When: Before the first freeze. Don’t push your luck on this one.
If you have an in-ground sprinkler system, don’t leave winterizing it until the last minute. Water left in the lines can freeze, expand and damage pipes, valves and sprinkler heads, turning a simple fall chore into a spring repair bill.
Some systems can be drained manually or automatically; others need to be blown out with compressed air. Check your system’s instructions to find out which method is appropriate. If it requires a blowout and you don’t have the right equipment, hiring an irrigation professional is money well spent. A mistake with compressed air can damage the system you’re trying to protect.
And while you’re at it, shut off the irrigation timer for the season. One less thing to forget when the temperatures drop.
10. Clean the gutters. Then clean them again.
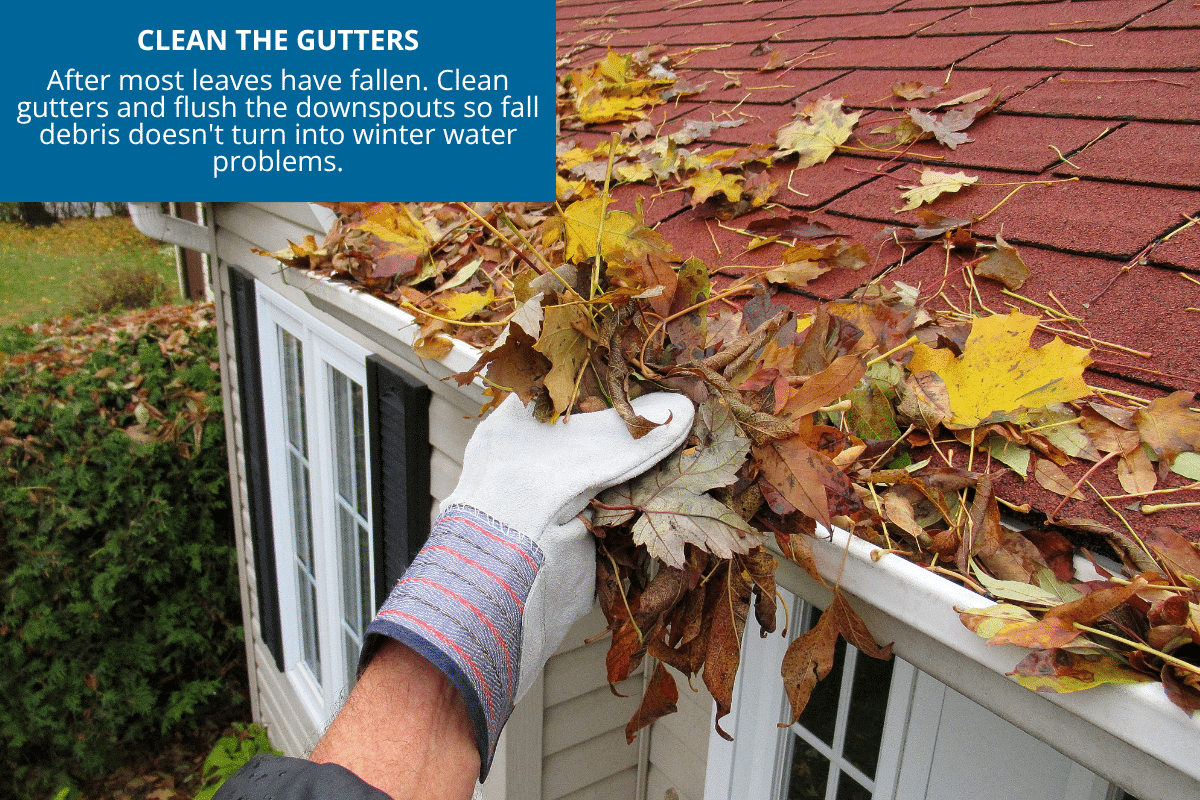
When: Late fall, after most of the leaves are down.
Clogged gutters can send water overflowing where you don’t want it: against your siding, fascia and foundation. Let that water freeze, and a small fall chore can turn into an expensive winter headache.
If your trees are still dropping leaves, clean the gutters once during the heavy leaf fall and again after most of the trees are bare. Run a hose through the gutters and downspouts afterward to make sure water is flowing freely all the way through.
Not comfortable on a ladder? This is worth paying someone $75 to $150 to do. Cheaper than a new roof, and a lot less stressful than watching your spouse hold the ladder while pretending they’re not nervous.
The small stuff that adds up
Got a little time left after tackling the big 10? These small jobs can make spring easier:
- Sharpen and oil garden tools before putting them away.
- Empty and store rain barrels so freezing water doesn’t damage them.
- Bring decorative planters inside. Freezing temperatures can crack them.
- Cover the firewood pile and make sure it’s protected from rain and snow while still getting enough airflow to stay dry.
- Take a soil test. Knowing what your soil actually needs now saves guesswork when spring arrives.
- Prune only shrubs that are appropriate for fall pruning. Timing varies by plant, so check before you cut—hydrangeas are a perfect example.
- Protect young or delicate trees from winter animal damage with tree guards or appropriate wraps.
What skipping it actually costs you
I did the math, because that’s what I do. A few examples:
- Split hose: $30 to $50 to replace
- Sprinkler damage: Hundreds of dollars to repair
- Dead lawn patches: $200 to $500 to replace
- Gutter-related fascia damage: Hundreds to thousands to repair
- Dead perennials: $50 to $200 to replace
- Winter-damaged patio furniture: $200 to $1,000 or more to replace
The exact numbers depend on your yard, your climate and what goes wrong. But the lesson is pretty simple: a little preventive work is almost always cheaper than fixing winter damage later. Most of these chores don’t require special skills or an entire weekend. Tackle them a little at a time, and you’ll head into winter knowing you’ve protected what you’ve already paid for.
That’s a pretty good return on a few hours of work and a whole lot better than discovering the problem when the repair bill arrives in spring.
Question: So what’s the one fall task you always skip? And be honest: what happened the spring you finally didn’t get away with it? Tell me in the comments. I promise I won’t judge. Much.
EverydayCheapskate™ is reader-supported. We participate in the Amazon Services LLC Associates Program and other affiliate advertising programs, designed to provide a means for us to earn from qualifying purchases, at no cost to you.

How to Escape the Tyranny of Too Many Choices
We live in a world overflowing with choices. From cereal and cookies to cell-phone plans and streaming services, we’re expected to compare, research and choose again and again. But having more options doesn’t always make life better. Sometimes it just makes us want to run to our rooms and slam the door. Here’s how I’ve learned to escape choice overload and make everyday decisions simpler.

A perfectly orchestrated backyard party took an ugly turn as the bounce house emptied of all 15 little friends, joined by twice as many adults gathered around to watch the 5-year-old birthday girl open a mountain of gifts.
And then, without warning, Emily melted into a puddle of tears.
Her embarrassed parents threatened punishment if she didn’t “stop right now!” which only made things worse. She ran into the house, straight to her room, and slammed the door.
I’m sure a child psychologist could have had a field day with that scene, citing poor parenting skills, hidden anger, deep-seated fear or any number of other possibilities. I saw it as much less complicated.
Emily may have simply had enough. Too many people. Too much noise. Too much excitement. Too many gifts. Too many choices. I know the feeling.
Put me in a supermarket with hundreds of brands of cereal, 47 varieties of pasta sauce and enough yogurt flavors to stock a small dairy farm, and my brain starts to sputter. Ask me to compare cell-phone plans with their different data limits, fees, perks and fine print, and I’m ready to run to my room and slam the door.
When too many options become too much
There is a name for at least part of what’s going on: choice overload. Research suggests that having more options can make choosing harder, particularly when the choices are complicated, difficult to compare or we’re not sure what we want.
And that can happen even when all those choices are supposed to make our lives better.
In his book The Paradox of Choice: Why More Is Less, author Barry Schwartz made the case that freedom and individual choice have a downside. As the number of choices increases, he argued, we can eventually become overwhelmed by them. At that point, choice stops feeling liberating and starts feeling like work.
That certainly rings true for me.
Recently, I attempted to count the number of choices in the cookie aisle at my neighborhood supermarket. When I hit triple digits, I stopped. I didn’t need a calculator. I needed a cookie and an exit!
How can I expect to make the “right” choice when there are so many choices competing for my attention?
Why too many choices can make decisions harder
And that’s the real problem: We often assume that more options automatically mean a better outcome. But more options also mean more comparing, more second-guessing and more opportunities to wonder whether we chose wisely.
It’s not just shopping, either.
Think about the number of decisions we make before noon: What should I wear? What should I eat? Which email should I answer first? Should I exercise now or later? Which streaming service has the movie I want? Do I buy this thing now or wait for a better price? Which insurance plan is best? Which phone plan? Which hotel? Which of the 3,000 nearly identical products online?
No wonder “I don’t care. You decide” can sometimes feel like the most luxurious sentence in the English language.
How I reduce choice overload
Fortunately, I’ve discovered ways to escape the tyranny of too many choices.
I let experts narrow the field
I avoid shopping environments where I’m tempted to wander through endless possibilities, preferring warehouse clubs where the buyers have already done some of the narrowing for me. Instead of choosing among dozens of brands of the same product, I may have just one or two reasonable options.
I can deal with that.
I make decisions before I shop
Grocery shopping is much easier when I have a list. Better yet, I build that list around what’s on sale, what I already have at home and what I actually need. I’ve eliminated dozens of decisions before I ever walk through the automatic doors.
This is also why meal planning works so well. The hardest question—“What are we having for dinner?”—gets answered when I still have the energy to think clearly, rather than at 5:30 p.m. when everyone is hungry and the refrigerator looks mysteriously empty.
I research major purchases ahead of time
When I’m buying something expensive or complicated, I don’t want to stand in the store trying to compare 25 options while a salesperson waits. I research in the quiet of my office, narrow the choices to two or three and then make the purchase.
Consumer publications, reputable reviews and comparison tools can help here. The goal isn’t to research everything. It’s to research enough to eliminate the choices that clearly don’t fit.
I create defaults for everyday decisions
This may be my favorite strategy of all. If something doesn’t matter very much, I don’t spend much time deciding.
I can wear a favorite combination of clothes. Order the same coffee. Keep a short list of easy dinners. Have a regular day for grocery shopping. Use a simple packing list for travel. Set automatic payments for predictable bills.
None of this means I’ve stopped making choices. I’m simply saving my decision-making energy for choices that actually deserve it.
And there’s a bonus: fewer unnecessary decisions can mean fewer opportunities to make an expensive mistake.
Simplify choices to save time and money
This matters especially when money is involved. When we’re tired or overwhelmed, it can be tempting to take the easiest option, click “buy now,” accept the default setting or pay for convenience just to be finished with the decision.
That’s why I like the rule: Simplify the small stuff so you have room for the big stuff.
If you’re facing a major financial decision, a complicated purchase or another choice with consequences, don’t make it harder than it needs to be. Give yourself time. Do your homework. Narrow the field. Then decide.
And if you’re standing in the grocery store staring at 137 varieties of cookies, remember: You are allowed to walk away.
As for little Emily, if they’d asked me, I would have suggested moving the mountain of gifts to another location and bringing out just one or two at a time. Or better yet, scaling the party down to just a few friends.
Sometimes even a good thing can become too much of a good thing.
The goal isn’t to have unlimited choices. The goal is to have enough good choices to choose from without losing your mind in the process.
Question: What’s one everyday decision you’ve simplified because you were tired of choosing? Share your story in the comments below.
EverydayCheapskate™ is reader-supported. We participate in the Amazon Services LLC Associates Program and other affiliate advertising programs, designed to provide a means for us to earn from qualifying purchases, at no cost to you.

How to Fly Cheaper: 8 Booking Tricks Airlines Won’t Teach You
Have you ever found a flight at a price you liked, only to check again later and watch it jump by $100? Or booked a ticket and discovered the same flight was cheaper the next day? Airfare can feel like a shell game. But you don’t need to become an airline pricing expert to pay less. You just need a few smart ways to shop.

Airfare prices can change quickly, and there’s rarely one magic trick that guarantees the lowest fare. The good news is that you have more control than it may seem. A little flexibility, some comparison shopping and a willingness to watch prices can make a real difference.
Here are eight practical tricks I use to shop smarter for airfare. No magic Tuesday afternoon. No secret browser incantation. Just simple ways to give yourself a better shot at a good fare and keep more of your travel money in your pocket.
Trick 1: Search in a Private Browser Window
You’ve probably heard that airlines watch your searches and raise the price when you keep checking the same flight.
That’s a great story. Unfortunately, there’s not good evidence that simply searching for a flight repeatedly causes an airline to jack up your personal price.
Airfares really do change, sometimes quickly. But that’s generally tied to things like demand, competition and the number of seats remaining in particular fare categories… not because the airline saw you checking Chicago again.
I still like using a private browsing window when I shop. It gives me a clean starting point and eliminates some of the personalized clutter that can come with regular browsing.
And here’s the bigger trick: compare. Check more than one search engine and check the airline’s own site before you buy.
Five minutes of comparison can be worth far more than five minutes of conspiracy theories about cookies.
Trick 2: Stop Worrying About the “Magic” Day to Buy
Tuesday at 3 p.m. used to be the darling of cheap-flight advice. Not anymore.
There isn’t a dependable day of the week when airfare magically drops. Current airfare studies produce different answers, and the differences can be surprisingly small. Expedia’s 2026 U.S. data, for example, found Friday was the cheapest day to book overall, while Saturday was the cheapest day for U.S. domestic bookings. The savings were only a few percentage points.
In other words, don’t rearrange your Tuesday afternoon around an airfare sale that may or may not happen.
Instead, pay attention to when you fly. Expedia found Tuesday was the cheapest day to fly domestically in its 2026 data, averaging 14% less than Sunday departures.
That’s a difference worth noticing.
Trick 3: Give Yourself a Booking Window
Should you book six months ahead? Tomorrow? Two hours before takeoff? None of the above is a universal rule.
Current Expedia data found that, on average, U.S. domestic economy fares were cheapest when booked 15 to 30 days before departure, compared with bookings made six months or more in advance. Google Flights similarly recommends booking domestic trips at least a few weeks ahead rather than waiting until the last minute.
But please don’t write “15 to 30 days” on a sticky note and assume you’ve cracked the airline code. Fares vary by route, season, demand and how flexible you are.
Here’s the smarter approach: start watching early. Learn what a normal fare looks like for your trip. Set a price alert. Then you’ll know a good deal when you see one.
And if you’re traveling during Thanksgiving, Christmas, spring break or another busy period, I wouldn’t play chicken with the calendar.vA good fare today beats a bargain that never appears.
Trick 4: Fly When Other People Don’t
Want a simple way to lower the price? Change the day you fly.
Tuesday and Wednesday departures are often less expensive than the most popular weekend travel days, and the difference can be especially noticeable on routes popular with business travelers.
Before you automatically search Saturday to Saturday, try Tuesday to Tuesday. Or Wednesday to Wednesday.
Even moving a trip by one day can change the price substantially. The key is to compare. Don’t assume Tuesday is always cheapest. Just give yourself permission to look.
Trick 5: Search More Than One Place, Then Check the Airline
I rarely buy the first airfare I find. Why would I?
Google Flights is my starting point because it makes comparing dates, nearby airports and price trends easy. It also lets you track fares and receive alerts when prices change.
I may also check Skyscanner or another airfare search site, especially for international trips.
Then I check the airline’s own website. Sometimes the airline has the same fare. Sometimes it doesn’t. And if something goes wrong later, dealing directly with the airline can be considerably simpler than trying to sort out a change or cancellation through a third party.
I don’t automatically rule out online travel agencies. I just don’t let the first search result make the decision for me.
Trick 6: Be Flexible About Dates and Airports
This is where airfare shopping gets fun. Well, as fun as shopping for airfare can be.
If your travel dates aren’t set in stone, use a flexible-date search. Google Flights’ date grid and price graph make it easy to see how much the fare changes from one day to another. You can also compare nearby airports.
Maybe flying Tuesday instead of Saturday saves $80. Maybe the airport 40 minutes farther away saves $150. Maybe neither one is worth the hassle. That’s fine, too.
Just make sure you compare the whole cost. A $150 airfare savings isn’t a savings if it disappears into parking, gas, tolls and an extra night at a hotel.
But if the numbers work? Take the money and run. Well, drive. To the other airport.
Trick 7: Watch the Fare Instead of Guessing
Here’s a habit that can take a lot of stress out of airfare shopping: watch the price before you buy.
Set up a fare alert for your route using Google Flights or another reputable airfare tracker. Google Flights lets you track specific flights or flexible dates and sends notifications when prices change.
Watching also teaches you something valuable: what your route normally costs. If you’ve been seeing $450 fares and suddenly one appears for $275, you’ll recognize the opportunity. If today’s price is $650 and you’ve been watching it hover around $400, you may decide to wait.
There are no guarantees. Airfares aren’t savings accounts. But having some history is much better than clicking Buy while wondering whether you’ve just paid too much.
Trick 8: Know the 24-Hour Rule
This one is worth knowing before you book. For qualifying airline tickets purchased at least seven days before departure, the U.S. Department of Transportation requires airlines to either let you cancel within 24 hours for a full refund or hold the reservation at the quoted price for 24 hours without payment. Airlines aren’t required to offer both options.
That can be helpful when you find a fare you really like but need a little time to make sure the rest of the trip works.
Check the airline’s policy before you book, because the rule doesn’t apply the same way to tickets purchased through online travel agencies.
And don’t confuse this with a free 24-hour period to change your ticket. That’s not what the rule says.
Still, when it applies, it’s a useful little safety net.
Bonus: Know About Hidden-City Ticketing
Here’s one airfare trick I think every savvy traveler should at least know exists.
Hidden-city ticketing means buying a ticket with a connection at the city you actually want to visit, then getting off there instead of continuing to the ticketed final destination. Sometimes the fare is considerably cheaper.
There are catches. Airlines generally prohibit this practice under their ticketing rules, and skipping one leg of a trip can cause the rest of an itinerary to be canceled. Checked luggage is another problem because it’s normally tagged to the ticketed final destination.
In other words, this is not the kind of trick I’d build a family vacation around. It’s worth knowing about. That’s different from recommending it.
What About All Those Other “Flight Hacks”?
Some popular advice simply doesn’t hold up very well.
- “Always buy on Tuesday.” No magic day exists. Current data varies from study to study.
- “Wait until the last minute.” Sometimes you’ll get lucky. I wouldn’t make luck your travel strategy.
- “Clear your cookies and the price will drop.” There’s no good evidence that repeated searches cause airlines to raise your individual fare.
- “The cheapest ticket is always the best deal.” Not when it comes with expensive baggage, terrible connections or a two-hour drive to the airport.
- And loyalty programs? They can absolutely be valuable if you fly enough to use the benefits. But don’t pay $200 more for a flight just to earn miles worth $12. That’s not saving. That’s collecting points at retail price.
The Real Trick: Give Yourself Choices
Here’s what all eight tricks have in common: they give you options.
Instead of searching one airline, one airport and one Saturday-to-Saturday itinerary, you compare. You watch. You move the dates. You check another airport. You know what a reasonable fare looks like.
That takes a little time. But airfare is one of those expenses where 30 minutes of smart shopping can sometimes save hundreds of dollars. And that’s the kind of math I like.
The goal isn’t to discover some magical hidden fare. It’s to stop assuming the first price you see is the price you have to pay.
Because when it comes to airfare, you don’t have to beat the airlines at their own game. You just have to shop like you know the game exists. Happy travels and may your next airfare search end with a price that makes you smile instead of swear.
Question: What’s the cheapest flight you’ve ever booked and how did you find it? Share your travel booking secrets in the comments below.
EverydayCheapskate™ is reader-supported. We participate in the Amazon Services LLC Associates Program and other affiliate advertising programs, designed to provide a means for us to earn from qualifying purchases, at no cost to you.

The One-Ingredient Litter Box Trick That Costs Pennies
The litter box smells again, and you just cleaned it. Before you spend $8 to $15 on a scented deodorizer your cat probably doesn’t even want, open your pantry. Plain baking soda handles odor control for pennies, no fragrance, no fuss, and no risk of your cat avoiding the box because it smells like a candle store. Here’s exactly how to use it safely, plus the free habits that matter more than any product on the shelf.

This post is for general information and isn’t veterinary advice. Talk to your vet about specific concerns for your cat.
If you own a cat, you already know the math. Clean box plus twenty minutes equals smelly box again. It’s not you. It’s just cats.
Walk down the pet aisle and you’ll find a whole shelf of “freshness” promises in loud packaging, most of them running $8 to $15 a bottle. Baking soda. Activated carbon. A fragrance thrown in for good measure. Here’s the thing nobody on that shelf wants to tell you: your cat doesn’t want the fragrance.
Cats have a sense of smell way sharper than ours, and a lot of them flat-out prefer unscented litter. Load up the box with perfume and some cats decide the bathroom isn’t worth the trip. Then you’ve got a different problem, and it’s a much worse one.
So skip the fancy label. Skip the markup. Use what’s already in your pantry.
The whole “recipe”
That’s it. That’s the ingredient list. No essential oils, no secret blend, no fragrance hiding behind a pretty name. Just the box of Arm & Hammer that’s probably already sitting next to your fridge doing nothing.
Why I won’t touch essential oils for this

You’ll find plenty of DIY litter deodorizer recipes online that call for a few drops of lavender or tea tree oil. Skip them. I mean it. Essential oils can be toxic to cats. Concentrated oils get absorbed right through the skin or land in their system during grooming, since cats groom constantly. Strong scents can also irritate a cat’s respiratory system.
Your cat is going to walk through this stuff, dig in it and use it every single day. That’s not the place to get creative with a Pinterest recipe.
Fragrance-free isn’t just cheaper. It’s usually safer. Usually, because baking soda has its own rules, and I’d rather you know them upfront than find out the hard way.
The safety part nobody skips
Small, controlled amounts of baking soda sprinkled into litter are considered safe for cats. Large amounts are a different story. Swallow enough of it and a cat can end up with a serious electrolyte imbalance, since baking soda is an alkaline salt and their bodies aren’t built to handle much of it at once. The fine powder can also irritate the lungs, especially in a cat with asthma or another breathing issue.
None of that means skip the baking soda. It means mix it in thoroughly instead of leaving a loose layer of powder sitting on top where a cat can inhale it or lick it off a paw.
How to actually use it
Start small, and let your cat cast the deciding vote. Trust me, they will let you know if they don’t approve.
After you scoop, sprinkle a light dusting of plain baking soda over the litter and work it in thoroughly, not just a quick pass on top. You’re not frosting a cake, and you’re not leaving loose powder for a paw to kick up into the air. A little goes a long way. Dumping in more doesn’t buy you more odor control, and it does raise the amount your cat could end up ingesting.
If your cat suddenly hates the box, stops using it or just seems off about the texture change, stop the baking soda. A clean box your cat actually uses beats a perfectly deodorized box that gets ignored in favor of your rug.
The routine that makes this work
- Scoop at least once a day. Multiple cats or a heavily used box? Twice a day earns its keep.
- Add a light sprinkle of baking soda. Mix it into the existing litter instead of leaving a layer sitting on top like snowfall.
- Keep scooping. Baking soda helps with odor. It does not replace cleaning.
- Wash the box regularly. Empty it out, wash with warm water and a mild unscented soap, rinse well and let it dry fully before you refill it. The ASPCA recommends staying on top of full cleanings, and steers clear of scented cleaners and anything ammonia-based.
What baking soda is actually doing
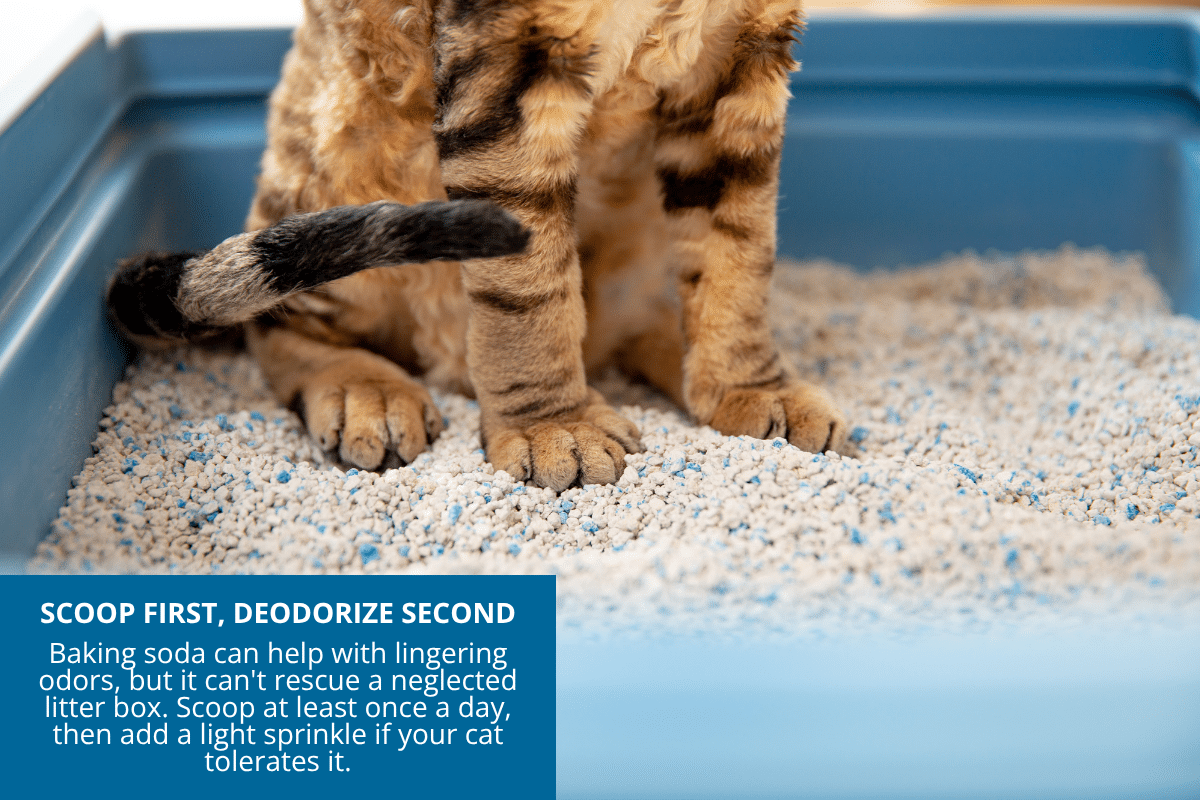
Baking soda, or sodium bicarbonate if you want to get fancy about it, is a household staple that helps neutralize odors instead of just piling another scent on top of the problem.
But let’s be honest about what it can and can’t do.
Baking soda is not a magic eraser. If the box isn’t getting scooped, the litter’s saturated or the plastic itself needs a real scrub, no amount of powder on top is going to fix that. You’re treating a symptom, not the source.
Think of baking soda as the supporting player, not the star. The real formula looks like this: scoop, clean litter, clean box, decent airflow, and a light dusting of baking soda if your cat’s on board.
Already using litter with odor control built in?
If your litter already contains baking soda or activated carbon or some other odor-fighting ingredient, you probably don’t need to add more on top. Different litters use different technology, and “more baking soda” isn’t some universal law that guarantees a fresher house.
And if your cat is already happily using an unscented litter without complaint, I wouldn’t mess with a good thing just because a new bag promises extra freshness. When it comes to cats, leave well enough alone.
The biggest odor fix costs nothing at all
If you’re really trying to get ahead of litter box smell, start here before you buy a single thing.
Scoop every day
This is the one that actually moves the needle. The ASPCA recommends scooping at least once daily, and busier households often do better with more. A quick pass in the morning and again at night can make a bigger difference than any product on the shelf.
Don’t wait for the smell to tell you something’s wrong
A stinky box is a signal that something needs attention. It’s not a cue to reach for more deodorizer. How often you need a full litter swap depends on the litter type, how many cats share the box and how consistent your scooping is. Check the manufacturer’s guidance, then adjust based on what you’re actually seeing.
Wash the box itself
When it’s time for a full change, wash the empty box with warm water and a mild, unscented soap. Rinse well. Let it dry completely before you add fresh litter. Skip the heavily scented cleaners. What smells “fresh” to you and what smells tolerable to your cat are two very different things.
More litter isn’t automatically better
Most cats prefer a shallower layer than you’d think. The ASPCA points to one to two inches as the sweet spot for many cats. Yours might feel differently. If your cat digs like it’s training for the Olympics, adjust accordingly.
Think about where the box actually lives
Put it somewhere quiet and easy to reach, but not somewhere your cat feels cornered. A dark closet behind a closed door might hide the evidence from your guests, but your cat isn’t thinking about your guests. Airflow matters too, but don’t relocate a box purely for ventilation if the new spot makes your cat nervous. A nervous cat finds other places to go.
The multi-cat math
More cats means more traffic, and the standard rule holds up: one litter box per cat, plus one extra. Two cats, three boxes. Don’t argue with the math.
And don’t line them all up in one corner like a public restroom. Spread them around the house so your cats have real options.
Yes, that’s more boxes to clean. But it also means no single box turns into the busiest bathroom in the neighborhood, which is exactly the kind of thing that pushes a cat to start looking elsewhere.
So what does this actually save you?
This is where the baking soda trick earns its keep. Skip the specialty pet-branded deodorizer and grab a plain box or the bigger bag from the baking aisle instead. It’ll cover a lot of ground for not much money.
I won’t hand you an exact number, since it depends on how many boxes you’ve got, how often you use it and what prices look like in your neck of the woods. But the principle holds: you’re using a household staple instead of paying extra just because a label slapped a cat on the front.
That’s the kind of savings I can get behind.
One important caveat
If your cat suddenly starts avoiding the litter box, don’t assume it’s the baking soda or a dirty box and call it a day. Sudden changes in litter box habits can point to something behavioral or medical, including urinary issues that cause a cat to go outside the box entirely. That’s a vet conversation, not a DIY project.
There’s also this: if a cat somehow gets into a real quantity of baking soda, not the light dusting mixed into litter but actual meaningful amounts, watch for vomiting, diarrhea, lethargy, tremors or trouble breathing. Those can show up within a few hours. If you see any of that, call your vet or a pet poison control line right away, don’t wait it out.
And if your cat just doesn’t like the baking soda, take it back out. No deodorizer on earth is worth a cat who’s decided the box isn’t for them anymore.
The bottom line
You don’t need a scented powder, essential oils or a complicated formula to keep a litter box smelling decent. Scoop daily. Keep things clean. Stick with unscented products. Give your cats enough boxes to go around. And if your cat’s willing to tolerate it, mix in a light, well-blended sprinkle of plain baking soda, never a loose layer on top.
Cheaper. Simpler. And nobody in the house has to smell like a lavender field just to use the bathroom.
Question: What’s your best litter box trick? A litter brand, a cleaning routine, a spot in the house that just works? Tell me about it in the comments.
EverydayCheapskate™ is reader-supported. We participate in the Amazon Services LLC Associates Program and other affiliate advertising programs, designed to provide a means for us to earn from qualifying purchases, at no cost to you.

House Rules for Adult Children Living at Home (Without Losing Your Mind or Your Garage)
Your adult kid just moved back home, boxes and all. Now what? A crowded nest doesn’t have to mean a chaotic one, but it does mean sitting down and setting real house rules for adult children before anyone unpacks a single box. Rent, chores, groceries, guests, and a real move-out date all belong in that conversation. Here’s how to have it without the guilt trip.

Remember when your kids couldn’t wait to move out? You remember it because you couldn’t wait either. You’d already picked out the paint color for their old room. Maybe you’d priced out a hot tub.
And then, one day, the doorbell rings and there they are. Adult children, back on your doorstep, boxes in hand, ready to move back into the nest you thought you’d finally emptied.
Here’s the good news: a full house doesn’t have to mean a chaotic one. I’ve talked to enough readers living this exact situation to know that the families who make it work all have one thing in common. House rules. Written down, agreed to, and actually enforced, not just implied and hoped for.
Let’s fix that.
Why so many “kids” are back home
You are not imagining that this happens more than it used to. A 2020 Pew Research analysis found that 52% of adults ages 18 to 29 were living with a parent that year, the highest share on record, even topping the peak from the Great Depression. Rent, student loans, a wobbly job market… take your pick. The reasons pile up.
None of that is your fault, and none of it is entirely your grown child’s fault either. But here’s what is within your control: what happens once they’re back under your roof. That part, you get to design.
Rule one: you go first
I don’t mean first in line for the shower, though that’s not a bad rule either. I mean this: your retirement account, your Contingency Fund, your own financial footing all come before their needs. Every time.
It feels backward, I know. Every parental instinct says feed the kid, fix the kid, fund the kid. But think it through. The single best gift you can give an adult child isn’t a rent-free bedroom at 34. It’s parents who aren’t a financial burden on them when you’re the one who needs help. Take care of your future first. Everything else is negotiable.
Set a move-out date before they move a single box in
This is the rule that gets skipped, and it’s the one that causes the most trouble later. Before anyone unpacks, agree on an end date. Not “we’ll see how it goes.” An actual date on an actual calendar.
Open-ended arrangements have a way of becoming permanent ones. Nobody plans that. It just happens, the way clutter happens, one day at a time until you turn around and it’s been three years. A deadline isn’t cruel. It’s a target everyone can work toward together, and it gives your adult child a reason to keep applying for that apartment instead of getting too comfortable with your Wi-Fi and your grocery budget.
Money talks… so make them contribute
Room and board isn’t free anywhere else in the world, and it shouldn’t be free here either. I’m not saying you need to charge market rent (though you certainly can). I am saying an adult child living at home should be putting money toward something: rent, groceries, a share of the utility bill, gas money if they’re borrowing the car.
This isn’t about squeezing your kid for cash. It’s about keeping them tethered to reality. The version of adulthood where somebody else pays for everything isn’t preparation for independence. It’s a very comfortable way to avoid it.
If they’re job hunting and truly can’t contribute cash yet, they can contribute labor: cooking dinner twice a week, handling the yard, driving grandpa to appointments. Contribution doesn’t always come with a dollar sign, but it has to come from somewhere.
Here’s a trick that turns this rule into something bigger than just fairness: quietly set aside whatever “rent” they pay into a Freedom Account earmarked just for them… first and last month’s rent, a security deposit, a decent set of pots and pans. When moving day finally comes, hand it back. You’ve taught them to contribute and given them a real head start, instead of a bill they resented paying.
Groceries and bills: theirs, not yours
I call this the Crowded Nest Diet… the mysterious way a full refrigerator empties itself in about thirty-six hours once an adult child moves back in. It’s real. It happens in nearly every house I hear from. And while watching your food budget evaporate might result in you personally losing a few pounds, it does nothing to teach your kid how the real world works.
Whatever bills your adult child arrives with (a phone, a credit card, a parking ticket from three states ago) those bills stay theirs. Do not pay them off. I know it’s tempting when you love someone and you can see them stressed. Resist anyway. An adult who never has to face the consequences of their own bills never really learns to avoid them in the first place.
Employment: looking counts, not looking doesn’t
If your adult child doesn’t have a job when they move in, job hunting needs to be their job. Not “eventually.” Not “after they recover from the last one.” Now. That means applications, interviews, follow-ups… visible effort you can actually see happening, not vague reassurances over dinner.
This one rule alone tends to be the difference between a boomerang who’s temporarily grounded and one who’s just landed for good.
Chores: be specific, not hopeful
“Help out around the house” is not a house rule. It’s a wish. Adult children (like most humans) respond to specifics: trash goes out Tuesday night, dishes get done same-day, bathroom gets cleaned every Saturday. Write it down. Assign it. Don’t leave it to memory or good intentions, because good intentions lose to Netflix every single time.
Laundry: not your job anymore
Here’s a rule that trips up more parents than you’d think, because it’s really a habit you have to break in yourself. Resist doing your adult child’s laundry. All the way resist it. No exceptions for “just this once.” That’s how every exception starts.
You spent eighteen-plus years training this person to eventually function without you standing over the washing machine. Don’t undo it now because it’s easier than watching them figure out the dial.
Guests, curfews, and privacy: say it out loud
This is where a lot of otherwise reasonable house rules for adult children fall apart, because everyone assumes the other person shares their expectations. They don’t.
Talk through the specifics before they become a fight:
- Can they have overnight guests, and how much notice do you want?
- Is there a curfew, or at least a “text me if you’ll be out past midnight” understanding?
- What parts of the house are shared, and what stays off-limits?
- How much notice do they need to give before bringing someone home for dinner?
None of this is about controlling a grown adult. It’s about two households worth of habits trying to occupy one house, and habits need ground rules the same way roommates do.
Transportation and parking: they’re on their own
Living at home doesn’t come with a chauffeur, and it shouldn’t come with automatic access to your car either. If your adult child needs their own transportation, that’s part of the “figuring out adulthood” package they signed up for by moving home.
Same goes for parking. Decide who parks where, and put your own car in the spot that makes your life easier. If that means your adult child parks on the street while your car sits in the garage, so be it. You paid for that garage. Use it.
Expect pushback (and a little guilt-tripping)
Somewhere around week three, expect resistance. A raised eyebrow at the grocery contribution. A sigh about the curfew text. Maybe even the classic guilt play: “I thought this was still my home too.”
Here’s the thing about pushback: it usually means the rules are working, not that they’re wrong. Hold the line anyway. You’re not running a hotel, and you’re not obligated to feel guilty for expecting an adult to act like one. This is also exactly where a written contract earns its keep, because you can point to the paper instead of relitigating the argument from scratch every single week.
Put it in writing
Every rule above works better the moment it’s on paper and signed by everyone involved. Not because you don’t trust your own kid… because verbal agreements have a way of getting “misremembered” right around the time they’re inconvenient. You raised this person. You know exactly how good they are at finding a loophole.
Keep the contract simple: move-out date, financial contribution, chores, guest and curfew expectations, and what happens if something isn’t working. Both sides sign it. Both sides keep a copy. When memory gets fuzzy (and it will), you’ve got something to point back to instead of just your word against theirs.
When it’s more than you can manage alone
Most families work through this with nothing more than a clear conversation and a little backbone. But if things are consistently tense, or a conversation about house rules keeps turning into a fight neither of you can walk away from, a session or two with a family counselor isn’t a failure. It’s a shortcut. An outside voice can sometimes get everyone to agree to a rule that two exhausted people living in the same house can’t quite land on their own.
A few questions I hear a lot
Do I really need a written contract for my own kid?
Yes. Not because you expect a fight, but because a contract turns “I feel like the rules keep changing” into “let’s look at what we agreed to.” That’s a much shorter conversation.
What if they refuse to pay anything?
Then the labor-instead-of-rent option isn’t optional, it’s the deal. No contribution in some form, cash or otherwise, isn’t a boundary problem. It’s a house rule with no rule attached.
Is it normal to feel guilty about charging your own kid rent?
Completely normal, and completely beside the point. Guilt is not a good reason to skip a rule that’s actually helping them. Feel the guilt if you must. Charge the rent anyway.
The nest doesn’t have to stay crowded
A full house isn’t a life sentence. It’s a season, and with the right house rules for your adult children, it can be a genuinely good one: closer relationships, real financial progress on both sides, and an actual exit ramp everyone’s working toward together instead of just hoping happens.
You raised them to leave the nest once. You can absolutely help them do it again. This time with a plan, a contract, and your own retirement account fully intact.
Question: What’s the one house rule you wish you’d set on day one? Share your experiences in the comments below.

More Money Isn’t the Answer. I Know Because I Tried It.
You know the person. New car, new gadgets, a closet that looks like it raided a department store. Must be nice, right? Must mean they’re rolling in it. Except they might not be. And here’s the part that took me way too long to learn: affluence was never about what you make. It’s about what you keep. I found this out the hard way, back when I was $100,000 in debt and still somehow convinced that one more raise would fix everything. It didn’t. It never does. Let me explain.

Turns out even six-figure earners feel broke.
If you think this is just an “I’m struggling so everyone must be struggling” story, I’ve got numbers for you. A recent The Harris Poll survey asked six-figure earners how they’re really doing, and the answers were not what you’d expect from people who supposedly have it made.
Sixty-four percent said a six-figure income isn’t a milestone anymore. It’s just what it takes to stay afloat. Nearly one in three described themselves as stretched, struggling, or flat-out drowning. Three-quarters had leaned on a credit card in the past three months, not for the points, but because the cash simply wasn’t there.
And the sacrifices people make to keep up appearances? Half admitted to skipping a night out just to avoid splitting a bill. Nearly as many said they’ve pretended their Venmo wasn’t working so they wouldn’t have to pay up. Forty-five percent put off going to the doctor because of the cost.
Read that again. These are people earning more money than most of us will ever see on a paycheck, and they’re dodging Venmo requests like the rest of us. If a bigger income were the fix, wouldn’t they be fixed by now?
Why the raise never feels like enough
Think back ten years. Your income was probably lower than it is now, maybe a lot lower. And you probably figured that once you made more, the debt would disappear, the savings would grow, and you’d finally breathe easy.
Then it happened. A raise, a promotion, a new job. More money landed in your account.
And what did you do with it? If you’re anything like most people, and anything like the me who was $100,000 in the hole, you added expenses to match. New debt showed up right behind the new income, like they were traveling together. Before long you were back to thinking, “If only I made a little more.”
So you got that too. And the cycle just kept spinning. Spending expands to meet whatever comes in, unless you make it stop on purpose.
Living on less takes actual effort
I won’t lie to you about that.
Cutting back sounds simple. It is not easy. It’s more like swimming upstream, or walking up the down escalator in heels. You’re working against a current that wants to carry you the other way.
It’s a decision you have to keep making, on the big stuff like insurance and groceries and on the small stuff like ATM fees and impulse buys. Nobody wakes up one day and coasts into financial peace. You build it, one deliberate no at a time.
But here’s the trade you’re actually making. Living below your means is hard. Living paycheck to paycheck, wondering if this is the month the car breaks down and wrecks everything, is harder. I’ve done both. Give me the first one every time.
The fix isn’t a bigger paycheck
It’s a plan for the one you’ve got. This is where I always point people toward something concrete instead of a vague “just save more” pep talk, because vague advice is exactly why nobody follows through.
Start a Freedom Account. It’s nothing fancier than setting aside a little each month for expenses you know are coming: car insurance, holiday gifts, that annual subscription that always catches you off guard. When the bill shows up, the money’s already there. No scramble, no credit card, no pretending your payment app is broken.
Then build a Contingency Fund on top of it, three to six months of expenses set aside for the stuff you can’t predict. That survey I mentioned? The number one thing keeping high earners up at night was being one unexpected bill away from chaos. A Contingency Fund is the answer to that fear, full stop.
Neither of these requires a raise. Both of them require a decision.
So what do you do the next time a raise lands?
Don’t let it slide straight into more stuff. That’s the trap the Joneses fell for, and judging by that survey, so did a whole lot of people making triple what you and I do.
Instead, feed it into the accounts that buy you peace instead of clutter. That daily latte, the streaming subscriptions you forgot you had, the impulse buy that seemed urgent at 11 p.m.: none of it is the enemy on its own. It’s what happens when there’s no plan catching the money before it wanders off.
Real affluence was never about the shiny car in your neighbor’s driveway. It’s the quiet feeling of knowing you’re covered, whatever this month throws at you. That’s a wealth worth having. And unlike a raise, it’s entirely up to you.
Question: When’s the last time a raise actually changed how you felt about money, and not just what you could buy? Share in the comments below.
How to Extend the Life of Your Central AC (5 Late-Summer Tune-Up Tips)
Nobody thinks about their central AC until the day it quits, and that day always seems to land during the worst heat wave of the summer. Here’s what most homeowners never hear: a system that gets a little basic care every year can outlast a neglected one by 5 to 8 years. These five late-summer tasks take about two hours, and every one of them, you can do yourself.
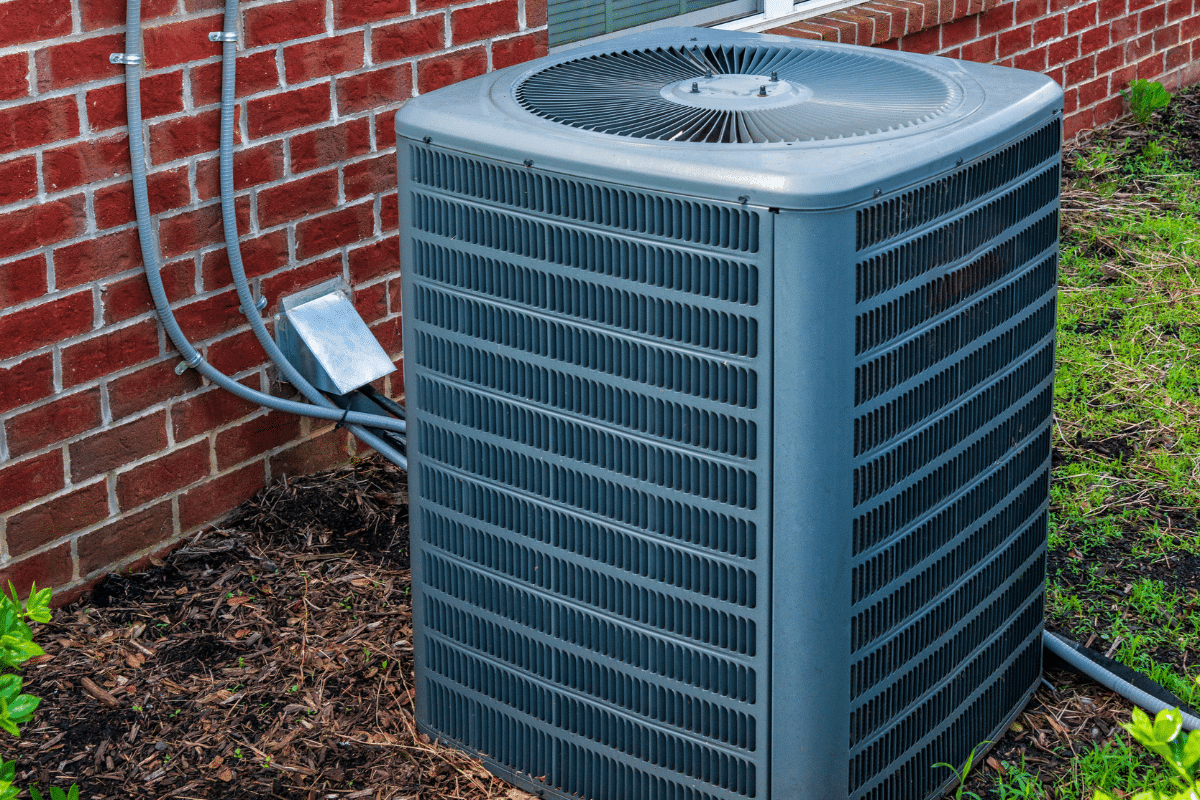
Quick question: do you know what a new central air system costs?
I do, because I made the mistake of finding out the hard way. $6,000 to $11,500, depending on the size of your house and how badly the HVAC guy thinks you need to be upsold that day. And the wild part is, most of us never think about our AC until the exact moment it stops working, which is always the hottest day of the year. Funny how that works.
Here’s the thing nobody tells you at the appliance store: a system that gets basic yearly maintenance can outlast a neglected one by 5 to 8 years. That’s not a rounding error. That’s the difference between replacing your AC once in a decade and replacing it twice.
And the maintenance? It’s not complicated. Five jobs, one Saturday morning, no license required. Do these before the last big heat wave rolls through, and your unit keeps humming along while your neighbor’s, the one who’s never once looked at his outdoor unit, starts making that death rattle sound.
Why these systems actually fail
Nothing dramatic. That’s what gets me. Clogged filters. Dirty coils. Bent fins. A blocked drain line. None of it sounds like a big deal on its own. But it all adds up quietly, squeezing the life out of your system a little at a time, until one August afternoon it just gives up.
Late summer is the sweet spot for catching this stuff. Your AC has been working overtime all season, so the wear is showing. And there’s still enough hot weather left that fixing it now pays you back immediately, in a lower electric bill. Here’s the order I’d do these in.
1. Replace the air filter. Today, not “this weekend”
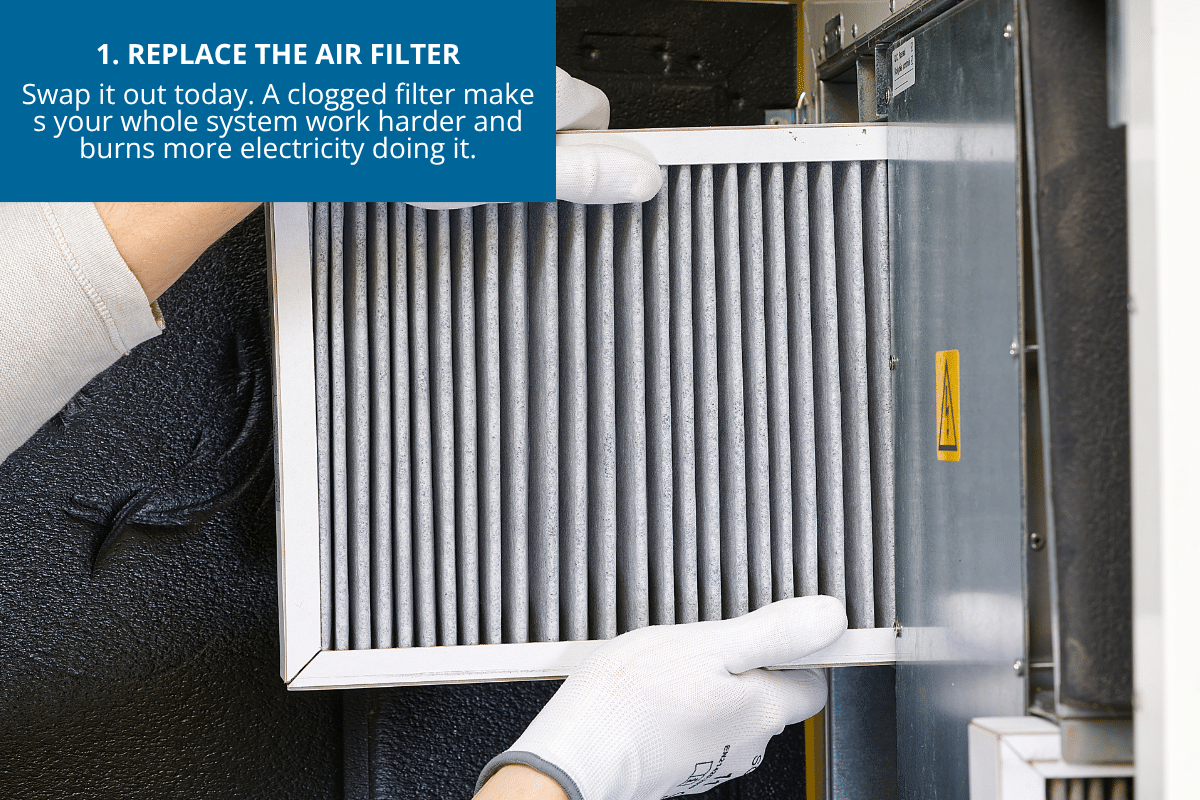
This one’s the biggest bang for your buck, and it’s the one people put off the longest. Your filter is the only thing standing between your system and every dust bunny in the house. When it’s clogged, the whole unit has to strain to pull air through it, which burns more electricity, wears out the blower motor faster, and can eventually freeze the whole system solid.
- Find the filter. It’s usually in the return-air duct or the air handler.
- Check the size printed on the old one (something like 16x25x1).
- Buy the same size. MERV 8 to 11 is the sweet spot for most homes. Higher isn’t automatically better here. If your system wasn’t built for it, a high-MERV filter can actually choke the airflow.
- Slide the new one in with the arrow pointing toward the air handler.
How often: every 1 to 3 months in summer. If you’ve got a dog shedding like it’s their job, make that monthly.
2. Hose down the outdoor unit
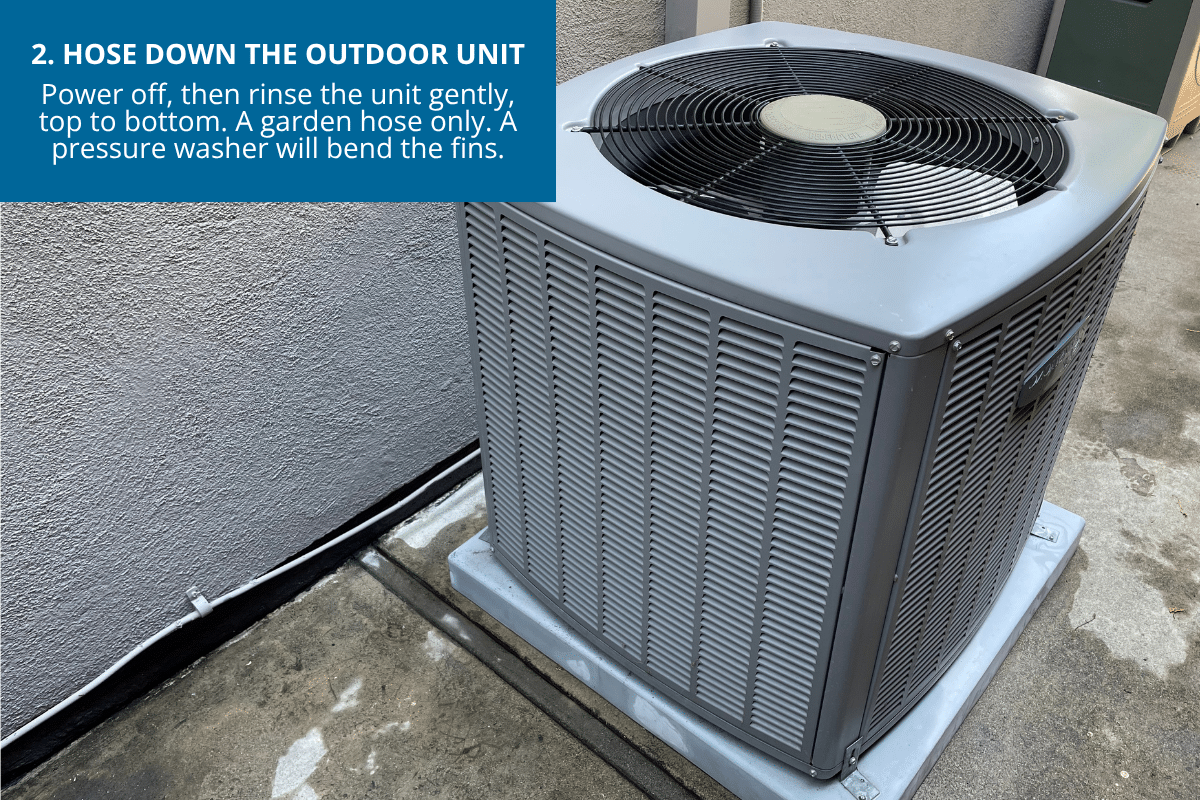
That big metal box sitting outside your house is working hard to dump the heat pulled from inside. If it’s caked in grass clippings, leaves, and whatever that fluffy stuff is that cottonwoods launch at us every June, it can’t breathe. And a unit that can’t breathe can’t cool your house.
- Flip the shutoff switch near the unit. Power off, always.
- Clear out any big debris on top and around the base: twigs, leaves, a stray grocery bag.
- Hose it down gently, top to bottom, all sides. A garden hose, not a pressure washer. Pressure washers will bend the fins right out of shape.
- Let it dry an hour before you flip the power back on.
- Trim anything growing nearby. Two feet clear on every side, five feet above. An overgrown hedge is basically asking your compressor to work through a pillow.
3. Straighten the fins
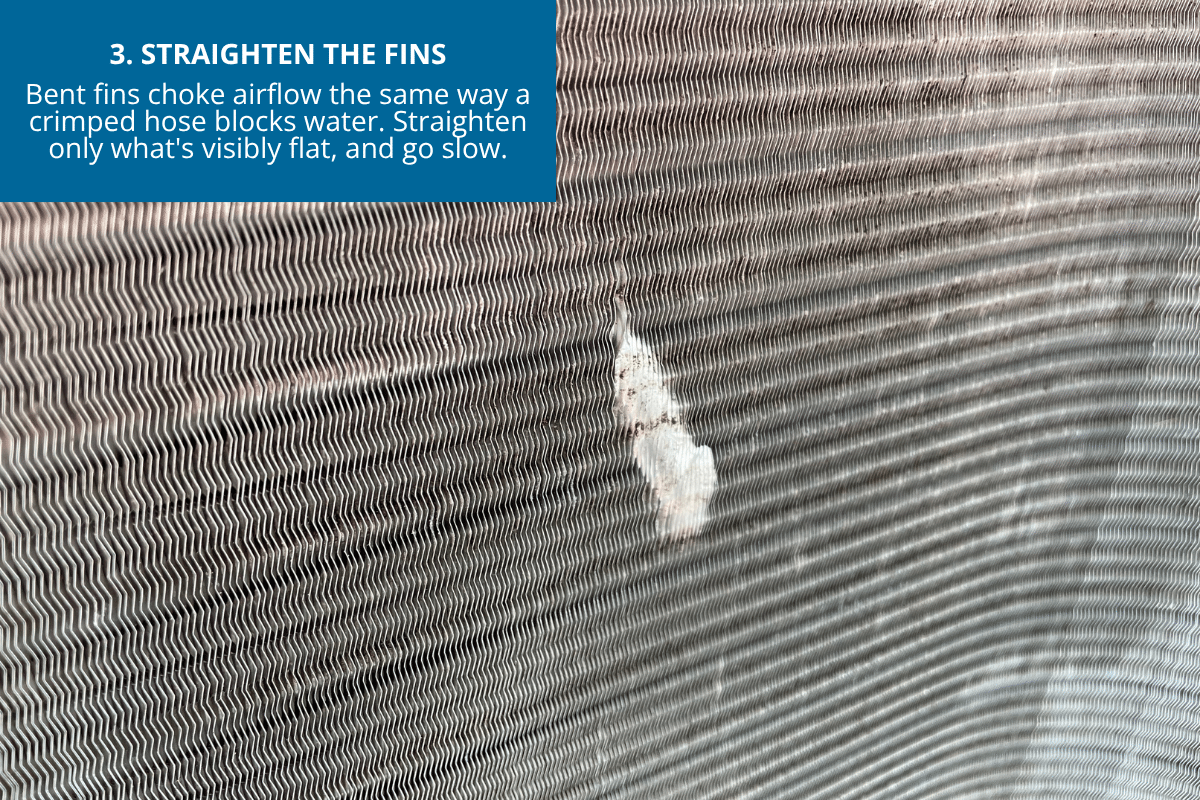
Your condenser has hundreds of thin aluminum fins, and over the years, weed whackers and hail and the occasional kid’s stray baseball bend them flat. Bent fins block airflow the same way a crimped garden hose blocks water. The system just works harder to compensate.
- With the power off, eyeball the fins from a few angles.
- Anything obviously bent flat, gently straighten it with a fin comb. They run $5 to $10 at any hardware store. No fin comb handy? A butter knife or the edge of a plastic ruler works fine. Just go slow. These things bend if you look at them wrong.
- Only fix what’s actually bent. Don’t go poking at fins that look fine. You’ll make it worse.
Small job. Noticeable payoff if your unit’s been neglected a while.
4. Clear the condensate drain line
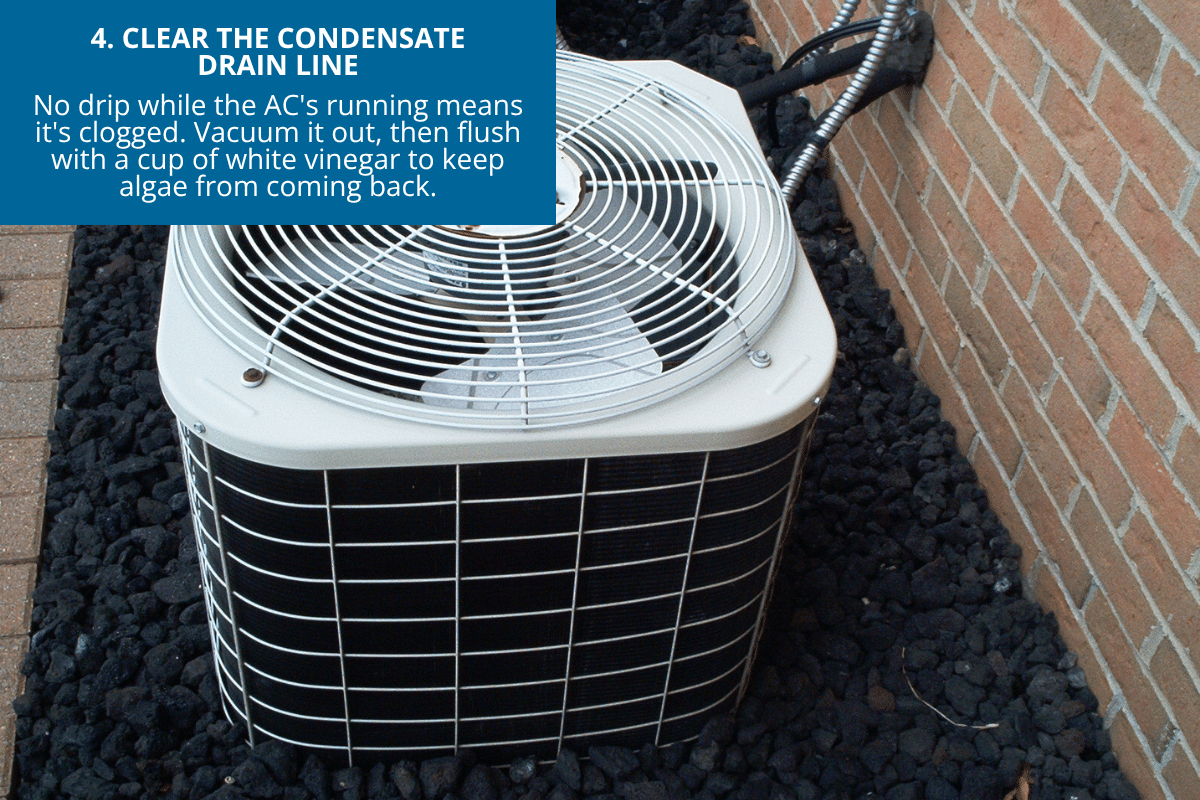
Your AC is pulling water straight out of the air, which is exactly why the house feels less sticky when it’s running. That water has to go somewhere, and it drains out through a thin PVC line. When that line clogs, usually with algae, the water backs up. Best case, a safety switch shuts your AC off. Worst case, and this is the one that keeps people up at night, it floods your ceiling if the unit lives in the attic.
- Find the outdoor end of the drain line. Small white PVC pipe, usually dripping while the AC runs. Not dripping? That’s your sign it’s clogged.
- Grab a wet/dry shop vac, seal the hose against the drain opening with a rag, and run it for a minute or two to pull the clog out.
- Once it’s clear, pour a cup of white vinegar into the cleanout access near the air handler (look for a small T-shaped fitting). Vinegar kills the algae before it comes back.
How often: a full clear once a year, in mid to late summer. A vinegar flush every few months keeps it from getting bad in the first place.
5. Rewrap the refrigerant line
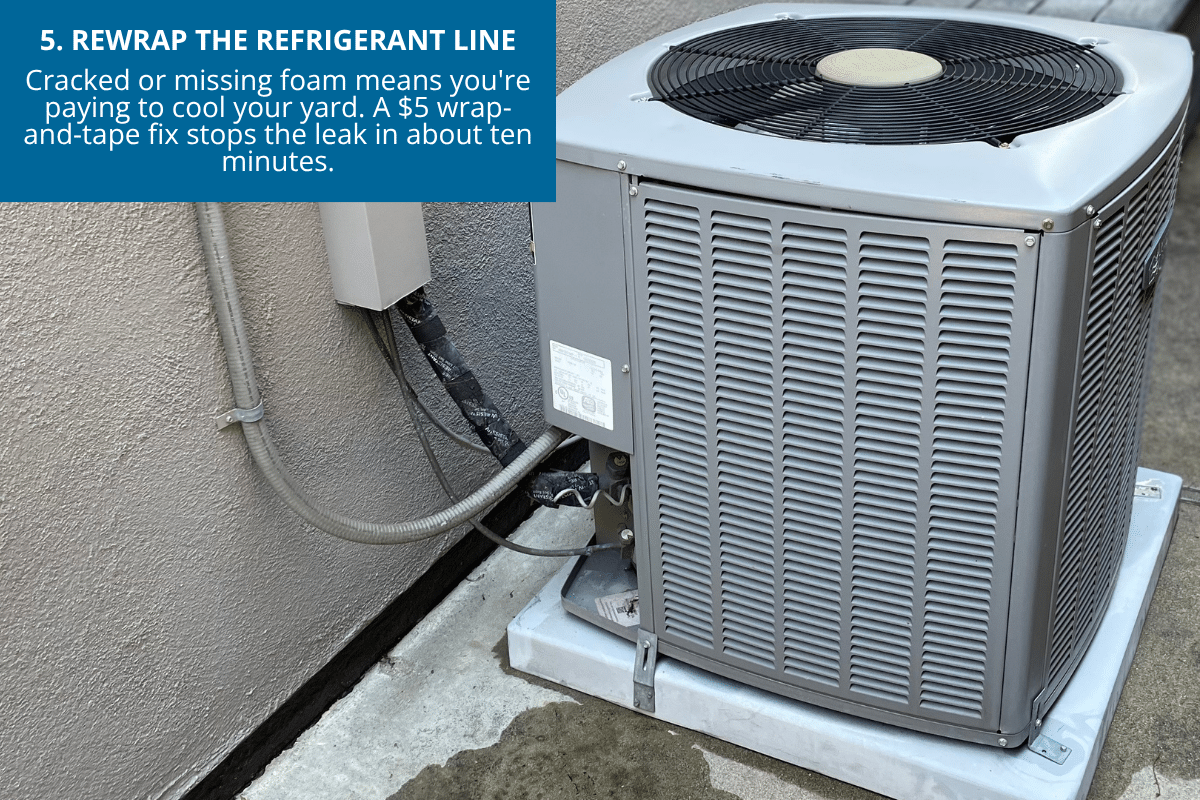
There’s a copper line running between your outdoor and indoor units, and it’s supposed to be wrapped in black foam insulation. Years of sun exposure and that foam cracks and crumbles right off, which means cold air is escaping before it ever makes it into your house. You’re paying to cool your yard.
- Look at the copper line coming out of the outdoor unit. Cracked, missing, or crumbly foam? Time for new insulation.
- Grab a length of foam pipe insulation at the hardware store. About five bucks for six feet.
- Slit it lengthwise, wrap it around the line, and seal it with electrical tape or the adhesive strip built into most of these.
Ten minutes. Real savings, every month, for as long as it lasts.
What to leave to a professional
I’m all for doing what you can yourself. I am not all for playing HVAC technician with anything involving refrigerant or live wiring. Some things belong to a pro:
- Refrigerant recharge. This requires certification, and if your system is low, that means there’s a leak somewhere that needs finding, not just topping off.
- Electrical work. Wiring, capacitors, anything inside the unit that could shock you.
- Compressor trouble. Strange noises, or the outdoor unit not running at all? Don’t go digging around. Call someone.
- Deep-cleaning the indoor evaporator coil. It means pulling panels apart, and it’s easy to damage if you don’t know what you’re doing.
A yearly professional tune-up runs $75 to $200. Pair that with the five things above, and your system is about as covered as it gets. Spring is the best time to book it, before everyone else remembers they own an air conditioner and the good appointment slots disappear.
What this is actually worth
A well-maintained AC uses 10 to 15 percent less electricity than a neglected one, lasts 5 to 8 years longer, and saves you thousands over its lifetime just by pushing the replacement date back. It’s also a lot less likely to quit on the one day you really need it, which, if you’ve ever lived through a AC failure in a heat wave, you know is worth something no spreadsheet can capture.
Two hours on a Saturday. That’s the whole ask. Go check that filter.
Question: How old is your AC, and what’s the one maintenance trick you swear by? Tell me in the comments. I collect these.
EverydayCheapskate™ is reader-supported. We participate in the Amazon Services LLC Associates Program and other affiliate advertising programs, designed to provide a means for us to earn from qualifying purchases, at no cost to you.

How to Keep Ants Away After You Treat the Ant Hill
You found the ant hill, you treated it, and for a few good days the yard was yours again. Then they came back. Turns out killing the colony is the easy part. Keeping the next one from moving in is the real job. Here’s how to keep ants away for good, plus my honest take on whether a pest control contract is worth paying for.

You did it. You found the hill, you treated it, and for a few glorious days the patio was yours again.
Then they came back.
Maybe not in the exact same spot. Close enough that you start wondering if ants hold a scheduling meeting while you’re asleep.
Here’s the part nobody mentions when you’re standing in the garden aisle with a can of ant killer: killing the colony you can see is the easy half. Keeping the next one from moving in is where the real work happens. And before we get into that work, let’s answer the question you’re probably actually asking. Do you need to hire someone for this, or can you handle it yourself?
Do you actually need a pest control contract?
I looked into the pricing on this, because that’s the kind of thing I do instead of watching TV. A one-time professional ant treatment runs somewhere between $150 and $300. That stings a little for spraying dirt, I know. A quarterly maintenance plan works out to roughly $40 to $70 a month once you average it over the year, and monthly plans run higher still, often 20 to 30 percent more annually than quarterly service for the same coverage.
So is any of it worth it?
Here’s my honest answer, and nobody’s paying me to say this. For ordinary household ants, the little pavement ants and black ones marching across your patio, you almost never need a contract. What you need is fewer reasons for them to show up. Spend twenty minutes fixing a leaky hose bib and wiping up crumbs, and you’ve done more good than most $55-a-month plans will ever do for you.

Carpenter ants are a different animal, and I mean that literally. They tunnel into wood framing, and a serious infestation can run $250 to $500 or more. If they’ve been at it long enough that a wall needs drilling, that number can climb past $1,500. If you’re finding little piles of what looks like sawdust near your foundation, or spotting ants that are noticeably larger with a pinched waist, stop DIYing and make the call. Everything else, you can handle yourself with a Saturday morning and a little follow-through.
Make your yard boring to an ant
Ants are only ever looking for three things: water, food, and somewhere safe to hide. Take away any one of those, and your yard stops looking like prime real estate.
Water first.
A dripping faucet, a sprinkler head that overshoots, an irrigation line with a slow leak nobody’s noticed. Ants find these spots faster than you do. I once spent three days blaming a new ant trail on “just bad luck” before I finally traced it back to a drip line fitting that had loosened under the mulch. Fixed the fitting, the trail dried up within a week. Walk your yard slowly sometime and look for ground that’s damp when it has no business being damp.
Then the landscaping.
Overgrown shrubs, a pile of leaves you keep meaning to bag, firewood stacked against the house. All of it reads as free real estate to a colony looking for cover. You don’t need a yard that looks like it’s ready for inspection. Just pull the mulch back a few inches from your foundation, keep the firewood up on a rack and away from the house, and clear out the debris pile before it becomes a subdivision.
Food is the big one.
If you’ve ever hosted a cookout, you’ve watched ants show up before the burgers came off the grill. Wipe up spills right away, keep the lids on your garbage cans, and don’t forget the pet food bowl you leave out overnight. Birdseed under a feeder counts too. To a colony, that’s an all-you-can-eat buffet with your name on the reservation.
Same goes for fruit trees. Fallen fruit rotting on the ground is basically a dinner bell. Pick it up before it turns into compost, or accept that you’re feeding the neighborhood.
Barriers can help, in moderation
Diatomaceous earth spread in the spots where ants keep returning works, as long as it stays dry, which around here is a bigger ask than it sounds. I’ve tried the peppermint oil trick too. It smells nice for about a day and then you’re refilling the spray bottle again. Treat these as a supporting player, not the whole plan.

Check in, don’t inspect
Once a week, take a slow lap around your yard. You’re not running a drill. You’re just noticing. A small mound of fresh soil, a new trail crossing the walkway, a few scouts where there weren’t any last week. Catch it at this stage and you’re dealing with a handful of ants. Miss it for a month and you’re dealing with a colony that’s already unpacked and hung curtains.
Not every ant deserves an eviction notice

This one surprises people. Most ants in your yard are actually doing you a favor. They break down organic matter, aerate the soil, and eat other bugs you’d rather not have around either. Unless they’re tearing up the lawn, coming inside, or setting up shop where the kids or the dog play, you can let them be.
Nature isn’t tidy, and it isn’t supposed to be. The goal was never zero ants. The goal is balance, and a yard where the odds are stacked against a colony ever getting comfortable in the first place.
A little housekeeping, sensible watering habits, and a weekly walk-through will do more for you long term than reaching for another can of spray every time you see three ants on the sidewalk. Save the spray, and the money, for the times you actually need it.
Ants are excellent house hunters. Your job is just to make sure the listing next door looks better than yours.
Question: What’s the one spot in your yard the ants always find first no matter what you do? Share in the comments below.
EverydayCheapskate™ is reader-supported. We participate in the Amazon Services LLC Associates Program and other affiliate advertising programs, designed to provide a means for us to earn from qualifying purchases, at no cost to you.
The Truth About “Dry Clean Only” (And When I Actually Listen to It)
Confession time: when I see “Dry Clean Only” on a tag, I don’t grab my car keys. I grab my sink. Not every garment that says it needs a cleaner actually does, and with prices climbing the way they have, that label is costing you more than it should. Here’s how I tell the difference, and how to hand-wash the ones that qualify without wrecking them.
I have a confession to make.
When I see “Dry Clean Only” on a clothing label, I don’t automatically head for the car keys. I pause. Then I ask myself whether this garment is genuinely asking for professional care, or whether some manufacturer’s lawyer told them to cover their bases.
A tailored wool suit? Absolutely, that’s dry cleaner territory. A silk-lined formal gown? I’m not gambling. But a simple cotton blouse, a linen shirt, a lightweight sweater? I’ve hand-washed dozens of those over the years, label be hanged, and I can’t recall a single disaster.
That doesn’t mean every “Dry Clean Only” garment belongs in your sink. But it does mean a little common sense, and a little nerve, can save you real money. And after what dry cleaning costs in 2026, I think it’s worth having the nerve.
Have you priced a dry cleaner lately?
Go on, brace yourself. A laundered dress shirt runs $4 to $8 now. Slacks, $7 to $14. A two-piece suit, $15 to $30. A winter coat can hit $45. And prices went up again this year: 5.3% between last June and this one, according to the government’s own index for laundry and dry cleaning services. That’s outpacing regular inflation. Since 2021, the same index is up 36%. A $10 cleaning bill five years ago is closer to $13.60 today.
Why? Mostly labor. Pressing a garment right still takes a person, not a machine, and that hasn’t changed. Add in tighter rules on the chemicals cleaners use and the equipment upgrades that come with them, plus rent, electricity, and every hanger and poly bag along the way, and you get a bill that keeps climbing.
Add it up over a month and it’s not small change. A modest business-casual wardrobe, a handful of slacks and shirts and one blazer, can run you $75 to $110 a month at the cleaner. That’s up toward $1,200 a year, just to keep clothes you could largely handle yourself looking presentable.
I’m not saying skip the dry cleaner altogether. I’m saying stop assuming every tag is giving you an order instead of a suggestion.
So is the label lying to you?
Not lying, exactly. Covering itself. A garment manufacturer doesn’t know if you’ll follow instructions carefully or toss the thing in with your gym clothes on hot. “Dry Clean Only” is often the safest sentence a lawyer can write, not a verdict on how the fabric actually behaves in water.
Look past the tag and study the garment itself. What’s it made of? Does it have beading, sequins, leather trim, or serious tailored structure? Shoulder pads, boning, a fitted lining? Those details matter more than the words on the tag ever will.
Natural fibers like cotton, linen, cashmere, and most wools tend to tolerate a careful hand wash just fine. Rayon is trickier, it goes weak when wet and can lose its shape. Silk deserves extra caution because some dyes bleed. When you’re not sure, dampen a white cloth and press it against a hidden seam. If color transfers, that garment is telling you something. Listen to it, not the tag.
One more thing worth knowing, because it trips people up: a “laundered” dress shirt and a “dry cleaned” one aren’t the same service, and they’re not priced the same either. Cotton gets washed in water and machine pressed, which is why it’s the cheapest thing on the price list. Silk, or anything with a structured, fused collar, goes through solvent instead, and the price roughly doubles. That’s a fabric difference, not an accident.
How I actually do it
Fill a clean sink with cool water. Add a small amount of mild detergent made for delicates, or even a gentle shampoo if that’s what’s under your sink. Swish it around before the garment goes in. You want the soap dissolved, not sitting in a puddle waiting to be scrubbed into the fabric.
Then don’t scrub. Most clothing isn’t dirty the way we think it is. It just needs refreshing. Move the garment gently through the water for a few minutes, giving a little extra attention to collars and cuffs.
Drain the soapy water, refill with clean cool water, and rinse until nothing sudsy remains. You may need to do this twice.
Now, the part where most good intentions go sideways: never wring it out. Twisting wet fabric stretches the fibers and can permanently warp the shape. Instead, lift the garment with both hands, let it hold its own weight, and press out water gently.
A thick towel is your best friend here. Lay the garment flat, roll the whole thing up like a jelly roll, and press. The towel pulls the moisture out without putting any stress on the fabric.
Reshape while it’s still damp. Sweaters and knits dry flat, always, on a towel or a drying rack, or they’ll stretch out of shape hanging wet. Lightweight woven shirts and blouses can usually hang to dry. If wrinkles show up once everything’s dry, a garment steamer works beautifully. If you’re reaching for an iron, use the right setting for the fabric and slide a pressing cloth between the iron and the garment.
And here’s a savings tip nobody tells you: you don’t have to wash a garment every single time you wear it. Jackets, sweaters, dresses, and a lot of blouses just need a day or two hanging out to air before they go back in the closet. A tiny stain treated fast with a damp cloth can save you the whole wash. Every trip you skip is money that stays right where it belongs… in your pocket, not a dry cleaner’s till.
When I actually pay a professional
Some things genuinely earn the trip. Wedding gowns are the obvious one. Cleaning and preservation runs $200 to $400, and that’s for good reason. There’s real hand work in treating beadwork and boxing a gown properly for storage.
Vintage clothing, anything with sentimental weight, and garments built from more than one fabric that behave differently when wet all belong on that list too. A blazer with a fused lining, for instance, can shrink at a different rate than its outer shell, and once that happens there’s no fixing it. I’ve seen readers describe exactly that: a jacket that looked fine on the hanger afterward but sat wrong on the body forever. That’s not worth the gamble on a piece you actually love.
Heavily structured formalwear, anything boned or corseted, leather and suede: leave those to the people with the right equipment. This isn’t me being cautious for the sake of it. It’s me telling you where the real risk lives, so you can take chances everywhere else with confidence.
Don’t treat the tag like scripture
Every “Dry Clean Only” label isn’t a commandment carved in stone. Sometimes it’s just a suggestion written by someone who’s never met your sink, your patience, or your determination to keep a few more dollars where they belong.
Pick one item from your closet this week. Something plain, something you like, something you wouldn’t be devastated to lose. Test it. You might just find out your sink has been more capable than your dry cleaner’s counter this whole time.
Question: Be honest, do you actually check the fabric before you obey the tag, or does “Dry Clean Only” just send you straight to the car?
EverydayCheapskate™ is reader-supported. We participate in the Amazon Services LLC Associates Program and other affiliate advertising programs, designed to provide a means for us to earn from qualifying purchases, at no cost to you.

The Donation Box Mistakes Thrift Stores Wish We’d Skip
You clean out a closet. You fill a box. You drop it at the thrift store and drive away feeling like a slightly better person than you were an hour ago. I love that feeling. I’ve built entire Saturdays around it. But here’s the part we don’t always think about: Not everything that makes it into our donation box belongs in someone else’s shopping cart.

I’ve talked to enough thrift store workers over the years to learn the dirty little secret of donation day. A surprising amount of what arrives at the back door never makes it to the sales floor. Stained. Broken. Missing pieces. Moldy in ways I don’t even want to describe.
Someone has to sort through all of that. And every minute spent digging through things that should’ve gone in the trash is a minute they can’t spend on the stuff that could actually help someone.
Being a good donor, I’ve decided, is a lot like being a good houseguest. You don’t leave a mess for someone else to clean up. Simple as that.
The friend test
Here’s my rule, and it’s served me well: If you wouldn’t hand the item to a friend or neighbor, don’t put it in the donation box.
Clothes get washed first. Kitchen gear gets wiped down. Toys need all their pieces, not just the ones you happened to find under the couch. Give everything a once-over at home before it goes anywhere, and you’ve just saved a volunteer from having to make that decision for you.
And honestly? It takes less time than feeling guilty about it later.
Mind the clock
I get it. The donation center is closed, the box is already in your trunk, and leaving it by the door feels like the easiest option. Don’t. Rain doesn’t check business hours. Neither do raccoons. A box left outside overnight can become a soggy, chewed-up mess before anyone opens the door in the morning. That perfectly good donation you carefully packed? Now it’s trash.
Drop off during operating hours whenever you can. Your donation deserves better than a night on the pavement.
Pack it like you’d want to open it

Picture two boxes. One is a garbage bag knotted tight, with glassware clinking against tangled cords and clothing stuffed into every available corner. The other is a sturdy box with similar items grouped together and anything breakable wrapped with a little care. Which one would you rather open on a Monday morning?
You don’t need matching bins, fancy labels or a degree in professional organizing. A few extra minutes of common sense goes a long way toward making somebody else’s job easier.
Two things worth double-checking
Recalls, for one
Cribs, car seats and certain toys can be subject to safety recalls. A quick search before you donate takes almost no time. Passing along a recalled item doesn’t help the next family. It just hands them your problem with a bow on it.
Electronics, for another
Some thrift stores test and resell electronics without blinking. Others have no way to check whether that toaster, lamp or ancient DVD player actually works. A quick call or look at the store’s website before you haul everything over can save everybody a trip.
Less is more. Really.
I’ve learned this one the hard way, mostly by being the person standing there with five overflowing boxes nobody wanted. A dozen clean, useful items beat a mountain of questionable stuff every time.
Donating isn’t about finding a new home for your junk. It’s about giving someone something they can actually use. Those aren’t the same thing.
Think about it from the other side of the counter and the choices get pretty easy. Wash the sweater. Match up the shoes. Tape the puzzle box shut so all 200 pieces are still inside. Wipe down the coffee maker instead of assuming somebody else will want to do it. Small stuff.
But it says something bigger: I thought about the person who’s getting this. That, to me, is the finest kind of thrift. Not just passing things along, but passing them along with a little care attached.
A good donation doesn’t just clear space in your closet. It opens up space in someone else’s life.
And speaking of thrift stores…
There’s a timely reason to think about all this: National Thrift Shop Day is August 17.
If you’re anywhere in the U.S., you’re probably not far from a thrift store, charity shop or resale store. And if you’re looking for an excuse to go treasure hunting, well, here you go.
Thrift stores and consignment shops aren’t quite the same thing, though they’re often lumped together. Most thrift stores are operated by charitable organizations and are stocked primarily through donations. Consignment shops work differently: You bring in your own items to sell, and the shop takes a portion when something sells. Both can be great ways to spend less.
And there’s something else I love about secondhand shopping: You never quite know what you’ll find. Maybe it’s the mid-century lamp you’ve been hunting for. Maybe it’s a great wool coat that looks like it walked straight out of 1965. Maybe it’s a perfectly good casserole dish for $4 when the one at the big-box store costs five times that. That’s part of the fun.
Every useful thing you buy secondhand is also one less thing headed for a landfill. Saving money while giving something useful another life? That’s a pretty good two-for-one.
A few honest answers, since you’re probably wondering
What’s the best day to shop?
You’ll hear Monday or Tuesday because weekend donations have supposedly piled up. Maybe. But stores need time to sort, price and put those donations on the floor. My advice? Shop early and shop often. Don’t try to outsmart the thrift-store calendar.
Is there anything I should skip buying?
Car seats are an easy no for me. You can’t tell by looking whether one has been in a crash, and car seats expire whether they look perfectly fine or not.
I’d also skip used underwear, swimsuits and makeup. Some things just don’t need a second act.
Do I need to wash clothes I buy there?
Yes. Every time. Dry-clean-only pieces are the exception, of course, but everything else gets washed before it joins my closet. Most thrift stores don’t launder clothing before putting it on the rack, and even if the original owner washed it, that item may have spent months sitting in a box or warehouse before you found it. Freshly washed is the way to go.
So there you have it: how to donate like someone people are glad to see coming and a perfectly good excuse to go treasure hunting this week. Give with a little care. Shop with a little curiosity. And if you find that $5 treasure you’ve been looking for, please tell me about it. I love a good thrift-store victory.
Question: What’s the best thrift-store treasure you’ve ever found? Share with us in the comments below.

How to Water Your Lawn Without Wasting Money This Summer
Every summer it happens. The weather turns hot, the lawn starts looking tired, and otherwise sensible people start dragging sprinklers around the yard like they’re trying to rescue the Sahara one gallon at a time. Somewhere in the neighborhood, there’s always one sprinkler faithfully watering the sidewalk. Good news: your lawn doesn’t need more water. It needs smarter water, and that’s the part nobody tells you.
Here’s a number worth sitting with: outdoor watering can eat up close to a third of a household’s total water use in summer, and for a lot of homes, that’s enough to double the water bill compared to the rest of the year. All for a lawn that, half the time, still looks patchy and stressed by August.
That’s the part that gets me. More water almost never fixes it. Most of us aren’t watering too little, we’re watering wrong, and the habit that feels the most responsible is usually the one doing the most damage.
Stop watering a little every day

This is the mistake almost everyone makes, and it feels like the responsible thing to do. Plants need water, right? So a little water every day must be good.
Except it isn’t. Frequent, shallow watering trains grass roots to stay near the surface, since that’s where the water shows up. Those roots never bother growing deeper, because why would they? Then a heat wave hits, the top inch of soil dries out in an afternoon, and your lawn has nothing to fall back on.
The fix is to water deeply and less often. Aim for about an inch to an inch and a half of water a week during dry stretches, delivered in one or two sessions rather than a daily sprinkle. That pushes roots down into the soil where it’s cooler and damper, and deep roots are what get a lawn through August without turning into straw.
How do you know when you’ve hit an inch? Lawn experts recommend setting an empty tuna can (or cat food can, whatever’s in the recycling bin) out in the yard while the sprinkler runs. When it fills to about the one-inch mark, you’re done. It’s not fancy, but it works, and it beats guessing based on how tired your arm is from holding the hose.
Watch your soil, not just the calendar

Clay soil and sandy soil play by completely different rules, and this is where a lot of otherwise careful watering schedules fall apart.
Clay soil
Clay holds onto water for a long time but takes forever to let it in, so the water runs off the surface before it soaks in. If you’ve got clay, you’re better off watering in shorter bursts with breaks in between rather than one long soak. Gardeners call this cycle-and-soak: run the sprinkler for ten minutes, let it rest for twenty so the water has time to sink in, then repeat. It sounds fussy. It saves a surprising amount of water once you actually try it, because none of it runs down the driveway.
Sandy soil
Sandy soil is the opposite problem. It drains fast, so it needs more frequent watering to keep the roots from drying out between sessions. If you’re not sure which one you’ve got, dig a small hole after it rains. Clay stays sticky and holds its shape. Sand falls apart in your hand.
Time it right, or you’re just watering the air

If you’ve been watering in the evening because it’s cooler out, I get the instinct. It also might be why you’ve got fungus problems.
Water that sits on grass blades overnight creates exactly the damp, warm conditions that fungus loves. Your lawn doesn’t need that kind of company.
Midday isn’t much better, just for a different reason. A good chunk of the water evaporates before it ever reaches the soil, so you’re paying for water your lawn never actually gets.
Early morning is the sweet spot, and it’s not close. Temperatures are cooler, wind is usually calmer, and the grass has all day to dry out before evening rolls around and the fungus-friendly window opens back up.
Let your mower do some of the work

If you love that short, tidy, golf-course cut, I hate to break it to you, but your lawn does not share your enthusiasm.
Grass cut too short exposes bare soil to direct sun, and bare soil dries out fast. Leave your mower deck set so the grass stays three to four inches tall, and that height creates enough shade to keep the soil underneath cooler and damper. It’s a free watering assist you get every time you mow. Taller grass also tends to crowd out weeds, since there’s less bare, sunny soil for weed seeds to take hold in. Less competition means more water actually goes to your grass instead of getting split with the dandelions.
Skip “watering day” when it just rained
If your area gets a good soaking rain, resist turning the sprinkler on anyway just because the calendar says it’s watering day. Grass doesn’t own a calendar. It only needs water when the soil actually starts drying out.
Two quick checks tell you what you need to know. Walk across the lawn. If your footprints spring back up right away, the grass has enough moisture and doesn’t need you. If the footprints stay flattened, or the grass has gone a dull, grayish-green instead of its usual color, it’s asking for a drink. Otherwise, let Mother Nature pick up the tab. That’s free water you already paid for through your property taxes, or at least it feels that way.
Walk your sprinkler line before you walk away
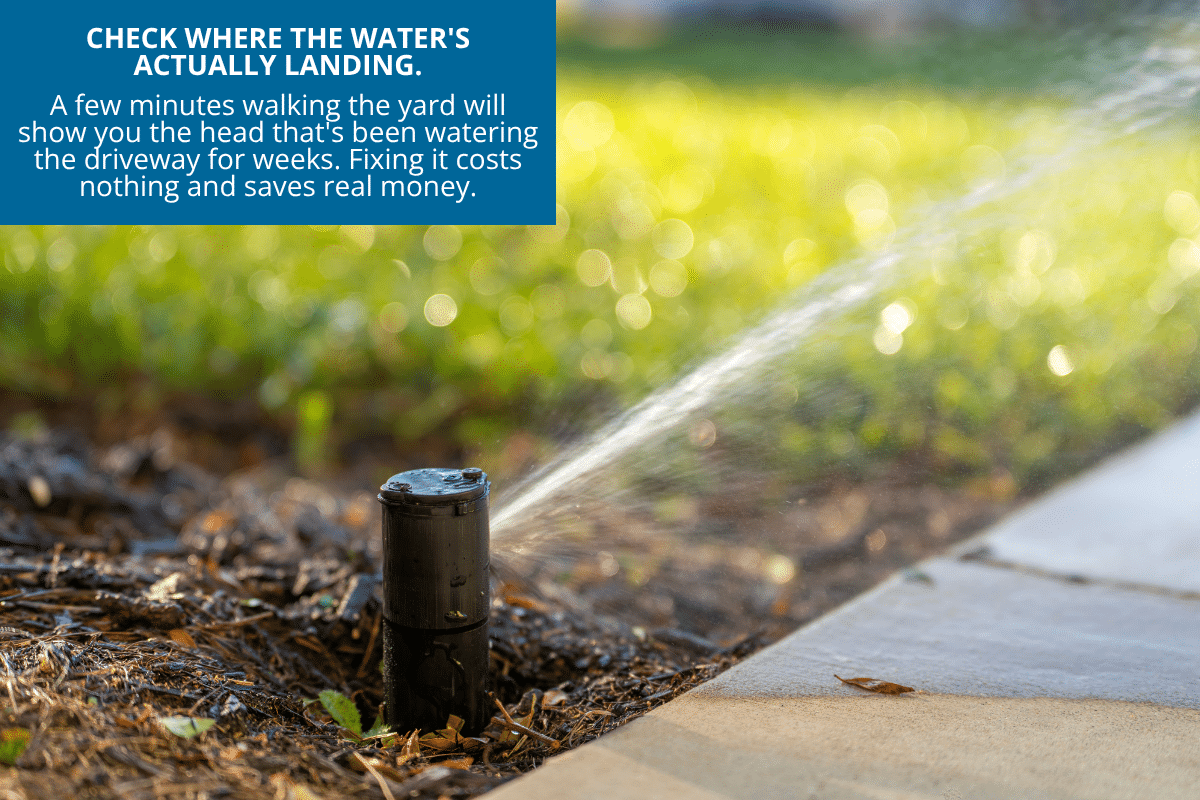
While you’re already thinking about water, take a slow lap around your sprinkler system and actually watch where it’s going.
You’ll probably find at least one head watering the driveway, the street, the neighbor’s fence, or a shrub that gave up hope years ago. Sprinkler heads shift, tilt, and clog over time without you noticing, and every minute one of them spends watering concrete is money down the drain, literally. A quick walk-around every few weeks is enough to catch it, and it costs you nothing but a few minutes.
Put that rain barrel to work
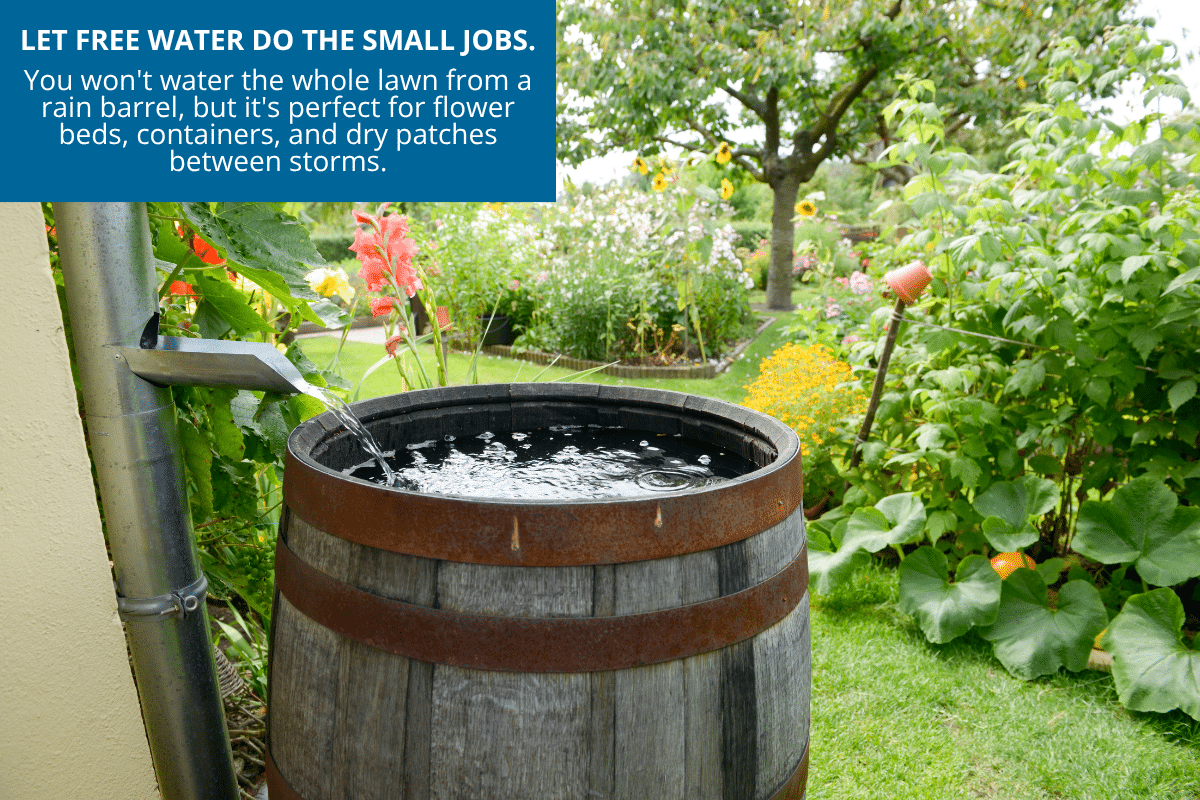
If you’ve got a rain barrel sitting under a downspout, don’t let it just sit there looking practical. You won’t water your whole lawn with it, but it’s perfect for dry patches, flower beds, containers, and anything newly planted that needs extra attention between storms.
A roof you wouldn’t think twice about can collect hundreds of gallons from a single inch of rain, which makes that barrel a lot more useful than most people give it credit for. It’s essentially free water sitting there waiting for a job.
Brown grass isn’t always an emergency

Not every brown patch means your lawn is dying. Plenty of grass types naturally slow down or go dormant during a long stretch of heat, and that’s a survival strategy, not a failure on your part. When the weather cools off and the rain comes back, healthy grass usually greens right back up on its own.
If you’re rethinking your lawn entirely, drought-tolerant grasses like Bermuda, Zoysia, or buffalo grass are worth a look, especially if you live somewhere that runs hot and dry most summers. That’s a bigger project than most of us are tackling this week, but it’s worth filing away for next time you’re reseeding or starting from scratch.
The greenest lawn on the block
Sometimes the greenest lawn on the block doesn’t belong to the person who uses the most water. It belongs to the one who knows when to put the hose away.
A little attention to timing, depth, and mowing height will save you money and give you better grass than dragging that sprinkler out every single evening ever did. Your water bill will thank you. So, eventually, will your lawn.
Question: Are you a “water it every day” person or a “let it beg for it” person? Be honest.
EverydayCheapskate™ is reader-supported. We participate in the Amazon Services LLC Associates Program and other affiliate advertising programs, designed to provide a means for us to earn from qualifying purchases, at no cost to you.

Easy Slow Cooker Peach Cobbler with Boxed Cake Mix
It’s too hot to bake. You know it. I know it. But peach season doesn’t care about the heat index. Those peaches are sitting on your counter getting riper by the hour, practically daring you to do something with them before they turn to mush. So what’s a person supposed to do… turn the oven on and roast the whole kitchen just for dessert?

No. You use the slow cooker sitting in your cabinet doing nothing since the last pot roast.
This peach cobbler happens in three ingredients and about five minutes of actual work. The slow cooker does the rest while you go sit somewhere with air conditioning, like a civilized person. I’m not going to pretend this is the most sophisticated dessert you’ll ever make. It’s not. It’s better than that. It’s the one you’ll actually make again.
Why this works
Here’s the thing about cobbler: it’s supposed to be a little messy. A little imperfect. That’s the whole charm of it. Somewhere along the way, recipe writers decided we needed cold butter cut into flour with a pastry blender and a biscuit dough rolled to a precise thickness, and I say: for a weeknight dessert in August? Absolutely not.
A box of white cake mix, cut with butter until it’s crumbly, does the same job as a made-from-scratch biscuit topping. It bakes up golden and just a little crisp on top, with all that peach juice bubbling up underneath. Nobody at your table is going to ask if you made the topping from scratch. And if they do ask, that’s a you problem, not a me problem.
What you’ll need
Fresh, ripe peaches
These are the whole point of the recipe, so don’t cheap out here. A peach that’s still hard as a baseball won’t break down and get juicy the way you want. If your peaches are a little underripe, leave them on the counter for a day or two first. In a real pinch, canned peaches (drained well) or frozen sliced peaches (thawed and drained) will work, though you’ll lose some of that fresh-peach flavor that makes this worth making in the first place.
A box of white cake mix
This is your topping, and it needs to be the dry mix straight from the box. Don’t prepare it first. Yellow cake mix works fine too if that’s what’s in your pantry. I’ve used it plenty of times when white wasn’t on the shelf. Spice cake mix is worth trying if you want something with a little more warmth to it.
Butter
This is what turns the dry cake mix into that crumbly, golden topping, so don’t try to skip it or swap in oil. It won’t crumble the same way and you’ll end up with something closer to cake batter than cobbler topping. Salted or unsalted both work. If you need this dairy-free, a stick of plant-based butter substitute (the kind sold in stick form, not the tub spread) will get you close.
That’s it. Three ingredients, and I’d argue the recipe gets worse the more you add to it.
How to make it
Start with the peaches
Peel and slice your peaches, then spread them in an even layer across the bottom of your slow cooker. A 3- or 4-quart size is right for this amount. Any bigger and your peaches will spread too thin and cook unevenly.
Don’t sweeten the peaches or toss them with anything first. Between the peaches’ own juice and the sugar already in the cake mix, you’ve got plenty of sweetness coming.
Cut the butter into the cake mix
In a separate bowl, dump in your dry cake mix and add the butter. Cut it in with a pastry blender if you own one, or do what I do most days and just use a fork, or honestly, a potato masher works great here too. You’re aiming for a crumbly texture, like coarse sand with some pea-sized clumps. Don’t overwork it into a paste.
Layer it over the peaches
Sprinkle that crumbly mixture evenly over the peaches. Resist the urge to stir it together. You want distinct layers, peaches on the bottom and that crumbly topping on top, so it bakes up with texture instead of turning into peach mush with cake crumbs mixed in.
Here’s the trick nobody tells you about the lid
Slow cookers trap condensation, and that condensation likes to drip right back down onto your topping and turn it soggy. Lay a paper towel across the top of the slow cooker before you put the lid on. It’ll catch the drips before they land on your cobbler. This one trick is the difference between a topping that stays crisp and one that turns to wet cake, and I learned it the hard way after one too many soggy cobblers.
Cook and walk away
Cook on HIGH for 2 to 3 hours, or on LOW for about 4, until the topping is golden and the peaches are bubbling around the edges. Resist opening the lid to check on it every twenty minutes. Every peek lets heat escape and adds to your cook time.
A few things I’ve learned
Serve it warm, with a scoop of vanilla ice cream melting into the peach juice underneath. That’s non-negotiable in my house. If you’ve got leftovers (unlikely, but let’s pretend), it keeps in the fridge for a few days and reheats just fine in the microwave. The topping won’t be quite as crisp, but it’ll still taste like summer.
And if peach season passes you by before you get to this? Frozen peaches make this a year-round dessert, not just a July-and-August one. I’ve made this in December when I needed something that felt like summer and didn’t want to think too hard about it.
This is the kind of recipe I love handing off to you: cheap, forgiving, and it doesn’t ask much of you in return. Give it a try this week while the peaches are still good, and let me know how it turns out.

Slow Cooker Peach Cobbler
Equipment
- 3- or 4-quart slow cooker
- Pastry blender (or fork, or potato masher)
Ingredients
- 6 fresh ripe peaches, peeled and sliced
- 1 box white cake mix
- ½ cup butter 1 stick
Instructions
- Place sliced peaches in the bottom of a 3- or 4-quart slow cooker.
- In a medium bowl, combine the dry, unprepared cake mix with the butter.
- Cut the butter into the cake mix with a pastry blender (or fork or potato masher) until crumbly.
- Sprinkle the cake mix mixture over the peaches.
- Apply the slow cooker lid.
- Optional: Place a paper towel over the top of the slow cooker before applying the lid, to catch and absorb any condensation that collects while cooking.
- Cook on HIGH for 2–3 hours, or on LOW for about 4 hours.
Notes
Nutrition
Question: Are you team ice cream on top, or eating it straight out of the crock? No judgment either way. Share in the comments.

What’s the Real Hourly Wage of Your Second Income Job?
Here’s a sentence I hear all the time: “We need my paycheck just to survive.” Maybe you’ve said it yourself, usually while writing a check to daycare that feels bigger than your mortgage. But here’s a question almost nobody asks before saying it. What does that paycheck actually cost you to earn? Not the number on the pay stub. The real number. The one left over after you subtract everything that job requires you to spend, and divide what’s left by every hour it eats out of your day. That number is usually a lot smaller than you think. Sometimes it’s embarrassingly small.

A reader named Bethany wrote to me about exactly this.
Dear Mary: “With two toddlers, my husband and I are paying through the roof for daycare. It feels like almost all the money I earn goes straight to childcare, so I’ve been thinking about quitting my job to stay home with the kids. I’m excited about being home with our boys, but I also want to know my family will be okay financially. Is there an easy way to make sure this decision is the right one?
— Bethany
Dear Bethany: You’re already asking the right question, which puts you ahead of most people who make this decision on a gut feeling alone. Good news or bad news, a decision this big deserves actual math, not a hunch at 11 p.m. after a rough day.
So let’s do the math. Grab a notebook, or open a blank spreadsheet, whichever feels less intimidating. This takes about twenty minutes and it will tell you more than any pro-and-con list ever could.
Step one: find your real take-home pay
Write down your monthly net pay. Not your salary. Not the number in your offer letter from three years ago. The actual dollar figure that lands in your bank account after taxes and deductions.
That’s your starting number. It’s about to shrink.
Step two: subtract everything that job costs you
Now list every dollar you spend because you work, and take it off the top. Daycare, obviously. For a lot of families that’s the whole ballgame. But don’t stop there. Add up:
- Commuting costs: gas, tolls, parking, transit passes, or the extra wear on your car
- Work clothes, dry cleaning, and the “I need something for this meeting” purchases
- Coffee, lunches out, and vending machine snacks you’d skip if you were home
- Gifts, office pools, and the birthday cake fund that somehow always needs five dollars
- Any professional dues, subscriptions, or continuing education you pay for out of pocket
For a lot of two-income households, this list alone chips away 15 to 25% of that paycheck before you’ve even gotten to childcare.
Step three: subtract childcare, in full
This is where it gets real. Daycare costs have climbed hard the last few years, and if it feels like you’re paying more than you used to, you’re not imagining it. Nationally, full-time infant care in a center now runs somewhere around $1,200 a month, and in plenty of states, especially on the coasts, it’s closer to double that. Costs for two kids under five can easily clear $24,000 a year in a lot of metro areas.
Put your actual number here. Both kids, full weeks, no rounding down.
Step four: divide by your real hours
Add up every hour that job takes from your life… not just the time you’re clocked in, but the commute both ways, the fifteen minutes you spend getting ready specifically for work, all of it. Multiply by the weeks you actually work in a month, minus vacation.
Now take what’s left of your paycheck after steps two and three, and divide it by that hour total.
That’s your real hourly wage. Write it down and sit with it for a second.
I’ve talked to women who thought they were earning $28 an hour and discovered, once they did this math honestly, they were closer to $4. Some land at zero. A few land in the negative, which means they were quite literally paying to go to work.
Let’s run the numbers
Numbers are always easier to trust when you can see them laid out. So let’s walk through a made-up family that probably looks a little familiar.
Say your monthly take-home pay is $3,600. Two kids in daycare runs $2,000 a month combined, which is right in line with what plenty of families are paying right now. Add another $300 for gas, tolls, and parking. Add $150 for the lunches, coffee, and “I forgot to pack anything” drive-through stops that happen on long work weeks. Throw in $75 for work clothes and the odd gift or office collection.
That’s $2,525 gone before you’ve even gotten to taxes pushing you into a higher bracket. What’s left is $1,075.
Now the hours. Say you work 40 hours a week, plus five hours a week commuting, plus another two and a half hours getting ready and packing lunches specifically because you’re headed to work. That’s 47.5 hours a week, times roughly 4.3 weeks a month, which comes out to about 204 hours.
$1,075 divided by 204 hours is $5.27 an hour.
Run your own numbers through this same exercise. I’d put money on the result surprising you, one way or the other.
But wait, there’s more
Here’s the part people forget: the hidden costs don’t stop once you’ve paid for daycare. Think about what your work schedule does to the rest of your budget.
Are you hitting the drive-through more because nobody has energy to cook after a ten-hour day? That adds up fast. A family that eats out three extra nights a week because of exhaustion can easily burn $150 to $200 a month that a slower pace at home would avoid.
Do you pay someone to mow the lawn, shovel snow, or clean the house because there’s no time left for it? Those are all real dollars that a stay-at-home season could put back in your pocket, because now you’re the one doing the yard work and the vacuuming, and that labor is worth something too.
And don’t forget what a second income does to your tax bracket. That extra paycheck might be pushing your household into a higher bracket, which means the government is taking a bigger bite of every dollar you earn on top of everything else already coming off the top.
Once you add all of that up, plenty of families discover the math tips in a direction they never expected. It’s entirely possible you’re currently paying to hold down a job.
What the math doesn’t measure
I want to be fair here, because the math isn’t the whole story, and I’d be doing you a disservice if I pretended it was.
A paycheck isn’t only about the hourly wage. It’s also retirement contributions building over decades, a foothold in your career so you’re not starting from scratch in five years, health insurance if that’s coming through your job, and for a lot of women, a sense of identity and adult conversation that matters more than the number on the check. None of that shows up in a spreadsheet, and none of it should be waived away because the hourly math looks bad.
So don’t treat this exercise as the whole decision. Treat it as the missing piece you didn’t have before. Now you can weigh the real dollars-and-cents cost against everything else that matters to you, instead of guessing at both.
Turn it into a plan, not a leap
Before you hand in any notice, write out what your household spending plan looks like on one income. Every bill, every category, written down in black and white… not estimated, not “we’ll figure it out.” If you don’t already have a system for this, start with a simple monthly plan on paper where every dollar coming in has a job to do before the month begins. It sounds old-fashioned. It works.
Build in a cushion, too. Even a modest cash reserve set aside before you make the switch gives you room to breathe if the first few months are tighter than expected, or if an unexpected expense shows up right when you’re adjusting to one income. That cushion is what turns “I hope this works” into “I know this works, even if something goes sideways.”
If the math from Bethany’s exercise says you’d only be netting a few dollars an hour after all the true costs, and your gut has been quietly begging you to be home with your kids, you may have your answer already. The spreadsheet just gave you permission to trust it.
The bottom line
You’re not choosing between “responsible” and “irresponsible” here, Bethany. You’re choosing between two different ways to be responsible, and the honest math is what tells you which one actually fits your family right now. Run the numbers, look at what’s left standing after you strip away the noise, and trust what you find.
Whatever you and your husband decide, you’re clearly the kind of parent who thinks it through instead of winging it. Your boys are lucky either way.
Question: So tell me… did doing this math surprise you or confirm what you already suspected? Join the conversation below.

Zucchini Overload? 10 Ways to Use Up Your Garden Surplus
It happens every August. That one zucchini plant you barely remember planting turns into a green monster, and suddenly you’re picking eight a day and running out of neighbors to ambush. Zucchini bread and pickles only get you so far. Here are 10 genuinely different ways to use up the surplus, plus a freezer trick that stretches it clear into next spring.

There’s a moment every August when the zucchini plant you tucked into the corner of the garden, the one you planted almost as an afterthought, turns into a green monster with no off switch. You picked five yesterday. You’ll pick eight tomorrow. And your neighbor has started peeking through the blinds before answering the door, because they know exactly what’s in your hands.
I’ve done the porch drop-and-run more times than I’d like to admit. Zucchini bread and zucchini pickles are wonderful. They’re also not a long-term plan, because no household on earth eats that much bread.
So here are 10 genuinely different ways to work through the surplus… most of which don’t taste like zucchini at all, plus the freezer trick that turns 20 pounds of August zucchini into fall soup, winter pasta, and spring pancakes without you lifting a finger next season.
Why zucchini gets away from you
Zucchini is one of the easiest vegetables to grow and one of the hardest to keep up with. One plant can hand you 10 to 20 pounds over a summer. Two plants and you’re feeding the whole block. Three, and you’re the person leaving unmarked bags on porches after dark, hoping nobody’s home.
Here’s the good news, though. Zucchini is basically a food chameleon. Grate it fine and stir it into almost anything, and it disappears. No taste, hardly any texture, while quietly adding moisture and bulk. Which means the real trick isn’t eating more zucchini. It’s sneaking it into meals you’re already making.
Here are 10 ways that actually work.
1. Grate it and freeze it in 2-cup portions
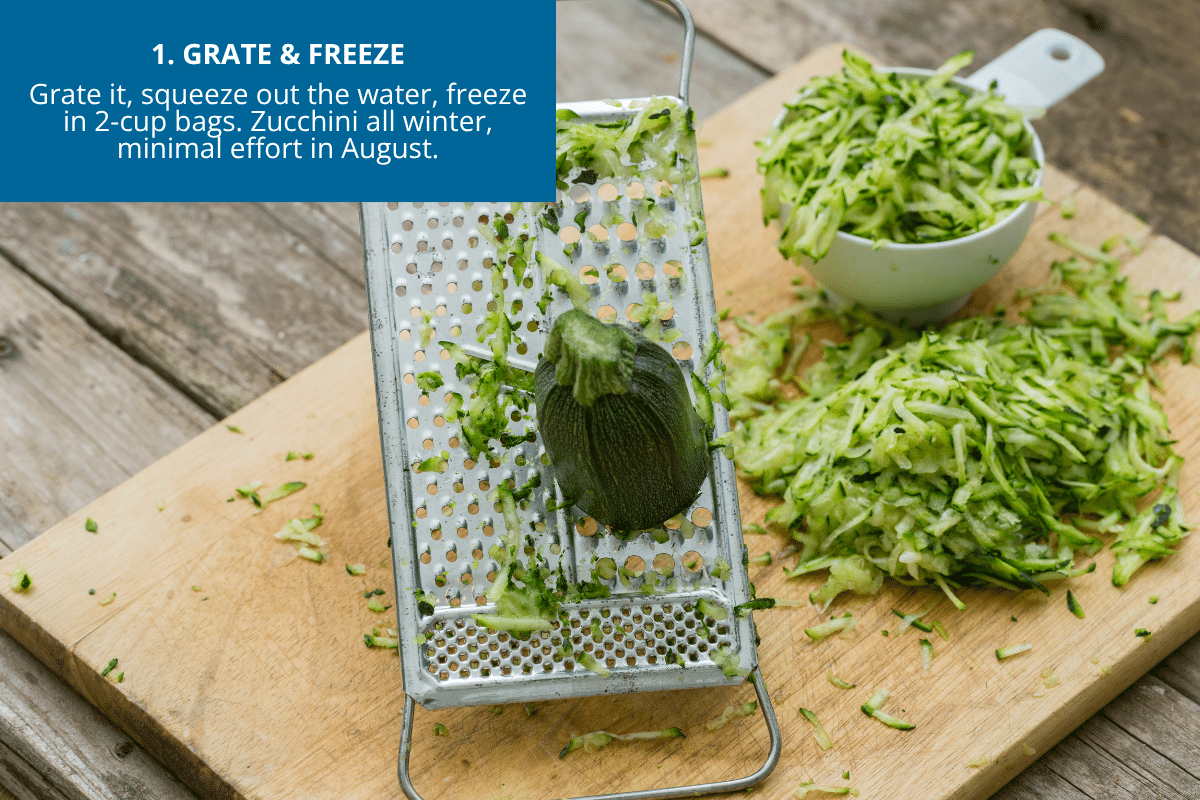
This is the single most useful thing you can do with a zucchini glut, full stop. Grate whole zucchini on the large holes of a box grater, then squeeze the water out in a clean kitchen towel. Don’t skip this part. Zucchini is about 95 percent water, and skipping it gets you a soggy mess later. Portion into freezer bags in 2-cup amounts and label with the date.
Frozen zucchini keeps about a year and drops right into soups, pasta sauce, chili, meatballs, muffins, pancakes.
2. Zucchini noodles for a fast weeknight dinner
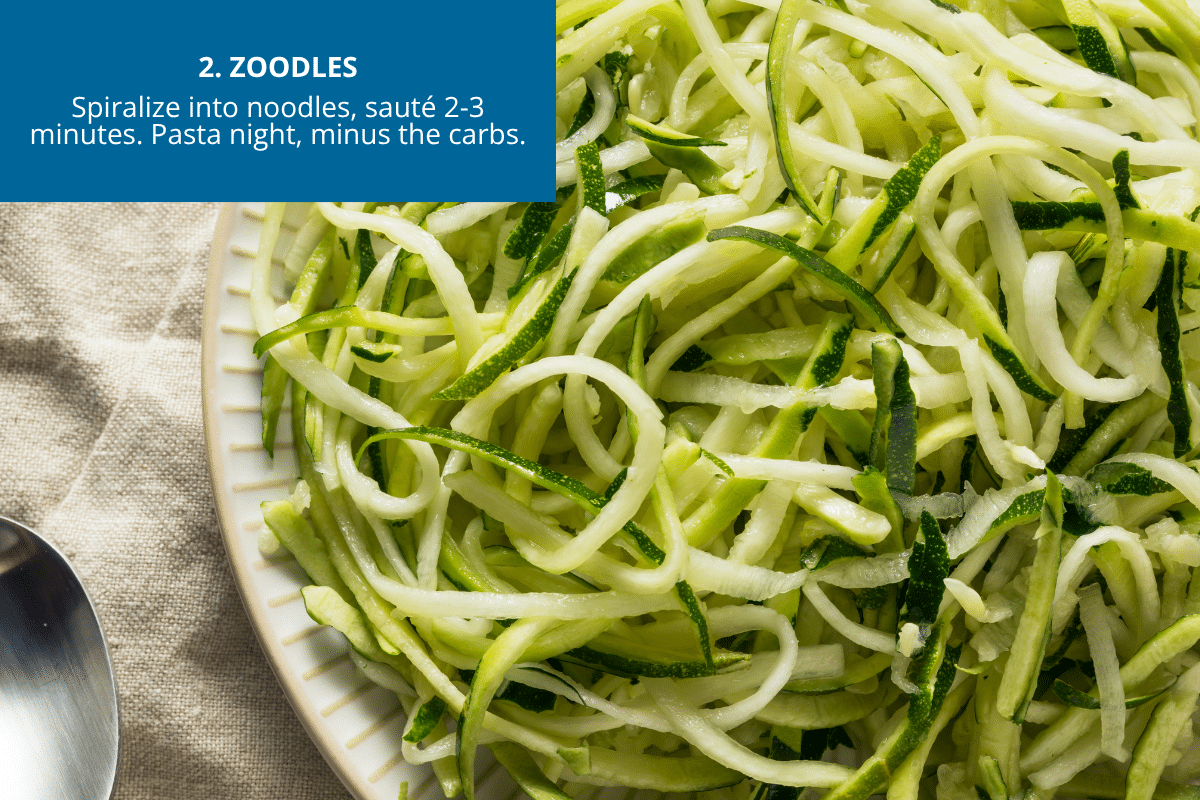
A spiralizer turns a whole zucchini into pasta-shaped noodles in under a minute. Sauté with olive oil and garlic for 2 to 3 minutes. Don’t walk away, because overcooked zoodles turn watery fast. Then toss with your favorite sauce and a handful of cheese. Low-carb, feels like real pasta, and uses up a whole zucchini per person.
No spiralizer? A regular vegetable peeler makes wider ribbons that work just as well. I use mine more than the fancy gadget, honestly.
3. Grated into meatballs, meatloaf, and burgers

Two cups of grated, well-squeezed zucchini folded into a batch of meatballs or meatloaf makes them noticeably juicier, stretches the meat further, and vanishes completely. The kids won’t know. The adults will just think you’ve gotten better at cooking.
For burgers, work in about half a cup of finely grated zucchini per pound of ground beef. Same trick, same disappearing act.
4. Zucchini fritters, the snack nobody turns down

Grate it, squeeze it dry, mix with an egg, a little flour, some feta or cheddar, salt and pepper. Pan-fry small patties in olive oil until golden on both sides. Serve with sour cream, or plain Greek yogurt with a squeeze of lemon if you want it lighter.
These get eaten at every table I’ve ever put them on. Side dish, snack, light lunch, or breakfast with a fried egg on top. They work everywhere.
5. Stuffed zucchini boats

This is where the baseball-bat zucchini you missed for a week finally earns its keep. Halve it lengthwise, scoop out the seeds, and stuff with whatever you’ve got: ground meat with rice and tomato sauce, taco filling and cheese, or sausage with breadcrumbs and parmesan. Bake at 375°F for 25 to 30 minutes.
One giant zucchini, properly stuffed, feeds a family of four.
6. Zucchini “lasagna,” no noodles required
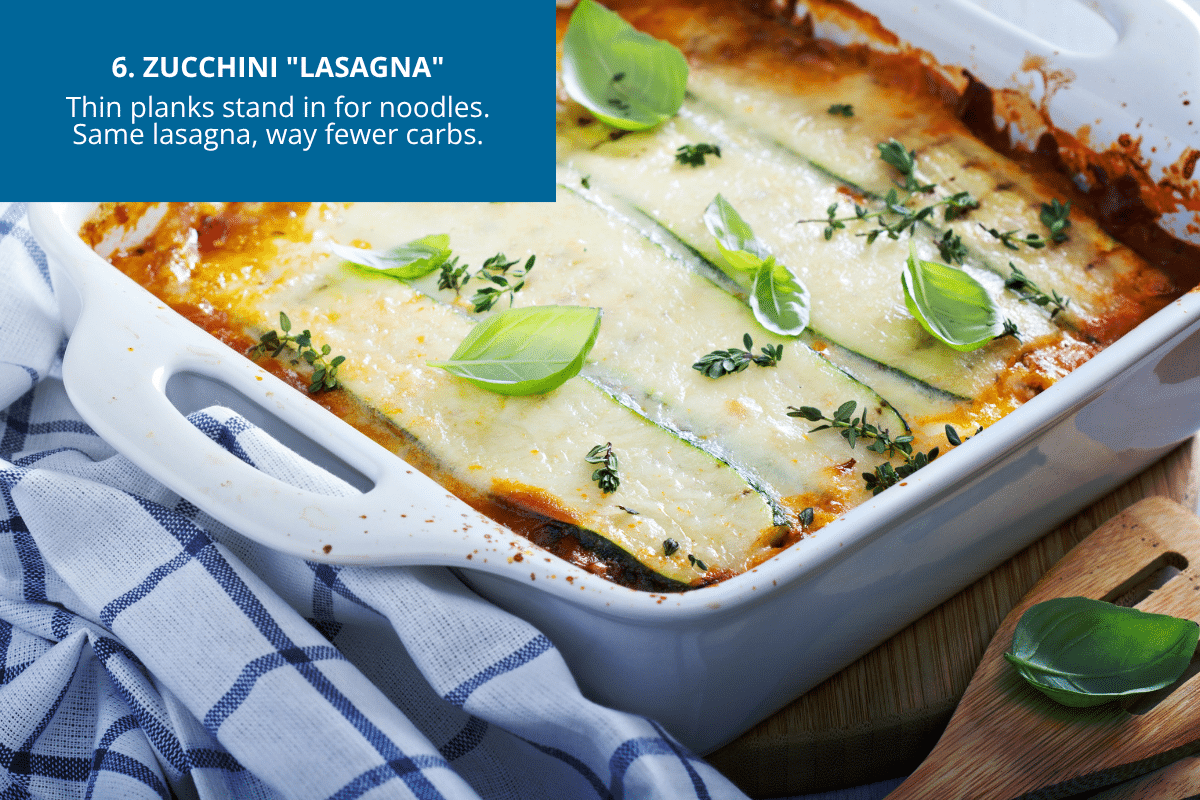
Slice zucchini into thin lengthwise planks, salt them, and let them drain to pull out the extra moisture. Then layer them exactly like lasagna noodles (ricotta, meat sauce, mozzarella) and bake at 375°F for about 45 minutes.
Kids and skeptics genuinely cannot tell the difference. Handy if anyone at your table is cutting carbs or avoiding gluten.
7. Chocolate zucchini muffins or cake

Yes, chocolate. Grated zucchini adds moisture to chocolate baked goods without adding a hint of its own flavor. It just makes everything more tender. Two cups stirred into a standard chocolate cake or muffin recipe changes the texture for the better.
Kids eat these without a second thought. Neighbors ask for the recipe, which is its own kind of revenge for all those porch bags.
8. Blender zucchini soup

Sauté a diced onion in butter, add chopped zucchini and a few cups of broth, season, and simmer 15 minutes. Blend smooth with an immersion blender, then stir in a splash of cream or a spoonful of cream cheese for body.
Silky, mild, and good hot or cold. Freezes beautifully, which means one pot of soup solves two future dinners.
9. Grilled zucchini rounds or planks

Slice into rounds or thick lengthwise planks, toss with olive oil, salt, pepper, and Italian seasoning. Grill 3 to 4 minutes a side until you’ve got real grill marks, then finish with a drizzle of balsamic glaze or a squeeze of lemon.
It’s the easiest side dish in the world, works at any cookout, and uses up a whole zucchini for every two people at the table.
10. Pickle it, bread it, or ferment it

For the surplus you want to stretch out longer:
- Refrigerator pickles: Slice into rounds or spears, pack in a jar, and pour over a hot brine of vinegar, water, sugar, salt, dill, and garlic. Keeps in the fridge 2 to 4 weeks.
- Bake and freeze: Zucchini bread freezes beautifully, so when you’re baking, make three loaves and freeze two. Future-you problem, solved.
- Ferment into relish: Grated zucchini with salt, water, and pickling spices in a jar turns into a tangy lacto-fermented relish, ready in about a week and good for months.
A few things NOT to do with a zucchini surplus
- Don’t freeze whole raw zucchini. It turns to mush every time. Grate and squeeze first, no exceptions.
- Don’t add raw zucchini to a yeast bread dough. The extra moisture throws off the rise and you’ll end up with a brick.
- Don’t let the giant baseball-bat zucchini sit on the vine. It tells the plant to stop producing, and the small ones taste better anyway.
And don’t leave zucchini on your neighbor’s porch after dark. They know it’s you. They’ve always known it’s you.
The sneak-it-in strategy
If your surplus is truly out of control, plan one “hidden zucchini” meal a week. Meatloaf on Monday, chocolate muffins on Tuesday, pasta sauce on Wednesday, muffins packed for lunches on Thursday. Two cups a meal is easy to tuck in without anyone noticing. Do that for a month and you’ve worked through 30 to 40 pounds of zucchini without a single complaint at the table.
By next August, you’ll have a whole system ready to go. And you’ll still plant one zucchini plant anyway, because they’re pretty, and because a zucchini fresh off the grill in July is one of the best things summer hands you.
Question: What’s the sneakiest way you’ve ever used up a zucchini surplus? And how many pounds did your best plant give you last year? Tell me in the comments. I love a good zucchini brag.
EverydayCheapskate™ is reader-supported. We participate in the Amazon Services LLC Associates Program and other affiliate advertising programs, designed to provide a means for us to earn from qualifying purchases, at no cost to you.

The Easiest Way to Turn Fall Apples Into Applesauce
Have you ever walked into a house where someone’s been cooking apples with cinnamon and thought, Well, I guess I live here now? There’s something about apples slowly cooking with warm spices that makes a kitchen feel instantly cozy. And with apple season just around the corner, this is the perfect time to put a simple little recipe on your radar.

This Harvest Apple Sauce is one of those recipes that does almost all the work while you go about your day. Toss sliced apples and water into the slow cooker, let time do its thing, then add a little brown sugar and pumpkin pie spice near the end.
That’s it. No stirring pot on the stove. No complicated ingredients. No need to buy a jar when you’ve got a pile of perfectly good apples sitting on the counter that need a purpose.
And homemade applesauce has another advantage: you’re in charge. You decide how sweet it is, what apples go into it and how much spice you want. That’s a pretty good deal for about 15 minutes of hands-on work.
Why Homemade Applesauce Is Worth It
Store-bought applesauce certainly has its place. I’ve bought plenty of it myself. But when apples are abundant, homemade applesauce is one of those things that makes you wonder why you ever paid someone else to peel the apples.
The flavor is the big difference. Slow cooking brings out the natural sweetness of the apples and gives them plenty of time to soften and mingle with the warm spices.
And because you control the ingredients, you can skip the preservatives and adjust the sugar to suit the apples you’re using. Sweet apples may need very little. Tart apples might appreciate the full amount.
That flexibility is part of the fun.
What You’ll Need
Apples
You can use just about any apples you have on hand, which makes this recipe especially handy during apple season. Gala, Fuji, Honeycrisp, McIntosh, Golden Delicious and Granny Smith can all work beautifully.
But here’s a little applesauce secret: mixing varieties can give you a more interesting flavor than using only one kind. Sweet apples bring natural sweetness while tart apples add a little brightness. Softer apples, such as McIntosh, break down beautifully and give the sauce a smoother texture.
Have a few apples in the fruit bowl that aren’t quite exciting enough to eat out of hand? Into the slow cooker they go.
Water
The water keeps the apples from sticking while they begin to release their own juices. You don’t need much. The apples will create plenty of liquid as they cook, so resist the temptation to add more unless your slow cooker is unusually dry.
Brown Sugar
Brown sugar adds sweetness and a little caramel-like depth, but don’t assume you have to use the full amount. Taste matters here. If your apples are naturally sweet, start with less and add more later if needed. If you’ve chosen tart apples, you may want the full amount.
That’s one of the beauties of making applesauce yourself. You’re not locked into somebody else’s idea of sweet.
Pumpkin Pie Spice
A little pumpkin pie spice turns plain cooked apples into something that tastes like fall in a bowl.
I like using my homemade Pumpkin Pie Spice Mix because it’s inexpensive, easy to make and uses spices you may already have in the cupboard. Making your own spice blends is one of those tiny kitchen habits that can save money over time without making life harder.
And no, you don’t need to wait for pumpkin pie season to use it. Apples are perfectly happy to share the spotlight.
How to Make Harvest Apple Sauce
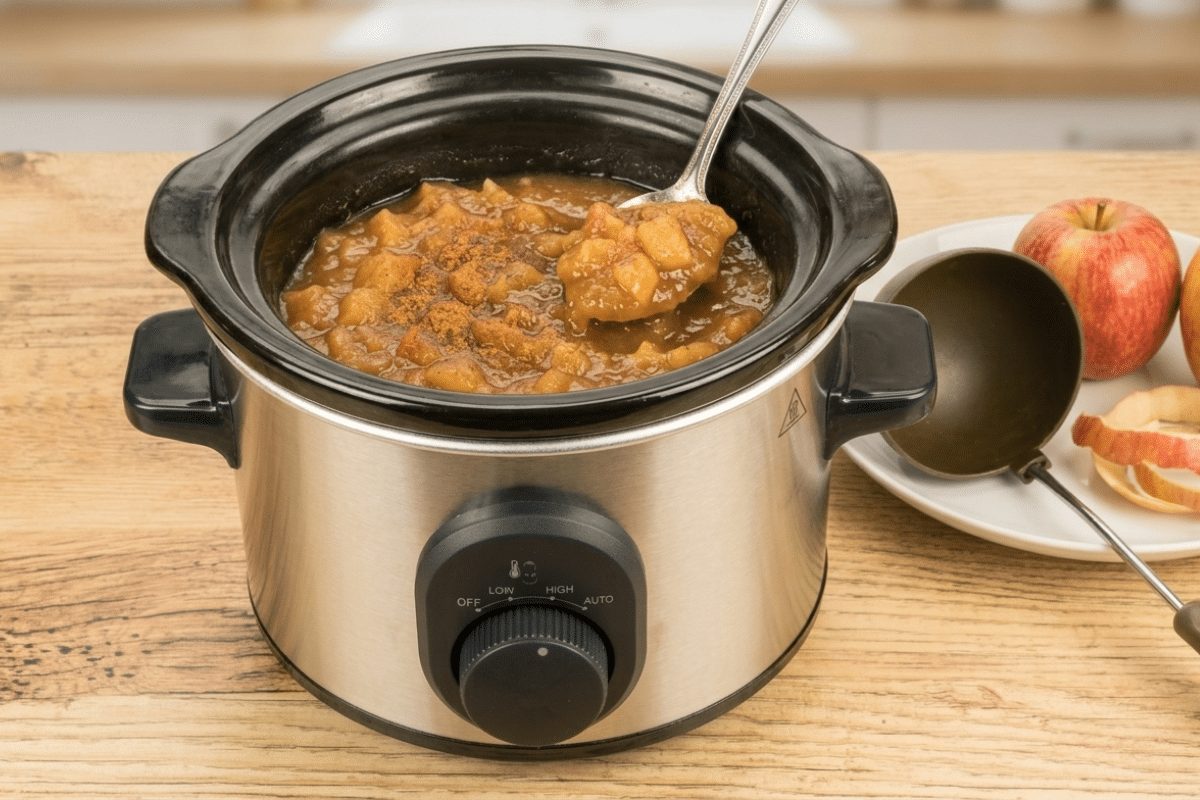
1. Give the Apples a Little Prep
Peel, core and thinly slice your apples. I know. Peeling eight apples isn’t exactly a party. But thin slices cook more evenly and break down beautifully in the slow cooker.
If you’re making a big batch, an apple peeler-corer-slicer can be a real sanity saver. Mine does all three jobs with one crank, and the suction base keeps it planted on the counter instead of sending it on a little kitchen adventure.
Do you need one? Probably not if you make applesauce once a year. But if apple pies, crisps and homemade applesauce are regulars in your kitchen, this is one gadget that can earn its keep.

(Disclosure: This post includes an Amazon Creator Connections product. I may earn a small commission if you purchase through the link, at no additional cost to you.)
2. Let the Slow Cooker Do the Heavy Lifting
Place the sliced apples and water into your slow cooker and set it to Low. Now walk away.
Let the apples cook for 6 to 8 hours, or until they’re very soft and the flavors have had time to develop. You don’t need to hover over the slow cooker or stir every 20 minutes.
As the apples cook, they’ll soften and release their natural juices. Your kitchen will also begin smelling like you’ve been working much harder than you actually have.
3. Add the Sweetness and Spice at the End
Once the apples are soft, stir in the brown sugar and pumpkin pie spice. Then let everything cook for another 30 minutes.
Adding the sugar and spice toward the end keeps the flavors fresh and gives them time to blend into the warm apples without spending the entire cooking time in the slow cooker.
This is also your chance to taste and adjust. Want it sweeter? Add a little more sugar. Prefer a stronger spice flavor? Add another pinch. You’re the boss of this applesauce.
4. Decide How Chunky You Want It
Here’s another advantage of homemade applesauce: you get to choose the texture.
If you like a rustic, chunky applesauce, simply stir the cooked apples until they’re broken down to your liking. For a smoother sauce, mash the apples more thoroughly with a potato masher or use an immersion blender.
I happen to like a little texture. It reminds me that this started out as actual apples instead of something that came from a factory wearing a label.
Easy Ways to Make This Recipe Your Own

Use Less Sugar
If you’re watching added sugar, start with less brown sugar and taste before adding more. Very sweet apples may need surprisingly little. You can also leave the sugar out entirely for a naturally sweet applesauce, depending on the apples you’re using.
Add More Spice
If you love cinnamon, go ahead and increase the pumpkin pie spice to suit your taste. You could also add a tiny pinch of additional cinnamon if you want the flavor to lean even warmer. Just remember that spices become more noticeable as the apples cook down, so it’s easier to add than to undo.
Use Up Apples That Need Help
This is one of my favorite reasons to make applesauce. Have apples that are a little wrinkly? Maybe they’re past their prime for a crisp lunchbox snack but aren’t spoiled? Peel away the less-than-perfect parts and use the good apple underneath.
Of course, don’t use apples that are moldy, rotten or otherwise unsafe. Applesauce is wonderfully forgiving, but it isn’t magic.
How to Serve Homemade Applesauce
Warm applesauce straight from the slow cooker is hard to beat.
Spoon it over pancakes, waffles or oatmeal for breakfast. Stir it into plain yogurt for a quick snack. Serve it alongside pork chops or roasted chicken for a sweet-tart contrast that makes an ordinary dinner feel a little more special.
Or grab a spoon and eat it straight from the bowl. I won’t tell.
A Fall Recipe Worth Keeping
When apple season arrives, grab a few extra apples and make a batch of this applesauce. It’s an easy way to turn a good sale, farmers market haul or backyard bounty into something you’ll actually use all week.
I love a recipe that saves money. I love one that saves time even more. But when it does both and tastes this good? That’s a keeper.

Harvest Apple Sauce
Equipment
- Slow cooker
- Apple peeler, corer and slicer (optional)
- Potato masher or immersion blender (optional, for smoother applesauce)
Ingredients
- 8 apples peeled, cored and thinly sliced
- ½ cup water
- ¾ cup packed brown sugar light or dark, or less to taste
- ½ teaspoon pumpkin pie spice preferably homemade
Instructions
- Add the apples and water. Place the peeled, cored and thinly sliced apples in the slow cooker. Add the water.
- Slow cook. Cover and cook on Low for 6 to 8 hours, or until the apples are very soft and easily mashed.
- Add the sugar and spice. Stir in the brown sugar and pumpkin pie spice. Continue cooking, uncovered or covered according to your slow cooker instructions, for 30 minutes to allow the flavors to blend.
- Adjust the texture. For chunky applesauce, stir and mash the apples lightly. For smoother applesauce, use a potato masher or immersion blender until you reach your preferred consistency.
- Serve. Enjoy warm over pancakes or oatmeal, alongside pork chops or roasted chicken, or simply spoon it into a bowl for a cozy snack.
Notes
Nutrition
Question: Are you team chunky or team smooth when it comes to applesauce? Let us know down in the comments.
EverydayCheapskate™ is reader-supported. We participate in the Amazon Services LLC Associates Program and other affiliate advertising programs, designed to provide a means for us to earn from qualifying purchases, at no cost to you.

Moneymaxxing? Honey, I’ve Been Doing That Since Before It Had a Name
“Moneymaxxing” is the new social media buzzword for trimming bills, chasing points, and boosting savings. Sounds familiar, doesn’t it? I’ve been teaching this exact approach since before anyone I knew had touched the internet, minus the hashtag. But the trend skips a step that actually keeps you out of debt long-term, and today I’m telling you what it is.

So there’s a new trend blowing up on social media called “moneymaxxing.” People are trimming subscriptions, hunting down credit card points, and parking their spare cash in high-yield savings. Financial advisors are calling it a cultural shift.
I have a different word for it. I call it 1992.
That’s the year I sat down to write the first issue of what was then called Cheapskate Monthly, on a machine we called a “word processor” because nobody had settled on a better name for it yet. People were starting to talk about something called the World Wide Web, but nobody I knew had actually seen it. There was no email, no app, nothing to tell me where my money was going. Just me, a stack of bills, and a decade of digging myself out of a genuinely horrific pile of credit card debt.
I don’t say that to be smug. I say it because I want you to notice something: the internet just discovered, packaged, and put a cute name on the exact thing I’ve been teaching in this space for more than three decades. And that tells you everything you need to know about whether it works.
- MORE: Books by Mary Hunt
What moneymaxxing actually is
Strip away the hashtag and here’s the recipe: track your spending, cut what you don’t use, automate your savings, and stop leaving free money on the table. Sound familiar? It should. That’s the bones of Everyday Cheapskate and Debt-Proof Living, minus the one piece I’ll get to in a minute.
I’m not knocking it. Anything that gets a 24-year-old to open a savings account instead of a new credit card is a win in my book. Brad Klontz, the psychologist who commented on this trend, put it well: it beats “credit-card maxxing,” which is what way too many of us have been doing for way too long. Amen to that.
But here’s where I want to gently pull you aside, like a friend at a party who’s noticed you’re about to make a mistake.
The part moneymaxxing skips
Every “maxxing” trend I’ve read about treats money the same way it treats sleep or fiber. Optimize the inputs, watch the outputs improve. Track more, spend less, automate the rest. Clean and simple.
Except money isn’t clean and simple. Money is emotional. It’s the car that breaks down the same week as the dentist bill. It’s Christmas showing up in December every single year like it’s some kind of surprise. Trimming your subscriptions won’t save you when the water heater dies and you reach for a credit card because you have nowhere else to reach. I know, because I reached for one plenty of times before I built something better.
That’s the piece I’ve spent thirty-plus years building, and it’s the piece no app or algorithm hands you: a plan for the expenses you know are coming, and a cushion for the ones you don’t.
I call the first one a Freedom Account. Instead of getting ambushed every time your car insurance or your kid’s birthday rolls around, you divide those predictable-but-not-monthly expenses by twelve and set the money aside a little at a time. Say your car insurance runs $600 a year and the dog’s checkup is another $200. That’s $800, or about $67 a month, sitting in savings before either bill ever shows up. By the time it does, you’re not scrambling. You’re just transferring money you already have.
The second piece is a Contingency Fund, and it’s exactly what it sounds like. Three to six months of expenses, sitting quietly, waiting for the day life throws you a curveball. Because it will. It always does.
Moneymaxxing gets you the first half of the equation: spend less, save more, stop bleeding money on stuff you forgot you subscribed to. Good. Do that. But without a system for the expenses that aren’t monthly and the emergencies you can’t predict, you’re just optimizing your way toward the next unexpected bill and the next round of credit card debt. I’ve watched it happen to plenty of people who were doing everything “right” on paper.
Why I’m not mad about this trend

I actually love that people are talking about their bank balances out loud now. Back when I was climbing out of that decade of debt, admitting you were broke, or that you’d made a dumb money mistake, was something you kept to yourself. I paid for the silence almost as much as I paid for the debt itself.
If a silly internet trend is what it takes to get a room full of strangers comparing savings rates instead of comparing sneakers, I’m here for it. I just don’t want you to stop at the trend. Trends fade. Systems don’t. Mine has outlasted the IBM Selectric, three website redesigns, and more “next big things” than I can count.
Where to start
If you want to try moneymaxxing my way, here’s tonight’s homework:
- Write down what you spend in a typical month. Nothing fancy, just the real number.
- Now write down what you spend once or twice a year that never makes it into that budget. Insurance, gifts, car registration, that dentist visit you dread. This list is always longer than people think.
- Add up that second list and divide it by twelve. Start moving that amount into savings every month. That’s your Freedom Account, and it’s the difference between “surprise expense” and “expense I already planned for.”
Then, whatever you’re not spending on subscriptions you forgot to cancel, or whatever cash-back you rack up hunting deals, funnel it toward a Contingency Fund instead of letting it evaporate into whatever caught your eye on your phone this week.
Maximize away. Just make sure you’re maximizing toward something that still stands when life doesn’t cooperate. That’s not a trend. That’s just how you stay out of debt for good.
Question: So tell me… were you moneymaxxing before it had a name, or is this the push you needed to finally start? I want to hear which one.
EverydayCheapskate™ is reader-supported. We participate in the Amazon Services LLC Associates Program and other affiliate advertising programs, designed to provide a means for us to earn from qualifying purchases, at no cost to you.

How to Get Smell Out of Towels: The 2-Wash Fix That Works
Pull a towel out of the dryer, bury your face in it, and get hit with mildew. Not exactly the spa moment you were going for. I hear about this one constantly, and there’s a reason it’s newer: those water-saving front-loading washers everyone loves are also really good at not rinsing detergent all the way out. Good news: you don’t need new towels.

If my inbox is any indication, smelly towels have become one of the great unsolved mysteries of modern laundry.
You don’t need new towels. You need about 45 minutes, some white vinegar, and a box of baking soda you probably already have in the fridge.
Why your towels smell (even though you just washed them)
That musty, mildewy smell isn’t your imagination and it isn’t a sign your towels are done for. It’s buildup. Detergent and fabric softener residue that never fully rinsed out, sitting there in the fibers, staying damp between showers. Damp plus residue is basically a welcome mat for bacteria. That’s your smell.
It’s also why your towels have gone stiff and scratchy instead of soft and fluffy. All that leftover soap coats the fibers, so instead of absorbing water like a towel should, it just kind of… repels it. You end up drying off with something closer to a cardboard washcloth.
More is not more here. I learned this one the hard way, back when I figured extra detergent meant extra clean. It meant extra crunchy.
Vinegar or baking soda? Do both, just not together
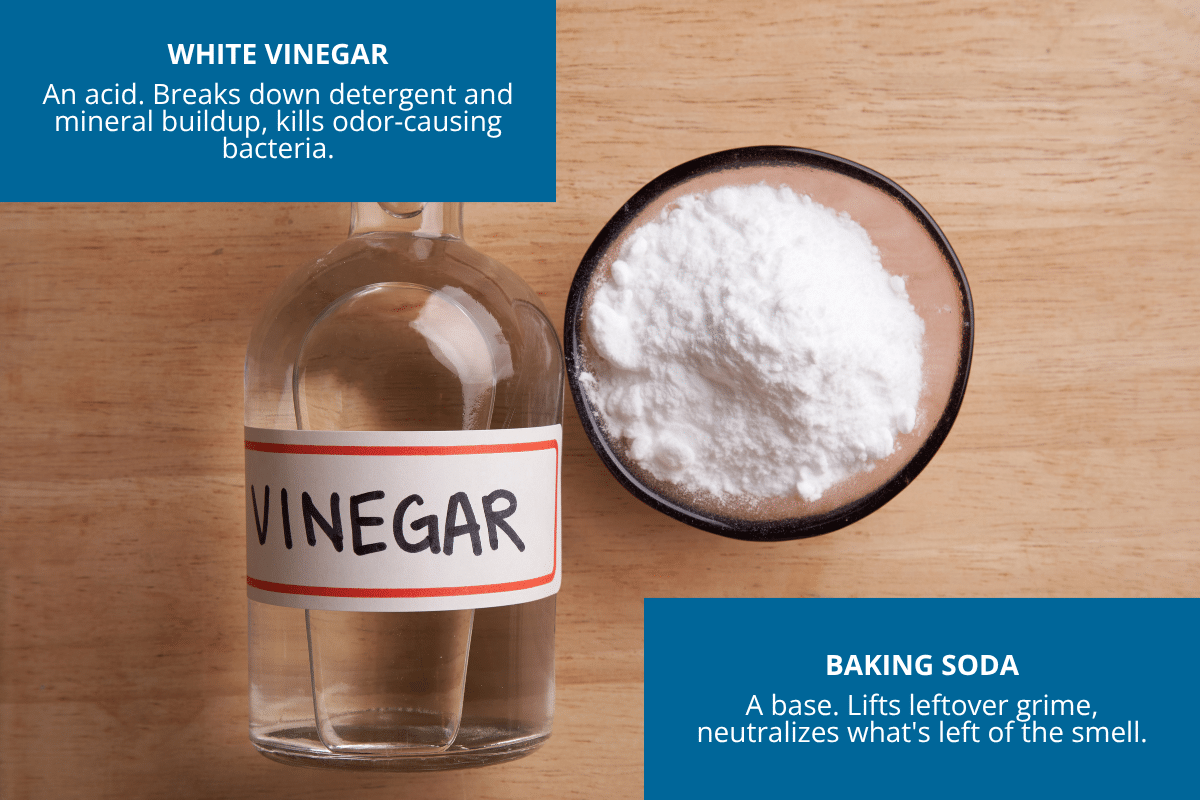
This is where people go wrong. They dump vinegar and baking soda into the same load at the same time, figuring they’re doubling up on cleaning power. Instead, the acid and the base mostly just cancel each other out and you’re left with clean-smelling, still-stinky towels.
Run them in two separate washes and each one gets to do its actual job:
- White vinegar is an acid. It breaks down the mineral and detergent buildup coating your towels and kills the bacteria causing the odor.
- Baking soda is an alkaline. It goes after leftover grime and neutralizes whatever smell is left behind.
One after the other, not mixed. Think of it as a one-two punch instead of a wasted handshake.


The towel reset: two washes, no special products
Wash one: vinegar
Load your towels loosely into the machine. Don’t cram them in; they need room to actually agitate against the water. Set the hottest water your machine offers. If your water heater can hit 140°F, use it. If it can’t, boil a pot on the stove and add it in to help the temperature along.
Pour in 2 cups of white vinegar, no detergent this round, and run a full cycle. When it’s done, leave the towels sitting in the machine instead of pulling them out right away.
Wash two: baking soda
Fill the machine with hot water again. Add 1 cup of baking soda, then run a complete cycle.
If your water heater caps out below 120°F, don’t sweat it. You can do both washes in a big bin or the bathtub instead. Boil water on the stove and add it in until you’re as close to 140°F as you can get.
Dry completely, no shortcuts
Air-dry outside if you can, or toss them in the dryer with wool dryer balls. Either way, they need to come out bone dry. Any leftover dampness is just inviting the smell right back.
Give them a sniff test once they’re dry. Still not quite right? Run both washes again. It sounds like a lot, but a stack of $40 towels is worth 90 more minutes of your time.
Keeping them fresh once you’ve fixed them
Here’s where I save you from doing this whole process again in three months.
Use less detergent than you think you need
Check your machine’s manual for the actual recommended amount, especially if you have an HE washer. Those machines use less water, so they need less soap to begin with. Overdoing it is the number one reason towels end up smelly and stiff again.
Skip the fabric softener and dryer sheets entirely on towels
I know, they smell nice. But that scent comes from a waxy coating that sits on the fibers and blocks absorbency, which is exactly what got you into this mess. A towel’s whole job is soaking up water. Don’t sabotage it.
Add a half cup of white vinegar to the rinse cycle every so often as maintenance.
It keeps residue from building back up so you’re not starting from scratch every few months.
Always dry towels completely before folding them away
A damp towel folded into a linen closet is a bacteria colony waiting to happen. If you’re not sure, give it another 20 minutes in the dryer. Better safe than smelly.
As for how long a towel should actually last you: if you’re washing and drying them properly, a good set can go two to three years before you need to think about replacing it. Smelly and stiff isn’t a sign of age. It’s a sign of buildup, and buildup is fixable.
I’d rather spend a little more on decent towels and take care of them than keep replacing cheap ones every year. That’s not a splash-out purchase, that’s just doing the math.
Question: What’s your go-to laundry fix that other people never seem to know about? Tell me in the comments. I collect these like other people collect coupons.
EverydayCheapskate™ is reader-supported. We participate in the Amazon Services LLC Associates Program and other affiliate advertising programs, designed to provide a means for us to earn from qualifying purchases, at no cost to you.

How to Prep Your Home for a Multi-Day Power Outage
You know the drill with a short outage. Power blinks off, you dig out a flashlight, you complain a little, and an hour later the fridge hums back to life like nothing happened. A multi-day outage is a whole different animal. Food starts turning. Water pressure drops. Phones go dark one by one. And that’s before anyone mentions the medication that needs to stay cold.

Here’s the part nobody wants to admit: most of us figure this out around hour 18. Right when the emergency is in full swing and the store shelves are already bare. I’d love to tell you I’ve never been that person. I have absolutely been that person, standing in a dark kitchen holding a phone at 3% battery, wondering where I put the good flashlight.
The fix isn’t complicated or expensive. One weekend, one bin, a specific list of stuff, and a multi-day outage goes from crisis to inconvenience. Here’s what actually matters, in the order you’ll need it.
Outages lasting more than a day aren’t the fluke they used to be, and the numbers back that up. The Census Bureau found that roughly 1 in 4 American households lost power completely at least once last year, and 70% of those outages stretched past six hours. Homeowners got hit harder than renters, and if you’re in a rural area, your odds jump to better than 1 in 3. Old infrastructure, wild weather, more demand on hot summer days… it all adds up. Worth getting ahead of it.
Priority 1: Light

Thirty minutes in, you’ll want light. Your phone flashlight works fine, until you remember that phone is also your only way to check on family, and now it’s at 40% with no outlet in sight.
Here’s your list:
- A flashlight for every family member (basic LED, standard batteries)
- A battery lantern for each room you’ll actually use (kitchen, living room, bathroom)
- A headlamp for every adult. Hands-free is a gift when you’re cooking or digging through a first aid kit in the dark
- Spare batteries, AA and AAA, in one labeled container so you’re not hunting
- If you want to get fancy: solar pathway lights from the yard work great brought inside at night
Skip the candles. They’re pretty right up until they’re a fire hazard. Battery-powered flameless candles give you the ambiance without the risk, and they last longer than you’d think.
Priority 2: Staying Connected
Your phone becomes your lifeline fast: weather updates, checking on your people, finding out if the outage is neighborhood-wide or something worse. Keeping it alive matters as much as having light.
- A portable battery bank, 20,000 mAh minimum. That’ll charge a phone four to six times before it needs a recharge itself
- Charging cables for every device in the house, because of course everyone has a different one
- A car charger. Your car turns into a charging station once the house power’s gone
- A hand-crank or battery emergency radio with NOAA weather-band. This is the item people skip and then wish they hadn’t
- A written list of important numbers. Doctors, family, insurance. Your contacts app is useless on a dead phone
Charge every battery bank fully now, then top them off once a month. A dead battery bank in an emergency is just an expensive paperweight. Ask me how I know.
Priority 3: Water
This is the one that matters most. FEMA says a gallon per person per day, covering drinking, cooking, and basic hygiene. For a family of four over 72 hours, that’s 12 gallons. Non-negotiable.
Store it now:
- Five-gallon jugs of bottled water are the most space-efficient way to stock up
- Rinsed 2-liter bottles or empty milk jugs filled with tap water work too. A drop of bleach keeps it stable for long-term storage
- If a storm’s coming and you have warning, fill the bathtub. A WaterBOB liner runs about $30 and safely holds 100 gallons of clean drinking water
If you run out:
- Your water heater is holding 30 to 50 gallons of drinkable water. Drain it from the bottom valve
- Toilet tank water (not the bowl) is safe in a pinch
- A cheap filter like a Sawyer Mini turns questionable water into safe water
Want to go deeper than 12 gallons? I’ve got a full breakdown of storage, purification, and where to actually put it all when your house doesn’t have a garage the size of a bunker: How to Build a Practical Emergency Water Storage Plan (No Bunker Required).
Priority 4: Keeping Food Safe
Nearly 1 in 7 households that lose power end up throwing out spoiled food. It doesn’t take long, either: a closed fridge keeps food safe for about four hours after the power goes. A full freezer buys you 24 to 48 hours.
If you get any warning at all, turn everything to its coldest setting, and fill empty freezer space with water bottles. Frozen water acts like extra insulation. Group foods close together. Density is your friend here.
Once the power’s out, eat the most perishable stuff first: dairy, meat, anything that won’t survive a day. Keep those doors closed as much as humanly possible, and once the fridge starts warming up, move what’s left into a cooler with ice. Anything sitting above 40°F for more than two hours goes in the trash. I know it feels wasteful. Food poisoning feels worse.
Stock your no-cook shelf:
- Peanut butter, jelly, bread
- Canned soup, chili, beans, tuna, chicken
- Crackers, granola bars, trail mix, nuts
- Dried fruit
- Bottled juice and sports drinks
- A manual can opener. This is the single item people forget every single time, myself included on more than one occasion
Want to build out that no-cook shelf properly? I’ve got a full list of what actually holds up long-term, plus where to stash it if your garage isn’t the size of a bunker: How to Build a Practical Emergency Food Stockpile.
Priority 5: Cooking, If It Drags On
Past 24 hours, some way to make hot food starts mattering for morale as much as anything else.
Your options: a camping stove with butane or propane, a charcoal or gas grill, a solar oven if you’ve got sunny days, or a fireplace or wood stove if that’s already part of your setup.
One rule that isn’t optional: never run outdoor cooking equipment indoors. Carbon monoxide doesn’t announce itself, and it kills people every single year during outages just like this one. Outside, or a well-ventilated space, always.
Priority 6: Managing the Temperature
Cold outside, cold inside. Hot outside, hot inside. Either one can turn dangerous fast if you’re not ready.
If it’s cold:
- Extra blankets and sleeping bags
- Warm layers, including hats (you lose a surprising amount of heat through your head)
- Battery-powered heaters made for indoor use. Never propane or kerosene inside, full stop
- Everyone camps out in one room to share body heat
- Shut the doors on rooms you’re not using so the warmth stays concentrated
If it’s hot:
- Battery or hand fans
- Cool wet cloths on the neck and wrists
- Move to the coolest spot in the house, usually the basement or lowest floor
- Wet sheets hung near windows create a little evaporative cooling
- Drink water, skip the yard work
Priority 7: Medications and Medical Equipment
Insulin, biologics, anything that needs to stay cold… this is where an outage stops being an inconvenience and starts being genuinely urgent. Same goes for anyone relying on a CPAP, oxygen concentrator, or dialysis equipment.
Keep a small insulated cooler set aside just for medications, with ice packs stored in the freezer specifically for this job. If you or someone in your house depends on powered medical equipment, call your supplier now and ask about battery backup…. not during the outage, now. Keep a written list of medications, dosages, and pharmacy contacts in your emergency binder, and know which nearby hospitals run on generators. Most do, but some are easier to reach than others.
One more thing worth ten minutes of your time: register with your utility company’s medical priority list if anyone in your home has critical needs. They’ll move your address up the list when the lights come back on.
Priority 8: Sanitation
Nobody wants to think about this until they have to. If water pressure drops or the sewer backs up, you’ll be glad you did.
- Baby wipes, for washing up without running water
- Hand sanitizer
- Extra toilet paper
- Heavy-duty trash bags
- A bucket with a tight lid. Lined with a trash bag, it becomes emergency plumbing if the toilets stop cooperating
Priority 9: Cash
ATMs don’t work without power. Neither do card readers at whatever store nearby happens to still be open. Cash turns into king faster than you’d expect.
Keep at least $200 in small bills (twenties, tens, fives) somewhere in the house you can actually get to. Enough to cover a few days of essentials if it comes to that.
The Full 72-Hour Kit
- Flashlights, lanterns, headlamps, batteries
- Portable phone chargers, fully charged
- Emergency radio
- 12 gallons of water for a family of four
- Three days of shelf-stable food
- Manual can opener
- Camping stove and fuel, for outdoor use only
- Coolers and reusable ice packs
- Blankets and warm layers, or fans and cooling gear, depending on the season
- First aid kit
- A few extra days of prescription medication
- Baby wipes, hand sanitizer, extra toilet paper
- Cash in small bills
- A battery-powered clock, so your phone isn’t doing double duty
- A deck of cards and a book or two. Seventy-two hours is longer than you think
Run a Test Before You Need To
Once you’ve got the kit together, actually use it. Pick a Saturday night, flip the main breaker, and live like the power’s out for a few hours. You’ll find the gaps immediately. Better to find that out on a random Saturday than in the middle of an actual storm.
Where to Keep It All
One clear 30-gallon plastic bin holds almost everything on this list. Keep it in a closet you can actually get to… not the basement, where flooding is a risk, and not the garage, where temperature swings will wreck your batteries and medications. Rotate the batteries, food, and water every six to twelve months so nothing in there is expired when you finally need it.
Getting ready for a multi-day outage isn’t paranoid. It’s just realistic. Most people who put this list together never need to use it. The ones who do are always glad they did.
My Picks, For What It’s Worth
(Disclosure: This post includes an Amazon Creator Connections product. I may earn a small commission if you purchase through the link, at no additional cost to you.)

This is the one that lives in my bag, not just my emergency bin. Three 100W ports mean I can keep my laptop running through an outage and still have juice left for my phone, which matters to me, because how else am I going to keep writing to you? It's carry-on friendly too, so it doesn't just sit in a closet waiting for a disaster. It travels.
I like this one because it actually lights a whole room, not just the six inches around it. Five brightness levels and the fact that it doubles as a phone charger is the kind of detail that makes a $30 gadget feel like it was designed by someone who's actually sat through an outage.

Hands-free light sounds like a small thing until you're trying to change a fuse or check on a kid in the dark with a flashlight clenched in your teeth. I keep two of these on hand because someone always borrows the first one and doesn't put it back. You know who you are.

Batteries die. Solar panels have bad days. What sold me on this one is the crank. Three minutes of turning it and you've got enough power to catch the next NOAA alert, no outlet, no sunshine required. That's the kind of backup I actually trust.
Cold sandwiches get old fast, and there's something about a hot meal that makes a bad situation feel manageable again. Two burners means I can heat soup and keep coffee going at the same time, and yes, coffee counts as an emergency supply in my house.

This one's tiny enough to forget you packed it, which is exactly why I like it. It's the backup to your backup. If you ever end up filtering water from a source you wouldn't normally trust, this is what makes it safe to drink.
Question: Your turn… what’s the longest outage you’ve ridden out, and what’s the one thing you wish you’d had on hand? Tell me in the comments. Real stories help everyone else prep smarter.
EverydayCheapskate™ is reader-supported. We participate in the Amazon Services LLC Associates Program and other affiliate advertising programs, designed to provide a means for us to earn from qualifying purchases, at no cost to you.

The 15-Minute Sunday Prep That Runs Your Whole School Week
If your Monday mornings feel like a scavenger hunt mixed with a fire drill, you’re in good company. Somebody can’t find a shoe. The lunchbox is still sitting in the dishwasher. A permission slip magically appears five minutes before it’s time to leave, complete with the words “Due today!” printed across the top. Meanwhile, your coffee is getting cold before you’ve had two sips. Ask me how I know.

Years ago I finally realized Monday wasn’t really the problem. Sunday was. Or more accurately, it was all the little things I kept putting off until “later.” Later always turned into Monday morning, when nobody had the time or the patience to deal with them.
That’s when I started spending about 15 minutes every Sunday evening getting ahead of the week. Nothing fancy. No marathon meal prep. No color-coded binders. Just a handful of simple jobs that keep Monday from getting the upper hand.
It’s one of those little habits that pays you back every single week.
The Five Sunday Tasks
Here’s the beauty of this routine: none of it is hard. None of it requires special supplies, a printable checklist, or a sudden personality change. Just five quick tasks. Do them in order and you’ll be amazed at how much smoother Monday feels.
1. Empty and Reset the Lunchboxes
Can we talk about lunchboxes for a minute? They have an incredible ability to hide things. Half an apple. A yogurt tube. That sandwich nobody admitted they didn’t eat.
Every Sunday, open every backpack and pull out every lunchbox. Toss whatever shouldn’t still be there, give everything a quick wash, and leave it ready for Monday morning.
It’s a tiny job that prevents one of life’s less pleasant surprises. You know the one.
2. Do a “Found on Floor” Sweep
Ever notice how everyone’s belongings slowly migrate to the exact wrong place?
Grab a laundry basket and take a quick lap through the house. Living room. Kitchen. Entryway. Wherever the daily clutter likes to gather. Anything that belongs elsewhere goes in the basket. Trash goes in the trash. That’s it.
You’re not cleaning the house. You’re simply putting things back where you’ll expect to find them tomorrow. Big difference.
3. Get Monday’s Clothes Ready
Want to avoid an early-morning debate about what to wear? Decide on Monday’s outfit the night before.
For younger kids, lay everything out on the dresser. Older kids can handle their own choices, but I still recommend making the decision on Sunday instead of six minutes before it’s time to leave.
And don’t forget the shoes and socks. Why is it always the socks?
4. Defuse the Backpack Bomb
Every family has one. A backpack stuffed with mystery papers, crumpled notices, old homework, and permission slips that somehow only surface at the worst possible moment.
On Sunday evening, empty it all out. Sign what needs signing. Toss what’s garbage. Save what’s important. Then put anything that needs to go back to school right in the front pocket.
If I could only keep one habit from this entire list, this would be the one. It saves more Monday-morning panic than anything else.
5. Take a Quick Look at the Week
Have you ever been surprised by a field trip that was listed on the calendar for three weeks? Me too.
Before you call Sunday done, spend a few minutes looking ahead. Check the family calendar. Scan the school schedule. See what’s coming before it sneaks up on you. Spirit day? Early dismissal? Sports equipment that needs to be packed? An appointment you’ve completely forgotten about?
Three minutes now can save a whole lot of scrambling later. And that’s really the goal of this entire routine. Not perfection. Not a magazine-ready home.
Just fewer surprises. Because Monday is going to show up whether we’re ready or not. I prefer to greet it with clean lunchboxes, signed permission slips, and at least a fighting chance.
What Makes This Stick
Ever started a new routine with the best of intentions… only to forget about it two weeks later? I’ve been there. The secret isn’t making this routine bigger or better. It’s making it easy enough that you’ll actually keep doing it. These two little tricks make all the difference.
Pick one regular time.
Maybe it’s right after Sunday dinner. Maybe it’s before everyone settles in for the evening. The exact time doesn’t matter nearly as much as doing it at the same time every week.
Once it becomes “what we do on Sunday,” you won’t have to remember it. It’ll simply become part of the rhythm of your week.
Set a 15-minute timer.
This may be my favorite part. Without a timer, it’s easy to think, “While I’m at it…” Suddenly you’re reorganizing the pantry, cleaning out the refrigerator, and wondering where your entire evening went. Don’t do that to yourself.
Set the timer, work steadily, and when it rings, you’re finished. Even if a couple of things didn’t get crossed off the list. Remember, you’re not trying to win the award for Most Prepared Family. You’re just giving Monday a little less power to surprise you. And that’s more than enough.
Got a Few Extra Minutes?
Once your 15-minute Sunday reset becomes second nature, you can stop there. Seriously. It’s enough. But if you happen to have another 15 or 20 minutes, here are a few extras that make the week even easier.
- Make breakfast before you need it. A pan of egg muffins, a batch of overnight oats, or a few breakfast burritos in the freezer can save your morning when everyone’s running behind. It’s one less decision before you’ve even had your coffee.
- Get a head start on lunches. Go ahead and tuck the easy stuff into lunchboxes on Sunday. Napkins, snacks, juice boxes, utensils, whatever doesn’t need refrigeration. Come Monday morning, all you’ll have to add is the sandwich, yogurt, fruit, or anything else that belongs in the refrigerator. Done in a minute or two.
- Set up tomorrow’s coffee. If you’re a coffee drinker, you already know this one. Fill the coffee maker. Measure the grounds. Or get the French press ready to go. Future You will be ridiculously grateful when all that’s left to do is push a button or pour the hot water. Some mornings, that first cup feels less like a beverage and more like a survival plan.
- Do a quick whole-house reset. I’m not talking about deep cleaning. Just ten extra minutes of putting things back where they belong. Fluff the couch pillows. Pick up the stray shoes. Toss the toys back in the basket. Run the vacuum through the busiest rooms if they need it. It’s amazing how much calmer Monday feels when you wake up to a house that looks like it’s on your side instead of plotting against you.
Remember, these are bonuses, not requirements. If all you have time for is the original five tasks, you’re already ahead of the game. And that’s exactly the point.
Why This Works When Other “Sunday Prep” Advice Doesn’t
Most Sunday prep advice tries to make you do too much. Meal prep the whole week. Deep clean the house. Plan every outfit for every kid for every day. That’s why nobody keeps doing it. Ambitious systems collapse within three weeks.
Fifteen minutes of specific, high-leverage tasks, the ones that eliminate the most Monday-morning friction, is small enough to sustain and big enough to matter. Two months in, you’ll realize your Monday mornings are unrecognizable compared to the pre-routine version.
What This Actually Fixes
So what do you get for your 15 minutes? No, life doesn’t suddenly become perfect. Kids will still misplace a shoe now and then, and somebody will probably remember a class project at the last possible minute. That’s just family life.
But here’s what does change.
- You spend a whole lot less time wandering the house asking, “Has anybody seen…?”
- Monday mornings feel calmer because you’ve already handled the little things that usually trip you up.
- Permission slips get signed before they’re due instead of during the drive to school.
- Packing lunches becomes a quick finish instead of a frantic scramble.
- And maybe best of all, Sunday evening feels less like the countdown to chaos and more like a fresh start.
None of these changes is dramatic by itself. But stack them together, week after week, and they make a surprising difference. That’s why I love simple routines like this. They don’t promise perfection. They just remove enough little headaches that the whole week feels easier. Fifteen minutes. Five simple tasks. A calmer Monday. I’ll take that trade every time.
Question: What’s the one Sunday habit that transformed your school-year mornings? Share yours in the comments below. We all steal from each other.
EverydayCheapskate™ is reader-supported. We participate in the Amazon Services LLC Associates Program and other affiliate advertising programs, designed to provide a means for us to earn from qualifying purchases, at no cost to you.

34 Leftover Recipes That Use Up Every Last Bit of Food
I used to toss more food than I’d like to admit, until I got smart about what to do with the “remains of the day.” Turns out most of what’s sitting in your fridge right now isn’t trash, it’s tomorrow’s dinner in disguise. Thirty-four ways to prove it, from pizza-for-breakfast to a rice pudding you’d swear was on purpose.
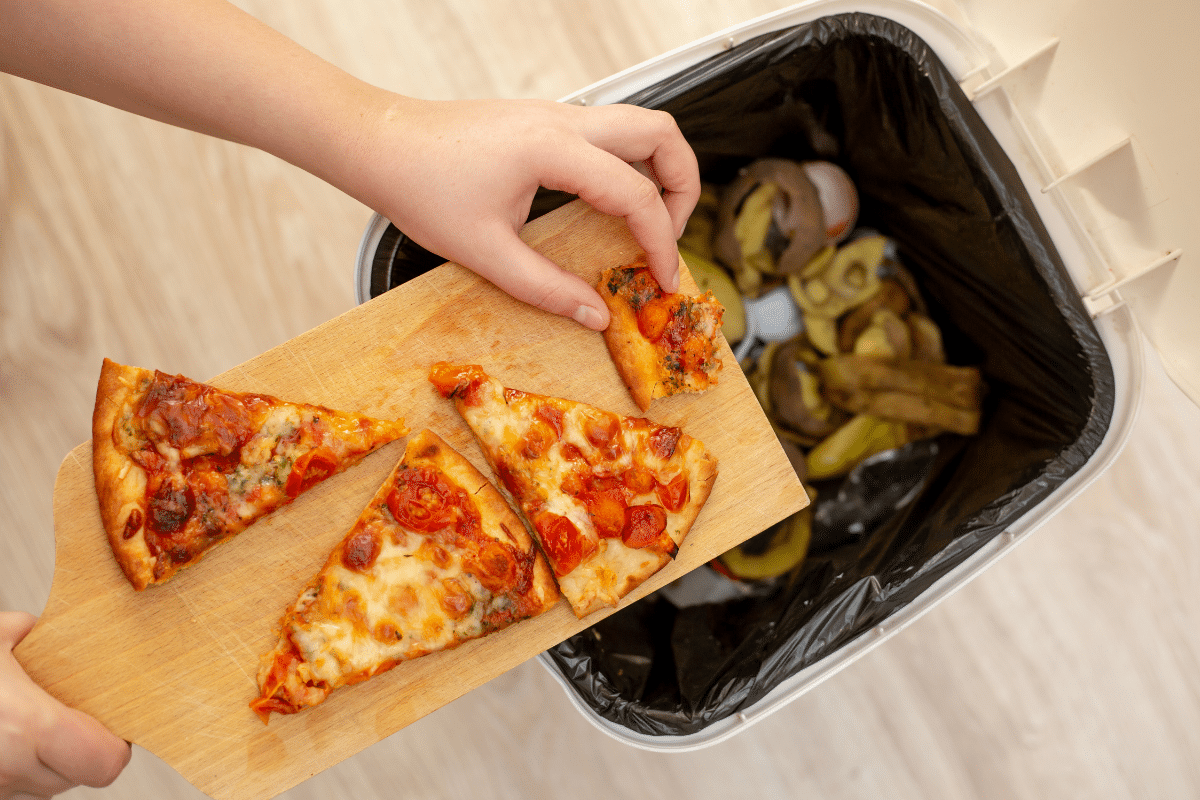
Be honest. How many times have you opened the fridge, spotted that lonely half-cup of rice or the last three inches of a baguette, and just… closed the door again?
I’ve done it more times than I’d like to admit. And every single time, I’m throwing away money I already spent. With grocery prices what they are these days, that’s not “cleaning out the fridge.” That’s setting cash on fire.
Julia Child had a much prettier name for leftovers. She called them “the remains of the day.” Lovely, right? But whether you call it that or just “the sad stuff in the back of the fridge,” it’s the same thing: food you already paid for, sitting there waiting for someone to notice it.
So let’s notice it. Here are 34 ways to turn what’s left into what’s for dinner.
Jump to:
- Pasta
- Pizza
- Tortilla chips
- Bread
- Cheese
- Eggs
- Mashed potatoes
- Coffee
- Rice
- Chicken, turkey
- Fish
- Meatloaf
- How long can you safely keep leftovers?
Pasta

Spaghetti frittata
Yes, spaghetti for breakfast. Stay with me. Take any leftover pasta, sauce and all, and mix in a few beaten eggs, a splash of milk, and whatever vegetables are hanging around. Fry it up in a skillet like you would an omelet. It works for breakfast, lunch, or dinner, and nobody will guess it started life as last night’s dinner. Get recipe →
Pasta stir-fry
If you want one skill that will single-handedly cut your food waste, learn to stir-fry. Toss in leftover pasta, whatever produce needs using, a bit of protein, and a sauce you like. Ten minutes later, dinner. Learn how to stir fry →
Pasta Mama
This one’s a reader (and family) favorite. I’ve shared it before, and it’s worth a repeat mention. Get the full recipe here →
Pizza

Pizza eggs
Cut two slices of leftover pizza into bite-size pieces. Beat 8 to 10 eggs in a bowl, stir in the pizza, and let it sit for 10 minutes so the flavors mingle. Scramble it all in a greased skillet over medium-high heat for about 6 minutes, top with cheese, and serve. Don’t knock it till you’ve tried it.
Pizza lasagna
This one takes a little imagination, but bear with me: build your usual lasagna, swapping the noodles for strips of leftover pizza. It sounds odd. It tastes incredible. Trust the process.
Tortilla chips

Breakfast scramble
Crush up that half-bag of stale tortilla chips. Really crush them. Then fold the pieces and some salsa into beaten eggs. Add cheese. Ten minutes, and you’ve got a scramble with actual personality. Get the recipe here →
Tortilla soup
Any good tortilla soup wants stale chips to finish it off, so this is basically a built-in excuse to make one. Here’s my favorite recipe →
Bread

French toast
Beat 2 eggs with 1/8 teaspoon salt and 2/3 cup milk. Soak 6 slices of stale bread, turning to coat both sides, then cook in a lightly oiled skillet over medium-high heat until golden on each side. Butter, syrup, done.
Croutons
Rub 4 slices of stale bread with a crushed garlic clove, cube them, and cook in 3 tablespoons of olive oil over medium heat until crispy. Salt and pepper to taste. Homemade croutons put the bagged kind to shame, and you already had the bread.
French onion soup
This soup actually calls for stale bread. A baguette or anything crusty works. You’ll use two slices per serving, one on top and one on the bottom. Here’s my go-to version, which takes a bit more effort but is worth every minute.
Avocado toast
Toast the bread, mash on some avocado, add a squeeze of lime, salt and pepper. That’s the whole recipe, and it’s a fine one. But if you want to turn it into an actual meal, top it with a fried egg… golden, runny yolk, the works. I walk through the whole thing, timing and all, in How to Make the Perfect Avocado Toast with a Fried Egg. Either way, it’s a “clean out the crisper drawer” recipe wearing a fancy restaurant name.
Cheese

Fromage fort
Before you ask… no, this isn’t a blanket of cheese for the kids to play on. It’s French for “strong cheese,” and it’s a genuinely brilliant way to use up every odd end of cheese in your fridge. Toss it all in the blender with a splash of wine, some garlic, salt, pepper, and herbs. Blend. You now have a spread for crackers, a dip for veggies, and zero rules to follow. There’s no official recipe. You just wing it. Here’s how I do it →
Mac ‘n cheese
Obvious, sure, but it depends on what cheese you’ve got. If it’s white cheddar, hallelujah. This copycat recipe is my family’s favorite, and if you love Panera’s version, you’re going to want to marry this one.
Eggs

Breakfast bowl
Not what you’re picturing. Stir an egg and a splash of vanilla into a bowl of Cream of Wheat, and it turns into something closer to a creamy breakfast pudding. Recipe here →
Pavlova
If a recipe called for only egg yolks, you’re now staring at a bowl of orphaned egg whites. Turn them into a pavlova… the fancy word for a meringue dessert that looks impressive and is much easier than it sounds. This one is as foolproof as they come →
Mashed potatoes

Potato cakes
Mix cold mashed potatoes with an egg or two, some leftover fish, ham, or corned beef, chopped onion, and just enough flour to hold it together. Form into small patties and shallow-fry until golden and crisp.
Pie topping
Spread leftover mashed potatoes over a savory filling instead of a crust. You probably won’t have enough for a full-size pie, so think individual shepherd’s pies or chicken pot pies.
Gluten-free cake
Mashed potatoes show up in a surprising number of gluten-free desserts, paired with gluten-free self-rising flour. Try this Lemon & Orange Cake or this Lemon Drizzle Cake and see for yourself.
Coffee

Pan sauce
After pan-frying chicken or pork, deglaze the pan with leftover coffee instead of wine. You’ll get a deeper, Southern-style gravy sometimes called red-eye gravy.
Freeze it
Coffee ice cubes keep iced coffee from watering down as they melt. Or stir in milk and flavorings and pour the coffee into popsicle molds for a frozen treat tomorrow.
Marinade
Leftover coffee makes a surprisingly good steak marinade. The acidity tenderizes cheaper cuts like flank or skirt, and you get a rich, faintly smoky flavor you can’t get any other way. I use this trick on flank steak in Grilled Flank Steak with Bold Coffee Marinade, and yes, people always ask what that flavor is. Get the step-by-step →
Rice

Fried rice
The whole recipe for fried rice starts with leftover, day-old white rice. That’s not a workaround, that’s the point. All you need is a decent roadmap, and I’ve got one right here: New Life for Leftover Rice →
Rice pudding
Most rice pudding recipes call for uncooked rice, which does you no good when you’re staring at a bowl of leftover cooked rice. That’s why I love this one. It’s a creamy, cardamom-spiced kheer that starts with cooked rice and turns into something that tastes like it came from a restaurant. Nobody has to know it started as last night’s side dish. Get the full recipe here →
Chicken or turkey

Chicken soup
Chicken and turkey are basically interchangeable here. Maybe you’ve got a family recipe passed down through the generations. If not, this one can easily become your new go-to →
Club salad
Cut-up chicken or turkey on top of a salad is protein and fiber in one bowl, and about as close to a “no-cook dinner” as you’ll get.
Mediterranean wrap
Skip the $12 sandwich shop version. Grab a flour tortilla, add leftover chicken or turkey and whatever grilled vegetables you have, and wrap it up. Same idea, a fraction of the price.
Turkey pot pie
Or chicken, either way, just the thought of a homemade pot pie gets me. Dad’s Leftover Turkey Pot Pie is foolproof and, frankly, a little emotional.
Turkey melt
If your fridge is stuffed tighter than the turkey was, this is the sandwich that makes people forget they’ve had turkey four times this week. Tangy red wine mayo, melty white cheddar, crisp sourdough… this recipe turns “we still have turkey” into something you’d actually crave. Get the recipe →
Fish

Fish salad
Got bits and pieces of leftover salmon, halibut, or anything else? Even breaded or fried? Don’t you dare toss it. Flake it over tomorrow’s lunch salad and call it a win.
Fish casserole
Move over, tuna casserole. This fish pasta bake is classier. It calls for 1½ pounds of white fish fillet, but leftover flaky fish works just fine. Since it bakes for under 25 minutes, there’s no risk of it drying out. Recipe here →
Meatloaf

Chili
Swap chopped leftover meatloaf in for ground beef in your usual chili. It’s already seasoned, so you’re basically cheating your way to dinner.
Quesadillas
Mix chopped meatloaf with onion, green pepper, and a little BBQ sauce. Layer between two tortillas with shredded cheese, cook in a skillet for a minute or two per side until golden and melty.
Spaghetti
Swap chopped meatloaf for ground beef in your regular meat sauce. Over spaghetti, it might be one of the best leftover transformations on this whole list.
Sliders
Small dinner rolls, a slice of meatloaf cut to fit, and whatever spread you like — bacon-onion jam, mayo, mustard. That’s a party. No party required.
How long can you safely keep leftovers?
Fair question, and one I’ll leave to the professionals. According to dietitian Katherine Zeratsky, R.D., L.D., leftovers are good for three to four days in the refrigerator. After that, your odds of food poisoning start climbing, so if you won’t get to them in time, freeze them right away.
Here’s the part that trips people up: bacteria doesn’t announce itself. It usually doesn’t change how food looks, smells, or tastes, so “it seems fine” isn’t proof of anything. When in doubt, throw it out. I know, I know, that’s the opposite of everything this post stands for, but food poisoning is not the kind of frugal we’re going for.
The fix is mostly about timing. Get perishables like meat, poultry, fish, dairy, and eggs into the fridge quickly. Don’t let them sit out more than two hours at room temperature, or one hour if it’s hotter than 90°F. Cold dishes like salads and sandwiches need the same treatment. The goal is keeping food out of the “danger zone” between 40°F and 140°F, where bacteria multiply fast.
When you’re ready to eat leftovers, reheat them until they hit 165°F, whether you’re using the stove, oven, or microwave. Skip the slow cooker for reheating. It typically can’t get food hot enough fast enough to kill off bacteria.
Thirty-four ways, and I guarantee you have ingredients on hand right now for at least three of them. That lonely rice, that stale bread, that suspicious tupperware in the back… it’s not trash. It’s tomorrow’s dinner in disguise.
Question: What’s the one leftover you never throw out, no matter what? Tell me in the comments. I might steal your idea for a future post.
EverydayCheapskate™ is reader-supported. We participate in the Amazon Services LLC Associates Program and other affiliate advertising programs, designed to provide a means for us to earn from qualifying purchases, at no cost to you.

How to Save Money on School Supplies (Beyond Just the List)
The list looks so innocent. A few notebooks, some pencils, a pack of crayons. Nothing costs much on its own, and yet you still walk out of Target $87 poorer with the wrong marbled notebook in the bag. Here’s what actually moves the needle on school supplies this year: clearance timing, free-supply channels nobody talks about, and a short list of things you can flat-out skip.

Everybody’s proud of shopping early this year. The National Retail Federation says 62% of families had already started their back-to-school shopping by early July, and 54% used June sales events like Prime Day to knock things off the list. Good for them. Terrible advice if what you’re buying is school supplies.
Here’s the thing nobody’s saying out loud: getting ahead of the crowd works great for electronics and clothes. It’s close to the worst possible timing for notebooks and crayons. And since the average family this year is spending $146.45 on supplies alone, out of $863.86 in total back-to-school spending, that’s real money going out the door at the wrong moment.
The early-shopping trap
June sales events discount the big stuff. TVs, laptops, backpacks with the right logo on them. What they don’t discount is the pack of glue sticks sitting on an end cap next to the register. Retailers don’t need to move supply inventory in June. They need to move it in September, after school’s already started and the shelf space needs to go to Halloween candy. That’s when the real discount shows up: 70 to 90 percent off, not “sale.”
So if you bought your supplies in that June rush because it felt responsible, you probably paid full price for the one category that actually goes on real clearance a couple months later. The families who look organized in July aren’t necessarily the ones saving the most. They’re just the ones who moved first.
The smarter number in the data
Buried in the same NRF report is a more useful stat: 47% of families now say they’re only buying the essentials up front and replenishing supplies as needed through the year. That’s not indecision. That’s the right instinct, even if most of those families haven’t connected it to a system yet.
Here’s what “replenish as needed” should actually look like: buy light in August, then buy heavy in September when the clearance hits, and stock a full year at once. Keep it in a bin. When your kid loses a pencil in November, you’re not making an $18 store run, you’re reaching into a closet. The 47% are already halfway to this. They just haven’t figured out where the real savings sit in the calendar.
If you want to put a number on it, treat it like a Freedom Account line item instead of a scramble: a small amount set aside starting in September for next year’s supplies, funded by what the clearance rack gives you, so August stops being a surprise expense at all.
Where the free supplies are, if you’d rather spend nothing
Before you buy anything, check whether you actually have to:
- Your school district’s supply drive: Many districts partner with local businesses to hand out free supply packs, no income check required. Check the district site in July.
- Kids in Need Foundation: A nonprofit built to get supplies to students who need them, distributed through schools.
- Buy Nothing groups: Parents constantly offload barely-used supplies their kids outgrew.
- Your employer: Some companies have a back-to-school stipend or discount partnership that almost nobody asks about.
- Your teacher’s Amazon wish list: Posted to lighten the load on families, and sometimes an item you needed gets bought for the whole classroom instead of by you alone.
Generic vs. brand name
Not everything on the list deserves the store brand. A few items are actually worth paying up for, because the cheap version fails.
Always go generic:
- Notebook paper and composition books
- Paper folders (they’re all identical, promise)
- Index cards
- Highlighters
- Glue bottles
- Rulers and protractors
Worth the name brand:
- Crayons: Crayola actually colors better and holds up without snapping in half. Ask any kid who’s used both.
- Markers: Crayola’s washable ones survive laundry. The knockoffs do not, and you will find out the hard way.
- Pencils: Ticonderogas sharpen properly and don’t crumble. Small thing. Kids notice it anyway.
- Scissors: A pair of kid scissors that won’t actually cut is worse than no scissors at all.
- Colored pencils: Crayola or Prismacolor, if art class is asking for them specifically.
Anything paper-based, buy the cheap version without a second thought. Anything your kid uses with their hands every day, don’t cheap out. That’s the whole rule.
What to skip entirely
Supply lists get padded. Send one glue stick, not four. One box of tissues, not the case. Skip the “specific color” folder requirement; it gets forgotten by week two. And a themed backpack doesn’t hold one extra sandwich over a plain one.
What this actually costs, by the numbers
Run the two paths against each other using this year’s own figures. Shop in the June rush like 54% of families did, and you’re likely paying close to full price on the $146.45 average supply spend, plus whatever mid-year runs come up because nothing was stocked ahead. Wait for the September clearance instead, stock a full year, and that same category can drop to a third of that number, with the mid-year runs mostly gone.
The families who feel behind in July aren’t behind. They might actually end up ahead in September.
Question: Did you shop early this year, or are you waiting for the after-school-starts clearance? I want to know which camp you’re in.
EverydayCheapskate™ is reader-supported. We participate in the Amazon Services LLC Associates Program and other affiliate advertising programs, designed to provide a means for us to earn from qualifying purchases, at no cost to you.

Want What You Have: How to Find Real Contentment Now
Ever feel like you’re constantly wanting something just out of reach? You’re not imagining it. The average person sees thousands of ads a day, each one nudging you to want more. I decided to count mine, and it broke me by mid-morning. Here’s what I learned about swapping that nagging dissatisfaction for real contentment, and how to actually want what you already have.

Years ago I read that the average American adult is targeted by roughly 3,500 ads a day. I remember thinking, that can’t be right. So I did what any reasonably obsessive person would do. I decided to count them myself. I figured I’d prove the number wrong. Maybe I’d hit 500. A thousand, tops. I was ready to feel smug about it.
The radio alarm went off and I hadn’t even opened my eyes before I owed the tally sheet two hash marks. By the time I got through the morning news I’d lost count of how many times I’d lost count. And I hadn’t even left the house.
Every billboard, every bumper sticker, every real estate sign, every logo on every truck that passed me on the way to the grocery store… I counted it. Good thing I wasn’t driving. The newspaper alone padded my number past anything I’d guessed. Then I flipped through a couple of magazines. Go ahead, count the ads in a magazine sometime. I’ll wait.
By the time I logged onto the internet, the count went sideways. The mail landed at ten that morning, and that’s when I put the pencil down. I couldn’t function and keep score at the same time, not on what was otherwise the most boring, ordinary day of my life.
Turns out I wasn’t wrong to be skeptical. I was wrong about the direction. Marketing researchers now put the number somewhere between 4,000 and 10,000 ads a day, depending on how you count screens, feeds, and everything in between. Nobody agrees on the exact figure, and honestly, it doesn’t matter. Whether it’s 4,000 or 10,000, the point stands: you are being sold to every single waking minute, and most of it doesn’t even register.
That’s not a conspiracy theory. That’s Monday.
I thought about that day again recently when a reader named Barbara wrote in:
Dear Mary: “How can I overcome the feeling of wanting something I just can’t have… a new house, or a car? I often feel discouraged and angry at myself, instead of feeling joy and being grateful for what I have.” Barbara
I read that and thought: girl, same. I have spent a lot of years wanting things I didn’t have and feeling vaguely cheated about it. It’s exhausting. And it’s not an accident that you feel that way. You’re swimming in a current built specifically to make you feel that way, every hour, on purpose.
The fix isn’t complicated, even if it isn’t always easy. Eight words:
Want what I have. Buy what I need.
Simple to say. Takes some practice to live. Here’s how I actually do it.
Attitude
You have complete control over one thing in all of this: what you choose to think about. Not the ads. Not the algorithm. Your thoughts.
Write down ten things you’re grateful for. Actually write them, don’t just think them. Then make a habit of returning to that list instead of the mental one where you catalog everything you don’t have.
Love your home. The one you’re actually living in, not the one in your feed. Clean it. Take care of it. Let it be the place where you’re allowed to just be you. That’s worth more than square footage.
Insulate
Gratitude isn’t just a nice feeling. It’s insulation. It puts a layer between you and the nonstop sales pitch aimed at your wallet.
Read the fine print. Ask what’s too good to be true, because it usually is. Every time you question a claim instead of swallowing it, you thicken that layer a little more.
Isolate
Know your weak spots and stay away from them. If the TV gets you spending, turn it off. If the catalog gets you dreaming, it goes straight in the trash… the smelly one, so you’re not tempted to dig it back out. If a certain store is your kryptonite, take a different route.
You are not entitled to spend money you haven’t earned yet. Nobody is. That’s not a punishment, that’s just math.
Self-Talk
Before you buy, ask yourself a few honest questions:
- Do I actually need this?
- Do I already own something that does the job?
- Is this really the good deal I think it is?
- Do I have the cash, right now, to pay for it?
- Can this wait a few weeks?
- Am I willing to sleep on it for 24 hours?
And you never owe anyone an apology for saying no to a purchase. If “I can’t afford it” feels embarrassing, try “I don’t choose to spend my money that way” instead. It’s true, and it puts you back in charge.
This is exactly why I built the Freedom Account… so the big, predictable expenses (insurance, gifts, car repairs) stop feeling like emergencies, and the Contingency Fund, so the truly unpredictable stuff doesn’t send you straight to a credit card. When those two things are in place, “I don’t choose to spend my money that way” isn’t a line you’re reciting. It’s just true.
Living below your means isn’t a punishment either. It’s margin. It’s the thing standing between you and the edge, and it’s how you build actual wealth instead of the appearance of it.
Practice Gratitude
Gratitude is the whole secret. It’s the quiet, steady place where you get to enjoy what’s actually yours, instead of chasing what an ad convinced you that you should want.
You’re not behind. You’re not missing out. You’re being marketed to, several thousand times a day, by people whose entire job is making you feel like you are.
Notice that. Then go enjoy your Monday.
Question: What’s one thing you’ve had to consciously stop wanting in order to feel content with what you already have? Let us know in the comments below.

News You Can Use • August 2026
Hello, August! The sun’s blazing, the snacks are melting, and some of us are wondering if back-to-school aisles always show up this early. While summer clings on, the headlines are heating up too. Whether you’re soaking in the last rays or just looking for a break from the news cycle, here’s your monthly dose of smart, useful, and occasionally surprising updates.

Why Your Dog Steals Your Seat
Your dog isn’t necessarily trying to take over the couch when they hop into your spot the moment you stand up. Your seat is warm, comfortable and, best of all, smells like you, making it an especially appealing place to curl up. Usually, it’s simply a dog’s way of staying close to their favorite person. There is one behavior, however, that’s worth watching for.
Read more →
Winter 2026–27: What’s Coming Your Way?
Winter may be milder than usual across much of the country, but don’t put the snow shovel away just yet. The Old Farmer’s Almanac is calling for pockets of colder, snowier weather, particularly across parts of the Northeast, Appalachians, Pacific Northwest and Intermountain West. The forecast also points to several periods when storms, snow or bitter cold could make an appearance.
Read more →
Waiting to Book Holiday Flights Could Cost You
If you’ve been telling yourself you’ll wait until fall to book Thanksgiving or Christmas flights, this may be the year to rethink that strategy. Holiday airfares are already running higher than last year, and recent pricing patterns suggest another jump could come as September approaches. The good news? Booking now doesn’t necessarily mean you’re stuck with today’s price if fares drop later.
Read more →
When You Can’t Trust the Cute Animal Video
Remember when an adorable animal video was an easy little dose of happiness? AI-generated images and videos are changing that and creating a real problem for pet owners, animal rescues and wildlife organizations. Fake animal photos are now being used in scams, while legitimate rescue and conservation work is sometimes dismissed as AI-generated. The result? We’re losing something surprisingly valuable: trust in the animals we see online.
Read more →
He Turned a Smart Car Into a Pizzeria
How small can a restaurant get? In New York City, Bradley Alvelo has squeezed a working pizzeria into a bright green Smart car, complete with two pizza ovens and everything needed to make fresh 12-inch pies. But the tiny car is only part of the appeal. By keeping his business small, Alvelo has rediscovered the personal connection with customers that he missed in corporate dining and built a business around doing what he loves.
Read more →
What Dolly Parton Never Left Behind
Dolly Parton grew up in a tiny East Tennessee cabin with 11 siblings, without electricity or running water and eventually became extraordinarily wealthy. But she never treated that humble beginning as something to hide or escape. She carried the lessons, memories and values of home into her music, philanthropy and life. Maybe “making it” isn’t about leaving your past behind after all. Maybe the best parts of where we came from are worth bringing along.
Read more →
Tariff Refunds Are Coming. Who Actually Gets the Money?
Billions of dollars in tariff refunds are now flowing back to U.S. businesses after the Supreme Court ruled certain tariffs illegal. But here’s the surprising part: the people who ultimately paid those higher prices may not automatically get their money back. Shipping companies that charged customers a separate tariff fee are expected to pass refunds along, but retailers that simply built tariff costs into their prices face a much murkier situation.
Read more →
Why Are People Choosing the Slowest Way to Text?
What if your next text took 20 minutes, an hour, or even longer to arrive? Two new apps are making that happen by sending messages at the approximate speed of a bird flying between you and your recipient. The quirky idea has already attracted hundreds of thousands of users, suggesting something surprisingly practical: people may be craving technology that gives them less immediacy, fewer interruptions and a reason to put the phone down.
Read more →
The Tiny Tasks Quietly Draining Your Energy
Ever wonder why a few unfinished tasks can make you feel so tired? Every ignored text, repair, appointment or difficult conversation can become an open loop, taking up mental space even when you’re not actively thinking about it. The good news: you don’t have to tackle the whole list at once. Pick one nagging task and take the smallest possible step toward finishing it. That little win can make the rest feel lighter.
Read more →
The $150 Million Experiment That Couldn’t Replace Nature
What happens when you put a tiny version of Earth under glass and cut it off from the real world? Biosphere 2 found that cockroaches, ants and fast-growing weeds thrived while birds and pollinators disappeared. Even the oxygen supply became a problem. The biggest lesson wasn’t about living on Mars. It was about how much invisible work nature does for us every single day, completely free.
Read more →
Stuck on a Big Decision? Ask Yourself This One Question
When a decision feels impossible, we tend to ask what’s safest, easiest or least uncomfortable right now. But there’s another way to look at it: Imagine yourself at 90, looking back at the choice you’re about to make. Which option would that older you be proud of? It’s a simple shift that can turn a confusing decision into a much clearer one.
Read more →
Shadow the Bald Eagle May Have Found a New Mate
After losing his longtime mate, Jackie, Big Bear’s famous bald eagle Shadow has been spending time with a younger female named Kaydee. A raptor biologist says their behavior strongly suggests they’re forming a pair bond, and if things continue, they could begin nesting together later this year. It’s a bittersweet reminder that in the wild, life keeps moving forward, even after loss.
Read more →
A 250-Year-Old Secret Was Hiding in a Town Record Book
A routine search through old town records in Wells, Maine, uncovered something extraordinary: a handwritten copy of the Declaration of Independence recorded in July 1776. It was written by the town clerk after Massachusetts officials ordered local clerks to preserve the historic document in their records. Nearly 250 years later, that handwritten page offers a remarkable glimpse into how news of American independence actually reached ordinary communities.
Read more →
Would You Trust a Chatbot With Your Money?
AI has moved from answering trivia questions to helping people decide what to do with their money. It can be surprisingly useful for basic budgeting, saving and investing questions, but it can also sound completely confident while giving advice that changes when you add one important detail. The smartest approach? Use AI as a financial thinking partner, not the final authority…
Read more →
Cholesterol Guidelines Just Changed: What You Need to Know
Think cholesterol is something to worry about later in life? New U.S. guidelines are taking the opposite approach. Doctors are being encouraged to look at cholesterol and other blood fats earlier, assess long-term heart risk more closely, and consider treatment sooner when lifestyle changes aren’t enough. The big takeaway: how long your LDL stays elevated may matter just as much as how high it gets.
Read more →
Check Your Eggs: FDA Raises Recall to Highest Risk Level
A massive egg recall has just been upgraded to the FDA’s most serious recall classification because of potential salmonella contamination. More than 1.6 million cartons were affected, with recalled eggs sold under multiple brand names across several states. If you have eggs in the refrigerator, this is one of those times when checking the carton before cracking another egg is five minutes well spent.
Read more →
Keebler’s New Cookie Has a Very Sweet Secret
Keebler is teaming up with a beloved chocolate candy to create a brand-new cookie, bringing together two familiar treats in one crunchy bite. It’s the kind of grocery-store mashup that makes you wonder why nobody thought of it sooner. The big question is: Which iconic candy is getting the Keebler treatment?
Read more →
The Economy Is Sending 5 Signals You’ll Feel at Home
Inflation may be cooling, but that doesn’t necessarily mean life is getting cheaper. Grocery prices dipped, gas remains painfully high, wages are losing some ground, and shoppers are showing some surprising spending habits, especially among lower-income households. Meanwhile, rising government debt could keep pressure on borrowing costs. In other words, the economy may be changing direction, but your household budget is still feeling the bumps.
Read more →
Food Recalls Are Piling Up: What Should You Still Eat?
With recalls and outbreaks involving lettuce, jalapeños, berries and eggs, grocery shopping can suddenly feel like a game of “Is this safe?” The good news is you don’t need to avoid fresh food altogether. A gastroenterologist shares a few simple precautions, including what to watch for when buying produce and the safest way to handle lettuce at home.
Read more →
A Solar Eclipse Is Coming: Will You Be Able to See It?
A solar eclipse is headed our way Wednesday, and parts of the U.S. will get a front-row glimpse, even though only a small portion of the Sun will be covered. Meanwhile, skywatchers in parts of Europe will experience something much more dramatic: total darkness during the day. If you’re planning to look up, there’s one important safety rule you absolutely shouldn’t skip.
Read more →
Moneymaxxing? We’ve Been Doing That for Years
“Moneymaxxing” may sound like the latest social-media trend, but there’s really nothing new about it. Cutting unnecessary expenses, stretching every dollar, paying down debt, automating savings and getting the most from what you already have are the same practical money habits that have helped families build financial breathing room for decades. The new part is simply giving an old-fashioned idea a trendy name.
Read more →
Three Midlife Habits That Could Buy You 13 More Years of Brain Health
Your brain may have a longer memory than you think. A 26-year study found that avoiding just three common health risks in midlife was linked to about 13 extra years without dementia. The encouraging part? Experts say it’s never too late to start making changes that benefit both your heart and your brain.
Read more →
The Moon Has a Brand-New Crater and a Satellite Caught It Happening
The Moon has a fresh scar after a stray SpaceX rocket stage slammed into its surface at nearly 5,400 mph. A South Korean lunar orbiter captured rare before-and-after images showing the new impact crater and the darker debris left behind. Even more detailed photos are expected soon, offering a fascinating look at an accidental cosmic collision.
Read more →
Ford’s New Electric Truck Has a Surprising Price Tag
Ford has finally revealed the name of its upcoming affordable electric pickup and the biggest surprise may be the price. Starting just under $30,000, the new truck is designed to make EV ownership more accessible while packing in features like hands-free driving, a front trunk, and room for five. If you’ve been waiting for an electric truck that won’t break the budget, this one is worth watching.
Read more →
Prime Members Have Free Books Waiting This Month
If you’re an Amazon Prime member, don’t overlook one of the quieter perks of your membership. This month, you can claim two free Kindle e-books through Amazon First Reads, including an early-release title and a bonus short read. It only takes a minute to add them to your library and they’re yours to keep.
Read more →
Fitbit Users Just Got a Feature They’ve Wanted for Years
If you use a Fitbit and an iPhone, managing your health data just got a lot easier. A new update finally lets Fitbit information like steps, sleep, workouts, and heart rate sync directly with Apple Health. No third-party apps or complicated workarounds required.
Read more →
The Hidden Retirement Cost of Helping Grown Kids
More adult children are moving back home, but the financial impact doesn’t stop with higher grocery bills. Financial planners say many parents are delaying retirement or saving less because supporting grown kids can cost thousands each year. Here’s why more families are rethinking the “empty nest” years and what to consider before saying yes.
Read more →
Check back regularly for updates! We’ll be adding new top news articles throughout August 2026.

Sweet Onion Salad Dressing (You’ll Never Buy Bottled Again)
Here’s a confession: I used to think salad dressing was one of those things you just… bought. Little glass bottle, big price tag, ingredient list longer than my grocery receipt. Then I made this one, and now I feel a little silly about all those years.

The secret’s not fancy. You grate a sweet onion and cook it down for a few minutes. That’s it. That’s the trick that turns a raw, sharp onion into something sweet and almost caramel-y and it’s the whole reason this dressing tastes like it came from a restaurant kitchen instead of your pantry.
What You’ll Need
Sugar
Sugar does double duty here. It’s not just sweetening the dressing. It’s what balances out the onion’s natural bite once it hits the pan. If you want to dial it back, you can drop to ½ cup with no real loss, or swap in ½ cup honey for a rounder, less sharp sweetness.
Salt
Salt keeps all that sugar from tasting like dessert. Don’t skip it just because the recipe seems sweet enough already.
Dry Mustard
Dry mustard is the ingredient doing the quiet work. Leave it out and the dressing tastes flat, like something’s missing and you can’t quite name it. No dry mustard in the cabinet? A teaspoon or two of grainy or Dijon mustard does the job just as well.
Celery Seed
Celery seed is small but it’s not optional in my book. It’s what keeps this from tasting like a straight sugar-and-vinegar situation and gives it that little savory backbone. If you truly don’t have it, the dressing will still work. It just won’t taste quite like this one.
Sweet Onion, Grated
This is the one place I won’t budge, and it’s actually two rules in one. First, it has to be a sweet variety: Vidalia, Walla Walla, Maui, whatever your grocery store calls it. A regular yellow or white onion stays sharp even after cooking, and it’ll fight the sugar instead of working with it.
Second, grate it. Don’t dice it, don’t shortcut it. Grating is what lets the onion melt into the dressing instead of sitting there in stubborn little chunks. A box grater and two minutes of mild eye-watering. Worth it. This is the ingredient the whole recipe is built around, so don’t substitute your way around either part of it.
Vegetable Oil
Vegetable oil is there to bind everything into a proper dressing instead of a syrup. Any neutral oil works: canola, avocado, whatever’s in your pantry. Extra virgin olive oil is fine too, but it brings its own flavor along, so the dressing will taste a little more “olive oil-forward” than the original.
Vinegar
Vinegar matters more than you’d think. White wine, rice, or apple cider vinegar all keep things bright without overpowering the onion and mustard. Red wine or balsamic vinegar will take over the whole bowl. I’ve made that mistake so you don’t have to.
A quick note on dietary needs: this dressing is naturally vegan and gluten-free as written, so it’s an easy one to serve to a mixed table without making a separate batch.
How to Make It

Step 1: Build the Dry Base First
Combine the sugar, salt, mustard, and celery seed in a small saucepan before anything wet goes in. Mixing the dry ingredients first keeps the mustard and celery seed from clumping once the liquid hits the pan… a small step, but it saves you from picking mustard clumps out of your dressing later.
Step 2: Add the Wet Ingredients and Grated Onion
Stir in the vinegar, oil, and grated onion, then set the pan over medium heat. Keep stirring as it heats. You’re watching for the sugar to fully dissolve. The mixture will go from grainy to smooth and slightly glossy. That’s your cue it’s done, usually about 5 minutes in.
Step 3: Decide Warm or Cool
This is genuinely your call, and I go back and forth. Warm, it’s fantastic drizzled straight over a salad or used as a dip. Cooled, it thickens up slightly and works better as a marinade you can really coat chicken or fish in. Neither one is “more correct.” Pick based on what you’re using it for tonight.
Step 4: Store It Right
Once it’s cooled, transfer it to a covered container and get it in the fridge.
How Long It Lasts (and How to Use It Up)
Kept covered in the fridge, this dressing holds for up to two weeks, which, in my house, is usually longer than it actually survives. Don’t be alarmed if the oil separates a bit while it sits. That’s normal, not spoilage. Just give it a good stir or a shake before you use it.
As for what to do with it: I use it as a salad dressing most nights, but don’t stop there. It’s a genuinely good dipping sauce for French fries or chicken fingers, and it moonlights well as a marinade for chicken, pork, or fish. An hour or two is enough for it to work its way in. One batch, a lot of jobs. That’s exactly the kind of recipe I like keeping around.
A Few Ways to Make It Your Own
- No dry mustard? Swap in 1–2 teaspoons of grainy or Dijon mustard instead.
- Toss in a clove of minced garlic with the onions if you’re a garlic person. I usually am.
- Want it silky instead of textured? Run the whole batch through a blender.
- Cutting sugar? You can go as low as ½ cup, or swap in ½ cup honey instead.
Give it a try this week. I think it’ll become one of those recipes you just have on hand, the way you always seem to have milk.

Sweet Onion Salad Dressing
Ingredients
- 1 cup sugar
- 1 tsp salt
- ¼ tsp dry mustard
- ¼ tsp celery seed
- 1 medium sweet onion grated (Vidalia, Walla Walla, or Maui all work)
- 2 tbsp vegetable oil
- ½ cup vinegar
Instructions
- Combine the sugar, salt, mustard, and celery seed in a small saucepan.
- Stir in the vinegar, oil, and grated onion. Set the pan over medium heat and stir until the sugar's fully melted. About 5 minutes.
- Let it cool, or serve it warm. Both are good. I've done both depending on how patient I'm feeling.
- Store in a covered container in the fridge for up to two weeks.
Notes
- In place of the dry mustard you can use 1 to 2 teaspoons of prepared grainy mustard or a Dijon mustard.
- Add a clove of finely minced garlic to the pan with the onions.
- Puree the entire salad dressing in a high-speed blender.
- The recipe calls for vinegar. Use white wine vinegar, rice vinegar, or apple cider vinegar. Red wine or balsamic vinegar would be overpowering.
- If you wish to reduce the sugar, you can go as low as 1/2 cup. Or substitute the sugar with 1/2 cup honey instead.
- You can use any neutral vegetable oil such as canola or even straight olive oil if you like, but if you use extra virgin olive oil the taste of the oil will be more pronounced.
- Cool and refrigerate, or serve as a warm dressing.
Nutrition
Question: What’s your go-to way to use this dressing? Straight on a salad, or does it end up as a marinade at your house more often than not?
EverydayCheapskate™ is reader-supported. We participate in the Amazon Services LLC Associates Program and other affiliate advertising programs, designed to provide a means for us to earn from qualifying purchases, at no cost to you.

Best Inexpensive Backpacks That Actually Last for Years
Every August it’s the same standoff. The kid wants the backpack with the cartoon character or the brand that’s cool this week. The parent wants something that’s still standing by Thanksgiving. I’ve bought a lot of backpacks in my life. I’ve also watched a few die in October, zipper gone, textbooks riding home in a grocery bag. So let me save you the trial and error.

A genuinely good backpack for an elementary or middle schooler costs $25 to $45 and will last three to five years of real kid abuse. Not “gentle use.” Abuse. The trick isn’t spending more. It’s knowing which five things actually matter, so you can walk right past an $80 status symbol and grab the $35 one that’ll still be standing when the next kid inherits it. High schoolers carry more and need bigger, tougher bags, so that range climbs a bit further up, and I’ll tell you exactly where it’s worth it.
Why The Cheap Ones Fail (And It’s Never Where You’d Guess)
A backpack is one of the only things a kid uses every single school day for nine months straight. It gets dropped, stuffed, sat on, rained on, dragged down hallways, and used as a pillow on the bus. That’s a rough life.
Cheap ones almost always fail in the same two spots: the seams or the zipper. And it always happens in February. Never in September, when you’re already braced for backpack shopping. Always in the dead of winter, when the last thing you want to do is go find another one.
Here’s the part that annoys me most: expensive doesn’t fix this. A $150 designer backpack from a big department store is frequently made with the same fabric and hardware as a $30 JanSport. You’re not paying for durability. You’re paying for the logo. And on the flip side, plenty of $20 backpacks are just fine for one year and dead by August.
The sweet spot, in my experience, sits right between $30 and $60. That’s where quality and price actually line up.
The Five Things That Matter (Everything Else is Just Fashion)
I’ve narrowed this down to five features. If a backpack has these, the color and the cartoon on the front are entirely up to your kid.
Fabric: 600 to 1000 Denier
Denier measures how thick and tough the fabric is. Higher number, tougher fabric. Most backpacks built to survive real school use are 600 or 900 denier polyester. Anything under 400 denier looks nice but won’t make it through a semester of being thrown on the ground. Anything over 1000 is overkill, and heavy. Look for “600D polyester” in the description. That one line eliminates most of the junk.
Zippers: YKK or SBS
Ask anyone who’s ever had a backpack fail and I’d bet the zipper was the culprit. It’s the single most common failure point on any bag. The fix is absurdly simple: buy backpacks with YKK or SBS zippers, which show up even on $25 bags if you know to look. Check the zipper pull itself. If those letters aren’t stamped on it, assume it’s generic, and assume it’s where this backpack is going to die.
Padded, Contoured Straps
Thin, flat straps dig into shoulders the second you load up a full binder and two textbooks. Straps should be at least an inch and a half wide, padded, and curved to actually sit on the shoulder instead of just draped over it. A sternum strap is nice but not a dealbreaker. For younger kids, make sure the bag doesn’t hang below the waist. A too-big backpack throws off how a kid stands and walks, and nobody needs that on top of everything else about being seven.
A Padded, Ventilated Back Panel
Textbooks are somehow still heavy in the era of tablets. A back panel with some padding and mesh channels for airflow keeps that sweaty-back problem from becoming a whole thing by October.
A Water Bottle Pocket That Actually Works
Every backpack claims one. Almost none of them fit a real 14 to 22 ounce kid water bottle without you fighting it every morning. Look for stretchy mesh, not a fixed little opening, and make sure it holds the bottle upright. A pocket that dumps water into the backpack is worse than no pocket at all.
My Picks By Age and Price
I test these categories the way I test everything for you: I look at what’s actually built well, not what’s marketed loudest. Here’s where I’d spend, and where I’d save.
Jump to:
Elementary School (Ages 5–10)
For the little ones, size matters more than anything else on this list. A backpack that hangs below a kindergartner’s lower back is a backpack that’s going to knock them over on the playground. Look for something in the 13 to 24 liter range, with dual mesh side pockets for water bottles and real foam padding on the straps and back panel.
Best Inexpensive: Bentgo Kids Backpack

Bentgo Lightweight 14” Backpack
This is the one I’d hand a kindergarten teacher and tell her to recommend to every parent in the class. It’s sized right for little bodies, the straps and back panel are actually padded (not just labeled that way), and the water-resistant fabric wipes clean, which matters more than you’d think when snack time goes sideways. There’s a built-in loop for a lunch bag, which sounds small until you’re the parent who isn’t chasing a lunch bag down the hallway every afternoon. It matches Bentgo’s lunch gear too, if your kid is the type who wants everything to coordinate.

Best Upgrade: Lands’ End ClassMate

Kids ClassMate Medium Backpack
If you want to spend a little more, this is where I’d put the extra money. The fabric and back padding are noticeably heftier than the budget picks, there’s a padded laptop pocket for kids who need one, and the exterior lunch loop matches their insulated lunch box, which clips right on. You can add monogramming for a personal touch, and there’s an interior name tag, which is the kind of small detail that saves you a very bad Tuesday when a backpack goes missing at school.
Middle School (Ages 10–14)
This is the stage where backpacks take the most punishment. Bigger loads, more hallway traffic, and kids who are suddenly too cool to be careful with anything.
Best Inexpensive: JanSport SuperBreak Plus
JanSport SuperBreak Plus Backpack
JanSport backpacks show up on “still going strong” lists for a reason, and this one’s built from 600 denier polyester with reinforced stitching, which is exactly what I told you to look for a minute ago. It fits a 15-inch laptop in a padded sleeve, has a front organizer pocket for the small stuff that always goes missing, and the back panel is fully padded for the days when the backpack weighs more than the kid carrying it. JanSport also backs every bag with a lifetime replace-or-fix promise, no questions asked. That alone tells you something about how confident they are in their own zippers.

Best Upgrade: JanSport Right Pack
Same lifetime guarantee, sturdier materials. This one’s made from Cordura fabric with a suede leather bottom, which is a genuine step up in durability and, honestly, looks sharp enough that a fourteen-year-old won’t roll their eyes at it. Padded laptop sleeve, padded straps, side water bottle pocket. If your kid is hard on backpacks (and at this age, they all are), this is the one that’ll outlast the school year and probably the one after it.

High School (Ages 14+)
By high school, backpacks start doubling as a personal style statement, which is fine, as long as the bones underneath are still solid. Heads up: prices climb here. High schoolers are hauling laptops, sports gear, and four years of daily wear, so I’m not finding a genuinely inexpensive pick in this tier the way I could for the younger age groups. What I found instead is a best value and a best splurge.
Best Inexpensive: Herschel Supply Co. Classic, 30L
Herschel Supply Co. Classic Backpack, Black, XL 30L
Herschel’s Classic is made from 600D recycled polyester, has a floating laptop sleeve that fits 15 to 16-inch laptops, and uses sturdy zippers with cord pulls that don’t snag. It’s the backpack I’d point a teenager toward if they want something that looks like it wasn’t picked out by a parent, but is still built the way I’d want it built.

Best Upgrade: Fjällräven Skule 28 ($119)
Fjällräven Skule 28 Backpack
This one’s for the kid carrying a genuinely heavy daily load, hiking on weekends, or just needs a backpack that’ll survive four years of college after high school. Hardwearing fabric, a padded 15-inch laptop sleeve, and a back panel with air mesh that actually breathes. It’s a real investment, well above what I’d tell you to spend for a younger kid, but it’s the kind of backpack that keeps its shape and its stitching long past when a cheaper one would’ve given up.

The Ones I’d Skip Entirely
- Anything under $15 from a big-box store. I know the price tag is tempting. I also know it’ll be dead by February, and you’ll have spent the same $15 twice.
- “Fashion” backpacks with tiny, flimsy straps. Designed to look cute sitting empty on a shelf. Not designed to carry a single textbook, let alone four.
- Wheeled backpacks, in most cases. Heavy, bulky, and the wheels are usually the first thing to break. Unless a doctor has specifically recommended one for your kid, skip it.
- Character-themed backpacks with plastic hardware. The character fades and peels, your kid outgrows the character faster than the backpack, and the plastic parts are usually the first thing to snap.
Habits That Make Any Backpack Last Longer
Buying the right backpack is half the battle. What you do with it the rest of the year is the other half.
- Empty it every Friday. A stuffed backpack puts constant stress on the zippers and seams. Give it a night to decompress and it’ll last longer.
- Wash it once a semester. Most backpacks can go through the washing machine inside a mesh laundry bag, cold water, air dry. It gets rid of the mystery smell and keeps the fabric from breaking down early.
- Zip every zipper before you put it away. An unzipped pocket flops around and eventually tears at the seam. Takes two seconds to prevent.
- Fix small seam issues before they become big ones. A sturdy needle, heavy-duty thread, fifteen minutes. That’s the difference between a repaired backpack and a dead one.
- Store it somewhere dry over the summer. A damp basement or a hot attic will break down fabric faster than a full school year will. Keep it inside the house.
The Math That Actually Matters
A $30 backpack that lasts three years costs you $10 a year. A $120 backpack that lasts two years costs you $60 a year. Even before you factor in that the cheaper one still looks decent at the end, it’s already won.
For elementary and middle schoolers, the $25 to $45 range is genuinely where the smart money lives. High schoolers cost more no matter which way you go, so there the win is picking the one that survives four years instead of two. Either way, buy the sturdy one once, and let the patches and keychains be where your kid gets to have fun with it. That part’s cheap. The backpack itself doesn’t have to be.
Question: What’s the longest a backpack has ever lasted in your house, and which brand was it? Tell me in the comments. I’m always collecting real-life durability winners.
EverydayCheapskate™ is reader-supported. We participate in the Amazon Services LLC Associates Program and other affiliate advertising programs, designed to provide a means for us to earn from qualifying purchases, at no cost to you.

How Much Does It Really Cost to Adopt a Pet Today?
That $150 adoption fee? That’s not the cost of a pet. That’s the cover charge. The real bill shows up over the next twelve months, one vet visit and one chewed-up shoe at a time. First year, most dog owners land somewhere between $1,500 and $3,000, and most of it hits before you’ve even finished house-training.

Vaccinations, food, supplies, training, and, sooner or later, the emergency vet trip you swore you’d never need. Cat owners get off easier, usually $600 to $1,500, but the pattern’s the same: the bulk of it lands in the first three months, right when you’re also trying to convince a new pet your rug is not a bathroom.
I’m not telling you this to talk you out of it. I’m telling you because I’d rather you know now than find out the hard way, like most of us did. Here’s the honest breakdown: what a pet really costs, where to find one without paying breeder prices, and exactly which corners are safe to cut.
Where to Adopt (and What Each One Costs)
Four main routes. I’ve ranked them cheapest to most expensive, because that’s how my brain works.
Craigslist and Facebook “Free to Good Home”: $0 to $100
Sometimes the right pet just finds you. Someone’s moving. Someone had a baby. Someone realized, three months in, that the puppy was a bigger commitment than they bargained for.
Works fine if you’re willing to do your own vetting… literally, with a vet. No health guarantee, no records, no return policy. And watch for scams; some of these “free” listings are backyard breeders trying to move puppies fast. Meet the pet in person. Ask questions. Trust your gut.
Municipal Animal Shelter: $50 to $200
Cheapest option, and arguably the one that does the most good. Your city or county shelter takes in strays, surrenders, and rescues. The fee usually covers initial vaccinations, a health check, and spay/neuter. Sometimes you’ll even walk out with a starter kit.
Best for adult dogs and cats, the breeds nobody’s fighting over, and adopters who can be flexible about which pet finds them.
One catch: staffing at these places is often stretched thin, so a health issue can slip through. Get your new pet to your own vet within the first week. Always.
Private Rescue Organization: $200 to $500
These are usually nonprofits, often built around a specific breed, running through foster homes instead of a shelter building. The higher fee buys more vet care up front and (this is the real value) a foster parent who actually knows the animal’s personality.
Good for specific breeds, younger animals (rescues often have puppies and kittens through their foster network), and anyone who wants the real story on temperament before they commit.
Expect a longer application. Home visits, references, sometimes an interview. Annoying in the moment, but it’s there for a reason.
Breeder: $1,500 to $5,000+
Only worth it if you’re set on a specific breed and rescue truly isn’t an option. Reputable breeders cost more, and they’re worth it, but “cheap breeder” is almost always code for puppy mill. That’s not a corner you cut.
Before you write that check, though: nearly every breed has its own breed-specific rescue. I’ve seen people about to pay $2,500 for a golden retriever puppy who had no idea Golden Retriever Rescue in their own state had puppies and adults for $300 to $500. Look before you leap.
Where to Actually Find Adoptable Pets
- Petfinder.com: The biggest database out there, searchable by breed, age, location
- Adopt a Pet: Similar setup, sometimes turns up different listings
- Your local city or county shelter’s own website
- Best Friends Animal Society: A national group with adoption partners everywhere
- Breed-specific rescue sites: Just search “[breed] rescue [your state]”
- Local Facebook rescue groups: Often the fastest way to hear about a new arrival
- Nextdoor: The occasional surrender or found-pet post turns up here too
The Real First-Year Cost Breakdown

This is the part the adoption pamphlet skips. Numbers below are averages, so yours will move around depending on where you live and what kind of pet you’ve got.
Initial Setup (First Month): $300 to $700
- Adoption fee: $50 to $500
- New-pet vet exam: $75 to $150
- Any missing vaccinations: $75 to $200
- Microchip, if not already done: $50
- Food and water bowls: $20
- Collar, leash, tags: $30 to $50
- Bed: $30 to $80
- Crate (dogs): $60 to $150
- Litter box, litter, scratching post (cats): $60 to $100
- Toys and enrichment: $30
- First bag of food: $40 to $80
First Year Ongoing, Months 2 through 12: $1,200 to $2,500
- Food: $400 to $900 (dogs eat like, well, dogs)
- Litter (cats): $200 to $400
- Preventatives (heartworm, flea and tick, dental): $200 to $400
- Annual vet visit: $200 to $350
- Training (dogs): $150 to $500
- Grooming: $150 to $600, depending entirely on how much coat you’re dealing with
- Pet insurance, optional: $300 to $600
- Boarding or pet sitting, as needed: $100 to $500
The Emergency Fund You’ll Wish You Had: $500 to $2,000
This is the one that blindsides people. An emergency vet trip in year one isn’t rare: swallowed socks, fight wounds, allergic reactions, a cracked tooth. It happens more than you’d think.
Here’s where I’d point you back to the Contingency Fund. You already know I’m going to say it: don’t wait for the emergency to figure out how you’ll pay for it. Set aside $500 to $1,000 in a dedicated pet fund before that pet ever sets a paw in your house. It’s the same principle behind everything I teach. The peace of mind isn’t in hoping nothing goes wrong, it’s in already having the money if it does.
Where to Save Without Shortchanging Your Pet
- Buy the furniture-style stuff used. Crates, kennels, pet gates… all easy to find secondhand for a fraction of retail.
- Skip the fancy branded food, at first. Ask the shelter what the pet’s been eating and stick with it, or transition slowly to something mid-tier. A boutique bag with a pretty label isn’t automatically better than a well-formulated standard one.
- Hit the thrift store for toys. Puppies destroy everything they touch anyway. A Goodwill squeaky toy does the job just as well as a new one, for about a tenth of the price.
- Groom short-coated pets yourself. Basic bathing and nail trims at home save you $30 to $60 a visit.
- Buy medications through 1-800-PetMeds or Chewy Pharmacy. Get the prescription from your vet, then buy it elsewhere. Usually 30 to 50 percent less than the vet’s own pharmacy.
- Use free training resources first. YouTube, library books, community obedience classes at the park. Basic training doesn’t require a $500 package.
Where NOT to Cut Corners
- Vaccinations and preventatives. Preventing an illness is always cheaper than treating one. Always.
- Spay/neuter. For the animal’s health and for keeping the shelter population down. Low-cost clinics exist. Check the ASPCA and Humane Society directories.
- Basic dental care. Dental disease is common, and it’s expensive once it’s advanced.
- Quality food, long-term. Once your pet’s settled in, feed something appropriate for their life stage. It pays you back in fewer vet visits.
- A trainer, if behavior issues show up. Still cheaper than replacing the couch, dealing with a genuinely anxious animal, or, worst case, giving the pet up.
Pet Insurance: Worth It, or Not?

Honest answer: it depends. Pet insurance runs $300 to $800 a year depending on the plan and the pet, and the average emergency vet visit runs $800 to $3,000. Do that math and you’ll see why a lot of families lean toward getting it.
Worth considering if you’ve got a puppy or kitten (long life ahead, plenty of unknowns), a larger dog breed (more prone to the expensive stuff), or you know you couldn’t easily cover a $3,000 surprise out of savings.
Skip it if you’ve already got solid savings and would rather self-insure, which, if you’ve built a real Contingency Fund, you’re already positioned to do. Older pets can also run into trouble finding affordable coverage for pre-existing conditions.
Popular options: Trupanion, Healthy Paws, Embrace, Pets Best. Compare a few quotes on an aggregator site like Pawlicy before picking one.
The Total Real Cost
First year for a dog: $1,500 to $3,000. First year for a cat: $600 to $1,500.
Going in with your eyes open is the whole game here. The love part takes care of itself. It’s the math part that catches people off guard.
But here’s the thing… nearly every pet owner I’ve ever talked to will tell you it was worth every dollar. Knowing what’s coming is what turns “joyful new pet” into “joyful new pet who also didn’t wreck the budget.”
Question: What did you wish you’d known about the real cost of adopting before you brought your first pet home? Tell me in the comments. It might save the next person a rough surprise.
EverydayCheapskate™ is reader-supported. We participate in the Amazon Services LLC Associates Program and other affiliate advertising programs, designed to provide a means for us to earn from qualifying purchases, at no cost to you.

Homemade BBQ Sauce Recipe That Beats Any Store Bottle
When did a bottle of BBQ sauce start costing $6 or $7? I picked one up not long ago, flipped it over out of habit, and there it was: high-fructose corn syrup as the second ingredient, followed by a string of things I couldn’t pronounce and one I’m pretty sure was just “flavor.” For that price. I put it back. Here’s the thing nobody tells you: BBQ sauce is one of the easiest things you’ll ever make at home. Twenty minutes, a saucepan, and a whisk. That’s it. And the payoff isn’t small. You get nearly double what’s in that bottle, for less money, and it tastes like something you’d actually be proud to serve.

This one clings to ribs the way sauce is supposed to. It brushes on clean. It stirs right into pulled pork like it was made for the job. Because, well, it was.
If you’ve already got my homemade ranch mix or taco seasoning going in your pantry, you know the drill. A little effort up front, a lot of payoff on the back end, and you’re the one deciding what’s in it. That last part matters more than people think.
Why the Homemade Version Wins
Most store-brand sauces lean hard into sweet and gooey and call it a day. There’s no real depth to them, nothing going on underneath.
My version starts with the same ketchup base, sure, but then I build on it. Molasses for depth. Worcestershire for that savory backbone. Smoked paprika, which is honestly the ingredient doing all the heavy lifting here. It gives you that wood-smoke flavor even if your “grill” tonight is a cast-iron pan on the stove. And enough vinegar and mustard to keep the whole thing from tipping into candy territory.
What You’ll Need

Chances are good most of this is already sitting in your pantry.
The Base:
- Ketchup: Your foundation, sweetness and tang both. Almost out? A can of tomato paste thinned with a little water and vinegar gets you close in a pinch.
- Brown sugar: The sweetness. Light keeps it milder, dark takes it deeper. Coconut sugar swaps in almost identically. Honey or maple syrup work too, but they add moisture, so cut the vinegar back slightly if you go that route.
- Apple cider vinegar: This is what keeps the sauce from turning into candy. White vinegar works in a pinch, though it’s sharper. Rice vinegar is the gentler option if that’s what’s in your cabinet.
- Molasses: The depth that separates this from anything in a bottle. In a real pinch, dark corn syrup or a touch more brown sugar gets you partway there, but you’ll lose that little bitter edge that makes molasses molasses. I use Grandma’s.
- Worcestershire sauce: Your umami backbone. Most major brands, Lea & Perrins included, are gluten-free, but check the label if that matters to you. Cooking for a vegetarian? Look for a version made without anchovies, or use soy sauce with a splash of vinegar instead.
- Dijon mustard: Sharpness, and it helps the whole sauce come together smoothly. Yellow mustard works fine. Just a little milder.
The Spices:
- Smoked paprika: This is the ingredient doing all the work. Skip it and you don’t have BBQ sauce, you have spiced ketchup. Regular paprika only gets you the color, not the flavor, so it’s not a real substitute here. I’ll admit, I’m particular about my smoked paprika. Cheap stuff tastes like dust. Spend the extra dollar or two on Spanish smoked paprika and you’ll actually taste the difference in the finished sauce.
- Garlic powder and onion powder: They round out the savory side. Fresh minced garlic or onion will work, but the sauce can turn grainy, so I stick with powder.
- Black pepper and salt: The basics. Adjust to your taste, no rules here.
- Celery seed: A quiet, earthy note in the background. Don’t have it? Leave it out rather than trying to replace it. It’s a nice-to-have, not a must.
- Cayenne: Heat, and entirely up to you. I skip it when I’m making a batch for the grandkids.
Optional Depth-Builders:
Not required, any of these. Pick one, maybe two, depending on where you want the flavor to go.
- Liquid smoke: Worth adding if you’re cooking indoors and want that outdoor flavor anyway.
- Bourbon or whiskey: The alcohol cooks off, but I still leave it out of any batch headed to a kids’ table.
- Hot sauce: For when cayenne alone isn’t cutting it.
How to Make It

Whisk Everything in Cold, Not Warm
Add all your ingredients to a medium saucepan before you turn on the heat, then whisk until smooth. Doing this cold instead of heating the ketchup first keeps the sugar from scorching on the bottom before everything else has had a chance to combine.
Simmer, Don’t Boil
Heat over medium until you see it just start to bubble. The second it does, drop it to medium-low. A rolling boil splatters (BBQ sauce burns are no joke) and cooks unevenly, scorching the bottom while the top stays thin.
Give It the Full 20 to 25 Minutes
Let it go uncovered, stirring now and then, until it coats the back of a spoon. This is the step people rush, and it’s the one that matters most. Pull it too early and you’ve got a thin, harsh-tasting glaze instead of a sauce. It really does need the full time to mellow out and thicken.
Here’s how to check: dip a spoon in, pull it out, and run your finger down the back of it. Line holds? Done. Sauce runs right back together? Give it five more minutes and test again.
Cool Before You Taste, Then Cool Again Before You Jar It
This is the step almost everyone skips, and it’s the one that saves the most batches. Taste it hot and it’ll seem too sweet or too sharp, so you’ll start “fixing” a sauce that wasn’t broken. Let it cool to room temperature first, taste again, and adjust only then. I’ve salvaged sauce I nearly ruined this way more than once.
Once it’s fully cooled, move it to a jar. A repurposed 16-ounce jar, mason or old spaghetti sauce, works fine. Refrigerate from there.
Makes: 2 to 2¼ cups. Keeps about 3 weeks in the fridge for best quality.
Five Ways to Riff on It
Once you’ve made the base version, you’ll see how easy it is to bend it in a new direction.
Kansas City Style (The Classic)
This is the recipe above, as written. Thick, sweet, tangy. The one you’ll reach for most.
Memphis Style (Vinegar-Forward)
Double the vinegar. Cut the brown sugar in half. Skip the molasses altogether. Stir in a tablespoon of tomato paste for backbone. Thinner and tangier, and it’s especially good on pulled pork.
Texas Style (Built for Beef)
Add a tablespoon of chili powder, a teaspoon of cumin, a little extra cayenne, and another teaspoon of coarse black pepper. Smokier, spicier, and this is the one that holds its own against brisket.
Carolina Gold (Mustard-Based)
Swap the ketchup for a cup of yellow mustard. Cut the vinegar to 2 tablespoons, the brown sugar to ¼ cup, and stir in 2 tablespoons of honey. Skip the smoked paprika entirely. Tangy, mustard-forward, and outstanding on chicken.
Sweet Alabama White
This one’s not even in the same family, but it’s worth the detour: a cup of mayonnaise, ¼ cup apple cider vinegar, 2 tablespoons lemon juice, 2 teaspoons black pepper, a teaspoon of horseradish, a teaspoon of garlic powder, salt to taste. No cooking required. Serve it cold over smoked chicken and you’ll wonder where it’s been your whole life. I mean that.
Where to Use It

The classic version works almost anywhere, but a few pairings are worth calling out:
- Ribs: Brush on during the last 15 minutes only. Any earlier and the sugar burns.
- Pulled pork or chicken: Stir it straight into the shredded meat.
- Grilled chicken: Brush on in the last few minutes.
- Burgers: Skip the ketchup. Use this instead.
- Meatloaf glaze: Brush on top during the last 15 minutes of baking.
- Slow cooker BBQ chicken: Pour a full jar over 2 pounds of boneless thighs, cook 6 hours on low.
- Dipping sauce: Chicken tenders, fries, whatever needs help. Which, let’s be honest, is most fried food.
Can I Make it Less Sweet?
Yes, and it’s an easy fix.
Cut the brown sugar to ⅓ cup, or swap in honey for part of it if you want something softer instead of just less. Taste it after it’s simmered and cooled (remember, not while it’s hot), then adjust with a splash more vinegar or a pinch of cayenne if it still needs balance.
Storage
Sealed in a glass jar in the fridge: 4 to 6 weeks.
In the freezer: up to 6 months. Portion it into small containers first, then thaw overnight in the fridge when you need it.
Here’s a small kindness you can do for future-you: make a double batch and freeze half. Grilling season’s got maybe six more weeks left in it. Might as well get the most out of it.

Homemade BBQ Sauce (Classic Kansas City Style)
Equipment
Ingredients
- 1½ cups ketchup
- ½ cup brown sugar
- ¼ cup apple cider vinegar
- 2 tablespoons molasses
- 2 tablespoons Worcestershire sauce
- 1 tablespoon Dijon mustard
- 2 teaspoons smoked paprika
- 1 teaspoon garlic powder
- 1 teaspoon onion powder
- ½ teaspoon black pepper
- ½ teaspoon salt
- ¼ teaspoon celery seed
- Pinch of cayenne optional
- Optional: 1 teaspoon liquid smoke, 1 tablespoon bourbon, 1 tablespoon hot sauce
Instructions
- Whisk all ingredients together in a medium saucepan.
- Bring to a gentle simmer over medium heat.
- Reduce heat to medium-low. Simmer uncovered 20 to 25 minutes, stirring occasionally, until thick enough to coat the back of a spoon.
- Cool completely, then transfer to a clean glass jar.
- Refrigerate. Keeps up to 3 weeks for best quality.
Notes
Nutrition
Question: Your turn… what’s your family’s go-to BBQ sauce? Sweet Kansas City, tangy Memphis, mustard-heavy Carolina, or something regional I haven’t even heard of? Tell me in the comments.
EverydayCheapskate™ is reader-supported. We participate in the Amazon Services LLC Associates Program and other affiliate advertising programs, designed to provide a means for us to earn from qualifying purchases, at no cost to you.
Fabric Softener Is Wrecking Your Laundry. Here’s What Actually Works.
You measure your coffee. You measure your medicine. So why do you eyeball fabric softener and dryer sheets, load after load, hoping for softer towels? That habit is exactly what’s leaving your laundry stiff, gray, and stinky. Here’s the science behind the buildup, and the one swap that finally fixed it for good.
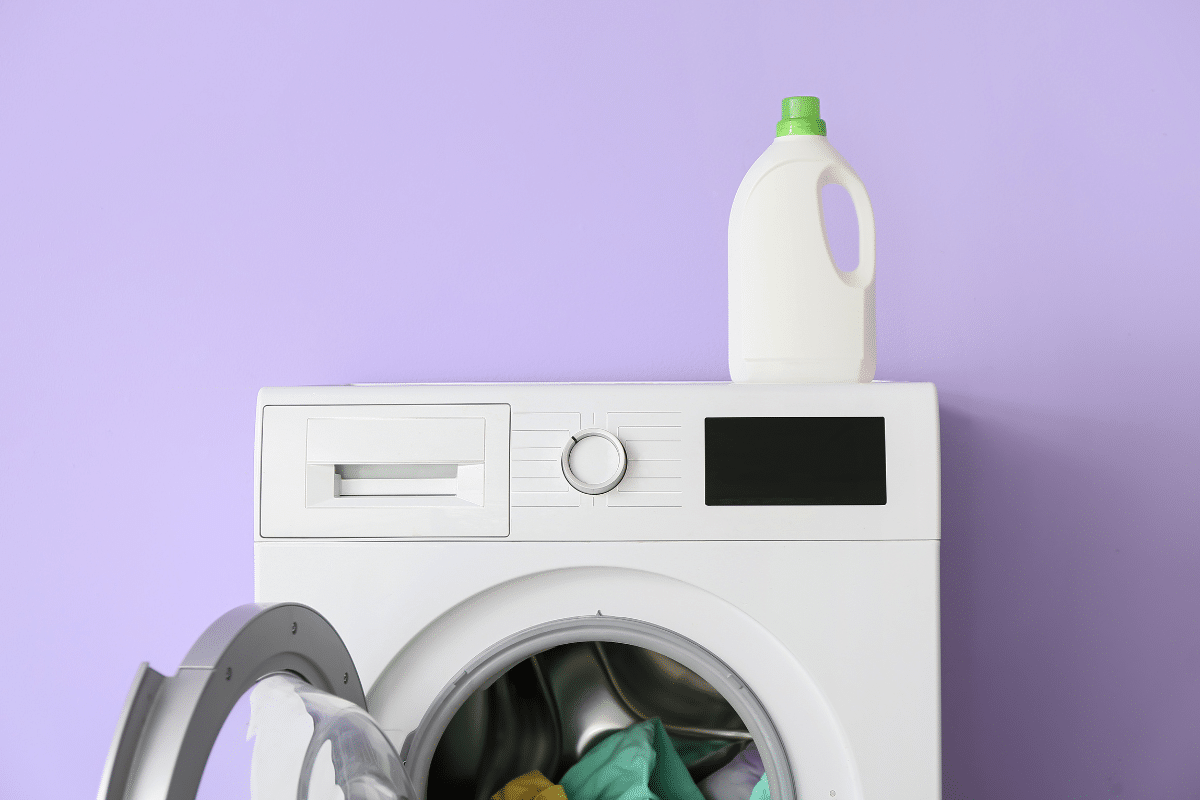
Be honest. When you pour fabric softener into that little cup, do you measure? Or do you just… pour, and hope for the best?
I know. Me too, for years. We want our towels fluffy, our sheets soft, our whites bright white. So we glug in extra liquid softener. We toss in one more dryer sheet, just to be safe. And when the laundry comes out looking gray and feeling like cardboard anyway, what do we do?
We use more. More detergent. More softener. More sheets.
It’s a losing game, and I played it for longer than I’d like to admit. Turns out the softener aisle has been selling us the problem and calling it the solution.
I remember the exact moment I figured this out. I pulled a load of “clean” bath towels out of the dryer, buried my face in one the way you do, and got a whiff of sour dishrag instead of fresh laundry. I’d used extra detergent, extra softener, and a second dryer sheet, thinking I was being thorough. I was actually just adding more residue on top of residue that was already there. That towel went straight back in the hamper, and so did my faith in commercial softeners.
The Real Reason Your Towels Feel Scratchy
Here’s the part nobody tells you at the store: fabric softener and dryer sheets don’t rinse away. Every single load leaves a little more residue behind, on your clothes and inside your machine.
That residue builds. And builds. Pretty soon your whites look dingy, your colors look tired, and your towels feel stiff instead of soft, no matter how much softener you add. Towels are the worst offenders. They go sour and stinky, and re-washing them with more product only feeds the cycle. All that leftover detergent and softener gives odor-causing bacteria a cozy place to move in, which is a big reason your washing machine starts to smell, too.
If your sheets feel like sandpaper lately, this buildup is very likely why. It’s not your fabric. It’s what’s clinging to your fabric.
What’s Actually in That Bottle
I’m not big on scare tactics, but you deserve to know what you’re rubbing into your sheets every week.
WebMD reports that fragrance, found in everything from laundry products to cosmetics to cleaning sprays, is the leading cause of cosmetic contact dermatitis, the itchy, sometimes blistering reaction a lot of us just chalk up to “sensitive skin.” Laundry products land squarely in that category. A 2020 study on top-selling textile-care products backs it up with real numbers: fragrance turned up as a contact allergen in 90% of the fabric softeners tested and 75% of the dryer sheets.
Dryer sheets bring their own baggage, too. A University of Washington study that sampled emissions straight from home dryer vents found more than two dozen volatile organic compounds released during a single scented load, including acetaldehyde and benzene. Both are classified by the EPA as hazardous air pollutants with no established safe exposure level, though in fairness, the amounts detected were small next to things like car exhaust. And that “clingy” feel liquid softener leaves behind comes from quaternary ammonium compounds, which are chemically related to substances recognized as asthma triggers, worth knowing if anyone in your house wheezes easily.
So here’s the irony that took me way too long to catch: the products marketed to make our laundry soft, fresh, and healthy can quietly work against all three. The more we use, the more residue ends up against our skin, night after night.
- MORE: Laundry Stripping: The Surprising Fix for Dingy Sheets, Gray Towels, and Sad-Looking Underwear
Breaking the Habit (It’s Easier Than You Think)
Cut the commercial stuff.
No more liquid softener. No more dryer sheets. No more heavily scented anything. Your skin will thank you, and so will your wallet. Scent-free, gentle products do the actual job of cleaning your clothes without the extras you never needed in the first place.
Double up on rinses, at least for a while.
If you’ve been a fabric-softener household for years, you’ve got buildup to undo. Add a half cup to a full cup of plain white vinegar to the final rinse, depending on your load size. Pour it right into the liquid softener dispenser and it will release automatically at the right time. It strips out lingering detergent and softener residue beautifully. Just know it might take several trips through the wash before everything’s fully rinsed clean.
And no, your towels will not smell like a salad. You only catch a whiff of vinegar while the laundry is still wet. Once it’s dry, even on the line, that smell is long gone.
The One Swap that Actually Solved It: Wool Dryer Balls
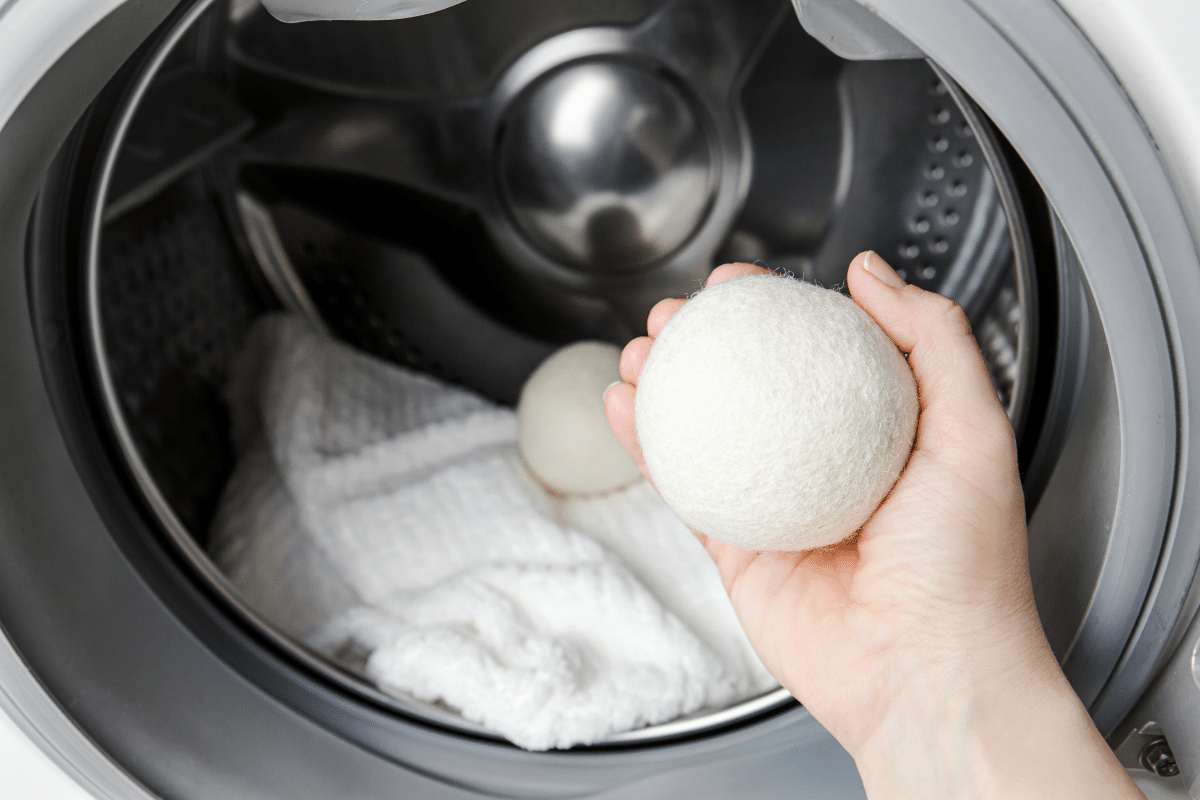
This is the part where I get a little evangelical, so bear with me. Wool dryer balls are the single best laundry change I’ve made in years, and I don’t say that about many products.
They contain no chemicals. They last for thousands of loads. They cut static, reduce wrinkles, soften your laundry, and shave real time off your drying cycles, which means real savings on your energy bill.
Here’s how they earn their keep:
They soften mechanically.
Instead of coating your fabric in chemical residue, wool dryer balls physically beat and separate the fibers as they tumble, which is what actually produces that soft feel.
They separate your load.
As they bounce around, they lift and separate clothes and linens instead of letting everything clump into one damp knot, which is half the reason overdried, wrinkled loads happen in the first place.
They hold and share heat.
Wool retains warmth and transfers it back into your laundry as it tumbles, which speeds drying and trims your energy use.
Not all dryer balls are created equal, and I’ve tried the flimsy ones so you don’t have to. My rule: buy them 100% wool, dense, and heavy. If you can squeeze one and feel it give, skip it. You want balls solid enough to outlast years of laundry without falling apart or losing their softening power.
The ones I keep in my own dryer are extra-large, about nine inches around, 100% wool, and sold in a six-pack. They’re the real deal, and they’ll outlive whatever plastic gadget is trending next.

(Disclosure: This post includes an Amazon Creator Connections product. I may earn a small commission if you purchase through the link, at no additional cost to you.)
But What About Static?
This is far and away the most common complaint I hear, and I mean thousands of emails over the years. Readers ditch the dryer sheets, love everything about wool dryer balls, and then static cling shows up and makes them want to run right back to the chemical aisle.
Don’t do it. Static almost always comes down to one thing: overdrying.
Run a dryer too long, with or without wool balls in it, and you’ll get static. Overdrying doesn’t just waste gas or electricity. It shreds your fabric fibers early, which is exactly where all that extra lint in the trap comes from. It’s also the number-one cause of static cling, especially on those bone-dry winter days when the air in your house is already thirsty.
I don’t have time to hover by the dryer watching for the perfect stopping point, so here’s my trick: I spray my wool dryer balls with water before I toss them in, or dunk them in a bowl of water so they’re good and wet. Since they’re denser than your laundry, they take longer to dry, which raises the humidity inside the dryer just enough to counter that overdrying effect. It doesn’t damage the balls, and in my experience it doesn’t add meaningful drying time, either. It just quietly fixes the static problem while everything else keeps working the way it should.
Your Questions, Answered
Are fabric softener sheets safe to use?
In small, occasional doses, probably not something to panic over. But used load after load, year after year, the chemical residue adds up on your skin, in your fabrics, and inside your washing machine. If you or anyone in the house deals with sensitive skin, asthma, or eczema, that’s your sign to switch.
What can I use instead of fabric softener sheets?
Wool dryer balls, hands down. A vinegar rinse handles the buildup already sitting in your fabrics. Between the two, you get soft, static-free laundry without a single chemical additive.
Will fabric softener ruin my washing machine?
It won’t break it overnight, but the residue buildup inside the drum and dispenser is exactly what causes that musty, sour smell so many washing machines develop over time. Switching off liquid softener is one of the easiest ways to keep your machine smelling clean.
How many wool dryer balls should I use per load?
I use four to six per load, more for bulky items like comforters or a full load of towels. They’re reusable for years, so buying one pack covers you for a very long time.
Is it okay to use fabric softener on bed sheets?
I’d skip it. Softener coats the fibers instead of cleaning them, which is exactly why so many readers tell me their sheets feel rough no matter how much they wash them. A wool dryer ball does the softening job without the coating.
Try It For a Month
You don’t have to swear off fabric softener forever to see if this works for you. Give it one laundry cycle through your whole routine: vinegar rinse to clear out the old buildup, wool dryer balls in every load after that. Watch what happens to your towels, your energy bill, and honestly, your skin.
I switched years ago and never looked back. Your washing machine will thank you, your sheets will feel like sheets again, and you’ll stop buying a product whose main job, it turns out, was making you buy more of it.
Question: Team liquid softener or team wool dryer balls: which side of the laundry room are you on? Share in the comments below. I read every one!
First published: 10-6-16; Updated and Republished 07-29-26
Everyday Cheapskate participates in the Amazon Services LLC Associates Program, an affiliate advertising program designed to provide a means for us to earn from qualifying purchases, at no cost to you.

Sweet Corn Chowder for Those Last Warm Summer Nights
You know the window I’m talking about. The corn at the farmers’ market (or your own garden, if you’re one of those people) is so sweet and milky you could practically eat it raw. And the evenings have started doing that thing where they’re warm when you sit down to dinner and a little chilly by the time you clear the table. That’s the window. And this soup is what I make in it, every single year, without fail.

Sweet corn chowder, built on real corn, a little bacon, a couple of potatoes, and just enough cream to make it feel like an actual meal instead of a snack in a bowl. It comes together in under 45 minutes and tastes like you fussed over it for twice that long. I won’t tell if you won’t.
Corn chowder gets overlooked because it isn’t flashy. Just corn, potatoes, broth, and a little cream doing exactly what they’re supposed to do. Sometimes boring is the whole point.
Don’t You Dare Toss Those Cobs
Here’s the trick, and it’s an old one my grandmother would’ve rolled her eyes at me for almost forgetting: after you cut the kernels off, the cobs go into the broth. Not the trash. The broth.
Let them simmer in there for about 15 minutes and they’ll hand over one more round of corn flavor before you say goodbye for good.
Free flavor from something you were about to throw away? I’ll take that trade every time.
What You’ll Need
Short list. Nothing exotic, nothing you’ll use once and forget in the pantry.
Fresh Sweet Corn
Peak season runs July through early September in most of the country. Look for tight green husks and moist silk, and kernels that feel plump when you press through the husk. Four to five ears gets you the 3 to 4 cups of kernels this recipe wants.
Out of season? Frozen corn works just fine, and it’s genuinely sweet enough that you won’t need to sugar it up. Just skip the cob-simmering step since, well, there’s no cob. Canned corn will get you through in a pinch, but it’s not going to taste like summer.
Bacon
Doing double duty here, flavor base and crunchy topping. Cook it first, then sauté everything else in the fat it leaves behind. That’s where the savory backbone of this soup comes from.
Meatless kitchen? Skip it and sauté the aromatics in a tablespoon of butter or olive oil instead. You’ll lose the smoky note, but the soup still holds up.
Onion and Celery
The workhorse pair. They cook down soft and sweet and give the broth its savory footing without stepping on the corn, which is the whole point. Out of celery? A diced fennel bulb does something similar, or just add a little extra onion and move on. Nobody’s going to notice.
Yukon Gold Potatoes
These hold their shape in the pot but still turn creamy at the edges, which is what gives this chowder body without you having to lean harder on the cream. Red potatoes are a fine substitute and stay even firmer. Russets will work in a pinch, but they break down more as they cook, so your chowder ends up thicker and a bit less chunky. Not wrong, just different.
Garlic and Thyme
Garlic for background depth, thyme for the earthy note that ties the corn and potato together instead of letting them taste like two separate things. No fresh garlic on hand? Half a teaspoon of garlic powder gets you there, though fresh really is better in this one. Dried thyme works fine too, just use half the amount.
Chicken Broth
This is your backbone liquid, and it’s also what carries the extra corn flavor once the cobs simmer in it. Stick with low-sodium so you’re the one deciding how salty the final bowl gets, not the can. For a vegetarian version, swap in vegetable broth. It won’t be quite as savory, but it gets the job done.
Half-and-Half
This is what turns “corn soup” into “chowder,” giving it that little bit of richness without going full cream soup. If you want it heavier and more indulgent, heavy cream is a straight swap. Going dairy-free? An unsweetened, neutral dairy-free cream or oat milk works, and the corn still does most of the talking either way.
Cayenne, Salt and Pepper, and Fresh Herbs
The cayenne is optional and barely there, just enough warmth in the background that you can’t quite place it. Leave it out entirely if you’re feeding picky eaters. Salt and pepper you adjust at the end, once everything’s had a chance to come together, and a scatter of chives or parsley on top adds the fresh, green bite the chowder needs after all that cream and bacon.
How to Make It

1. Cook the bacon, prep the corn.
In a large Dutch oven or heavy soup pot, cook the bacon over medium heat until crisp. Move it to a paper towel and leave about 2 tablespoons of fat behind in the pot. While that’s happening, stand each ear of corn up in a big bowl and run a sharp knife down the sides to shave off the kernels. Save the cobs. You need them.
2. Sauté the aromatics.
In that bacon fat, cook the onion and celery for 5 to 7 minutes, until soft. Stir in the garlic and thyme for about 30 seconds, just until your kitchen smells like something good is happening.
3. Build the broth with the cobs.
Pour in the chicken broth, drop in the corn cobs (break them in half if they’re being stubborn about fitting), and let it all simmer gently for about 15 minutes. Then fish out the cobs and toss them. They’ve done their job.
4. Add potatoes and corn.
In go the potatoes and about two-thirds of your corn kernels. Simmer 8 minutes, then add the rest of the corn and cook another 5 to 7, until the potatoes give easily to a fork. Keeping that last batch of corn out until the end is what keeps it sweet and snappy instead of tired and mushy.
5. Blend part of it for body.
Scoop out about 2 cups of soup and puree it, either with an immersion blender right in the pot or carefully in a regular blender. Stir that puree back in. Now you’ve got a chowder that’s thick and creamy but still has real chunks of corn and potato in every spoonful, not baby food.
6. Finish with cream.
Stir in the half-and-half and the cayenne if you’re using it. Warm it gently, don’t let it boil, and taste before you salt. It usually needs more pepper than you’d think.
7. Serve.
Ladle into bowls, top with the crumbled bacon and a scatter of chives or parsley, and hit it with one more crack of black pepper. A little pat of butter melting on top isn’t necessary. It’s just nice.
Worth Trying
This chowder bends without breaking. A few of my favorites:
- Chicken Corn Chowder: Stir in 2 cups shredded rotisserie chicken with the potatoes and suddenly dinner’s actually dinner.
- Southwestern: Add a diced jalapeño with the onion and a teaspoon of cumin, then finish with cilantro and a squeeze of lime.
- Smoky: One chopped chipotle in adobo, added with the aromatics. Warm, deep heat that sneaks up on you.
- Cheesy: A cup of shredded sharp cheddar, stirred in low and slow after the cream so it doesn’t break on you.
- Dairy-Free: Swap the half-and-half for an unsweetened, neutral dairy-free cream or oat milk. The corn still gets to be the star.
Storing and Freezing It
In the fridge, it holds for 4 to 5 days in a sealed container. Reheat low and slow, with a splash of broth or milk if it’s thickened up on you.
For the freezer, stop before you add the cream. Cook it through the potato-and-corn stage, cool it, and freeze it in portions. When you’re ready, thaw overnight in the fridge, reheat gently, and stir in the half-and-half right before serving. If you’re only freezing part of a batch, just pull that portion out before the cream goes into the rest.
Make a double batch and freeze half. It’s one of the kindest things you can do for your future self. Come December, that bowl of chowder tastes exactly like August, and trust me, you’ll need the reminder.

Fresh Sweet Corn Chowder with Bacon and Potatoes
Equipment
- Large Dutch oven or heavy soup pot
- Immersion blender (or a regular blender you don't mind ladling hot soup into carefully)
Ingredients
- 4 to 5 ears fresh sweet corn about 3 to 4 cups kernels, cobs reserved
- 4 slices bacon chopped
- 1 medium onion diced
- 2 celery stalks diced
- 3 cloves garlic minced
- 1 teaspoon fresh thyme or 1/2 teaspoon dried
- 2 medium Yukon Gold potatoes scrubbed and cut into 1/2-inch cubes
- 4 cups low-sodium chicken broth
- 1 cup half-and-half
- 1/8 teaspoon cayenne pepper optional
- Salt and freshly ground black pepper to taste
- Fresh chives or parsley for garnish
Instructions
- Cook the bacon in a large pot over medium heat until crisp. Remove to a paper towel, leaving about 2 tablespoons of fat in the pot.
- Cut the kernels from the cobs and set aside. Save the cobs.
- Sauté the onion and celery in the bacon fat, 5 to 7 minutes, until soft. Add garlic and thyme, stir 30 seconds.
- Add the broth and corn cobs. Simmer gently about 15 minutes, then remove and discard the cobs.
- Add the potatoes and two-thirds of the corn. Simmer 8 minutes. Add the remaining corn and cook 5 to 7 minutes more, until the potatoes are tender.
- Puree about 2 cups of the soup with an immersion blender, then stir it back into the pot.
- Stir in the half-and-half and cayenne, if using. Warm gently without boiling. Season with salt and pepper.
- Ladle into bowls and top with crumbled bacon and fresh herbs.
Notes
Nutrition
Question: So tell me… what’s your go-to move with peak-season corn? Chowder, straight off the cob with too much butter, a salsa, something I haven’t even thought of? Drop it in the comments. I read every one.
EverydayCheapskate™ is reader-supported. We participate in the Amazon Services LLC Associates Program and other affiliate advertising programs, designed to provide us with compensation from qualifying purchases, at no cost to you.

How to Get a Refund on Almost Anything: 5 Consumer Rights You Should Know
“I’m sorry, we can’t refund that.” I used to just… accept it. Say okay, thank the nice person, and walk out $40 poorer and a little annoyed at myself. Then I learned something that changed how I shop for good: they usually can. They’re just hoping you won’t ask twice. Here’s what nobody tells you at the register: consumer protection law in this country gives you way more leverage than the average shopper ever uses. Companies are counting on that gap. The good news is you don’t need a lawyer to close it. You need a plan.

Below is the ladder I use, from easiest to most involved. Start at the bottom rung. Most disputes never make it past step two, because the second a company realizes you know your options, they fold. Every step here costs you nothing but a little time and a little nerve.
Step 1: Work the Return Policy You Already Have
Every retailer has one. Most are more generous than the tiny print taped to the register.
Thirty to ninety days is standard at major retailers, receipt or no receipt. Plenty will look you up by the card you paid with. Even outside that window, unopened items or anything still under manufacturer warranty often get accepted anyway. And a few stores (Costco, Kohl’s, Nordstrom, the old Bed Bath & Beyond) built entire reputations on “any reason, no time limit” returns.
The phrase that works: “I’d like to return this. What are my options given [your situation]?” Ask what’s possible before you tell them what the policy says. The minute you open with “I know your policy says X, but…” you’ve made the rep defensive, and defensive reps stop being helpful.
Step 2: Ask for the Manager
If the front-line answer is no and you’ve got a real case, ask. Simple as that. Managers can do things cashiers can’t… override the policy, look up a receipt-less purchase by card, offer store credit as a middle ground, apply a price match after the fact.
Say this: “I understand the policy. I’m hoping there’s flexibility given [your situation]. Is there a manager who could take a look?” Stay pleasant. Say exactly what you’d be happy with. “I’d take store credit” often gets you further than holding out for cash back.
Step 3: File the Chargeback
This is the one most people don’t know they have, and it’s the most powerful tool on this list. Under the Fair Credit Billing Act, your credit card company has to investigate any billing dispute you file and they can pull the money back from the merchant if your claim holds up.
Use it when the item never showed up, arrived broken and the seller won’t respond, doesn’t match what was advertised, or you canceled something and got charged anyway. Email the merchant first and ask for the refund in writing. Give it two to four weeks. Nothing? Call the number on the back of your card, say “I’d like to dispute a charge,” and hand over your documentation. You’ll usually see a provisional credit while they investigate.
You’ve got about 60 days from the statement date to file, though plenty of issuers stretch that to 120. And here’s why it works so well: chargebacks cost merchants real money, on top of the refund itself. Most would rather just refund you than eat that fee. I’ve watched a company suddenly “find” a resolution within days of a dispute landing on their desk.
Step 4: Call the Manufacturer, Not Just the Store
Here’s the part people miss: a store return policy and a manufacturer’s warranty are two completely separate systems. The store saying no doesn’t end anything.
Most electronics carry a one-year warranty at minimum. Plenty of small appliances, tools, and luggage run multi-year, some lifetime. You often don’t even need the original receipt; a credit card statement usually does the job, and registering the product just smooths things along, it’s rarely required.
Find the manufacturer’s number on the product, the box, or the website. Explain what went wrong, give them the model number and purchase date, and let them offer a replacement, a refund, or a repair. L.L.Bean, Patagonia, Duluth Trading, Zippo, Craftsman, Snap-on, Osprey… if you own something from any of these and it fails, skip the store entirely and go straight to the source.
Step 5: Bring in the Regulators
The nuclear option. You won’t need it often, but when a big company stonewalls you, it works.
- Your state attorney general’s consumer protection office takes complaints against businesses operating in your state, free, usually through an online form. They won’t personally intervene, but they forward your complaint to the company and companies really don’t want that letter showing up.
- The FTC handles deceptive practices nationally. They won’t resolve your individual case, but paired with a state complaint, it adds pressure.
- The BBB isn’t a regulator, just a nonprofit, but plenty of small businesses care about their rating enough to respond fast.
- The CFPB is your move for anything financial: banks, cards, loans, debt collectors. Companies have to respond within 15 days, and the CFPB tracks whether they did.
- Small claims court is worth knowing about for the disputes too big to shrug off but too small for a lawyer, typically $2,500 to $10,000 depending on your state. Filing costs $30 to $100. Often, just filing gets you a settlement offer, because no company wants to send someone to court over a few hundred dollars. Bring your paper trail. Judges like documentation, and you won’t need an attorney to present it.
The Boring Secret Weapon: Paperwork
Every single step above works better if you’ve got proof. This is the unglamorous part, and it’s also the part that decides whether you win.
- Save receipts, physical or digital, for anything that matters
- Screenshot the product page and the confirmation email when you buy online
- Write down who you talked to, when, and what they said
- Hang onto boxes and manuals until you know everything works
- Photograph anything that arrives damaged, before you say a word to the seller
Ninety percent of these disputes go to whoever showed up with better paperwork. I keep a folder (actual paper, don’t laugh) just for this.
What This Actually Looks Like
A reader wrote to me about a $400 gadget that arrived broken. Two weeks of emails to the retailer got her nowhere. She filed a chargeback instead. Provisional credit showed up in three days. The retailer suddenly found a way to help, and she took the refund and moved on. Four days, zero dollars out of pocket, and she never had to go past step three.
Or the $150 hotel charge that shouldn’t have happened. Front desk said no. Manager said no. One call to the credit card company later, the charge was disputed, the hotel ate the loss plus a chargeback fee, and the refund landed within a week.
Nobody behind that counter is going to volunteer that you have a chargeback option, or a warranty option, or an attorney general’s office two clicks away. That’s the whole trick. Knowing the ladder exists is most of the battle. Using it is the easy part.
Question: What’s the most surprising refund you’ve ever talked your way into? Tell me in the comments. Someone reading this needs to hear it.
EverydayCheapskate™ is reader-supported. This post is general educational information, not legal advice, and consumer laws vary by state.

End-of-Summer Ratatouille (Uses Everything From the Garden)
If your kitchen counter looks anything like mine right now, you’ve got a small mountain of zucchini nobody asked for, a wheelbarrow of tomatoes, and one eggplant plant you only put in “just to try it.” Sound familiar? By late August, every gardener I know is drowning in the exact same three things, and there’s exactly one dish built to use all of it at once.

Ratatouille. One pot, zucchini, tomatoes, eggplant, peppers, and onion, all of it simmered down into a stew that somehow tastes even better the next day. Every French grandmother has her own version. Every overwhelmed gardener eventually finds their way into one, too.
And if that fussy movie with the perfectly arranged vegetable rounds ever scared you off? Take a breath. The real, peasant version is easier than half the dinners you already make on a Tuesday. Here’s how I do it, plus a shortcut for the nights you don’t have an hour to babysit a pot.
It’s Fancier in Reputation Than in Real Life
At its core, ratatouille is just a vegetable stew. The French answer to something nearly every culture with a good growing season figured out on its own. Italians call theirs caponata. Spain has pisto. Georgia has ajapsandali. Same basic move every time: cook down summer’s overflow with olive oil, garlic, and herbs until the vegetables give up and turn into something better than they started as.
Hot, warm, or spooned cold over toast the next morning… it works all three ways. I’ve eaten it for breakfast more times than I’ll admit.
The movie made it look like a weekend project. It isn’t. The real version is one pot, an hour of mostly ignoring it, and dinner’s done. The only real skill involved is resisting the urge to crank the heat. Vegetables need to cook low and slow to turn sweet instead of turning to mush.
What You’ll Need
Six vegetables and stuff you already have in the pantry. This recipe is famously forgiving, so lean the proportions toward whatever’s actually taking over your kitchen.
The Vegetables
- 1 large eggplant (about 1 pound), cubed into 1-inch pieces
2 medium zucchini or yellow squash, cubed - 2 bell peppers (any color mix), cored and cubed
- 4 large ripe tomatoes, roughly chopped (or one 28-ounce can of good crushed tomatoes)
- 1 large onion, diced
- 4 cloves garlic, minced
Pantry
- 1/3 cup good olive oil
- 1 teaspoon dried thyme (or 1 tablespoon fresh)
- 1 bay leaf
- Salt and freshly cracked black pepper
- Fresh basil leaves, torn, for finishing
- 1 tablespoon red wine vinegar or lemon juice, at the end
That’s the whole list. No stock, no wine required, no fussy French mother sauce hiding in the background. The vegetables make their own liquid. They’re generous that way.
The Classic Method (About an Hour)

1. Salt the eggplant first
Toss the cubed eggplant with about a teaspoon of salt in a colander and let it sit in the sink for 20 to 30 minutes. This pulls out extra moisture and any bitterness. Rinse it, pat it dry, move on.
Skip it if you want. Newer eggplant varieties are a lot less bitter than the ones our grandmothers dealt with. If yours came fresh off the vine today, you can probably skip this step and nobody will know.
2. Cook the vegetables in waves
Here’s the actual secret to ratatouille that doesn’t turn to mush: cook each vegetable just enough on its own, then bring them together. In a large Dutch oven over medium heat, work through this order.
Start with 2 tablespoons of olive oil and the onion. Five minutes, until it goes translucent. Add the garlic, stir for 30 seconds. Don’t walk away, garlic burns the second you look away from it.
In go the peppers. Five to seven minutes, until they soften a little.
Then the zucchini. Five more minutes.
Then the salted, drained eggplant, with another tablespoon or two of oil, because eggplant drinks oil like it’s been waiting all day for it. Eight to ten minutes, until it’s soft but still holding its shape.
Last, stir in the tomatoes, thyme, bay leaf, and a good pinch of salt.
3. Simmer it down until it looks like ratatouille
Drop the heat to medium-low. Simmer uncovered for 25 to 35 minutes, stirring now and then, until the liquid’s reduced and everything’s melted into a thick, glossy stew. Taste it. Adjust the salt and pepper. This is not optional, tomatoes vary too much to skip it.
4. Finish with basil and a splash of acid
Pull out the bay leaf. Tear a handful of fresh basil over the top and stir it in right before serving. A drizzle of good olive oil at the table doesn’t hurt. And a splash of red wine vinegar or fresh lemon juice at the very end wakes up every slow-cooked flavor in the pot. Don’t skip this part, it’s the difference between good and great.
Serve it over pasta, rice, polenta, crusty bread, or next to grilled chicken. Honestly? It’s even better tomorrow.
The Real-Life Weeknight Shortcut
Some nights you don’t have an hour. Fine. Skip the waves.
Cut everything smaller, into half-inch pieces. Heat all the oil in the pot, dump in every vegetable except the tomatoes and basil, cover, and cook 10 minutes. Add the tomatoes, thyme, and bay leaf. Simmer uncovered 15 minutes. Stir in the basil.
Less elegant. Still good. Half the time.
How to Serve It
This might be one of the most flexible dishes on earth. Here’s where mine ends up most often.
- Alongside grilled chicken, fish, or steak (the classic sidekick role)
- Over pasta, polenta, or rice, for a hearty vegetarian dinner
- Topped with a fried egg and crusty bread, for a rustic dinner or a lazy Sunday brunch
- Cold as a chunky spread, on toast with a smear of goat cheese
- Layered into a lasagna in place of the meat sauce
- Stirred into scrambled eggs the next morning, which might be my favorite way to eat it
Every reheating tastes better than the last. I’d argue day-three ratatouille is the whole point of making it.
Storage and Freezing
Refrigerator: 5 to 7 days, covered. It genuinely improves as it sits.
Freezer: 6 to 8 months. Cool it completely, portion it into freezer bags or containers, and freeze flat so it stacks and thaws fast. Thaw overnight in the fridge, reheat gently on the stove. The texture holds up better than you’d expect.
Make a double batch in August and you’ve bought yourself four or five weeknight dinners in the middle of winter, when nothing’s growing and everything at the store costs twice as much. That’s about as good a return as cooking gets.
Variations Worth Trying
- Roasted: Roast everything on sheet pans at 400°F for 30 minutes, then combine with the tomatoes and simmer briefly. Deeper flavor, a little caramelized around the edges.
- Spicy: Add a chopped jalapeño or serrano with the sweet peppers. Or just a pinch of red chili flakes if that’s all you’ve got.
- Provençal: A splash of white wine and a tablespoon of capers, stirred in with the tomatoes.
- Rustic: Cut everything into bigger, 2-inch chunks instead of cubes. Chunkier, more stew than sauce.
- With sausage: Brown some Italian sausage first, set it aside, cook the ratatouille as usual, stir the sausage back in at the end.

End-of-Summer Ratatouille
Equipment
- Large Dutch oven or heavy-bottomed pot
- Colander
- Chef's knife
Ingredients
- 1 large eggplant cubed
- 2 medium zucchini cubed
- 2 bell peppers cubed
- 4 large tomatoes or 1 can crushed, chopped
- 1 large onion diced
- 4 cloves garlic minced
- 1/3 cup olive oil
- 1 teaspoon dried thyme
- 1 bay leaf
- Salt and pepper
- Fresh basil torn
Instructions
- Salt the eggplant in a colander, drain 30 minutes, rinse, pat dry.
- In a large Dutch oven, sauté the onion in olive oil until translucent. Add garlic, cook 30 seconds.
- Add peppers, cook 5–7 minutes.
- Add zucchini, cook 5 more minutes.
- Add eggplant with more oil if needed, cook 8–10 minutes.
- Stir in tomatoes, thyme, bay leaf, salt. Simmer uncovered 25–35 minutes, until reduced and thick.
- Remove bay leaf. Stir in fresh basil. Adjust seasoning. Serve.
Notes
Nutrition
Question: What’s your best “uses up everything from the garden” recipe? Ratatouille, minestrone, a garden pasta, something entirely your own? Tell me in the comments.
EverydayCheapskate™ is reader-supported. We participate in the Amazon Services LLC Associates Program and other affiliate advertising programs, designed to provide a means for us to earn from qualifying purchases, at no cost to you.

How to Set Up a Homework Station Your Kids Will Actually Use
“Sit down.” “Where’s your pencil?” “Have you even started?” “Is that my pen or yours?” If you’ve said some version of that five nights a week for the last however-many years, welcome to the club. We meet every weeknight from 3:30 to bedtime. Here’s the thing nobody tells you: a homework station won’t make your kid love long division. Mine still don’t, and they’re grown. But the right setup does something almost sneaky. It quietly removes about ten tiny frictions a day that were making the whole ritual harder than it needed to be. And you can build one for under $30. Often for free, with stuff you already own.

The real problem isn’t homework. It’s the ten small stalls before homework. The pencil’s dull. Where’s the sharpener? Where’d the glue stick wander off to? The dog’s barking, the lighting’s bad, and forty-five minutes into “homework time,” not one problem has been solved.
That’s death by a thousand tiny cuts. A homework station’s whole job is to eliminate the cuts. Put everything in one spot, at the right height, with decent light and the right supplies, and kids sit down and start. Not cheerfully, necessarily. But they start. That’s most of the battle right there.
Three Things That Actually Matter (Forget the Pinterest Board)

1. Put It Near You, Not Away From You
The most common mistake I see? Tucking the homework spot into a bedroom or basement “so they can concentrate.” Kids don’t want to concentrate alone. They want to be near the noise, the snacks, the dog, and you. Isolate them and they’ll stall, wander, or dig in their heels.
The best spot is in or near the kitchen. A corner of the dining table, a little desk at the end of the counter, even a rolling cart that comes out at 3:30 and disappears at 5. Close enough to help without hovering. Close enough to holler “have you started your reading?” without leaving the stove.
2. Every Supply is Within Arm’s Reach
Every trip away from the desk is an invitation to get distracted, and kids will take that invitation every single time. A small caddy or bin holds everything: pencils, an eraser, a mini sharpener, a pen, glue stick, scissors, a ruler, a highlighter, a few colored pencils, some index cards. Nobody leaves the chair.
Restock it once a month. Five minutes, and it kills the “I need a new pencil” stall tactic dead.
3. Actual Task Lighting, Not Just the Overhead Light
Overhead lighting is fine for finding the remote. It’s not enough for close reading or detail work. A small adjustable LED desk lamp, $15 to $20 anywhere, changes the whole feel of the spot. It also does something psychological: it signals “this is where homework happens,” which helps that mental switch flip.
Go warm-white, not cool-white. Easier on the eyes. And get one with an adjustable neck. Skip the fancy features, you don’t need them.
The Basic Setup, For Under $30
You don’t need new furniture. You almost certainly already own most of this.
- A table or desk you already have. The dining table corner works fine.
- A chair that fits. Feet should touch the floor, or use a footrest. A chair that’s the wrong height kills focus faster than almost anything else on this list.
- A supply caddy or bin, $5 to $10. Target, Dollar Tree, or a plastic container you already own.
- An LED desk lamp, $12 to $20.
- Basic supplies you probably already have. Pencils, pens, erasers, a sharpener, glue, scissors, a ruler, sticky notes.
- A small timer or clock, $3 to $8. A kitchen timer, or an actual clock. Phones are terrible homework tools. We’ll get to that.
That’s the whole list. Twenty to forty dollars, depending on what’s already in a drawer somewhere.
Small Additions That Punch Above Their Weight
Once the basics are handled, a few small upgrades pay for themselves fast.
- A small cork board or dry erase board, mounted at kid-eye-level. Due dates, spelling words, the weekly reading log. This is for the kid to see what’s coming, not for you to leave notes.
- A “done” tray. A shallow bin where finished work lands. It’s the finish line, and something about a physically full tray works on younger kids in a way that “you’re done!” from across the room just doesn’t.
- A basket for the Friday backpack dump. Permission slips, spelling tests, the crumpled mystery paper from the bottom pocket. One basket, sorted on Sunday night, instead of a frantic Monday morning archaeology dig.
- A dedicated spot for the water bottle. Fill it before they sit down. This alone kills the “I need water” break that somehow happens every ten minutes.
- A pre-picked snack, nearby but not on the desk. Crumbs and homework don’t mix. But hunger and focus don’t mix either, so have something ready before the “I’m starving” stall even gets a chance to start.
The Routine Matters as Much as the Station
The setup is half the system. The daily habit running on top of it is the other half, and honestly, it might be the more important half.
- Snack first, homework second. A hungry kid can’t focus, full stop. Ten minutes of a snack and some chatting before you start pays for itself.
- Same time, every day. Predictable beats motivated. For most families, 3:30 to 4:30 works. The exact hour matters less than the fact that it never changes.
- Set a timer for the tough subjects. “Twenty minutes, then a break” is an easier sell than “finish all your math.” Use an actual kitchen timer. A phone timer means a phone on the desk, and we already covered how that goes.
- Be nearby, not hovering. Do your own thing at the kitchen island while they work at the station. Available for questions, not narrating every problem over their shoulder.
- Notice the progress, not the gap. “You got through your reading and half your math, nice work” lands a lot better than “you’ve still got a page left.” Try it. It works on adults too, honestly.
A homework station was never about the perfect setup. It’s about clearing out the daily friction that turns a thirty-minute job into a ninety-minute standoff. Get that part right, and the whole school year gets easier to live with.
Question: What’s the one small thing that changed homework time at your house? A timer, a snack routine, a corner of the kitchen that finally worked? Tell me in the comments. I read every one.
EverydayCheapskate™ is reader-supported. We participate in the Amazon Services LLC Associates Program and other affiliate advertising programs, designed to provide a means for us to earn from qualifying purchases, at no cost to you.
10 Small Home Annoyances You Can Fix in Under 15 Minutes Each
You know the drawer. The one that’s never quite closed all the way since roughly 2019. You’ve stopped seeing it. Your family has stopped seeing it. And yet every single time you walk past, some tiny part of your brain clocks it and sighs. That’s the thing about small home annoyances. None of them are bad enough to call anyone about. But string ten of them together: the squeaky door, the wobbly chair somebody hip-checked at dinner, the window that fights you every spring… and the whole house starts to feel a little tired.
A little defeated. Like it’s given up before you have.
Here’s what I’ve learned after fixing more of these than I can count: the dread is always worse than the job. You’ll put something off for three months, finally deal with it on a random Tuesday, and it takes ninety seconds. Then you stand there feeling a little silly. I do this to myself constantly.
So let’s just get it over with. Ten of the most common household annoyances, the real reason each one happens, and the fix. No handyman required, nothing fancier than a basic toolbox and maybe a quick trip to the hardware store.
1. Squeaky Door Hinges
That squeak is just dry metal rubbing against metal. Nothing more dramatic than that.
Fix: Lift the hinge pin about halfway out. Tap it up from underneath with a screwdriver and a hammer. Rub on a little white lithium grease or 3-in-One oil, then push the pin back down and work the door a few times. Done.
No oil handy? A bar of soap or a candle stub rubbed on the pin works better than you’d expect. WD-40 will get you through the afternoon, but it doesn’t stick around the way real grease does.
Time: about 5 minutes per hinge.
2. The Toilet That Won’t Stop Running

Nine times out of ten, it’s the flapper (that rubber disc at the bottom of the tank) or the fill valve.
Fix for a bad flapper: Shut off the water at the valve behind the toilet, flush to empty the tank, and unhook the old flapper from the chain and the tank studs. A new one runs about five dollars at any hardware store. Hook it on, turn the water back on, and you’re finished.
Fix for a bad fill valve: Budget more like 30 minutes. New valves run $10 to $15 and come with instructions, and YouTube has a video for pretty much every toilet model ever made.
Time: 10 minutes for the flapper, 30 for the valve.
3. The Wobbly Chair or Table

If the wood joints have loosened, glue’s your friend. If the floor’s just uneven, that’s a different, easier fix.
Fix for loose joints: Flip the piece upside down and find where the legs meet the seat or apron. Work wood glue into any gap you can see, then clamp it with a rubber band or a length of rope. Let it sit overnight. This is the one repair on the list you can’t rush.
Fix for uneven floor: Cut a small square of thin cork or cardboard, wedge it under the short leg, and trim off what shows. Or just slap adhesive furniture pads under all four legs and call it done.
Time: 15 minutes, plus overnight for the glue to set.
4. The Drawer That Won’t Close
Almost always dirty or misaligned tracks. Sometimes you’ve just asked the drawer to hold more than it should.
Fix: Pull the drawer out completely. Wipe the tracks with a damp cloth to clear out the dust and grime, then run a little dry silicone spray or beeswax along them. Skip oil here, it just attracts more dust. Slide the drawer back in.
Still sticking? Take a look inside and lighten the load. If a track is bent, a pair of pliers will usually straighten it, or you can swap in a new set for about $10.
Time: 10 minutes.
5. The Cabinet or Drawer Handle That’s Gone Loose
Either the screw worked its way out, or it stripped the wood around the hole.
Fix for loose screw: Tighten it and move on with your life.
Fix for stripped wood: Stripped hole takes a little trick I love. Pull the handle off, break a couple of wooden toothpicks in half, dip them in wood glue, and stuff them into the hole. Let that dry about 30 minutes, snap off what’s sticking out, then reattach the handle. The screw now has fresh wood to grip instead of a worn-out hole.
Time: 2 minutes for a simple tighten, 15 with drying time for the toothpick fix.
6. The Window That Fights You Every Time

Usually it’s paint, dirt, or old dried-up lubricant clogged in the tracks.
Fix: Vacuum the tracks well, then wipe them down with a damp cloth to lift the sticky residue. Run a little dry silicone spray or paraffin wax along the length of the track and try it again.
Painted shut? Score along the seams with a utility knife to break the paint seal, then ease the window open slowly. Don’t force it. You’ll just be patching a splintered frame next.
Time: 10 minutes per window.
7. The Squeaky Floorboard
Wood expands and contracts, and when boards rub against each other or the subfloor, you get that little groan every time someone walks by.
Fix for hardwood or laminate: Sprinkle baby powder or graphite powder right into the seams of the noisy spot, work it in with a stiff brush, then sweep up what’s left. The powder cuts the friction that’s causing the noise.
Fix for carpeted squeaks: Carpeted squeak is a little different. Find the joist underneath (usually near where two rooms meet or along a wall) and drive a small trim screw down through the carpet into it. Twist the screw off just below the carpet’s surface so nobody ever knows it’s there.
Time: 10 minutes.
8. The Sink That Drains Like It’s Thinking It Over
Hair, soap scum, or a clog sitting in the trap.
Fix: Start simple: a cup of baking soda followed by a cup of white vinegar. Let it foam and work for 15 minutes, then chase it with a full kettle of boiling water.
Didn’t budge? Set a bucket under the trap, unscrew it, clear out whatever’s in there by hand, and reinstall. No plumbing license required.
If it’s specifically hair, a Drain Weasel (that little plastic strip with barbs along the edge) will pull a clog out in about 30 seconds flat. I keep one in the bathroom drawer at all times.
Time: about 15 minutes if you go the trap route.
9. The Faucet That Wiggles When You Turn It On
The mounting nut underneath the sink has worked itself loose.
Fix: Get down there, find the large nut at the base of the faucet, and snug it up with a basin wrench or channel-lock pliers. Snug, not white-knuckle tight. You can crack the porcelain if you overdo it.
If it keeps coming loose no matter what, a little plumber’s putty or silicone caulk under the base will help it stay put.
Time: 10 minutes.
10. The Blind or Shade with a Broken Cord
Either the cord’s snapped or frayed, or the mechanism inside has jammed up.
Fix: For a snapped cord, most major brands sell replacement cords and tassels online for just a few dollars. Match the color and thickness to what’s already there and you’re set.
For a jammed mechanism, take the blind down and give it a firm shake upside down. Sounds too simple to work, but it usually resets whatever got tangled inside. Rehang it and see.
Time: 15 minutes once you’ve got the right cord in hand.
Do Them All in One Saturday
Here’s my actual trick, and it works every time: don’t fix these one by one as they annoy you. Grab a notepad, walk the whole house room by room, and write down every small thing that’s been bugging you. Then knock the entire list out in one sitting.
Two hours of focused fixing wipes out a hundred tiny daily irritations. You’ll feel it the first time you open that drawer and it just closes. Quietly. Like it always should have.
Question: So… what’s the one thing in your house you’ve been stepping around for months? Tell me in the comments. This might just be the weekend it finally gets fixed.
EverydayCheapskate™ is reader-supported. We participate in the Amazon Services LLC Associates Program and other affiliate advertising programs, designed to provide a means for us to earn from qualifying purchases, at no cost to you.
Freeze Summer Produce Now to Taste It All Winter Long
Right now, for about ten glorious weeks, produce is doing its best work. Peaches taste like peaches. Corn is sweet without you having to lie to yourself about it. Then October shows up, and by January you’re paying $6 for a clamshell of strawberries that taste like a snow cone with regrets. I used to just accept that. Then I started freezing summer properly, not just tossing fruit in a bag and hoping. Done right, a bowl of berries in January can taste like it’s still August outside.
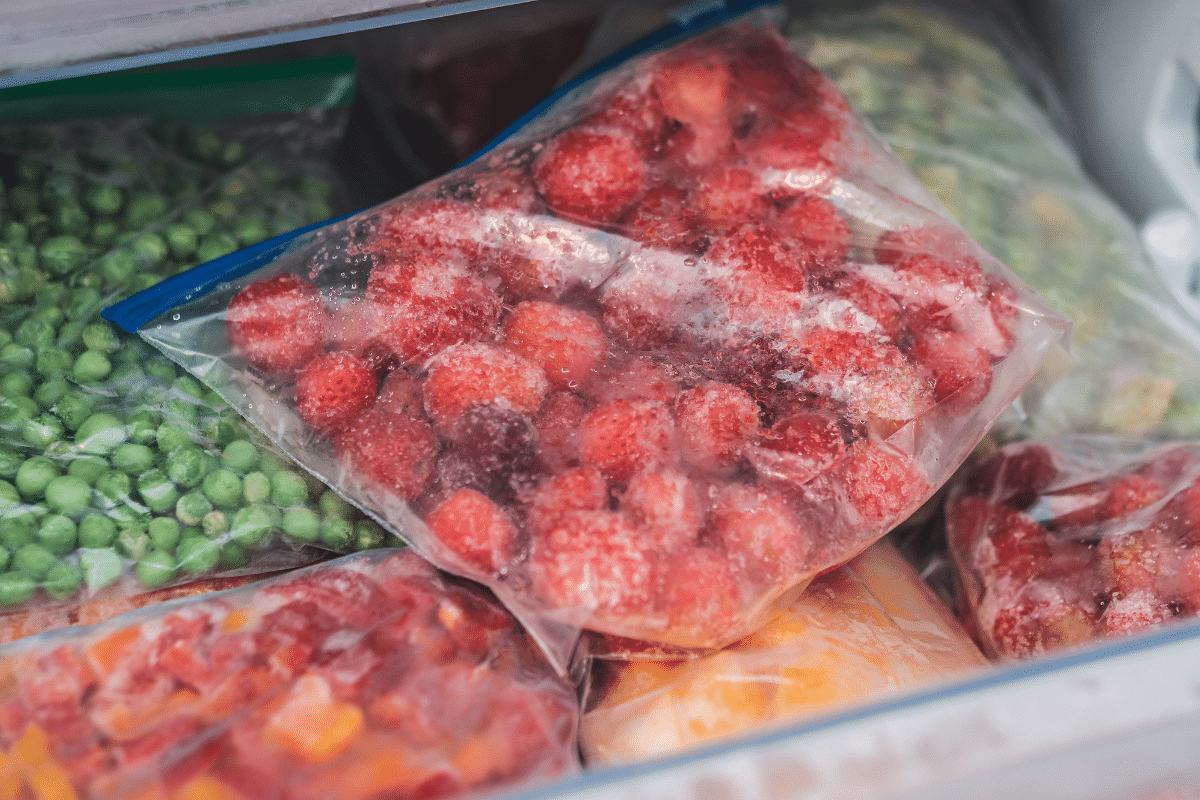
I’ve eaten peach cobbler in a snowstorm and felt genuinely disoriented about the season. That’s the power we’re talking about.
Here’s the catch: there’s a wrong way to do this, and most of us have already done it. You know the bag. Solid frozen brick, corn kernels welded together, strawberries gone mushy and sad the second they thaw. One bad freezer experience and people give up on the whole idea, which is a shame, because the fix is simple. You’re just missing a couple of steps.
I’ve frozen every crop below more times than I can count, including plenty of failures I’d rather not discuss. What’s left is what actually works. Do this right and you’ll have peaches for December pancakes, blueberries for February smoothies, and corn for November chili that tastes like it came straight off the stalk.
The Four Rules That Apply to Almost Everything
1. Flash Freeze Before You Bag
This is the one trick that changes everything. Spread your prepped produce in a single layer on a parchment-lined baking sheet and freeze it for a couple of hours until each piece is solid on its own. Then bag it. Skip this step and you get one giant produce iceberg you have to chip at with a butter knife. Do it right and you can pour out a handful at a time like cereal.
2. Squeeze Out the Air
Air is the enemy. It’s what turns good frozen food into freezer-burned regret. Press as much air as you can out of the bag before sealing. A vacuum sealer does this beautifully, but a straw and a little elbow grease works just fine too.
3. Freeze at Peak Ripeness
Freezing doesn’t fix produce. It just presses pause on whatever state it’s already in. Sour berries go in sour and come out sour. Freeze things when they’re perfect, and “perfect” later will actually mean something.
4. Label with the Date
I learned this one the hard way. Frozen produce stays good for 8 to 12 months. After that it’s still safe, just tired. A piece of tape and a marker saves you from playing freezer archaeology.
Berries (Strawberries, Blueberries, Raspberries, Blackberries)

The easiest win in this whole list, and honestly the one that convinced me freezing was worth the trouble in the first place.
Method: Rinse them gently and pat them completely dry. Wet berries turn into one frozen clump no matter how well you flash freeze. Hull and slice strawberries. Leave blueberries and raspberries whole. Spread on a sheet pan, freeze about 2 hours until solid, then bag.
Best uses: Don’t plan on eating these thawed and fresh. The texture just doesn’t survive the trip. But drop them into a smoothie, fold them into muffins, or stir them into oatmeal, and they’re perfect.
Shelf life: 10 to 12 months.
Peaches, Nectarines, and Plums

The results are extraordinary if you do it right.
Method: Peel peaches (nectarines and plums keep their skin… one less job for you). Slice into wedges and toss with a tablespoon of lemon juice per pint so they don’t turn that sad brownish-gray. Flash freeze, then bag.
Best uses: I keep a bag of these on hand all winter for cobbler, and there’s something a little smug about pulling out summer fruit in February while everyone else is stuck with grocery-store peaches that bounce like tennis balls. Good in pies, over ice cream, in cocktails, or straight into pancake batter.
Shelf life: 8 to 10 months.
Tomatoes
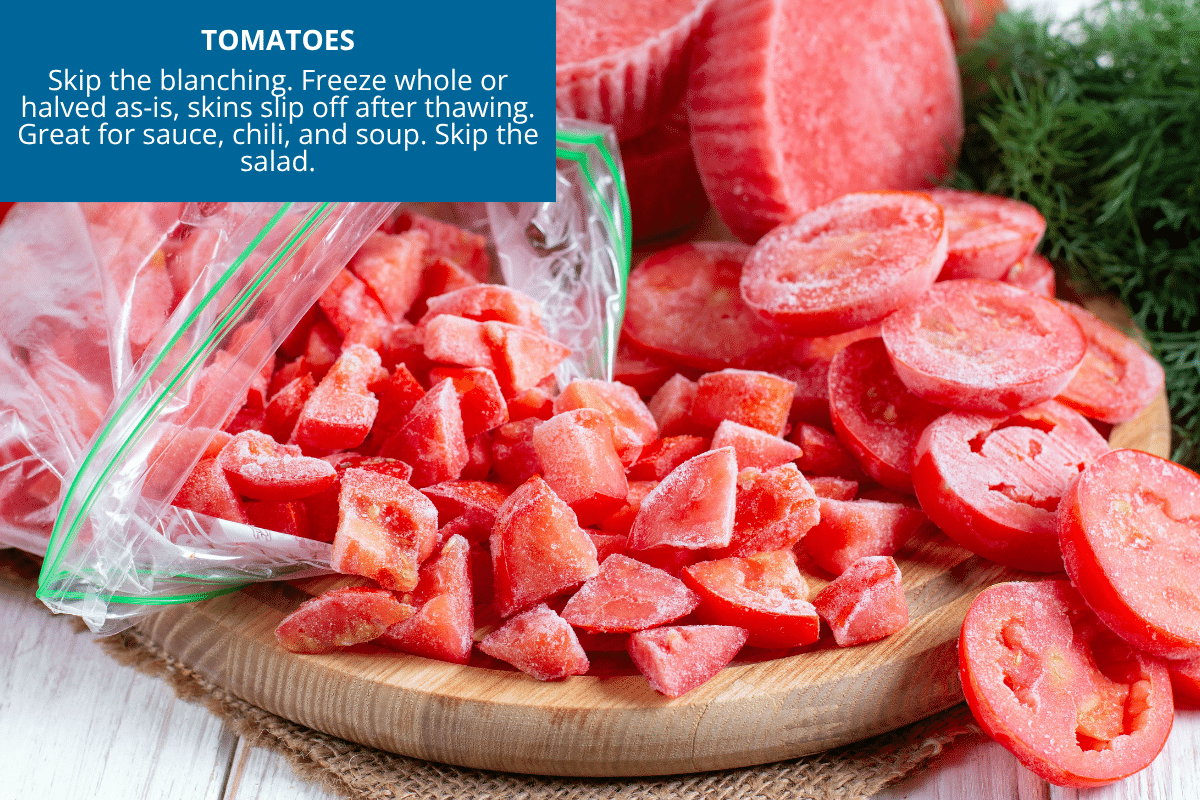
The freezer’s best-kept tomato secret is that you don’t need to blanch or peel. Whole cherry tomatoes, or whole regular tomatoes, freeze beautifully.
Whole method: Wash and dry. Freeze whole (cherry tomatoes) or halved (larger ones). No peeling required. The skins slip right off after thawing.
Sauce method: If you’d rather have sauce ready to go, cook it down first… garlic, olive oil, salt, a slow simmer, then cool and freeze flat in bags so it stacks like files in a drawer.
Best uses: Frozen tomatoes are useless in a salad. Don’t even try. But for pasta sauce, chili, or soup, they’re every bit as good as fresh.
Shelf life: 6 to 8 months.
Corn on the Cob and Kernels
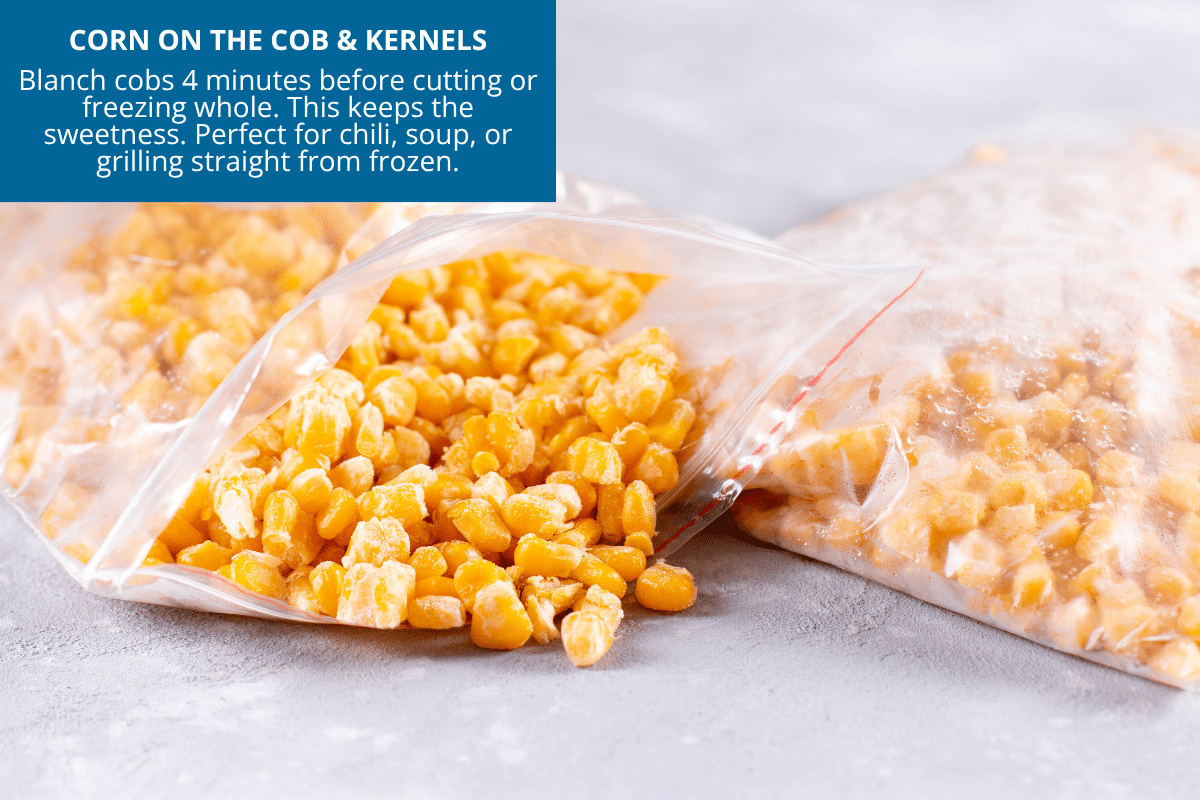
Late-summer corn might be the single best thing on this list to freeze.
Method: Shuck it, then blanch whole cobs in boiling water for 4 minutes. Don’t skip this. It’s what keeps frozen corn from going starchy and sad. Plunge into ice water right after to stop the cooking.
For kernels, cut them off the cob with a sharp knife, flash freeze on a sheet pan, then bag.
Want whole cobs for grilling later? Wrap each one in plastic, then foil, then toss the bunch in a freezer bag.
Best uses: Great in soup, chili, and corn cakes, and the cobs grill beautifully straight from frozen.
Shelf life: 10 to 12 months.
Green Beans

Method: Wash, trim, and cut to whatever length you actually use. Blanch 3 minutes, plunge into ice water, drain well, flash freeze, then bag.
Best uses: Perfect for casseroles, stir-fries, or a quick side dish when you didn’t plan dinner.
Shelf life: 10 to 12 months.
Peppers, Bell and Hot

No blanching required, which makes these one of the lowest-effort items here.
Method: Remove seeds and stems, slice or dice however you’ll use them later, flash freeze, then bag.
For hot peppers, I freeze them whole. It saves my hands from a burning sensation I have made the mistake of ignoring more than once.
Best uses: Great in fajitas, stir-fries, sauces, and chili.
Shelf life: 8 to 10 months.
Herbs: Basil, Parsley, Cilantro, Dill
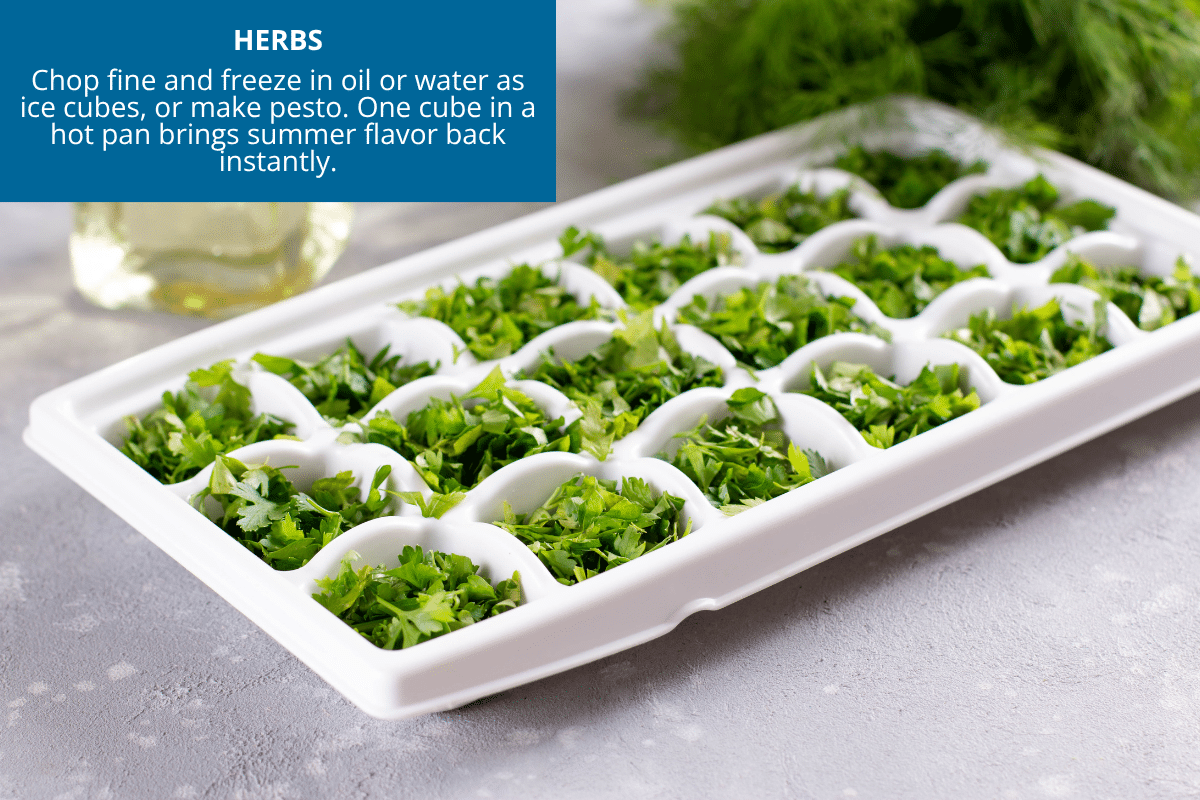
My favorite trick in this entire list: herb ice cubes.
Method: Chop your herbs fine, fill an ice cube tray about two-thirds full, cover with olive oil or water, and freeze solid. Pop them out and store in a bag. Drop one straight into a hot pan and it’s like summer walked back into your kitchen.
If it’s basil, make pesto instead and freeze it in portions. Basil pesto in January tastes exactly like July, which still feels like cheating every single time.
Shelf life: 6 to 8 months for cubes, up to a year for pesto.
Zucchini and Summer Squash
Method: Grate on the large holes of a box grater, then squeeze the water out hard. A clean towel or a nut milk bag works. Squash is almost all water, and skipping this step gets you a watery, sad zucchini bread. Portion into 1- or 2-cup amounts and freeze flat.
Best uses: Good for zucchini bread, muffins, soups, and meatballs.
Shelf life: 10 to 12 months.
What NOT to Freeze
Some produce simply doesn’t freeze well. Save your effort:
- Lettuce and leafy greens. Spinach and kale for cooking are the exception. Those freeze fine.
- Cucumbers. Mush, every time.
- Radishes. The texture goes strange. Trust me.
- Whole potatoes. They turn gray and gritty, though shredded and blanched hash browns are fine.
- Watermelon and cantaloupe. Sad slush. No exceptions.
- Fresh herbs meant for garnish. Fine for cooking, not for looking pretty on a plate.
How to Thaw
Different produce needs different thawing:
- Berries and stone fruit: Use directly from frozen in smoothies. Thaw slightly in the fridge for baking. Never at room temperature.
- Vegetables for cooking: Toss directly into the hot pan or soup pot from frozen. No thawing needed.
- Tomatoes: Run under warm water and the skins slip right off. Then chop and use.
- Corn cobs: Grill from frozen with a light brush of olive oil.
- Herb cubes: Drop directly into hot food.
What This Saves You
A rough estimate. A family that freezes 15 pounds of summer produce across the season (peaches, tomatoes, berries, corn, herbs) saves about $200 to $300 in winter produce costs.
The bigger win, honestly, is eating better in the cold months. Real summer produce instead of whatever pale imitation showed up on a truck from a greenhouse somewhere. An hour or two of prep spread across a couple of weekends in August pays you back all winter. Twelve months later, you’re eating peaches for breakfast in a snowstorm.
Question: Your turn… what do you freeze every single summer without fail? And what have you tried that turned into a freezer disaster? Tell me both. I want the wins and the warnings.
EverydayCheapskate™ is reader-supported. We participate in the Amazon Services LLC Associates Program and other affiliate advertising programs, designed to provide a means for us to earn from qualifying purchases, at no cost to you.

3 Slow Cooker Summer Salads for Hot Weather Dinners
I’ll admit it: the phrase “slow-cooked salad” made me a little queasy the first time I heard it. Warm lettuce? No, thank you. Turns out that’s not what’s happening at all. Your slow cooker has a hidden talent it’s been hiding from you this whole time. Let it do the heavy lifting on the main ingredients while you’re out running errands, then toss in the fresh stuff right before dinner. Cool, crisp, and you never had to touch the oven. That’s the whole trick.

Here’s what’s on the menu:
- Orange Chicken Spinach Salad with Feta
- Green Beans and Petite Reds with Albacore
- Quinoa Salad with Beets, Oranges and Fennel
- Mary’s Famous Pico de Gallo
Orange Chicken Spinach Salad with Feta

This one’s a family favorite, and I’m not exaggerating when I say it might be the best chicken salad I’ve ever made. The slow cooker handles the chicken. You handle the assembling. Everybody wins.
You’ll need: bone-in split chicken breasts, garlic, thyme, salt, orange juice, balsamic vinegar, baby spinach, cherry tomatoes, Kalamata olives, feta cheese, bottled vinaigrette.
Get the full recipe →
Green Beans and Petite Reds with Albacore

This one gets a funny look every time I mention it. “Green beans and tuna… as a salad?” Just trust me on this. It’s bursting with flavor, it’s hearty enough to be dinner, and it’s perfect after a day that was too hot to think about cooking.
You’ll need: fresh green beans, small red-skin potatoes, onion, mayonnaise, sour cream, milk, Dijon mustard, lemon juice, tarragon, salt, pepper, canned solid white albacore, and fresh baby spinach if you want it.
Get the full recipe →
Quinoa Salad with Beets, Oranges and Fennel

If lettuce isn’t really your thing, this is the salad for you. Earthy beets, sweet oranges, crunchy fennel, and quinoa doing its quiet, protein-packed job underneath it all. It’s the kind of dish that looks like you fussed over it. You didn’t.
You’ll need: fresh beets, olive oil, an orange, honey, quinoa, canned mandarin oranges, fennel, and green onion and salad greens if you’re feeling fancy.
Get the full recipe →
Mary’s Famous Pico de Gallo

And now, the recipe so many of you have asked about since I first showed off my Chop Wizard. Here it finally is.
You’ll need: Roma tomatoes, red onion, garlic, cilantro, fresh lime juice and zest, jalapeño, and a little garlic powder and cumin if you’ve got them.
Get the full recipe →
Question: What’s your go-to “too hot to cook” dinner? I’d love to steal a good one. Tell me in the comments.
EverydayCheapskate™ is reader-supported. We participate in the Amazon Services LLC Associates Program and other affiliate advertising programs, designed to provide a means for us to earn from qualifying purchases, at no cost to you.

How to Read Your Water Bill and Lower Your Monthly Costs Now
Be honest. When your water bill shows up, do you actually read it? Or do you glance at the total, wince, and move on? I did that for years until one summer my bill jumped $40. Turns out a worn toilet flapper had been quietly leaking the whole time. A $5 replacement fixed the problem, and my bill dropped right back down. That’s the thing about water bills. Nobody really teaches you how to read one, so most of us don’t. And a bill you can’t read is a bill you can’t fix.

Here’s the good news: once you know what you’re looking at, most households can trim their water use by 15 to 30 percent through leak repairs and a few habit changes, no comfort sacrificed and no big purchases required. Let’s get you fluent.
First, Decode the Bill Itself

Your bill probably has three or four parts. Once you know what each one means, the whole page stops looking like a foreign language.
Water Usage Charge
This is what you actually used, measured in gallons or in CCF, which stands for “hundred cubic feet” (whoever named that wasn’t thinking about the rest of us). One CCF is 748 gallons. So 8 CCF on your bill means you used about 5,984 gallons that month.
Sewer Charge
Many utilities base this on how much water went into your home, on the assumption that most of it eventually flows back out through the sewer. Some charge sewer based on your total metered water use. Others set a winter average and charge that rate year-round, since winter usage doesn’t include lawn watering.
That last detail matters more than you’d think. If you water your yard all summer, you may be paying sewer charges on water that soaked into your lawn and never touched a sewer pipe. Some utilities offer a “summer averaging” adjustment to fix that. It’s worth asking about, because it usually has to be requested. Nobody’s going to volunteer it.
Service Charge
A flat monthly fee for infrastructure and meter reading, whether you used one gallon or one thousand. Usually somewhere between $15 and $40 these days, more in bigger metro systems.
Everything Else
Stormwater fees, conservation fees, watershed fees. These vary a lot by city, so check your bill’s fine print for what applies to you.
Then, Find Your Baseline
Pull your last three bills. Write down the gallons or CCF for each month. If you can dig up last year’s bills for the same months, even better.
You’re looking for two things: how much water your household typically uses, and whether that number is climbing. The average American household now spends around $120 a month on combined water and sewer service, though your bill could be much higher or lower depending on where you live, your local utility’s rates, and how much water your household uses.
A sudden spike almost always means a leak. Steady high usage usually just means it’s time to change a habit or two. Either way, now you know which problem you’re solving.
The Leak Hunt
Small leaks are the single biggest reason water bills creep up without anyone noticing. A running toilet can waste hundreds of gallons a day, sometimes climbing into the thousands if it’s bad enough, and most people never hear a drop.
The 15-Minute Leak Check
Turn off every water-using appliance in the house (dishwasher, washer, ice maker) and don’t use any water for 15 minutes. Then read your water meter. Wait 15 minutes with no water use. Read the meter again.
If the numbers changed, you have a leak somewhere. Common sources:
- Toilets: Drop some food coloring into the tank and wait 15 minutes without flushing. Color in the bowl means the flapper is leaking. A replacement flapper runs about $5 and can genuinely turn into real monthly savings.
- Faucets: Even a slow drip adds up to several gallons a day. Fix it with a new washer or cartridge, usually $10 to $15 in parts.
- Outdoor spigots: Check the spigot itself and the hose connection. It’s almost always a worn rubber washer, and those cost pennies.
- Sprinkler heads: Walk your yard while the system runs. Look for heads spraying the driveway instead of the grass, or heads that are just broken. A single bad head can waste a surprising amount of water in one watering cycle.
- Water softener: Older timer-based softeners often regenerate more often than they need to, dumping water down the drain on a schedule instead of based on actual use. Check your settings.
The Habits That Actually Move the Needle
Once the leaks are handled, this is where the real savings live.
Shorter Showers
A typical showerhead runs 2 to 2.5 gallons per minute. Cut a 10-minute shower to 5 and you save around 12 gallons a day, per person. For a family of four, that adds up to roughly 1,500 gallons a month. A shower timer, or just a favorite song that runs about 5 minutes, works better than willpower ever will.
Run Full Loads Only
Dishwashers and washing machines use close to the same amount of water whether they’re full or half-empty, so make them earn their keep. And skip the pre-rinse. Modern dishwashers are built to handle food scraps, and pre-rinsing can waste thousands of gallons a year for no real benefit.
Stop Letting the Water Run
Turning off the tap while you brush your teeth saves several gallons a day. Same for shaving. Scraping dishes into a bowl of water instead of running the tap over them saves more than you’d guess, meal after meal.
None of these feel like much on their own. Stack them together and you’re looking at well over 1,000 gallons a month for a typical family, without anyone in the house noticing a difference.
Outdoor Watering… The Big One
If you’re going to focus your energy anywhere, focus it here.
- Water early, between 5 and 8 a.m. Evening watering invites fungus, and midday watering loses a lot more to evaporation than morning watering does.
- Water deeply and less often. One inch of water a week in one or two sessions beats a light daily sprinkle every time, because it trains roots to grow deeper instead of staying near the surface.
- A rain sensor for your sprinkler system costs $30 to $100 and can cut unnecessary watering by roughly 15 to 30 percent, depending on your climate.
- Mulch, 3 to 4 inches around your plants, slows evaporation and can meaningfully cut how often you need to water.
- And wash your car at a car wash instead of your driveway. Most commercial car washes recycle a good chunk of their water, which makes them more efficient than a garden hose running for 20 minutes in your driveway.
Contact Your Utility About Adjustments

Two conversations that can save money without changing anything:
Ask About Leak Forgiveness.
If you had a genuine leak and fixed it, many utilities will forgive some or all of the extra charges, usually if you can show a repair receipt. Ask specifically about their leak adjustment or one-time credit policy. Nobody will offer this unprompted.
Ask About Sewer Averaging
If you water a lawn or garden, ask whether your utility caps summer sewer charges based on your winter usage. Some do, some don’t. It’s regional. But if yours does, it can save you real money in the warm months.
Ask About Assistance Programs
For lower-income households or seniors, many water utilities have discount programs. It’s worth a call to ask what’s available.
What This Looks Like in Practice
Take a family of four with a $110 monthly water and sewer bill:
- Fix a running toilet: save 6,000 gallons/month = $18 lower bill
- Cut shower times from 10 to 6 minutes: save 1,200 gallons/month = $4 lower bill
- Adjust sprinkler schedule and add rain sensor: save 4,000 gallons/month in summer = $12 lower bill (summer)
- Enroll in sewer averaging program: $18 lower bill (summer)
- Stop pre-rinsing dishes: save 500 gallons/month = $2 lower bill
Add it up and you’re often looking at a 20 to 35 percent reduction, more in homes with real leaks or heavy outdoor watering, less in homes that were already pretty efficient. Your exact numbers will depend on your local rates, which vary more than you’d think from one town to the next. But the direction is always the same: down.
Set a Monthly Review Habit
Once you’ve done the initial work, don’t stop there. Once a month, open your water bill, note the gallons used, and compare to the previous month. Any surprise spike is a signal to check for leaks.
Water bills are one of the few household expenses that respond quickly and predictably to attention. Pay attention once, and the savings compound month after month for years.
Question: Now I want to hear from you. What’s the one fix that actually moved the needle on your water bill? A toilet repair, a sprinkler tweak, finally breaking the long-shower habit? Tell me in the comments. I read every one.
EverydayCheapskate™ is reader-supported. We participate in the Amazon Services LLC Associates Program and other affiliate advertising programs, designed to provide a means for us to earn from qualifying purchases, at no cost to you.

Cucumbers Galore? Here’s What to Do With Every Single One
Cucumbers are having a moment. Actually, they have this moment every summer, and every summer I fall for it all over again. If you’re growing your own, you already know the drill. One week you’ve got two sad little cucumbers hiding under the leaves. The next week you’re hauling in an armload and wondering who you can foist them off on. Sound familiar?

I picked up a full box at the farmers’ market the other day for seven bucks. Seven. For a box I could barely carry. That’s the beauty of cucumber season. The more of them there are, the less they cost, so this is exactly the time to go a little overboard.
I happen to love cucumbers enough that I’d eat them in a salad, on a sandwich, pickled, or just sliced with a sprinkle of salt standing over the sink. Every single day. So today I’m rounding up my favorite ways to use them up before they go soft on you, plus one reader trick that’ll buy you extra time either way.
Grandma’s Creamy Cucumber Salad

This one goes back generations in my family, and my grandmother never measured a thing. Turned out perfect anyway, every time. I finally pinned down what she was actually doing… a salt-and-rest step most recipes skip entirely, and it’s the difference between a salad that stays creamy and one that turns into cucumber soup by dinnertime.
Cucumbers, sweet onion, sour cream, a little sugar, a splash of apple cider vinegar. That’s it. Get the full recipe (and the trick for keeping it from getting watery) here: Grandma’s Creamy Cucumber Salad Recipe Made Easy.
Jump to the full recipe →
Easy Refrigerator Dill Pickles

No canning. No giant pot on the stove. No lying awake wondering if you sealed the jars right and you’re about to poison the family come January. Just cucumbers, brine, a few jars, and your fridge doing all the work.
I go into which cucumbers actually make a good pickle (hint: not the ones you’re using for salad) and walk through the whole thing step by step. Full recipe here: The Best Easy Refrigerator Dill Pickles—No Canning Needed!.
Jump to the full recipe →
Chicken Pasta Salad

If you’ve still got cucumbers left after the salad and the pickles and with a box that size, you probably will, toss the extras into a chicken pasta salad. It’s the dish I make for potlucks, graduation parties, and any week where I’m suddenly feeding more people than I planned on. Chopped cucumber goes right in with the peppers and onion, and it tastes even better the next day. Recipe here: Easy Chicken Pasta Salad Recipe for a Crowd.
Jump to the full recipe →
Freezer Cucumber Relish for the Days You Can’t Keep Up

If you’ve got more cucumbers than you can eat fresh this week, don’t let them turn to mush in the crisper. A quick relish: chopped cucumber, onion, vinegar, a little sugar and salt, freezes beautifully and turns overflow into something you’ll actually use come fall, on a hot dog or straight out of the jar with a spoon. It’s the same instinct as the pickles: don’t let peak-season abundance go to waste just because you can’t eat it all today.
Skip the Fancy Water

Before you buy another case of flavored sparkling water, try this: a few cucumber slices in a pitcher of tap water, into the fridge overnight. Tastes like something you’d pay too much for at a spa, costs about thirty cents. I keep a pitcher going most of the summer.
The Trick That Keeps Cucumbers Fresh Longer
Here’s one from EC reader Jessica that I wish I’d known years ago. You know how the pricier English cucumbers come wrapped in plastic at the store? That’s not packaging for show. Those cucumbers spoil faster than the regular kind, and the wrap is what keeps them going.
Turns out that trick works on any cucumber once you’ve cut into it. Jessica tested it out after seeing it recommended by the folks at Cook’s Illustrated, wrapping plastic wrap snugly around the cut end so there’s no gap between the wrap and the cucumber, no air bubbles, sealed tight around the sides. Into the fridge it goes. A cut cucumber that would normally turn slimy in a day or two will hold up for close to a week.
I’ve started doing this with every cucumber I slice into and only use part of, and it’s a small thing that’s saved me more produce than I’d like to admit.
One more thing while we’re on the topic of storage… resist the urge to shove your cucumbers into the coldest part of the fridge. Anything below about 40°F and they start to go soft and pitted. The crisper drawer, not the back wall, is where they want to live.
So there you have it. A salad, a jar of pickles, a pasta salad that’ll feed a crowd, and a trick to keep the rest of that box from going to waste. Seven dollars never stretched so far.
Question: Now tell me… what’s your go-to move when the cucumbers start piling up? I’m always looking to steal a new one.
EverydayCheapskate™ is reader-supported. We participate in the Amazon Services LLC Associates Program and other affiliate advertising programs, designed to provide a means for us to earn from qualifying purchases, at no cost to you.

The 7-Item Emergency Car Kit Every Driver Needs (Cheaper Than One Tow)
You know the moment. It’s 9 p.m., your phone’s at 4%, and you’re standing on the shoulder of the highway looking at a flat tire like it owes you money. Sound familiar? It’s happened to me. It’ll probably happen to you. The only question is whether you’re ready for it.

Here’s the thing nobody tells you: most roadside emergencies aren’t emergencies at all. They’re minor annoyances that turn into 2 a.m. tow truck calls because nobody had the right two or three items within reach. A good kit fixes that. It costs less than you’d think, takes up less trunk space than your gym bag, and takes about an hour to put together.
I’ve built and rebuilt this kit more times than I care to admit, usually right after learning the hard way what I was missing. So let’s skip the trial and error. Here are the seven things worth having, and just as important, what to skip.
Skip the Pre-Made Kits
Those roadside emergency kits at the auto parts store? The ones in the shrink-wrapped box for $40 to $100? Mostly filler. They’re built to look impressive on the shelf, not to actually get you out of a ditch.
Build your own instead. Same money, way better gear, and you’ll actually know what’s in it.
The Seven Things That Matter
The seven items below cover about 95 percent of the real-world situations that leave people stuck. Everything else is optional. Assemble these, store them in a small bag or bin in the trunk, and forget about them until the day you need them.
1. Jumper Cables or a Portable Jump Starter

A dead battery is the number one reason cars won’t start, full stop. Jumper cables still work and run $15 to $25. Problem is, you need another car and a stranger kind enough to stop.
That’s why I’ve switched to a portable lithium jump starter. Mine’s about the size of a paperback, holds a charge for months without being touched, and jumps my car without needing another driver at all. It’ll charge your phone in a pinch, too. Expect to pay $60 to $100 for a good one.
What to Buy:
A NOCO Boost Plus GB40 or something similar. If you’re sticking with cables, get 10-gauge, 12 feet long. The flimsy ones aren’t worth the trunk space.

(Disclosure: This post includes an Amazon Creator Connections product. I may earn a small commission if you purchase through the link, at no additional cost to you.)
2. A Real Flashlight (Not Your Phone)
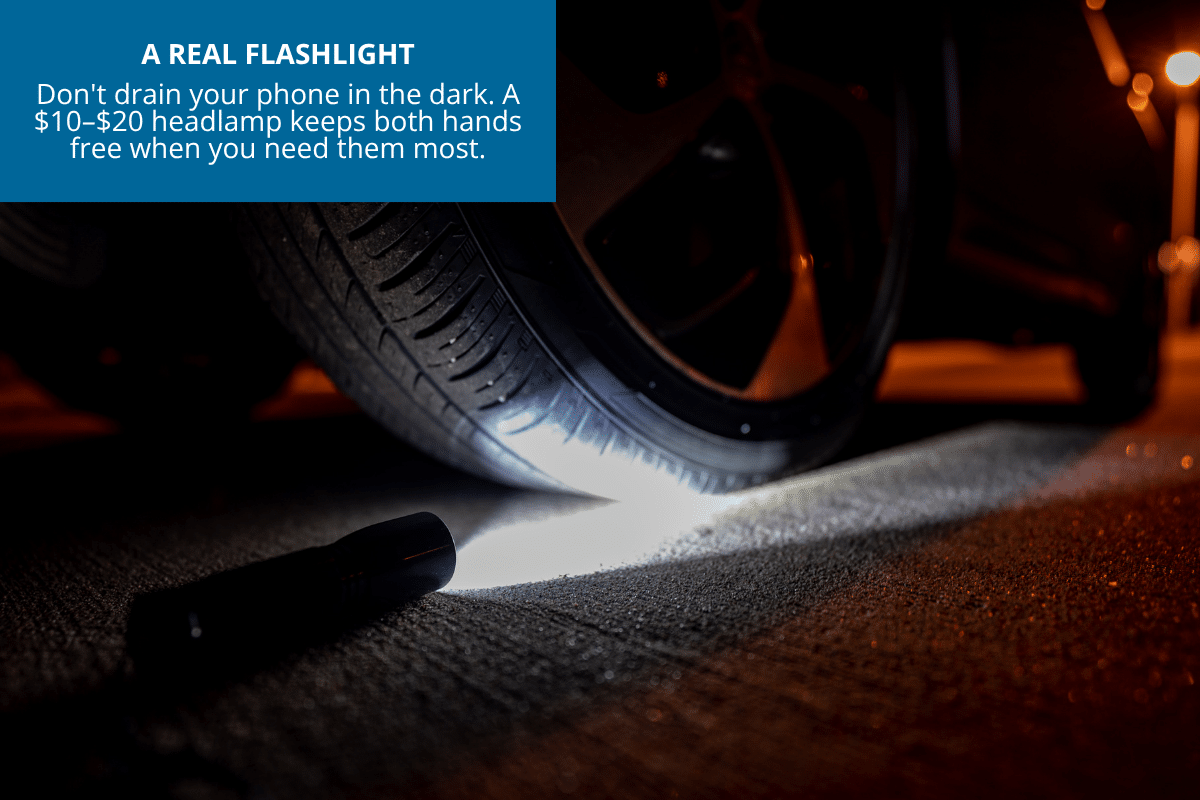
Your phone’s flashlight drains the battery you need for the tow app. A cheap dedicated flashlight runs $10 to $20 and lasts for hours on batteries you’re already carrying as spares.
A headlamp beats a handheld every time. Try changing a tire while holding a flashlight in your teeth and tell me I’m wrong.
What to Buy:
A basic LED headlamp with fresh AAA batteries. Keep spare batteries in a small container in the kit.

3. A Multi-Tool and a Tire Pressure Gauge

Ninety percent of small roadside fixes come down to one of two things: pliers or a pressure reading. A decent multi-tool handles loose battery terminals, a stuck hood latch, even cutting a seatbelt if it ever comes to that. A tire gauge tells you the difference between “looks a little low” and “24 PSI when it should be 32,” which matters more than you’d think.
What to Buy:
A Leatherman or Gerber multi-tool ($40 to $60) and a digital tire pressure gauge ($8 to $15).


(Disclosure: This post includes an Amazon Creator Connections product. I may earn a small commission if you purchase through the link, at no additional cost to you.)
4. Portable Tire Inflator

This is the one item almost nobody owns and everybody wishes they did. Plug it into your car’s outlet and it’ll re-inflate a slow leak in about five minutes flat.
Pair it with a plug kit (see below), a small leak that would have stranded you becomes a 15-minute inconvenience.
What to Buy:
AstroAI or OlarHike portable inflators run $25 to $40. Look for one with a built-in digital gauge and auto-shutoff.


5. A Tire Plug Kit
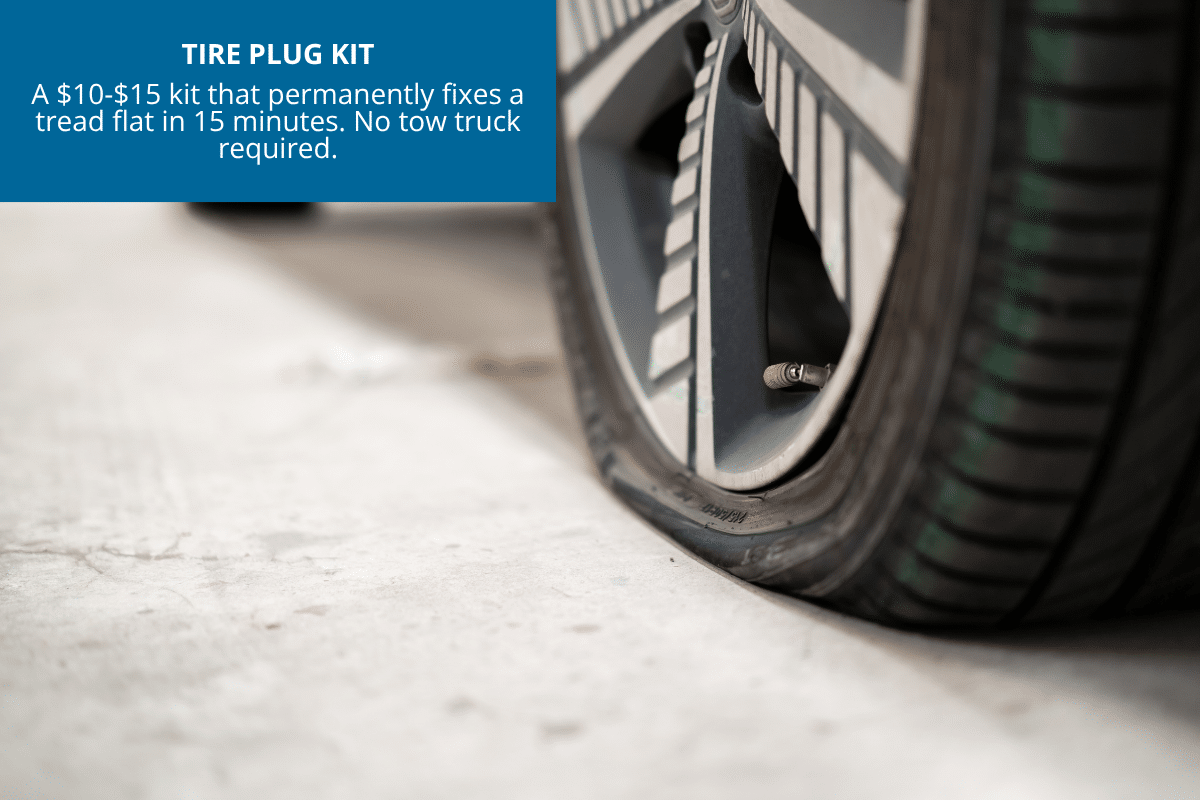
Fifteen dollars. Weighs nothing. Can permanently fix a nail-in-the-tread flat in under fifteen minutes, and yes, it’s a real fix, not a Band-Aid, as long as the puncture’s in the tread and not the sidewall.
Between this and the inflator, most flats never need a tow truck or a spare at all.
What to Buy:
A basic plug kit with plugs, reamer, and insertion tool. Watch one YouTube video before you need it. It looks harder than it is.

6. An Actual First Aid Kit
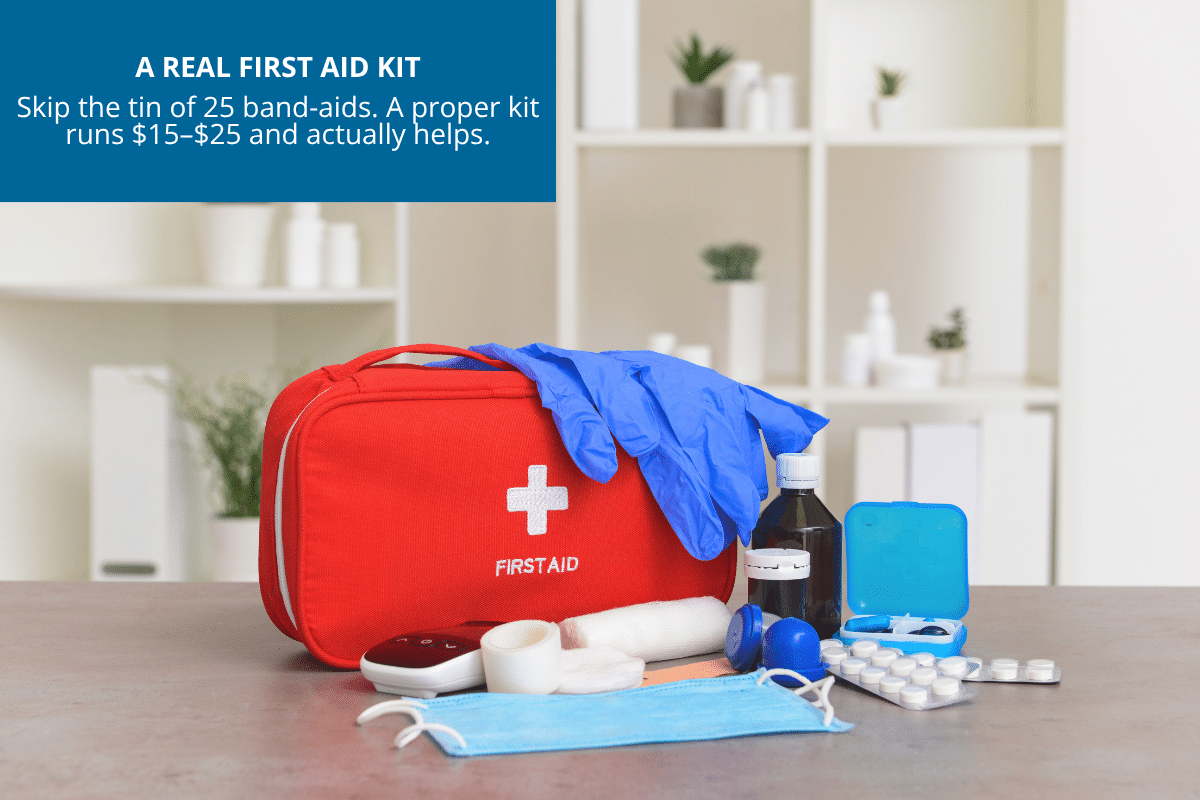
Most roadside trouble is mechanical. But when it’s medical, it tends to matter fast. Skip those sad little tins with 25 band-aids and nothing else useful. Get a real kit with gauze, tape, antiseptic wipes, tweezers, gloves, and pain relievers in more than sample-packet quantities.
What to Buy:
A Johnson & Johnson All-Purpose kit or similar, $15 to $25. Toss in an actual bottle of ibuprofen or acetaminophen. Those tiny foil packets never have enough.

7. Warmth and Water
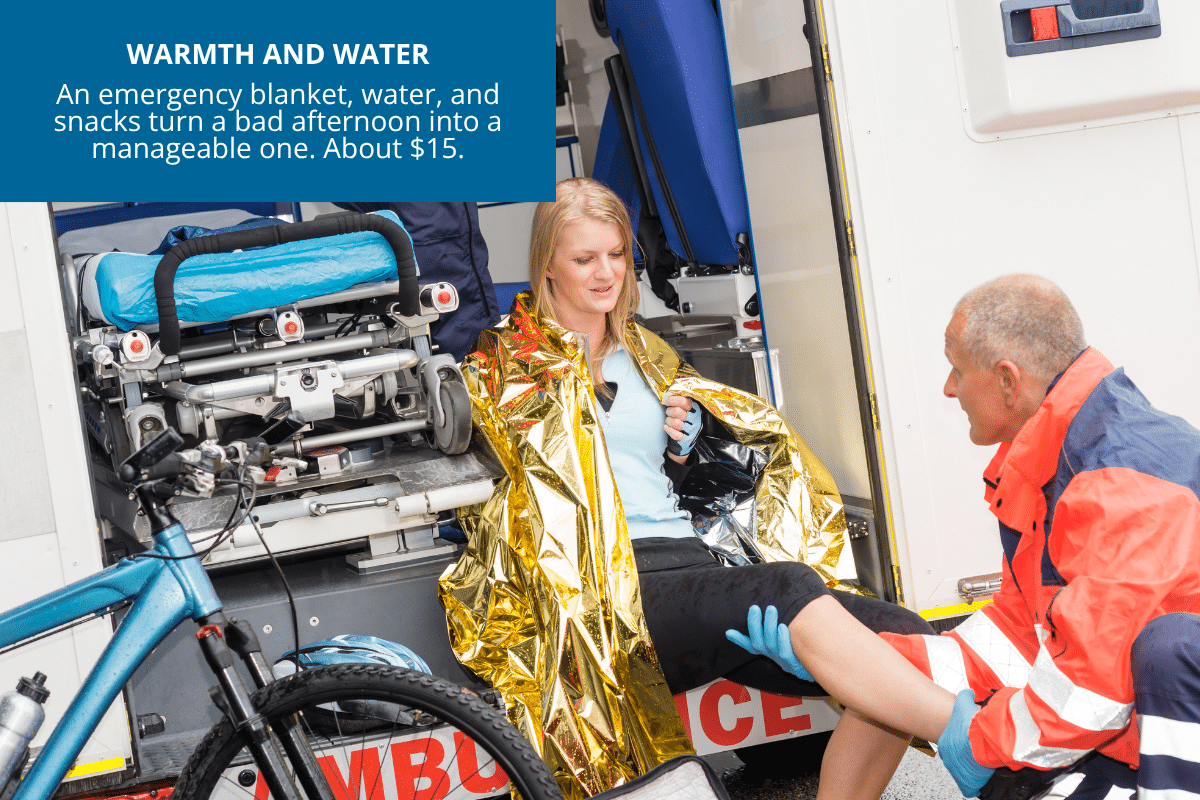
For the times you’re stuck longer than you’d like. A cheap emergency blanket folds down to wallet size, costs about $5, and can be the difference in a winter breakdown. Add water and a few granola bars and a rough afternoon becomes a manageable one.
What to Buy:
Two Mylar blankets, four to six water bottles, a small stash of snacks that won’t melt or freeze. Rotate the water twice a year.

(Disclosure: This post includes an Amazon Creator Connections product. I may earn a small commission if you purchase through the link, at no additional cost to you.)
What to Leave Out
Most pre-made roadside kits include things you’ll never realistically use:
- Cheap tow straps. Usually rated for something smaller than your car. If you actually need a tow, call for one.
- Reflective triangles. Fine in theory, flimsy in the box. Flares do the job better.
- Poncho and gloves. Sounds useful until you realize “one size fits all” means “fits no one.”
- Whistle and matches. Filler. Not roadside gear.
- The tiny hammer. Marketed as a window breaker, too small to actually break one. If that’s a real concern for you, buy a proper automotive escape tool instead.
Where to Keep It
A duffel bag, backpack, or plastic bin in the trunk holds everything except the jumper cables, which usually live in the spare tire well or a side pocket.
Keep the flashlight, tire gauge, and jump starter where you can grab them fast, not buried under a stroller and three reusable grocery bags. You won’t want to dig for it when you actually need it.
Twice a year (clock-change weekends work great for this) pull the kit out. Check the batteries, swap out anything expired, rotate the water. Ten minutes, and it keeps the kit useful instead of decorative.
Question: So tell me… what’s the one thing that’s saved you on the side of the road? I want to hear it. Drop it in the comments. Somebody reading this is going to need exactly that tip someday.
EverydayCheapskate™ is reader-supported. We participate in the Amazon Services LLC Associates Program and other affiliate advertising programs, designed to provide a means for us to earn from qualifying purchases, at no cost to you.

The Boring Money Move That Earns You $400 to $2,000 a Year (High-Yield Savings Explained)
Let’s talk about the least exciting way to make money I know. No stock picks. No side hustle. No 5 a.m. anything. You just move money you already have from one account to a slightly better one. That’s it. That’s the whole trick. And most people never do it.

If your emergency fund and general savings are sitting in a checking or savings account at your regular big bank, there’s a very good chance you’re earning somewhere between 0.01 and 0.50 percent interest on that money. Meanwhile, online-only banks and a handful of higher-yield brick-and-mortar options are currently paying between 3.50 and 4.20 percent on the exact same kind of account. Same FDIC insurance. Same easy access to your cash. Just a much better rate.
That difference, on money you’re already keeping around for emergencies and planned expenses, comes out to $400 to $2,000 a year for a lot of households. For doing nothing but switching where it sits.
Why Your Bank Pays You Peanuts
Here’s the part nobody explains at the branch. Your big bank doesn’t need to compete for your savings. They already have your checking account, your debit card, your loan, and your undivided attention. Why pay up for money that isn’t going anywhere?
Online banks don’t have that luxury. They have to earn your deposits, so they pay for them. That’s the entire story behind that rate gap, and it’s been true for years.
What a High-Yield Savings Account Actually Is
A high-yield savings account (HYSA) is a regular FDIC-insured savings account, just like the one at your local bank, with one meaningful difference: the interest rate is much higher.
Key features of a good HYSA:
- FDIC-insured up to $250,000 per depositor, per bank (same as any bank)
- No monthly fees at any account tier you’d actually use
- No minimum balance requirement at the good ones
- Easy transfers to and from your regular checking account (usually 1 to 3 business days)
- No lockup. You can withdraw anytime, unlike CDs
- Interest paid monthly and compounded daily
It’s not a special investment. It’s not risky. It’s just a regular savings account at a bank that pays a competitive rate.
Why the Timing Matters Right Now
A quick market note. The Federal Reserve is currently holding the federal funds rate at 3.50 to 3.75 percent (as of July 2026), and observers expect them to hold steady for the rest of the year. That means HYSA rates are stable in the 3.50 to 4.20 percent range for now, but they typically drift down when the Fed cuts rates.
Translation: today’s rates are the good ones. Two years ago, the best HYSAs paid under 1 percent. Two years from now, nobody knows. Opening an account now locks in access to today’s higher rates. The interest rate itself will fluctuate over time (that’s normal for savings accounts), but the gap between your big bank and a good HYSA has stayed at 5 to 10 times higher for the last several years.
The Two-Account Strategy
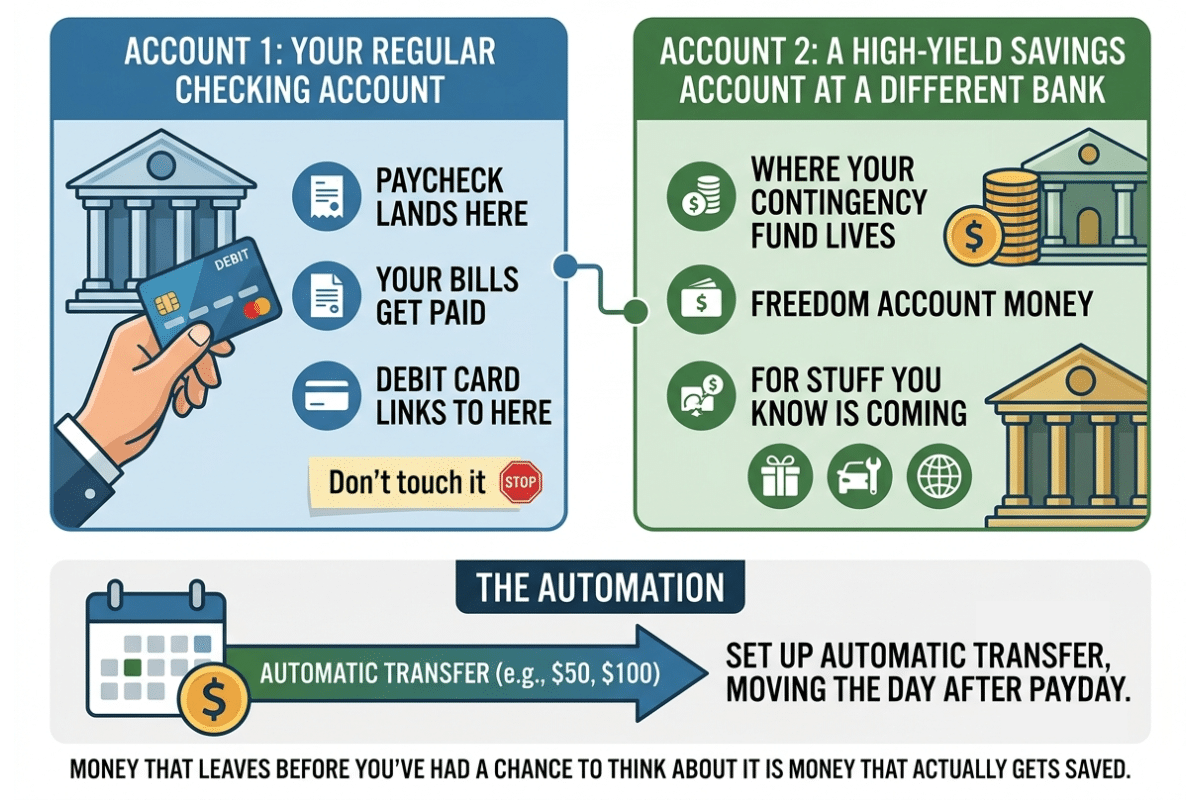
This is the setup that works for almost everyone. Simple, low-friction, and it makes the whole system automatic.
Account 1: Your Regular Checking Account
Keep this where it is. Your paycheck lands here. Your bills get paid from here. Your debit card links to here. This account exists for daily cash flow and immediate access.
Don’t touch it. You don’t need to overhaul your whole banking life to make this work.
Account 2: A High-Yield Savings Account at a Different Bank
Account two is your HYSA, at a different bank. This is where your Contingency Fund lives, along with your Freedom Account money for the stuff you know is coming: holiday spending, car repairs, that vacation you’re already dreaming about. Link it to your checking account and let the transfer time work for you. A day or two of friction between “I want to spend this” and “I can spend this” has saved me from myself more than once.
The Automation
Then set up an automatic transfer, even $50 or $100 a month, moving the day after payday. Money that leaves before you’ve had a chance to think about it is money that actually gets saved.
Who’s Worth Your Money Right Now (July 2026)
Rates change monthly, so the specific APY numbers below will shift over time. Always check the bank’s current rate before opening. That said, the players and their track records don’t move around much.
The Big-Name Reliable Choices
These are the online banks that have been around for years, are well-regarded, and consistently offer competitive (if not the absolute highest) rates. Any of these is a fine choice, and I wouldn’t talk you out of any of them.
- Ally Bank: No minimums, no fees, excellent app, buckets feature for organizing savings goals. Currently around 3.00% APY. My longtime personal pick for its simplicity. Learn more →
- Marcus by Goldman Sachs: No minimums, no fees, straightforward. Currently around 3.40% APY. Backed by Goldman Sachs, which is about as institutionally solid as it gets. Learn more →
- Capital One 360 Performance Savings: No minimums, no fees, and has physical cafes if you like occasional in-person access. Currently around 3.00% APY. Learn more →
- American Express High Yield Savings: No minimums, no fees, well-known brand. Currently around 3.00% APY. Great if you already have an Amex card. Learn more →
The Higher-Yield Options (With Caveats)
These banks currently offer slightly higher rates but come with more strings attached. Worth considering if you’re going to keep a larger balance.
- CIT Bank Platinum Savings: Currently around 3.75% APY, but requires a $5,000 minimum balance to earn the top rate. If your balance dips below, the rate drops sharply. Learn more →
- Forbright Bank Growth Savings: Currently around 3.85% APY, no minimum balance required. There’s also a promotional 4.15% rate for new customers through the end of 2026, but that one does require a $1,000 minimum. Learn more →
- E*TRADE Premium Savings: Currently around 3.50% APY. Good option if you already have an E*TRADE brokerage account. Learn more →
All-in-One Banking Options
These accounts combine checking and high-yield savings into a single relationship. Useful if you want to move your primary banking online.
- SoFi Checking & Savings: Currently around 3.80% APY on savings (with direct deposit), 0.50% on checking, no minimums, no fees. Learn more →
- Wealthfront Cash Account: Base rate is 3.30% APY, no minimum. You can stack that up to 4.20% by combining a 3-month new-client boost (+0.65%, capped at $150,000) with a permanent bump for direct depositing $1,000/month plus keeping a funded investing account (+0.25%). Technically a brokerage account, functions like a checking/savings hybrid. Learn more →
Your Local Credit Union (Don’t Skip This)
Credit unions occasionally offer surprisingly competitive rates on savings and money-market accounts, especially for members. Check what’s available at any credit union you already belong to. NCUA insurance is equivalent to FDIC.
What to Check Before You Open One
A few things worth thirty seconds of your time:
- Is it FDIC-insured? Non-negotiable. It should say so plainly on the site. If it doesn’t, walk away.
- Any hidden fees? Some charge for excess withdrawals or paper statements. Read the fee schedule once.
- Is there a minimum for the top rate? This is the oldest trick in the book. Below a certain balance, that shiny APY quietly disappears.
- Is the rate a teaser? Some accounts advertise a great rate for the first few months, then drop it. Read past the headline number.
- How fast are transfers, and how many are you allowed? For a Contingency Fund, quick access actually matters.
- Is the app any good? You’ll live in this app. A clunky one turns a smart money move into a chore you avoid.
How to Open One (It Takes 15 Minutes)
The process is genuinely simple:
- Pick a bank from the list above
- Go to their website and click “Open account”
- Provide your name, address, Social Security number, and driver’s license number
- Link your existing checking account (routing number and account number, easily found on any check or in your bank app)
- Fund the new account with an initial transfer
- Wait 2 to 5 business days for the account to be verified and funded
- Set up automatic monthly transfers from your checking account
The whole process takes about 15 minutes online. No credit check (opening a savings account doesn’t ping your credit). No paperwork by mail. No branch visit required.
Where This Fits in Your Financial Plan
A high-yield savings account is the right home for money that meets three criteria:
- You want it FDIC-insured and safe. No market risk.
- You need access to it within a year or two. Not money you’re locking away for retirement.
- You’re not planning to spend it in the next few weeks. Otherwise it can just stay in checking.
That covers your Contingency Fund, holiday savings, car repair money, home maintenance money, vacation savings, and quarterly tax savings if you’re self-employed. Basically, all the “I know this is coming” and “I hope this never comes” money most households carry around.
Money you’re not touching for five years or more, retirement, a kid’s college fund, a house down payment way out on the horizon, belongs somewhere else entirely: a retirement account, a 529, a taxable brokerage account. But your Contingency Fund and your Freedom Account? This is exactly where they should live.
The Real Return
Let’s do real math, because it’s more convincing than I am.
| Savings balance | At 0.38% | At 3.75% | Difference |
|---|---|---|---|
| $5,000 | $19/yr | $188/yr | $169/yr |
| $15,000 | $57/yr | $563/yr | $506/yr |
| $50,000 | $190/yr | $1,875/yr | $1,685/yr |
The math is the same for every household. The only variable is how much money you have in savings, and how long you’ve been leaving it in an account that doesn’t pay much. Every year of delay is real money left on the table.
The Fine Print
This is general information, not personalized financial advice for your specific situation. Rates move, banks change their offers, and everybody’s circumstances are a little different. Check current rates directly with the bank before you open anything, and if your finances are genuinely complicated, a fee-only planner is worth the conversation.
None of that changes the basic point, though. Moving idle cash from a 0.38 percent account into a 3.75 percent one is about as close to a free lunch as personal finance gets. It’s not clever. It’s just something worth actually doing, instead of meaning to do.
Question: Have you already made the switch? Tell me which bank you landed on and whether you’d still pick it today. And if you haven’t moved yet, what’s holding you back? Drop it in the comments. It helps everybody else reading this figure out where to start.
EverydayCheapskate™ is reader-supported. This post is general educational information, not personalized financial advice. Interest rates and account terms change frequently, so verify current rates directly with the bank before opening any account. All banks listed are FDIC-insured; confirm insurance status on each institution’s site.

DIY Car Interior Cleaning Wipes That Actually Work Well
Let’s talk about your dashboard. Go ahead, run a finger across it. Gross, right? It’s one of the dirtiest surfaces you touch every day, and keeping it clean feels like a losing battle. Commercial wipes help, but they cost a small fortune and dry into a crusty brick within a month. Ask me how I know. So a few years ago I made my own. Two ingredients, a jar, some microfiber cloths. Costs pennies, never turns into a hockey puck. Here’s the version I’ve used for years, plus where it should hand off to the real stuff.

Plastic gets sticky. Vinyl fades and cracks if you use the wrong thing on it, mostly from sun and heat over time. Leather wants completely different treatment than cloth. The vent slots and cup holders hoard crumbs no vacuum on earth can reach. And you’re doing all of this hunched into a space roughly the size of a phone booth.
Here’s something worth knowing: those commercial wipe brands aren’t hiding some secret formula. Most are mostly water and a mild cleaner at their core. What you’re paying extra for is everything built around that: UV protectants, anti-static agents, and preservatives that keep the tub from turning into a swamp before you’ve used half of it.
A simple homemade version covers the everyday cleaning part just fine. It’s just not going to give you the UV protection or the finish a dedicated product will. More on that in a minute.
Why the Homemade Version Wins
A few honest reasons:
- It’s cheaper. Pennies a session versus $2 to $3 for the store stuff, for routine wiping.
- The cloths get reused. Wash them, use them again, do that for years. Disposable wipes are one-and-done and straight into the trash.
- No mystery ingredients. No propylene glycol. No unlisted fragrance. No ammonia hiding in the fine print.
- You make exactly what you need. No half-used tub drying out in your glove box until next summer.
- It’s honest about its limits. This isn’t trying to replace every product in your garage. It’s for the everyday wipe-down. Save the specialty stuff for the specialty jobs.
What You’ll Need
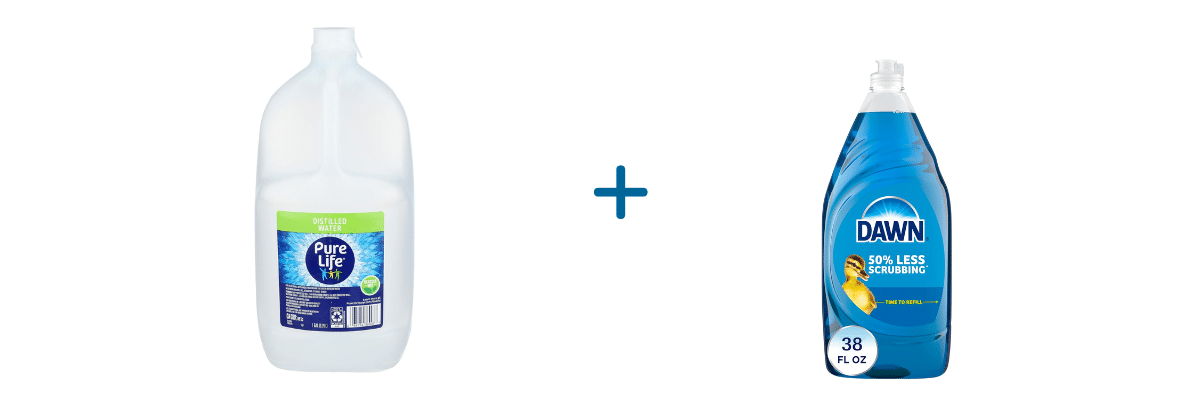
Two ingredients. Plus some cloths you already own, or should.
Water, distilled if you can
Distilled water skips the mineral spots and streaks that tap water sometimes leaves on darker surfaces. A gallon runs under $2 and lasts months.
Original Blue Dawn dish soap
The gentle degreaser that cuts through sticky spills, fingerprints, sunscreen residue, and everyday grime. A little goes a long way here, more on the exact amount below.
Optional: a few drops of essential oil. Purely for scent, nothing more. Skip it if you’d rather not risk any residue or if anyone riding with you is sensitive to fragrance. It doesn’t add cleaning power.
That’s it. No oil in this one. I used to add olive oil for shine, and I’ll be straight with you: I was wrong about that. It looks nice for about a day, then it starts attracting dust, can turn slightly sticky, and it doesn’t actually protect anything from cracking or fading, that’s a UV and heat issue, not a moisture one. Professional detailers steer clear of kitchen oils on dashboards for good reason. If you want real UV protection or a conditioned finish, that’s what a dedicated automotive interior protectant is for. Use one once or twice a year and let this cleaner handle the in-between.
How to Mix It Up
In a clean small jar or spray bottle, combine:
- 1 cup distilled water
- 2 to 3 drops Original Blue Dawn dish soap
- A few drops essential oil (optional, scent only)
Shake it up. Store it in the car in something leak-proof.
Want the real wipe experience? Grab an old container, an empty wipe tub, or whatever you’ve got, and roll up 3 to 4 folded microfiber cloths inside. Pour the solution over them until they’re damp, not dripping. Congratulations, you’ve just made your own tub of wipes for pennies.
One thing to know: this has no preservative in it, unlike the store version. Mix a small batch and use it up within a couple of weeks rather than letting it sit for months. It’s cheap enough that this isn’t a hardship.
How to Actually Clean the Thing
1. Vacuum first.
The wipes handle grime, not crumbs. A small handheld vacuum takes care of seats, floors, and the console before you touch a cloth.
2. Work top to bottom.
Dashboard, then steering wheel, then door panels, then console, then cup holders. Anything that drips lands on something you’re about to clean anyway. Efficient, if I do say so myself.
3. Wipe the dashboard and vinyl.
Long, gentle strokes with a damp cloth. You’re wiping, not scrubbing. Follow up with a dry cloth to buff it out.
4. Get into the vents.
A small paintbrush or an car detailing brush beats any cloth here. Dip it in the solution, brush the dust out, then wipe with a damp cloth to catch whatever you just loosened.
5. Steering wheel and gear shift.
The two dirtiest spots in the entire car, hands down, because your hands are on them constantly. A damp wipe followed by a dry buff makes an embarrassing difference.
6. Cup holders get their own moment.
Coffee drips, sticky soda residue, dust, all of it pools right there. Use a small brush with the solution. For the truly stubborn stuff, make a paste of baking soda and water, let it sit a few minutes, then scrub and wipe clean.
What This Solution is Safe On
- Vinyl and hard plastic dashboards
- Steering wheels, whether rubber, vinyl, or leather
- Painted plastic trim
- Cup holders and console surfaces
- Door panels
- Vent slots
A couple of surfaces need a little more care than a general-purpose cleaner:
Genuine Leather
For routine wiping, use plain water on a lightly damp cloth. When it needs a real clean, reach for a leather cleaner made for the job. Dish soap isn’t what leather manufacturers recommend for regular use, even diluted.
Touchscreens
Many newer displays have a coating that resists fingerprints and glare, and that coating doesn’t love soap of any strength. Play it safe: use a microfiber cloth dampened with water only, never spray directly on the screen, and check your owner’s manual for anything it specifically recommends or warns against.
What to Leave Out
Vinegar
I skip vinegar inside the car. It’s not that one splash will ruin your dashboard on the spot, but a lot of interior materials aren’t designed for acidic cleaners, and vinegar can dull certain finishes with repeated use. Leather especially shouldn’t see it as a regular routine.
Rubbing Alcohol
No rubbing alcohol on leather or wood. Dries both out fast. It’s fine on hard plastic in small amounts, but keep it away from anything soft.
Essential Oils
Skip essential oils if you’re not set on the scent. They don’t add any cleaning power, and some can leave a residue or bother anyone with sensitivities. Citrus is the gentlest choice if you do use one.
Never spray anything directly onto electronics. Onto the cloth first, always.
Don’t eyeball the dish soap. More isn’t better here. Too much and you’re left with a filmy residue you’ll spend the next cleaning session trying to wipe away.
How Often You Actually Need to Do This
A five-minute wipe-down every couple of weeks keeps things from ever spiraling. A full 15-minute detail every 2 to 3 months keeps the car looking close to new. And a deeper clean at the seasonal swap, spring and fall, when you’re already pulling out floor mats or digging out winter gear, rounds it out nicely. If you want real UV protection on top of all that, that’s when a proper interior protectant earns its spot, once or twice a year is plenty.
Get into that rhythm and your car interior more or less takes care of itself. You’ll also dodge the $8-a-month store-wipe habit for good. That adds up faster than you’d think.
DIY Car Interior Cleaning Wipes
Equipment
- Small jar or spray bottle
- Old wipe tub or small food container
- 6-8 microfiber cloths
Ingredients
- 1 cup distilled water
- 2 to 3 drops Original Blue Dawn dish soap
- A few drops essential oil optional, for scent only
Instructions
- Combine the distilled water and Dawn in a clean jar or spray bottle. Add essential oil if using.
- Shake to combine.
- Fold 6 to 8 microfiber cloths and roll them into your empty container.
- Pour the solution over the cloths until damp, not dripping.
- Store in the car in a leak-proof spot.
Notes
Question: So, what’s the one spot in your car you can never quite get clean? Mine’s the seatbelt buckle area. I have no idea how it collects as much as it does, but it does, every time. Tell me yours in the comments. Misery loves company, and so do I.
EverydayCheapskate™ is reader-supported. We participate in the Amazon Services LLC Associates Program and other affiliate advertising programs, designed to provide a means for us to earn from qualifying purchases, at no cost to you.

Back-to-School Lunch Ideas for a Week (No Boring Sandwiches)
By the third week of school, the packed lunch has become a small daily battle. The kids are bored of the same sandwich. You’re bored of making it. The cafeteria is $4 a day per kid and adds up to real money by October. And whatever you send half-untouched comes home in a lunchbox that smells like a warm banana. There’s a way out of this cycle, and it isn’t more Pinterest boards. It’s a rotating set of five lunches your kids will actually eat, built from pantry basics, prepped in one 30-minute Sunday session, and packed in under 10 minutes each morning.

I was good at packing lunches. Tuna sandwiches, a bag of chips, sometimes something a little fancier, and every now and then a candy bar tucked in as a surprise. My boys didn’t have a cafeteria to fall back on most days, so whatever went in that lunchbox was what they ate. I took it seriously.
That was a long time ago. These days I get a front-row seat to the same lunchbox scramble, one generation later, watching my two school-age grandsons live it out. Some things never change. Kids still get sick of the same sandwich. Whoever’s packing it still runs out of ideas by week three.
Here’s what I’ve learned watching this play out again: the school-lunch problem was never really a food problem. It’s a 6:47-a.m. problem. That’s the moment you’re standing in front of the fridge trying to think while a kid can’t find a shoe and another one wants to know if today is actually Thursday. Whatever gets made under those conditions is always the same lunch. Sandwich. Chips. Apple. Repeat until June.
The fix is doing all the decisions on Sunday and none on Monday morning. Five different lunches, five sets of ingredients, and one simple rotation. A month of school lunches gets easier by the third week because the whole system runs on autopilot.
The Sunday 30-Minute Prep Session
This is the whole trick. Half an hour on Sunday afternoon sets up the week.
- Wash and cut a large container of raw vegetables (carrots, celery, cucumbers, bell peppers)
- Wash and portion fruit into grab-and-go containers or bags
- Cook a batch of pasta (for pasta salad and cold pasta lunches)
- Boil 6 to 8 eggs (for egg salad, protein snacks, and toppings)
- Portion out one snack per day into small containers (crackers, pretzels, popcorn, etc.)
- Bake or buy one baked good for the week (muffins, banana bread, energy bites)
That’s it. Everything else assembles from what you already have in the fridge and pantry.
Monday: The Bento-Box Snack Plate

This is the picky eater’s dream, because it’s not one meal. It’s a collection of little ones, and little things feel less threatening. What goes in:
- Cheese cubes (cut Sunday, stored in a small container)
- Whole-grain crackers (Ritz, Triscuit, or Cheez-Its)
- Small handful of grapes or berries
- Sliced deli turkey or ham (rolled up like little logs)
- A few baby carrots with a small container of ranch or hummus
- One “treat” item (a couple of chocolate chips, a mini cookie, or two pretzel M&Ms)
Small portions. Everything looks appealing. Nothing on the tray is scary enough to reject on sight. This is the lunch that turns a picky eater into someone who actually eats.
Tuesday: Pasta Salad

Made from Sunday’s pasta batch, and it only gets better the longer it sits in the fridge.
Toss cold cooked pasta (bowties or elbows) with halved cherry tomatoes, cubed cheddar or mozzarella, diced cucumber, and Italian dressing. Add whatever protein’s already hanging around: leftover chicken, chopped ham, half a boiled egg. Pack it in a small container with an ice pack, toss in a fork, and you’re done before your coffee’s cold.
Wednesday: The Wrap Day
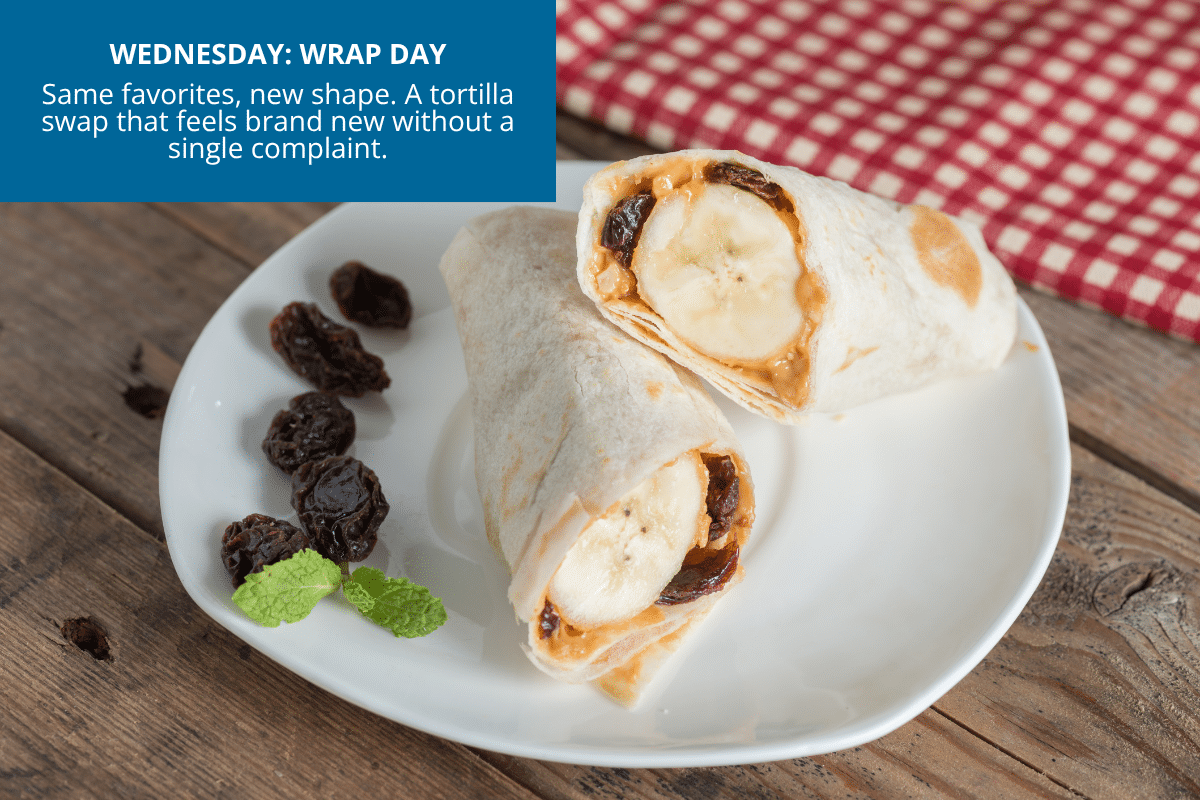
Same idea as a sandwich, but in a tortilla instead of bread. Different enough to feel new. Familiar enough that nobody complains.
Options:
- Turkey and cheese with lettuce and a schmear of hummus or ranch
- Ham and cheddar with mustard
- Cream cheese, cucumber, and shredded carrot (surprisingly popular with kids)
- Chicken salad with grapes and chopped celery
- Peanut butter, banana, and a drizzle of honey (rolled into a “sushi” style if kids like the shape)
Slice into pinwheels if you have time. Just wrap tightly in foil if you don’t.
Thursday: Breakfast for Lunch

Kids love this. Just take whatever they’d eat at 7 a.m. and pack it for noon instead.
Options:
- Mini pancakes or waffles (leftovers from the weekend, or a small stack made the morning of) with a small container of syrup
- Yogurt parfait: yogurt, granola, and fruit in a small container (assemble in the morning so the granola stays crunchy)
- Hard-boiled egg with mini muffins or banana bread
- Breakfast burrito: scrambled egg, cheese, and salsa wrapped in a tortilla (send with a small ice pack)
It’s cheap, it’s familiar, and it’s different enough from the rest of the week to feel like a treat instead of a chore.
Friday: The DIY Lunchable

The store version is $4 for essentially nothing. The homemade one is under $1 and better.
What goes in:
- Round crackers (Ritz, water crackers, or homemade whole-grain rounds)
- Sliced deli meat cut into circles (a small round cookie cutter is worth $2)
- Sliced cheddar or mozzarella, also cut into rounds
- Grapes or berries
- One small treat: a fun-size candy or a small cookie
- A small container of a fun dip if that’s your kid’s thing (ranch, honey mustard, Nutella)
Pack in a bento-style box or a container with dividers. Feels like a special lunch.
Snacks and Drinks: The Rotation
Two morning snacks and a drink, on rotation. Once you’ve got this figured out, you never have to buy the pre-portioned single-serve versions again. And trust me, those little bags are where your grocery budget goes to die.
Snacks (rotate through the week):
- Small handful of pretzels
- Homemade trail mix (nuts, dried fruit, a few chocolate chips)
- Cheese crackers
- A muffin or half a banana bread slice
- Energy bites (peanut butter, oats, honey, chocolate chips rolled into balls on Sunday)
- Popcorn (air-popped, portioned into snack bags)
For drinks, water wins every time. Milk boxes are fine but they add up fast. Juice boxes are more sugar than fruit, so if you’re sending them, cut them half and half with water. Honestly, a good insulated water bottle for each kid might be the single best money you spend on lunch all year.
How Much This Actually Saves
Doing the math on a typical family:
- School cafeteria for one kid: $4 per day x 180 school days = $720 per year
- Two kids: $1,440 per year
- Packed lunches (homemade): approximately $1.50 per lunch x 180 days x 2 kids = $540 per year
That’s a savings of about $900 a year for a two-kid household. For 30 minutes on Sunday and 10 minutes each weekday morning, that might be the best-paid part-time job you’ll take all year.
Question: So tell me… what’s the lunch your kids will eat every single time, no complaints, no leftovers coming home? Drop it in the comments. We’re all just trying to get out the door by 7:30.
EverydayCheapskate™ is reader-supported. We participate in the Amazon Services LLC Associates Program and other affiliate advertising programs, designed to provide a means for us to earn from qualifying purchases, at no cost to you.

7 Things to Always Buy Used (And 5 You Never Should)
I’ve been thrifting, Marketplace-scrolling, and estate-sale-hunting for more years than I care to admit. Here’s what I’ve learned, the hard way and the smart way: some things get better with age. Some things depreciate the second you drive them off the lot. And a small handful of things you should never, ever buy from a stranger, no matter how good the price looks.

This isn’t about being frugal for frugal’s sake. It’s about matching the purchase to reality. Below is my honest list, the categories where used is basically a magic trick, and the categories where “new” is the only answer that makes sense.
Always Buy Used: 7 Categories
1. Cars

You know this one. A new car loses 20 to 30 percent of its value the first year and half its value by year three. Somebody has to eat that depreciation. Let it be someone else.
The sweet spot is a car 2 to 4 years old with 30,000 to 60,000 miles on it. Most of the steep drop is already behind it, there’s usually still some warranty left, and you’ve got years of good driving ahead.
My strategy: go private-seller for the deepest discount, or certified pre-owned if you want the warranty peace of mind. Skip the dealership’s “gently used” lot. Those prices are barely below new, and you’re paying for the privilege of a nicer waiting room.
Typical savings: $5,000 to $15,000 over buying new. That’s real Freedom Account money, sitting right there for the taking.
2. Furniture, Especially High Quality Wood

Here’s a secret the furniture stores hope you never figure out: most new furniture is particle board wearing a coat of stain. Furniture built before the 1970s is often solid wood, and it’s a different animal entirely.
Look for real wood (it’s heavy, and you can see the grain through the finish), dovetail joints on the drawers, and hardware that isn’t plastic pretending to be brass. I’ve bought a mid-century dresser for $150 that would run you $800 new, easy, and mine will outlive both of us.
Best hunting grounds: Facebook Marketplace, estate sales, thrift stores.
Typical savings: 60 to 80 percent off new.
3. Books

A book you finished last week is exactly as good as a book fresh off the shelf. There is no wear pattern on a good story. Library sales and thrift stores sell $30 hardcovers for $3 all day long, and nobody’s the wiser.
Best hunting grounds: Library book sales, thrift stores, ThriftBooks online.
Typical savings: 80 to 95 percent off new.
4. Kids’ Toys and Baby Gear
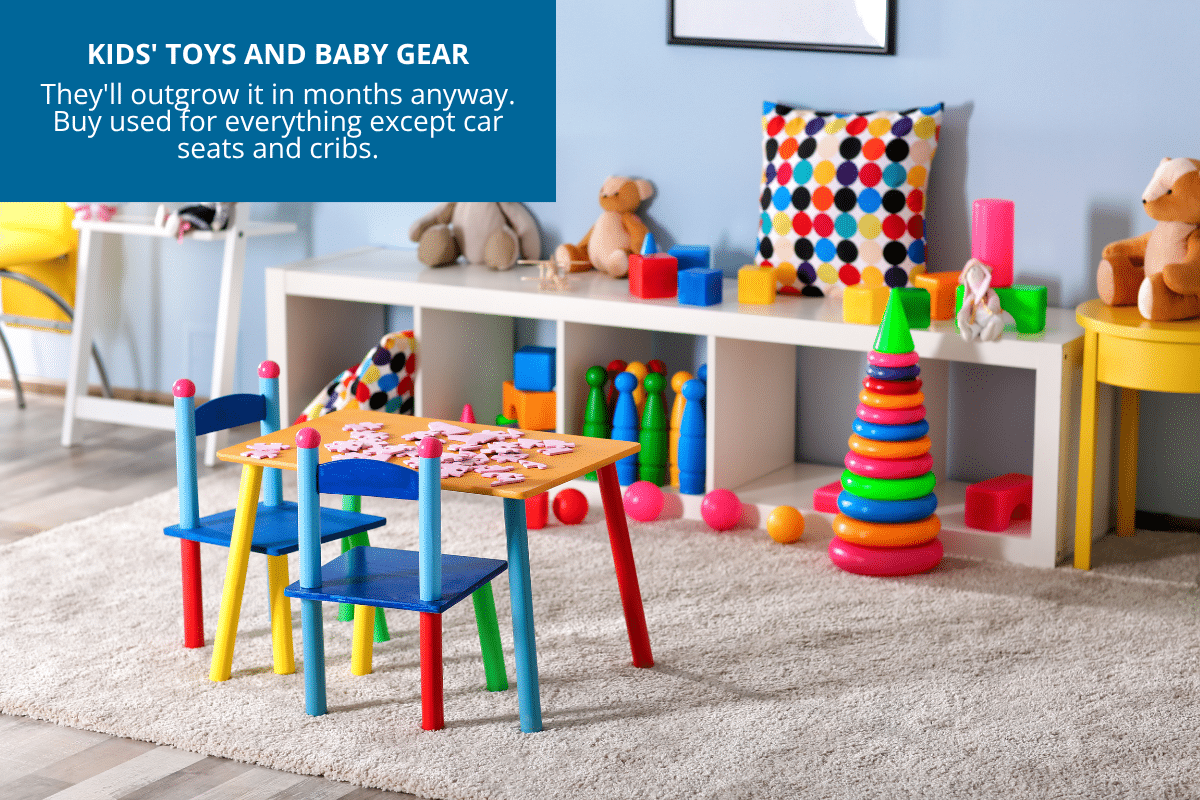
Kids grow out of everything in months. Buying new for a toddler is like buying a new umbrella for a hurricane that’s already passing. Which is exactly why the used market for baby gear is so huge, and so full of bargains.
Two exceptions worth knowing: skip used car seats (more on that below) and used cribs, since safety standards have changed enough that older ones may not meet them. Nearly everything else, buy it used and don’t think twice.
Best hunting grounds: Facebook Marketplace, consignment shops, hand-me-downs from friends who are done with that stage.
Typical savings: 60 to 80 percent off new.
5. Sporting Goods and Exercise Equipment

Every basement in America has a treadmill on it that got used four times. Same with the soccer cleats your kid wore for one season and then decided soccer wasn’t for them after all.
Bikes, kayaks, camping gear, skis, tennis rackets, golf clubs, someone bought all of it with good intentions and barely touched it. Their loss, your gain.
Best hunting grounds: Play It Again Sports, Facebook Marketplace, end-of-season consignment sales.
Typical savings: 50 to 70 percent off new.
6. Tools
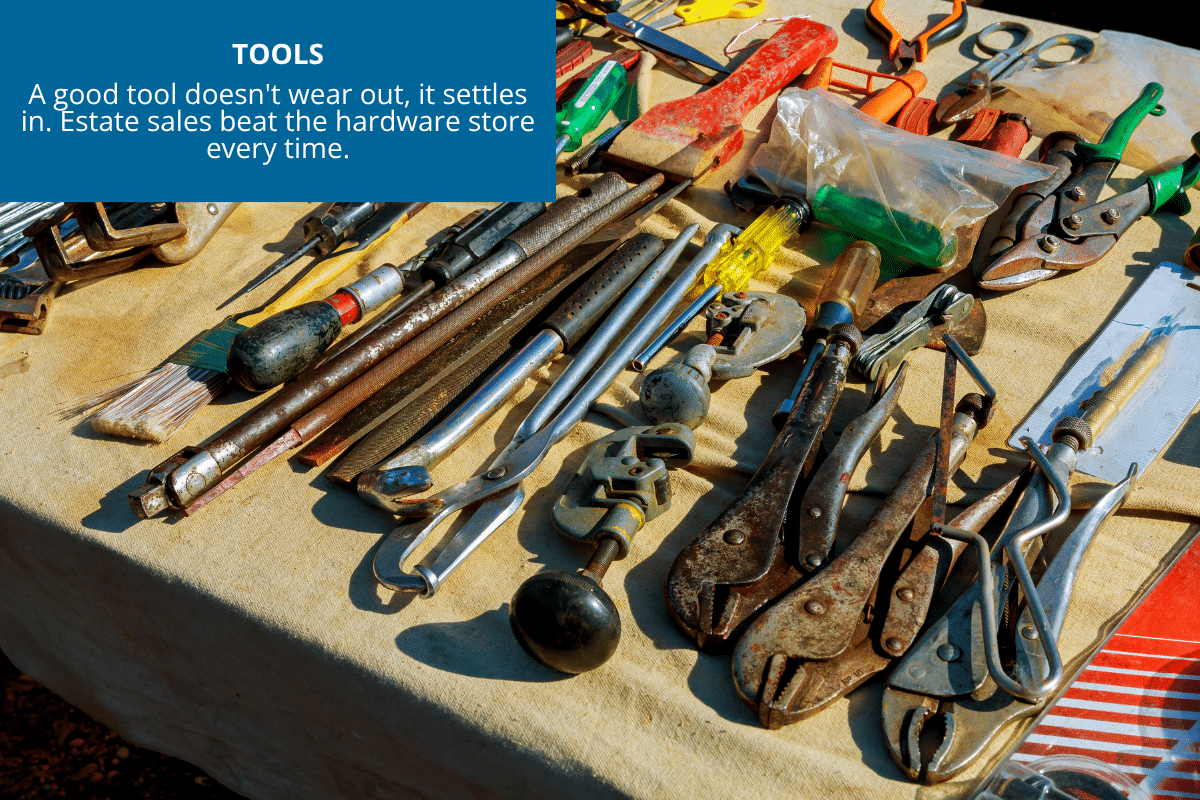
A good tool doesn’t wear out, it settles in. I’ll take a Craftsman wrench from the 1980s over most of what’s on the shelf today. Estate sales and hardware store closures are where the real deals hide.
One caution: pass on used power tools with damaged cords or batteries that have clearly seen better days. Corded tools that look well cared for are usually a safe bet.
Best hunting grounds: Estate sales, garage sales, Habitat for Humanity ReStore.
Typical savings: 40 to 70 percent off new.
7. Musical Instruments (Beginner and Intermediate)

A well-maintained instrument doesn’t lose value, it develops character. A used student violin or guitar has often been played in already, meaning the wood has settled and the finish has cured. That’s a feature, not a flaw.
If you’re a serious player who needs a specific pro-level instrument, buy new from a reputable dealer. For everyone else, used is smart.
Best hunting grounds: Music store consignments, Reverb.com, local classifieds.
Typical savings: 40 to 60 percent off new.
Never Buy Used: 5 Categories
1. Mattresses

You already know this one, and yet the used mattress ads keep showing up because someone out there keeps buying them. Don’t be that someone.
A mattress you can’t see inside of is a mattress you can’t verify. Bed bugs, dust mites, mold, and things I won’t even describe in a family newsletter can all be living in there, invisible and immovable. Some states won’t even let stores resell them. That should tell you something.
Buy new instead: Direct-to-consumer brands like Nectar, Tuft & Needle, or Casper start around $699 for a decent queen, and sales run constantly. Your back will thank you either way.
2. Helmets, Any Kind

Bike, motorcycle, ski, football, doesn’t matter. A helmet is built to absorb one hard hit and then it’s done, even if you can’t see the damage. A drop off a shelf you never witnessed can quietly compromise the foam inside, and you’d never know until it mattered.
Buy new instead: Bike helmets start around $30. Motorcycle helmets start around $150. This is not the place to save ten bucks.
3. Car Seats

Same logic as the helmet, plus an expiration date. A car seat that survived a fender bender may look perfectly fine and still fail when it counts. And every seat has a shelf life, typically 6 to 10 years from manufacture, after which the plastic starts to degrade whether it’s been in an accident or not.
Buy new instead: Graco has solid seats starting around $150. Plenty of communities also run car seat swap or check-in programs if cost is the real barrier, worth a look before you write a check.
4. Underwear, Bathing Suits, Pajamas, and Worn Shoes
I shouldn’t have to explain this one, but here we are. No amount of washing resets intimate fabric. And worn shoes carry the last owner’s foot shape, plus whatever fungus decided to move in along the way.
Exception: vintage clothing that’s outerwear, thoroughly cleaned, and never intimately worn is a different story.
5. Nonstick Cookware
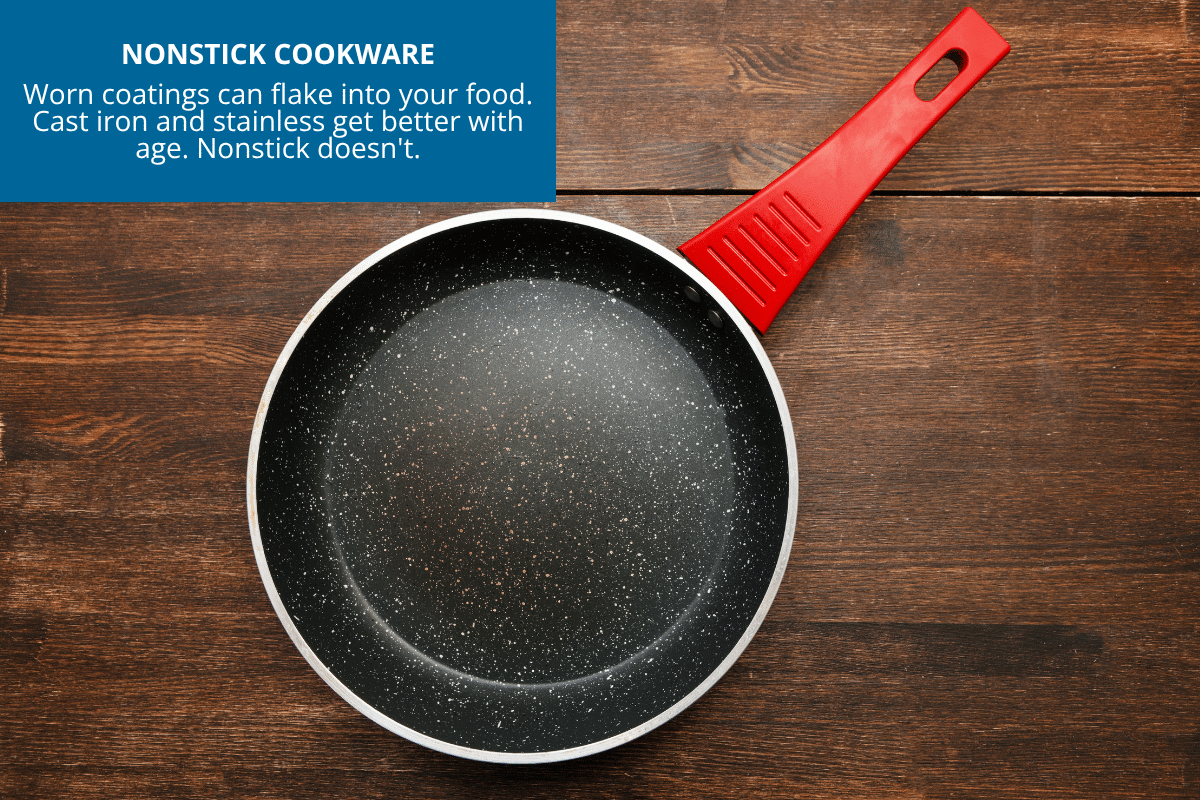
Nonstick coatings break down over time, and a used pan almost always has scratches or a worn surface you can’t fully see. Whether those flaking particles end up in your dinner is exactly the kind of question I’d rather not gamble on to save ten dollars.
Exception: cast iron and stainless steel are the opposite story. They get better with age and I buy them used without a second thought. It’s only the nonstick coating that’s the problem.
The Gray Area: It Depends
A few categories don’t sort neatly onto either list.
- Electronics. Used TVs, computers, and phones can be great deals, but only from a reputable reseller with a real return policy. Certified refurbished through Amazon Renewed or Apple Refurbished beats “used” from a stranger nearly every time.
- Small appliances. Blenders, mixers, food processors, usually fine used if you can plug it in and test it first. Skip anything with a frayed cord or a sketchy plug.
- Video games and DVDs. Discs are fine used, just check for scratches. Digital game keys are their own can of worms.
- Wedding dresses. Some brides love the vintage angle. Some don’t. Both are right.
- Cameras. Often a good buy, but check the shutter count and test the autofocus before you hand over any cash.
The Simple Rule
Buy used when the item is durable and easy to inspect. Buy new when the item is intimate, safety-critical, or hides its condition on the inside where you can’t check.
That one rule covers about 90 percent of your buying decisions. When you’re not sure, lean new for anything safety-related and used for anything built to last. Follow that pattern for a lifetime and you’ll quietly save tens of thousands of dollars on things nobody would ever have known you bought new anyway.
Your turn: What’s the best used purchase you ever made? And the worst? Tell me both in the comments. I promise I won’t judge, I’ve got a “worst” story of my own involving a free couch and a decision I regret to this day.
EverydayCheapskate™ is reader-supported. We participate in the Amazon Services LLC Associates Program and other affiliate advertising programs, designed to provide a means for us to earn from qualifying purchases, at no cost to you.

How to Knock $200+ Off Your Car Insurance Bill (Without Switching Companies)
Most of us treat our car insurance bill like the weather. It is what it is, and every year it creeps up a little. We sigh, we pay it, we move on. Here’s what nobody tells you: auto insurance is one of the most negotiable expenses in your entire budget. And I mean that literally negotiable, with one phone call. The average driver can knock $200 to $500 off their annual premium without switching companies and without giving up a single bit of coverage they actually need. You just have to know what to ask for. And where the discounts are hiding.

I ran this exact process on my own policy last year, expecting maybe fifty bucks. I found $180 in less than an hour. Turns out my “good driver” discount had quietly fallen off my policy two renewals ago, and nobody bothered to mention it. Insurance companies aren’t in the business of volunteering savings. They wait for you to ask. So let’s ask.
Step One: Request a Full Discount Review
This is the step almost nobody takes, and it’s the one that matters most. Call your insurance company or your agent and say this, word for word:
“I’d like to do a full discount review on my policy. Can we go through every discount available and check what I qualify for that’s not currently applied?”
That’s a different conversation than “what discounts do you offer.” A discount review means the rep pulls up the actual checklist and works through it with you, line by line. That’s how you catch the stuff you’d never think to ask about.
Have your policy number handy. Block off thirty minutes. This is the whole ballgame.
The Discounts Worth Asking About By Name
Most insurers offer a surprising number of discounts. Some get applied automatically. Others only show up if you ask about them.
- Bundling. Put your home or renters policy with the same company as your auto, and you’re typically looking at 5 to 25 percent off. If you’re split between two companies right now, get a quote to combine them. The math is usually better than people expect.
- Multiple vehicles. Insuring two cars on one policy instead of two separate ones saves 10 to 20 percent. If you and your spouse still have separate policies from your single days, fix that.
- Good driver. No tickets, no accidents in three to five years usually gets you 5 to 20 percent off. Make sure it’s actually applied. Mine wasn’t.
- Defensive driving course. Most companies offer a discount for completing an approved defensive driving course. Many courses are online, take just a few hours, and cost around $20 to $60. Depending on your insurer and state, the discount may last several years.
- Paying in full. Pay your six-month or annual premium up front instead of monthly, and you can save a few percent or help you avoid installment fees.. If your cash flow allows it, and this is exactly the kind of thing a healthy Freedom Account makes painless, it’s one of the easiest discounts on this whole list.
- Paperless billing and autopay. It’s usually a modest savings, but it takes only a couple of minutes to set up.
- Low mileage. Drive less than 7,500 to 12,000 miles a year? Ask about this one. Retirees, work-from-homers, and city dwellers who ride transit often qualify without realizing it. Worth 5 to 15 percent.
- Safety features. Anti-lock brakes, airbags, anti-theft systems, lane-keeping assist are all worth small discounts that add up. Make sure your insurer actually knows what your car has.
- Affiliation discounts. Employer, alumni group, AAA, AARP, military, teachers, nurses, credit unions… a lot of these come with an insurance perk nobody mentions. Ask.
- Loyalty. Been with the same company five-plus years? There’s sometimes a discount for that too, and it doesn’t always apply itself. But don’t let loyalty keep you from shopping around every few years. Ironically, longtime customers don’t always get the best rates.
- Usage-based programs. Progressive’s Snapshot, State Farm’s Drive Safe & Save, Allstate’s Drivewise all track your driving through an app or device. If you’re a genuinely careful driver, you could save 10 to 30 percent. If you drive like you’re late for something, skip it.
- Good student. If you have a teen or college student on your policy who maintains a B average or better, many insurers offer a discount, typically 5 to 15 percent, sometimes more depending on the carrier. The savings can be significant and are often available until about age 25.
Step Two: Raise Your Deductible, Carefully
Bump your deductible from $500 to $1,000, and your premium may drop by around 5 to 15 percent, depending on your policy.
Here’s the catch, and it’s non-negotiable: you need that $1,000 sitting in savings, ready to go. This is exactly what a Contingency Fund is for… money set aside specifically for the stuff you can’t predict but know will eventually happen. If you don’t have that cushion yet, don’t raise the deductible. If you do, the long-term savings often make it a smart move.
Step Three: Take a Hard Look at Your Coverage
This is where I want you to slow down. Don’t cut coverage you genuinely need just to shave a few dollars off the bill. But there are a couple of spots where people are quietly over-insured.
- Collision and comprehensive on an older car. If your car is only worth a few thousand dollars, it may be time to run the numbers. Compare the car’s current value, your deductible, and what you’re paying each year for collision and comprehensive coverage.
- Rental reimbursement. Worth keeping if you’d be stranded without a car. Skip it if you’ve got a second car or easy access to transit.
- Roadside assistance. If you already have AAA or your car manufacturer includes roadside assistance, check whether you’re paying twice. You may be able to remove it.
What Not to Touch: Liability
Do not reduce your liability coverage to save a few bucks. Liability covers what you’d owe someone else if you’re at fault in an accident, and increasing your limits is often cheaper than people expect. The extra protection can be worth every penny. One bad accident without enough liability coverage can undo years of careful budgeting in an afternoon.
Step Four: Work on Your Credit Score
In many states, insurers use a credit-based insurance score as one factor when setting your auto insurance rate. California, Hawaii, Massachusetts, and Michigan are exceptions where credit-based insurance scoring is restricted or not used for auto rates.
A stronger credit profile can translate into lower premiums over time, although the difference varies widely depending on where you’re starting, your insurer, and your state. The biggest savings usually come from improving a weaker credit profile, but even moving from good to excellent can help.
Quick wins: keep credit card balances low compared with your limits (under 30 percent is a good goal, and lower is even better), dispute any errors on your credit report, pay every bill on time, and avoid unnecessary new credit applications before your renewal date.
Step Five: Shop Competitor Quotes Every Couple of Years
You don’t have to switch to benefit from knowing what else is out there. Get quotes from two or three competitors every two years. Find a better price? Call your current company, quote in hand, and ask them to match it.
Most of the time, they will. Keeping you as a customer is cheaper for them than losing you, and they know it.
What This Actually Looks Like
Take a driver paying $1,400 a year. Here’s what a policy review could uncover:
- Discount review finds missing good driver and paperless billing discounts: −$95/year
- Online defensive driving course, $25 out of pocket: −$75/year for three years
- Raising the deductible from $500 to $1,000: −$130/year
- Switching to annual payment: −$60/year
Total savings: $360 a year.
About 45 minutes of phone calls and clicking around online. Same coverage. Same company. Just a smarter look at the bill.
How Often to Run This
Put it on your calendar once a year, a month or so before renewal. Do the discount review, double-check nothing’s fallen off your policy, and shop competitor quotes every other year.
Insurance is one of the rare bills you can permanently lower with a single focused afternoon. Do this once, and the savings just keep compounding while you go on with your life.
Question: What’s the biggest chunk you’ve ever talked off your car insurance with one phone call? Tell me in the comments. I want to know I’m not the only one who let a discount slip for two years.
EverydayCheapskate™ is reader-supported. We participate in the Amazon Services LLC Associates Program and other affiliate advertising programs, designed to provide a means for us to earn from qualifying purchases, at no cost to you.

The Best Way to Make Iced Tea? Depends What You’re After
Here’s a confession: I have made bad iced tea. Weak, bitter, watered-down-by-melting-ice bad. And for years I blamed the tea bags. It was never the tea bags. Iced tea seems like the easiest drink in the world. Bags in hot water, ice, done. But there’s a real gap between the iced tea you get at a good diner and the sad amber water most of us make at home. The fix isn’t pricier tea. It’s picking the right method for what you actually want out of the glass.

I’ve made iced tea five different ways over the years, for five different moods. Some I still use. One I’ve quietly retired. Here’s how they stack up, and which one wins in my house.
Why Bother Comparing Methods At All?
Because iced tea is cheap, it’s caffeinated, and it beats soda for sugar, so it deserves better than “toss and hope.” Made right, it’s one of the best deals in your kitchen. Made wrong, it’s flat or bitter, sometimes both at once. The method is the whole game.
Method 1: Sun Tea
Charming, but I’ve stopped making it

I grew up on sun tea. A jar on the porch rail, tea bags steeping away in the summer heat, that lazy slow-brewed flavor. There’s real nostalgia in it.
But the CDC has been warning about this one for a while now, and I take it seriously. Sun-warmed water doesn’t get hot enough to keep bacteria from growing during that long steep. It’s not a guaranteed problem. Plenty of people drink sun tea all summer without incident. But once you know the risk, “it’s probably fine” stops feeling like a good enough reason.
If you still want to make it, I’ve laid out exactly how to do it as safely as possible, including how long is too long, in How to Make Sun Tea So It Is Bacteria-Free and Safe to Drink. Read that one before you fill the jar.
My Take: The charm doesn’t outweigh the risk when the other methods are just as easy. I’ve moved on.
Method 2: Refrigerator Cold Brew
My everyday method

Ever notice how the best things require you to do almost nothing? This is that.
Tea bags, cold water, a pitcher, the fridge. Walk away for 8 to 12 hours. That’s the whole recipe.
What you get back is the smoothest, gentlest iced tea there is. No bitterness, because there’s no heat pulling harsh tannins out of the leaves. It’s a little lower in caffeine too, which I don’t mind on a slow afternoon.
How I Do It: Cold water in a half-gallon pitcher, 8 to 10 tea bags, cover, fridge overnight. Pull the bags, pour over ice.
The only real downside is patience. You have to think ahead, which is exactly why I set mine up before bed. By morning it’s ready and I’ve done nothing but sleep.
My Take: This is the one I reach for most. If you only try one method from this list, make it this one.
Method 3: Hot-Brewed Stovetop
For when you need tea now

Some days you don’t have 8 hours. Some days it’s 4pm, it’s ninety degrees, and you want iced tea in the next twenty minutes.
That’s what stovetop brewing is for. Boil water, steep the bags hard and fast, then dilute with cold water instead of pouring it straight over ice. That last step matters more than people think. Pour hot tea directly onto ice and you’re mostly drinking melted ice by the second glass.
How I Do It: Boil 4 cups water, remove from heat, steep 6 to 8 tea bags for 3 to 5 minutes (no longer, or it turns bitter), pull the bags, stir in 4 cups cold water. Let it come down toward room temperature before it goes in the fridge, or serve straight over ice.
My Take: The fastest route to a decent glass. Not the smoothest tea on this list, but when you need it now, you need it now.
Method 4: Tea Concentrate
The smartest fridge space you’ll use all summer

This one’s for households where nobody agrees on how strong their tea should be. Sound familiar?
You brew one small, very strong batch, keep it in the fridge, and everybody dilutes their own glass to taste. Weak for the kids, strong for you. Same jar, different results.
How I Do It: boil 2 cups water, add 10 to 12 tea bags, steep 5 minutes, pull the bags, refrigerate the concentrate. To serve, fill a glass about a third full of concentrate, then top off with cold water and ice.
My Take: Brilliant if you’re tired of negotiating tea strength with your own family. Also doubles nicely in a mocktail or a real one.
Method 5: The Classic Sweet Tea Method
Sugar goes in while it’s hot

If what you actually want is Southern sweet tea, the syrupy, diner-style kind, this is the only method that gets you there. I’ve written up the full version, with the exact ratios that make it taste like it came from a real Southern kitchen, in How to Make Iced Tea: Perfect Recipe for Refreshing Summer Drinks.
The short version: sugar dissolves into hot tea in seconds. Try to stir sugar into a pitcher of cold tea and you’ll be at it for ten minutes with grit still settling at the bottom of the glass. Sweeten hot, every time.
My Take: This is a one-job method. Sweet tea, and only sweet tea. If that’s what you’re craving, don’t fight it, just brew it that way from the start.
So Which One Wins?
For most households, most days: refrigerator cold brew. It’s safe, it’s the smoothest tea you’ll make, and it asks almost nothing of you except a little patience the night before.
If you need tea on short notice, go stovetop, and don’t skip the cold-water dilution step.
If your household can’t agree on strength, make a concentrate and let everyone doctor their own glass.
And if what you’re really craving is sweet tea, don’t try to shortcut it. Sweeten it hot, the way it’s meant to be done.
Tea Bag vs. Loose Leaf, Black vs. Green vs. Herbal
A few notes worth knowing:
- Tea bags work fine. You do not need to upgrade to loose-leaf tea to make something good. A box of Lipton or Luzianne has been getting this job done for decades, and it’ll keep doing it.
- Black tea is the classic. Strong enough to hold its own against ice and sugar without disappearing.
- Green tea is more delicate. Cold-brew method works best so it doesn’t get bitter.
- Herbal teas are forgiving. Good for kids, good for an evening cup with nothing that’ll keep you up.
- Fruit-flavored varieties. Hibiscus, peach, raspberry, are lovely cold-brewed, and even better blended half-and-half with black tea.
Keep a Jar of Simple Syrup on Hand
This is the trick that ends the “how do I sweeten cold tea” problem for good. Instead of fighting sugar into a cold pitcher, make a batch of syrup once and keep it in the fridge.
To Make It: Simmer 1 cup water and 1 cup sugar in a small saucepan, stirring until the sugar disappears. Cool it, pour it into a lidded jar, and refrigerate.
A tablespoon or two sweetens a glass of tea perfectly, no grit, no stirring marathon. It’s just as good in coffee, lemonade, or a cocktail, so make a double batch. You’ll use it.
Question: So, tell me: what’s your go-to method? Cold brew loyalist, stovetop-when-desperate, or die-hard sweet tea traditionalist? Tell me in the comments.
EverydayCheapskate™ is reader-supported. We participate in the Amazon Services LLC Associates Program and other affiliate advertising programs, designed to provide a means for us to earn from qualifying purchases, at no cost to you.

I Stopped Buying $7 Frappuccinos. Here’s What I Make Now
If your daily coffee shop habit has quietly become a $40-a-week expense, here’s the home version that ends it without ending the pleasure. Strong coffee, ice, milk, and a little sweetener whirled in a blender… that’s the whole base recipe. Add chocolate, caramel, vanilla, cinnamon, whatever you’d order at the counter. The whole thing takes five minutes, costs about $1.50, and tastes noticeably better than the $7 version with the green straw. After you’ve made it once, you’ll wonder why anyone ever paid full price for a glorified milkshake with espresso in it.

Confession: I’m a coffee snob. A serious one. I roast my own beans at home, and I import them green, straight from the La Minita farm in Costa Rica’s Tarrazu region. Organic, fair trade, and about as good as coffee gets on this planet.
You don’t need any of that for this recipe. A cup of whatever’s already in your pot works fine. But it’s exactly why I know how much the coffee itself matters here. Weak, mediocre coffee makes a weak, mediocre frozen drink no matter what you dress it up with. Good coffee needs less sugar to taste good, which is the whole secret those $7 versions are hiding from you.
The math on coffee shop frozen drinks is rough. A grande Frappuccino runs $6 to $7 these days. Five times a week is $30 to $35. That’s $1,500 to $1,800 a year for a drink you can make at home in five minutes.
The home version isn’t a compromise, either. You control the strength of the coffee, the sweetness, and the proportions. Nobody’s hiding a bad ingredient behind a mountain of whipped cream.
What You’ll Need
A short list. Everything you need is probably already in your kitchen.
Strong brewed coffee, chilled
About 1 1/4 cups. Yesterday’s leftover coffee works beautifully, as long as it’s strong. Cold brew concentrate also works well, or you can use espresso topped with cold water.
The stronger and colder the coffee, the better. Weak coffee or warm coffee will melt the ice too quickly and leave you with a thin, disappointing drink.
Whole milk (or a creamy alternative)
About 3/4 cup. Whole milk creates the creamiest texture, but 2 percent will work in a pinch. Half-and-half makes it extra rich, almost like a dessert drink.
For a dairy-free version, try oat milk or full-fat coconut milk for the best texture. Almond milk works too, but the finished drink may be a little lighter and less creamy.
Ice
About 1 1/4 cups. Regular ice cubes work just fine, or swap in coffee ice cubes for a stronger coffee flavor. The blender does the heavy lifting here, turning everything into a thick, frosty treat.
The smart freezer trick
Pour leftover coffee into an ice cube tray and freeze it. Coffee ice cubes keep your drink bold from the first sip to the last instead of watering down halfway through the glass.
Sweetener
2 to 3 tablespoons of sugar, simple syrup, sweetened condensed milk, or maple syrup. Sweetened condensed milk is a favorite because it adds both sweetness and a rich, creamy texture in one easy step.
Start with less and taste before serving. Ice can dull sweetness, so adjust until it tastes just right.
How to Make the Base Recipe

1. Add everything to the blender at once
Coffee, milk, ice, sweetener. Order doesn’t matter much, but if you have a temperamental blender, put the liquids in first and pile the ice on top.
2. Blend on high until smooth
20 to 30 seconds, until the ice is fully crushed and the drink is thick and frothy. Stop and scrape down the sides if needed. The texture should be like a thick milkshake. My Blendtec plows through a full load of ice without slowing down, which is more than I can say for the blender I owned before it.
3. Taste and adjust
Taste a spoonful. Too strong? Add a splash more milk. Not sweet enough? A little more sweetener and a quick re-blend. This is your moment to fine-tune.
4. Pour and garnish
Pour into a tall glass. Top with whipped cream (from a can is fine), a drizzle of whatever syrup matches your flavor, and a sprinkle of cocoa, cinnamon, or chocolate shavings if you’re feeling fancy. A reusable straw and you’re done.
10 Flavor Variations
The base recipe handles every coffee shop flavor with one small addition:
- Mocha: Add 2 tablespoons of chocolate syrup or 1 tablespoon of cocoa powder before blending.
- Caramel: Add 2 tablespoons of caramel sauce. Drizzle extra on top after pouring.
- Vanilla bean: Add 1 teaspoon of vanilla extract or 1/2 teaspoon of vanilla bean paste.
- Salted caramel: Caramel sauce plus a pinch of flaky sea salt on top.
- Hazelnut: 1 tablespoon of Nutella or 2 tablespoons of hazelnut syrup.
- Mint chocolate chip: 1/4 teaspoon peppermint extract plus 2 tablespoons mini chocolate chips.
- Java chip: Add 2 tablespoons of mini chocolate chips during the last few seconds of blending so they stay chunky.
- Pumpkin spice: Add 2 tablespoons of pumpkin puree plus 1/4 teaspoon of pumpkin pie spice.
- Cinnamon dolce: Add 1/2 teaspoon of cinnamon and 1 tablespoon of brown sugar.
- Cookies and cream: Add 3 to 4 crushed Oreos during the last few seconds.
Quick Tips
- Pre-chill your glass. Five minutes in the freezer before pouring keeps the drink colder, longer.
- Make coffee ice cubes on Sunday. Five-minute weekend habit that pays off all week.
- Double the recipe for company. Most blenders handle a double batch easily.
- Make it dessert. Use the base recipe with a scoop of vanilla ice cream instead of (or in addition to) the milk. Affogato meets Frappuccino.
Redirect what you’re not spending at the drive-thru. Even $30 a week adds up fast when it has somewhere to go instead of just disappearing.

Homemade Frozen Coffee Drink
Equipment
- blender
Ingredients
- 1 1/4 cups strong brewed coffee chilled
- 3/4 cup whole milk
- 1 1/4 cups ice use coffee ice cubes for an extra-strong coffee flavor
- 2 to 3 tablespoons sugar simple syrup, or sweetened condensed milk (adjust to taste)
- 1/2 teaspoon vanilla extract optional
- Pinch of salt optional, brings out the coffee flavor
- Whipped cream and garnish for serving
Instructions
- Add chilled coffee, milk, ice, sweetener, and any optional flavor add-ins to a blender.
- Blend on high for 20 to 30 seconds, until smooth, thick, and creamy.
- Taste and adjust sweetness or coffee strength as needed.
- Pour into a tall glass, top with whipped cream, and add your favorite garnish.
- Serve immediately.
Notes
Nutrition
Question: What’s your daily coffee shop order? Tell me what you usually buy and I’ll guarantee you can make it at home for under $1.50. Drop it in the comments below.
EverydayCheapskate™ is reader-supported. We participate in the Amazon Services LLC Associates Program and other affiliate advertising programs, designed to provide a means for us to earn from qualifying purchases, at no cost to you.

How to Negotiate Medical Bills and Cut Costs 30-50%
Here’s something most people never figure out: medical bills are negotiable. Almost always. Hospitals, doctors, labs, imaging centers… they’ll routinely knock 30 to 50 percent off the original bill, sometimes a lot more, for patients who simply know to ask. Why doesn’t everybody ask? Because they don’t know it’s on the table. They look at the number on the bill and assume that’s the price. It’s not. It’s an opening offer. Here’s the whole process. Every step, in order, plus the exact phrases that work. And it doesn’t matter if you have insurance, no insurance, or a high-deductible plan that just handed you a number that made your stomach drop. This works the same way.

Medical billing in this country is strange, and I mean genuinely strange. The same procedure, same hospital, same doctor, same day, can run $4,000 for one patient and $400 for another. Insurance companies negotiate their own rates behind the scenes. Cash patients get hit with the “chargemaster” rate, which can be 4 to 10 times what anyone actually pays. And if you stay quiet? That inflated number just stands.
The whole game is understanding how this system really works, then using the same playbook the insurance companies use. Below is every step. Don’t skip any of them.
Step One: Don’t Pay Anything Yet
When that bill lands, your first move is to wait. Don’t pay it. Don’t ignore it either. And don’t panic.
Most medical bills give you 30 to 60 days before they’re considered late. Use that window to do the actual work that shrinks the number.
If a collections call comes in early, tell them you’re disputing the bill and need time to review it. They’ll typically pause things while you sort it out.
Step Two: Request an Itemized Bill
That first bill you get? It’s a summary. One big number, no detail. You need the version that breaks out every single charge, line by line.
Call the billing office and say this:
“I’d like to request a fully itemized bill with all CPT and ICD-10 codes listed for each charge, please.”
CPT codes cover procedures. ICD-10 codes cover diagnoses. Asking for them by name tells the person on the phone you know what you’re doing, and that changes the conversation.
They’re required by law to give you this. It’ll take 7 to 14 days, usually by mail.
Step Three: Audit the Bill for Errors
This is where the real money hides. Medical billing error rates are shockingly high… somewhere between 30 and 80 percent of bills have at least one mistake, depending on which study you read.
Here’s what to hunt for:
- Charges for things you never received. Medications never given. Tests never run. Procedures coded wrong.
- Duplicate charges. The same service, billed twice.
- Upcoding. A simple procedure billed as something bigger and pricier.
- Out-of-network charges that should’ve been in-network. This happens constantly with anesthesiologists, radiologists, and ER doctors who don’t always share the hospital’s network.
- Room charges for nights you weren’t even there.
Go through each line against what you actually remember happening. If a code looks unfamiliar, look it up. There are free CPT lookup tools online. Write down every discrepancy you find.
Find errors, and your next phone call gets a whole lot easier. Now you’ve got specifics to point to.
Step Four: Find Out the Fair Price
Before you pick up the phone to negotiate, know what the procedure should actually cost. FAIR Health Consumer (fairhealthconsumer.org) is free and lets you search by procedure and zip code, showing what’s typical in your area both in-network and out-of-network.
If your bill says $8,500 and FAIR Health says the fair price is $3,200, that’s your number going into the call.
Step Five: Call the Billing Office to Negotiate
Time to make the call. Have this in front of you: the itemized bill, your list of errors, your fair-price research, and an hour where nobody’s going to interrupt you.
Open with this:
“Hi, I’m calling about my bill from [date of service]. I’ve reviewed the itemized bill carefully and I’d like to discuss the charges. A few items I have questions about, and I’d like to see if we can work out a reduced amount I’m able to pay.”
Then work through your list:
- Walk through every error you found. Ask for each one to be removed.
- Bring up any out-of-network charges and ask if they can be rebilled in-network.
- Point to your fair-market research on anything that looks inflated.
Step Six: Ask for Specific Discounts
Once the errors are handled, ask about discounts. Three worth knowing:
The Prompt-Pay Discount
Ask:
“If I pay the corrected balance in full today, what discount can you offer?”
A lot of hospitals will take 10 to 30 percent off for immediate payment in full. They’d rather have cash today than chase installments or risk you defaulting.
The Self-Pay / Cash-Pay Discount
If you’re uninsured or paying out of pocket, ask:
“I’m paying this bill out of pocket. What is the cash-pay rate or self-pay discount?”
Hospitals keep a separate, lower rate for cash patients than for insurance patients. That cash rate can run 40 to 70 percent below the chargemaster number.
Financial Hardship / Charity Care
For bigger bills, say:
“This bill is creating a significant financial hardship. Can you tell me what financial assistance or charity care programs are available?”
Most non-profit hospitals are legally required to run charity care programs, and they can reduce or wipe out a bill entirely based on income. The thresholds are usually more generous than people expect… sometimes up to 400 percent of the federal poverty level.
Step Seven: Negotiate a Payment Plan If Needed
Can’t pay the negotiated amount all at once? Ask for an interest-free plan. Say:
“I appreciate the discount. I’d like to set up an interest-free payment plan over the next 12 months.”
Most hospitals will offer 12 to 24 interest-free months without much of a fight. Get it in writing.
One thing I want to be really clear about: never put a medical bill on a high-interest credit card if a hospital will give you an interest-free plan instead. The interest ends up costing more than the bill did.
Step Eight: Get the Agreement in Writing
Whatever you land on, get written confirmation before you send a single payment. Say:
“Can you please email or mail me written confirmation of the agreed-upon balance, the payment terms, and the reference number for this conversation?”
Reps make promises on the phone that don’t always make it into the system. Written confirmation is your proof if a dispute pops up down the road.
What If They Won’t Budge?
A few things to try:
- Ask for a billing supervisor or patient advocate. Frontline reps often can’t approve much on their own. Supervisors usually can.
- Call back another day. Different reps give different answers more often than you’d think.
- File a complaint with your state attorney general, especially if you found errors they refuse to fix.
- Hire a medical billing advocate. Rates run $75 to $350 an hour, or 25 to 35 percent of whatever they save you if they work on contingency. If cost is the concern, ask about a free option first. Patient Advocate Foundation and Dollar For help with medical debt navigation at no charge.
What This Can Look Like
Here’s a realistic walkthrough. Uninsured patient, $14,000 ER bill.
- Requested the itemized bill and found 3 duplicate medication charges: minus $340.
- Disputed an out-of-network ER physician charge. Since 2022, the No Surprises Act has required emergency physicians to be billed at in-network rates no matter their own network status, so this charge shouldn’t have been there at all: minus $1,800.
- Asked for the self-pay discount, got 40 percent off the remaining balance: minus $4,744.
- Negotiated a prompt-pay discount on what was left, another 10 percent: minus $711.
Final bill: $6,405 instead of $14,000. About 90 minutes on the phone and some paperwork. Same care, same doctor, same everything. Just a fraction of the price.
The Mindset That Makes This Work
Two things matter more than anything else here.
Stay calm and friendly.
Billing reps field angry callers all day long. Someone pleasant, organized, and prepared is the easy part of their shift, and they’ll go further out of their way for you than they will for the person yelling.
Be persistent.
The first answer is almost never the final answer. Keep asking, politely, for a supervisor, a different option, a discount you read about somewhere. The real savings usually show up on the second or third ask, not the first.
This works. Households do this every single year and walk away with real money back in their pocket. Medical debt is the leading cause of bankruptcy in this country, and most of that debt is sitting on inflated, error-ridden bills that nobody bothered to question. You don’t have to be one of them.
Question: What’s the biggest amount you’ve ever talked off a medical bill? Or is there one you wish you’d known to fight back then? Tell me about it in the comments. It might be exactly what someone else needs to read today.

News You Can Use • July 2026
Hello, July! The backyard grill is working overtime, the ice cream disappears faster than you can scoop it, and summer conversations seem to get a little more interesting this time of year. This month’s headlines are just as eclectic. We’ve got brain-boosting habits that take only two minutes, a surprising new savings account for kids, a Disneyland debate that’s dividing fans, and even a hot dog bun that somehow tastes like Pringles. So pour yourself something cold, settle into the shade, and enjoy this month’s collection of fun, useful, and conversation-worthy reads.

The 10-Second Hotel Habit That Could Help the Next Guest
Skipping the front desk at checkout may seem like a time-saver, but it can delay housekeeping and keep your room from being prepared for the next traveler. Hotel experts say one quick step before you leave can make a surprising difference, especially during busy travel seasons.
Read more →
Booked the Wrong Flight? This Airline Just Made Refunds Harder
If you tend to book flights at the last minute, here’s a change worth knowing. American Airlines has tightened its 24-hour cancellation policy, meaning some travelers who could previously get a full refund may no longer qualify. Before you hit “Book,” it’s worth understanding the new rules so an honest mistake doesn’t become an expensive one.
Read more →
80 Years of Research Revealed a Surprising Cost of Financial Stress
We’ve all felt the strain of money worries, but a remarkable 80-year study suggests the effects may go deeper than sleepless nights. Researchers found that long-term financial hardship may be linked to changes in brain health decades later, highlighting one more reason why reducing chronic stress matters.
Read more →
You’ll Never Look at Animal Sleep the Same Way Again
Think your sleep schedule is unusual? Nature has some incredible competition. From dolphins that sleep with half their brain awake to elephants that get by on just two hours a day and birds that nap while flying, these amazing creatures have evolved some truly mind-bending ways to rest and survive.
Read more →
The Family Car Nobody Saw Coming Is Suddenly Cool Again
Think minivans disappeared with the 1990s? Think again. Sales are climbing fast as more parents trade pricey SUVs for sliding doors, better fuel economy, and family-friendly features they never knew they needed. It turns out practicality may finally be winning over image and younger families are leading the charge.
Read more →
The Simple Habit That Could Quiet Your Busy Brain
Feeling mentally exhausted before lunch? It might not be your workload—it could be all the tiny decisions you’re making. Research suggests that trimming everyday choices, from what you wear to what you buy, can reduce mental fatigue and leave more energy for the things that truly matter.
Read more →
The Student Loan Scam That’s Spreading Fast Right Now
Big changes to student loan repayment are creating the perfect opportunity for scammers. Fraudsters are using fear, confusion, and fake promises of lower payments or loan forgiveness to trick borrowers into handing over money or personal information. Knowing the warning signs could save you from an expensive mistake…
Read more →
Two Popular Pain Relievers Just Became One Pill
A new over-the-counter pain reliever is on the way, combining Tylenol and naproxen in a single tablet for the first time. Because the two medicines fight pain in different ways, the combination may provide longer-lasting relief for headaches, back pain, muscle aches, arthritis, and more. Here’s what to know before you reach for it…
Read more →
Jackie and Shadow Just Got the Best News Yet
After years of effort, a grassroots campaign has reached its ambitious goal: raising $10 million to protect 63 acres of forest along Big Bear Lake from development. The land includes important habitat for Jackie, Shadow, and countless other wildlife, ensuring it will remain untouched for generations to come.
Read more →
A Promising Update on Big Bear’s Beloved Bald Eagle Jackie
Fans of the famous Big Bear eagle nest have reason to breathe a little easier. After being grounded and rescued following repeated attacks from juvenile eagles, Jackie appears to have avoided any major injuries. She’s still undergoing medical evaluations, while her longtime mate, Shadow, continues caring for their two young eaglets on his own.
Read more →
5 Designer Secrets That Can Make Any Small Room Feel Surprisingly Bigger
You don’t need to knock down walls to make a small home feel more spacious. Interior designers say a few simple changes, like where you hang your curtains, how you position your furniture, and even the way you use paint, can completely change how a room looks and feels. These budget-friendly tricks work whether you own or rent.
Read more →
You Could Still Be Owed Up to $51 From Amazon
If you had Amazon Prime anytime between 2019 and 2025, you may still qualify for part of a massive $2.5 billion settlement. Eligible customers have until July 27 to file a claim for up to $51, but not everyone qualifies. Here’s who can apply, how to avoid settlement scams, and a simple way to keep unwanted subscriptions from slipping through the cracks.
Read more →
The $25 Chick-fil-A Order That’s Saving Families More Than You’d Expect
Fast-food prices keep climbing, but one dad found a surprisingly simple way to stretch a Chick-fil-A order. Instead of buying individual sandwiches, he ordered nuggets and inexpensive buns, letting everyone build their own sandwich for a fraction of the usual cost. It’s an easy hack that’s getting plenty of parents talking and could trim your next drive-thru bill.
Read more →
The Unexpected Reason Travel Changes You Long After You Get Home
Vacation may do more than help you unwind. Researchers say new experiences force your brain out of autopilot, creating fresh neural connections that can boost creativity, sharpen thinking, and even help you see yourself differently. The best part? You don’t have to fly halfway around the world to get the benefits.
Read more →
The Taco Bell Ingredient Health Officials Are Warning People to Avoid
Health officials are urging people in five states not to eat shredded iceberg lettuce served at certain Taco Bell locations after linking it to a major cyclospora outbreak. The company has already pulled the ingredient nationwide while investigators work to trace the source. Here’s where the outbreak is happening, what symptoms to watch for, and why this case is drawing national attention.
Read more →
Could This Be the Last Time You Ever Change Your Clocks?
The twice-a-year clock change may finally be on its way out. Congress is considering a bill that would make daylight saving time permanent, meaning no more springing forward or falling back for most Americans. The proposal has cleared a key hurdle, but there are still a few steps before it could become law.
Read more →
Getting a Text From the IRS? Here’s How to Tell if It’s Real
For years, the IRS said it would never text taxpayers. Now that’s changing, but only in very limited situations. The agency will send text messages for just three specific reasons, and only if you’ve opted in. Knowing what a legitimate IRS text looks like could help you avoid falling for the growing number of tax scams.
Read more →
These Tiny Ballpark Visitors Nearly Stole the Show From Shohei Ohtani
Shohei Ohtani hit a major career milestone, but two unexpected guests had fans talking too. Before the Dodgers took on the Rockies, a pair of curious baby raccoons wandered along the outfield wall, delighting the crowd and quickly going viral. Stadium staff safely retrieved the furry visitors, creating one of the night’s most unforgettable moments.
Read more →
The Free Browser Trick That Makes Amazon Shopping Much Less Frustrating
Shopping on Amazon can feel like searching for a needle in a haystack, thanks to endless sponsored listings and unfamiliar brands. A free browser extension aims to clean up the clutter by hiding or dimming questionable listings, making trusted brands easier to spot. It’s a clever shortcut, though shoppers should still do their homework before buying.
Read more →
Would You Try a Pringles Hot Dog Bun? This Summer Twist Is Turning Heads
Hot dogs are getting a crunchy makeover this summer. Pringles has introduced limited-edition potato-based hot dog buns infused with its signature Sour Cream & Onion, BBQ, and Honey Mustard flavors. Available only for a limited time around National Hot Dog Day, these unusual buns are sure to get people talking at backyard cookouts.
Read more →
Millions of Kids Now Qualify for New Trump Accounts. Here’s What Parents Should Know
A new federal investment account for children is officially live, and millions of eligible kids could benefit, including some who qualify for a one-time $1,000 government contribution. But before you open an account, it’s worth understanding who qualifies, how the money grows, when it can be used, and how it compares to options like 529 plans and Roth IRAs.
Read more →
The 2-Minute Toothbrushing Trick That May Give Your Brain a Workout
What if one small change to your morning routine could challenge your brain in a new way? Some people are brushing their teeth with their non-dominant hand to engage different neural pathways and encourage neuroplasticity. While scientists say it’s no miracle brain booster, the simple habit may help increase focus and coordination, alongside proven brain-healthy habits.
Read more →
The Everyday American Foods That Have World Cup Fans Completely Obsessed
Sometimes it takes visitors to remind us what’s uniquely American. As World Cup fans explore the U.S., they’re falling in love with everything from ranch dressing and Waffle House to Buc-ee’s, giant drinks, and even ice machines. Their reactions are funny, surprising, and might make you see a few everyday favorites in a whole new light.
Read more →
Disney Changed One Classic Ride, and Fans Are Not Happy About It
Disneyland’s beloved Pirates of the Caribbean just got a high-tech makeover, but not everyone is cheering. A new animatronic uses cutting-edge effects to transform a pirate into a skeleton, replacing a decades-old scene that many fans considered iconic. The technology is impressive, but longtime visitors say something important may have been lost in the process.
Read more →
The Surprising Hobby That Could Help Keep Your Brain Younger
Learning a new language may do more than help you order dinner on vacation. New research suggests people who speak multiple languages tend to have brains that appear years younger than those who speak only one, with the biggest benefits seen in those who start earlier and become more fluent. Scientists say it’s another reason it’s never too late to challenge your brain.
Read more →
- MORE: News You Can Use • June 2026
- MORE: News You Can Use • May 2026
- MORE: News You Can Use • April 2026
Check back regularly for updates! We’ll be adding new top news articles throughout July 2026.
Best Coolers for Camping, Road Trips, and Beach Days
I get asked constantly which cooler I’d actually buy, so here’s the honest rundown. No sponsored fluff, just the three I’d hand you if you showed up at my door asking. One’s a splurge, one’s a steal, and one rolls right along behind you so your back doesn’t have to argue about it. One quick note before we dive in: the cooler matters less than how you pack it, so read that guide first →
All three of these have earned a permanent spot in my rotation, and I picked them for different reasons rather than crowning one champion. Price, durability, and how much hassle you’re willing to carry all factor in, so here’s where each one fits and why.
Jump to:
- Best Overall, Best Hard Cooler, and Best for Camping: RTIC 65 Quart Cooler Ice Chest
- Best Budget: Coleman Chiller Series 16 Quart Insulated Portable Cooler
- Best Wheeled Cooler, Best for Tailgating, and Best for Road Trips: Coleman Xtreme 50 Quart Rolling Cooler


Best Overall, Best Hard Cooler, and Best for Camping: RTIC 65 Quart Cooler Ice Chest
RTIC 65 Quart Cooler Ice Chest
If I had to own exactly one cooler, this is it. It’s a hard-sided cooler built for punishment, and it keeps ice frozen for days rather than hours. Yes, it’s heavy and it eats into your interior space with all that insulation, but that’s the tradeoff for a cooler that shows up for camping trips, tailgates, and everything in between without complaint.
It earns best overall because it does nearly everything well without an obvious weak spot, but it’s worth calling out on its own for two other reasons. If you want a cooler that’s essentially indestructible and don’t mind the weight, it’s also my pick for best hard cooler. And for a multi-day camping trip away from a store, it’s the one I’d send you off with too. Pair it with block ice from my packing guide and you can go several days without needing to restock.
Best Budget: Coleman Chiller Series 16 Quart Insulated Portable Cooler
Coleman Chiller Series 16 Quart Insulated Portable Cooler
This is the one I recommend to anyone who doesn’t need a heavy-duty setup and just wants something reliable for picnics, park days, and quick beach trips. It holds up to 11 cans with 8 pounds of ice, has a sturdy grip handle, and is made in the USA. It won’t survive a multi-day camping trip in July, but for the price, nothing else comes close.
Best Wheeled Cooler, Best for Tailgating, and Best for Road Trips: Coleman Xtreme 50 Quart Rolling Cooler
Coleman Xtreme 50 Quart Rolling Cooler
Once a cooler gets much past 40 quarts, carrying it stops being fun. This one solves that with wheels and a pull handle, and it’s rated to keep ice for up to five days.
It’s the cooler I reach for on weekend trips, car camping, tailgating, or as a backup in case the power goes out and the fridge stops helping, which is really just another way of saying it earns best for tailgating and best for road trips right alongside best wheeled cooler. Wheels make all the difference in a parking lot, especially when you’re also hauling chairs, a grill, and a folding table. And for a road trip, you get enough capacity for a family’s worth of snacks and drinks, wheels for gas station parking lots, and a price that won’t make you wince if it gets scuffed up being loaded and unloaded a dozen times over a week. Versatile enough to earn a spot in the garage year-round.
Best Backpack Cooler
I’ll be straight with you here: I haven’t found one I’m ready to put my name behind yet. If you’re shopping this category, look for welded (not sewn) seams, a wide-mouth main compartment, and at least 24 hours of claimed ice retention. I’ll update this section once I’ve tested one I actually trust.
Question: Got a cooler you swear by that isn’t on this list? Tell me about it in the comments; I’m always looking for the next one to put through its paces.
EverydayCheapskate™ is reader-supported. We participate in the Amazon Services LLC Associates Program and other affiliate advertising programs, designed to provide a means for us to earn from qualifying purchases, at no cost to you.
How to Pack a Cooler That Stays Cold for 48 Hours
You’ve had this happen. The ice melted by lunchtime. The soda came out lukewarm. And that chicken you packed for dinner? You stood there poking it, trying to decide if “probably fine” was a food safety standard you were willing to trust. Here’s what I’ve learned after packing more coolers than I can count: the cooler is rarely the problem. A $30 cooler packed the right way will out-perform a $400 one packed carelessly. Every time.
The difference comes down to a handful of habits. Pre-chilling. Layering. Filling every bit of empty space. And resisting the urge to leave that lid open “just for a second.” None of it is complicated. All of it adds up.
Twenty extra minutes before you leave the house can buy you two full days of reliable cold. Let’s get into it.
Why Packing Matters More Than the Cooler Itself
A cooler has exactly one job: keep the cold air inside colder than the air outside for as long as possible. Everything you do either helps with that job or works against it.
Ice melting isn’t really “ice melting.” It’s heat moving into your cooler and forcing the ice to absorb it. Every bit of warm air, every open lid, every gap of empty space is an invitation for heat to come in and eat through your ice supply. Pack smart, and you’re not fighting that battle nearly as hard.
Step 1: Pre-Chill Everything, Including the Cooler
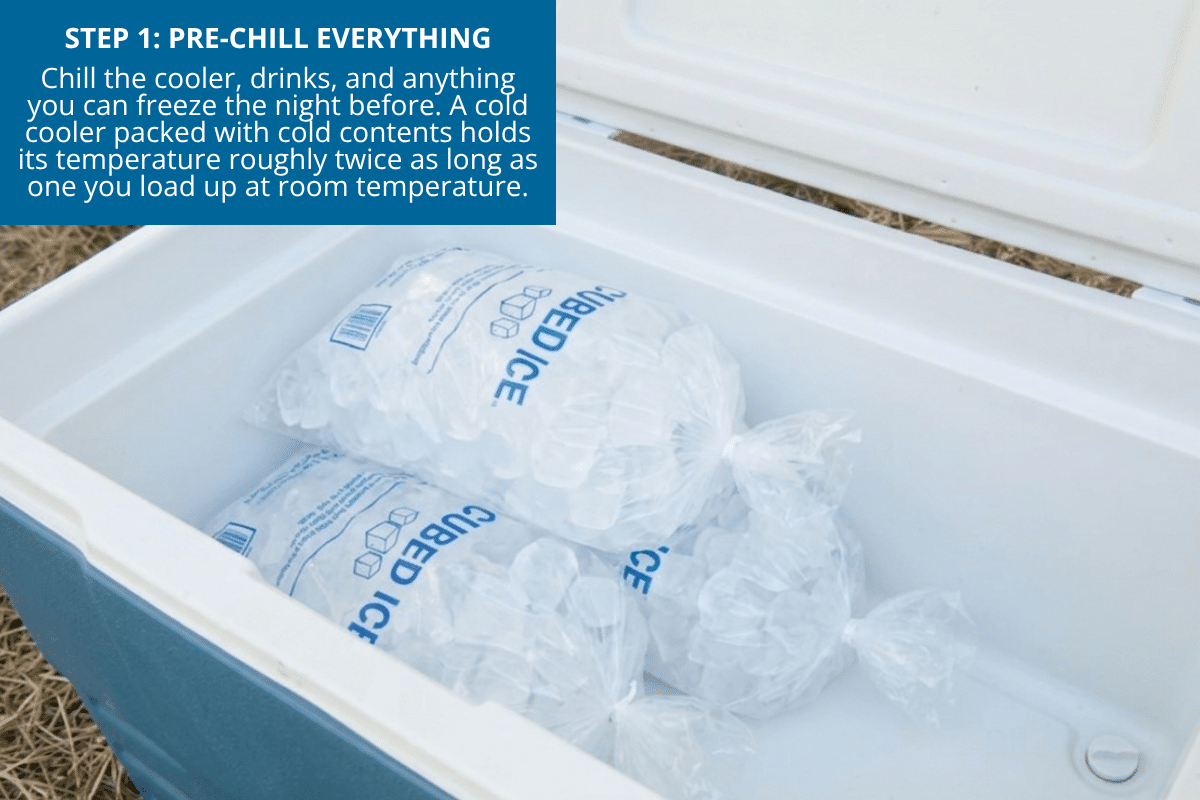
This is the step almost everyone skips, and it might be the single biggest factor in how long your ice survives.
Think about it this way. If your cooler is sitting at room temperature and your drinks are sitting at room temperature, the first job your ice has to do is cool down the cooler and the drinks before it can even start keeping anything cold. That’s wasted ice, gone before you’ve even left the driveway.
Pre-chill the cooler.
The night before, toss a couple of bags of ice into the empty cooler, close the lid, and leave it in the garage or on the porch overnight. By morning the walls and interior are cold clear through. Dump that ice out right before you pack for real.
Pre-chill your drinks.
Get cans and bottles into the fridge at least 12 hours ahead. A cold drink going in means your ice isn’t wasting effort cooling something that should’ve already been cold.
Freeze what you can.
Bottled water, juice boxes, meat you’re cooking the next day. All of it freezes fine, and all of it works as bonus ice while it slowly thaws out over the trip.
A cold cooler packed with cold contents will hold its temperature roughly twice as long as a room-temperature cooler packed with room-temperature contents. Same amount of ice. Wildly different results.
Step 2: Use the Right Kind of Ice for the Job

Not all ice behaves the same way, and knowing the difference changes how you pack.
Block Ice
Block ice is your workhorse. A solid block melts far slower than the same amount of ice broken into cubes, simply because it has less surface area exposed to warm air. This is what holds your temperature down over the long haul.
You can buy block ice, or make your own for free. Fill a few empty milk jugs or large juice bottles with water and freeze them solid overnight. Use them whole, still sealed. When they melt, you’ve got clean water to drink instead of a cooler full of murky ice water, and nothing goes to waste.
Cubed or Chipped Ice
Cubed or chipped ice melts faster, but it also cools faster, which makes it perfect for filling in gaps and chilling things down quickly. Use it around your food and in the layers, while your block ice anchors the temperature underneath.
Dry Ice
Dry ice is worth considering only for longer trips in serious heat, three days or more. A small amount layered on top of your regular ice stretches the cold life considerably. A few rules if you go this route: handle it with gloves, never bare hands. Never seal the cooler completely airtight with dry ice inside, since it needs somewhere to vent the gas it releases. And keep it well out of reach of kids and pets.
One more point in block ice’s favor, since I know you’re already doing the math: making your own is free. A store-bought block of ice can run you several dollars a trip, and you’re paying that every single time you head out. A few old milk jugs and a freezer full overnight, and you’ve got the same result for the cost of the water that was already coming out of your tap anyway. I keep two or three jugs in rotation in my freezer at all times, refilling and refreezing as soon as one comes back empty from a trip.
Step 3: Layer It Like You Mean It
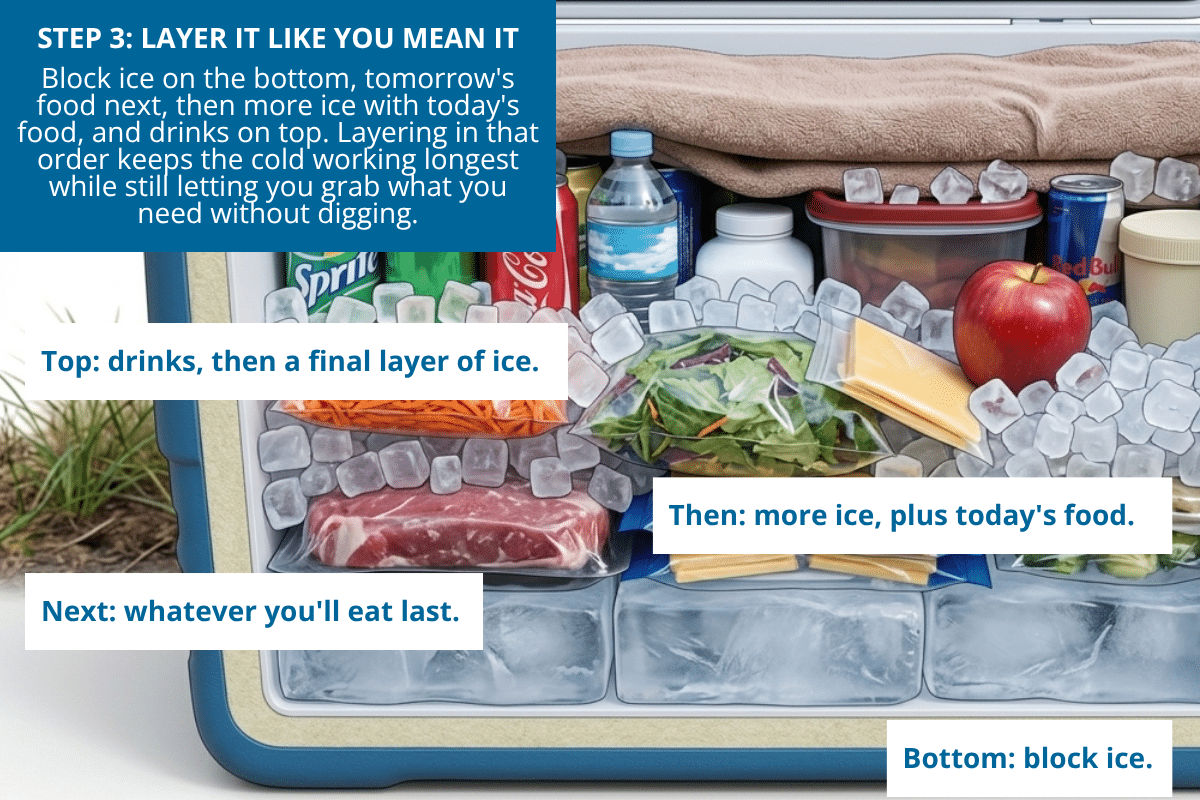
Order matters more than most people realize. Here’s the layering that gets you the longest cold life and still lets you grab what you need without unpacking the whole thing.
Bottom: block ice.
Cover the entire bottom of the cooler. Cold air sinks, so this bottom layer keeps working on everything above it for the whole trip.
Next: whatever you’ll eat last.
Tomorrow’s dinner, day-three breakfast, anything you won’t touch right away. This is the layer that benefits most from sitting in the coldest part of the cooler.
Then: more ice, plus today’s food.
A scattering of cubed ice, then whatever you’re eating today. Put the things you’ll grab first closer to the top so you’re not digging.
Top: drinks, then a final layer of ice.
Drinks belong at the top so nobody has to excavate for a soda. Scatter a last bit of ice over everything.
If you’ve got the room, a folded towel or piece of cardboard laid over that top ice layer adds a surprising amount of extra insulation once the lid closes.
Step 4: Fill Every Bit of Empty Space
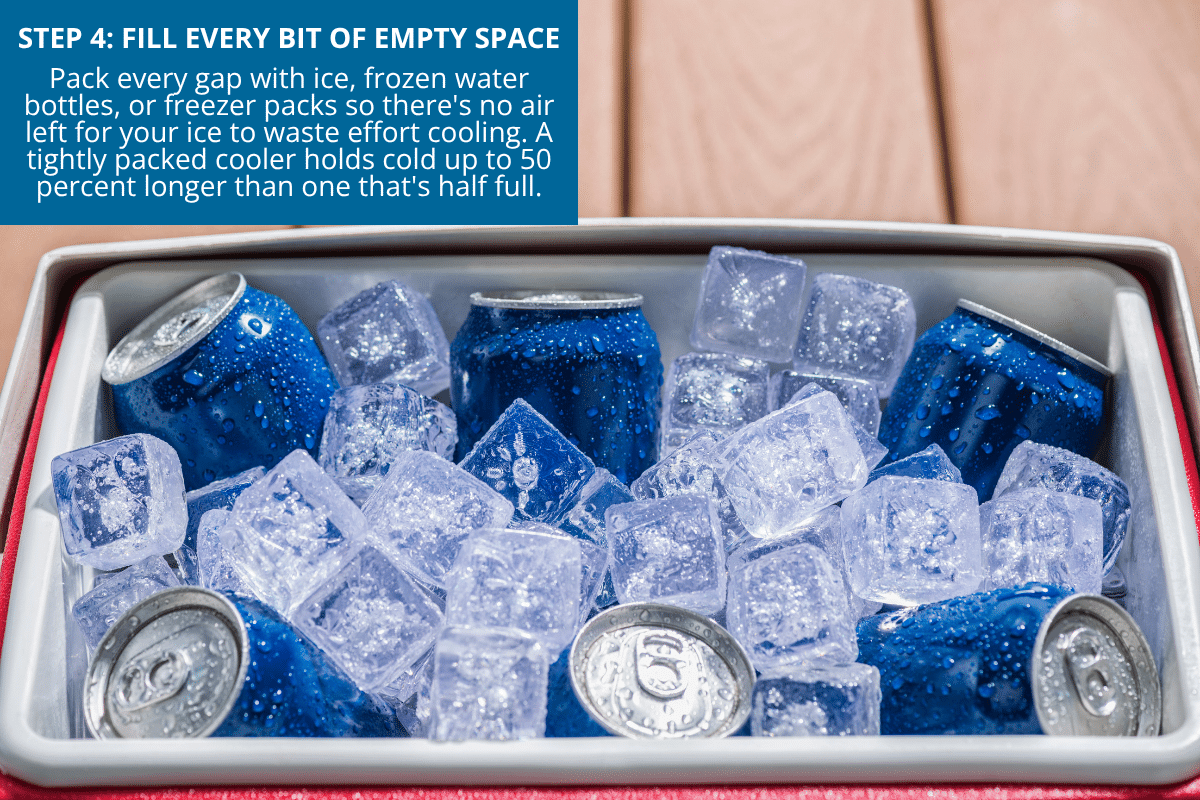
Empty space is the enemy here. Any gap of air inside your cooler is a gap your ice has to work to cool, and it does that at your ice’s expense.
Things that fill gaps well:
- More ice
- Frozen water bottles, which double as drinking water later
- Crumpled aluminum foil, which reflects radiant heat
- Reusable freezer packs tucked into corners
- Frozen meals or burritos sealed in freezer bags.
A cooler packed tight can hold its cold up to 50 percent longer than one that’s half full. If you’re a day or two into a trip and your cooler has gone from packed to half-empty, it’s worth consolidating everything into a smaller cooler rather than hauling around a big one that’s mostly air.
Step 5: Manage the Cooler Once It’s Packed
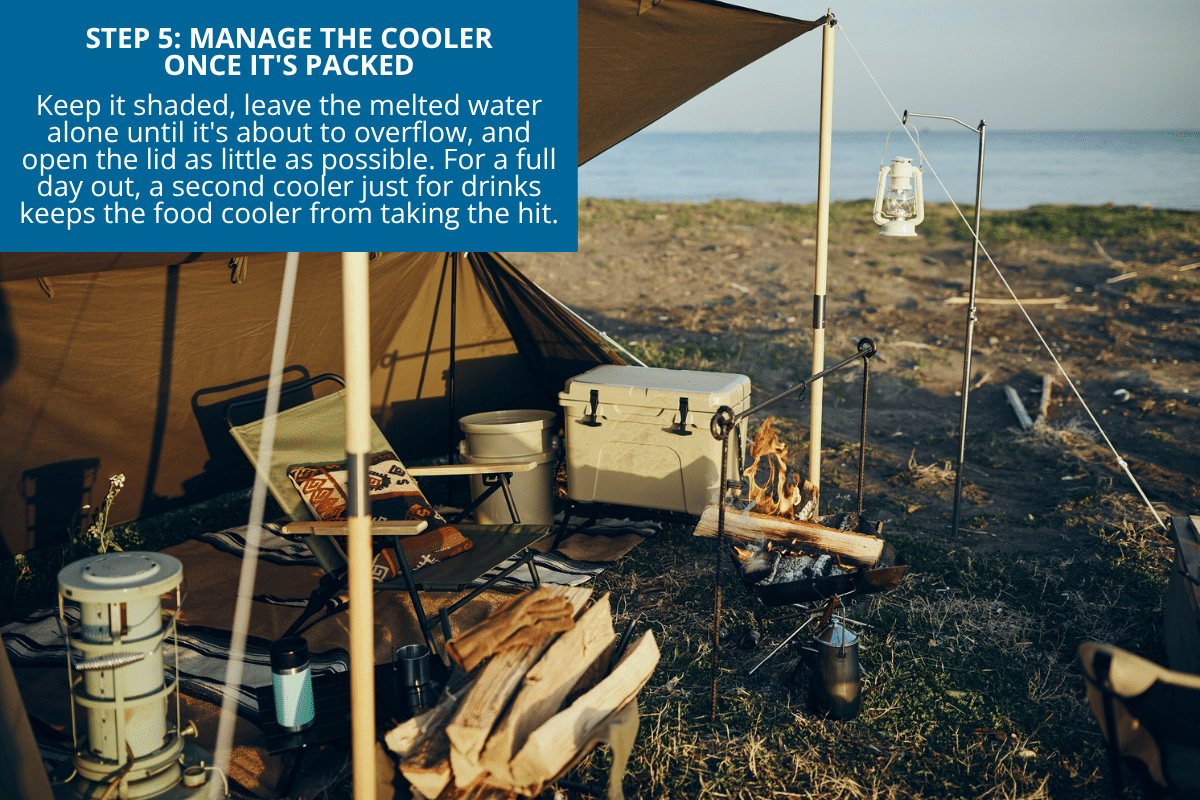
Packing well gets you most of the way there. What you do after matters too.
Keep it in the shade.
Always. An hour sitting in direct sun can undo a lot of your careful packing. If shade isn’t available, throw a light-colored towel or blanket over the top.
Don’t drain the melted water too soon.
That cold water is still doing work keeping things chilled. Wait until it’s genuinely about to overflow before you drain it. Draining early just invites warm air in for no reason.
Open the lid as little as possible.
Every time that lid comes up, cold air spills out and warm air rushes in to replace it. Decide what you need before you open it, grab it, and close the lid right away. This is the rule that’s easiest to ignore and does the most damage when it’s ignored.
Consider two coolers for a full day out.
One for drinks that gets opened constantly, one for food that barely gets touched. The food cooler, left alone, can hold its temperature for days. The drink cooler takes the hit instead.
A word on food safety
Cold drinks are forgiving if things go a little wrong. Raw meat and eggs are not.
Keep raw meat sealed and at the very bottom of the cooler, below everything else, so any leaks can’t get near food that isn’t going to be cooked before it’s eaten.
For any trip longer than 24 hours, a cheap cooler thermometer left inside is worth having. You want everything staying below 40°F, which is the line where food safety becomes a real concern. If anything’s been above that for more than two hours, it goes in the trash. Not worth the gamble.
And when you can, pre-cook what you’re bringing. Cooked food holds up better than raw, both for staying safe and for staying appetizing by the time you’re ready to eat it.
How Much Ice is Actually Enough?
People chronically underpack ice, then wonder why their cooler doesn’t perform. A good rule of thumb: ice should make up at least half the total volume of your cooler, and for longer or hotter trips, closer to two-thirds.
For a weekend trip in warm weather, that usually means one full bag of ice for every 10 to 15 quarts of cooler space, split between block and cubed. It sounds like a lot until you remember that ice is doing double duty. It’s keeping things cold, and it’s filling the empty space that would otherwise be working against you.
If you’re ever debating between “that seems like plenty” and “that seems like too much,” go with too much. Ice you don’t use just melts down to water you can dump out. Ice you didn’t bring can’t be un-forgotten once you’re 20 miles from the nearest store.
Common Mistakes That Undo All This Work
A few habits quietly wreck even a well-packed cooler, and they’re worth calling out on their own.
Packing loosely “for airflow.”
There’s no version of this that helps. Air doesn’t need room to circulate in a cooler. It needs to not exist in the first place. Every pocket of air is a pocket your ice has to cool down, over and over, all day.
- Setting the cooler in the truck bed or car trunk in direct sun. Metal and dark upholstery heat up fast, and your cooler sits right in it for the whole drive. A trunk with the windows cracked, or better yet, the back seat with some shade, keeps things noticeably cooler.
- Grabbing drinks one at a time with the lid open the whole time you’re deciding. This is the quiet killer. Decide before you open the lid. Grab. Close. Every extra second the lid sits open is cold air leaving and warm air taking its place.
- Reusing melted ice water as an excuse to skip fresh ice on a multi-day trip. If you’re out for more than a day or two, plan to restock ice partway through if you have access to it. Trying to stretch one bag of ice across four days in July isn’t frugal, it’s just going to end with warm cheese.
Question: What’s the longest you’ve ever kept a cooler cold on a trip? Any tricks I missed? Tell me in the comments.

What My Debt Taught Me About Real Freedom
I owed over $100,000 in consumer debt on a good income, and nobody made me do it. This July 4th, I want to tell you what actually got me free: not a windfall, but a simple gap between what I earned and what I spent. Here’s how you can declare your own financial independence, starting today, no fireworks required.

Happy 250th birthday, America.
Two hundred fifty years ago, a bunch of guys in wool coats sat in a hot room in Philadelphia and declared they were done. Done being controlled, done answering to a king who didn’t have their best interests at heart. I didn’t have a king. I had a Visa card, and it took me a lot longer to get free of it.
Over $100,000 in consumer debt. On a good income. Nobody put a gun to my head. I did it myself, one “I deserve this” purchase at a time, telling myself I’d deal with it later. Later took a very long time to show up.
So while everybody else is celebrating the 4th with flags and potato salad this weekend, I want to talk about a different kind of independence. The kind you can declare for yourself without waiting for a parade.
What are you really up against?
The Founders had King George. You’ve got something else holding the reins, and it’s worth naming.
Maybe it’s a credit card balance that never quite shrinks no matter what you throw at it. Maybe it’s that feeling on the 28th of the month where you’re already doing math about the 30th. Maybe it’s just knowing, deep down, that one flat tire would wreck your whole week.
Whatever it is, name it. You don’t need a revolution, and you definitely don’t need 56 signatures. You just need a decision.
The whole secret
The gap between what you earn and what you spend. That’s it. That’s the whole game, and it took me way too long to believe something so simple could actually work.
Every dollar that doesn’t leave your hand is a dollar working for you instead of against you. I didn’t climb out of six figures of debt because I got a raise or won the lottery. I climbed out because I made that gap a little wider, week after week, longer than I care to admit.
Put it in writing
Nothing important stays real for long if it only lives in your head. The Founders didn’t just grumble about King George at dinner. They wrote it down and signed their names to it.
Get a piece of paper and write down what you’re sick of and what you want instead. Maybe that’s minimum payments and overdraft fees on one side, an actual emergency fund on the other. Maybe it’s a car payment you’re tired of versus a car you just own.
Sign it, date it, and stick it somewhere you’ll actually see it. Somewhere you can’t pretend not to notice.
Build yourself some reinforcements
I keep a separate account for the expenses that aren’t quite emergencies but sure act like ones. The car repair. The dead water heater. The property tax bill that catches me off guard every single year even though it lands on the same date every single year. I call it my Freedom Account, and it’s less a savings account than it is ammunition.
When the unexpected shows up, and it always does, you meet it with a plan instead of a panic and a credit card. Pair that with a real emergency fund for the bigger stuff, job loss, a real medical bill, and you’ve built yourself a little army that doesn’t answer to a bank, a bill collector, or a 22% interest rate.
Skip the sparkler
Fireworks are gorgeous for about thirty seconds, then they’re smoke. Financial freedom doesn’t work that way. It’s a lot less dazzling and a lot more useful.
Mostly it just feels like exhaling: not flinching when the phone rings, actually falling asleep instead of doing math in your head at midnight. Nobody claps for a healthy savings account, and that’s fine by me. It outlasts every sparkler I’ve ever lit, easy.
Make it official
You don’t need a committee to sign off on this, and you definitely don’t need perfect timing. You need a piece of paper and the willingness to start today instead of “someday.”
A couple hundred years ago, a bunch of stubborn colonists decided they were done answering to somebody else, and they didn’t wait for ideal conditions to say so. Tonight, in your own kitchen, you get to make that same call about your own money.
Happy Independence Day. Go write yours down.
Question: What’s one financial “king” you’ve already booted, debt, a bad habit, a subscription you’ve been meaning to cancel? I’m nosy. Tell me in the comments.

10 Everyday Items You Never Think to Wash (But Should)
Let’s play a game. I’m going to name some things in your house, and you tell me the last time you washed them. The throw pillows you flop onto every night after dinner. The curtains that have hung through three pollen seasons without a single trip through the wash. The reusable grocery bag that hauled raw chicken home on Monday and your kid’s apples on Tuesday. Same bag, no rinse in between. Uncomfortable, right? Don’t worry.

Most cleaning advice sticks to the greatest hits: kitchen counters, bathrooms, the laundry hamper. Fine. Important. But there’s a whole second tier of household items nobody mentions because nobody’s thinking about them: throw pillows, curtains, reusable bags, the shower curtain liner you’ve had since flip phones were cool (kidding… sort of).
These things collect dust, dust mites, pet dander, food particles, and assorted everyday grime quietly for months or years. None of it is dangerous, exactly, but it adds up. Wash them once and your house will smell fresher, your allergies might bother you less, and a few items you’d given up on will look noticeably better.
Ready? Let’s get after it.
1. Throw Pillows

How often: Twice a year, minimum. More often if pets sleep on them.
How to wash: Most throw pillows can go right in the washing machine. Wash two at a time on the gentle cycle in cool water with a small amount of mild detergent. Add an extra rinse cycle to make sure all the soap is out. Dry on low with a few tennis balls or dryer balls to fluff up the filling.
Dry-clean-only tag? Vacuum thoroughly with the upholstery attachment, then sprinkle with baking soda, leave for an hour, and vacuum again. Spot-clean stains with a damp cloth and a drop of Dawn.
2. Curtains and Drapes

How often: Once or twice a year for sheers; every two to three years for heavier drapes.
How to wash: Take down the curtains and shake them outside (the amount of dust that falls is alarming). Most cotton and synthetic curtains can be machine-washed on gentle in cool water. Lined drapes, silk, or velvet should be dry-cleaned.
The trick: re-hang while still slightly damp. Curtains hung wet hang straight and dry without wrinkles, skipping the ironing step entirely.
3. Reusable Grocery Bags
How often: Once a week if you use them often. The same bag that holds raw meat one day and produce the next is a real food-safety concern most people never think about.
How to wash: Cotton and canvas bags go in the washing machine on cold with regular detergent. Insulated bags get wiped down with disinfecting wipes or a spray of vinegar-and-water, inside and out. Dry completely before storing.
A useful habit: keep one bag specifically for raw meat and label it. Wash it after every use.
4. Shower Curtain Liner
How often: Every two to three months.
How to wash: Toss the plastic or fabric liner in the washing machine with two old towels (which act as gentle scrubbers). Hot water, regular detergent, and a half cup of white vinegar in the rinse. Hang to dry — don’t put in the dryer.
This pulls off soap scum, mildew, and the pink bacteria that develops on the bottom edge. Saves you from replacing the liner every six months.
5. Pillowcases AND Pillow Inserts

How often: Pillowcases weekly, pillow inserts every 4 to 6 months.
How to wash: Most synthetic and down pillows are machine-washable. Wash two at a time for balance, on the gentle cycle in warm water. Dry on low with dryer balls until completely dry… usually 60 to 90 minutes. A damp pillow center grows mold.
A pillow that’s lost its shape after washing is past its life. Replace it. Most pillows are good for 1 to 2 years.
6. Lampshades

How often: Twice a year.
How to wash: For fabric or paper shades: use a lint roller or the soft-brush attachment on your vacuum to lift dust. For washable fabric shades (rare but check the label): submerge in cool soapy water, swish gently, rinse, and air-dry away from sunlight.
A dust-free lampshade actually noticeably brightens the room. You’ll see the difference the next time you turn the light on.
7. Toothbrush Holder
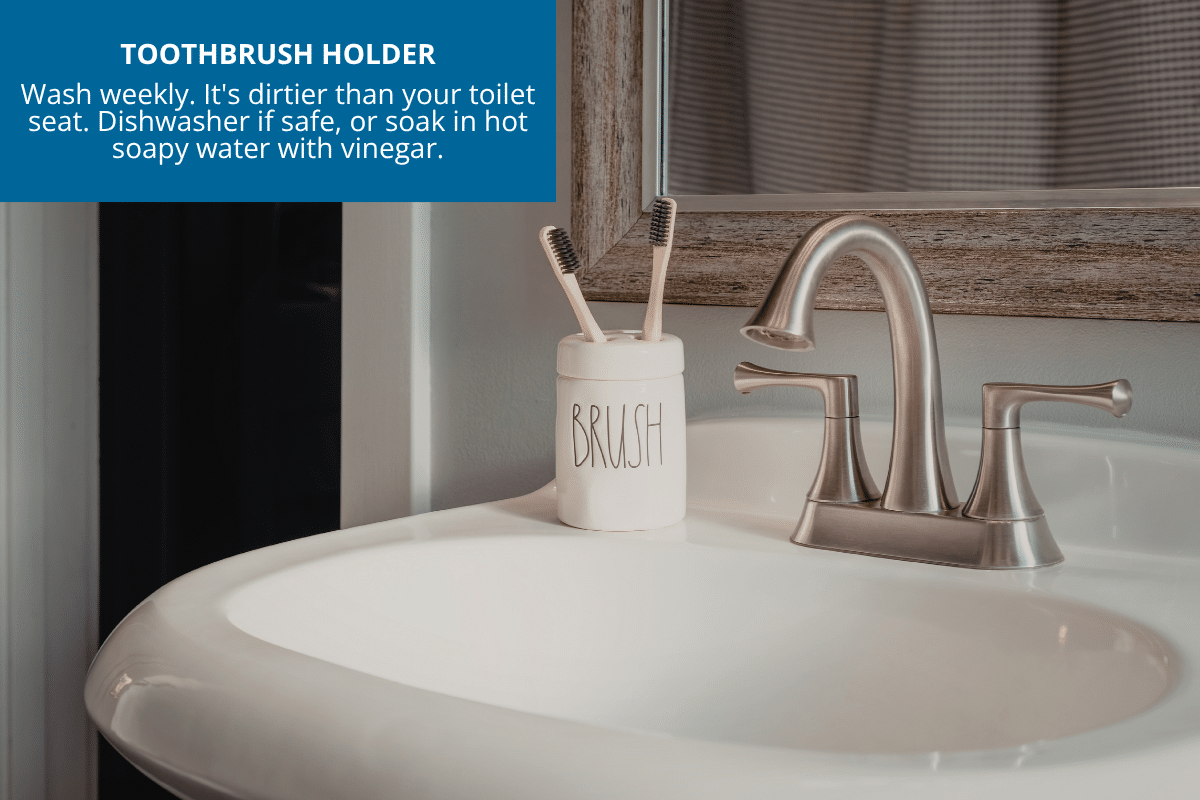
How often: Weekly.
How to wash: Studies have repeatedly found toothbrush holders to be among the dirtiest items in the bathroom, often containing more bacteria than the toilet seat. Run it through the dishwasher if it’s dishwasher safe. Otherwise, soak in hot soapy water with a splash of vinegar for 15 minutes, scrub the inside with a small brush, and air dry.
8. Cloth Napkins and Tablecloths
How often: Cloth napkins after each use; tablecloths after meals where they were used, or every 2 to 3 months if decorative.
How to wash: Most cotton and linen napkins and tablecloths can go in the regular wash. Pre-treat any spots immediately with the homemade stain paste. Iron while slightly damp for the crisp look.
A small tip: a basket near the kitchen for used cloth napkins keeps them out of sight until laundry day and saves you from constantly buying paper.
9. Backpacks, Lunchboxes, and Purses

How often: Backpacks once a season; lunchboxes weekly; purses occasionally.
How to wash: Most backpacks and lunchboxes can be machine-washed on gentle in cold water (zip up all zippers first, place in a mesh bag). Hang to dry… never the dryer.
For leather or specialty purses: wipe the exterior with a damp cloth, clean the interior with a small vacuum attachment, and treat any leather with a small amount of leather conditioner once a year.
10. Stuffed Animals
How often: Every few months for ones the kids use heavily. Once a year for the rest.
How to wash: Most stuffed animals can be machine-washed. Place inside a mesh laundry bag or pillowcase to protect them. Wash on gentle, cool water, mild detergent. Air dry or tumble on the very lowest setting with dryer balls.
For battery-operated or particularly delicate ones: spot-clean with a damp cloth and a drop of Dawn. Sprinkle with baking soda, leave for an hour, then vacuum off to freshen.
Bonus: A Few More You Might Be Missing
Since you’re already in a washing mood, might as well go all in:
- Bath mats and rugs: Every two weeks
- Oven mitts and pot holders: Monthly
- Mattress cover/protector: Every two months
- Couch cushion covers (if removable): Twice a year
- Welcome mat: Monthly shake-out, seasonal wash
- Yoga mat: Wipe weekly, deep wash monthly
- Pet beds: Every two to four weeks
- Car seat covers: Seasonally
- Laundry hamper itself: Wipe down monthly
The Simple System That Makes This Actually Doable
Here’s where I stop you before you try to tackle this entire list in one weekend. Don’t. You’ll burn out by Saturday afternoon and never touch it again.
Instead, add just one item to whatever load you’re already doing. Washing towels? Toss the shower curtain liner in with them. Washing sheets? The pillow inserts ride along. Washing throw blankets? That’s your throw pillow covers’ moment.
Within a month or two, everything on this list has been freshened up — and adding one “forgotten” item per cycle becomes second nature. The house feels cleaner. Your allergies behave. And you will never again side-eye your curtains wondering when they last saw soap and water.
Question: Which item on this list shocked you to realize you’d never washed? Or what would you add to the list? Share in the comments below.

34 Fourth of July Recipes and DIY Hacks for a Stress-Free Holiday
Here’s the truth about the Fourth of July nobody tells you: it’s not actually a one-day holiday. It’s a three-day production: the shopping, the marinating, the “wait, do we have enough lawn chairs” panic. And somewhere in there, you’re supposed to relax and enjoy fireworks too. I’ve been hosting backyard Fourth of July gatherings for more years than I care to count, and I’ve made every mistake in the book. Forgot the bug spray. Burned the ribs. Once served sweet tea so strong it could strip paint. (Long story.) So consider this your cheat sheet.

Here’s a number that’ll wake you up: Americans are expected to drop $9.4 billion on food this Fourth of July, plus another $4 billion on beer and wine. Add in 150 million hot dogs (someone’s eating my share) and you’ve got a holiday that costs a small fortune before the fireworks even start.
None of that has to be you. This roundup is everything I actually make, all tested, all affordable, and all good enough to skip the catering altogether. Grab what you need, skip what you don’t, and let’s get you to that backyard with time (and money) to spare.
Fire Up the Grill

Nothing says Fourth of July like the smell of something delicious drifting over the fence. Here’s how to make sure what’s drifting is “amazing,” not “smoke alarm.”
- Easy Baby Back Ribs: Fall-off-the-bone tender, no smoker required. Recipe →
- Coffee-Marinated Flank Steak: Sounds odd. Tastes incredible. Trust the process. Recipe →
- Honey Orange Teriyaki Chicken: Sweet, sticky, and gone before the second round of fireworks. Recipe →
- Crispy Baked Chicken Thighs: For when “fire up the grill” really means “I don’t feel like firing up the grill.” Recipe →
- DIY In-N-Out Style Cheeseburger: Skip the drive-thru line. Build the legend in your own backyard. Recipe →
- Homemade Shake ‘n Bake Coating Mix: Crunchy, golden, and a fraction of the cost of the box stuff. Recipe →
BBQ Side Dishes Everyone Loves

Let’s be honest… half of us show up to a cookout for the sides. The main dish gets the spotlight, but the sides get the second helpings.
- Best Baked Beans with Bacon: Because plain baked beans are a missed opportunity. Recipe →
- Mary’s Famous Broccoli Salad: The dish people ask me to bring. Every. Single. Time. Recipe →
- Sweet Restaurant-Style Coleslaw: Classic, cool, and the perfect partner for anything off the grill. Recipe →
- Mediterranean Pasta Salad: Bright, herby, and a nice change of pace from the usual mayo-based fare. Recipe →
- Chicken Pasta Salad: Hearty enough to be the main event if you need it to be. Recipe →
- My Grandmother’s Creamy Cucumber Salad: Cool as a cucumber, because it is one. Five minutes, tops. Recipe →
- Mary’s Famous Pico de Gallo: Fresh, simple, and somehow always the first bowl to go empty. Recipe →
Dips for Every Chip

A cookout without dip is just… sad. Don’t let that happen on your watch.
- Traditional 3-Ingredient Hummus: Yes, really. Three ingredients. I checked twice myself. Recipe →
- Creamy Garden Vegetable Dip: The dip your veggie tray has been waiting for. Recipe →
- Cheesecake Fruit Dip: Dessert disguised as an appetizer. I won’t tell if you won’t. Recipe →
- 3-Ingredient Guacamole: Fast, foolproof, and gone in minutes no matter how much you make. Recipe →
- Chili Cheese Dip: Warm, gooey, and dangerously easy to eat with a spoon. Recipe →
- Queso Blanco Dip: Smooth, cheesy, and worth every chip you’ll dunk into it. Recipe →
Sweet Summer Desserts

I don’t make the rules, but I do follow them, and the rule is: Fourth of July requires dessert. Possibly more than one.
- Texas Sheet Cake: Big, chocolatey, and feeds a crowd without a fuss. Recipe →
- Banana Pudding: A Southern staple that disappears faster than you can say “seconds.” Recipe →
- Classic Lemon Bars: Tart, sweet, and the perfect antidote to a hot afternoon. Recipe →
- Mini Cherry Cheesecakes: All the cheesecake joy, none of the slicing drama. Recipe →
- Melted Ice Cream Cake: The happiest of accidents, turned into an actual recipe. Recipe →
- Grilled Peaches with Balsamic and Blue Cheese: Fancy enough for guests, easy enough for a Tuesday. Recipe →
Drinks to Beat the Heat

July in most of the country means heat. Real heat. The kind that makes you reconsider all your life choices around 2 p.m. These will help.
- Strawberry Lemonade: Real strawberries. Fresh lemons. Sugar. Water. That’s it. Recipe →
- Whipped Frozen Lemonade: Somewhere between a drink and a dessert. We don’t judge here. Recipe →
- Southern Sweet Tea: Done right this time, no paint-stripper strength involved. Recipe →
- Easy Punch for 100: Hosting a crowd? This one scales without the math headache. Recipe →
- Cold Brew Coffee: For the early risers who need fuel before the festivities even start. Recipe →
Last-Minute DIYs

And because no holiday is complete without a little behind-the-scenes hustle, here are a few quick fixes to make your backyard (and your bouquet) picture perfect.
- Homemade Flower Food: Keep that centerpiece looking fresh through the whole weekend. Recipe →
- DIY Fruit Fly Trap: Because nothing ruins a dessert table faster than uninvited guests. Recipe →
- Outdoor Window Cleaner: Streak-free patio doors before company arrives. Ten minutes, tops. Recipe →
- DIY Mosquito Repellent Spray: Keep the mosquitoes away without chasing everyone inside. Recipe →
So there you have it… everything you need to pull off a Fourth of July that looks effortless, even though you and I both know better. Pick a few from each section, prep what you can the day before, and give yourself permission to actually enjoy the fireworks this year.
You’ve got this. Happy Fourth!
Question: What’s your must-make dish every Fourth of July… the one that would cause a full-on family revolt if it didn’t show up on the table? Let me know in the comments below.

7 Best Things to Buy in July for Huge Summer Savings
Want to know the real secret to scoring a deal? It’s not where you shop. It’s when. Get the timing right, and the same exact blender, grill, or sundress can cost you half as much. July happens to be one of those magic windows. Retailers are nervous, inventory is piling up, and that nervous energy works in your favor.

Here’s the thing about midsummer: everyone’s at the lake, not the mall. Stores know it. So they sweeten the pot with markdowns and clearance blowouts to lure you in before back-to-school season steals all the attention. Translation? July rewards patience. Let’s go shopping.
1. Outdoor Grills: Fire Up the Deals

Once the fireworks smoke clears, grill prices start falling. Fast. Retailers overbought for early summer, and now they need that floor space back before the fall lineup arrives.
If you’ve had your eye on a Weber, Blackstone, Charbroil, Traeger, or Pit Boss, now’s your moment. Walmart usually wins on price, Home Depot wins on selection, and Amazon is solid if you just want it shipped to your door without the wrestling match in the parking lot.
Quick math: the average grill runs around $316. Time it right in July and you could walk away with enough left over for burgers, buns, and yes, a new spatula. You deserve the spatula.
2. Kayaks: Paddle Into Clearance Prices

Kayaks are basically giant plastic roommates that don’t pay rent, and stores are over it. Come July, they need that floor space for skis and snowboards (I know, I know, it’s 95 degrees outside, but retail calendars don’t care about your sweat).
So they slash prices. Hard. Look to Bass Pro Shops, Cabela’s, REI, and online at Outdoorplay or Amazon for clearance on recreational and inflatable models especially.
Entry-level kayaks start around $250 to $400. Get fancy with a fishing or touring model and you’re looking at $900 to $3,500, with premium sea kayaks climbing toward $5,000. Buy now, paddle through fall. That’s the deal.
3. Home Appliances: July’s Coolest Deals
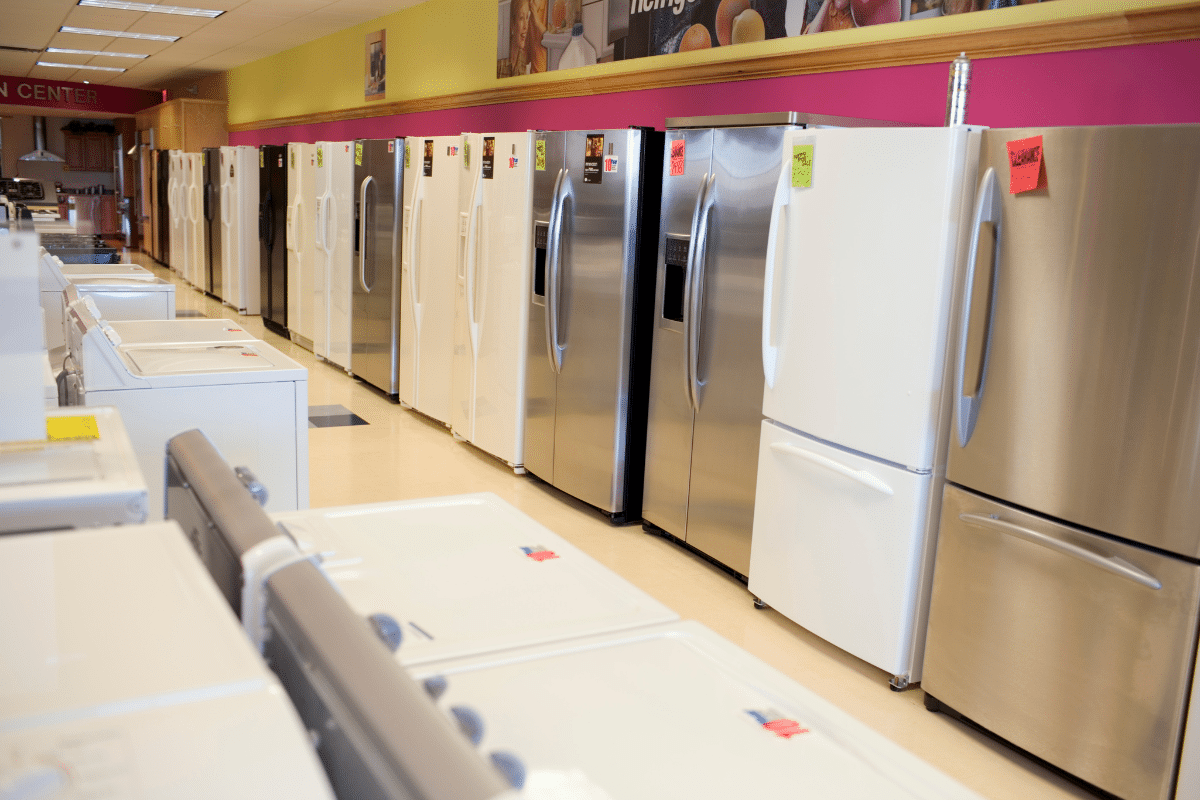
Now THIS is where July earns its keep. Dishwashers, ranges, washers, dryers, fridges, freezers… appliance retailers go all in around the Fourth of July, and the deals tend to stick around through month’s end.
You can typically find 30% to 45% off, and with the average appliance running around $2,175, that’s real money back in your pocket. GE alone has been offering up to 43% off select appliances for its Fourth of July sale. Check local dealers too; they don’t always make the headlines, but they often beat the big chains.
A few things worth knowing before you buy:
- Energy Star models cost a bit more upfront but pay you back in lower utility bills over time.
- Bundling appliances (say, a fridge and dishwasher together) often unlocks an extra discount.
- And open-box or slightly dinged units can be a steal if you don’t mind a tiny imperfection nobody else will ever notice.
Also, bigger isn’t always better. That 29-cubic-foot fridge looks impressive in the showroom, but you’re probably just paying to keep empty space cold.
4. Fresh Produce: Sweet Deals You Can Freeze

I couldn’t write a July savings post without a detour through the produce aisle. Peaches, plums, cherries, melons, grapes… this is their moment, and prices drop right along with the abundance.
Buy more than you’ll eat this week. Freeze or can the extra, and come November, you’ll be making pancakes with summer berries while everyone else is stuck with frostbitten grocery store fruit. Cherries especially are having a moment, with prices down around 20% thanks to a strong Pacific Northwest harvest. If strawberries have lost their shine, let cherries steal the spotlight in your desserts.
Also worth grabbing while they’re cheap and plentiful: avocados, cucumbers, corn, tomatoes, zucchini, summer squash, berries of every color, eggplant, and green beans. The average American eats less than a quarter of the fruit the USDA recommends. July’s prices make it a whole lot easier to do better.
5. Personal Electronics and Tech: Catch the Tail End

Amazon Prime Day actually happened in June this year (June 23-26, to be exact). Amazon moved it up to get ahead of tightening budgets and to beat the other big retailers to the punch. If you missed it, don’t panic.
Target, Walmart, and Best Buy are still running their own competing sales through July, with deals on headphones, laptops, and TVs (though if you really want a big-screen bargain, Black Friday is still your best bet… patience, friend).
And here’s a sneaky-smart move: late July is when back-to-school supplies start dropping to silly-low prices. Think 10-cent notebooks and 50-cent crayon packs. If your state has a sales-tax holiday on school supplies (many do, in July, August, or September depending on where you live), that’s your window to buy the big-ticket items, like a laptop, completely tax-free. Check your state’s dates and add them to your calendar now.
6. Frozen Treats: Celebrate National Ice Cream Month

Thanks to a 1984 proclamation from President Reagan, all of July is National Ice Cream Month, with National Ice Cream Day landing on the third Sunday. That’s July 19 this year. Mark it. Celebrate it. Tell no one you’re celebrating a regulatory proclamation about dairy.
Expect supermarket sales and BOGO deals on ice cream all month long. And don’t sleep on 7-Eleven’s Slurpee Day on 7/11. Walk in, walk out with a free small Slurpee. It’s basically a national holiday hiding in plain sight.
7. Patriotic Merch and Summer Apparel: Stock Up Now

Around the Fourth of July, every store from the department stores to the party supply shops goes red-white-and-blue crazy with sales and with America’s 250th this year, expect even more of it. Wait until close to the holiday for the best prices on decorations and patriotic clothing.
While you’re at it, raid the swimwear and summer apparel racks. By July, tank tops, shorts, and swimsuits have been sitting on shelves for weeks (sometimes months), and stores are ready to deal. Look for storewide sales of 50% off or more at places like J.Crew and Old Navy. Nordstrom’s Anniversary Sale kicks off July 18, too. Just don’t expect a discount on your Oakleys or Reef sandals. Those stay in high demand all summer, full price and all.
One thing to skip this month: lawn mowers and other big outdoor equipment. Demand is still high, so discounts are scarce. Give it until late August or September when the leftover stock finally gets marked down.
So there you have it… seven categories where July is quietly working in your favor, if you know where to look. Go forth, shop smart, and maybe treat yourself to that ice cream. You’ve earned it.
Question: What’s the best deal you’ve ever snagged during a July sale? Tell me about it in the comments. I love a good bargain story almost as much as I love a good bargain.
EverydayCheapskate™ is reader-supported. We participate in the Amazon Services LLC Associates Program and other affiliate advertising programs, designed to provide a means for us to earn from qualifying purchases, at no cost to you.

Summer Grilled Peaches with Balsamic and Blue Cheese
Can I tell you about the dessert that made my dinner guests go completely silent? Not in a bad way. In that oh-my-goodness-what-is-this way where everyone stops talking and just…eats. That kind of silent. It was grilled peaches. With balsamic glaze and blue cheese. I know. Stay with me.

I get it. Blue cheese on fruit sounds like something that happened by accident at a fancy restaurant and someone was too embarrassed to admit it. But here’s the thing… sweet, smoky, tangy, and creamy is one of the most magical flavor combinations in existence. Once you taste it, you’ll wonder what took you so long.
This recipe is also shockingly simple. We’re talking 18 minutes from start to finish. Four ingredients you can grab at any grocery store. And zero oven required, which, in the middle of summer, feels like a gift.
What You’ll Need
Balsamic Vinegar
The star of the show. Reach for a mid-range bottle… nothing too cheap (it’ll taste flat) and nothing too precious (you’re reducing it anyway). Standard grocery store balsamic is exactly right.
White Granulated Sugar
White granulated sugar is the base of the balsamic glaze. Plain white sugar works perfectly here. Don’t swap in brown sugar or honey, which can throw off the balance of the glaze.
Black Pepper
Freshly ground black pepper adds a subtle heat that makes the sweetness of the peaches and glaze pop. Pre-ground works in a pinch, but fresh-ground is noticeably better here.
Ripe Peaches
Ripe peaches make or break this recipe. You want peaches that give just slightly when you press them: fragrant, juicy, ready to go. A firm, underripe peach is going to fight you on the grill and lose. Farmer’s market peaches are ideal, but good grocery store peaches work beautifully too. No fresh peaches? Canned peach halves in juice (not syrup) can work. Just pat them very dry before grilling and watch them closely, since they’ll caramelize faster.
Blue Cheese
Blue cheese is what makes this dessert unforgettable. Gorgonzola is a milder, creamier option if blue cheese feels like a lot. Goat cheese is a great swap for something tangier and less pungent and it makes this dish friendly for guests who are blue cheese skeptics. If dairy is off the table entirely, a handful of toasted walnuts or pecans gives you that same savory contrast without the cheese.
Let’s Make This

1. Make the Balsamic Glaze
Combine the sugar, balsamic vinegar, and black pepper in a small saucepan over medium heat. Stir it together and let it simmer until it reduces by half. It’ll thicken slightly and smell absolutely incredible. Remove from heat and set aside.
Don’t rush this step. The reduction is what transforms ordinary balsamic into something glossy, concentrated, and complex. You’ll know it’s ready when it coats the back of a spoon and the bubbles slow down. It will continue to thicken a little as it cools, so don’t panic if it seems thin while it’s still hot.
2. Get Your Grill Ready
Preheat to medium-high and lightly oil the grates. This is worth doing carefully. A well-oiled grate means clean grill marks and no peach stuck to the grill. A folded paper towel dipped in a little vegetable oil, held with tongs, works perfectly.
3. Grill the Peaches
Place peach halves cut-side down and leave them alone for about 5 minutes. Resist the urge to move them around. You’re looking for caramelized flesh and those gorgeous grill marks that mean the natural sugars have done their thing.
Flip them over, brush the tops generously with balsamic glaze, and cook for another 2 to 3 minutes. The glaze will sink into the warm peach and start to caramelize at the edges. That’s exactly what you want.
4. Plate and Serve
Transfer each half to a serving dish, drizzle with the remaining glaze, and scatter crumbled blue cheese over the top.
Then stand back and accept the compliments.
Serving and Scaling
This recipe makes 4 servings, one peach half per person, which is the perfect amount for a light summer dessert. But it scales beautifully. Doubling it gets you 8 servings. Tripling it and feeding a crowd? Go for it. The glaze comes together fast and the grill does all the real work.
Serve these warm, right off the grill. They’re at their best in that first few minutes… caramelized edges, melty cheese, glossy glaze. You could add a small scoop of vanilla ice cream alongside and I would not argue with you.

The Bottom Line
If your summer dessert rotation has been stuck on the same three things, this is your sign to shake it up. Grilled peaches with balsamic and blue cheese look impressive, taste extraordinary, and take less time than driving to the ice cream shop.
Fire up the grill. Grab some peaches. I promise you’re going to love this one.

Grilled Peaches with Balsamic and Blue Cheese
Ingredients
- 3 tablespoons white granulated sugar
- ¾ cup balsamic vinegar
- 2 teaspoons freshly ground black pepper
- 2 large ripe peaches halved and pitted (peel on)
- 2½ ounces blue cheese crumbled
Instructions
- In a small saucepan over medium heat, stir together the sugar, balsamic vinegar, and black pepper.
- Simmer, stirring occasionally, until the liquid has reduced by half and is slightly thickened, about 6–8 minutes. It will continue to thicken as it cools. Remove from heat and set aside.
- Preheat grill to medium-high heat. Lightly oil the grill grates.
- Place peach halves cut-side down on the prepared grill. Cook for about 5 minutes, until the flesh is caramelized and grill marks have formed. Do not move them around. Let them sit.
- Flip peaches over. Brush the cut sides generously with balsamic glaze. Cook for another 2 to 3 minutes.
- Transfer peach halves to individual serving dishes. Drizzle with remaining glaze and sprinkle with crumbled blue cheese. Serve immediately.
Notes
Nutrition
Question: Have you ever grilled fruit for dessert? Tell me what you made or if this is your first time, let me know how it turns out!

DIY After-Sun Spray That Cools and Soothes Skin
The first real sunburn of the season is always a surprise. You felt fine an hour ago. That’s not bad luck… UV damage shows up hours after exposure, not during it. Now your shoulders are screaming, your face feels like a stovetop, and the only thing in the cabinet is an ancient bottle of green gel with an expiration date you’d rather not inspect too closely. Sunburn sneaks up on everyone. Every. Single. Summer. Here’s the good news: you can make a cooling, soothing after-sun spray in about five minutes with three ingredients you probably already have. Gentle enough for most skin types. Cheaper than anything at the drugstore.

A bad sunburn isn’t just uncomfortable. It’s a minor medical situation. Your skin is inflamed, dehydrated, and damaged in ways you won’t fully see for a day or two. And if you were in the water? Wet skin burns faster than dry, so the damage was stacking up even while you were having fun.
So any good after-sun treatment needs to do three things: cool the surface, calm the inflammation, and lock in enough moisture so your skin heals clean instead of peeling in sad little sheets.
Three ingredients. All three jobs. Done.
What Goes In It and Why
A short list, real purpose for each one.
Pure Aloe Vera Gel
The workhorse. Aloe is genuinely effective at calming inflamed skin and helping it retain moisture during healing. Look for a bottle that’s at least 99 percent pure aloe. Many drugstore “aloe” products are mostly water and alcohol with a tiny bit of aloe added. Lily of the Desert and Fruit of the Earth both make affordable, mostly-pure versions.
Alcohol-Free Witch Hazel
That refreshing cooling sensation when you first spray it? That’s the witch hazel doing its thing. It can help temporarily ease that tight, irritated feeling. Just make sure it’s alcohol-free. Regular witch hazel with alcohol will sting sunburned skin and dry it out further, which is exactly the opposite of what you’re going for.
Vegetable Glycerin
Glycerin helps the spray stick to the skin and locks in moisture longer. Skip if you don’t have it, but if you do, your spray will feel a little more like a real lotion.
Optional: Lavender Essential Oil
Lavender adds a light, calming scent, and some preliminary research suggests it may support skin comfort. While the evidence isn’t strong enough to call it a treatment for sunburn, many people enjoy its soothing aroma.


How to Make the Spray
You’ll need a clean 8-oz amber glass spray bottle. The amber glass matters because it blocks the light that breaks down both the aloe and the essential oil over time. Into the bottle, combine:
- ¾ cup 99% aloe vera gel
- ¼ cup alcohol-free witch hazel
- 2 teaspoons vegetable glycerin
- Optional: 0–5 drops lavender essential oil
Cap tightly and shake until well combined. The aloe will give the spray a slightly thicker, milky look. That’s normal. Shake before each use because the oil and water will separate naturally.
Now here’s my favorite part: store it in the fridge. Cold-from-the-fridge after-sun spray on a hot, angry back is one of the genuinely great feelings of summer. Don’t skip this.

(Disclosure: This post includes an Amazon Creator Connections product. I may earn a small commission if you purchase through the link, at no additional cost to you.)
How to Use It

1. Cool Down First
If the burn is fresh and hot, take a cool (not ice cold) shower first. Pat your skin dry. Don’t rub. You want to bring the surface temperature down before you apply anything.
2. Mist Generously
Hold the bottle about six inches from the skin and spray a light, even mist over any sunburned areas. Don’t rub it in. Let it air-dry naturally. The combination of evaporation and the aloe’s cooling effect does most of the work.
3. Reapply Every Few Hours
Sunburns benefit from repeated treatment. Spray every two to three hours for the first day, less often after that. Keep the bottle in the fridge between uses for that cool-on-contact feeling.
4. Follow With a Moisturizer
Once the spray has dried, apply a fragrance-free lotion or cream. This one extra step does more to prevent peeling than anything else.
5. Drink Water While You Treat
Sunburns dehydrate you from the inside out. The spray helps the surface; water helps the rest. Two glasses while you’re treating the burn makes a real difference.
Safety Notes Worth Knowing
- Patch test first. Spray a small area on the inside of the forearm and wait 15 minutes before using broadly. Sunburned skin is reactive; if you have any sensitivity to aloe or lavender, you want to know now.
- Skip the essential oil for young children. For kids under 3, use the spray without the lavender. Just aloe, witch hazel, and water.
- Don’t use on broken or blistered skin. Blisters mean the burn is serious. That needs a doctor, not a DIY spray. Same goes for any burn covering a large portion of the body or coming with fever, chills, dizziness, or vomiting. That’s sun poisoning territory. Please get medical help.
- Make small batches. Without preservatives, refrigerated spray is best used within two to three weeks. Make less, more often.
What Else It’s Good For
Once you’ve made a bottle, you’ll find yourself reaching for it all summer long. This same spray works beautifully on:
- Mild heat rash and prickly heat
- Light bug bites and general skin irritation
- Razor burn, especially after shaving sun-exposed skin
- Post-pool chlorine dryness
- Wind-chapped skin after a long day outside
One small bottle handles most of the everyday summer skin annoyances that nobody talks about but everybody deals with.

DIY After-Sun Relief Spray
Equipment
- 8-oz amber glass spray bottle
Ingredients
- ¾ cup 99% pure aloe vera gel
- ¼ cup alcohol-free witch hazel
- 2 teaspoons vegetable glycerin
- 3-5 drops lavender essential oil optional
Instructions
- Pour the aloe vera gel into a clean 8-oz amber glass spray bottle.
- Add the witch hazel.
- Add vegetable glycerin and lavender essential oil, if using.
- Cap the bottle tightly and shake until well combined.
- Store in the refrigerator. Shake before each use.
Notes
Question: What’s your go-to fix when a sunburn sneaks up on you? Cold towels? Aloe straight from the plant? Something your grandmother swore by? Drop it in the comments. I’d love to hear what works for you.
EverydayCheapskate™ is reader-supported. We participate in the Amazon Services LLC Associates Program and other affiliate advertising programs, designed to provide a means for us to earn from qualifying purchases, at no cost to you.
Homemade Laundry Stain Paste That Works for Pennies
The window of time between when a stain happens and when you actually do laundry is where most lost clothes go to die. The shirt with the spaghetti sauce dot. The kid’s pants with the grass stain that turned brown by Tuesday. The work blouse with the coffee spot you didn’t notice until it was already dried in. The good news? You don’t need an expensive commercial pre-treater to rescue most everyday stains. This homemade stain paste takes just a few minutes to mix, costs pennies per batch, and works remarkably well on everything from greasy food splatters to muddy knees and fresh grass stains.
Stains have a settling-in period, and it’s not in your favor.
The first few minutes after a spill, the stain is easiest to lift. A few hours later, it starts bonding with the fabric fibers. After a wash-and-dry cycle? Good luck. You may be looking at a permanent souvenir.
The trick is having an effective stain treatment ready when you need it… not three days later when you’re finally tackling the laundry basket.
Why This Works So Well
Many commercial stain pens are designed for one specific job: cleaning up small, fresh stains while you’re away from home. They do that well.
This homemade paste is a different kind of cleaner. It’s designed as a laundry pre-treatment that can be worked into the fabric before washing. Because it’s thicker, it stays where you put it, making it especially useful for greasy food stains, larger stained areas, and many common household stains that benefit from a little extra time before laundering.
While enzyme-based commercial stain removers may still have the edge on certain protein-heavy stains like dairy, egg, or baby formula, this simple homemade version handles an impressive variety of everyday messes using ingredients you probably already have on hand.
What You’ll Need
Three things. Maybe four.
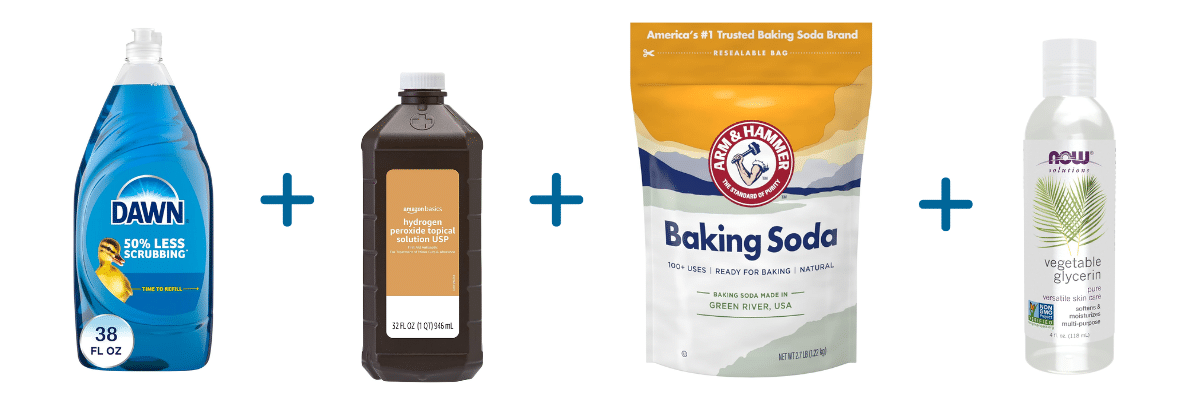
Original Blue Dawn Dish Soap
The grease-cutting workhorse. Original blue Dawn does an excellent job breaking down oily stains like cooking grease, makeup, sunscreen, and motor oil. Stick with the original blue formula rather than scented or specialty versions.
Hydrogen Peroxide (3%)
The brightener. Hydrogen peroxide helps lift many organic stains such as blood, grass, fruit juice, wine, and sweat. It’s inexpensive, easy to find, and a little goes a long way.
Baking Soda
Baking soda thickens the paste so it clings to fabric instead of running off. It also provides a little extra cleaning power and mild scrubbing action when gently worked into the stain.
Optional: A Little Vegetable Glycerin
One teaspoon of vegetable glycerin helps keep the paste from drying out quite as quickly. If you don’t have it, simply leave it out.


How to Make the Stain Paste
In a small clean glass jar, combine:
- 2 tablespoons Original Blue Dawn dish soap
- 2 tablespoons 3% hydrogen peroxide
- 3 tablespoons baking soda
- 1 teaspoon vegetable glycerin (optional)
Stir gently until you have a thick, smooth paste similar to toothpaste. If it’s too thick, add a few drops of peroxide. If it’s too thin, stir in a little more baking soda.
Because hydrogen peroxide gradually loses strength once it’s mixed with other ingredients, this paste works best when it’s fresh. I like making a small batch that lasts a week or two, then mixing another when needed. It only takes a couple of minutes.
Store the jar tightly covered in a cool, dark place between uses.
How to Use It
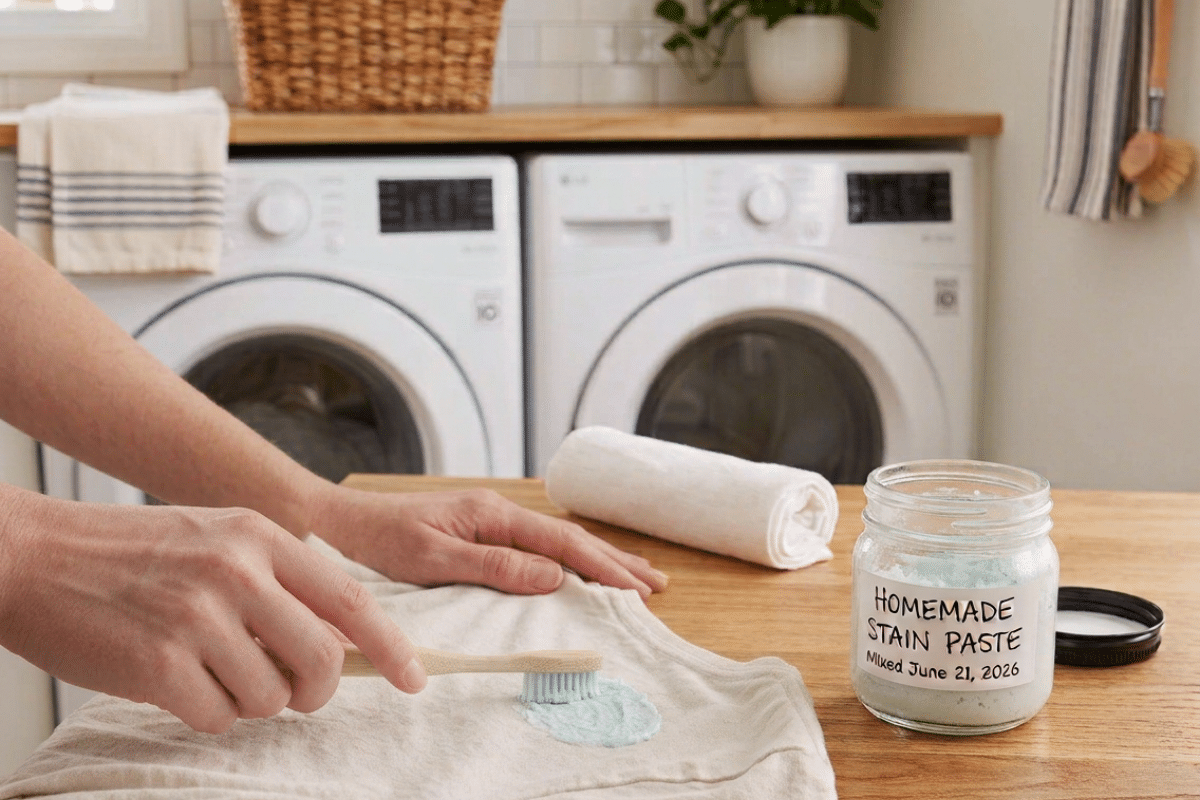
1. Blot First
Remove as much of the spill as possible with a clean cloth. Blot. Don’t rub, which only pushes the stain deeper into the fibers.
2. Apply the Paste
Using your finger or an old soft toothbrush, work a small amount of paste directly into the stain. You don’t need a thick layer… just enough to coat the stained area.
3. Let It Work
Fresh stains usually need only 10 to 15 minutes.
Older or tougher stains can sit for 30 to 60 minutes before washing. If the stain is especially stubborn, it’s generally better to repeat the treatment than leave peroxide on colored fabrics overnight.
4. Gently Agitate
Use the toothbrush to work the paste into the fibers with light circular motions.
5. Wash Normally
Wash according to the garment’s care label.
Before tossing it into the dryer, make sure the stain is completely gone. Dryer heat can permanently set whatever remains. If needed, repeat the treatment and wash again before drying.
What This Paste Works On
- Grass stains: Excellent, especially when treated promptly.
- Blood: Very good. Rinse first with cold water whenever possible, then apply the paste.
- Coffee, tea, and wine: Usually very good, especially if you catch the stain early.
- Tomato sauce, ketchup, and mustard: Very good. The sooner you treat them, the better the results.
- Grease, sunscreen, and makeup: Excellent. This is where Dawn really shines.
- Sweat and underarm stains: Very good on fresh stains. Older yellowing may require more than one treatment.
- Ballpoint ink: Fair. Start by blotting with rubbing alcohol, then follow with the paste.
- Old set-in stains: Results vary. Some disappear completely. Others improve with repeated treatments.
What to Avoid
Skip this on silk, wool, leather, suede, and anything labeled dry-clean only.
Because hydrogen peroxide can lighten some dyes, always test an inconspicuous area first before treating brightly colored or dark fabrics.
And never mix hydrogen peroxide with chlorine bleach.
A Word About On-the-Go Stains
For everyday laundry stains at home, this paste is hard to beat. But if you’re out to dinner or sitting in a meeting when disaster strikes, a commercial stain pen wins that round. It’s compact, clean, and ready immediately. Carry one in your bag, do first aid on the spot, then give the stain a thorough treatment with this paste once you’re back home.
Best of both worlds.
DIY Heavy-Duty Laundry Stain Paste
Ingredients
- 2 tablespoons Original Blue Dawn dish soap
- 2 tablespoons 3% hydrogen peroxide
- 3 tablespoons baking soda
- 1 teaspoon vegetable glycerin optional
Instructions
- Combine Dawn, hydrogen peroxide, baking soda, and vegetable glycerin (if using) in a small glass jar.
- Stir gently until fully combined and the mixture forms a smooth, thick paste similar in consistency to toothpaste.
- If paste is too thick, add a few drops of hydrogen peroxide. If too thin, stir in a little more baking soda.
- To use: blot the stain first to remove excess. Apply a small amount of paste directly to the stained area using a finger or soft toothbrush.
- Work the paste gently into the fabric using light circular motions.
- Allow to dwell 10–15 minutes for fresh stains, or 30–60 minutes for older or tougher stains.
- Wash according to the garment's care label.
- Check the stain before placing the item in the dryer. If the stain remains, repeat treatment and wash again before drying.
Notes
Question: What’s the stain you finally gave up on? Grass? Red wine? Grease? Tell us where it landed and how long it sat. Chances are someone here has fought that same battle and won.
EverydayCheapskate™ is reader-supported. We participate in the Amazon Services LLC Associates Program and other affiliate advertising programs, designed to provide a means for us to earn from qualifying purchases, at no additional cost to you.

Christmas in June? Try This Amazon Prime Day Gift Guide
December will be here before you know it. I know, I know… you don’t want to hear that in June. But here’s the thing: the people who sail through the holidays without stress, debt, or a last-minute sprint through a crowded mall? They shopped in the summer. On purpose.

Prime Day 2026 ends tonight at midnight Pacific, which means right now is your last chance to grab the deals we’ve been recommending all year long.
I went back through every gift guide we’ve published over the last three years, coffee lovers, grandparents, teens, RV owners, foodies, and more, and cross-referenced every item against what’s actually confirmed on sale this Prime Day. What you’ll find below are the picks that made the cut: confirmed deals from brands we’ve already vetted and recommended to readers.
These aren’t random finds. Every item below appeared in an EC gift guide. Every deal is based on confirmed Prime Day brand discounts (Stanley, Keurig, Beats, Instant Pot, Jackery, Adidas, and more). Shop tonight.
One word of warning from someone who’s learned this the hard way: keep a list. Write down what you bought and who it’s for. Then put everything in one spot (think: a bin, a shelf, a corner of the closet) and label it. Because the only thing worse than forgetting to buy a gift is buying the same gift twice. Or finding it in March.
Don’t Miss a Better Deal!
-
- Some discounts are Prime-exclusive and run even deeper than what shows here. Always click through to see the real-time price. You might be pleasantly surprised.
Shop by Category:
- For Him
- For Her
- For Teens
- For Kids
- For Grandparents & Seniors
- For Foodies & Home Chefs
- For Travelers & Outdoor Enthusiasts
For Him
Listen, shopping for the men in your life doesn’t have to be hard. The trick is finding things they’d actually buy for themselves but never do. Start there.


Keeps beer cold and carbonated for 24 hours or coffee hot for 18 — 64 ounces of whatever he's in the mood for, with a lifetime warranty to back it up. Stanley quality, zero plastic, one very happy guy.

One shave to rule them all. This waterproof razor adapts to his beard and skin for a close, comfortable shave, perfect for the guy who says 'I’m low maintenance' (but isn't).

Let him geek out on mood lighting. Voice-controlled, color-changing, and energy-saving, these bulbs make any man cave, garage, or office smarter.

Big sound, 24-hour battery, fully waterproof, and under $40. This is the speaker that goes everywhere. The beach, the campsite, the backyard and never lets him down.

4K video, 20MP photos, waterproof to 131 feet, and a bundle full of mounting accessories for every adventure he's already planning. Basically a GoPro for a fraction of the price.

Hot breakfast sandwich in 5 minutes, start to finish. No drive-through, no freezer aisle, no regrets. Makes two at once, cleans up easy, and will absolutely become his favorite appliance by week two.

Ten crystal-clear 2-inch cubes that melt slower and look like they came from a craft cocktail bar. For the guy who takes his whiskey seriously or just likes to look like he does.

A classic zip-up hoodie that actually holds its shape, in a soft cotton-poly blend that gets better with every wash. The kind of reliable, no-fuss layering piece he'll reach for every single day and never think to buy himself.

Nineteen precision length settings, hypoallergenic blades, fully washable, and 50 minutes of cordless runtime. For the guy who wants a clean, consistent beard without the barbershop bill.
Snaps magnetically onto any MagSafe iPhone, doubles as a kickstand for hands-free viewing, and slips into a pocket without a second thought. For the guy who's always at 12% battery at the worst possible moment.

For the guy who'd never buy this for himself but absolutely should. Caffeine and peptides tackle dark circles, puffiness, and crow's feet and it absorbs instantly with no greasy residue. Nobody has to know.

A sharp, well-built folding knife with a glass breaker, pocket clip, and ambidextrous thumb studs, ready for camping, hiking, everyday carry, or just being the guy who always has a knife when someone needs one.
For Her
Whether she’s your mom, your sister, your best friend, or yourself (yes, yourself counts), these are gifts worth giving.

For the one who's walking laps before coffee or just trying to move more, this Fitbit helps build better habits with real-time heart rate, GPS, and Google smarts.

One-button magic for custom mugs that actually last. If she's crafty, or wants to be, this set takes the guesswork out of DIY gifts, teacher mugs, and Pinterest goals.

A gorgeous enameled cast iron Dutch oven that braises, roasts, bakes sourdough, and goes straight from stovetop to table. No seasoning required, easy to clean, and pretty enough to leave out. The pot she'll cook in for the next twenty years.

A 10-inch HD digital frame that displays photos sent straight from family phones. Free unlimited storage, no subscription, one-minute setup. The gift that puts every grandchild's face on the wall and updates itself automatically.

Classic, elegant, and ready to wow. This set makes gifting easy with a timepiece and two sparkly bracelets that dress up any outfit without breaking the bank.

A skin-boosting spa treatment she can do from the couch. Red light, blue light, and even yellow, this portable mask covers all the beauty bases with zero appointments.

A chic insulated lunch bag with a hinged top, detachable shoulder strap, and room for up to 10 cans. Keeps everything cold from morning to evening and looks good doing it. Stanley quality, lifetime warranty, and she'll never pack a sad desk lunch again.

A little pot of overnight magic. This Korean beauty fave softens dry lips while she sleeps, because cracked lips and peppermint bark don’t pair well.

French press, pour-over, and espresso-style all in one compact, shatterproof device that brews a rich, smooth cup in under two minutes and cleans up just as fast. For the coffee lover who refuses to settle for bad hotel coffee ever again.

Tracks sleep, stress, activity, heart health, and women's health metrics from a ring so sleek most people won't even know it's a fitness tracker. Up to 8 days of battery life, no screen, no buzzing. Just accurate data and the occasional compliment.

A 3-quart electric fondue pot with eight temperature settings, eight forks, and a nonstick interior that cleans up easily because melted cheese and chocolate with people you love is always a good idea.
For Teens
The hardest category to shop for and the easiest to get wrong. These picks are actually cool or at least they were when I checked.


Up to 120 hours of wireless battery life, premium memory foam comfort, and a detachable mic with a mute indicator for the teen who games for hours and needs a headset that can keep up without dying mid-match.

For the teen who’s never not swinging a bat, this durable trainer builds power, focus, and consistency, without denting garage doors or driving the neighbors crazy.

Lights up, charges fast, and flies like a dream. This disc is what happens when you cross backyard fun with next-level tech. Great for late-night tosses or camping trips.

Let them set the mood with voice-controlled color changes, timers, and routines. Perfect for late-night study sessions, gaming setups, or just vibing.

Yes, it's iconic and still going strong. This all-in-one organizer is perfect for makeup, art supplies, or stashing secret snacks. Retro style, modern function.

Their own mini fridge for the bedroom or dorm. Keeps drinks cold, runs quietly, and fits basically anywhere. Independence never looked so practical.
Removes everything, waterproof mascara included, with just water. No wipes, no harsh removers, no excuses for sleeping in makeup. Seven cloths, one for every day of the week.
Quilted vegan leather, RFID-blocking card slots, and a wide adjustable strap. Stylish enough to want, practical enough to actually use every day. The kind of bag she'll reach for without thinking about it.

Seventeen feet of warm fairy lights with 50 clips for hanging photos, Polaroids, or whatever makes her room feel like hers. Instant atmosphere, zero decorating skills required.
For Kids
Practical for the parent. Exciting for the kid. That’s the filter I used.


Blast off into stargazing with this kid-friendly telescope. With great magnification and a phone adapter, little astronomers can snap pics of the moon, then proudly show Grandma.
When you need to burn energy fast, this indoor trampoline is a sanity saver. With a handlebar for safety, it's the kind of bounce party you want in your living room.
Four crash intersections, a motorized booster, and a built-in storage, this track set delivers nonstop racing chaos right out of the box. Buckle up.

Seven books, thousands of hiding spots, and one very elusive guy in a striped shirt. The ultimate keep-them-busy gift for road trips, rainy days, and any moment you need five minutes of peace.

Real walkie-talkies with a 3-mile range, built-in flashlight, and 22 channels because every kid deserves to feel like they're on a mission. Hours of outdoor fun that doesn't require a screen or a Wi-Fi password.

Draw a cherry-scented rainbow or a cinnamon spaceship. These markers bring bold colors and big creativity. Chisel tips let kids color inside and outside the lines.

What’s better than a cat lamp? A cat lamp you paint yourself! It’s art, decor, and a night light all in one purr-fectly fun project.
Smooth rocks, glow-in-the-dark paints, and zero mess anxiety. This kit turns an afternoon into a full art studio experience. The finished rocks look impressive enough that adults will want to keep them.

Sloths playing ping pong? Dogs at a fiesta? With over 1,500 things to find, this brain-busting puzzle book is pure joy for sharp-eyed kids and parents who dare to compete.

The classic light-up art toy that's been delighting kids since the '60s still just as magical. Peg by peg, they create glowing masterpieces and feel like absolute geniuses doing it.
For Grandparents & Seniors
Comfort, practicality, and things that make daily life genuinely better. That’s the brief.
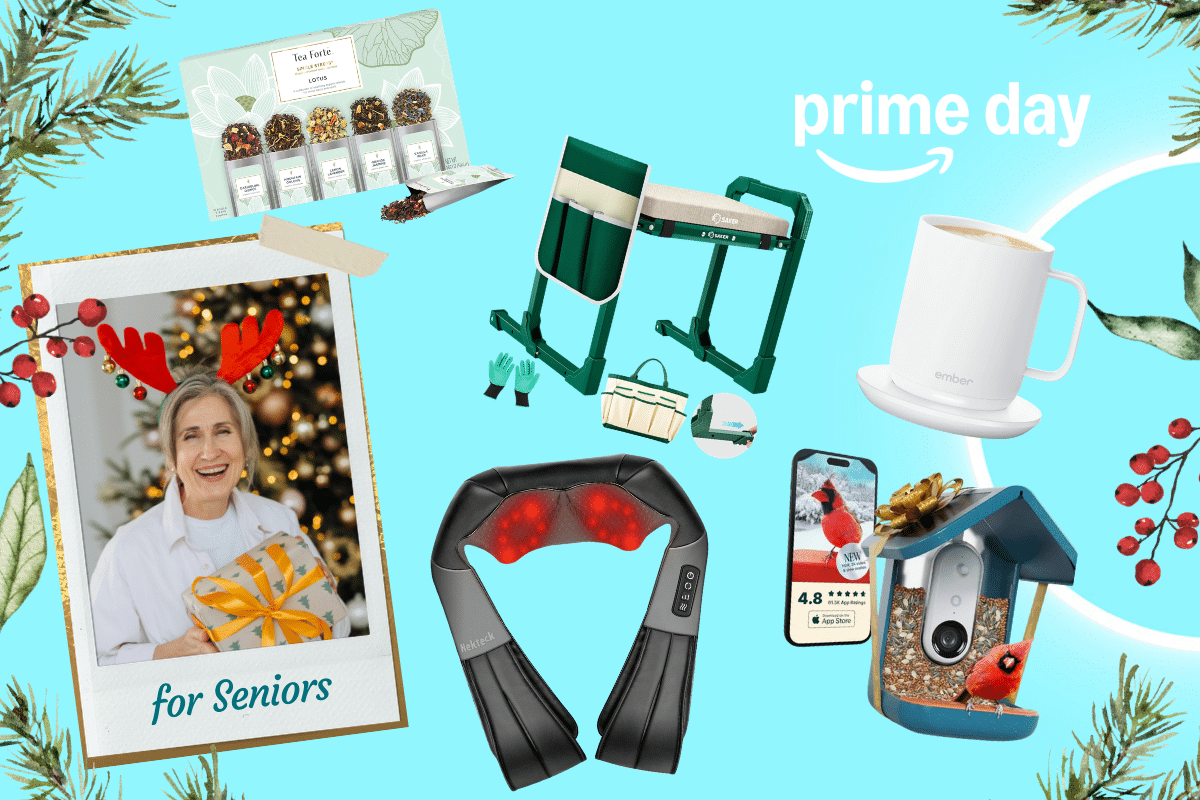

Vacuums and mops in one pass, empties itself for up to 75 days, and maps every room with precision so nothing gets missed. The gift that cleans the house while they do absolutely nothing and they will love every second of it.

A solar-powered bird feeder with a built-in AI camera that identifies visiting species, captures 2K video, and sends alerts when birds arrive — birdwatching from the comfort of the couch. The gift that turns a window into a nature documentary.

Help them join the pickleball craze with this easy-to-use set made for all skill levels. Two paddles, two balls, a carry bag, and hours of fun and friendly competition.
No products found.

Impossibly soft, reversible, and warm without being heavy. The kind of blanket that gets claimed immediately and never leaves the couch. A gift they'll reach for every single day.
Fifteen pre-portioned pouches of premium loose leaf tea in five elegant varieties. No measuring, no guessing, just a perfect cup every time. A small luxury that feels like a big treat.

Sixteen deep-kneading nodes, heat up to 113°F, and three intensity levels like having a massage therapist on call without the appointment or the tip. A gift they'll use every single day and wonder how they lived without.

Flips from kneeler to seat in seconds, supports up to 400 pounds, and comes with a built-in tool organizer so everything stays within reach. For the gardener who refuses to slow down but whose knees have other ideas.

Six solar stakes with 48 warm LED lights that sway in the breeze like real fireflies. No wiring, no electricity bill, just pure garden magic after dark. Stick them in the ground and let the sun do the rest.

A wall-mounted teak shower seat that folds flat when not in use, supports up to 400 pounds, and looks more spa than medical supply. The kind of thoughtful, practical gift that quietly makes every single day safer and easier.

Sets the exact temperature, holds it for 90 minutes, and keeps drinks warm all day on the charging coaster. For the coffee or tea lover who's reheated the same cup three times before finishing it, this ends that cycle for good.
For Foodies & Home Chefs
For the people who think about their next meal while eating the current one. You know who they are.


Handcrafted in Nova Scotia from Canadian larch, this end-grain board is gentle on knife edges, built to last generations, and beautiful enough to leave on the counter. The kind of kitchen tool that gets passed down, not replaced.

Crank it up to 800°F and bake artisan-style pizzas right on your countertop. With 5 presets, a pizza stone, and a peel included, this sleek oven delivers Neapolitan vibes without the wood fire.

Nonstick, scratch-resistant, and PFAS-free, this diamond-infused ceramic cookware heats evenly and looks sharp doing it. Safe for induction and oven use.

Custom brew sizes, temperature control, iced coffee setting, and a 75oz water tank. Whether it's a quick cup or a stronger brew, this Keurig has it handled.

Say goodbye to freezer burn. This sealer extends freshness, cuts food waste, and even preps for sous vide. Includes bags, rolls, and everything to get started.

Make fizzy drinks at home with zero electricity needed. Comes with CO2 cylinders, bottles, and bubly drops for flavored fun. Easy cleanup, endless bubbles.

Pressure cook, slow cook, sauté, steam, make yogurt, and more, all in one sleek pot. With 800+ recipes in the app, it’s a home chef’s dream time-saver.

Real-time cooking data, guided recipes, WiFi monitoring, and a 1000°F safe probe, this is steak-night tech at its finest. Grill smarter, not harder.

Transforms dull kitchen knives into razor-sharp 15-degree edges in about a minute and a quick 10-second touch-up keeps them that way. The gift that makes every knife they already own perform like a professional one.
For Travelers & Outdoor Enthusiasts
For the people who are always going somewhere or wishing they were.


Lightweight yet tough, this sleek luggage duo glides effortlessly and expands to fit souvenirs (or over-packers). Built-in TSA locks keep everything secure.

Set up camp in just 60 seconds. With pre-attached poles, water-resistant fabric, and space for air beds, this tent makes roughing it feel a little less rough.

Keeps ice for five days, holds 167 cans, rolls over any terrain, and doubles as a seat that supports 250 pounds. The cooler that handles every adventure from beach day to week-long camping trip without breaking a sweat.

A fully cushioned camp chair with a built-in 4-can cooler in the armrest, side pockets, and a cup holder because the best seat at any campfire, tailgate, or beach day should also be the most comfortable one.
A chiropractor-approved daypack with a padded laptop sleeve, stretch-mesh pockets, two water bottle slots, and reflective details for visibility built for the traveler who needs everything organized and accessible without the bulk.
Two powerful burners, 24,000 BTUs, and cast-iron grill and griddle accessories included. A complete outdoor kitchen that packs into a carry case and sets up anywhere. Camping meals just got a serious upgrade.
Rated to 10°F, flannel-lined, and roomy enough for adults up to 6 foot 7 inches the sleeping bag for serious campers, cold-weather hunters, or anyone who refuses to shiver through the night. Machine washable is just a bonus.
Question: Which of these Prime Day picks made it into your cart? Anything from a past EC gift guide that finally hit a price you couldn’t pass up? Tell me in the comments!
EverydayCheapskate™ is reader-supported. We participate in the Amazon Services LLC Associates Program and other affiliate advertising programs, designed to provide a means for us to earn from qualifying purchases, at no cost to you.

How to Care for Swimsuits and Make Them Last Years
Here’s how most swimsuits die: tossed in the laundry with the towels, tumbled through the dryer, left wadded up in the bottom of a beach bag for three days. By Labor Day, the elastic is shot, the color has faded, and you’re already eyeing replacements. Sound familiar? A good swimsuit can cost as much as a decent pair of jeans. And yet we treat them like something we grabbed out of a bargain bin. The good news? Keeping a swimsuit looking great for three to five seasons isn’t complicated or expensive. It’s just a handful of small habits, most of which take about two extra minutes after each swim. Let me walk you through what actually works.

Swimsuits are made of stretchy synthetic fibers (typically nylon, spandex, lycra, polyester, or a blend) that are surprisingly sensitive to a few specific things: chlorine, saltwater, heat, harsh detergents, friction, and sunscreen oils. Most swimsuit damage comes from one of these, not from actually swimming in the suit.
The pool itself isn’t the problem. The pool deck, the laundry machine, the dryer, and the beach bag are the real culprits. Manage those four and your swimsuits can easily last three to five years with their shape and color intact.
The Post-Swim Routine That Changes Everything
This is the single most important habit. Do it every time and your swimsuit life doubles.
1. Rinse in Cold Tap Water Right Away
The moment you’re done swimming, rinse the suit thoroughly in cold tap water. Most pools have a quick-rinse shower for exactly this purpose. If there isn’t one, a public restroom sink works.
The goal is to flush out chlorine, salt, sunscreen, and any pool chemicals before they can sit on the fabric and damage the fibers. Five minutes of rinsing right after swimming prevents days of slow damage later.
2. Don’t Wring It Out
The hardest habit to break. Wringing twists and stretches the elastic fibers permanently. The suit loses its shape, the leg openings go droopy, and the bust support disappears.
Instead, press the water out gently. Roll the suit in a dry towel and squeeze, the same way you’d dry a delicate sweater. Slower than wringing, but it adds years of life.
3. Hang to Dry Out of Direct Sunlight
Direct sunlight fades swimsuit colors fast. Dry in a shaded spot with good airflow. Think: a covered porch, a bathroom, anywhere out of the sun. Lay flat on a towel or hang over a wooden hanger that won’t snag the fabric.
Never use a plastic clothespin to clip the suit by a strap. The clip leaves a permanent indentation and weakens the elastic underneath.
4. Never the Dryer. Ever.
I mean it. The dryer is where swimsuits go to die. Heat permanently destroys elastic fibers. One cycle and the suit is noticeably looser. Three cycles and it’s done. There are no exceptions here. Air dry only, always.
How to Actually Wash a Swimsuit
Good news: most swimsuits don’t need the washing machine. The cold-water rinse handles the daily work just fine. But every few weeks (or after a particularly long pool day) give it a proper wash.
The Hand-Wash Method
Fill a sink or basin with cool water and a small amount of mild detergent (about a teaspoon of Woolite, baby shampoo, or any “delicate” detergent.) Submerge the suit, swish gently, and let it soak for 15 to 30 minutes.
Rinse thoroughly in cool water until all suds are gone. Press out water gently (no wringing). Hang to dry as described above.
This is the best method. It takes about ten minutes of total time, and it’s gentle on every part of the suit.
The Machine-Wash Method (If You Must)
If you absolutely need to use the washer:
- Place the suit in a mesh delicates bag
- Wash on the gentlest cycle, cold water
- Use a small amount of mild detergent
- No fabric softener (it breaks down elastic over time)
- Air dry immediately afterward
A mesh bag is essential. It prevents the suit from snagging on zippers, hooks, or other items in the wash.
(Disclosure: This post includes an Amazon Creator Connections product. I may earn a small commission if you purchase through the link, at no additional cost to you.)
What Never to Use
- Bleach: Destroys the fibers, full stop. Even oxygen bleach like OxiClean can weaken elastic over time.
- Fabric softener: Coats the fibers and reduces their stretch.
- Hot water: Heat is the enemy.
- Regular detergent with brighteners: Too harsh.
- MORE: Are You Washing Everything Too Often (or Not Enough)?
Beach Bag Habits That Matter More Than You Think
Half the damage to swimsuits happens between the swim and the wash. A few simple habits prevent it.
- Bring a wet bag. A small waterproof dry bag (or even a gallon zip-top bag) keeps the wet suit from soaking everything else in your bag while preventing the mildew that develops if it sits damp for hours.
- Get the suit out of the bag the moment you get home. Wet, balled-up suits develop mildew and lose shape within hours. Rinse, press dry, hang.
- Rotate suits if you swim often. Even with perfect care, a suit needs 24 to 48 hours to fully dry and the elastic to recover. Swimming daily in the same suit wears it out 3 times faster.
End-of-Season Storage
When summer’s winding down and the suits are going away for months, a little care now pays off next June.
- Wash them one last time using the hand-wash method.
- Dry completely. Truly completely. Even slightly damp fabric mildews over months in storage.
- Fold loosely (don’t roll tightly). Tight rolling sets creases in the elastic that don’t bounce back well.
- Store flat in a drawer or cloth bag. Plastic bags trap moisture. A cotton pillowcase is perfect.
- Keep them in a cool, dry place. Heat in summer storage (attics, garages) breaks down elastic. Inside the house is best.
When It Really Is Time to Replace
Even with perfect care, swimsuits eventually wear out. Signs it’s time:
- The fabric feels see-through when wet (most common with light colors)
- The elastic at the legs or back is permanently loose
- Color has faded significantly
- Underwire or padding is broken
- You’ve worn it for 4+ summers of regular use
A swimsuit cared for properly should last 3 to 5 summers. Cared for poorly, it lasts one. The math is worth the five-minute routine.
Question: How long has your favorite swimsuit lasted, and what’s your secret for keeping it looking new? Share your tip in the comments below.
EverydayCheapskate™ is reader-supported. We participate in the Amazon Services LLC Associates Program and other affiliate advertising programs, designed to provide a means for us to earn from qualifying purchases, at no cost to you.

Why Does My Ice Taste Weird? Here’s the Answer
If your ice tastes strange, you’re not imagining it and you’re not alone. Bad-tasting ice is one of those sneaky kitchen problems that quietly develops for months before anyone notices. The good news? It’s almost always fixable without a repair call or special products. Here’s why your ice tastes weird and exactly what to do about it.

Have you ever filled a glass with ice-cold water, taken a big refreshing sip, and thought, “What on earth is that taste?” The water seems fine. The refrigerator is humming along. Nobody in the family is complaining except you. Or maybe they do. They just keep drinking it anyway.
Here’s the thing: if your ice tastes funny, the problem usually isn’t the ice. It’s what the ice has been exposed to. And summer is when we finally notice. Because we’re using more ice, we’re paying more attention. And suddenly something that’s been developing for months becomes impossible to ignore.
Ice Is a Sponge. A Literal Sponge.
This is the part most people don’t know, and it explains everything.
Ice is porous, which means it readily absorbs odors from whatever is nearby. But here’s the kicker: in most refrigerators, air circulates between the fridge and freezer sections. So it’s not just your freezer that’s contributing to the flavor. That leftover garlic bread on the second shelf? Fair game. The onions in the crisper drawer? Also fair game.
Odors are airborne compounds. In a freezer, those compounds settle onto surfaces, and ice, being porous and polar, is especially good at grabbing them and holding on. Then it serves them straight into your lemonade.
Not exactly the refreshing summer experience you had in mind.
The Most Common Culprit: Freezer Odors
Take a peek in there. Really look. Is there anything unwrapped? Leftovers from a month ago? A foil-covered something you’re afraid to identify? Those are flavor contributors. Every single one.
Ice doesn’t discriminate. It’ll absorb onion, salmon, or freezer burn with equal enthusiasm.
Clear out the old stuff. Wipe down the interior while you’re at it. Then leave an open box of baking soda in the freezer to help absorb any lingering smells going forward. This alone can make a remarkable difference.

When Did You Last Clean the Ice Maker?
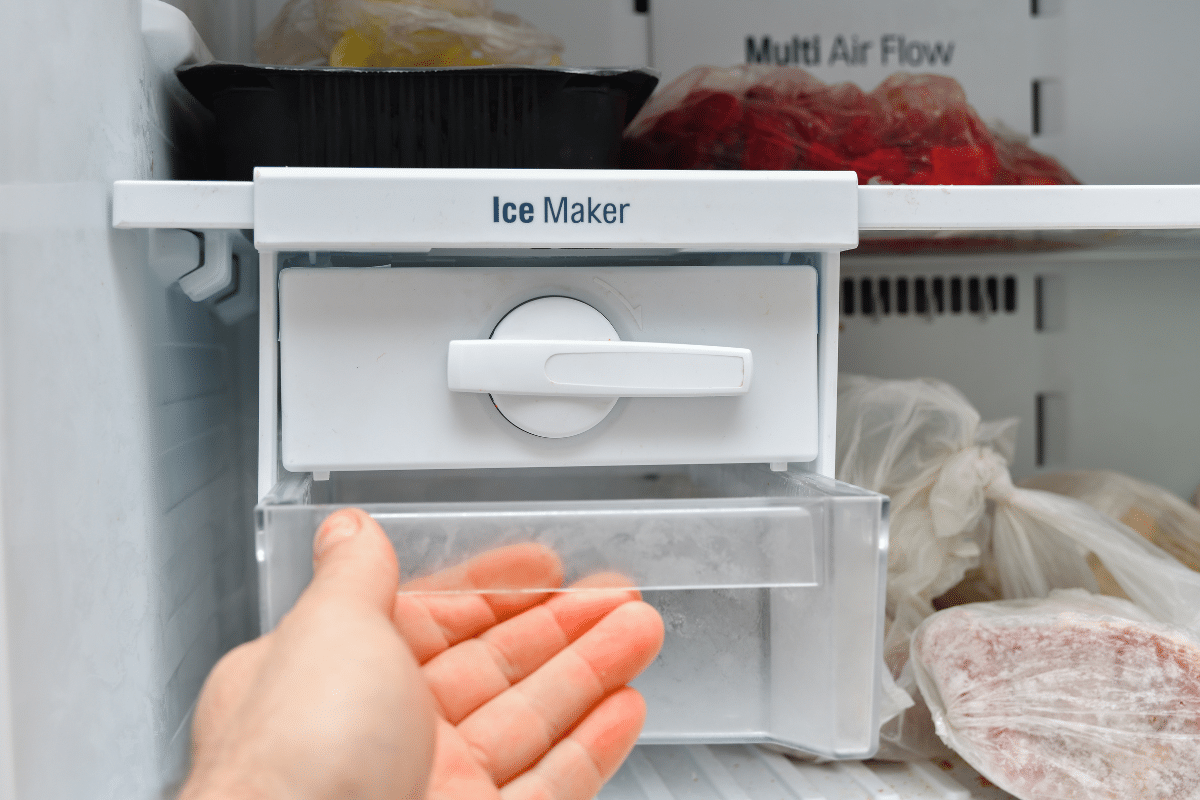
I’ll wait while you think about it.
Most of us clean the fridge shelves when something spills, the vegetable drawer when it starts looking suspicious, and the outside when company’s coming. The ice maker? That little workhorse gets completely ignored.
Mineral deposits, mold, and bacteria can build up over time, especially anywhere moisture lingers. If your ice tastes stale or musty, a cleaning is probably overdue. Wipe down the dispensing chute and wash the ice bin with warm, soapy water or a white vinegar and water solution. Dry it completely before putting it back.
Simple. Effective. Long overdue.
Don’t Forget the Water Filter
If your fridge has one, and many do, check it.
Filters are typically designed to last about six months. When they’re past it, they stop doing their job. That means chlorine, sulfur, and other impurities that should be filtered out are going straight into your water and your ice. The result? Ice that tastes metallic, sour, or just off.
Many fridges have an indicator light for this. If yours doesn’t, check the manufacturer’s recommendation. Sites like everydropwater.com can help you find the right replacement cartridge for your specific model.
After you replace it, dump the old ice and flush the system before making a fresh batch.
What About Ice Cube Trays?
If you’re using a standard open-top ice tray, that’s part of the problem.
Open trays expose your ice to freezer air the entire time it’s freezing, which means it’s absorbing odors from the moment you fill it. A covered tray makes a real difference.
If your tray doesn’t have a lid, pop the ice out once it’s frozen and store the cubes in a zip-top bag or airtight container. Frees up the tray for the next batch, too.
One more note on silicone: it looks great and releases ice easily, but it’s permeable to gases and can absorb freezer odors over time. Wash silicone molds with white vinegar and water regularly to keep off-flavors from sneaking in.
If you’re in the market for a tray upgrade, I like this DOQAUS Ice Cube Tray Set. It comes with four silicone trays, a storage bin, and a scoop, and they all stack neatly so you’re not playing freezer Tetris every time you need ice. The lids help block odors while the ice freezes, and the flexible bottoms mean the cubes actually come out without a wrestling match.

(Disclosure: This post includes an Amazon Creator Connections product. I may earn a small commission if you purchase through the link, at no additional cost to you.)
When Was the Last Time You Dumped the Ice Bin?
This may sound wasteful, but hear me out. Ice shrinks over time through a process called sublimation. It slowly evaporates even while frozen. Old ice gets stale, absorbs more odors, and just tastes worse. Dumping the whole bin and starting fresh can make a noticeable difference almost immediately.
Think of it as hitting the reset button.
The Five-Minute Fix
If your ice tastes off, here’s all you need to do:
- Toss the old ice and let the machine make a fresh batch
- Wash and dry the ice bin (white vinegar works great)
- Replace the water filter if it’s been six months or more
- Clear expired items out of the freezer
- Wipe down the freezer interior
- Store strong-smelling foods in airtight containers
- Put an open box of baking soda in the freezer
That’s it. No expensive repair call. No special products. No troubleshooting chart that requires an engineering degree.
Just a little maintenance.
Because when temperatures climb into the triple digits, the last thing you want is a glass of water that tastes like frozen salmon and forgotten leftovers.
You deserve better. So does your lemonade.
Question: Be honest… when did you last clean your ice maker? (Most of us haven’t. No judgment.)
EverydayCheapskate™ is reader-supported. We participate in the Amazon Services LLC Associates Program and other affiliate advertising programs, designed to provide a means for us to earn from qualifying purchases, at no cost to you.

25 Things Summer Heat Can Ruin in Your Garage
If your garage is anything like mine, it’s where good intentions go to retire. There’s a half-used can of paint. Spare batteries. That giant bag of birdseed you bought because the price was just too good to pass up. Holiday candles. Cleaning supplies. A mystery box labeled “Important Stuff” with a layer of dust that tells its own story.

Here’s the thing nobody warns you about: your garage turns into an oven every summer.
Even when it’s a perfectly pleasant 85 degrees outside, the temperature inside a closed garage can blow past 100 and keep climbing. Your lawn mower doesn’t care. But a surprising number of things you’ve stashed out there absolutely do. Some lose their effectiveness. Some warp, melt, leak, or spoil. A few can become genuine safety hazards.
Ask me how I know.
Actually, don’t. Let’s just say that one summer I opened a cabinet to find a melted candle had permanently bonded itself to the shelf like it was trying to become one with the wood. It was not one of my finer moments. But it was a very effective lesson.
Here are 25 things you’ll want to rescue before the heat gets there first.
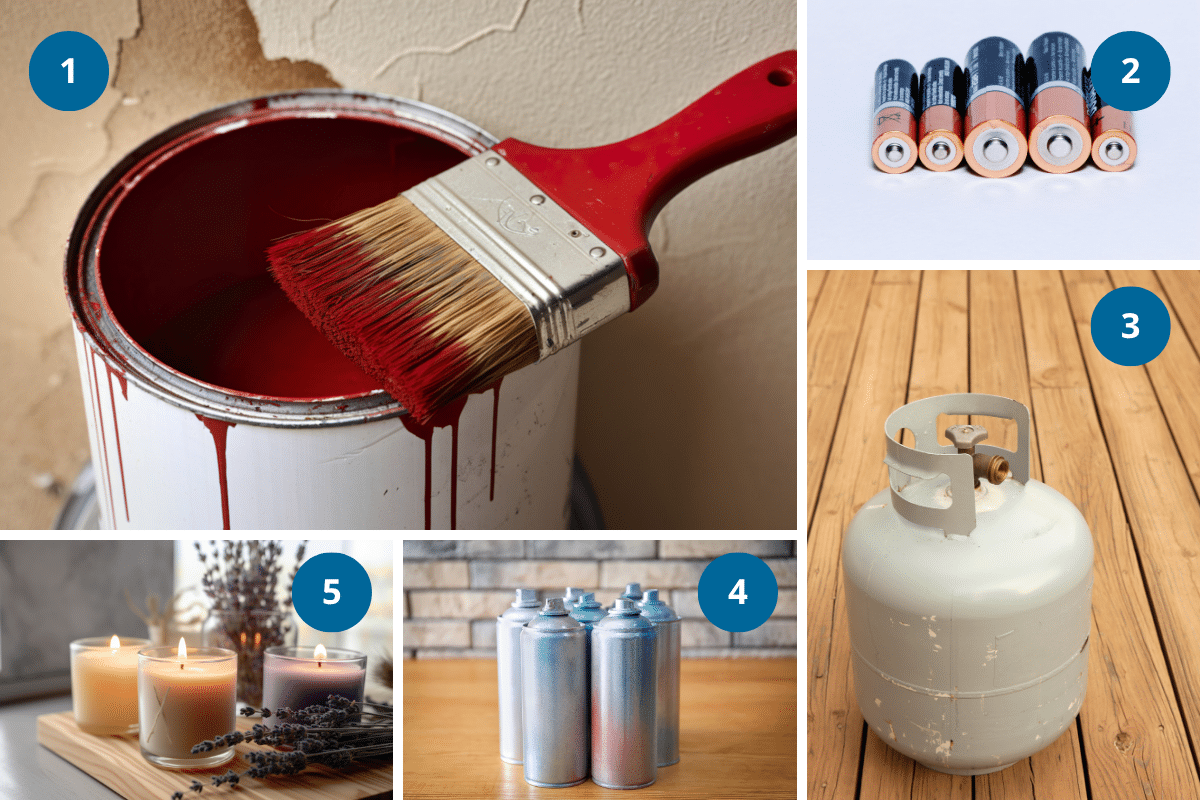
1. Paint
Heat causes paint to separate, thicken, and turn into something you couldn’t roll onto a wall if your life depended on it. If a can is even halfway useful, it deserves better than a July garage.
2. Batteries
High temperatures drain battery life and increase the odds of leaking. Keep them in a cool, dry drawer inside. They’ll last so much longer.
3. Propane Cylinders
Propane cylinders don’t belong in your garage, not primarily because of heat, but because propane is heavier than air. A slow leak in an enclosed space doesn’t dissipate. It accumulates. Add the fact that pressure relief valves can vent when temperatures hit around 120°F, and “store outside in a well-ventilated area” starts to make a lot of sense.
4. Aerosol Cans
Spray paint, air freshener, dry shampoo, WD-40… these cans are not designed to sit in 110-degree heat. Pressure builds. Things burst. It’s not pretty.
5. Candles
This one seems obvious until you discover a waxy puddle where your favorite pillar candle used to be. The jar survived. The candle did not.

6. Crayons
Every parent and grandparent has learned this lesson the hard way. Usually in the car. But the garage is just as unforgiving.
7. Chocolate
Unless you’re intentionally making fondue, in which case, carry on.
8. Pet Food
Heat speeds up spoilage and degrades the nutritional quality. If you buy in bulk (and I know you do), store it inside.
9. Birdseed
Warmth attracts moisture, and moisture attracts insects, mold, and rodents. That 40-pound bag you got on sale is not worth the trouble it’s about to cause you.
10. Fertilizer
Heat and humidity can cause some fertilizers to lose effectiveness or, worse, clump into a rock-solid mass you can’t get out of the bag. Check the label for storage guidance and take it seriously.
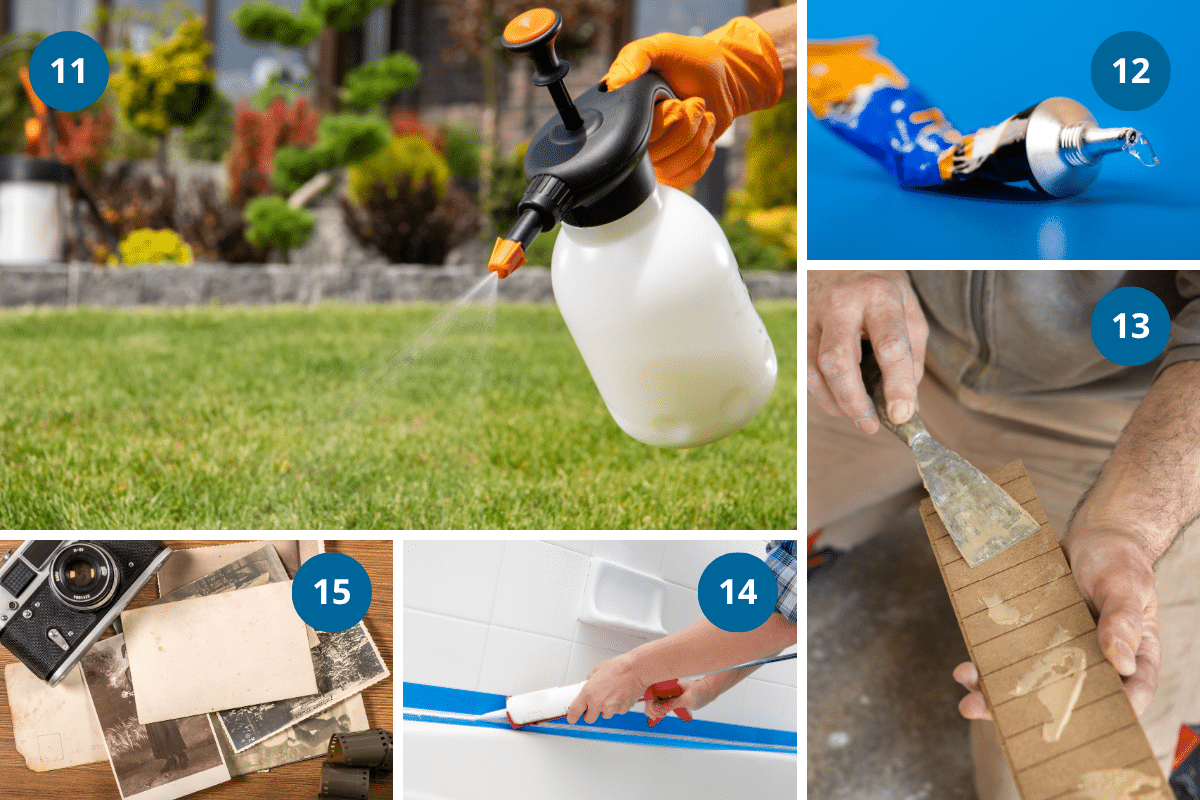
11. Lawn Chemicals
Herbicides, pesticides, fungicides… these are formulated to work within a certain temperature range. Storing them in a hot garage can reduce their effectiveness or, in some cases, cause them to break down in ways you really don’t want. Follow the label.
12. Glue
Super glue, wood glue, epoxy… heat breaks them down or causes them to cure prematurely inside the container. You’ll reach for the bottle and find a solid brick.
13. Wood Filler
Same story. Heat dries it out long before you ever get around to that project you’ve been meaning to start since spring.
14. Caulk
The tube may survive the summer just fine. The product inside? That’s a different story. Extreme heat degrades caulk’s ability to seal, which is, you know, the whole point.
15. Photographs
Heat and humidity are the sworn enemies of printed photos. If you have boxes of old prints stored in the garage, this is your sign to bring them in.
- MORE: What to Do with Hundreds of Family Photos: A Practical Guide to Organizing and Preserving Memories
16. Important Documents
Birth certificates. Passports. Tax records. Social Security cards. These belong in a cool, dry place, ideally a fireproof box inside your home. Not in a box in the garage that may or may not be labeled “Important Stuff.”
17. Vinyl Records
One hot afternoon is all it takes to warp your favorite album into something that now qualifies as modern art. Beautiful, maybe. Playable, no.
18. Electronics
Old laptops, tablets, cameras, gaming consoles… prolonged heat exposure damages batteries and degrades internal components. If it plugs in or takes batteries, it doesn’t belong in a summer garage.
19. Extension Cords
Heat damages the insulation over time, which creates a fire hazard you won’t discover until you plug something in next fall. Bring them inside.
20. Cleaning Products
Bleach is the big one here. Heat causes it to break down and lose its disinfecting power faster than you’d expect. Many other cleaners and concentrates are more heat-tolerant, but “cool, dry location” is the standard recommendation for a reason. When in doubt, check the label. Your garage in August is rarely either of those things.

21. Medicines
Most medications, prescription and over-the-counter, should be stored at room temperature in a temperature-controlled environment. A hot garage is the opposite of that.
22. Bottled Water
Water doesn’t spoil, but hot-garage water has a way of tasting like warm plastic and that’s reason enough to store it somewhere better. Some research also suggests heat may cause plastic bottles to leach trace compounds over time, though the amounts are generally considered safe. Still, if you’re building an emergency supply, a cool, dark closet beats a sweltering garage shelf.
23. Cosmetics and Skincare
Sunscreen, lotions, makeup… heat causes them to separate, melt, and lose effectiveness. Especially sunscreen, which you’re counting on to actually work.
24. Sports Drinks
The electrolytes are fine. The flavor is not. Heat degrades taste and can shorten shelf life if seals aren’t airtight. If you buy by the case, bring them inside.
25. Family Heirlooms
If you would be heartbroken to lose it, don’t trust it to a garage in July. Full stop. Quilts, old letters, handmade items, anything irreplaceable… none of it belongs out there.
A Quick Garage Reality Check
Here’s a fast way to evaluate anything you’ve got stored out there: *Would I leave this sitting in a parked car all summer?*
If the answer is no, it probably doesn’t belong in your garage either. The temperatures are comparable, and the risks are the same.
You don’t have to turn your garage into a showroom or empty it out completely. Just rescue the things that heat can actually harm. Spend twenty minutes this weekend walking through, and I promise you’ll find at least three or four items that deserve a better home than a sweltering garage shelf.
And if you happen to stumble across that mystery box labeled “Important Stuff” while you’re at it, maybe this is the summer you finally open it.
Just wear gloves. Trust me on that one.
Question: Has summer heat ever ruined something you had stored in your garage? I’d love to know what it was and whether it was a lesson learned the hard way like mine!

The Cheapskate’s Guide to Winning Prime Day 2026
Every year, Amazon throws the world’s biggest sale and dares you to overspend. Every year, I take that as a personal challenge. Let’s talk about how to win.

Prime Day 2026 runs June 23 through June 26: four full days, starting at midnight Pacific. That’s 96 hours of deals dropping as often as every five minutes. Sounds thrilling. Also sounds exhausting. This is exactly where having a plan goes from “nice to have” to “necessary for survival.”
Why This Year Feels Different
Let’s be honest about where we are economically. Prices are up. Not catastrophically, but enough that you feel it at the grocery store, at the gas pump, and every time you think about replacing something that’s limping along but technically still works. Tariffs have been quietly baked into the cost of imported goods for months now, and that’s showing up in prices across electronics, home goods, and personal care. The good news: Amazon absorbs some of that pain during Prime Day to move volume. The better news: you’re reading this, which means you’re not going in blind.
This is actually a great year to use Prime Day strategically, buying things you genuinely need at prices that beat what you’d pay in August or October. The trick is not letting “it’s on sale” become the reason you buy something.
First Things First: You Need to Be a Prime Member
Prime Day deals are exclusively for Prime members. If you’re not one, you can start a free 30-day trial at amazon.com/prime. Just remember to cancel before the trial ends if you don’t want to keep it. The regular price is $14.99/month or $139/year.
If you’re between 18 and 24, Prime for Young Adults is half price, $7.49/month or $69/year, and during Prime Day you can stack an extra 10% cash back on beauty, apparel, electronics, and personal care on top of whatever’s already discounted. That’s a genuinely good deal if you’re in that window.
Qualifying government assistance recipients can try Prime Access free and pay just $6.99/month after. Details at amazon.com/getprimeaccess.
Before June 23: Do These Three Things
1. Make your list.
Not a wish list. A real list. What have you been putting off buying because the price hasn’t been right? What do you need (actually need) before fall? Write it down before you open a single deal page. This is the only thing standing between you and a cart full of things you didn’t know you needed until Amazon suggested them.
2. Add items to your Amazon Wish List now.
Once Prime Day starts, you can see at a glance which items have dropped in price. This saves frantic searching during the event when your brain is running on deal adrenaline.
3. Check price history.
Before you buy anything, use CamelCamelCamel.com to look up the item’s price history. Some deals are genuinely excellent. Some are Amazon quietly raising the price a few weeks ago and then “discounting” it back to normal. Know the difference.
New This Year: Alexa Can Do the Heavy Lifting
Amazon has leaned hard into Alexa for Shopping this year, and for once, I think it’s actually useful. You can ask Alexa to build you a personalized Prime Day Deals Guide based on your shopping history, set price alerts for specific items, or even enable Auto-Buy, which will automatically purchase something when it hits your target price. If there’s a specific item you’ve been stalking and you know exactly what you’d pay, that feature alone could be worth setting up.
New deals drop three times daily: midnight, 8 a.m., and 1 p.m. Pacific, during “Today’s Big Deals,” which feature limited-quantity items from brands like Sol de Janeiro, Stanley, Ninja, LG, and Levi’s. These go fast. If something on your list falls in this window, set an alarm.
What’s Actually Worth Buying This Year
Based on what EC readers actually bought and loved during last Prime Day (not what Amazon is pushing, not what’s prettily photographed), here’s where I’d focus:
- Cleaning supplies. This is consistently where my readers get the best bang for their buck. Dawn Powerwash, spray bottles, washing soda, concentrated vinegar. These are things you use anyway, and buying them at Prime Day prices when you can stock up makes real financial sense. Not glamorous. Extremely smart. See deals →
- Shark vacuums. Three different Shark models landed in EC readers’ top purchases last year, and for good reason: they’re workhorses at a fraction of the price of a Dyson. If yours is struggling, this is the sale to watch. See deals →
- Books and puzzles. I know, I know… not exactly the Prime Day flex most people are going for. But hear me out. Print books are up to 65% off and Kindle titles up to 80% off. That’s real money if you’re a reader, and hidden pictures books, puzzle boards, and activity kits make surprisingly great gifts to have stashed away. Stock up while the prices are right. See deals →
- Kitchen basics. Santoku knives, silicone baking mats, dish racks, kitchen thermometers. Practical tools that last for years are exactly what to buy on sale. Skip the novelty gadgets. Buy the things you’ll use for the next decade. See deals →
- Personal care. Sunscreen, lip balm, retinol serums, shower steamers. Personal care sees some of the deepest Prime Day discounts, and these are things you’re buying anyway. Stock up. See deals →
- Outdoor and garden. Meat thermometers, mosquito control, garden kneelers, portable power stations. Prime Day lands right in the heart of summer, and this stuff is priced to move. If you’re a Jackery fan or have been eyeing a portable power station for storm prep, now’s the time to look. See deals →
A Few Things I’d Skip
Not everything that’s “on sale” is a deal. Here’s where I’d be cautious:
Big-ticket electronics, unless they’re something you’ve been researching for months and you already know the fair price. Tariff-related costs are baked into imported electronics, and the “discount” sometimes just gets you back to where the price should have been.
Anything in your cart because it showed up in a “Customers also bought” sidebar. That’s not a deal. That’s Amazon being very good at its job.
Anything you’d need to return. Returns during and after Prime Day are a headache, and some items have restocking fees that quietly eat your savings.
The One Mindset Shift That Changes Everything
Here’s what I’ve learned after years of covering these sales: the best Prime Day shoppers aren’t the ones who buy the most. They’re the ones who buy exactly what was on their list, at a price better than they’d find any other time of year, and close the laptop.
That’s it. That’s the win.
Check Back Here During the Event
Team EC will be updating our Prime Day roundup in real time June 23 through 26 with verified deals, honest assessments, and the items your fellow readers are snapping up. Bookmark this page. Subscribe to the daily newsletter if you haven’t already, so the best deals land in your inbox before supplies run out.
And if you’re already a subscriber, you know what’s coming. Let’s shop smart together.
Question: What’s at the top of your Prime Day list this year? Something you’ve been waiting on, or a household staple you want to stock up on? Tell me in the comments!
EverydayCheapskate™ is reader-supported. We participate in the Amazon Services LLC Associates Program and other affiliate advertising programs, designed to provide a means for us to earn from qualifying purchases, at no cost to you.
Photocopying or reproduction other than for subscribers’ personal use is strictly prohibited without written permission from the publisher, DPL Press, Inc.
Everyday Cheapskate, Debt-Proof Living, Cheapskate Monthly, Tiptionary, Rapid Debt-Repayment Plan, Rapid Debt-Repayment Plan Calculator, Freedom Account, Live the Plan! and 7 Money Rules for Life are trademarks owned by Mary Hunt.
All letters, tips and other materials and correspondence submitted to Everyday Cheapskate, Debt-Proof Living and Mary Hunt become the property of Mary Hunt and all rights thereto including copyrights.
Submitters grant the exclusive right to use and or reproduce the materials in any manner and for any purpose. All information published is taken from the most reliable sources possible and given as information only. All specific financial, legal, tax and accounting situations should be referred to appropriate legal or accounting professionals.