If your garage is anything like mine, it’s where good intentions go to retire. There’s a half-used can of paint. Spare batteries. That giant bag of birdseed you bought because the price was just too good to pass up. Holiday candles. Cleaning supplies. A mystery box labeled “Important Stuff” with a layer of dust that tells its own story.
Here’s the thing nobody warns you about: your garage turns into an oven every summer.
Even when it’s a perfectly pleasant 85 degrees outside, the temperature inside a closed garage can blow past 100 and keep climbing. Your lawn mower doesn’t care. But a surprising number of things you’ve stashed out there absolutely do. Some lose their effectiveness. Some warp, melt, leak, or spoil. A few can become genuine safety hazards.
Ask me how I know.
Actually, don’t. Let’s just say that one summer I opened a cabinet to find a melted candle had permanently bonded itself to the shelf like it was trying to become one with the wood. It was not one of my finer moments. But it was a very effective lesson.
Here are 25 things you’ll want to rescue before the heat gets there first.
1. Paint
Heat causes paint to separate, thicken, and turn into something you couldn’t roll onto a wall if your life depended on it. If a can is even halfway useful, it deserves better than a July garage.
High temperatures drain battery life and increase the odds of leaking. Keep them in a cool, dry drawer inside. They’ll last so much longer.
3. Propane Cylinders
Propane cylinders don’t belong in your garage, not primarily because of heat, but because propane is heavier than air. A slow leak in an enclosed space doesn’t dissipate. It accumulates. Add the fact that pressure relief valves can vent when temperatures hit around 120°F, and “store outside in a well-ventilated area” starts to make a lot of sense.
4. Aerosol Cans
Spray paint, air freshener, dry shampoo, WD-40… these cans are not designed to sit in 110-degree heat. Pressure builds. Things burst. It’s not pretty.
5. Candles
This one seems obvious until you discover a waxy puddle where your favorite pillar candle used to be. The jar survived. The candle did not.
6. Crayons
Every parent and grandparent has learned this lesson the hard way. Usually in the car. But the garage is just as unforgiving.
7. Chocolate
Unless you’re intentionally making fondue, in which case, carry on.
8. Pet Food
Heat speeds up spoilage and degrades the nutritional quality. If you buy in bulk (and I know you do), store it inside.
Warmth attracts moisture, and moisture attracts insects, mold, and rodents. That 40-pound bag you got on sale is not worth the trouble it’s about to cause you.
10. Fertilizer
Heat and humidity can cause some fertilizers to lose effectiveness or, worse, clump into a rock-solid mass you can’t get out of the bag. Check the label for storage guidance and take it seriously.
11. Lawn Chemicals
Herbicides, pesticides, fungicides… these are formulated to work within a certain temperature range. Storing them in a hot garage can reduce their effectiveness or, in some cases, cause them to break down in ways you really don’t want. Follow the label.
12. Glue
Super glue, wood glue, epoxy… heat breaks them down or causes them to cure prematurely inside the container. You’ll reach for the bottle and find a solid brick.
13. Wood Filler
Same story. Heat dries it out long before you ever get around to that project you’ve been meaning to start since spring.
14. Caulk
The tube may survive the summer just fine. The product inside? That’s a different story. Extreme heat degrades caulk’s ability to seal, which is, you know, the whole point.
15. Photographs
Heat and humidity are the sworn enemies of printed photos. If you have boxes of old prints stored in the garage, this is your sign to bring them in.
Birth certificates. Passports. Tax records. Social Security cards. These belong in a cool, dry place, ideally a fireproof box inside your home. Not in a box in the garage that may or may not be labeled “Important Stuff.”
One hot afternoon is all it takes to warp your favorite album into something that now qualifies as modern art. Beautiful, maybe. Playable, no.
18. Electronics
Old laptops, tablets, cameras, gaming consoles… prolonged heat exposure damages batteries and degrades internal components. If it plugs in or takes batteries, it doesn’t belong in a summer garage.
19. Extension Cords
Heat damages the insulation over time, which creates a fire hazard you won’t discover until you plug something in next fall. Bring them inside.
20. Cleaning Products
Bleach is the big one here. Heat causes it to break down and lose its disinfecting power faster than you’d expect. Many other cleaners and concentrates are more heat-tolerant, but “cool, dry location” is the standard recommendation for a reason. When in doubt, check the label. Your garage in August is rarely either of those things.
21. Medicines
Most medications, prescription and over-the-counter, should be stored at room temperature in a temperature-controlled environment. A hot garage is the opposite of that.
22. Bottled Water
Water doesn’t spoil, but hot-garage water has a way of tasting like warm plastic and that’s reason enough to store it somewhere better. Some research also suggests heat may cause plastic bottles to leach trace compounds over time, though the amounts are generally considered safe. Still, if you’re building an emergency supply, a cool, dark closet beats a sweltering garage shelf.
Sunscreen, lotions, makeup… heat causes them to separate, melt, and lose effectiveness. Especially sunscreen, which you’re counting on to actually work.
24. Sports Drinks
The electrolytes are fine. The flavor is not. Heat degrades taste and can shorten shelf life if seals aren’t airtight. If you buy by the case, bring them inside.
25. Family Heirlooms
If you would be heartbroken to lose it, don’t trust it to a garage in July. Full stop. Quilts, old letters, handmade items, anything irreplaceable… none of it belongs out there.
A Quick Garage Reality Check
Here’s a fast way to evaluate anything you’ve got stored out there: *Would I leave this sitting in a parked car all summer?*
If the answer is no, it probably doesn’t belong in your garage either. The temperatures are comparable, and the risks are the same.
You don’t have to turn your garage into a showroom or empty it out completely. Just rescue the things that heat can actually harm. Spend twenty minutes this weekend walking through, and I promise you’ll find at least three or four items that deserve a better home than a sweltering garage shelf.
And if you happen to stumble across that mystery box labeled “Important Stuff” while you’re at it, maybe this is the summer you finally open it.
Just wear gloves. Trust me on that one.
Question: Has summer heat ever ruined something you had stored in your garage? I’d love to know what it was and whether it was a lesson learned the hard way like mine!
https://www.everydaycheapskate.com/wp-content/uploads/20260622-a-single-car-garaged-with-beautiful-flowers-along-landscape-beds-things-ruined-by-heat-in-the-garage.png8001200Mary Hunthttps://www.everydaycheapskate.com/wp-content/uploads/EC-Logo-by-Mary-Hunt-Tagline-Trimmed.pngMary Hunt2026-06-22 20:24:432026-06-22 20:24:4325 Things Summer Heat Can Ruin in Your Garage
Every summer starts with the best intentions and ends with six emergency store runs, missing sunscreen, and someone asking what’s for dinner at 4:17 p.m. Sound familiar? A little June prep to save time and money this summer is all it takes to break the cycle. Here’s exactly what I do before the heat and busyness take over and why it works every single time.
Here’s something I’ve figured out after a few too many summers spent reacting instead of planning: summer problems don’t surprise you. They repeat.
The same things get misplaced. The same foods disappear. The same last-minute purchases happen over and over because nobody stopped long enough to build a simple system before the heat and busyness took over.
That’s the whole problem. And honestly? It’s also the whole solution.
A small amount of thoughtful setup in June quietly pays dividends for the next three months. Not extreme prep. Not “end-times pantry” prep. Just enough to keep summer from turning into an expensive, exhausting game of catch-up.
So let’s do that now. In June, when we still have the energy.
The Summer Grab-and-Go Station
This is the single biggest game changer in my house, and it costs nothing to set up.
Pick one spot in your kitchen: a shelf, a basket, a corner of the counter, a cabinet with an empty lower shelf. Doesn’t matter where, as long as it’s accessible and everyone knows about it. Then stock it with the things your family spends the warmer months hunting for:
Reusable water bottles (rinsed, dried, and actually ready to grab)
Drink mixes and electrolyte packets
Sunscreen (one bottle per person if you can swing it)
Bug spray
A small first aid kit or at least some bandages and antiseptic wipes
Sandwich bags and zip-top bags in a couple of sizes
Paper napkins or a stack of cheap paper towels
Easy snacks that travel well: granola bars, individual packs of nuts, fruit pouches for the kids
The magic isn’t in the stuff. It’s in the location. When everything lives in one spot, it’s no longer a scavenger hunt every time someone heads out the door. No more yelling “has anyone seen the sunscreen?” No more leaving for a picnic and realizing the bug spray is still somewhere in the garage.
And here’s the money piece: this one small setup cuts down on those “quick runs to the store” that are never quick and never cost what you planned. You know exactly what I’m talking about. You go in for sunscreen, you come out with $34 worth of stuff you didn’t need. The grab-and-go station quietly closes that loop before it opens.
The Freezer and Fridge Prep That Saves You at 5 p.m.
Summer has a sneaky way of making everyone hungrier at odd hours. And when there’s “nothing easy,” people start making bad financial decisions. Think: drive-throughs, delivery apps, pizza “just this once.”
I’ve been there. It adds up fast.
So in early June, I do one round of simple prep before the chaos kicks in. Here’s exactly what that looks like at my house:
Cook and freeze a batch of taco meat. Portion it into zip-top bags, flatten them, and stack them in the freezer. On a busy night, it goes from frozen to dinner in about 15 minutes.
Wash and cut fruit. Grapes, melon, strawberries, whatever’s in season. Cut it once, eat it all week. When it’s ready to grab, it disappears. When it’s not, people grab something that costs more and delivers less.
Make a big jar of iced tea concentrate. Keep it in the fridge and everyone stops reaching for bottled drinks. I have a foolproof method right here: How to Make Perfect Iced Tea. Takes minutes, saves dollars.
Prep the ingredients for my Chicken Pasta Salad. This is my most-requested summer dish… hearty, make-ahead friendly, and genuinely better after a night in the fridge. Get the full recipe here: Easy Chicken Pasta Salad Recipe for a Crowd. In June, I chop the vegetables and get everything ready so throwing it together takes almost no effort when I actually need it.
The goal isn’t to meal prep like a competitive athlete. It’s just to remove friction. When something easy exists, people eat it. When nothing easy exists, someone is on their phone ordering tacos and spending $47.
Before you spend a single dollar on summer supplies, do a quick inventory of what you already have. I call this my Summer Reality Check, and every single year it saves me money. Real money. The kind that adds up to “wait, why did I buy three bottles of sunscreen?” money.
Here’s how to do it. Walk through your house: closets, garage, hall bathroom, that basket by the back door, and round up everything summer-related. Then ask yourself:
Sunscreen: How many bottles do you actually have, and are any of them still good? (Sunscreen expires. Check the date before you toss it in the bag and assume you’re covered.)
Bug spray: Same drill. One working can per household is usually enough. You probably already have one.
Coolers: Do you own two and only ever use one? Could you borrow one from a neighbor instead of buying another?
Paper plates, napkins, plastic utensils: Check the cabinet before you grab a pack at the checkout. There’s a very good chance you bought these on clearance last September and completely forgot.
Water bottles and tumblers: Round them all up. Wash them. You may not need to buy a single one.
Outdoor games and gear: Frisbees, pool toys, sidewalk chalk, citronella candles… all of this accumulates. Find it before you replace it.
Once everything is in front of you, make a simple list: what you actually need, what you need to replace, and what you can skip entirely this year.
Then go shopping. And only for what’s on the list.
The Patio. Do It Now. Trust Me.
Every year I tell myself I’ll deal with the patio “later.” And every year, later shows up during the hottest week of July, when every piece of outdoor furniture feels like it was forged in a volcano and sitting down requires actual courage.
So now I handle it in June. Here’s the whole process. It takes less than an hour and you’ll only need to do it once:
Sweep and scrub the surface. Broom first, then a bucket of warm water with a squirt of dish soap and a stiff brush. Concrete, pavers, wood decking… all of it. Don’t skip the corners where debris collects all winter.
Wipe down every piece of furniture. A damp microfiber cloth handles most of it. For stubborn grime on plastic or resin furniture, try a paste of baking soda and a little dish soap. It cuts through a full season of buildup without scratching. Metal furniture? Wipe it dry completely to head off rust before it starts.
Check the cushions. If they survived winter storage, great. If they smell musty, toss the covers in the wash. If they’re flat, cracked, or beyond saving, now is the time to replace them… not mid-July when your options are picked over and overpriced.
Toss what’s broken. The wobbly chair nobody sits in. The umbrella that won’t stay open. The side table missing a leg. If it’s been broken for two summers already, it’s not getting fixed. Let it go.
Set it up like you mean it. Arrange the seating so it’s actually inviting, not just functional. Add a small table for drinks, a candle or two, whatever makes you want to be out there. This part matters more than it sounds.
Here’s the payoff: once the patio is ready, you use it. More meals outside. More evenings with a cold drink and nowhere to be. And every hour you spend out there is an hour you’re not in the car, not in a restaurant, not spending money you didn’t plan to spend.
The Ceiling Fan Check You’ll Forget to Do (Until You Need It)
While you’re at it, check your fans. In June, before you desperately need them. Dust the blades, check the cords, test each fan to make sure it actually works, and decide which rooms benefit most from the airflow.
Do this now, while the stores still have fans in stock and you still have options. Wait until the first heat wave and you’ll be standing in an aisle staring at empty shelves, sweating and considering spending $200 on a box fan because any fan sounds good right now.
What surprises me every single year is how much calmer summer feels when I’ve done this. Not perfect. Summer is never perfect, and honestly, some of the disorder is part of the charm. But calmer. Easier. There are fewer repeated decisions, fewer frantic searches, fewer “we’re out of ice again” moments right when you need it most.
None of these tasks takes very long individually. But together, they create something better than a to-do list. They create momentum. The house just functions better. Meals feel easier. People stop asking where everything is every six minutes.
Well. Mostly.
A reasonable amount of June prep keeps summer from drifting into expensive, exhausting confusion. And that’s the whole point… not a perfect summer. Just a good one, without all the unnecessary friction.
Go enjoy it. You’ve got this.
Question: What’s the one thing that always goes missing or runs out right when you need it most every summer? Share in the comments below.
https://www.everydaycheapskate.com/wp-content/uploads/20260611-June-prep-to-save-time-and-money-this-summer-beach-ball-in-pool.png8001200Mary Hunthttps://www.everydaycheapskate.com/wp-content/uploads/EC-Logo-by-Mary-Hunt-Tagline-Trimmed.pngMary Hunt2026-06-11 22:51:312026-06-11 22:51:31What I Prep Once in June to Save Time and Money All Summer
Spring shows up and suddenly I’m standing in a pile of corduroy, hunting for the one pair of shorts that actually fits. They’re at the bottom of a bin. In the storage closet. Behind the holiday decorations. Of course they are. Sound familiar? Yeah. I thought so. Here’s the good news: there’s a better way. A way that takes about fifteen minutes, costs nothing, and will actually save you money, though you won’t fully believe that last part until you’ve done it twice. It’s called the seasonal closet swap, and once you’ve got a system, you’ll never go back to the chaos.
When your closet is jammed with things you can’t see, three expensive things happen.
First, you buy duplicates. You forget about the gray cardigan from two years ago and buy a new one in late August because you can’t remember if you owned one. (You did. You own three now.)
Second, you stop noticing what’s worn out. Frayed cuffs, stretched-out elastic, pilled sweaters… they hide in the crowd. You don’t replace them because you forget you need to.
Third, you start making clothing decisions out of frustration. “Just buy something” energy is expensive energy. Closet visibility cures it.
You need three bins or piles. That’s it. Label them in your head as:
Keep. In the closet, in active rotation, for the season ahead.
Store. Off-season. You’ll want it back. Just not right now.
Out. Donate, sell, or trash. It’s done. Let it go.
That’s the whole system. Every piece of clothing has to land in one of those three bins. No “I’ll decide later.” Later is the enemy.
Set aside 30 to 60 minutes (it goes faster than you think) and tackle one closet or dresser at a time. Don’t try to do the whole house in one day. Just start somewhere.
The Questions That Cut Through the Waffling
For each item, ask in this order:
Did I wear it last season? If you didn’t wear it last winter at all… it’s not coming back to active rotation in the closet. Store or out.
Does it still fit? Bodies change. There is no reward for holding on to clothes that haven’t fit in three years just in case. Out.
Is it actually wearable, or just sentimental? Sentimental clothes can be stored. They don’t get to take up closet real estate during the season you’re not wearing them.
Would I buy this today? If the answer is a clear no, it’s done its job. Out.
Ten seconds per item, max. The longer you stare at something, the more likely you are to talk yourself into keeping a blouse you’ve worn twice since 2019.
The off-season clothes need somewhere to live for six months. You don’t need fancy under-bed bins or vacuum-seal bags (though if you have them, they’re great). Free and almost-free options:
Empty cardboard boxes from Costco runs. Label the side with what’s inside and the season.
Pillowcases. A queen pillowcase holds an astonishing amount of folded sweaters. Knot the open end and you have a soft, breathable storage bag.
Empty suitcases. They’re already in your closet doing nothing for half the year. Use them.
Trash bags as a last resort. Free, easy, and they keep moths out if sealed.
Store somewhere cool and dry. Closets, the back of a deep dresser, under-bed storage, attic if it’s not too humid. Avoid garages and damp basements… mildew is not a wardrobe problem you want to discover in October.
One more thing: tuck a bay leaf or two into each storage container. Old-school moth deterrent, completely free if you already have them in the kitchen, and they smell nice. This is the kind of tip I wish someone had given me years ago.
The “Mend Before You Store” Trick
Okay, this is the part that genuinely changed things for me. Before the off-season clothes go away, fix whatever needs fixing. Right now, while you’re holding it.
Loose button? Sew it on. Takes three minutes. Tiny hem rip? Five minutes with a needle and thread. Wool coat that needs a dry cleaner? Get it there before it goes into storage so it comes back clean.
Then in October, when you pull everything out again, it’s all ready to wear. No standing there thinking, oh right, that button, then buying a replacement because the original got worse in a bag over the summer.
Same idea for summer clothes going back into the closet: anything that needs a wash, a stitch, or a stain treatment gets handled before it goes into rotation.
You know what I’m talking about. The donate bag that sits in the hallway for six weeks. The one you step around every day. That’s not a system. That’s just relocating the problem.
Get it out the same day if you can. Here’s how:
Donate same-day. Drop it off the day you do the swap. Goodwill, a local shelter, a thrift store. Done.
Sell the good stuff. If you have name-brand items in great shape, Depop, Poshmark, Facebook Marketplace, or a local consignment shop can turn them into actual money. Don’t expect riches. Expect maybe $20 to $80 if you have a decent stack.
Trash the truly worn out. If something is stained, torn, or beyond donation, don’t pawn it off on a thrift store. Toss it.
What Happens After
The first time you do this, you’ll find clothes you forgot you owned. You’ll realize you’ve been wearing the same five outfits because they were the only ones visible. You’ll get dressed faster. You’ll feel better.
And here’s the part I love most: you’ll buy less. When your closet shows you what you actually have, that “I have nothing to wear” feeling tends to quiet down. And every dollar not spent on yet another summer top is a dollar that lives to fight another day.
Fifteen minutes. Three piles. Bay leaves optional.
Your future self will be standing in front of a usable closet by next weekend.
Question: What’s the most surprising thing you’ve found while doing a closet swap? Share your discoveries in the comments… I love a good “I forgot I owned this” story.
EverydayCheapskate™ is reader-supported. We participate in the Amazon Services LLC Associates Program and other affiliate advertising programs, designed to provide a means for us to earn from qualifying purchases, at no cost to you.
https://www.everydaycheapskate.com/wp-content/uploads/20260527-seasonal-wardrobe-swap-sweaters.png8001200Mary Hunthttps://www.everydaycheapskate.com/wp-content/uploads/EC-Logo-by-Mary-Hunt-Tagline-Trimmed.pngMary Hunt2026-05-27 18:18:242026-05-27 18:18:25The 15-Minute Closet Swap That Saves Money on Summer Clothes
Summer grocery waste has a sneaky personality. Produce turns faster, leftovers get forgotten, and somehow there’s always one cucumber liquefying quietly in the back drawer. You know the one. Warm weather makes food management harder because schedules get looser and meals become less predictable. But one small habit can dramatically cut waste, reduce grocery runs, and save money without requiring color-coded containers or a spreadsheet. And no, you do not need to become one of those people who alphabetizes their refrigerator.
Let’s talk numbers for a second, because I think they’re worth hearing. The average American household throws away somewhere between $1,500 and $1,800 worth of food every year. That’s not a typo. That’s real money leaving your wallet in the form of rotting produce and forgotten leftovers.
Cut that in half, which is genuinely achievable with something as simple as the habit I’m about to share, and you’re looking at $700 to $900 back in your budget annually. Without buying anything, joining anything, or changing where you shop.
So why does summer make this so much worse? Glad you asked.
Why Food Spoils Faster in Summer
Here’s something I didn’t fully appreciate until I started paying attention to my grocery budget: summer is basically a food spoilage accelerator, and it’s not just the heat outside.
It’s us. Our schedules go sideways. The kids are home. Dinner plans evaporate by 4 p.m. We stop at a drive-through and suddenly that beautiful bunch of kale is on borrowed time.
Add to that the fact that summer produce is more delicate (berries, peaches, fresh herbs, zucchini) and you’ve got a refrigerator that’s working against you if you’re not working with it. These things don’t wait around. They have opinions and a deadline.
The good news? A little awareness goes a long way. You don’t need a system overhaul. You need one habit.
The habit is this: every time you open your refrigerator, you look for what needs to be used first. That’s it.
Not a full inventory. Not a deep dive. Just a quick scan with the question, What’s closest to done? Then you build whatever you’re eating next around that answer instead of starting from scratch.
I know, I know. It sounds almost too simple. But here’s why it works when willpower and good intentions don’t: it changes the decision you’re making. Instead of “what do I feel like eating?” you’re asking “what do I have that needs to go?” That tiny reframe is the whole game.
Professional kitchens have operated on this principle for decades. It’s called FIFO (First In, First Out) and it’s one of the main reasons restaurants don’t hemorrhage money on food waste the way home kitchens do. New stock goes behind the old. The oldest always gets used first. We’re just borrowing that idea and scaling it down to a family fridge.
The other thing this habit does is break the duplicate-buying cycle. You stop coming home with a second bag of spinach because you forgot you already had one. You stop finding two open jars of the same salsa in the back. Because you’re actually looking at what you have, regularly, briefly, on purpose.
If you want the “Use It First” rule to actually work, you need a dedicated spot in your refrigerator for things that are about to turn. I call it the “Eat Me First” shelf, and it has genuinely changed how I shop and cook.
Pick one shelf, ideally at eye level, because out of sight really does mean out of mind, and make it the home for anything that needs to be used in the next one to three days. Leftover grilled chicken. Half an onion. That lone ear of corn. A container of soup. The peaches that are just on the edge of perfect.
When you open the fridge, you see the shelf. When you see the shelf, you remember what needs attention. When you remember, you use it. Simple chain reaction.
A few things that make this shelf actually function:
Use clear containers. This matters more than you’d think. An opaque container of mystery leftovers gets ignored. A clear one gets eaten. If you can see it, you’ll use it.
Keep it to one shelf and resist the urge to pile. The moment things start stacking, visibility drops and the shelf stops doing its job. If something doesn’t fit, that’s your signal to cook, not to cram.
Do a quick reset every few days. Sunday evenings work well for a lot of people, or whatever day you typically grocery shop. See what’s still there, and plan at least one meal around it before you add anything new.
How to Stop Losing Produce in Drawers
Ah, the crisper drawer. Where vegetables go to become unrecognizable.
The problem with drawers isn’t that they’re bad. It’s that they’re invisible. They’re down low, they close, and they take things away from your sight line. Which means they take things away from your awareness.
Here’s what I do: I treat the drawers as storage, not a final destination. When I bring produce home, I sort by how long it’ll last and where I’ll actually see it. The sturdier stuff (carrots, cabbage, celery, beets) those are genuinely happy in the drawer for a week or more. But berries, fresh herbs, cut fruit, anything tender? They go up top on the Eat Me First shelf where I’ll see them and use them before they turn.
One thing worth knowing: most crisper drawers have humidity controls, and most people ignore them:
High humidity is for thin-skinned produce that wilts. Think leafy greens, herbs, cucumbers, broccoli.
Low humidity is for things that emit ethylene gas as they ripen. Think apples, pears, avocados, because that gas will accelerate spoilage for everything around them.
Two seconds to adjust the slider, and your produce genuinely lasts longer.
For fresh herbs, I trim the stems and stand them upright in a small jar with an inch of water, then loosely cover with a produce bag and keep them on the shelf. Treated like a tiny bunch of flowers, they last one to two weeks instead of days. Cilantro, parsley, mint… all of them respond well to this.
Because here’s the truth: if you can see it, you’ll eat it. If you can’t, you won’t.
This is where the “Use It First” habit really pays off, because now you’re looking at three random ingredients and asking, what can I make with this? instead of what am I going to buy for dinner? The answer is almost always: more than you think. A few reliable formulas for whatever’s on the brink:
The Scramble: Eggs will accept almost any vegetable, cheese, or leftover protein you throw at them. Onion, pepper, last night’s potatoes… done. Breakfast, lunch, or dinner.
The Grain Bowl: Cooked rice or any grain + whatever roasted or raw vegetables you have + a sauce you can make in thirty seconds (olive oil, lemon, salt, garlic or just soy sauce and sesame oil if we’re being honest). This is my most-used move.
The Big Soup: You know those odds and ends that don’t quite make a meal on their own? They make a magnificent soup together. Simmer everything in broth with garlic and whatever spices sound right. Add beans if you have them. Eat well for two days.
The Sheet Pan: Toss anything vegetable-adjacent with olive oil, salt, and pepper, roast at 400°F until caramelized, and eat it over whatever starch you have on hand. It will be better than it sounds.
None of these require a recipe. Just the willingness to look at what you have and make something of it. That’s a skill worth building, and summer is a great time to practice.
Remember those numbers from the top? The $1,500 to $1,800 the average household throws away every year? Summer is where a big chunk of that happens and it’s also where this habit pays off fastest.
You’ll notice the difference in your produce drawer within a week. You’ll notice it in your grocery total within a month.
And here’s the thing I love most about this habit: it gets easier. Once you start seeing your fridge as a rotation system instead of a storage unit, you stop losing things in it. You stop buying duplicates because you forgot you already had something. You stop that sinking feeling when you open the produce drawer and find something sad and soft that used to be a bell pepper.
Start this week. Pick your shelf, move the most vulnerable things to eye level, and just look before you reach. That’s the whole habit. Low-tech, zero cost, and it works every single time.
Your future self and your grocery budget will thank you.
Question: What’s the saddest thing you’ve ever found in the back of your crisper drawer? Don’t be shy… share in the comments below.
Selling, soon? Here’s the truth: when it comes to selling a home, you really can judge a book by its cover. Buyers scroll fast, make snap decisions, and often decide how they feel before they even step inside. The good news? You don’t need a massive renovation budget to make a strong impression. It’s usually the small, smart updates, the ones that make a home feel clean, cared for, and easy to move into, that get buyers through the front door. Think of this as your practical, no-nonsense checklist to help your home stand out (without overspending to get there).
Here’s why this matters more than most people realize: the right small updates can increase your home’s sale price by 5% to 20% or more. Something as simple as fresh paint, updated fixtures, or a light kitchen refresh can deliver a strong return, sometimes close to what you put in. Even curb appeal alone can boost value by around 7%. On the flip side, visible neglect or unfinished repairs can quietly chip away at your bottom line, sometimes reducing what buyers are willing to pay by 10% to 30%.
And it’s not just about price… it’s about momentum. Homes that feel clean, updated, and move-in ready tend to attract stronger offers faster, while “needs work” homes often sit longer and sell for less in the end. When you factor in commissions, closing costs, and timing, those small, strategic improvements can make a meaningful difference in what you actually walk away with. Let’s start with the one buyers notice first.
1. Refresh the Landscape
First impressions start before anyone touches the front door. Add fresh mulch, trim overgrown shrubs, and replace anything that looks tired or patchy. Clear pathways, pull weeds, and define edges so everything looks intentional… not forgotten. A few inexpensive plants or potted flowers near the entrance can instantly make the home feel welcoming.
Why it matters: Buyers often decide how they feel about a home in the first 10 seconds. A tidy yard signals the home has been well cared for and that assumption carries inside. The payoff can be real: landscaping improvements have been shown to boost perceived home value by roughly 5% to 12%, and in some cases even higher. Skip it, and even a great house can feel like a project before buyers walk in.
Your front door is your home’s handshake. It sets the tone before buyers even step inside. A fresh coat of paint (or a new door if needed), a clean porch, updated house numbers, and a simple, modern mailbox can go a long way. Make sure lighting works and feels bright, especially for evening showings and photos.
Quick win: Swap in a new doormat and a simple light fixture. Add a potted plant if you have one.
Why it matters: This is one of the highest-return updates you can make. A new steel front door can recoup around 188% of its cost at resale, and even a simple paint refresh delivers a strong visual payoff. These small details signal “well-maintained” before the door even opens and that mindset tends to carry through the rest of the showing.
3. Let the Light In
Outdated or heavy curtains can make a home feel smaller and darker. Remove them or swap for simple, neutral options. Clean your windows (inside and out), trim back anything blocking light, and open everything up before photos or showings.
Quick win: Add a mirror across from a window to bounce light deeper into the room.
Why it matters: Bright homes feel bigger, cleaner, and more inviting, three things buyers consistently look for. Natural light also shapes how a home feels, and that feeling sticks. Well-lit spaces tend to photograph better, show better, and often sell faster because buyers can more easily picture themselves living there.
You don’t need designer pieces. Swapping out dated light fixtures and worn faucets, especially in kitchens, bathrooms, and entryways, can instantly make a home feel more current. Focus on anything that looks brassy, cloudy, or tired.
Stick with simple finishes like brushed nickel, matte black, or warm brass and keep them consistent throughout the home so it feels intentional, not pieced together.
Why it matters: These are small details buyers notice up close. Updated fixtures signal a home has been maintained, while outdated ones can quietly drag the whole space down. The good news? This is one of the more affordable upgrades (often a few hundred dollars total) that can improve photos, showings, and help avoid those “we’ll need to update everything” negotiations.
5. Clarify Every Space
If a buyer has to guess what a space is for, you’ve already lost a little momentum. Give every area a clear purpose, even the awkward ones. A small desk, reading nook, or simple storage setup helps buyers understand how the space actually works.
Use appropriately sized furniture and keep it minimal. Too much (or oversized pieces) can make a room feel smaller instead of more useful.
Why it matters: Buyers aren’t just looking at space. They’re trying to picture their daily life. When a room is undefined or confusing, that mental picture breaks down. Clear, simple staging helps rooms feel more functional, improves how they show in photos, and builds confidence that the home “makes sense” in real life.
6. Address Popcorn Ceilings (Carefully)
Popcorn ceilings can instantly date a home, but this is one place where you don’t want to rush in blindly. If your home was built before 1979, have it tested for asbestos first and bring in a licensed professional if needed.
Full removal gives the cleanest, most modern look. Covering with drywall is often faster and less messy. Painting can soften the look, but it doesn’t solve the underlying issue.
Why it matters: This is one of those features buyers notice right away and often use as a negotiating point. Removing it can help a home sell faster (sometimes by a few weeks) and may add several thousand dollars in value. Ignore it, and buyers may mentally subtract before they’ve even seen the rest of the house.
7. Opt for Partial Renovations
You don’t need a full remodel to make a real difference. Focus on what buyers actually notice: cabinet hardware, countertops, and bathroom vanities.
Fresh handles alone can make kitchens and bathrooms feel more current. If countertops are stained or clearly dated, an upgrade can deliver strong returns. And in the bathroom, even a simple vanity refresh can shift the whole feel of the space.
Why it works: Buyers don’t study homes. They react to what they can see and touch. Small, visible updates signal “well cared for” without the cost or disruption of a full renovation.
8. Return Rooms to Their Intended Purpose
Buyers shop by room count, not creativity. If a bedroom has been turned into an office or gym, it needs to look like a bedroom again to be counted (and valued) properly.
You can still suggest flexibility by adding a small desk or reading chair, but keep the bed as the main focus so there’s no confusion.
Why it matters: A “lost” bedroom can quietly reduce perceived value by tens of thousands of dollars. In many markets, the jump from 2 to 3 bedrooms is one of the biggest value increases a home can have. If buyers can’t instantly recognize the room’s purpose, they tend to mentally discount it or assume it doesn’t count at all.
9. Deal with Worn Flooring
If carpet is stained or worn, cleaning can help, but only up to a point. If it still looks tired, consider replacing it or removing it to reveal hardwood underneath. If you already have hardwood, a simple refinish can make it look like new.
Rule of thumb: If it looks questionable, buyers will assume it needs replacing and subtract that cost from your price.
Why it matters: Flooring is one of the first things buyers notice and one of the hardest to ignore. Hardwood floors can boost value (often up to a few percent) and tend to be a top buyer preference, while worn carpet is usually seen as a project. Even a basic, clean update can make the whole home feel fresher and more move-in ready.
Buyers aren’t buying your life… they’re trying to picture theirs. Pack up family photos, diplomas, and anything highly specific so the space feels open to interpretation.
But don’t swing too far. A completely empty home can feel cold and forgettable.
The sweet spot: Think “welcoming hotel.” Neutral art, a few simple accessories, maybe a folded throw or fresh towels. Clean, calm, and easy to step into.
Why it matters: The less mental editing buyers have to do, the faster they connect and that connection is what turns a showing into an offer.
11. Clean Like It Matters, Because It Does
A true deep clean is one of the highest-return things you can do. Windows, baseboards, grout, inside cabinets… the spots you’ve stopped noticing? Buyers won’t.
Reality check: They’ll clock grime in seconds and once they do, everything else feels less cared for.
Focus where it counts: Kitchens (especially appliances), bathrooms (grout + caulk), windows (inside and out), and high-touch spots like switches and handles. Skip heavy air fresheners. Clean should smell like… clean, not “trying to hide something.”
Why it matters: A spotless home signals maintenance. And maintenance builds trust, which makes buyers far less likely to start mentally discounting your price.
That bright pink bedroom might have been a hit at home… but buyers see it as a weekend project. Stick with soft, neutral shades (warm whites, light grays, or greige) to create a calm, cohesive feel from room to room.
If you don’t want to repaint everything, prioritize the most visible spaces (living room, kitchen, primary bedroom).
Why it matters: Light neutrals reflect more light, make rooms feel bigger, and photograph beautifully which is half the battle in online listings.
Before anyone walks through your door, they’ve already formed an opinion online. Bright photos, clean spaces, and simple styling aren’t extras anymore. They’re the baseline. Take a few photos with your phone. What looks slightly “off” in a picture will stand out even more in a listing.
At the same time, don’t overlook the small stuff. Loose handles, squeaky doors, chipped paint… buyers notice, and they tend to connect those dots into bigger maintenance concerns. Tighten hardware, swap burnt-out bulbs, touch up scuffs, silence those squeaks. Nothing fancy, just handled.
Then bring it all together with one goal: a home that feels move-in ready. Not perfect… just clean, cohesive, and easy to say yes to. Matching finishes, organized spaces, and a fresh (not overly scented) feel go a long way.
You don’t need to do everything on this list. But the more boxes you check, the more your home feels cared for, functional, and worth the price.
And that’s what turns interest into offers.
Question: What’s one small home project you’ve been putting off… that you know would make a big difference if you finally did it?
EverydayCheapskate™ is reader-supported. We participate in the Amazon Services LLC Associates Program and other affiliate advertising programs, designed to provide a means for us to earn from qualifying purchases, at no cost to you.
https://www.everydaycheapskate.com/wp-content/uploads/20260505-budget-friendly-home-improvements-to-increase-sales-price.png8001200Mary Hunthttps://www.everydaycheapskate.com/wp-content/uploads/EC-Logo-by-Mary-Hunt-Tagline-Trimmed.pngMary Hunt2026-05-05 21:38:292026-05-05 21:40:21Before You List: 12 Easy Wins to Boost Your Sale Price
Ever notice how a house can feel messy even when nothing looks that bad? A few papers on the counter. A couple of dishes in the sink. Something mysterious in the back of the fridge you’re choosing not to investigate. None of it feels urgent… but somehow the whole place feels heavier than it should. That quiet buildup is exactly why a simple Friday reset routine works so well. In just ten minutes, this routine lets you knock back the little messes that create everyday friction and head into the weekend feeling calmer, more organized, and a little more in control.
Most household stress doesn’t come from big disasters. It comes from small things that quietly pile up all week long. A little clutter here. A forgotten leftover there. Grit on the floor that somehow multiplies overnight. Individually they’re harmless. Together they create that nagging feeling that the house (and your brain) never quite get a reset.
None of it feels urgent in the moment. But taken together, it creates that constant, low-grade feeling that you’re behind, no matter how hard you try.
Why a Simple Friday Reset Routine Works
If I hired a housekeeping service, I’d schedule them every Friday afternoon without fail. There’s something wonderful about heading into the weekend with a clean house and a clear head. But since there’s no housekeeping service happening at my house, I rely on something else: a simple Friday reset.
This is not deep cleaning. This is not perfection. It’s ten minutes. Minimum. That’s it.
The point isn’t how much you accomplish in those ten minutes. The point is that you interrupt the slow creep of little messes before they turn into frustration, wasted time, and that nagging feeling that everything feels harder than it should.
For me, this weekly habit doesn’t just straighten up a few problem spots. It clears my mind, too. When the counters are clear and the floors aren’t gritty, the whole house feels calmer… and so do I. Sometimes it even sparks a little joy, which is no small thing at the end of a long week.
Step 1: Clear the Kitchen Counters & Shine the Sink
My reset always starts in the kitchen, because that’s where clutter seems to gather and throw a party.
First up: counters and sink. Anything that doesn’t have a permanent home on the counter gets removed. Mail. Stray dishes. Papers. Bags. Empty cups. Random piles of “I’ll deal with this later.” If it doesn’t belong there, it goes… wherever it actually lives.
This step alone can change the entire feel of a kitchen. Clear counters create breathing room. Suddenly the space looks calmer and more functional, even if nothing else has changed.
Then I give the sink and fixtures a quick polish until they shine like a brand-new penny. It’s amazing what a clean sink does for the overall mood of a kitchen. Even if nothing else is perfect, a shiny sink makes the whole room feel like it’s got its act together.
Next comes a quick refrigerator check… and the emphasis here is on quick. This is not a scrub-down or a full reorganization. It’s just a look.
Leftovers that need to be eaten soon get moved front and center. Anything past its prime gets tossed before it turns into a science project. Produce gets an honest assessment. No guilt. No debates. Just decisions.
This tiny step removes a surprising amount of daily friction. When you know what’s actually in the refrigerator, meals become easier to plan and food is far less likely to go to waste. And that constant “What are we going to do about dinner?” stress? It quiets down considerably.
Step 3: Sweep High-Traffic Floors Before the Weekend
With whatever time I have left, I sweep or vacuum the hard floors in the highest-traffic areas: the entryway, kitchen, and main hallway.
Dirt and grit have a way of spreading everywhere if they’re ignored, like they’re on a mission. Catching them once a week keeps floors from feeling grimy and prevents that nagging sense that the house is never quite clean, no matter how often you tidy.
It’s a small step, but walking into the kitchen on Saturday morning and feeling clean floors underfoot is a surprisingly satisfying way to start the weekend.
How a 10-Minute Friday Reset Reduces Household Stress
Three simple actions. No special products. No marathon cleaning sessions. No background music required, though it doesn’t hurt.
What makes this reset work isn’t the clock or the exact steps. It’s the rhythm. Ten minutes once a week keeps small stressors from multiplying.
When counters stay clear, mornings run smoother. When the refrigerator gets checked regularly, food decisions feel easier. When floors aren’t gritty, the house feels calmer… literally underfoot.
Small routines like this work because they’re easy to repeat. And repetition is what keeps little problems from quietly turning into bigger ones.
If you like the idea of having a simple reminder, I’ve created a 10-Minute Friday Reset checklist you can print and keep on the fridge or tuck inside a planner. It’s nothing fancy… just the same three steps in a quick, easy format so you don’t have to think about it at the end of a long week.
This is what works for me, but it’s not meant to be a rigid system. Think of it as a template. Maybe your reset takes fifteen minutes instead of ten. Maybe you swap out one step for something that causes more stress in your household. The goal isn’t precision. It’s consistency.
Most household stress builds quietly when no one is looking. A weekly reset interrupts that process. It keeps small messes visible and manageable before they become overwhelming.
And what a fine way to head into the weekend… with a cleaner house, a clearer head, and one less thing nagging at you from the back of your mind.
Question: What’s the one small task that instantly makes your house feel cleaner? Share your tips the comments below.
https://www.everydaycheapskate.com/wp-content/uploads/20260314-tidy-living-room-Friday-reset-routine-with-bright-natural-light.png8001200Mary Hunthttps://www.everydaycheapskate.com/wp-content/uploads/EC-Logo-by-Mary-Hunt-Tagline-Trimmed.pngMary Hunt2026-03-14 13:55:272026-03-14 13:55:27The 10-Minute Friday Reset That Saves Your Weekend
By the time winter finally loosens its grip, our houses tend to feel a little tired. The air is stale, the light feels dimmer than it should be, and no candle, no matter how pine-scented, can convince you it’s actually spring. Before you reach for expensive sprays or “spring refresh” products, try something simpler. A few small, strategic resets can freshen a house after winter quickly, and most of them cost little to nothing.
A house can look perfectly clean and still feel a little off this time of year. That “winter house” feeling is surprisingly common, and it usually has less to do with cleaning habits and more to do with how homes behave when they’re sealed up for months.
Why Houses Feel Stale After a Long Winter
During winter, homes essentially become closed systems. Windows stay shut, doors open less often, and the same indoor air circulates over and over again through the heating system. Every time the furnace runs, it moves that air and whatever is floating in it throughout the house.
That includes dust, pet dander, fibers from blankets and clothing, cooking odors, and tiny particles tracked in from outside. Over time, fabrics, carpets, and soft surfaces quietly hold onto those smells and particles.
Heating systems also stir up dust that’s already settled. Floors, baseboards, vents, and furniture all become sources once warm air starts moving regularly. If the furnace filter is clean, it traps a lot of that. If it isn’t, those particles simply keep circulating. If you can’t remember the last time the filter was changed, it’s probably time.
Winter living adds its own layer to the mix. Heavier clothes shed fibers, blankets get constant use, pets spend more time indoors, and entryways collect whatever boots bring inside. None of that means a home is dirty. It’s just what happens when life moves indoors for a few months.
All of this is why the simplest way to freshen a house after winter usually has nothing to do with buying new products. What makes the biggest difference is clearing out the stale air, refreshing the fabrics that held onto winter odors, and letting natural light back into the rooms that carried us through the colder months.
The biggest difference usually comes from three simple things: fresh air, refreshed fabrics, and a little more light.
1. Start With Fresh Air
First, open the windows. Yes, even if it’s still chilly. Fresh air is the fastest way to freshen a house after winter. Five to ten minutes of cross-ventilation can do more for a house than any spray bottle ever could. Open windows on opposite sides of the house and let fresh air push the stale stuff out. You’re not trying to heat the neighborhood… just giving your home a quick lungful of outside air.
This quick air exchange helps remove built-up moisture, lingering odors, and the recycled indoor air that’s been circulating all winter. Because the exchange happens quickly, the walls and furniture keep most of their heat, so the house warms back up faster than you might expect.
It’s one of the simplest ways to make a house smell and feel fresher almost immediately.
2. Refresh Winter Fabrics That Trap Odors
Next, deal with fabrics. Winter is heavy on soft surfaces: blankets, throws, extra pillows, rugs, and curtains. All of them quietly collect dust, cooking smells, and that vague “been indoors too long” odor.
You don’t have to tackle everything at once. Start with what makes the biggest difference. Wash throw blankets and pillow covers. Toss small rugs into the washer or hang them outside and give them a good shake. If curtains aren’t washable, take them down and hang them outdoors for an hour or two.
Fresh air does a remarkable job of clearing trapped odors from fabrics, and it costs absolutely nothing.
While you’re at it, sprinkle baking soda on carpets and rugs before vacuuming. Let it sit for about 15 minutes, then vacuum thoroughly.
Baking soda absorbs odors instead of covering them up. It pulls smells out of carpet fibers that regular vacuuming leaves behind. A simple box from the pantry can do the same job as those specialty carpet powders without the price tag or the heavy fragrance.
Light is another overlooked reset button. Winter grime builds up quietly on windows, lampshades, and light fixtures. Cleaning windows inside, not just outside, can make a room feel brighter almost instantly. Dust light bulbs and fixtures, and wipe down lampshades with a microfiber cloth or lint roller.
You’re not imagining things when a room feels brighter after this. Clean glass and bulbs allow more light to pass through, which can change the entire feel of a space without moving a single piece of furniture.
Then comes one of the easiest refreshes of all: remove one thing per room that doesn’t belong there anymore. Winter has a way of encouraging clutter to hibernate. Boots by the door. Extra blankets on chairs. Stacks of mail on flat surfaces.
You don’t need a full decluttering marathon. Just take a slow lap through the house and put away or remove one out-of-season item in each room. That small shift alone can make spaces feel calmer and more open.
Now let’s talk about scent, but not the store-bought kind. Skip plug-ins and sprays. Instead, simmer a small pot of water on the stove with lemon peels, a splash of vinegar, or a few sprigs of rosemary if you have them. Citrus rinds, cinnamon sticks, and leftover herb stems work well too.
The gentle steam helps neutralize lingering odors while adding a light, clean scent to the air. When you’re done, just turn off the heat and let the pot cool.
No chemicals. No artificial fragrance. Just a kitchen trick that’s been working quietly for generations.
Finally, give a little attention to the spots winter living hits hardest: entryways and kitchens. Wipe down door handles, light switches, cabinet fronts, and the inside of the refrigerator. These small, high-touch areas quietly influence how clean a house feels day to day.
A quick wipe with warm water and a little dish soap usually does the trick.
Here’s the truth: freshening a house after winter isn’t about buying something new. It’s about undoing what months of closed windows and indoor living quietly left behind.
Air it out. Lighten it up. Remove what no longer fits the season.
The cheapest way to freshen a house after winter isn’t found in an aisle… it’s already sitting right there, waiting for a little attention.
Question: What’s the first thing you do to make your home feel like spring again? Open the windows, start cleaning, or move things around a little?
EverydayCheapskate™ is reader-supported. We participate in the Amazon Services LLC Associates Program and other affiliate advertising programs, designed to provide a means for us to earn from qualifying purchases, at no cost to you.
https://www.everydaycheapskate.com/wp-content/uploads/20260307-Spring-crocus-flowers-blooming-on-snow-how-to-freshen-a-house-after-winter-spring-cleaning.png8001200Mary Hunthttps://www.everydaycheapskate.com/wp-content/uploads/EC-Logo-by-Mary-Hunt-Tagline-Trimmed.pngMary Hunt2026-03-07 12:04:292026-03-07 12:04:30How to Freshen a House After Winter for Almost Free
Ever wonder why the emails you actually want seem to vanish, while the junk shows up like clockwork? It’s not you. It’s your inbox trying to be “helpful.” The fix is simple: safelist email addresses for the senders you trust. This tells your email provider, “Hey, this sender stays.” Once you do, important messages stop wandering off into spam purgatory.
Email providers are getting more aggressive about filtering… sometimes a little too helpful. Even emails you asked for can end up sidelined without warning.
Safelisting is your way of telling your inbox that the Everyday Cheapskate daily email is welcome and wanted. Once you do, future emails land where they belong, consistently and reliably. Below, you’ll find simple, step-by-step instructions for the most common email providers so you can fix this once and stop wondering what you missed.
What “Safelist” Really Means (and Why It Works)
Safelisting simply means adding an email address to your contacts so your inbox knows it’s a trusted sender. Think of it as giving your email provider a clear instruction instead of letting it guess.
You may also hear this called an allowlist… same idea, different name. Either way, it’s a small, one-time step that tells your inbox, “This email is welcome here.” And once that message is received, your emails stop bouncing around behind the scenes and start showing up where you expect them.
How to Safelist an Email Address in Popular Email Providers
Email providers don’t all work the same way, but the goal is identical: tell your inbox that an email is trusted and should always be delivered. The good news is that once you know where to click, safelisting takes about a minute and it’s a one-and-done fix.
Below are step-by-step instructions for today’s most commonly used email providers, so you can jump straight to the one you use and move on with your day.
Let’s cut to the chase: the quickest way to make sure emails you actually want don’t vanish into the junk abyss is simple… tell your email system that you trust the sender.
In most email services, this boils down to three actions:
Mark it as “Not Spam” or “Not Junk.” If a message lands in your spam folder, open it and hit that button. It teaches your inbox to treat future messages from that sender like gold.
Add the sender to your contacts. Saving the email address makes the system recognize it as familiar and friendly.
Set a filter or rule. If your email provider allows it, create a simple rule that says, “Always deliver messages from this address straight to my inbox.”
Do this once, and your inbox will start cooperating. It’s fast, it’s reliable, and it spares you the frustration of hunting for important messages later.
Using Filters and Rules to Protect Important Emails
If you’ve ever missed an email that really mattered, you know the frustration… ours lost hunting through your inbox or, worse, discovering it too late.
You don’t have to leave it to chance. Filters and rules are your personal email bodyguards, quietly making sure that the messages you actually care about never get lost in the shuffle.
Most email services let you set simple rules: send emails from a specific address straight to your inbox, skip the spam folder, or even tag them with a label for easy spotting.
Start with the addresses you trust (i.e., family, important newsletters, work contacts) and create a filter. After that, your inbox stops being a wild jungle and starts working for you, letting you focus on the emails that matter instead of fighting the ones that don’t.
Gmail
Method #1: Add the Sender to Your Contacts
This is the easiest first step.
Open Gmail in your browser and log in.
Find an email from the sender you want to safelist.
Hover over the sender’s name or email address at the top of the message.
Click Add to contacts.
Saving a contact signals to Gmail that you want these messages delivered.
Pro Tip: If you don’t see it in your inbox, check the Spam folder first and mark the email as Not spam. That tells Gmail it’s important.M
Method #2: Create a Filter to Never Send to Spam
This is the most reliable way to safelist a sender.
Click the gear icon in Gmail’s top right corner.
Choose See all settings.
Go to the Filters and Blocked Addresses tab.
Click Create a new filter.
In the From field, type the full email address you want to safelist (e.g., mary@everydaycheapskate.com).
Click Create filter.
Check Never send it to Spam.
Click Create filter again to save it.
Once you’ve done this, Gmail will stop sending future messages from that sender to the spam folder and deliver them straight to your inbox.
Optional: Improve Where It Lands
Gmail sometimes sorts messages into tabs like Primary, Social, or Promotions. If an email lands in the wrong one:
Drag it into your Primary tab.
Gmail should ask if you want future messages from that sender in Primary. Click Yes to lock it in.
Outlook (Outlook.com / Hotmail / Live)
Method #1: Add the Sender to Your Safe Senders & Contacts
This method makes sure Outlook treats the sender as trusted.
Open Outlook.com in your browser and log in.
Click the Settings gear icon in the top right corner.
At the bottom of the Settings sidebar, click View all Outlook settings.
Choose Mail, then Junk email.
Under Safe senders and domains, click Add safe sender.
Type the full email address you want to safelist (e.g., mary@everydaycheapskate.com).
Press Enter or click OK, then click Save.
Adding an address here tells Outlook never to send those emails to the Junk folder.
Pro Tip: Outlook also treats addresses in your Contacts as safe by default. So if you’ve saved the sender as a contact in Outlook, you’re already partway there.
Method #2: Check Junk & Blocked Lists
If messages still don’t show up where you want:
Go back to Settings → Mail → Junk email.
Look at your Blocked senders and domains list.
If the address you want to receive is listed there, remove it.
Save your changes.
Sometimes Outlook’s filters still hold old info. This clears the path.
Optional: Mark as “Not Junk”
If an important email already went to Junk:
Open your Junk folder.
Find the email you want.
Right‑click it and choose Mark as not junk.
That trains Outlook that these messages belong in your inbox going forward.
Apple Mail (iCloud Mail)
Method #1: Mark an Email as “Not Junk”
This is the simplest move if a message you want lands in the Junk folder.
Open Mail (either the Mail app on your device or iCloud.com).
Go to your Junk folder.
Find an email from the sender you want to safelist.
Select it and click Not Junk or Move to Inbox.
When you move an email out of Junk, iCloud learns that future messages from the same sender should go straight into your inbox.
Pro Tip: On an iPhone/iPad, long‑press the email in Junk and choose Move to Inbox. Over time, Mail starts recognizing that sender as important.
Method #2: Add the Sender to Your Contacts
Adding someone as a contact tells iCloud Mail that you trust them.
Open the email you want to keep.
Tap or click the sender’s name or email address.
Choose Add to Contacts or Create New Contact.
Save the contact.
While Apple doesn’t call this a “safe sender list,” having a sender in your contacts does improve the chance their messages land in your inbox instead of spam.
Method #3: Create an iCloud Mail Rule (Web Only)
If you want a more reliable, automatic way, especially on the web, create a rule that directs certain mail to your inbox.
Log in to iCloud.com and open Mail.
Click the Settings gear icon (lower left) and choose Settings.
Select Rules.
Click Add to create a new rule.
Enter a name (like “Always Inbox”).
Set the rule so If a message is from the specific email address.
Under Then, choose Move to Inbox.
Click Add or Done to save.
Rules act like a safelist by telling iCloud Mail exactly what to do with messages you want to keep front and center.
Why this matters: iCloud Mail doesn’t have a traditional “safe senders” section like Gmail or Outlook, but training the filter and adding contacts works well. Moving messages out of Junk, saving the sender as a contact, or adding a rule takes just a couple of minutes and sharply reduces the odds of missing something important.
Yahoo Mail
Yahoo Mail doesn’t have a traditional “safe senders” box the way some mobile apps or older systems did, but you can still make sure the emails you want land in your inbox by teaching Yahoo what to recognize.
Method #1: Add the Sender to Your Contacts
This is the simplest first step.
Log in to Yahoo Mail in your browser.
Click the Contacts (address book) icon near the top of your inbox.
Select New Contact.
Enter the name and full email address of the sender you want to safelist (e.g., mary@everydaycheapskate.com).
Click Save.
Adding a sender to your Yahoo contacts acts as a signal that you want their messages, which helps keep them out of spam.
Pro Tip: If you don’t see expected mail, check your Spam folder. If the message is there, mark it Not Spam. That tells Yahoo this sender belongs in your inbox.
Method #2: Create a Filter to Send to Inbox
If you want a more direct instruction, especially if you haven’t received mail from that address yet, set up a filter:
Click the Settings gear icon in Yahoo Mail.
Choose More Settings.
Select Filters from the left‑side menu.
Click Add new filters.
Give your filter a name (like “Always Inbox”).
In the field for From, enter the full email address you want to safelist.
Choose Inbox as the destination folder.
Click Save.
This tells Yahoo Mail exactly what you want it to do with mail from that sender.
AOL Mail
Method #1: Add the Sender to Your Contacts
This is the most effective and straightforward way to safelist in AOL Mail.
Open AOL Mail in your browser and sign in.
Click the Contacts icon in the left sidebar (sometimes labeled Address Book).
Click New Contact at the top of the contacts list.
Enter the full email address you want to safelist (e.g., mary@everydaycheapskate.com).
Click Add Contact or Save.
Adding a sender to your contacts tells AOL Mail that you want messages from that address, which helps keep them out of spam and more likely to show up in your inbox.
Pro Tip: If you already see a message from that email in your Spam folder, open it and click Not Spam first. This trains AOL’s filters that the message belongs in your inbox next time.
Method #2: Use Spam Controls (If Available)
Some AOL Mail setups include a spam control option that lets you tighten things down so only contacts get through.
Go to Settings → Security & privacy.
Look for Block all senders except contacts.
Turn that option on.
When you enable this, AOL will let only senders in your contacts reach your inbox. This isn’t for everyone, but it’s powerful if you want maximum control over what lands in your inbox.
Optional: Create a Filter (If You Don’t See Mail from Someone)
Some versions of AOL Mail let you create filters that move mail from specific senders directly into your inbox or another folder:
Open Settings and choose Filters (if it’s shown).
Click Create filter.
Set the rule so messages From the email address go to Inbox.
Save the filter.
This acts like a safelist by giving AOL an explicit instruction about where those messages belong. (Not all AOL accounts show this option, but it’s worth checking.)
Comcast (Xfinity Email)
Method #1: Mark Messages as “Not Spam”
This is the easiest way to teach Comcast what you want.
Log in to your Comcast / Xfinity Email account in a browser.
Open the Spam folder.
Select the message from the sender you want to safelist.
Click the Not Spam button (or toolbar option).
Doing this signals to Comcast’s filters that future messages from that sender belong in your inbox.
Method #2: Add the Sender to Your Contacts
Saving a sender as a contact makes it much more likely their mail shows up where it should.
While logged in to Comcast / Xfinity Email, click the Address Book or Contacts icon.
Click New or New Contact.
Enter the name and full email address you want to safelist (e.g., mary@everydaycheapskate.com).
Click Save.
If you combine this with marking messages as Not Spam, Comcast gets a strong signal that the sender is trusted.
Method #3: Create a Filter Rule to Deliver to Inbox
Filters give you the most direct instruction Comcast can follow.
In your Comcast webmail, click the Settings icon.
Choose Filter Rules or similar mail filtering settings.
Click Add new rule.
Name the rule (like “Always Inbox”).
Under Conditions, select Sender / From and enter the full email address.
Under Actions, choose Move to folder → Inbox.
Click Save.
This tells Xfinity exactly where to put messages from that sender.
Optional: Use the Email Safe List Carefully
Some Comcast accounts include an Email Safe List feature that only delivers mail from addresses you enter and rejects everything else. While that sounds appealing, it’s a scorched‑earth approach: any sender not on the list will be discarded entirely, even if it’s something you want later.
AT&T WebMail
Method #1: Create a Filter to Always Deliver to Your Inbox
This is the most direct way to safelist a sender in AT&T WebMail.
Log in to AT&T WebMail in your browser.
Click Options (sometimes the gear icon).
Choose Filters.
Click Add Filter.
In the top row labeled From Header, select contains from the drop‑down menu.
Enter the full email address you want to safelist (e.g., mary@everydaycheapskate.com).
Down where it says Move the message to, choose Inbox from the drop‑down menu.
Click Add Filter again to save it.
This tells AT&T Mail: yes, these messages belong in my inbox. Plain and simple.
Method #2: Add the Sender to Your Address Book
Even if you don’t set a filter, saving a sender as a contact helps AT&T recognize that their mail should reach you.
While logged in to AT&T WebMail, click your Address Book or Contacts.
Click Add New Contact.
Enter the sender’s name and full email address.
Click Save.
When mail arrives from someone you’ve saved as a contact, most spam filters interpret that as a sign you want that mail.
Pro Tip: If you’re also using the newer Yahoo‑based AT&T interface, the Yahoo Mail safelisting steps (like filters and contacts) apply here too, so you can use whatever option seems easiest to you.
Optional: Mark Mail as “Not Spam”
If an expected message landed in your Spam or Bulk Mail folder first:
Open the message.
Look for a Not Spam or Move to Inbox button.
This tells the system that messages like this one belong in your inbox in the future.
Cox.net
While the Cox.net brand still exists in some email addresses, the service is now hosted through Yahoo Mail in 2026 for most users. That means many Cox.net email safelisting steps look a lot like Yahoo Mail safelisting, but there is a legacy webmail interface where you can set exceptions directly if you’re still using it. Below are the most reliable ways to make sure emails you want land in your inbox, whether you’re on the older Cox webmail setup or the newer Yahoo‑based system.
Method #1: Add the Sender to Your Cox/Yahoo Contacts
This works whether your Cox.net mail is in the legacy interface or in the Yahoo Mail interface:
Open your Cox.net email (either at the Cox webmail or through Yahoo Mail).
Go to your Contacts or Address Book.
Click Add New Contact.
Enter the sender’s name and full email address (e.g., mary@everydaycheapskate.com).
Click Save.
When a sender is in your contacts, both Yahoo‑based and older Cox filters are more likely to let their emails land right in your inbox.
Pro Tip: If a message from a saved contact still ends up in Spam, open it and click Not Spam. That tells the system these messages are wanted and should be delivered to your inbox.
Method #2: Add an Exception in the Cox Webmail Interface
If you’re using the older Cox webmail interface (not the Yahoo Mail interface), you can add specific addresses or domains to the exceptions list:
Open Cox.net WebMail in your browser.
Click Preferences or Settings.
Under General Email Preferences, select Blocked Senders (or similar).
In the Exceptions List box, type the full email address you want to safelist (e.g., mary@everydaycheapskate.com).
Click Add, then Save.
This doesn’t exactly call it a “safe list,” but adding an address here tells the filter not to treat that sender as blocked or junk.
Method #3: Use Yahoo Mail Safelisting if Your Cox.net Account Is Yahoo‑Hosted
If your Cox.net email has migrated into Yahoo Mail (very common as of 2026), you can use all the Yahoo Mail safelisting steps we cover elsewhere on this page, like creating a filter to send messages to your inbox or marking mail as Not Spam.
Mail.com
Method #1: Add the Sender to Your Allowlist
This is the most direct way to tell Mail.com that a sender should always bypass the spam filter.
Log in to Mail.com in your browser.
Click E‑mail at the top.
Go to Settings (the wrench icon).
Under Security, select Allowlist.
Type the full email address you want to safelist (like mary@everydaycheapskate.com).
Click Save.
Once added, emails from that address (or even the whole domain if you want) will go straight to your inbox.
Pro Tip: If you often receive emails from the same company but different addresses (like newsletters), you can enter the domain instead of a single address (e.g., everydaycheapskate.com).
Method #2: Add the Sender to Your Contacts
Saving someone as a contact also tells Mail.com they’re trusted.
While logged in, click Contacts at the top.
Click New Contact.
Enter the name and full email address you want to safelist.
Click Save.
Mail.com treats contacts as trusted senders, which helps future messages land in your inbox instead of spam.
Method #3: Train Your Personal Spam Filter
Mail.com’s spam filter learns over time based on how you sort mail.
If a message you want lands in Spam, open it and click Not Spam.
If a message you don’t want arrives in your inbox, click Spam.
Each time you move a message where it belongs, Mail.com’s filter gets better at recognizing what you want and what you don’t.
Pro Tip: If you make mistakes or things get jumbled, you can reset your personal spam filter in Spam Protection settings and retrain it from scratch.
GMX
Method #1: Add the Sender to Your Allowlist
This is the most direct way to safelist a sender in GMX. Emails from allowlisted addresses are not checked for spam and go straight to your inbox.
Log in to GMX Mail in your browser.
Click Settings (usually a gear icon).
Select Allowlist under the spam or security settings.
Type the full email address you want to safelist (e.g., mary@everydaycheapskate.com).
Click Save.
Pro Tip: If you subscribe to newsletters from the same domain (like everydaycheapskate.com), you can allowlist the entire domain (just type everydaycheapskate.com). That catches all related addresses without typing each one.
Method #2: Save the Sender as a Contact
GMX treats contacts as trusted senders. Simply saving someone in your address book improves the odds that future mail goes to your inbox.
Open the message from the sender you want to safelist.
Click the sender’s name or email address.
Choose Add to Contacts.
Save the contact.
Once the sender is in your contacts, GMX weights messages from them as wanted mail.
Method #3: Train Your Personal Spam Filter
If an email you want shows up in Spam, manually correcting it helps the system learn your preferences over time.
Go to your Spam folder.
Select the message you want.
Click Not Spam or Move to Inbox.
Every time you correct a misclassified message, GMX’s spam filter learns what you do and don’t want. If things get messy, you can reset your personal spam filter in Spam Protection settings and start fresh.
Thunderbird (Desktop Email Client)
Thunderbird isn’t a webmail service like Gmail or Yahoo. It’s a desktop email program.
Method #1: Add the Sender to Your Address Book
Thunderbird treats people you’ve saved as trusted.
Open Thunderbird on your computer.
Open an email from the sender you want to safelist (e.g., your newsletter).
Click the sender’s name or email address in the header.
Choose Add to Address Book.
Choose Personal Address Book and click OK.
When the sender is in your address book, Thunderbird’s junk tools are less likely to tag their messages as spam.
Method #2: Enable Whitelisting via Junk Settings
This step makes sure Thunderbird uses your contacts as its safelist.
From the main window, click the menu button (☰).
Go to Account Settings for the email account you’re working with.
Choose Junk Settings under that account.
Make sure Enable adaptive junk mail controls for this account is checked.
For Do not automatically mark mail as junk if the sender is in: select an address book (like Personal Address Book).
Click OK to save.
Now Thunderbird won’t mark mail from contacts in that address book as junk.
Method #3: Train the Junk Filter
Thunderbird learns what you want and don’t want by your actions.
If a message you want lands in Junk, right‑click it and choose Mark → Not Junk (or use Shift + J after selecting it).
If a message you don’t want lands in your inbox, mark it as Junk the same way.
Doing this regularly sharpens Thunderbird’s junk filter so it gets smarter over time.
Road Runner
Road Runner email still exists for legacy accounts, but in 2026 it’s accessed through Spectrum’s webmail platform rather than an old “roadrunner.com” interface. So if you’re trying to safelist a sender in Road Runner, you’re really working in the Spectrum webmail system, which behaves a lot like other webmail services when it comes to spam and safelisting.
Method #1: Mark as “Not Spam”
This is the easiest and most reliable way to tell Road Runner/Spectrum webmail that you want future messages from a sender.
Open your Road Runner webmail (Spectrum Webmail) in your browser.
Go to your Spam or Junk folder.
Find an email from the sender you want to safelist.
Select it and click Mark as Not Spam (or Not Junk).
That action moves the message back to your inbox and trains the system that similar mail should be delivered correctly next time.
Pro Tip: If you already have a filter option in your webmail settings (some Spectrum setups offer them), you can use it to make this permanent, but “Not Spam” alone teaches the system what you prefer.
Method #2: Add the Sender to Your Contacts
Saving someone as a contact is a classic safelisting habit that helps most inbox systems understand what you want:
While logged in to your Road Runner/Spectrum inbox, open the message.
Click on the sender’s name/email address.
Choose Add to Contacts or Save Contact.
Save the contact info.
Once a sender is in your contacts, future mail from them is much less likely to be treated as junk.
Quick reminder: If your Road Runner email hasn’t been accessed in a long while, it’s worth signing in regularly so it stays active and doesn’t get deactivated.
What to Do If Emails Still Go to Spam
Even with safelisting and filters, sometimes emails still sneak into the spam folder. Don’t panic… it happens. The trick is to train your inbox, step by step.
Start by checking your spam folder regularly. When you spot an email that shouldn’t be there, mark it as “Not Spam” or “Move to Inbox.” Most email systems learn from this and adjust over time. You can also double-check your filters and safelist settings to make sure nothing got missed.
If a particular sender keeps slipping through, consider creating a dedicated folder for them and a rule to send all their messages there. It’s a simple way to keep their emails visible, even if the spam filter insists on being overprotective.
Think of it as teaching your inbox how to behave. Patient, consistent nudges usually get results. Within a few days, those important emails should start landing exactly where they belong.
Question: How often do you check your spam folder just to make sure you didn’t miss something important?
https://www.everydaycheapskate.com/wp-content/uploads/20260127-woman-typing-on-laptop-keyboard-learning-how-to-safelist-an-email-address.png8001200Mary Hunthttps://www.everydaycheapskate.com/wp-content/uploads/EC-Logo-by-Mary-Hunt-Tagline-Trimmed.pngMary Hunt2026-01-27 22:32:212026-01-27 22:32:22How to Safelist an Email Address and Never Miss a Message
If getting organized feels like something that requires a free weekend, a gallon of coffee, and a personality transplant, you’re not alone. I used to think that way too… until 10-minute decluttering proved me wrong. Not someday minutes. Real-life, right-now minutes.
For years, I told myself I’d get organized “when I had time.” Funny how that day never showed up. What did show up were small pockets of waiting… coffee brewing, oven preheating, sitting in the car line. Turns out, 10 minutes is plenty when you’re focused.
This isn’t about perfection or Pinterest-worthy homes. It’s about steady progress that fits real life. One drawer leads to another. One small win builds confidence. Once you start spotting small pockets of time and using them with intention, clutter loses its grip and progress finally sticks.
How to Find Hidden Chunks of Time Every Day
If you think organizing your home or getting your personal affairs in order requires a lot of time, you might be right. But if you feel that you don’t have any time, then you’re probably wrong.
The solution is learning to recognize the little chunks of free time already woven into your day. These moments are easy to overlook because they don’t look like “real time.” But stack them together, and they add up to hours every week.
I wasn’t born with this mindset. My natural self believes anything worthwhile takes at least a full weekend and my weekends are always booked months in advance. That’s how clutter sneaks in. When that excuse pops up, I have to beat it into submission: Ten minutes. That’s all you need. Set the timer and go.
This idea shared by an Everyday Cheapskate reader changed everything for me: Figure out what you can get done in the time it takes to brew your morning coffee.
Instead of staring out the window or fiddling with my phone during those three minutes, I turn it into a challenge. It’s like 1-2-3 GO!… me versus the coffee maker. I hate to lose. The coffee maker could not care less.
At first, I went easy on myself. Straightening the knives, tidying the grinder. But without clearly defined tasks, I’d get distracted and lose. Losing is not my jam.
Once I started defining the challenge (empty, clean, and organize the silverware drawer or polish the sinks until they shine), everything changed. Suddenly I was winning. That led to bigger challenges, and before long I could unload the dishwasher before the last gurgle or, if I’m fully awake and in tip-top hustle mode, vacuum the entire kitchen floor, crumbs and all, while Bunn tries to beat me. Ha! Not a chance.
Here’s the part that matters: waiting time is everywhere, and most of us give it away without thinking twice. Ten-minute pockets show up constantly: at the doctor’s office, while dinner cooks, in the car line, waiting for the oven to preheat or the coffee to brew. Instead of letting those minutes slip by, start claiming them. Used with intention, they can add up to hours of real progress every single week.
One thing that helps me actually start (and not negotiate with myself) is using a simple visual timer. I have a small rotating cube timer on my counter that I flip to 5 or 10 minutes and race it. Do you need one? Absolutely not. But there’s something about seeing time pass and knowing it’s short that keeps me moving. If a little tool makes it easier to begin, it’s doing its job.
(Disclosure: This post includes an Amazon Creator Connections product. I may earn a small commission if you purchase through the link, at no additional cost to you.)
If you’re ready to try this, start small. Set a timer. Give it your full attention for just 10 minutes… then stop. These are quick, realistic projects that actually work because they have clear start-and-finish lines.
Organize one dresser drawer. Take everything out. Wipe out crumbs and debris, clean with an all-purpose cleaner or damp sponge, then refold and neatly replace what belongs.
Choose one collection spot (i.e., utensils, tools, cleaning supplies, or kids’ sports equipment) and toss or recycle anything you no longer use or consider worth keeping.
Declutter and vacuum the car. Inside counts just as much as inside the house.
Install those hooks you bought years ago and finally give bags, coats, or tools a proper home.
Declutter the drawer(s) on your nightstand or end table. Toss, dust, clean, and return only what belongs there.
Organize contacts on your smartphone. Make sure your In Case of Emergency contacts are set up.
Hunt down batteries, postage stamps, and lightbulbs and store them in one designated spot so you stop buying duplicates.
Organize business cards and loose addresses by adding them to your contacts once and for all.
Organize your underwear drawer. Retire worn-out socks and undies, repurpose old shirts as cleaning rags, then neatly fold what remains.
Declutter and organize one file drawer. Recycle, shred what’s no longer needed, and re-file the rest.
Purge your fridge of anything questionable or past its prime.
Declutter your desktop. Remove everything (yes, everything!), clean and polish the surface, then return only what’s absolutely necessary.
Organize your social media apps by grouping them onto one screen or folder on your phone.
Declutter your Facebook or Instagram profile and review privacy settings. Unfriend anyone who doesn’t need a front-row seat to your life.
Spend 10 minutes organizing your freezer. Toss anything unidentifiable or freezer-burned and label what remains.
Clean the ice maker and ice trays. One of those small tasks that makes a big difference.
Organize your entertainment list. Keep a running list of movies and shows you want to watch in your phone notes.
Declutter one desk drawer. Toss what doesn’t work, relocate what doesn’t belong, and group like items together.
Clean makeup brushes or grooming tools. Wash, disinfect, and let them dry while you move on with your day.
Create a landing spot for incoming mail so it doesn’t instantly become a pile.
Assess the coffee table. Put away what doesn’t belong there and make a note of where it went so it stays gone.
You’ll be amazed how much progress you can make in just 10 focused minutes and how quickly those small wins start stacking up.
There are so many things we can reasonably accomplish in just 10 minutes if we set our minds (and attitudes) to it. Over time, these small efforts stop feeling isolated.
One organized drawer leads to another. A clean microwave inspires a clean refrigerator. Soon, the whole kitchen follows. Momentum builds quietly, without drama or burnout.
That’s the beauty of this approach. You’re not overhauling your life. You’re simply using the time you already have on purpose and letting progress take care of the rest.
Question: What’s one small area in your home you know you could tackle in just 10 minutes? Share in the comments below.
EverydayCheapskate™ is reader-supported. We participate in the Amazon Services LLC Associates Program and other affiliate advertising programs, designed to provide a means for us to earn from qualifying purchases, at no cost to you.
https://www.everydaycheapskate.com/wp-content/uploads/20260115-10-minute-decluttering-woman-holding-timer-with-kitchen-in-background-1.png8001200Mary Hunthttps://www.everydaycheapskate.com/wp-content/uploads/EC-Logo-by-Mary-Hunt-Tagline-Trimmed.pngMary Hunt2026-01-15 14:44:482026-03-14 15:35:2010-Minute Decluttering That Actually Works (No Overwhelm)
I never thought a tiny office supply could take over my home, but binder clips have. From sealing snack bags to keeping cords tidy, these little clamps showcase just how many clever binder clip uses exist around the house. Affordable, versatile, and surprisingly strong, binder clips earn their place in every room. They’re the tool you didn’t know you needed, turning everyday chaos into manageable (and even fun) solutions.
If you had told me back in my spendthrift years that one of my most-used household tools wouldn’t be fancy or expensive, but a humble little office supply, I probably would’ve smiled politely and gone back to reorganizing my bevy of credit cards. But here we are.
Binder clips. The unsung hero of the home. Those little black clamps with silver arms that come in myriad sizes and even colors now? I keep them in nearly every room of my house, and not because I’m overly sentimental about organizing stuff. It’s because they work. They solve problems. And they do it on the cheap. You could call it a binder clip obsession. I call it a lifestyle.
In the Kitchen: Clamp and Conquer
The kitchen is where binder clips earn their stripes.
Chip Bag Savior: There’s nothing glamorous about a stale tortilla chip. Binder clips keep snack bags sealed tight. I don’t care what the packaging says… “resealable” rarely means “will stay shut.”
Freezer Organization: Half-used bags of frozen vegetables? Binder clip them together by type or purpose. You can even hang them from wire freezer shelves using the handles.
Fridge Tidy-Up: Small snack bags, condiment packets, or rogue string cheeses all get clipped and corralled before they vanish into the back of the fridge, never to be seen again.
Recipe Display: I print recipes (yes, still) and clip them to my cabinet handle at eye level. It’s like having my own test kitchen without the splatters on my iPad.
In the Bathroom: Surprisingly Handy
You wouldn’t think the bathroom would be a hotspot for binder clip action, but oh, it is.
Toothpaste Squeezer: Clip the tail of the tube and roll it forward as you go. You’ll be squeezing out that last pea-sized dot long after your spouse has opened a new tube.
Cord Control for Hair Tools: I wrap and clip cords for my hairdryer, curling iron, and straightener so they don’t morph into one big angry noodle pile.
Shower Curtain Trick: If your liner creeps toward you like it’s trying to start a conversation, clip it to the heavier outer curtain. No more clingy plastic surprises.
In the Home Office: Naturally Useful
Of course, binder clips belong in the office, but not just for holding stacks of paper.
Cable Wrangler: Clip one to the edge of your desk and thread your phone charger or USB cable through the handles. That charger will never again dive off the desk like a bungee jumper.
Mini Easel: Stand up a business card, sticky note, or even a photo by flipping the handles up. Instant desktop display.
Keyboard Stand Fix: When the little foot snapped off my keyboard, I propped it up with a medium-sized binder clip. Still using it years later. It works better than the original.
In the Bedroom: Unexpected Helpers
I never thought I’d keep binder clips in my nightstand, but they’ve earned their place.
Curtain Closer: If your blackout curtains don’t quite meet in the middle, a clip will bridge the gap and help you sleep past sunrise. I consider this a public service.
Cord Keeper: Clip a charger cable to the back of your nightstand or headboard. The cord stays put, and you won’t have to go fishing with your arm halfway behind the bed.
Sock Security: I clip sock pairs together before they go in the laundry hamper. They come out as the couple they went in as. Marriage counseling not required.
In the Closet: Tame the Chaos
Closets love to get cluttered. Binder clips fight back.
Scarf Organizer: Use pants hangers and binder clips to hang scarves in plain sight. If I can see it, I might actually wear it.
Shoe Pair Keeper: Clip the backs of flats, sandals, or kids’ shoes so they don’t wander off from their sole mate.
Air-Drying Assistant: For delicates like bras or hand-washables, clip them to a hanger and hang that from the shower rod. Voilà! Instant drying rack.
In the Laundry Room: Clip and Sort
Lint Bag Hanger: I clip an old grocery bag to the wall to collect lint from the dryer. When it’s full, I toss the whole thing (bag included) into the trash.
Drying Rack Assistant: I’ve used binder clips to hang dishcloths, wet socks, or random fabric swatches from drying racks when I run out of pegs.
Lost Sock Station: One clip on the wall becomes the temporary holding zone for solo socks. When their partner shows up, the reunion is glorious.
In the Garage & Car: Portable Genius
These little clips can handle heavier jobs, too.
Car Phone Mount: Clip two large binder clips together and wedge them into your car’s air vent. Add your phone, and you’ve got a DIY mount that costs pennies and takes 30 seconds to install.
Glove Box Paper Clamp: I use a binder clip to keep my registration, insurance card, and roadside assistance info all together. Easy to find, especially when it matters.
Tool Tagging: If you use plastic bins or baskets for screws, bolts, or craft supplies, clip a labeled index card to the side instead of using sticky labels that peel off.
For Kids and Pets: Yes, Really
Crayon and Marker Clamp: I keep a small bunch clipped together in my purse or car bag for emergencies. No more rogue crayons melting into upholstery.
Snack Sealer for Littles: I clip individual snack bags closed and toss them into my car’s Snack Bag. (Grandma of the Year Award anyone?) Kid-friendly and keeps Goldfish from turning to powder.
Pet Food Bag Helper: Fold and clip a big bag of dog food closed instead of trying to use a built-in zipper that doesn’t work. It’s critter-safe and keeps the food fresher.
On the Go: Travel Hacks with Binder Clips
I keep a few binder clips in my suitcase and carry-on. Here’s why:
Hotel Curtain Closer: Hotel curtains never seem to meet all the way. One clip fixes that light leak in seconds.
Toothbrush Stand: Clip one to the counter edge and stand your toothbrush upright through the handles.
Laundry Line: A bit of twine and two binder clips gives you a travel clothesline for drying swimsuits or hand-washed unmentionables.
Bonus: If your suitcase zipper loses its pull-tab mid-trip (ask me how I know), thread on a binder clip and zip like nothing happened.
There’s a quiet satisfaction in finding new uses for something simple. Binder clips don’t beep or buzz. They don’t need charging or syncing. They just work.
In a world of overcomplicated solutions and overpriced gadgets, the humble binder clip reminds me to pause, look around, and use what I already have. It’s the Everyday Cheapskate way.
I’ve always said that living frugally doesn’t mean living without. It means being creative, paying attention, and maybe even having a little fun in the process.
So yes, I keep binder clips in nearly every room. They’re tucked in drawers, clipped to hangers, holding up art projects and charging cables alike. And every time I find a new use, I can’t help but smile at the cleverness of it all.
If you’ve got a favorite binder clip trick (or discover one after this) send it my way. I’ll be the one organizing socks, sealing snack bags, and trying not to clip my fingers in the process.
Question: What’s the most unexpected way you’ve used a binder clip at home? Drop your smart uses in the comments below.
EverydayCheapskate™ is reader-supported. We participate in the Amazon Services LLC Associates Program and other affiliate advertising programs, designed to provide a means for us to earn from qualifying purchases, at no cost to you.
https://www.everydaycheapskate.com/wp-content/uploads/20251230-binder-clips.png8001200Mary Hunthttps://www.everydaycheapskate.com/wp-content/uploads/EC-Logo-by-Mary-Hunt-Tagline-Trimmed.pngMary Hunt2025-12-30 13:02:562025-12-30 13:02:57Why I Keep Binder Clips in Every Room (and You Might Want To)
I nearly tossed a handful of empty eyeglasses cases after donating old prescription glasses until the attendant gently asked me not to leave them behind. That pause was all it took. These sturdy little cases are quietly useful, surprisingly versatile, and way too good for the trash. With a little imagination (and help from smart readers), they can earn a second life doing real work around your home, car, and bag.
I almost threw them away. Those sturdy eyeglasses cases piling up in a drawer felt like clutter, until I stopped and thought about what they actually are: durable, portable, perfectly sized organizers hiding in plain sight.
From travel toiletry kits and tech cord wranglers to emergency supplies and kid distractions, these cases quietly solve everyday annoyances. The best ideas? Many came straight from readers who’ve been putting them to work for years.
Before you toss another one, take a look. Chances are, there’s a job it’s ready to do and do well.
Electronic Accessories
An eyeglasses case is just about the perfect size for earbuds, charging cords, and that mystery cable you know you’ll need someday. Tossing cords loose into a bag is how they turn into a knotted mess. A hard case keeps everything contained, protected, and, miracle of miracles, easy to find when your phone hits 12%.
Why it matters: Less digging, less frustration, fewer broken cords. Simple wins count.
Sewing Kit
Travel-size thread, scissors, needles, pins, and a couple of buttons fit easily inside an eyeglasses case. If you glue a few small magnets inside the lid, sharp items stay put and don’t jab you when you least expect it. Ask me how I know.
Why it matters: You don’t need a full sewing drawer to handle loose buttons or quick fixes on the go.
Toiletries
Because eyeglasses cases have hard sides, they’re ideal for corralling small toiletries… the emergency kind you carry “just in case.” A full-size bottle of nail polish fits perfectly, which makes me very happy after once discovering a purse that looked like a crime scene.A toothbrush, floss, and a small tube of toothpaste also fit neatly, staying clean and lint-free.
Why it matters: Containment. Protection. And fewer purse disasters.
Where to Donate Old Glasses (and Why It Matters)
Out-of-prescription eyeglasses don’t have to sit in a drawer or be buried with someone who no longer needs them. Many vision centers partner with Lions Clubs to collect used prescription glasses and distribute them locally and through medical missions abroad.
In some parts of the world, the cost of eyeglasses can equal a year’s income. For people who rely on detailed handwork (basket weaving, textile work, rug making), clear vision isn’t a luxury. It’s their livelihood.
Reader reminder from Lynn: When a loved one passes, consider donating their eyeglasses. It’s a quiet way to extend care beyond your own household.
Reusing things is smart. Giving someone the ability to see clearly? That’s something else entirely.
Makeup Case
Lipstick, mascara, eyeliner, brushes… those long, narrow items were practically designed for an eyeglasses case. Everything stays in one place instead of migrating to the darkest corners of your bag.
Why it matters: Faster touch-ups, less clutter, and no melted lipstick surprises.
The last place a necklace or earring should live is loose in a purse or backpack. That sinking feeling when you find only one earring and realize its partner has gone missing forever? This fixes that.
Designate one eyeglasses case as a portable jewelry holder and put an end to that heartbreak.
Why it matters: Protects delicate pieces and saves time and money replacing lost ones.
First Aid Kit
Bandages, ointment, tweezers, alcohol wipes… basic first-aid items fit neatly inside an eyeglasses case. Everything stays together and easy to grab when needed.
Why it matters: Emergencies rarely announce themselves. Having supplies ready is quiet competence.
Emergency Art Supplies
Fill a case with stickers, crayons, and a pad of mini Post-it notes. It will bless you the day you’re stuck in line, a waiting room, or any place where boredom threatens to take over.
Why it matters: Small distractions can prevent big meltdowns… yours included.
Contact Lens Kit
An eyeglasses case will hold a spare pair of contacts, a lens case, and a small bottle of solution. Everything stays clean, contained, and easy to find when you need it right now.
Why it matters: Losing or drying out a contact lens shouldn’t derail your day.
Loose coins rolling around in the bottom of a bag or car console are endlessly irritating. An eyeglasses case makes a perfect coin holder… quiet, contained, and easy to grab when you actually need change.
Why it matters: Less noise, less clutter, and no more fishing for quarters at the worst possible moment.
Emergency Medication Case
A sturdy eyeglasses case works beautifully for carrying emergency medications like a small bottle of insulin, syringes, or other essentials you don’t want rattling around loose. The hard shell offers protection, and everything stays together where you can find it fast. As EC Reader Dianne wisely points out, be mindful of heat and rotate contents regularly to avoid loss of potency.
Why it matters: When minutes count, fumbling doesn’t help. This keeps critical supplies organized and protected.
Mini Phone Vault
If you carry a smaller cellphone, an eyeglasses case can double as a protective sleeve. EC Reader Sam says it keeps the phone clean, prevents accidental dialing, and adds a layer of protection when it’s tossed into a bag or backpack.
Why it matters: Fewer cracked screens, fewer surprise calls, and one less thing to worry about.
Mini Office-in-a-Case
This idea from EC Reader Sue made me smile because it’s so quietly brilliant. An eyeglasses case can hold a mini stapler, eraser, pencil leads, paper clips, stamps, glue dots, even a small bottle of correction fluid. It’s perfect for a glove compartment, backpack, laptop bag, or carry-on.
Sue also suggests using cases to corral paper clips, rubber bands, or small parts in a junk drawer.
Why it matters: A little preparedness saves a lot of hassle, especially when you’re on the go
Battery Organizer
Another great one from EC Reader Sue… Eyeglasses cases are ideal for carrying spare batteries… AA, AAA, button batteries, the odd sizes you never find when you need them. Much cheaper to pack what you need than hunt them down on the road.
Why it matters: Dead batteries always strike at inconvenient times. This keeps backups handy and contained.
Crochet hooks, cross-stitch tools, scissors, large needles, and magnetic needleminders all fit neatly inside eyeglasses cases. EC Reader Laurie notes that unused magnetic needleminders stay safely corralled, while tools needed for classes or travel stay together.
Why it matters: Craft time is more enjoyable when you’re not hunting for tools.
Mailing Fragile Food Items
When mailing delicate items like dried garden peppers, an eyeglasses case provides just enough protection to prevent crushing. Bonus points for the good laugh when the recipient opens it. Thanks for the tip, Linda!
Why it matters: Practical, protective, and unexpectedly charming.
Sometimes the smartest organizing solutions aren’t new or fancy. They’re already sitting in a drawer, waiting for a second job. An old eyeglasses case is proof that usefulness doesn’t expire if you’re willing to look at things just a little differently.
Question: What’s the smartest way you’ve ever reused something you almost threw away? Share in the comments below.
https://www.everydaycheapskate.com/wp-content/uploads/20251216-repurpose-old-eyeglasses-cases-on-blue-background-with-reading-glasses.png8001200Mary Hunthttps://www.everydaycheapskate.com/wp-content/uploads/EC-Logo-by-Mary-Hunt-Tagline-Trimmed.pngMary Hunt2025-12-16 11:59:352025-12-16 12:01:18Don’t Toss That Eyeglasses Case… Try This Instead!
Hosting Thanksgiving for the first time can feel like standing at the base of Mount Everest in an apron. But with a solid plan, a few clever shortcuts, and realistic expectations, you can pull off a feast your guests will remember and actually enjoy it yourself. From menu prep to seating hacks, this guide walks you step by step through the first-time hosting experience without the overwhelm.
It’s not just you. Nearly nine in 10 Americans report some stress during the holidays: juggling finances, navigating family dynamics, or worrying everything won’t turn out perfectly. The pressure isn’t just financial; there’s a lot riding on creating a warm, memorable day that feels “just right” for everyone.
Much of that stress comes from expectations. You want the turkey golden, the sides delicious, and the atmosphere cozy, but relaxed enough that you actually get to enjoy your guests. About four in 10 adults say their stress spikes during the holidays, and more than a third see the season as a competition. That’s a lot to pack into a single day!
The good news? Stress doesn’t have to define your first Thanksgiving. Setting realistic goals, simplifying your menu, and enlisting a few helpers can make a big difference. Even small reminders, like the fact that the day isn’t about perfection, but togetherness, can turn nerves into excitement.
By giving yourself permission to simplify and using a few clever hacks, you can host a day that feels joyful instead of exhausting. After all, Thanksgiving isn’t just about the food. It’s about creating a space where everyone, including you, can actually enjoy the moment.
Plan Ahead: Create Your Thanksgiving Timeline
First things first: write everything down. Seriously. Recipes, cooking times, oven temps, even the time you plan to shower. Memory is fragile under pressure, and the turkey isn’t going to wait.
Start with a master schedule. Work backward from your planned dinner time, factoring in oven use, turkey resting, and last-minute prep. Seeing the day laid out on paper transforms chaos into a game you can actually win.
Grocery shopping deserves its own strategy. Split your list in two: pantry staples to grab weeks ahead, and fresh items just before the big day. This keeps you from staring down an empty fridge while panicking over missing ingredients.
Don’t forget your “pre-flight checks.” Clear fridge space, check expiration dates, pull out serving dishes. Little prep steps like these prevent last-minute scrambling and let you actually enjoy hosting instead of running a relay race in your kitchen.
Easy “insurance” dishes. If juggling multiple sides has you sweating, bring in a little backup. Pre-bought pies, frozen sides, or even a ready-made gravy can save hours and prevent last-minute panic.
Don’t forget the extras. Drinks, coffee or tea for dessert, and kid-friendly options if little ones are attending. Thoughtful touches go a long way toward keeping everyone happy.
The key is balance. Aim for a mix of make-ahead dishes and last-minute hits. Mashed potatoes can wait until the last 20 minutes, but that green bean casserole? Assemble it the night before and bake it quickly.
Advance prep is your best friend. Chop, mix, and store vegetables, stuffing, and sauces a day or two ahead. Some dishes (pies, cranberry sauce, casseroles, even mashed potatoes in a crockpot) can be fully made early. Day-of cooking then becomes about finishing touches instead of starting from scratch.
Label everything. Sticky notes or masking tape on containers and serving utensils mean you won’t be running around asking yourself, “Which casserole was the green bean one?”
Leverage your tools. Double ovens, crockpots, warming trays, or a toaster oven keep food hot and fresh while you multitask. A little prep goes a long way toward a smooth, calm, and enjoyable day.
Serving & Seating: Tips to Keep Guests Comfortable
Think of this as your “guest comfort checklist.”
Map it out. Plan seating for space, guest size, and tricky family dynamics. Extra tables or even outdoor seating can save a lot of elbow-jostling drama.
Stock smart. Make sure you have enough plates, silverware, napkins, and cups. Disposable can be a lifesaver, but nicer options give the table a little polish without extra stress.
Set the stage early. Arrange tables and serving stations ahead of time. Cover with sheets or towels to keep dust (or curious pets) at bay. When the day arrives, everything’s ready to go.
Keep the little ones busy. A simple coloring table or craft station can save you from constant interruptions, while letting kids feel included. And don’t forget your pets. Set ground rules early so Fido doesn’t end up in the cranberry sauce.
Drinks, Desserts, and Extras: Don’t Forget the Little Things
It’s easy to get lost in turkey and sides, but the little extras are what make Thanksgiving feel effortless and memorable.
Drinks first. Mulled cider, punch, wine, or sparkling water can be prepped ahead, with extra ice on hand. A self-serve station keeps guests happy and saves you from endless trips back and forth.
Desserts that save the day. If baking a pie feels like pressure, keep a store-bought option handy. One ready-made dessert can relieve stress without sacrificing style or flavor.
Set it up smart. Arrange your drinks and dessert garnishes ahead of time. Napkins, straws, whipped cream, or a sprinkle of cinnamon ready at hand makes things flow smoothly.
Little things, big impact. Butter, condiments, flowers, or unscented candles don’t take extra time but make your table feel thoughtful and welcoming.
Think of these as finishing touches in a well-planned meal… small details that take zero extra brainpower but make everyone feel cared for.
Delegate & Enjoy: How to Share the Workload
Hosting doesn’t have to mean running a one-person show. In fact, the smarter move is to hand off tasks so you can actually enjoy the day.
Assign ahead. Ask guests to bring a dish or take a specific role (i.e., setup, cleanup, or even a last-minute grocery run.) Clear roles keep everyone feeling helpful instead of wandering around aimlessly.
Make it meaningful. A little guidance goes a long way: “Could you man the drink station?” or “Would you handle the cranberry sauce?” Small responsibilities keep the kitchen running smoothly without putting all the pressure on you.
Preserve your sanity. Schedule a few intentional minutes for yourself. Shower, get dressed, maybe sip a quiet cup of coffee before the first guest arrives. It sounds minor, but it can completely change your hosting mood.
Delegate wisely, and you actually get to enjoy the feast you worked so hard to create.
Cleanup Made Easy: Wrapping Up Without Stress
The key to surviving post-feast cleanup? A little strategy and a few helpers.
Clean as you go. Keep dishes and prep areas under control throughout the day. Assign friends or family to tackle trash, recycling, and leftover containers so nothing sneaks up on you.
Send leftovers home. Disposable or reusable containers make it simple for guests to grab a plate and keep your fridge from overflowing.
Final sweep. Before collapsing into the couch, do a quick run through the kitchen, bathrooms, and common areas. A tidy space makes that first sip of tea (or wine) even sweeter.
Plan for next year. Jot down what worked, timing tweaks, and extra dishes needed. A few notes now mean a smoother, smarter holiday next time.
The goal isn’t a flawless feast. It’s a Thanksgiving you actually remember. Forget perfection and focus on being present. Hosting isn’t about ticking boxes; it’s about making memories. With a few smart shortcuts, you’ll savor the laughter, the leftovers, and yes, even that perfectly golden turkey.
Question: First-time Thanksgiving hosts, what’s your biggest worry? And Thanksgiving pros, what did I miss? Share your top tricks and secrets in the comments below!
Ever had surprise guests call to say they’re “just dropping by”? Don’t panic…my 10-Minute House Rescue Plan has got you covered! This quick, no-fuss guide helps you fake a clean, cozy home faster than you can find your vacuum cord. From the air-freshening trick to the “special basket” that makes your bathroom guest-ready, you’ll be ready for company (and maybe even a compliment or two). You’ve got this!
The phone rings. Surprise! Long-lost friends are in town and they’ll be at your front door in ten minutes. You take one look around and realize the house isn’t exactly company-ready. There’s no time to panic (or scrub floors), but you do have time to pull off this fast and foolproof 10-Minute House Rescue Plan. It’s amazing what a little strategy—and a lot of pretending—can do in a pinch.
Ready, set… go!
Step 1: Freshen the Air Instantly
Before you tackle the mess, fix the mood. Set a small pan of water over medium heat and toss in a few pantry staples: cinnamon, allspice, cloves, or even a splash of vanilla. Within minutes, your home will smell warm and welcoming (and suspiciously like you’ve been baking all day). No time for stovetop simmering? A quick spritz of essential oil spray or lighting a favorite candle works just as well.
Grab a box, laundry basket, or grocery bag and do a quick sweep of all visible surfaces: coffee tables, end tables, kitchen counters, and that spot by the front door where things mysteriously pile up. Don’t stop to organize, sort, or make decisions right now. Just move fast. Anything that’s not in its rightful place goes in the box.
Once you’ve cleared those surfaces, stash the box in a closet or another out-of-the-way spot. The goal isn’t perfection. It’s instant visual calm. When clutter disappears, even temporarily, your space feels lighter and your brain gets a quick win. You can circle back later when you’ve got more time (and energy) to decide what stays, what goes, and what just needs a new home.
Step 3: Hide Bathroom Chaos in Seconds
Need your bathroom to look company-ready, fast? Toss everything cluttering the counter, lotions, razors, toothpaste, and that half-empty bottle of dry shampoo, straight into the tub or shower. Then pull the curtain closed and walk away. Instant calm.
This trick works wonders when guests are on the way or you just need a quick mental reset. Later, when you’ve got a few minutes (and a little less pressure), take a peek behind the curtain and decide what actually deserves to stay out. For now, you’ve reclaimed your sanity and your sink.
Keep a small basket tucked under the sink, ready to pull out at a moment’s notice. Stock it with a couple of nice hand towels, a fresh bar of soap, or a travel-size lotion, simple touches that feel welcoming without trying too hard. When company’s on the way, just set it on the vanity, and voilà!
Whether it’s neighbors dropping by or your adult kids coming home for the weekend, having those thoughtful little details ready reminds everyone (including you) that hospitality doesn’t have to be complicated.
Step 5: Quick Surface Clean
Grab a microfiber cloth, a spritz of all-purpose cleaner, or a dab of furniture polish, whatever fits the job. Give those freshly cleared surfaces a quick once-over.
A clean surface does wonders for your mood. In just a few minutes, the whole room feels calmer, lighter, and more put together.
Start at the front door and make a quick pass through the areas people will actually see. Don’t worry about perfection. Just hit the main walkways, rugs, and any obvious crumbs or pet hair zones. Five focused minutes can make your whole home look freshly cleaned, even if you didn’t touch a single corner.
Bonus tip: If your vacuum has a “boost” or “turbo” mode, or you have a cordless stick vacuum, now’s the time to use it.
Step 7: Create Cozy Vibes (Martha Would Approve)
You’ve done the hard work. Now it’s time to make your space feel like you actually live there, not just clean it. Light a candle (or three), cue up your favorite playlist, and dim the lights until everything feels soft around the edges. If you’ve got a fireplace, even better.
Take a breath. Look around. You just transformed your space from “chaos” to “calm,” and that deserves a moment of appreciation. Maybe this is your cue for a cup of tea, or if it’s been that kind of day, a well-earned glass of wine. Either way, pause long enough to enjoy what you’ve created.
Bonus Tip: Keep One Room Guest-Ready Year-Round
Here’s a little secret: pick one room, maybe your living room, guest bedroom, or even a corner office, and keep it always guest-ready. Between now and New Year’s (or forever, if you’re ambitious… hey, no judgment!) make it your “show-off” space. No clutter, no last-minute panic, just a calm, welcoming zone.
Bonus points: this isn’t just for visitors. Walking into a clean, peaceful room anytime you need a mental reset is surprisingly satisfying.
Question: What’s your go-to move when guests are 10 minutes away and your house looks like a tornado hit? Asking for a friend…
https://www.everydaycheapskate.com/wp-content/uploads/20251015-10-minute-house-rescue-plan-unexpected-guests.png8001200Mary Hunthttps://www.everydaycheapskate.com/wp-content/uploads/EC-Logo-by-Mary-Hunt-Tagline-Trimmed.pngMary Hunt2025-10-15 18:02:562025-10-15 18:05:30Your 10-Minute House Rescue Plan That Really Works
Before you spend another dime on “pantry-perfect” bins or Instagram-worthy organizers, take a peek at your recycling bin. From cottage cheese tubs to spaghetti sauce jars, your groceries already come with some of the best disposable containers to repurpose—practical, sturdy, and ready for a second life. Let’s look at which containers are worth keeping and clever ways to repurpose them in everyday life.
Before you spend another $10 on plastic tubs or a fancy set of “pantry organizers,” pause for a moment. Your house is already bursting with some of the best storage containers money can’t buy. They show up free with your groceries: cottage cheese tubs, pickle jars, coffee cans, yogurt cups, and takeout clamshells.
They may not win awards on Pinterest, but they’ll hold leftovers, tame a junk drawer, organize craft supplies, and even keep squirrels out of your birdseed. And here’s the kicker: they do it all without a price tag.
Repurposing isn’t just about saving money. It’s also about saving waste. According to the EPA, containers and packaging made up over 82 million tons of municipal solid waste in 2018. That’s nearly 30% of everything Americans throw away each year. Instead of sending every tub, jar, and clamshell straight to the landfill, giving them a second life in your home means less waste and more value.
So let’s dig in and look at which containers are worth keeping, plus a few clever ways readers have already put them to use.
Cottage Cheese & Yogurt Tubs
Why save them: These plastic tubs are sturdy, stackable, and usually come with tight-fitting lids. Perfect for freezing soups, storing leftovers, or corralling all those little odds and ends that never seem to have a home.
Repurpose ideas:
Freeze soup, chili, or stock in meal-sized portions (bonus: they pop out easily for quick weeknight meals).
Store craft beads, buttons, or screws—basically anything that loves to roll under the couch.
Use as mini planters for seedlings or fresh herbs. (Hello, repurposed indoor herb garden!)
Pack snacks for road trips or kids’ activities, because no one wants to pay $5 for trail mix at the gas station.
Tip: Avoid heating them in the microwave (unless they’re labeled microwave-safe). And please, label what’s inside unless you enjoy the suspense of wondering if that white tub holds chicken stock or leftover pudding.
Glass Jars (Pickles, Pasta Sauce, Jelly)
Why save them: Glass jars are practically indestructible. They don’t absorb smells, they’re dishwasher-safe, and they look downright chic lined up on a pantry shelf.
Repurpose ideas:
Pantry storage for rice, beans, flour, or coffee beans.
Homemade salad dressings, marinades, or overnight oats.
Organize nails, screws, or washers in the garage and avoid that frustration of digging through a coffee can of “random hardware.”
Quick gift packaging: fill with homemade granola, bath salts, or cookie mix for a thoughtful, low-cost present.
Reader story: One Everyday Cheapskate reader admitted she uses empty spaghetti jars as vases. “The kids think I’m cheap. I say I’m resourceful. Roses don’t care what they’re sitting in.”
Bonus tip: If you like the “clean look,” soak off the labels and add chalkboard paint or stick-on tags. Suddenly, that old pickle jar could pass for something straight out of an Instagram kitchen tour.
Why save them: Coffee cans are practically legendary in the repurposing world. Sturdy, spacious, and usually equipped with a snug lid, they’re like the Swiss Army knife of household containers.
Repurpose ideas:
DIY piggy bank or coin jar. Savings add up fast when you make a game of tossing in your spare change.
Dry pet food or birdseed storage.
Handy kitchen compost bucket. Line it with a paper bag and you’ve got an eco-friendly setup.
Organize extension cords, paintbrushes, or small tools. Perfect for the garage or closet.
Create a “gratitude jar” or “experience fund.” Drop in notes, ticket stubs, or small savings toward something you’re looking forward to.
Bonus use: Drill a couple of holes in the bottom, and presto! You’ve got a flowerpot. Instant upcycle.
Plastic Berry Bins
Why save them: Those vented clamshell containers that strawberries and blueberries come in may look flimsy, but don’t underestimate them. They’re lightweight, stackable, and the built-in holes make them surprisingly versatile.
Repurpose ideas:
Store small toys like LEGO bricks or puzzle pieces—easy for kids (or grandkids) to tote around.
Drain freshly washed herbs, grapes, or cherry tomatoes without soggy messes.
Create an on-the-go snack box for the car. Perfect for road trips, sports practice, or commuting.
Organize office supplies (cords, chargers, sticky notes) for those of us juggling home and work life.
Use as mini organizers in drawers. Ideal for socks, scarves, or even makeup.
Reader story: Berry bins make excellent “mini greenhouses.” One reader told me she lines the bottom with a coffee filter, adds soil, and starts seedlings in plastic berry bins.
Margarine or Butter Containers
Why save them: Small, lightweight, with lids that snap tight. They may not win a beauty contest, but when it comes to storage, these little tubs are the underdogs of the kitchen.
Repurpose ideas:
Store leftover gravy, sauces, or broth without tying up your “good” containers.
Portion out snack cups for kids, grandkids, or yourself on busy workdays.
Perfect for corralling craft glue, beads, or paint for kids’ (or grown-ups’) art projects.
Use for small freezer portions of soup or chili. Ideal for quick solo meals or lunches.
Road-trip hack: pack trail mix or cut fruit in them for mess-free snacking on the go.
Tip: My neighbor uses them to stack cookies in the freezer. It’s a perfect disguise from the cookie thieves in her house.
Why save them: They’re practically made for leftovers, and the fact that they stack neatly in the fridge is a bonus.
Repurpose ideas:
Freeze homemade meals in single portions for grab-and-go lunches. Great for workdays, road trips, or sending home with family.
Organize crayons, colored pencils, or sewing notions without spending a dime on craft bins.
Temporary paint trays for DIY projects. No cleanup, just toss when you’re done.
Use for picnic packs: portion out potato salad, fruit, or chips for an easy outdoor meal.
Garden helper: start seedlings in deli containers or use clamshells as mini greenhouses.
Caution: They can warp in the dishwasher, so treat them kindly (hand-washing is your best bet).
Plastic Milk Jugs & Juice Bottles
Why save them: These are heavy-duty plastics with built-in handles. Don’t overlook them. They’re perfect for tasks that need durability and a little extra grip.
Repurpose ideas:
Cut in half to make scoops for birdseed, pet food, or garden soil.
Reuse as watering cans. Perfect for indoor plants or balcony gardens.
Store bulk cooking oil or homemade cleaning solutions (just be sure to label clearly!).
Freeze water in clean juice bottles to make inexpensive ice packs for coolers or lunch boxes.
Keep in the garage for storing small hardware, sand, or kitty litter in manageable amounts.
Reader story: One Everyday Cheapskate reader freezes juice bottles filled with water to create portable ice packs for summer road trips. “Cheap, easy, and they last for hours,” she says.
Peanut Butter Jars (Plastic or Glass)
Why save them: Wide mouths, tight lids, and sturdy enough to handle wear and tear.
Repurpose ideas:
Store bulk spices, baking soda, or other pantry staples.
Keep trail mix, nuts, or granola fresh for road trips, hikes, or busy workdays.
Organize buttons, screws, nails, or other small parts in the craft or garage area.
Use as mini prep bowls when cooking or baking. Perfect for mise en place.
Pro tip: Got sticky peanut butter residue? Fill the jar with warm water and a drop of dish soap, shake, rinse, and it’s ready for its next life.
Why save them: Just the right in-between size—big enough for extras, small enough to fit anywhere.
Repurpose ideas:
Freeze leftover chili, pasta sauce, or soup for easy future meals.
Pack potluck leftovers without worrying if the container comes back.
Organize craft supplies like pom-poms, pipe cleaners, or googly eyes.
Portion snacks for kids, road trips, or work lunches.
Reader story: One reader uses her Cool Whip tubs to freeze individual smoothie portions. “I just grab a tub, toss in the blender, and breakfast is done,” she says—a little prep that saves big stress in the morning.
Egg Cartons
Why save them: Cardboard or Styrofoam, egg cartons are underrated for organizing.
Repurpose ideas:
Start seeds for your garden. Each little cup is the perfect mini planter.
Sort jewelry, beads, buttons, or screws to keep small items from disappearing into the abyss.
Use as kids’ paint palettes. Less mess, more creativity.
Portion out snacks for on-the-go lunches or picnics.
Eco-tip: Stick with cardboard cartons if you plan to compost them later.
Bakery Clamshells
Why save them: Lightweight, clear, and shallow, these containers are perfect for organizing without taking up much space.
Repurpose ideas:
Keep muffins, cupcakes, or pastries safe without squishing them.
Organize puzzle pieces, game cards, or craft supplies. No more hunting under the couch cushions.
Create a caddy for ribbons, stickers, or small DIY project pieces.
Portion out grab-and-go snacks for lunchboxes or road trips.
Reader story: One reader uses clamshells to store leftover cookie dough in the freezer. “They stack neatly, and I can grab just one serving at a time,” she says.
Baby Food Jars
Why save them: Tiny glass jars with secure lids are perfect for storing small items. Sturdy, reusable, and just the right size.
Repurpose ideas:
Create homemade spice blends for easy cooking or travel-sized pantry organization.
Make mini candles for gifts or cozy accents.
Keep paper clips, thumbtacks, safety pins, or other small office and craft supplies neatly contained.
Portion out small amounts of condiments or dressings for lunches on the go.
Pro tip: Label each jar with a chalkboard sticker or washi tape to keep things clear and add a fun DIY touch.
Don’t Buy What You Already Own
Sure, there’s nothing wrong with fancy storage sets, but frugality (and a touch of common sense) says use what you already have. Those containers have already earned their keep once, and giving them a second life is both practical and eco-friendly.
Repurposing saves money, reduces waste, and might even spark a laugh when your family realizes that your “organized storage system” is really just last week’s grocery haul.
After all, why buy storage bins when cottage cheese tubs, pickle jars, or yogurt containers have been doing the job for generations?
Question: What’s the one “disposable” container you refuse to throw away and how do you use it?
Getting organized isn’t rocket science. It’s just really hard to start. Clutter creeps in when we’re busy, tired, or just plain overwhelmed. But once you begin learning how to get rid of clutter—truly, thoughtfully—it creates a ripple effect. Your space calms down… and so does your brain. Ready to ditch the mess and keep what truly serves you?
Key Points
Clutter causes more than mess. It creates mental stress and drains energy, making it harder to feel calm and productive at home.
Decluttering starts with letting go. Eliminate what no longer serves you and concentrate on keeping only what you truly use and value.
Simple strategies like the Brown Bag and Salami Methods make tackling clutter doable, one small step (or slice) at a time.
Getting organized is like dieting. Everyone knows how to do it. The problem? Actually getting around to it, clearing the clutter, organizing what’s left, and then maintaining the whole setup long enough for it to make a difference. And let’s be honest, the overwhelm often hits before we’ve even pulled open that first junk drawer.
A few years back, when we remodeled our kitchen, I emptied every cupboard and drawer. Everything went into bins, labeled in detail. That alone raised a few red flags. I found things I’d completely forgotten, like that fondue set from the ‘90s and a mountain of mismatched Tupperware. When it came time to put everything back, I had a lightbulb moment: instead of organizing by what I might need someday, I put things away based on how I actually use them.
That changed everything. I finally understood why it had been so hard to keep the kitchen neat. You simply cannot organize chaos. First, you have to clear it out. Funny how clearing out the clutter also cleared my mind.
Why Getting Organized Feels So Overwhelming
Here’s the thing: according to psychologist Dr. Joseph Ferrari, clutter isn’t just a housekeeping issue. It’s a psychological one. In his research, clutter is defined as “an overabundance of possessions that collectively create chaos and disorderly living spaces.” And that chaos? It affects more than your countertops. It creates stress, tanks productivity, and even lowers overall life satisfaction. In fact, studies show the more clutter we live with, the less happy we tend to feel.
So why do we hang on to all this stuff? Ferrari says it’s a combination of emotional attachment, procrastination, and a lack of time, energy, or know-how. Sometimes it’s not even our decision, especially when someone else in the household isn’t ready to let go. And let’s not forget the excuses: I don’t have time. I don’t know where to take it. My kids don’t want the china, but I can’t just toss it! Sound familiar?
What helped me the most was realizing this: the issue isn’t abundance. It’s attachment to that abundance. We confuse wants with needs, and we let our stuff tell us who we are or who we used to be. But the truth is, when we let go of the unnecessary, we create space, not just in our homes, but in our lives.
Let’s start there.
The “Too Much Stuff” Wake-Up Call
Face it. If your closets are crammed, your drawers barely close, and your garage has become a black hole of forgotten items, you probably own too much stuff. It’s not a character flaw. It’s a common reality in a culture that tells us more is better. But the truth? More stuff usually just means more stress.
Start small. Pare down. Donate what no longer serves you. Pass along those “just in case” items you haven’t used in years. Let your spaces breathe again. When your drawers slide open easily, when your countertops stay clear, it brings a quiet kind of peace. Your home begins to feel serene, intentional, kept.
And here’s the good news: there’s no single “right” way to organize. What works for your neighbor might not work for you. The best system is the one that fits your style, your energy, and your daily life. Whether you’re a label-everything minimalist or a tuck-it-away-and-call-it-good realist, your home should support you, not overwhelm you. Find what works, tweak it as needed, and make it yours.
Eliminate and Concentrate: Your Clutter-Free Mantra
No matter your decluttering style or system, let this be your mantra: Eliminate and concentrate. Say it out loud. Write it on a sticky note. Whisper it into that closet you’re afraid to open. Then say it again.
Eliminate
This part is the hardest—for me too. I can always find a reason to keep something: It’s valuable. I might need it. The power grid could fail and I’ll wish I had these candle stubs. (Yes, I’ve said that. Out loud.) But even as I laugh at myself, I know deep down, it’s time to let it go.
According to clutter researcher Dr. Joseph Ferrari, one of the biggest barriers to decluttering is emotional attachment, even to things we no longer use. We assign meaning to items, and that makes it hard to part with them. But here’s the truth: value isn’t just about price. It’s about purpose. If something has no real role in your life anymore, it’s not serving you. Eliminate it with confidence.
Concentrate
Now that you’ve cleared out what you don’t need, let’s focus on what you do. It’s amazing how often we find the same essential item in five different places around the house. (Spatulas in the garage, anyone?) Getting like-items together in one location can be both enlightening and humbling. Yes, I need scissors. No, I do not need seven pairs.
When you concentrate your belongings by category (tools with tools, batteries with batteries), you’ll instantly see what you have, what you use, and what you can live without. It’s about regaining control, not creating Pinterest-perfect cabinets. Start small. Keep it real. And remember: clarity follows action.
Try the Brown Bag Method for Instant Relief
When clutter has you teetering on the edge of chaos, don’t overthink. Just grab a brown bag. The Brown Bag Method is my go-to for instant relief, especially when I’m overwhelmed and need a quick win.
Here’s how it works: Take one (or more) large brown grocery bag, bin, or box and start scooping up the clutter—stacks of mail, magazines, papers, mystery items on your counters or dining table. The goal here isn’t to make decisions. It’s to clear the visual noise. Just get it out of sight and into the bag. You’re not tossing anything yet. You’re simply buying yourself some breathing room. (At least, that’s what you tell yourself.)
Then, pause. Look around. Take in that clean surface, that calm space. It feels good, doesn’t it?
Now here’s the kicker: if no one in the household mentions anything missing in the next 48 hours, odds are it’s safe to let most (if not all) of it go. It’s a sneaky method, yes, but it’s surprisingly effective. Sometimes, we just need a little space (literal and mental) before we’re ready to part with things for good.
You wouldn’t eat an entire salami in one bite, and you shouldn’t try to declutter your whole house that way either. That’s where the Salami Method comes in. The idea is simple: tackle your clutter one slice at a time.
Start small. One drawer, one shelf, one corner of the laundry room. Then tomorrow, do another. Before you know it, you’ve made real progress without burning out or tearing the house apart in a single afternoon. It’s a gentler, more realistic way to reclaim your space.
Personally, I’ve found that when I get control over the stuff in my life, something shifts. I think clearer. I feel calmer. I’m less reactive, more productive, and a whole lot happier. There’s something powerful about putting things in their place. It brings order not just to your home, but to your head.
So don’t aim for perfect. Aim for progress. One slice at a time.
A Book That Might Just Change Your Life
There’s real comfort in knowing you’re not the only one feeling overwhelmed by clutter. In fact, I once read that the ratio of naturally-born neatniks to the rest of us messies is about one in a million. That sounds about right, doesn’t it?
Marla, affectionately known as “The FlyLady” by her devoted online following, has a magical way of reaching into messy, chaotic homes with kindness, humor, and just enough structure to get you moving. She meets you where you are, whether you’re drowning in dishes or buried in laundry.
Her philosophy starts small, with something as simple as “Shiny Sink 101.” And while that might sound trivial, there’s something oddly motivating about waking up to a sparkling kitchen sink. It’s the first domino in a chain reaction of calm and control. And who couldn’t use a little more of that?
Question: What’s the weirdest thing you’ve found while decluttering? Mine: a petrified half-eaten granola bar in a purse I haven’t used since 2011. Your turn!
EverydayCheapskate™ is reader-supported. We participate in the Amazon Services LLC Associates Program and other affiliate advertising programs, designed to provide a means for us to earn from qualifying purchases, at no cost to you.
https://www.everydaycheapskate.com/wp-content/uploads/20250709-How-to-get-rid-of-clutter-garage-messy-organization.png8001200Mary Hunthttps://www.everydaycheapskate.com/wp-content/uploads/EC-Logo-by-Mary-Hunt-Tagline-Trimmed.pngMary Hunt2025-07-09 16:23:502025-07-09 16:25:23How to Get Rid of Clutter and Take Back Your Life
Tucked behind the frosty bag of peas and that half-used block of something-or-other, your ice cube tray is probably holding on for dear life—cracked, stained, and underappreciated. But here’s the thing: that little tray? It still has some solid kitchen street cred. Sure, we used to rely on them for, well, ice. But these days, ice cube tray hacks go way beyond turning out cubes of ice.
What follows are ice cube tray hacks that are practical, clever, and surprisingly good at saving money, cutting food waste, and keeping things just a bit more organized. You don’t have to be a gourmet cook or an Instagram organizer to make good use of them—you just need a tray, a freezer, and a little “Why not?”
Here’s a roundup of smart, frugal ways to give your old ice cube trays a new lease on life. And no judging if the last thing they froze was grape juice in 1994.
1. Herb Time Capsules
Ever buy fresh herbs with the best intentions, only to watch them shrivel into a sad little heap in the fridge? Don’t toss them—chop ’em up (parsley, basil, rosemary, whatever’s on life support), press into an ice cube tray, and cover with olive oil or melted butter. Freeze, then pop out a cube anytime dinner needs a little help.
It’s like preserving hope in cube form.
2. Make Coffee Cubes for Better Iced Lattes
Iced coffee shouldn’t taste like regret and water. Pour leftover coffee into a tray, freeze, and toss the cubes into your next iced latte. No more watered-down brews—just full-bodied flavor to the last sip.
This is one of those ice cube tray hacks that might actually earn you a little morning gratitude—from yourself.
We all have dreams of being smoothie people. And then we meet reality: overripe bananas and that Costco spinach that could upholster a loveseat.
Here’s the fix: blend the produce while it’s still salvageable, freeze in ice cube trays, and toss the cubes into your next smoothie. You’ll feel like a wellness guru—just without the celery juice sermon.
Leftover broth doesn’t have to sit in the fridge and die slowly. Freeze it in trays, bag it up, and now you’ve got just the right amount to boost rice, soup, or stir-fry. Bonus points if you label the bag. Gold star if you can actually find it when you need it.
Spoon yogurt into trays, drop in a berry or banana slice, and freeze. Just like that—snack problem solved. Whether it’s for little ones or for you (especially when you’re trying to dodge another late-night graham cracker binge), these bites hit the spot.
Cheap, cheerful, and way less messy than a yogurt pouch exploding in the backseat.
6. Eggs on Ice (It’s a Thing)
If egg prices have you questioning your breakfast loyalties, try this: crack an egg into each tray compartment, whisk if you like, and freeze. Great for baking or last-minute breakfasts when the fridge is bare but the freezer’s full of hope.
One of those ice cube tray hacks that sounds ridiculous—until it saves your quiche.
7. Wine Cubes for Cooking (and Lookin’ Fancy)
We all say we’ll use the leftover wine for cooking. Now you actually can. Freeze it in trays and add a cube to sauces, soups, or that risotto you keep meaning to try. Also works with champagne… if you’re the kind of person who has “leftover” bubbles. (Teach us your ways.)
8. DIY Chocolate Cubes
Melt some chocolate, pour it into an ice cube tray, and top with chopped nuts, shredded coconut, or dried fruit. Freeze, pop, and snack like the genius you are. Hide them behind the frozen broccoli if you want them to last more than a day.
9. Tame the Junk Drawer
Pop one in your desk or junk drawer to sort earring backs, buttons, thumbtacks, or those mystery screws from the furniture you swear you’ll fix someday. It’s the little victories that keep us going.
Scoop cookie dough or meatballs into trays and freeze for later. Perfect for meal prep… or spontaneous cookie cravings. No judgment here on how many you eat—we’re just saying, it’s nice to have options ready to go.
12. Freeze Pesto, One Spoonful at a Time
If you’ve ever made a batch of homemade pesto and ended up with enough to paint a house, this one’s for you. Spoon it into your tray, freeze, and toss a cube into pasta, soup, or sautéed veggies whenever your dinner needs a little personality. It also works with store-bought pesto—especially when you know you won’t use the whole jar before it goes gray and fuzzy.
13. Citrus Juice Portions for Recipes or Emergencies
Got lemons or limes that are about to head south? Juice them and pour into trays. Freeze and save the cubes for recipes, salad dressings, or when life hands you tequila and you’re short on limes. You can even freeze orange juice for smoothies or to drop in with hot tea when your throat starts acting like it’s auditioning for a NyQuil commercial.
Coconut milk is wonderful… until you open a can, use a third, and the rest stares at you from the fridge until it curdles out of spite. Pour the leftovers into a tray and freeze it. Perfect for curries, stir-fries, or smoothies later on. It saves money, cuts waste, and spares you the guilt of tossing $3 worth of tropical dinner dreams.
15. Flavored Ice Cubes That Impress Guests
Want to impress your guests without actually trying? Freeze mint leaves, lemon zest, cucumber slices, or berries in water. Once frozen, drop into lemonade or sparkling water and pretend you’ve got your life together. This is one of those ice cube tray hacks that feels luxurious but costs basically nothing—my favorite kind.
What About Microplastics?
Several readers, including Elaine (hi, Elaine!), reached out with a smart question: Are ice cube trays really safe to use with food, especially with all we hear about microplastics these days?
I hear you. It’s a valid concern. While many plastic trays are still widely used, silicone is generally considered a safer alternative. It’s more stable at varying temperatures and less likely to shed microplastics than traditional plastic. That said, it’s not completely exempt—silicone is still a plastic polymer and can slowly degrade over time, especially with heavy use or rough washing.
If you want to play it extra safe, here are two reader-approved options:
Thanks to everyone who chimed in with this question—your curiosity helps make this space better for all of us.
Why Ice Cube Trays Deserve a Comeback
You don’t need a Pinterest-perfect pantry or a color-coded freezer to make this work. What you need is to see those humble trays for what they really are: cheap little tools with surprisingly big potential.
Whether you’re freezing broth, taming that junk drawer, or crafting iced coffee that actually tastes like coffee, ice cube tray hacks deliver more than convenience—they deliver small wins in a world full of long grocery receipts and wasted food.
So maybe it’s time to give your ice cube trays a second chance. They might not win any beauty contests, but they’ll still get the job done—and then some.
Question: What’s the weirdest thing you’ve ever frozen in an ice cube tray? Share your hacks in the comments below.
https://www.everydaycheapskate.com/wp-content/uploads/20250530-ice-cube-tray-hacks-pastel-on-a-bright-yellow-background.png8001200Mary Hunthttps://www.everydaycheapskate.com/wp-content/uploads/EC-Logo-by-Mary-Hunt-Tagline-Trimmed.pngMary Hunt2025-05-30 17:36:042025-05-31 13:38:26The Great Ice Cube Tray Hack Roundup (Hint: Not Just for Ice)
Running a home isn’t for the faint of heart. Whether you’re working, raising kids, juggling pets, or simply trying to stay on top of the laundry mountain, being a “homebody” doesn’t exactly mean “taking it easy.” Luckily, these simple ways to simplify your life can help you cut through the chaos and reclaim a bit of calm—without blowing your budget or your weekend.
Let’s face it—life at home can be just as hectic as life outside. It has a way of piling up—dishes, schedules, random shoes, mystery leftovers… and that’s before anyone even rings the doorbell. If you’re the CEO of your household, then you’re managing logistics, supply chains, customer service, inventory, waste removal, and occasionally refereeing minor civil wars over who gets the cozy, soft blanket. It’s a lot.
But here’s the encouraging part: Simplifying your home doesn’t require a full-blown renovation or a trip to the container store. These original, low-effort tips are practical, clever, and designed for real-life people with real-life stuff. Whether you try one or ten, the goal is the same: less stress, more sanity.
1. Date With Tape
Use masking tape and a Sharpie to label the date you opened pantry items, freezer containers, and half-used jars in the fridge. It takes just seconds and spares you from playing “what is this and when did we open it?” six weeks from now. No more guessing games with leftovers or wondering if that jar of salsa is still safe.
2. Out-the-Door Drop Zone
Designate a small basket near the front door for anything that needs to leave the house—returns, borrowed books, packages to drop off, or that sweater finally making its way to Aunt Marge. This simple catch-all system saves last-minute scrambles and repeat trips up the stairs. Everyone in the household knows: if it’s headed out, it goes in the basket until it does. You’ll be surprised how often this one tiny habit keeps things from falling through the cracks.
3. Manual Storage Hack
Skip the filing cabinet. Tape a gallon-size zip-top bag to the inside of a kitchen cabinet door and tuck in all your appliance manuals—microwave, blender, air fryer, you name it. They’re out of sight but right where you’ll need them when that mysterious blinking light shows up. Out of sight, but not buried under tax records from 2017.
4. Inside-Door Organizer
Stick an adhesive cork board to the inside of a kitchen or utility cabinet door and use it to pin things you actually need handy: school calendars, dog shot records, your go-to plumber’s name, or a takeout menu from that Thai place with the perfect peanut sauce. It’s the perfect solution for the papers you need but don’t want cluttering the fridge. A tiny space that earns its keep–instant sanity station.
5. Time Your Tidy
Give your cleaning sessions a “quitting time.” Instead of cleaning until you drop or give up, set a timer—15, 20, maybe 30 minutes—and see how much you can knock out with zero distractions. When the buzzer goes off, you’re done. No guilt. Twenty minutes of focused cleaning beats three hours of procrastinating while holding a Swiffer.
6. Claim a Pantry Spot
If your kitchen storage is laughable, repurpose a linen closet, laundry nook, or even a hallway shelf into a micro pantry. Use it to store non-perishables, canned goods, and backup staples like pasta or peanut butter so you’re not playing grocery roulette every Tuesday.
7. Make It Leftovers Night
Choose one night a week to serve up a smorgasbord of whatever’s hanging out in the fridge with a lid. Leftover tacos? Half a pot of soup? Three lonely meatballs? It all goes on the table. Let everyone build their own plate. No one complains when they’re allowed to eat mashed potatoes with leftover pizza. Plates get cleared, and you get a night off. It cuts down on food waste, clears out the fridge, and turns “what’s for dinner?” into a surprisingly fun family ritual.
Store a dedicated pair of scissors in your laundry area—you’ll be surprised how often they come in handy. Snip itchy tags, loose threads, dryer sheets that turn into streamers, or stubborn packaging of whatever new thing you forgot you ordered. Keeping them right where you need them saves time, frustration, and maybe even a chipped nail or two.
9. Color-Coded Bins
Use colored bins sorted by activity—not by room. For example, red for crafts, blue for batteries and lightbulbs, green for pet gear. Label each bin clearly and stash them where you have space. When you need something, you head straight to the bin—not hunting through four drawers spread across three different rooms. It’s a simple way to cut clutter and save precious minutes.
10. Extension Cord Storage
Store extension cords in empty paper towel rolls. Simply coil the cord, slide it inside, and label the outside. No more tangles or digging through drawers, and you’ll always know which cord goes where. Plus, it’s a great way to recycle those cardboard tubes instead of tossing them in the trash, right?
11. The “Don’t Care” Basket
Designate one laundry basket as your “don’t care” basket—the landing spot for clothes that don’t need folding. Pajamas, workout gear, cleaning rags, even dog towels go straight here. Toss and forget about it. This way, you save time and keep your good folding energy reserved for the stuff that actually goes out in public.
12. Seasonal Storage
Use those top shelves for “out of season” living. Dedicate the high, hard-to-reach spots to seasonal items—picnic ware, holiday linens, or that one appliance you only dust off when it’s eggnog season. Out of sight but not out of mind—just make sure you keep a running list of what’s stored where so you’re never hunting blind.
13. Portioned Butter Storage
Freeze your butter in easy-to-use portions. Slice sticks into halves or quarters, then freeze them in a mason jar or silicone muffin cup. These smaller chunks thaw quickly, so you won’t be battling a frozen brick when spreading butter on your morning toast.
Build an “Oops Kit” for your car. Not survivalist stuff—think napkins, small trash bags, stain wipes, a few snacks, quarters for parking meters, and a spare phone charger. It’s perfect for those everyday mishaps that don’t call for a full evacuation but still need a quick fix on the go.
15. Pantry Re-Buy List
Keep a “re-buy list” taped inside your pantry—just a simple sheet of paper and a pen. When someone finishes the last of anything, they jot it down. Revolutionary, I know. It might even keep the people in your house from asking if we’re out of ketchup while holding the empty bottle.
Keep It Real
Simplifying isn’t about chasing perfection. It’s about not losing your marbles over socks, soup, or missing glue sticks. These tips won’t turn your home into a magazine spread, but they will make it run like a calmer, kinder version of what you’ve already got.
Question: What’s your favorite little life hack that saves your sanity at home? Share it with us in the comments — let’s swap tips!
https://www.everydaycheapskate.com/wp-content/uploads/20250526-woman-relaxing-on-couch-with-cup-of-coffee-ways-to-simplify-life-at-home.png8001200Mary Hunthttps://www.everydaycheapskate.com/wp-content/uploads/EC-Logo-by-Mary-Hunt-Tagline-Trimmed.pngMary Hunt2025-05-26 21:15:302025-05-26 21:15:30More Ways to Simplify Your Life at Home: The Homebody Edition
Ever feel like you’re paying a monthly fee just to postpone a decision? You’re not alone. Millions of Americans are spending over $1,200 a year to store belongings they rarely—if ever—see, use, or even remember owning. If that sounds familiar, stick with me. I’ve got a practical, no-nonsense plan for how to stop paying for storage, reclaim your space, and put that money back where it belongs—your wallet.
So let me ask: Is your stuff really worth what it’s costing you to store it?
It only takes a couple of episodes of Hoarders to make even the most sentimental saver eye their junk drawer with suspicion. I only watched it once—and that was enough. Halfway through the episode, I had this uncontrollable urge to clean out a closet. (Actually, two closets. And maybe a drawer or five.)
What really struck me? They were living with their clutter—seeing it, stepping over it, maybe even sitting on it. But the rest of us? We’re spending real money every month to keep things hidden away, out of sight and (often) out of mind.
The True Cost of Storing Stuff You Don’t Use
It crossed my mind that at least those hoarders were living with their stuff—which is more than we can say for the nearly 14 million U.S. households paying monthly rent to store things they don’t even see, let alone use.
And they’re not just stashing it in the garage. The U.S. is now home to over 50,000 self storage facilities, housing roughly 1.7 billion square feet of space—that’s about 6 feet of storage for every American. That’s more facilities than McDonald’s, Starbucks, and Subway combined.
And it’s not cheap. While prices vary depending on location and amenities, the average cost to rent a storage unit hovers around $90 to $130 per month, with premium options climbing higher. That’s $1,500 or more a year—money that could go toward an emergency fund, vacation, or just breathing room in your monthly budget.
Even more eye-opening? The self storage industry isn’t slowing down. It’s booming. In 2023, the U.S. market was valued at over $58 billion and is projected to hit nearly $90 billion by 2030. That kind of growth isn’t happening because people are suddenly more organized—it’s happening because we keep paying to avoid making decisions.
And it’s not just boomers or Gen Xers. Millennials now account for nearly 40% of all storage renters, often citing downsizing, lack of space, or temporary moves as the reason. The average rental term? About 10 months. The average unit size? 100 square feet. That’s roughly the size of a small bedroom—one you’re paying for, but can’t sleep in.
In high-demand areas like Los Angeles, San Francisco, and Seattle, storage costs jumped another 7–10% in recent years. Even in more affordable cities like Dallas or Atlanta, prices are on the rise.
Bottom line: that “just until I figure it out” storage unit can easily turn into a year-long expense for stuff you’ve completely forgotten about.
Why We Hold Onto Things (and Pay to Do It)
Let’s be honest—sometimes we hang on to things not because we truly need them, but because it’s easier than dealing with them. And when you add a storage unit into the mix, that procrastination comes with a price tag.
Human Laziness
One self-storage owner confided that the industry banks on renters staying put—literally. Once folks move their stuff in, the chances of them going through the hassle of moving it all out again? Slim to none. It’s no secret: dragging boxes, lifting furniture, and sorting through years of accumulation isn’t anyone’s idea of a fun weekend. Sure, there are times when renting a unit is necessary—moving, downsizing, emergencies. But the key word here should be temporary, not permanent.
Procrastination
Storage units make it way too easy to delay decision-making. “Just one more month” turns into a year—or five. And because it’s usually charged automatically to a credit card, you barely feel the sting. Out of sight, out of mind… and out of your wallet, month after month.
Entitlement
Let’s face it—many of us have enjoyed decades of abundance. That prosperity has translated into extra clothes, extra gadgets, extra everything. And while those things may have started out as treasures, they often end up as just more stuff. The emotional attachment fades, but the clutter sticks around.
Frugality Gone Wrong
Here’s one I’ve seen a lot: well-meaning parents renting storage units to hang onto outgrown clothes, baby gear, and toys “just in case” a younger sibling might need them someday. It sounds frugal, but let’s do the math. You could outfit your child head to toe from a local yard sale or resale group for far less than a year’s worth of storage fees. Holding onto things might save a few bucks down the road—but paying to store them almost guarantees a loss.
Before you decide what to keep, it helps to weigh not just the dollar cost, but also how much joy those stored items really bring you.
Dollar value
Let’s do some simple math. Most of us like to think our stuff is priceless—but if you held a garage sale tomorrow, what would it actually bring in? Now multiply your monthly storage fee by 12. That’s what you’re spending every year to keep those forgotten boxes company. Be honest: is what’s inside really worth that much? If the answer makes you wince, it’s probably time to rethink what you’re holding onto.
Enjoyment Level
Okay, maybe you’re storing things you love. Things you just can’t part with because they spark joy or remind you of your glory days. But here’s the tough question: when was the last time you visited those items? Thought about them? Enjoyed them in any real way? You can’t relive memories through a padlock. Try this instead—take a few good photos of those sentimental treasures. You’ll still have the memory, without the monthly bill. Bonus: your digital photo won’t collect dust.
If you’re ready to stop the storage cycle and reclaim your space (and your money!), I’ve got two words for you: eliminate and organize. And yes, the order matters.
Eliminate
Now, don’t panic—I’m not suggesting you toss everything into the nearest dumpster. “Eliminate” simply means liquidate. Sell what you can. Host a yard sale, list items online, or take them to a consignment shop. Will it take effort? Absolutely. But you’re trading your time for cash and clarity, and that’s a pretty fair deal.
For the items that aren’t sale-worthy but are still usable, donate them. Before you load up your car, make a quick inventory. Apps like ItsDeductible or a simple spreadsheet can help you track the fair market value—which may give you a tidy deduction come tax time.
Organize
Once you’ve pared things down to what truly matters, it’s time to give those remaining items a real place in your life—not just a bin in the garage. Store them neatly, label clearly, and keep them accessible. If you don’t have room? That’s your cue to reassess—because what’s worth keeping should also be worth using.
Whether you’re in a compact apartment or a spacious home, chances are there’s untapped storage space hiding in plain sight. Think under the bed, behind the closet door, above the cabinets. Smart storage tools—whether store-bought or DIY—can make a big difference and cost far less than months (or years!) of storage unit fees. Shoe organizers, stackable bins, tension rods—they’re not glamorous, but they work.
Now, about that storage unit full of “someday” stuff…
Maybe your storage story started with good intentions—like keeping family heirlooms or postponing tough decisions after a loss. That’s completely understandable. But if it’s been more than a few seasons (or years), it’s time for a fresh look. Heirlooms shouldn’t live in cardboard boxes, and neither should guilt. Keep only what serves a real purpose or brings you joy. The rest? Sell it, donate it, or let it go. You deserve the peace that comes with moving forward.
Set a deadline—and mean it.
Pick a date, circle it in red, and commit. Then share it with someone who will actually hold you to it (we all have that one friend). Whether you chip away at it over a few weekends or tackle it all in one marathon session, having a clear deadline makes all the difference. Just think—your future self will thank you every time the credit card bill doesn’t include a storage fee.
Question: What’s the most ridiculous thing you’ve ever found in your storage unit or junk drawer—and how long had it been in there? Share in the comments section below.
https://www.everydaycheapskate.com/wp-content/uploads/20250521-how-to-stop-paying-for-storage-door-rolled-up-full-of-boxes-and-furniture.png8001200Mary Hunthttps://www.everydaycheapskate.com/wp-content/uploads/EC-Logo-by-Mary-Hunt-Tagline-Trimmed.pngMary Hunt2025-05-21 11:34:032025-05-21 11:36:21How to Stop Paying for Storage and Take Back Your Space
Let’s be honest—most of us have too much stuff. Stuff we don’t use, don’t need, and maybe can’t even remember why we bought in the first place. If your closets are bursting and the garage is one good sneeze away from an avalanche, it might be time for a garage sale. But not just any garage sale—you’ll want one that’s organized, efficient, and maybe even a little fun. With the right garage sale tips, you can clear the clutter and walk away with some serious cash in your pocket.
Every year, somewhere between 6.5 and 9 million garage sales pop up across America, generating up to $2 billion in revenue. That’s a lot of folding tables and cardboard signs! And if you think it’s just about getting rid of junk, think again—garage sales attract savvy shoppers (especially twenty- to forty-somethings) looking to outfit homes and kids on a dime. Most buyers actually out-earn the sellers, which just goes to show: everyone loves a good deal.
So if your goal is to declutter, make some extra cash, or just connect with neighbors in a meaningful way, a well-run garage sale is a triple win. These 9 tried-and-true tips will help you plan, price, and pull off a sale that turns your “I should really get rid of this” pile into cold, hard cash—and maybe even a few laughs along the way.
1. Why Planning Ahead Is the Key to a Successful Garage Sale
A successful garage sale doesn’t just happen overnight—it starts with a solid game plan. Give yourself at least 3–4 weeks to get organized. This gives you time to sort, clean, price, and promote without scrambling the night before (ask me how I know).
Before locking in a date, do a quick check for local holidays, neighborhood events, or even high school graduations—anything that might pull your potential buyers elsewhere. Better yet, consider coordinating your sale with a larger community garage sale weekend. More sales in one area = more foot traffic for everyone.
Don’t skip the legal stuff: Check with your city or HOA about garage sale rules. Some areas limit the number of sales you can host per year, restrict signage, or even require a permit. A quick phone call or online check now can save you a headache (or fine) later.
Garage Sale vs. Estate Sale: What’s the Difference?
If you’re staring down a house full of stuff and wondering what kind of sale to host, here’s a quick cheat sheet:
Garage Sale: Think casual, low-key, and DIY. Perfect for clearing out closets, toy bins, and that stack of kitchen gadgets you haven’t touched in years. You’ll do the pricing, setup, and haggling—and maybe meet a few neighbors in the process.
Estate Sale: Bigger and more formal. Ideal when you’re downsizing, relocating, or handling a loved one’s belongings. These are usually run by professionals who know how to price antiques, stage furniture, and draw in serious buyers (and yes, they take a cut—but often earn it).
Bottom Line: If it fits in a few boxes, it’s probably a garage sale. If it fills the whole house, estate sale all the way.
2. Clean, Fix, and Organize: First Impressions Matter
Here’s the truth: if it looks like junk, folks will walk right past it—even if it’s a diamond in the rough. Shoppers are more likely to buy items that look clean, cared for, and well-presented. So, take a little time to dust off, wipe down, and—if needed—freshen up what you plan to sell. No need to polish your old coffee maker like it’s headed to the Smithsonian, but a quick once-over with a damp cloth can make all the difference.
If something’s broken, either fix it or don’t include it. Or, if it’s a fixer-upper item, label it honestly and price it accordingly.
As you’re prepping, go ahead and sort everything by category—kitchenware, books, clothes, toys, tools, and so on. This simple step makes setup a breeze the morning of your sale. Trust me, you’ll be glad when you’re not frantically deciding where to plop down a stack of baking pans while your first shoppers are already circling.
Let’s be honest—garage sale shoppers are not out for retail therapy. They’re on the hunt for a deal, and if your prices feel too close to what they’d pay at the store (or heaven forbid, more), they’ll keep walking. The goal? Price things to sell while still putting a few bucks back in your wallet.
A good rule of thumb is to price most items at about 10% of the original retail price. If something’s brand-name or in pristine condition, you might nudge it up to 20%. And if the tags are still on it and it’s never been worn or used? You’ve got some wiggle room—think 30 to 40% of retail.
Here’s a quick cheat sheet based on national averages to help you skip the guesswork:
Clothes: $0.25 – $1
Shoes: $1 – $10
Accessories: $0.25 – $1
Furniture: $10 – $50
Home Decor: $0.25 – $5
Books: $0.50 – $2
Movies & Video Games: $5 – $10
Toys: $0.25 – $5
Appliances: $10 – $30
Dishes: $1 – $5
Sheets & Linens: $1 – $10
Take a few minutes to scan eBay or Craigslist if you’ve got a high-ticket item, like a piece of furniture, a collectible, or an appliance over $100. If you still have the original manual, box, or warranty info—set those out with the item. It builds trust and can even help justify your price.
Use painter’s tape or preprinted garage sale price stickers for clear, easy-to-read labels. Nothing frustrates a shopper faster than playing “guess the price.”
4. Advertising Tips That Actually Attract Buyers (Not Just Drive-Bys)
If you want more than just curious neighbors peeking over your fence, you’ve got to get the word out—loud and clear. A cardboard sign at the end of your street is a good start, but if you’re serious about moving your stuff, it’s time to go pro with your promo.
Start with bold, eye-catching signs—whether you’re a DIY-er with neon poster board and a thick marker or you’re short on time and prefer a ready-made solution, these pre-printed garage sale signs make it easy to stand out. Keep your message simple and clear: Garage Sale – Saturday 8–2 – 123 Maple Street. Be sure to place signs at the end of your street and in high-traffic intersections nearby. Want a head start? Put them up a few days early to build some buzz!
NextDoor.com—a goldmine for reaching nearby neighbors who might not be active on Facebook.
Be specific in your listings. Highlight big-ticket or buzzworthy items (i.e., Furniture, Tools, Kids’ Toys, Brand-Name Clothing, etc.) Include clear, well-lit photos of your best stuff—people will drive across town if they see something they really want.
Don’t overlook old-school word of mouth. Tell your friends, your coworkers, your aunt Marge—anyone who might come by or pass the info along. Ask them to share it on their own social media, too.
If you’ve got the energy, hang a few flyers on local community bulletin boards—libraries, rec centers, coffee shops—anywhere with foot traffic. Just make sure they’re neat and easy to read at a glance.
The more eyes on your sale, the more likely you are to turn your clutter into cash—and that’s the goal, right?
A little planning goes a long way here. Think of your setup like a mini department store. Group like items together—kitchenware in one section, kids’ toys in another, books neatly stacked or standing up like they would be in a bookstore. Use folding tables if you have them, or get creative with crates or bins flipped upside down. Put larger items out front to catch attention from drive-by bargain hunters.
Now let’s talk about clothes—don’t just toss them on a table or in boxes. That’s the fastest way to have them ignored. Instead, hang them up so folks can browse like they would in a real store. No rack? No problem. Two ladders and a sturdy pole can be your new best friends, or rig something with bungee cords and creativity. The key is visibility and ease. When items are well-presented, they feel more valuable—which means they’re more likely to sell.
And a pro tip? Use painter’s tape or sticky notes to clearly mark anything not for sale. If you’ve ever had someone try to buy your garden hose or patio chairs, you’ll know why this matters!
6. Make Your Checkout Area Work for You
Set up a friendly little “cashier’s corner” where you’ll handle payments and—if you’re feeling ambitious—move a few more items out the door. This is prime real estate for small impulse buys like grab bags (toss a handful of random trinkets into brown lunch sacks, tape them shut, scribble “Mystery Bag! $1” and watch them disappear). It’s also a great spot for coffee, cookies, or bottled water—especially if you’ve got early-bird shoppers showing up before breakfast.
Before sale day, swing by the bank and get at least $100 in small bills and coins. Think ones, fives, quarters—whatever you need to avoid the dreaded “Sorry, I don’t have change” moment. Keep your cash in a secure cash box (or a trusty apron if you prefer to keep it close).
And don’t forget: not everyone carries cash anymore. If you’re comfortable with it, offer Venmo or Zelle as a payment option. Just be sure to create a QR code (you can make one in Canva or a free QR generator), print it out, and post it at your checkout station so folks can scan and pay without hassle. Convenience is key—if it’s easy to pay, they’re more likely to buy.
7. What to Do If It Rains on Garage Sale Day
Rain happens—even to the best-laid garage sales. But don’t let a little drizzle wash out all your hard work. If there’s even a whisper of rain in the forecast, plan ahead. Have a few tarps or plastic sheeting on hand, and think through where you’ll stash anything water-sensitive like electronics, books, or anything with paper packaging.
Your garage, porch, or even a pop-up canopy can become a lifesaver. Group the delicate stuff under cover from the get-go so you’re not scrambling mid-sprinkle. And don’t be afraid to move things around as the weather shifts. Shoppers are pretty understanding—as long as you’re prepared and not letting your best finds get soggy.
Worst case? You hit pause, wait out the weather, and resume once the skies clear.
8. Don’t Go It Alone—Ask for Help
Running a garage sale solo can be a lot—especially when the early birds start circling before you’ve even had your coffee. So here’s my advice: don’t go it alone. Enlist a friend, neighbor, or family member to help with setup, checkout, and keeping an eye on things. Bonus points if they bring donuts or have a knack for charming shoppers into buying just one more thing.
If you really want to level up your sale game, I highly recommend The Garage Sale How-To Guide by Cindy Sabulis. It’s packed with smart strategies, clever tricks, and real-world advice that can turn a so-so sale into a total success. This book is absolutely worth its weight in gold!
Question: What’s the weirdest (or most wonderful!) thing you’ve ever found—or sold—at a garage sale? Let us know in the comments section below.
EverydayCheapskate™ is reader-supported. We participate in the Amazon Services LLC Associates Program and other affiliate advertising programs, designed to provide a means for us to earn from qualifying purchases, at no cost to you.
https://www.everydaycheapskate.com/wp-content/uploads/20250508-garage-sale-tips.png8001200Mary Hunthttps://www.everydaycheapskate.com/wp-content/uploads/EC-Logo-by-Mary-Hunt-Tagline-Trimmed.pngMary Hunt2025-05-08 11:02:572025-05-08 11:04:178 Garage Sale Tips to Help You Make More Money This Weekend
Let’s face it—most of us don’t clean out the fridge until something smells suspicious or we stumble on a fuzzy science project in the back. But once the expired condiments are tossed and those sticky shelves get wiped clean, you’ve got the perfect blank slate—and a chance to rethink how to organize a refrigerator in a way that keeps food fresher, makes meals easier, and helps you waste less (and spend less) every single week.
Let’s be honest: cleaning out a messy fridge isn’t anyone’s idea of a good time. But getting that fridge in order isn’t just about making it look Pinterest-worthy. It’s about saving money, wasting less, and even doing a little good for the planet.
According to the USDA, Americans toss out up to 40% of their food supply every year. That’s billions of pounds of perfectly good food—gone. Poof. Into the trash. We’re talking about $161 billion worth of groceries that could have gone to feed families, saved us money, and spared our landfills.
Organizing your fridge helps you see what you already have, which means you’re less likely to let food spoil in the back corner. Fewer science experiments in Tupperware = more money in your wallet. In fact, the average household could save about $370 per person each year just by wasting less food. That’s $1,500 for a family of four—enough for a weekend getaway or to finally replace that squeaky dryer.
And there’s an even bigger picture. When food ends up in landfills, it releases methane—a greenhouse gas more potent than carbon dioxide.
The Best Way to Organize Your Fridge (Zone by Zone)
Ever wonder how restaurant kitchens keep things safe and running like clockwork? It all comes down to fridge zones—a simple system based on food safety and temperature control. Here’s how to borrow that strategy at home:
Upper Shelves
This area runs a little warmer, so it’s best for leftovers, drinks, and ready-to-eat items like yogurt, sour cream, and cottage cheese. These are things that don’t need cooking and should be within easy reach.
Lower Shelves
Cooler and more consistent in temperature, these shelves are ideal for raw ingredients like meat, poultry, and eggs. Think of it as your food prep zone—just be sure to keep things well-wrapped and on a tray or in a bin to avoid drips.
Fridge Door
This is the warmest spot in your fridge (thanks to frequent opening and closing), so reserve it for items that can handle a little fluctuation—like condiments, sauces, and bottled dressings. Not cheese, not milk, and definitely not eggs.
Drawers
Most fridge drawers are humidity-controlled, which makes them perfect for produce. One drawer for fruits, one for veggies keeps everyone happy. If you’d rather use a drawer for meat, go for it—just make sure to clean it weekly to avoid contamination. And if you’re tight on drawer space, a clear plastic bin on a lower shelf works great as a makeshift meat drawer—easy to clean and keeps any rogue drips from becoming a problem.
A Quick Deep-Clean Routine Before You Organize
Before you dive into fridge organization glory, take a minute (okay, maybe 30) to give that fridge the deep clean it probably really needs. According to the American Cleaning Institute, here’s how to do it right—and bonus points if you tackle this before your next grocery run.
Unplug the fridge and give the coils a once-over with a coil brush or vacuum. (It’s dusty down there. Trust me.)
Empty it out. Toss the expired stuff, mystery meals, and those questionable leftovers from two Taco Tuesdays ago.
Remove drawers and shelves, then wash them in warm, soapy water. Use a toothbrush to get into all those grime-loving crevices.
Spray the inside with a food-safe multi-surface cleaner. Wipe down every wall and shelf like you’re prepping it for a magazine shoot.
Wipe down jars and bottles before returning them—no one likes a sticky jelly jar reunion.
Plug it back in, pop a box of baking soda in the back, and admire your fresh start.
For the outside: microfiber and stainless steel spray for stainless finishes, or a trusty multi-surface cleaner for enameled steel. Rub with the grain, not against it.
Keep it clean by wiping spills as they happen, purging expired food weekly, and keeping that baking soda tucked in year-round. Future you will thank you.
Smart Refrigerator Storage Solutions That Make a Real Difference
A well-organized fridge isn’t just easier on the eyes. The goal? Use every inch of space wisely so nothing gets lost. These tried-and-true storage helpers can turn even the most chaotic fridge into a calm, efficient space where you can actually see what you have and get dinner on the table faster.
If yogurt tends to scatter across your fridge like it’s playing hide and seek, this peel-and-stick slider is a handy fix. It keeps up to 16 containers neatly lined up and easy to grab—no tools, no fuss. You just stick it under a shelf or on the side wall, and voilà: instant order. Bonus? It adjusts to fit different yogurt sizes (think Greek, vegan, or your go-to variety), so you’re not stuck with a one-size-only solution. And because it’s made of lightweight, food-safe plastic, it won’t weigh down your fridge shelves or add clutter.
Why it’s fridge-worthy: Keeps yogurt visible and in one tidy row, helps reduce waste (no more forgotten cups in the back), and frees up shelf space for the rest of your fridge essentials.
You know those half-used bags of chopped veggies or marinated chicken that end up crammed into fridge corners? This clever organizer hangs your zipper bags in a tidy, file-folder style that keeps everything visible and easy to grab. It holds up to 11 bags—plenty for a week’s worth of meal prep—and can support up to 22 lbs. Bonus: it installs tool-free and adjusts to fit your fridge rails, so setup takes less time than making a sandwich.
Why it’s fridge-worthy: Saves space, keeps meal prep bags organized and off the shelves, and puts an end to digging through piles of floppy plastic.
Cans have a way of multiplying in the fridge, don’t they? This sleek organizer keeps up to 8 standard cans neatly corralled and ready to roll—literally. Thanks to its gently sloped base, each can slides forward as one is removed, so there’s no more rooting around behind pickle jars to find your last seltzer. The clear bin and raised sides keep things contained, while the removable lid adds bonus storage space up top.
Why it’s fridge-worthy: Saves space, keeps beverages visible and accessible, and doubles your storage with a sturdy lid you can stack on.
These clear, durable bins are the perfect solution for decluttering your refrigerator, pantry, or freezer. Whether you’re organizing condiments, snacks, or those random leftovers, these stackable containers maximize space and help you see exactly what’s inside at a glance. Made from shatterproof, BPA-free plastic, they’ll stand up to daily use and last long enough to become your new fridge staple. The best part? You can customize the layout with multiple sizes, from egg holders to drink organizers, so everything fits just right.
Why it’s fridge-worthy: Brings instant organization, helping you maximize space while keeping everything easily accessible and visible.
This 42-piece Rubbermaid Food Storage Containers set is all about convenience—its Easy Find Lids snap directly onto the container bases, and they’re all the same size for easy matching every time. No more hunting for the right lid! The set includes various sizes, keeping your fridge and cabinets organized. Plus, the vented lids make microwaving a breeze, while the durable, BPA-free containers are microwave and dishwasher safe, making it perfect for everyday use.
Why it’s fridge-worthy: The stackable design and interchangeable lids make this set a must-have for organizing and simplifying your kitchen storage.
This lazy susan turntable brings smooth, 360° rotation to your fridge or cabinets, making it easy to grab anything—no more digging through the back for that jar of mustard. Measuring 11 inches in diameter, it fits perfectly in standard refrigerators and pantry shelves, and its rimmed edges ensure everything stays in place. BPA-free and non-slip, this organizer is durable and simple to clean. With no assembly required, it’s ready to load and spin.
Why it’s fridge-worthy: It makes accessing items in your fridge a breeze, turning even the most crowded spaces into organized, easily accessible zones.
Tired of scrubbing sticky spills off fridge shelves? These colorful, washable mats make cleanup a breeze—just lift, rinse, and you’re done. You can trim them to fit any drawer or shelf, and they’re waterproof, oil-resistant, and non-slip. Even better, they add a cheerful pop of color while helping keep your food zones tidy and easy to manage. Perfect for sorting meat, produce, and dairy by color, or just giving your fridge a little personality!
Why it’s fridge-worthy: They turn dreaded fridge spills into a wipe-and-go job—and make your shelves look way more fun in the process.
A few bonus tips that’ll make your fridge work smarter, not harder:
Don’t overload the shelves. Airflow matters—your fridge can’t keep cool if it’s packed tighter than a Thanksgiving leftovers drawer.
Wipe up spills ASAP. It’s easier to clean now than to chisel it off three weeks later.
Use a thermometer. Your fridge should stay at or below 40°F. Warmer than that? Say hello to mystery smells and spoiled milk.
Keep raw meats on the bottom shelf. If they drip (ugh), they won’t contaminate other foods.
Tidy as you go. A 2-minute sweep once a week keeps things from turning into a Sunday afternoon project.
Question: What’s the weirdest or oldest thing you’ve ever found hiding in your fridge? Be honest… we won’t judge!
EverydayCheapskate™ is reader-supported. We participate in the Amazon Services LLC Associates Program and other affiliate advertising programs, designed to provide a means for us to earn from qualifying purchases, at no cost to you.
https://www.everydaycheapskate.com/wp-content/uploads/20250501-how-to-organize-a-refrigerator.png8001200Mary Hunthttps://www.everydaycheapskate.com/wp-content/uploads/EC-Logo-by-Mary-Hunt-Tagline-Trimmed.pngMary Hunt2025-05-01 10:23:322025-05-01 10:25:35How to Organize a Refrigerator and Keep Food Fresher
Let’s talk about plastic wrap. That clingy, see-through roll that lives in a box with teeth and never behaves the way you want it to. You pull, you tear, you battle static—and end up with a wad of frustration wrapped around your leftovers like Saran’s version of a bad attitude. If you’ve ever stood there whispering “why are you like this?” to a sheet of plastic, this post on alternatives to plastic wrap is for you.
Why It’s Time to Break the Habit
Plastic wrap might feel convenient—until you think about what it actually does to our bodies, our kitchens, and the planet. It’s not just annoying—it’s potentially harmful.
Most plastic wraps are made from polyvinylidene chloride (PVDC) or low-density polyethylene (LDPE). When heated (hello, microwave) or even just wrapped over warm leftovers, they can leach chemicals into your food. Not exactly the side dish you had in mind when you made that homemade stew with organic carrots and good intentions.
And then there are microplastics—tiny particles that break off and sneak into seafood, salt, your bloodstream, and even placentas. (Harvard Medical School confirms —let that sink in.) Researchers estimate the average person consumes a credit card’s worth of microplastics each week. Bon appétit?
The Waste is Real
Plastic wrap is the poster child for single-use. You use it once—maybe twice if you’re an optimist—and off it goes to a landfill, where it will outlast your leftovers and possibly your will to declutter that one kitchen drawer. It’s not recyclable through regular curbside programs, and it doesn’t break down. Over 5 million tons of plastic film and wrap are discarded in the U.S. each year.
The better news? You don’t have to give up leftovers—just the plastic. Let’s look at some clever, frugal, and reusable food storage solutions that get the job done without the toxic baggage.
Smart Alternatives to Plastic Wrap for a Healthier Kitchen
The good news? You don’t have to keep inviting plastic to dinner.
Made from cotton fabric coated in beeswax, tree resin, and jojoba oil, these wraps mold around bowls and sandwiches with the warmth of your hands. They’re breathable, reusable for up to a year, and smell faintly like honeycomb nostalgia. Hand wash, air dry.
Great for: Cheese, cut produce, sandwiches Skip for: Raw meat—these wraps aren’t into cross-contamination.
One sheet can replace hundreds of feet of plastic wrap—saving money and the landfill.
Think yoga pants for your bowls. These stretchy, reusable covers hold tight, bounce back, and come in a variety of sizes. Perfect for containers that lost their lids in the dishwasher abyss.
Great for: Covering bowls, pans, half-used cans Trick: If your lids and containers have divorced, these make excellent mediators.
They’re top-rack dishwasher safe and easy to hand wash with soapy water. They don’t stain easily or hang onto weird smells, which is more than we can say for plastic wrap. Each lid replaces dozens of single-use wraps over time—saving money and space in your kitchen.
Tip: A tiny bit of water on the bowl’s edge helps them seal even better.
These are the workhorses of any eco-friendly kitchen swap. Microwave-safe, dishwasher-safe, and see-through so you can tell if that’s soup or a science experiment. Built with thick tempered glass to handle heat, cold, and clumsy hands alike.
Perfect for: Leftovers, meal prep, lunches, freezer storage Bonus: No weird plastic taste. No leaching. No drama.
They’ll last for years—unlike that warped plastic set you’ve been avoiding.
Think of these as shower caps for your salad. Made from cotton fabric with elastic edges, they’re machine washable and give your fridge a little charm.
Great for: Rising bread dough, potluck dishes, storing produce Tip: Skip the fabric softener when washing—keeps the elastic springy and the fit snug.
They cut down on single-use plastic and make your fridge look a little more put-together.
A grandma favorite—and a true zero-waste kitchen idea. A dinner plate fits perfectly over most bowls, creating a decent seal in the fridge or microwave. Just make sure the plate is microwave-safe if you’re reheating.
Great for: Quick storage, reheating leftovers Tip: Stack carefully to avoid a midnight fridge avalanche.
Free, functional, and already in your kitchen—what’s not to love?
You already bought the pasta sauce—why not keep the jar? These glass gems are perfect for soups, salad dressings, leftover coffee (hello, iced latte), and chopped veggies. They’re also pantry heroes for storing dry goods or giving homemade gifts a rustic touch.
Bonus: Dishwasher-safe and nearly immortal. Frugal perk: Free is a great price point. Pro tip: Use masking tape and a Sharpie to label contents and dates.
Freezing? Just leave some headspace to prevent cracks.
Like Ziplocs, but without the landfill guilt. These sustainable food storage options come in sandwich, quart, and gallon sizes—and you can use them hundreds of times.
Silicone is heat-resistant and great for liquids, while PEVA is perfect for dry snacks and cold storage. Both options reduce the need for single-use plastic bags, making them a long-lasting and eco-friendly alternative.
Dishwasher safe or quick to rinse with warm soapy water
Pro Tip: Got garlic-scented leftovers? Soak the bag in a baking soda solution before washing. Unless you like your grapes with a hint of garlic. You do you.
Let’s be real—habits don’t change overnight, especially when you’ve got spaghetti sauce to put away and someone asking where their other sock went. But here’s how to make it easier:
Use up your last roll of plastic wrap, then let it go. Don’t stock up on more. It’s like quitting cookies but keeping Oreos in the pantry “just in case.” Once it’s gone, you’ll have no choice but to reach for a better alternative.
Put your alternatives where you can see them. If your beeswax wraps are buried behind the fondue pot, you’ll forget you have them. Make it easy to grab your new tools for success.
Label storage drawers. One for lids, one for bags, and one for that drawer of miscellaneous kitchen chaos.
Get the whole household on board. Have a fun challenge to see who can go the longest without using plastic wrap. The winner gets the remote, chocolate, or the last clean dish towel—whatever motivates your crew!
Bottom Line: Progress, Not Perfection
This isn’t about being perfect—it’s about doing better. Every time you skip the plastic wrap and reach for a reusable, you’re saving money, protecting your family’s health, and keeping trash out of the landfill. That’s a win-win-win.
And while it’s tempting to revert back to old habits, just remember: Every small swap adds up. You’re making the world a little cleaner with every choice you make. So if you need a quick reminder of why you’re doing this, just picture a plastic-wrapped sandwich floating in the ocean next to a very confused sea turtle. That ought to do it.
Take it one step at a time—every bit of progress counts.
Question: What’s the most creative thing you’ve used instead of plastic wrap—and did it actually work?
EverydayCheapskate™ is reader-supported. We participate in the Amazon Services LLC Associates Program and other affiliate advertising programs, designed to provide a means for us to earn from qualifying purchases, at no cost to you.
https://www.everydaycheapskate.com/wp-content/uploads/20250425-alternatives-to-plastic-wrap.png8001200Mary Hunthttps://www.everydaycheapskate.com/wp-content/uploads/EC-Logo-by-Mary-Hunt-Tagline-Trimmed.pngMary Hunt2025-04-25 15:39:562025-04-25 15:39:56How to Break the Plastic Wrap Habit in Your Kitchen (and What to Use Instead)
If your kitchen junk drawer has become a chaotic mess, you’re not alone! But reclaiming that cluttered space doesn’t require a trip to The Container Store or a full-on Pinterest-worthy makeover. With just three simple steps—dump, divide, and categorize—you can transform that drawer full of randomness into a tidy, functional Help Drawer.
I’m going to go out on a limb and assume you have a junk drawer. Most of us do. And I don’t know about you, but I’m not giving mine up. After all, where else would I stash twist ties, rogue screws, birthday candles, and that one key we can’t identify but might be important?
Not long ago, a reader emailed me in desperation: “I can’t find anything in there, so I keep re-buying all the stuff I bought already!”
That hit a little too close to home. So I decided to look into it and see what the experts say about conquering the infamous junk drawer.
Emilie Barnes, author of More Hours in My Day, insists the secret is simple: dividing containers. But hold on—don’t dash off to buy fancy organizers just yet. Emilie suggests using what you already have: muffin tins, silverware trays, ice cube trays, coffee cans, small boxes, even egg cartons (although, let’s be honest, that last one feels a little iffy to me).
Then I turned to Marla Cilley, better known as The FlyLady and author of Sink Reflections. Her advice?
“You can’t organize clutter.”
She’s right. The only real way to reclaim any space—junk drawer included—is to empty it out, clean it thoroughly, and then return items, placing each one in a proper home. It’s so obvious it almost feels profound.
Step 1: Empty and Clean Your Junk Drawer
Before I could give advice with a straight face, I knew I had to face my own junk drawer. So, armed with intention, determination, and a pinch of dread, I did it—I dumped the entire contents right onto my kitchen rug. (Fair warning: this part can be both deeply satisfying and slightly horrifying.)
To my surprise, I discovered the drawer was lined with some rather charming vinyl paper. I hadn’t seen the bottom of that drawer in years! Who knew it had a personality under all that chaos?
With everything out, I took a few minutes to wipe down the drawer and clean the lining—it was overdue for some TLC. A quick clean goes a long way here, and if your liner’s looking tired or sticky, this is the perfect time to replace it with something fresh and cheerful. You’ll be amazed how a clean, empty space gives you the motivation to keep going.
Step 2: Find Creative Dividers You Already Have
Once the drawer was clean, I went on the hunt for something—anything—to serve as dividers. I wasn’t about to run out and buy a set of Pinterest-worthy organizers. Instead, I rummaged through my kitchen and office cabinets like a woman on a mission. I found an old muffin tin (still with cupcake liner residue), a silverware tray, and a desk drawer organizer that I honestly don’t remember acquiring. It was buried in what I can only describe as my “junk cupboard.” Yes, that’s a thing—and it might be my next project.
Just for fun (and fairness), I gave an egg carton a second chance at life. One quick coat of spray paint later, and it was surprisingly… not hideous! I ended up cutting the egg carton into smaller sections to nestle around the larger tray, creating a patchwork of compartments that actually works.
The goal here isn’t perfection—it’s function. Use what you have. Ice cube trays, ramekins, jewelry boxes, shoebox lids—get creative. As long as each item has its own little “parking spot,” you’re on your way to junk drawer bliss.
Now, the real test: tackling that mountain of stuff I dumped on the floor…
Step 3: Categorize and Tidy Up Your Items
Once I had my little compartments in place, I started sorting. First up: cords. If it had a plug, a USB, or anything resembling tech, I wound it neatly and secured it with a rubber band. Then came the hardware parade—screws in one pile, nails in another, and tiny tools and pencils marched straight into the long, narrow slots of my desk organizer.
The egg carton turned out to be perfect for the itty-bitty stuff—tacks, washers, mystery keys, and those round things I always hesitate to toss but never quite know where they belong. Everything else got grouped into like-with-like categories until all that remained was—let’s call it what it is—trash.
I was genuinely surprised by what I uncovered. There were batteries (still good!), scissors I thought had vanished forever, and yes, like my reader-friend, several items I had definitely re-purchased simply because I couldn’t find the originals. But the best discovery? The missing lid to my beverage vacuum pump. That alone made this whole junk drawer makeover totally worth it.
All told, it took me about two hours to wrestle our kitchen junk drawer back from the brink. And now? It’s neat, functional, and dare I say… kind of beautiful. In fact, it’s earned a promotion. I no longer have a junk drawer—I have a fully upgraded Help Drawer!
The American Junk Drawer
Ah, the classic junk drawer—an unofficial staple of American households! It’s that one catch-all spot (often in the kitchen) where small, oddball items go to hide. Think: rubber bands, takeout menus, paperclips, and keys with no known locks. These drawers may hold little monetary value, but plenty of sentimental weight—like that lone earring you’re sure you’ll find the match for someday.
Interestingly, the term junk drawer appears to be a uniquely American phrase dating back to the early 1900s. And while they often live in kitchens, you’ll find junk drawers in home offices, garages, workshops—even in some workplace breakrooms. Anywhere there’s a drawer, there’s potential for a little organized chaos.
Maintaining Your Organized Junk Drawer
Is it actually possible to keep a junk drawer organized? Well… maybe if you live alone and are currently on a six-month yoga retreat in Bali. For the rest of us—with families, kids, spouses, roommates, pets (who knows?)—a junk drawer is going to need some routine TLC.
That’s the beauty of this system: when things start to slip, you don’t need to start from scratch. Just circle back to Steps 1-2-3. Dump. Divide. Categorize. Done.
The Junk Drawer Two Years Later
It’s been over a year since I first tackled our junk drawer. Did I take a before photo? Absolutely not. I didn’t even think about taking one. As much as I live and breathe writing, I don’t walk through life with a camera in one hand and blog post headlines in the other. Honestly, I was hoping no one—ever—would see the chaos that once lived in that drawer. It was up there with The Chair in terms of household shame.
But when I shared this post originally, my inbox was flooded—tsunami-style—with requests, questions, and even desperate pleas to see the before-and-after transformation. And here’s the truth…
That “before” photo you saw up above? Stock photo. It’s not mine, though it’s a dead ringer for what I started with. Recreating that drawer in all its horror just for a photo? Not going to happen.
But here’s the good news: the photo below is my current drawer, snapped just 10 minutes ago. No styling. No touch-ups. I opened the drawer, took the shot, and that was it. Turns out, once you give everything a proper home, it really is easier to keep it tidy. Much like a closet that’s been truly decluttered, maintaining a well-organized junk drawer becomes nearly effortless—because now, everything actually has a place.
Question: What’s the most creative thing you’ve used to organize your junk drawer? Any tips or tricks you’d swear by? Share your organizing hacks below!
EverydayCheapskate™ is reader-supported. We participate in the Amazon Services LLC Associates Program and other affiliate advertising programs, designed to provide a means for us to earn from qualifying purchases, at no cost to you.
https://www.everydaycheapskate.com/wp-content/uploads/20250424-how-to-organize-a-junk-drawer.png8001200Mary Hunthttps://www.everydaycheapskate.com/wp-content/uploads/EC-Logo-by-Mary-Hunt-Tagline-Trimmed.pngMary Hunt2025-04-24 22:35:502025-04-24 22:37:29How to Organize Your Junk Drawer in 3 Simple Steps
Water is one of those everyday essentials we don’t think twice about—until it’s suddenly gone. Whether it’s a natural disaster, power outage, or plumbing issue, losing access to water turns life upside down fast. That’s why having an emergency water storage plan isn’t just a good idea—it’s essential. But you don’t need a doomsday bunker or a mountain of bottled water to be prepared—just a smart, practical plan that works for your space and your family.
Water is life—literally. It’s also one of those everyday essentials we barely think about… until suddenly we have to. One minute you’re sipping from your favorite tumbler like it’s no big deal, and the next, a broken water main or fast-moving wildfire has you eyeing your ice cubes like liquid gold. Whether it’s a natural disaster, a power outage, or a plumbing emergency that hits at the worst possible time (is there ever a good one?), losing access to water throws everything off balance—fast.
Why You Need an Emergency Water Storage Plan
Most of us assume that clean, running water will always be there when we need it—until the day it isn’t. And unfortunately, water disruptions don’t send a courtesy text. They just show up: a surprise boil notice, a busted main, a hurricane headed your way, or even a cyberattack that knocks out utility systems. Suddenly, the simplest things—making coffee, flushing the toilet, washing your hands—become impossible.
That’s where a solid emergency water plan comes in. It’s not about fear. It’s about freedom. Knowing you have enough safe, drinkable water on hand to take care of your family, pets, and basic needs? That’s peace of mind you can’t buy at the last minute when the store shelves are already bare.
You don’t need to be a survivalist or sacrifice your linen closet to make it happen. A few smart choices now can keep you comfortably hydrated later.
FEMA and the CDC both recommend storing at least one gallon of water per person per day, which sounds reasonable… until you do the math.
Let’s say you’ve got a family of four. That’s 28 gallons for one week, 56 for two—and that doesn’t even include your pets (because good luck explaining rationing to a parched golden retriever). Now, if you actually want to cook, wash your hands, brush your teeth, or—gasp—shower, you’ll probably want to bump that up to 1.5 or even 2 gallons per person per day. Suddenly, your “just-in-case” water stash starts to look like a small swimming pool.
Where Do You Store All This Water?
If you’re blessed with a spacious home, the obvious choices include 55-gallon barrels in the garage, a basement stockpile of large water storage tanks, or a fortress of stackable 3.5-gallon water bricks. But let’s be real—not everyone has a garage the size of a three-car showroom or a secret underground bunker. For the rest of us, it’s time to channel our inner Tetris champion.
Under the bed? Perfect. Behind the couch? Why not. That awkward empty space at the back of your closet? Water storage goldmine. Flat, stackable containers can disappear under furniture without anyone noticing. Those slim 5-gallon jugs? Tuck them behind a bookshelf or slide them along the wall like you meant for them to be part of your emergency-chic aesthetic.
Even your kitchen and bathroom cabinets can hold a few gallons. And if you live in an apartment, don’t forget the balcony. Just make sure you use weatherproof bins, unless you want your water supply doubling as a mosquito Airbnb.
The trick is to think modular, mix sizes, and use what space you have. You’re not just storing water—you’re building peace of mind, one gallon at a time.
Emergency Water Storage Solutions for Small Spaces
If you’re working with limited square footage, don’t worry—you can still be brilliantly prepared. It just takes a little creative thinking and a shift in strategy. Start by tapping into the water you already have: your home’s water heater holds 30 to 50 gallons of usable water (just be sure to turn off the power and let it cool before accessing).
Next, consider your bathtub. A product like the WaterBOB can line your tub and store up to 100 gallons of clean water—just fill it at the first sign of an emergency.
And if physical storage just isn’t in the cards, focus on water purification instead. A reliable water filter—like a gravity-fed system or high-quality portable filter—can turn questionable water into safe drinking water. Keep a couple of collapsible water containers tucked away for emergencies. They take up almost no space when not in use but can be filled quickly when needed.
Don’t worry—you don’t need to single-handedly drain the city reservoir to build a solid emergency stash. One of the simplest ways to get started is by filling up sanitized containers with good old tap water. To sanitize: rinse each jug with a solution of one teaspoon of unscented household bleach per gallon of water, let it sit for 30 minutes, then rinse thoroughly. Fill with fresh tap water, seal tightly, label with the date, and you’re good to go. Just remember to rotate your supply every six months to keep things fresh.
If you’re more of a set-it-and-forget-it type, commercially bottled water works just fine. It’s a bit pricier and takes up more space, but the convenience factor can’t be beat. Just keep an eye on the “best by” date and store it somewhere cool and dark—away from gasoline, paint, or anything with strong fumes (nobody wants eau de WD-40 in their drinking water).
If local laws give the green light, rainwater collection is a great way to supplement your supply for non-potable uses like flushing toilets or washing up. Just make sure to filter and purify it thoroughly before considering it safe to drink.
And for those ready to go all-in, a larger storage solution—like a 160-gallon tank—can be a smart long-term investment. Some tanks come BPA-free and UV-resistant, making them ideal for garage or outdoor storage.
If your emergency stash dries up, don’t panic—just shift into purification mode. The gold standard is boiling: bring water to a rolling boil for at least one minute (make it three if you’re at a high altitude) to kill bacteria, viruses, and other nasties.
But what if you can’t boil water—no stove, no power, no campfire in sight? Unscented household bleach to the rescue. Add 8 drops per gallon of clear water (16 if it’s cloudy), stir, and let it sit for 30 minutes. If you don’t notice a slight chlorine smell afterward, repeat the process and give it another 15 minutes. Not glamorous, but effective.
Water purification tablets are another solid backup—compact, easy to stash in a go-bag, and generally effective within 30 minutes. Just follow the instructions on the package, as timing and dosage can vary.
For longer-term situations, having a solid water filter on hand is a must-have. LifeStraws are great for individual use and ultra-portable. The Sawyer Mini can filter up to 100,000 gallons—yep, you read that right—and fits in the palm of your hand. For families, a countertop gravity filter like a Berkey offers serious peace of mind with high-capacity, no-electricity filtering.
And when all else fails? Let the sun do the work. The SODIS method (solar water disinfection) might sound like survival science fiction, but it’s the real deal: fill a clear plastic bottle with water, lay it in direct sunlight for at least six hours, and let UV rays work their purifying magic. It’s not fast, but it’s free—and effective in a pinch.
In a water emergency, it’s not just about what you’ve stored—it’s about how long you can make it last. When every drop counts, a few smart swaps can stretch your supply way further than you’d think.
Start by ditching dish duty altogether: use disposable plates, cups, and utensils when possible (paper over plastic if you can recycle or burn them later). When it comes to hygiene, swap the faucet for a spray bottle—it’s surprisingly effective for washing hands, doing a quick dish rinse, or even a mini “shower” if needed.
Toilet use? Get strategic. If it’s yellow, let it mellow. If it’s brown… well, you know the rest. Reuse gray water (like what’s left from handwashing or rinsing veggies) for flushing or cleaning floors. And embrace the humble washcloth—sponging off with a little warmed water goes a long way when showers are off the table.
It’s not glamorous, but neither is running out of water. These small habits can buy you time, lower stress, and make your emergency stash last longer without sacrificing too much comfort.
Final Emergency Water Checklist (Don’t Skip This!)
Water storage isn’t optional—it’s a lifeline. A little planning now means you and your crew stay hydrated, clean, and mostly sane if things go sideways. Store what you can, purify when needed, and use every drop wisely.
Whether you’re weathering a storm or riding out a blackout, this checklist will keep you and your household hydrated, clean, and calm.
Storage Containers: Enough to cover at least two weeks per person (that’s about 14 gallons each—more if you’ve got pets)
Filling Plan: Tap water in sanitized containers, bottled water, rain collection systems, or large-capacity tanks
Purification Supplies: At least two methods—boiling, bleach, water filter, and/or purification tablets
Conservation Plan: Use sparingly, reuse gray water, skip the dishwasher, and limit flushes
Backup Plan: Identify local water sources (like rivers, lakes, or public spigots) and know how to make that water safe to drink
Question: If you had to store 100 gallons of water today, where would you put it? No cheating with the neighbor’s pool! What’s the most unexpected place you’ve ever stored emergency water? Share in the comments below.
EverydayCheapskate™ is reader-supported. We participate in the Amazon Services LLC Associates Program and other affiliate advertising programs, designed to provide a means for us to earn from qualifying purchases, at no cost to you.
https://www.everydaycheapskate.com/wp-content/uploads/20250412-water-storage-for-emergency-disaster-preparedness.png8001200Mary Hunthttps://www.everydaycheapskate.com/wp-content/uploads/EC-Logo-by-Mary-Hunt-Tagline-Trimmed.pngMary Hunt2025-04-11 16:26:542025-04-11 16:26:56How to Build a Practical Emergency Water Storage Plan (No Bunker Required)
Spring is here, and that means it’s time for a fresh start—especially in the kitchen. If your cabinets are overflowing, your drawers are a mess, and your countertops have become a catch-all, this guide is for you. I’ll walk you through exactly how to spring clean your kitchen with a simple, no-fail method: declutter, deep clean, and reorganize. Plus, I’ve got some DIY cleaning recipes that will leave your kitchen sparkling!
Ever feel like your kitchen is working against you instead of for you? You’re not alone. Over time, cabinets fill up with mystery lids, appliances you swore you’d use, and a dozen mismatched coffee mugs. And let’s not even talk about the junk drawer. (Spoiler alert: You don’t need 27 takeout soy sauce packets or that lone corn cob holder.)
A decluttered and well-organized kitchen can make cooking and cleaning so much easier. I’ve revamped my annual kitchen decluttering challenge to make the process simple, efficient, and—dare I say—fun. Grab some boxes, roll up your sleeves, and let’s get to work!
Step 1: Empty Cabinets and Drawers Completely
I know, I know—this part feels like creating more chaos before the magic happens. But trust me on this one. If you really want to spring clean your kitchen the right way, you need to start with a blank slate. That means pulling everything out of your cabinets and drawers. Yes, even the questionable spice jars lurking in the back from who-knows-when.
Lay it all out on your counters or table so you can see exactly what you’re working with. This step is crucial because it forces you to take stock of what you actually have—spoiler alert: probably more duplicates and expired items than you think. (Looking at you, three half-used bottles of vanilla extract.)
And while you’re at it, maybe it’s finally time to part ways with that electric French-fry fryer you used once and the odd collection of sports bottles from every charity walk-a-thon you’ve ever participated in. We all have them. It’s okay.
Step 2: Sort and Declutter with Smart Categories
Now that your kitchen looks like a yard sale exploded, it’s time to sort and declutter. This is where we separate the “actually useful” from the “what was I thinking?” and give everything a proper place.
Start by creating four simple categories:
Donate: The gadgets you swore you’d use (but never did) and the extra mugs multiplying in your cabinet like rabbits. If it’s still in good condition but not serving you, let someone else enjoy it.
Sell: If you’ve got high-end cookware, small appliances, or trendy kitchen tools that are still valuable, list them online and make a little cash back.
Trash: Anything broken, expired, or past its prime—yes, including that mystery spice jar with a faded label from a decade ago.
Keep: This is the good stuff, the kitchen MVPs that earn their spot in your home. But before tossing everything back in, we’re going to get strategic.
As you sort, think about how you actually use your kitchen. Group similar items together and create zones that match your daily routines:
Coffee Station: Keep mugs, coffee pods, and sweeteners all in one spot.
Prep & Cooking Zone: Cutting boards, knives, and mixing bowls go near your prep space.
Everyday Essentials: Keep plates, glasses, and silverware within arm’s reach—and just as easy putting away once they’ve made their great escape from the dishwasher.
This method isn’t about just moving things around—it’s about creating a kitchen that works for you. And if you’ve been holding onto something “just in case,” ask yourself: Would I actually buy this again today? If not, it’s time to let it go!
Step 3: Deep Clean Every Surface
Now that your cabinets and drawers are empty, it’s time to give them a deep clean. You’ll be amazed at how much dust, crumbs, and mystery debris collect in these spaces—no judgment, it happens to all of us.
Start with the Insides
Before you reach for a cleaner, grab a handheld vacuum (or your vacuum’s hose attachment) and suck up all those stray crumbs and dust bunnies lurking in corners. Once the loose debris is gone, wipe down every surface using a microfiber cloth and an all-purpose cleaner (or our DIY All-Purpose Heavy Duty Cleaner.)
Now, Tackle the Outsides
If your wood cabinets have developed a sticky film of grease and grime, they need a little extra love. An orange oil wood polish will work wonders to cut through the buildup while nourishing the wood. Or, for a budget-friendly and just-as-effective alternative, try our DIY General Wood Cabinet Cleaner Recipe.
Don’t Forget the Countertops
Grease, spills, and daily wear can leave countertops looking dull and grimy. A kitchen surface degreaser (or our DIY Kitchen Surface Degreaser) will cut through the mess with ease—without harming your surfaces. This cleaner is safe for just about anything: granite, quartz, quartzite, slate, soapstone, Formica, stainless steel, porcelain, ceramic tile, finished wood, and even concrete. If your countertop isn’t on this list, chances are, it’s still safe—but maybe do a quick spot test to be sure.
Once everything is sparkling, step back and admire your work! A deep-cleaned kitchen just feels lighter, fresher, and way more inviting—and now you won’t cringe the next time you open a drawer.
Now that your kitchen is clean, it’s time to put everything back. The goal? A setup that saves you time, frustration, and unnecessary digging through cluttered drawers when all you want is a measuring cup.
Group Like Items Together: Keep baking supplies in one spot, cooking oils and spices near the stove, and everyday dishes within easy reach. Think about how you use your kitchen and arrange things accordingly. If you use your blender every morning, don’t stash it on a high shelf—give it a home where you can grab it without an upper-body workout.
Use Bins, Dividers, and Lazy Susans: Deep cabinets and pantries are notorious for swallowing items into the abyss. Clear bins keep small items from getting lost, drawer dividers prevent utensil chaos, and a lazy Susan is a game-changer for spices, condiments, or under-sink supplies.
Label It (If That’s Your Thing): If you love a Pinterest-worthy pantry, go for it. Labels keep everyone in the house on the same page—so no more “Where does the coffee go?” debates.
Make It Functional, Not Just Aesthetic: A beautifully organized kitchen is great, but if it doesn’t make your life easier, what’s the point? Store everyday essentials in prime real estate and rarely used items like holiday cookie cutters up high or in less accessible spots.
Once you’ve placed everything with intention, take a step back and admire your work. Doesn’t it just feel lighter and more efficient? Now, the next time you cook, you’ll spend less time hunting for things and more time enjoying your beautifully organized space!
Creative Storage Solutions to Maximize Your Kitchen Space
Here are some ideas that’ll free up space and make your kitchen function more smoothly.
1. Towel Racks with S-Hooks
A basic towel rack with S-hooks is a genius way to store your cooking tools and keep them within arm’s reach. It’s simple to set up, and it adds a bit of flair to your kitchen without taking up valuable counter space.
S-hooks and towel bars come in various finishes and sizes, so you can easily pick the style that complements your kitchen’s vibe.
When you think of pegboards, you probably picture a cluttered garage or tool shed. But Julia Child’s famous kitchen pegboard proves this idea belongs in the heart of the home too. Imagine using a small pegboard above your stovetop or near your fridge to store utensils, pots, or measuring cups. It’s not just functional—it’s a great way to showcase your kitchen tools, too.
Believe it or not, there was a time before Command hooks. Introduced in 1996, the idea was awesome but the look left a bit to be desired. But now—so many years later? Wow. It’s hard to remember what we did without them. Command hooks have been perfected. And they come in so many options—some able to hold up to 7.5 pounds. Perfect for hanging measuring cups, dish towels, or even your favorite kitchen gadgets. I use them in my bathrooms, but trust me, they’re equally great in the kitchen for keeping things tidy and off the counters.
Alright, it’s time to stop putting this off. My kitchen isn’t going to organize itself, as much as I’d like it to. And let’s be real, that pile of mismatched Tupperware and the mysteriously warped pan that hasn’t seen daylight in years? They’re not going anywhere unless I take action.
Here’s my rule: If I’ve used it in the last month, it gets a chance to stay. If it’s been languishing in the back of the cabinet, collecting dust and lost hopes, it’s officially on the chopping block.
I’m committed. I’m determined. I will box it up, donate it, and maybe even pawn some of it off on unsuspecting friends and family. No mercy for the kitchen clutter that’s too “good” to throw away but never gets used. (Spoiler: It’s all gotta go.)
I’ll go shelf by shelf, drawer by drawer, until every corner is clean, organized, and functional. And when it’s all done, I’ll sit back, sip my coffee, and admire the kitchen of my dreams—until it’s time to cook dinner and start all over again.
Are You In?
Because I have a feeling I may not be alone in this need for kitchen organization, I’m inviting all who dare to join me in this marathon event! I could use the company.
Somehow knowing others are participating in the same task will keep me on track and moving forward.
Question: Be honest—What’s the weirdest (or most useless) thing you’ve ever found hiding in your kitchen cabinets? I once found a jello mold shaped like Mount Rushmore—I wish I were joking.
EverydayCheapskate™ is reader-supported. We participate in the Amazon Services LLC Associates Program and other affiliate advertising programs, designed to provide a means for us to earn from qualifying purchases, at no cost to you.
https://www.everydaycheapskate.com/wp-content/uploads/20250329-how-to-spring-clean-your-kitchen.png8001200Mary Hunthttps://www.everydaycheapskate.com/wp-content/uploads/EC-Logo-by-Mary-Hunt-Tagline-Trimmed.pngMary Hunt2025-03-29 11:49:112025-03-29 11:51:23Clean, Clear, & Ready to Cook: Your Spring Kitchen Overhaul
Is your fridge packed to the brim? Before you start eyeing a bigger model, take a closer look—because you might be storing things in the refrigerator that don’t belong there in the first place. Some foods lose flavor, texture, or even nutritional value when chilled, while others become completely inedible. The good news? Knowing what not to refrigerate can free up space, keep your groceries fresher for longer, and help you cut down on waste.
While certain foods must be refrigerated, others actually do better at room temperature. And then there are those tricky in-between items that can survive in either spot. Do you know which ones really shouldn’t be in the refrigerator? You might be surprised!
Fruits That Hate the Fridge
1. Tomatoes
Want your tomatoes to taste like cardboard? Stick them in the fridge. The cold stops the ripening process, messes with their texture, and dulls their flavor—leaving you with mealy, tasteless fruit (yes, tomatoes are fruit!). Ever notice how grocery stores keep them out of the refrigerated section? There’s a reason for that.
Instead, store fresh tomatoes on the countertop at room temperature, stem-side up to prevent bruising. If you grow your own, leave a small piece of the vine attached when harvesting. This little trick helps them stay fresh longer and can even boost their flavor. Want to slow ripening? Keep them in a cool, shady spot, but skip the fridge!
2. Unripe Bananas
Bananas are one of the few fruits that keep ripening after they’re picked—but only if you let them. Pop them in the fridge too soon, and you’ll put that ripening process on ice (literally). Instead, keep unripe bananas on the countertop, away from direct sunlight, and let nature do its thing.
Once they reach peak ripeness, you can refrigerate them to slow down further ripening. Just don’t panic when the peel turns black—that’s totally normal. The fruit inside stays perfectly sweet and ready for smoothies, oatmeal, or, let’s be honest, banana bread.
3. Citrus Fruit
Oranges, lemons, limes, and grapefruits thrive at room temperature. While it might seem logical to keep them chilled, the cold air in the fridge can actually dry them out, dull their bright flavors, and even cause the rinds to harden.
For the juiciest, most flavorful citrus, store them in a cool, dry place—like a fruit bowl on the counter. If you have an abundance and need to keep them fresh longer, refrigeration is an option, but let them come to room temperature before eating for the best taste.
4. Uncut Melon
Melons, like watermelon and cantaloupe, get sweeter and more flavorful when left to ripen at room temperature. But here’s something you might not know—the fridge can actually zap some of their nutritional value. Chilled temperatures can reduce the antioxidants found in melons, meaning you’re missing out on some of their natural health benefits.
Plus, let’s be honest—whole melons hog a ridiculous amount of fridge space. Instead, keep them on the countertop until you’re ready to slice in. Once cut, transfer the leftovers to an airtight container and refrigerate for up to three days to keep them fresh.
A quick note on honeydew: Unlike its melon cousins, honeydew won’t ripen further once it’s picked. Whether in the fridge or on the counter, it’s as ripe as it’ll ever be.
5. Green Avocados
A perfectly ripe avocado is a thing of beauty—but patience is key! If you toss an unripe avocado in the fridge, it’ll stubbornly refuse to ripen, staying rock-hard for what feels like forever. Instead, keep it on the counter and let nature do its thing.
Once your avocado is just right, you can extend its life by popping it in the fridge. The skin may darken, but the creamy goodness inside will stay fresh for a few extra days—just in time for that perfect batch of guacamole.
Storing nuts in the fridge might seem like a good idea, but it can actually rob them of their rich, nutty flavor. Worse, they’re like little sponges, soaking up odors from everything around them—garlic-scented almonds, anyone? No thanks. Plus, the cold can make them soft instead of crisp and crunchy.
For short-term storage (a week or two), keep nuts in a covered container in the pantry or even in a bowl on the countertop for easy snacking. If you’ve stocked up and won’t go through them quickly, the best long-term storage is the freezer. Just use an airtight container or vacuum-sealed bag to lock in freshness and keep them from absorbing any weird freezer smells.
7. Strawberries
Refrigerating strawberries—or any berries, for that matter—can zap their natural sweetness and turn them into sad, mushy versions of their former selves. Instead, store fresh strawberries on the countertop, out of direct sunlight, and aim to use them within a day or two for the best flavor and texture.
One more thing: Keep them dry. Moisture is the enemy of fresh berries. Wait to wash them until you’re ready to eat, or they’ll spoil much faster. If you need to store them a bit longer, arrange them in a single layer on a paper towel in a breathable container, but even then, don’t expect them to last more than a couple of days. Fresh berries are meant to be enjoyed quickly.
8. Apples
For the best flavor and texture, keep fresh apples on the countertop. While refrigeration can help them stay crisp longer, there’s a catch—apples naturally release ethylene gas, which can cause nearby fruits and veggies to ripen (or spoil) faster than you’d like.
If you do need to store apples in the fridge, take a simple extra step: Place them in an airtight container or a sealed bag. This keeps them from affecting other produce while still maintaining their crunch. And if an apple starts to soften? Time for applesauce, pie, or a quick snack with peanut butter.
Cucumbers might seem like fridge staples, but they’re actually pretty sensitive to the cold. Storing them below 50°F can lead to chilling injuries—think soft, mushy spots, watery texture, and faster decay. Not exactly the crisp, refreshing crunch you’re hoping for.
For the best results, keep whole, uncut cucumbers at room temperature. Stored this way, they can stay fresh for up to two weeks. If you’ve already sliced one, wrap it tightly and refrigerate, but plan to use it within a day or two for the best texture.
10. Peaches
Peaches—and their stone fruit cousins like nectarines, plums, and apricots—suffer the same sad fate as tomatoes when stored in the fridge. The cold can zap their sweetness, dull their flavor, and leave you with mealy, disappointing fruit.
For the juiciest, most flavorful peaches, store them at room temperature in a fruit bowl. Let them ripen naturally, and once they’re perfectly soft and fragrant, enjoy them within a few days. If you absolutely must refrigerate, do it only when they’re fully ripe to slow down spoilage—but expect a slight downgrade in texture.
Tossing potatoes in the fridge might seem like a good idea, but cold temps actually mess with their natural starches, turning them into sugar too quickly. The result? Weirdly sweet, gritty-textured spuds that won’t cook up quite right.
For the best flavor and texture, store raw potatoes in a cool, dark, and well-ventilated spot—like a pantry or a breathable basket. Keep them away from onions, which can speed up spoilage. And whatever you do, don’t wash them until you’re ready to use them—moisture invites sprouting and rot.
Whole, uncut onions and refrigerators do not mix. The fridge’s humidity turns them into a mushy, moldy mess in no time. Even worse, the cold converts their natural starches into sugars, which can make them taste oddly sweet—and if left long enough, they’ll liquefy into a slimy disaster. Yuck.
For best storage, keep onions in a cool, dry, well-ventilated space. The easiest option? Leave them in the mesh bag they came in. Want them to last even longer? Try this old-school trick: Drop an onion into the toe of a clean pair of pantyhose, tie a knot above it, add another onion, and repeat. Hang the whole thing in your pantry, and you’ll have fresh onions for a month or more!
Garlic and refrigerators don’t get along. The moisture inside can cause unpeeled cloves to sprout or turn moldy faster than you’d think. Plus, unless you want your butter and berries to have a garlicky aftertaste (yikes!), it’s best to keep those pungent bulbs out of the fridge.
For the longest shelf life, store whole, unpeeled garlic bulbs in a cool, dry place with good air circulation—like a mesh bag or a ventilated basket. This way, they’ll stay fresh and flavorful for weeks, if not months.
Pantry Staples That Last Longer Without Refrigeration
14. Honey
Honey is one of those magical foods that never goes bad—thanks to its natural preservative power (sugar!). As long as it’s stored in a sealed container, it can last forever. The fridge, however, is not its friend. Cold temps can cause honey to crystallize and turn into a sticky rock-hard mess that will have you wondering if it’s still edible.
But don’t panic if you’ve already made the fridge mistake. Simply place the honey jar in a pot of warm water, and let it slowly return to its liquid state. It might take some time, but trust me, it’s worth the wait. Just be patient, and your honey will be as good as new.
Coffee is one of those simple joys in life that can be easily ruined by improper storage. When you refrigerate coffee beans or ground coffee, the moisture in the fridge can quickly rob them of their rich, robust flavor. Even worse, the fridge can make your coffee taste flat and stale. The freezer is only a better option if the beans are in a vacuum-sealed bag, and even then, it’s a bit of a gamble.
For the best flavor, store roasted coffee beans in a sealed container on your pantry shelf or countertop away from sunlight. To keep your coffee at its peak, try to use the beans within two weeks of roasting, and once ground, use them within a couple of hours. That’s the sweet spot for a fresh, aromatic cup that hits just right.
When it comes to oils, the fridge is not their friend. Vegetable oil, olive oil, and other common cooking oils will solidify in the cool temperatures of the refrigerator, making them harder to pour and less effective for cooking. Instead, store these oils in a cool, dark spot in your pantry to keep them in liquid form and preserve their flavor.
However, nut-based oils (like walnut or hazelnut oil) are an exception. These should be stored in the fridge to maintain freshness and prevent them from turning rancid too quickly.
17. Hot Sauce
Hot sauce is one condiment that thrives at room temperature. With its high vinegar content and bold, fiery flavors, hot sauce is naturally preserved and doesn’t need refrigeration to stay safe. In fact, the fridge can actually dull its heat and alter its signature tangy kick.
The peppers in hot sauce remain just as potent when stored in a cabinet or pantry—no need to take up valuable fridge space. So, unless the label specifically recommends refrigeration (which is rare), keep your hot sauce on the countertop and let the flavors shine through until it’s time to use it up.
18. Peanut Butter and Spreads
Peanut butter and spreads like Nutella are best kept out of the fridge. When refrigerated, they can turn into a thick, stubborn block that’s nearly impossible to spread.
Unless the jar specifically says otherwise (this is common with natural varieties that contain fewer preservatives), store your peanut butter and chocolate spreads in the pantry. This keeps them at their smooth, spreadable best for sandwiches, toast, or whatever you use them for. Just give it a good stir when you first open the jar, and you’re all set.
19. Bread
It might seem like a good idea to store bread in the fridge, especially with its moisture content. After all, it’s supposed to keep mold at bay, right? But here’s the catch: while it slows mold growth, refrigeration actually makes bread tough, chewy, and well, just not as tasty.
Instead of popping it in the fridge, store your bread at room temperature in a cool, dry place—just keep it tightly wrapped or in a breadbox to maintain freshness. And if you know you won’t use the whole loaf before it starts to go stale, toss it in the freezer. Bread freezes beautifully for up to a month. The same goes for cookies and pastries—just reheat for that fresh-baked flavor.
Coconut oil is a pantry staple with a shelf life of up to two years when stored at room temperature. So, there’s no need to keep it in the fridge—unless, of course, you enjoy scraping out rock-hard coconut oil with a chisel. When kept in a cool, dark place, it remains soft and scoopable, ready for cooking and skincare.
21. Ketchup
Ketchup might survive just fine in the fridge, but why waste valuable fridge door space when it doesn’t need to be chilled? Thanks to the vinegar and salt, ketchup is pretty resistant to spoiling, even once it’s opened. Most bottles will be perfectly happy on the pantry shelf. Of course, always check the label just to be sure—some brands might have special instructions. But in general, it’s one less thing for your fridge to hold onto.
Thanks to its high salt content, soy sauce is one condiment that doesn’t need to be refrigerated, even after opening. The salt acts as a natural preservative, keeping it perfectly safe at room temperature. The same goes for other similar condiments like teriyaki sauce or Worcestershire sauce. But hey, when in doubt, just take a peek at the label—if it says otherwise, follow those instructions. Otherwise, keep it on the shelf and save that fridge space.
23. Spices
Most ground spices can last for years when stored properly, and they’ll keep their flavor and aroma intact. The key is to keep them in a dry, dark place—think a spice rack or cupboard, away from heat and light. At room temperature, your spices will stay potent, flavorful, and ready to elevate your meals.
Thanks to their high sugar content, most jams and jellies are perfectly happy living in the pantry for up to a month after opening. No need to squeeze them into the fridge, where they might lose some of their spreadable charm. But as always, double-check your specific brand’s label for any special instructions. In general, room temperature is the way to go for your favorite fruity spreads.
More Foods that Thrive Outside the Fridge
25. Fresh Basil
Fresh basil is so lovely and useful, but storing it in the fridge? Not the best move. When basil hits the cold, it absorbs the smells of other foods and turns black. Instead, keep your basil on the countertop with its stems submerged in water, like a little bouquet of flavor. This simple trick will keep your basil fresh and vibrant longer—no fridge required.
Chocolate, with its long shelf life, doesn’t belong in the fridge. In fact, storing it in the fridge can mess with its flavor and texture. Keep it on the countertop for the best taste and texture. If you must refrigerate it, just know that you might end up with “sugar bloom”—a grainy, gritty layer that forms when the sugar rises to the surface. The solution? Enjoy it at room temperature, and let its smooth texture shine!
And Never Store These in the Fridge
27. Batteries
Batteries are one of those things that many people mistakenly believe should be stored in the fridge or freezer to extend their life. The truth? Extreme cold (or heat) can actually shorten their performance. Storing batteries in the fridge doesn’t help and can even harm them.
Instead, keep them in a clean, dry, room-temperature spot. Major battery brands recommend this as the ideal storage condition. A properly stored battery, like your typical alkaline variety, will only lose about 3% of its charge per year. Single-use lithium batteries lose even less, making fridge storage unnecessary. Keep it simple—room temperature is all they need!
Question: What’s one thing you used to refrigerate, only to learn you were doing it all wrong? Join the conversation in the comments below.
https://www.everydaycheapskate.com/wp-content/uploads/20250327-27-things-to-never-put-in-the-refrigerator.png8001200Mary Hunthttps://www.everydaycheapskate.com/wp-content/uploads/EC-Logo-by-Mary-Hunt-Tagline-Trimmed.pngMary Hunt2025-03-27 13:33:462025-03-27 15:36:0027 Things You Should Never Put in the Fridge (and Why It Matters!)
Spring cleaning isn’t just for your home—it’s the perfect time to tackle the kids’ bedrooms, too. Organizing a kid’s room can feel like a battle, but with a few clever tricks, you can make it fun. Get your kids involved, and they’ll actually want to keep their rooms tidy!
We’ve all been there: stepping on rogue LEGO bricks, discovering a week-old snack hidden under the bed, or attempting to stuff one more shirt into an overflowing drawer. It’s enough to make any parent want to throw in the towel.
When kids feel like they have a say in the process, they’re far more likely to embrace organization rather than resist it. By making it fun, simple, and suited to their level, you’ll not only get a cleaner space but also teach them valuable habits that will stick with them as they grow.
Don’t make their bedrooms a battleground. Instead, grab this opportunity to help your kids organize their rooms and their stuff—without the tears and tantrums.
Make Room for Kids: Organizing at Their Level
Ever notice how a kid’s room can feel more like an obstacle course than a functional space? That’s because most furniture and storage solutions are designed for adults—not little hands and growing bodies. What seems perfectly practical to us can be downright frustrating for them, which means their rooms stay messy no matter how many times we tell them to clean up.
Take a step back (or better yet, kneel down) and see the room from their perspective. Those dresser drawers? Probably too heavy. The closet rod? Way out of reach. Even toy bins with lids can be a hassle for small hands. The fix? Make their space work for them, not against them. Try removing closet doors to create an open, accessible space. Lower the clothes rod and swap out bulky adult hangers for child-sized ones. Use open baskets for socks and underwear—no lids, no struggle. When organizing is easy, kids are much more likely to do it!
How to Let the Kids Help Without Chaos
It’s tempting to take the bulldozer approach—storming in with a trash bag and single-handedly “fixing” the mess. But while that may be efficient in the short term, it doesn’t teach kids how to maintain their space (or prevent the inevitable meltdown when they realize their favorite rock collection is gone).
Instead, get them involved in a way that gives them some control without turning the process into total chaos. Guide them in sorting their things into three simple categories:
Use Now: Items they play with, wear, or need daily.
Want to Keep: Special keepsakes or seasonal items that can be stored away neatly.
Don’t Want Anymore: Things they’ve outgrown, don’t use, or are willing to donate.
The key is to advise and suggest rather than dictate. Ask open-ended questions like, “Where do you think this should go?” or “How can we make it easier for you to put this away?” Let them come up with ideas for organizing their space. When kids have a say in the setup, they’re much more likely to keep things tidy—and a little less likely to act like cleaning is some form of cruel and unusual punishment.
1. Hooks: The Simple Secret to Keeping Kids’ Rooms Tidy
Hooks are a game-changer when it comes to keeping kids’ rooms organized. Instead of losing backpacks, jackets, or favorite dress-up costumes in the depths of a junk drawer or buried under a mountain of clothes, give each item a dedicated (and super cute) home.
The trick? Make hooks fun, accessible, and easy to use. Place them at your child’s eye level and add a simple label or picture next to each one. You’ll be amazed at how quickly they associate the blue hook with their backpack or the yellow one with their favorite hoodie. Suddenly, putting things away isn’t a chore—it’s second nature!
Not all hooks are created equal, and these heavy-duty wall-mounted hooks are proof. Designed specifically for kids’ rooms, classrooms, and play areas, this 7-pack of colorful, curved hooks makes organizing fun and easy. Each hook is built to hold up to 50 lbs., meaning even the heaviest backpacks or rain-soaked jackets won’t stand a chance at ending up on the floor. The smooth, curved design means no sharp edges—perfect for active kids.
Think beyond the bedroom. These hooks are great for the bathroom (hello, towels that never hit the floor!), entryways, or even inside closet doors. With the right hooks in place, keeping things tidy is no longer a battle. Instead, it’s a simple habit that even kids can master.
2. Bins: The Easy Way to Keep Clutter Under Control
Toys, books, stuffed animals, and those tiny trinkets that somehow multiply overnight—everything needs a place, and bins make tidying up quick and effortless.
The key? Make it fun and foolproof. Use colorful storage bins and label them with pictures or words so kids know exactly where things go. Grouping similar items together—like dolls in one basket, art supplies in another—helps kids easily find (and put away) their treasures. No more dumping everything into one mystery pile.
These colorful, kid-friendly storage cubes turn clean-up time into a game. Available in a rainbow of colors, they’re perfectly sized for cube organizers, shelves, or even standalone storage. With reinforced handles for easy carrying and a collapsible design for compact storage, these bins are as practical as they are fun.
Remember to stack them low so little ones can reach their bins without help. Try matching colors to categories—blue for books, pink for stuffed animals, green for art supplies.
3. Labels: The Simple Trick to Keeping Kids’ Spaces Organized
If there’s one secret to getting kids to actually put things where they belong, it’s labels. When every bin, basket, and shelf has a clear identifier, there’s no more guesswork—just quick and easy clean-up.
The key? Make labels kid-friendly. For little ones, use pictures—a teddy bear for stuffed animals, a LEGO brick for building toys. Older kids? Big, bold text does the trick. The goal is to make it so obvious that even the most distracted child knows exactly where things go.
If you want a labeling system that lasts, a label maker is a must-have. I’ve had my Brother P-Touch Label Maker for over a decade, and would you believe I’ve never had to replace the batteries? It just keeps going! It’s rechargeable with the optional A/C adapter, easy to use, and perfect for labeling everything from toy bins to school supplies.
When making multiple labels, don’t print and cut each one separately. Instead, leave a few spaces at the end of each label and keep typing the next one. This way, you print in one long strip and cut them yourself—saving tons of label tape (and frustration).
Toy Rotation: The Secret to Keeping Kids’ Rooms Clutter-Free
Instead of keeping every single toy in their rooms, try a simple toy rotation system. Set aside some toys in “storage” elsewhere in the house and swap them out every month or two. This keeps things fresh and exciting—like getting new toys without spending a dime.
These plastic shoe boxes are the perfect size for sorting and storing kids’ toys and treasures. The clear design lets kids see exactly what’s inside, so there’s no mystery about where things belong. They’re sturdy, stackable, and lightweight enough for little hands to lift and carry.
With the right storage tricks, even the messiest rooms can stay (somewhat) tidy.
The secret to organizing a child’s room is to make it at least as easy to put something away as it was to get it out. When you involve your child in the process of organizing and making decisions, you can be sure your child will be more eager to learn and exercise his or her organizational skills to keep it that way.
Question: What’s the most creative way you’ve found to get your kids to help clean their rooms? Let’s share ideas in the comments below.
EverydayCheapskate™ is reader-supported. We participate in the Amazon Services LLC Associates Program and other affiliate advertising programs, designed to provide a means for us to earn from qualifying purchases, at no cost to you.
https://www.everydaycheapskate.com/wp-content/uploads/20250320-organized-kids-bedroom-teddy-bears-on-neatly-made-bed.png8001200Mary Hunthttps://www.everydaycheapskate.com/wp-content/uploads/EC-Logo-by-Mary-Hunt-Tagline-Trimmed.pngMary Hunt2025-03-19 21:01:372025-03-19 21:03:24Simple Ways to Help Kids Keep Their Bedroom Tidy
Some of us are natural-born collectors, while others develop a habit of holding onto things just in case. Before we know it, closets are bursting, drawers are jammed shut, and the mere thought of decluttering feels overwhelming. But here’s the truth: clearing out the excess isn’t just about tidying up—it’s about reclaiming your space, time, and peace of mind. If you’re ready to send your inner hoarder to time-out, these seven decluttering tips will get you there.
I’m not exactly sure why some of us have such a strong tendency to accumulate, collect, and cling to things long past their usefulness. Maybe it’s in our DNA. More likely, it’s the deeply ingrained (and often unfounded) fear that we’ll regret letting something go—that someday we’ll need it, and it won’t be there.
Whatever the reason, clutter has a sneaky way of creeping in until it takes over, costing us time, money, energy, and even peace of mind.
I won’t pretend I tackled it all overnight. But step by step, by putting these seven simple decluttering tips into action, I can confidently say my inner hoarder has been benched for good.
1. Understand Why You Hold Onto Things
For me, the first step was acknowledging my tendency to hold onto things just in case. While I never crossed into full-blown hoarding, I could see how easy it would be to get there.
Hoarding is classified as an obsessive condition related to OCD in the Diagnostic and Statistical Manual of Mental Disorders (DSM-5). But here’s the thing—only a small percentage of people meet the clinical criteria. For most of us, clutter isn’t about a disorder; it’s about mindset.
Why is it so hard to let go of things we don’t actually use? The reasons are as varied as the clutter itself:
Sentimental value: Every old T-shirt and ticket stub carries a memory.
Fear of future need: What if I need this someday?
Financial guilt: I spent good money on this!
Decision fatigue: Where do I even start? What if I regret it?
Eco-guilt: We don’t want to be wasteful, so we hang onto things with good intentions of donating—but never actually do.
Plain old procrastination: It’s easier to shove that pile of papers in a drawer and deal with it later.
Recognizing why you’re holding onto things is the first step in letting go and creating a home that feels calm and functional, not like a storage unit for “what-ifs.”
2. Start Small
Trying to undo years of accumulation in one weekend? That’s a recipe for failure. Instead, start with something manageable—one drawer, one shelf, or one closet. This is one of the most effective decluttering tips I’ve learned: small wins lead to big progress.
For me, it was a very large closet. And inside? Seventeen plastic storage bins stuffed with fabric, yard goods, fat quarters, and quilt kits. My fabric stash was, frankly, impressive—but also overwhelming. I had collected more than I could ever use, and instead of bringing me joy, it had become a burden.
Enter my dear friend Rosalie. She kindly offered to take all of it off my hands, distributing it to quilters and crafters over the course of several months. Letting go was hard, but her generosity turned my excess into a gift for others. That moment changed everything. I discovered the unexpected relief of releasing what no longer served me—and the joy of knowing it would bring happiness to someone else.
If you’re feeling stuck, start small. Choose one area, clear it out, and experience how good it feels to lighten your load.
3. Use the Box Method
Struggling to decide what stays and what goes? Whether it’s magazines, unused toiletries, kitchen gadgets, or clothes that don’t fit but are too nice to part with, indecision can keep clutter hanging around far too long. That’s where the Box Method comes in.
Take those I’m-not-sure-yet items, place them in a box, tape it shut, and write today’s date on the top. Then, put it somewhere out of sight. If six months pass and you haven’t needed or even thought about what’s inside, you won’t believe how easy it will be to let it go.
This simple “interim” step has made decluttering so much easier for me. And easier means doable.
For years, I collected teacups—dozens of them, all antique and, in my mind, precious. Not because I ever wanted to, but because I inherited them, along with an unspoken obligation to grow the collection and eventually pass it down. The truth? They weren’t my style, and they took up space I could have used for things I actually loved.
Once I realized that letting them go wouldn’t dishonor my mother-in-law’s memory, it was shockingly easy to part with them. If you’re drowning in a collection you never truly wanted, try this: Keep just one meaningful piece, take photos of the rest, and find them a new home where they’ll actually be appreciated. Sometimes, the real treasure is reclaiming your space.
5. Give It Away and Feel the Joy
Letting go of stuff is so much easier when you know it’s going to someone who truly needs and appreciates it. That’s why I love Nextdoor.com—a neighborhood site where people share local news, information, and yes, freebies. It’s become my go-to for giving good stuff a second life.
I simply post items for what our local group calls “free porch pickup”—a few photos, a short description, and out they go on the porch. Within hours, they’re gone. No haggling, no meetups, no stress. But the best part? The messages of gratitude that come afterward. Knowing something I no longer need is bringing joy to someone else? That makes the whole decluttering process so much more rewarding.
I’ve become quite the conversationalist—especially with myself. My slipperiest places? Costco, Amazon, and those tempting mail-order catalogs from L.L.Bean and Pottery Barn. Before I even think about clicking “Buy Now” or tossing a glossy catalog into my shopping pile, I have a little chat with myself.
It’s like dealing with a persistent toddler:
Why do you need that?
Where will you put it?
How long will it sit in a box before you finally admit defeat and donate it?
The best trick? I make myself walk away. Whether it’s an in-store find or an online cart full of “bargains,” I leave it alone for a few days. Nine times out of ten, I forget about it entirely—or realize I didn’t really want it in the first place.
There’s something extraordinary to be said for minimalism. Clear counters, an empty closet, a drawer with only three things in it. Those things slow my pulse, clear my head, and make me feel nimble.
Having fewer things doesn’t mean going without. It means having what I truly need and love. A tidy kitchen stocked with only the tools I use makes cooking more enjoyable. A closet filled with pieces that fit and flatter makes getting dressed easier.
This kind of freedom is my antidote to clutter. It keeps me focused, lightens my load, and—best of all—keeps my bratty inner hoarder firmly in time-out where it belongs!
Question: Be honest: What’s the one thing you KNOW you should get rid of but just can’t bring yourself to let go of? Let me know in the comments section below.
https://www.everydaycheapskate.com/wp-content/uploads/20250303-clutter-in-garage-workshop-decluttering-tips-hoarding-hoarder.png8001200Mary Hunthttps://www.everydaycheapskate.com/wp-content/uploads/EC-Logo-by-Mary-Hunt-Tagline-Trimmed.pngMary Hunt2025-03-03 10:34:222025-03-03 10:36:107 Simple Strategies to Silence Your Inner Hoarder for Good
Do spices really expire, or are we tossing them too soon? The truth is, while they don’t go bad like milk, they do lose potency over time. But don’t worry, I’ve got smart storage tips and some genius ways to repurpose them before you throw them out.
It’s been years since my husband and I packed up our lives and moved from California to Colorado, but I still remember the chaos of sorting through every cupboard, closet, and drawer. One of the biggest shockers? My spice cupboard.
I’m pretty sure I unearthed a few bottles that belonged in a museum—possibly pre-dating the Nixon administration. And that ground allspice? Let’s just say if spices had a fossil record, this one would be a prime exhibit.
Do Spices Expire?
Spices and dried herbs don’t go bad in the same way milk or fresh produce does—no moldy surprises or unpleasant stomach issues. But here’s the catch: they do lose their flavor over time, which is kind of the whole point of using them in the first place.
That dusty bottle of curry powder from who-knows-when won’t make you sick, but it also won’t bring much to the table—literally. Ground spices, in particular, lose potency faster than whole ones, meaning your carefully seasoned dishes might end up tasting a little…meh.
While researching this topic, I kept coming across a so-called “rule of thumb” suggesting we should toss herbs and spices every six months. What?! That seemed a bit extreme (and expensive), so I dug deeper into what the experts actually recommend. Here’s what I found.
Here’s the Truth
The folks at McCormick, who actually put “best by” dates on their products, offer these more realistic guidelines—definitely more generous than the every-six-months rule floating around:
Ground spices (nutmeg, cinnamon, turmeric): 2 to 3 years
Dried herbs (basil, oregano, parsley): 1 to 3 years
Seasoning blends, marinades, and sauces: 1 to 2 years
Whole spices (cloves, peppercorns, cinnamon sticks): 4 years
Seeds: 4 years—except for poppy and sesame seeds, which should be tossed after 2 years
Extracts: 4 years—except for vanilla, which lasts forever
Other Pantry Staples: How Long Do They Really Last?
Salt
According to Morton, regular table salt never expires. But once iodine is added, the equation changes—iodized salt has a shelf life of about five years.
Sugar
The folks at Domino say sugar has an indefinite useful life because it doesn’t support microbial growth. Sweet news, right?
Cornstarch
Both Argo and Kingsford assure us that as long as cornstarch is sealed and stored in a dry place, it’s good for at least three years.
Baking soda
Arm & Hammer says baking soda also lasts indefinitely when stored properly—sealed and dry.
Baking powder
Clabber Girl prints an expiration date on the bottom of the can—two years from the manufacturing date. But here’s the catch: moisture is its enemy. In humid areas, baking powder should be replaced after a year, not because it goes bad, but because it loses its oomph. Nobody wants flat biscuits!
Best Storage Practices
To keep baking powder, baking soda, and cornstarch in top shape, store them in a dry cupboard away from heat and humidity. Always use a dry utensil to scoop them, and replace the lid promptly. Even a little moisture can trigger a reaction inside the can, making your baking powder a dud. And while the fridge seems like a good idea, the condensation can have the same effect—so keep these pantry staples at room temperature for the best results.
How to Tell If Your Spices Have Lost Their Flavor
The Sniff Test
Personally, I swear by the good ol’ sniff test. Open the container and take a whiff. If it doesn’t smell like what the label says—or if you have to work way too hard to smell anything—that spice is past its prime. And if it’s weak now, it won’t do much for your cooking, either. Time to let it go!
Use Your Common Sense
Not all fading spices need to be tossed immediately. If your cinnamon still smells pleasant but isn’t as punchy as it used to be, simply add a bit more than the recipe calls for to compensate.
Smart Buying & Storage Tips
Buy Smarter, Not More
Consider buying spices from a store that sells in bulk, so you can purchase only what you’ll reasonably use in the next six months or so. This way, you get fresher, more flavorful spices without the guilt of waste.
Storage Matters
To get the most mileage from your spices, store them in a cool, dry, and dark place—away from direct sunlight and moisture. If you buy in bulk and need long-term storage, freezing is an option for backup supplies, keeping them fresh for up to three years.
Smaller is Better
Whenever possible, opt for smaller containers rather than stocking up on jumbo sizes. Spices don’t last forever, and buying only what you need ensures you’re cooking with the freshest, most flavorful ingredients.
Here are some clever ideas for squeezing every last bit of goodness out of your spices—even after their culinary days are over.
Freshen Your Carpet (and Your Vacuum, Too!)
Don’t toss those past-their-prime spices just yet! Mix an assortment like cinnamon, thyme, cloves, and nutmeg—or try a blend of rosemary and ginger. Sprinkle the mix on your carpet, let it sit for a bit, then vacuum it up for a fresher-smelling home.
Pro Tip: Always test in an inconspicuous spot first to avoid any surprise stains.
Banish Bugs Naturally
Many spices double as natural pest repellents. Ants, for example, detest strong-smelling spices like pepper, oregano, sage, and peppermint. Sprinkle these in problem areas to keep the creepy crawlies at bay.
Protect Your Garden from Hungry Critters
Hot spices like cayenne and chili powder aren’t just for adding kick to your food—they’re also a great deterrent for rabbits, squirrels, and other garden invaders. A light dusting around plants can help keep your harvest safe.
DIY Cinnamon Spice Ornaments
Turn old spices into festive, cookie-like ornaments that not only look charming but also fill your home with a cozy, nostalgic scent.
Make Scented Candles
If you’re into candle-making, give those expired spices a second life by adding a tablespoon of ground cinnamon, nutmeg, or cloves to your wax mixture. Just be sure to use ground spices only—whole spices can be a fire hazard!
Simmer for a Natural Air Freshener
Even if your spices have lost their punch in the kitchen, simmered in water they can release the last bits of volatile oils, giving off a lovely subtle aroma. Simmer a pot of water into which you’ve dropped any combination of spices to make the house smell fantastic and deodorize the air. Cardamom, cinnamon, cloves, and ginger are all great choices.
Question: What’s the oldest spice in your pantry right now? Be honest! Do you still use it, or is it just taking up space? Let me know down in the comments below.
https://www.everydaycheapskate.com/wp-content/uploads/20250210-do-spices-expire-herbs-bottles-glass-peppercorn-turmeric-paprika.png8001200Mary Hunthttps://www.everydaycheapskate.com/wp-content/uploads/EC-Logo-by-Mary-Hunt-Tagline-Trimmed.pngMary Hunt2025-02-10 12:53:402025-02-10 12:55:13Do Spices Expire? The Truth About Freshness & Use
Tired of digging through piles of clothes to find your favorite sweater? With just five simple steps, you can transform your messy closet into an organized oasis. Best of all, you don’t need to spend a fortune—just a bit of time and effort. From decluttering to arranging with purpose, these practical tips will help you create a stress-free, functional space that makes getting dressed a breeze.
Want to make your life easier? Start by tackling your clothes closet. When your closet is organized, you can quickly see what you have, what fits, and what makes you feel fabulous. Even better—everything becomes easier to find, saving you time and frustration every single day!
Now, let’s be honest—what’s hiding behind your closet door? Is it a Pinterest-worthy display of neatly stacked t-shirts, perfectly paired shoes, and color-coordinated hangers? Or is it more like a small-scale disaster zone that could qualify for federal emergency relief?
Knowing you’d rather not compete with actual disaster victims for funding, here’s a better idea: organize it! The steps ahead will help you create order out of chaos—not just in your clothes closet but also in linen closets, utility closets, and even your food pantry.
And here’s the cherry on top: you can do it all without spending a single dime. With just a bit of effort and a few everyday items you already have, you’ll be on your way to a calmer, more functional space. Ready to get started?
Essential Tools for Organizing Your Closet
Having the right tools on hand can make your closet clean-out faster and more efficient. The good news? You likely already have everything you need.
1. Large Bags, Boxes, or Bins
You’ll need these to sort your clothes into categories: items that fit and bring you joy, things to consign or sell, pieces to donate, and the inevitable pile for the trash. Clear bins are ideal because you can see what’s inside, but plain cardboard boxes or reusable shopping bags work just as well.
2. Labels
If you have a label maker, fantastic! But don’t feel like you need to invest in one. Grab some plain paper, a marker, and tape to create simple labels for your sorting containers. Clear labeling will keep you organized and save you from accidentally mixing up your piles.
3. A Full-Length Mirror
This is non-negotiable—it’s time to face the music (or the mirror). A full-length mirror is your best friend for trying on questionable items and deciding if they truly deserve space in your closet. Be honest with yourself: Does it fit? Do you love it? Does it make you feel great?
4. A Trash Can
You’ll be amazed at what lurks in your pockets and the corners of your closet—receipts, rubber bands, price tags, stray buttons, and who knows what else! Keep a trash can nearby so you can toss these items as you go, keeping your workspace tidy and your momentum strong.
Pro Tip
If you’re feeling overwhelmed, set a timer for 15 minutes and tackle one category or section at a time. Little victories build big momentum!
Step 1: Empty Your Closet Completely
Yes, everything. I mean everything—every last hanger, belt, shoe, scarf, and sweater. Take it all out and lay it somewhere you can clearly see it, like your bed or the floor. Why? Because you can’t truly organize a space until you know what you’re working with.
This step also helps you rediscover how much space you actually have in your closet. Spoiler alert: It’s probably more than you think! Be prepared to gasp when you see the mountain of stuff that comes out—especially if it’s been a while since your last purge.
Pro Tip
As you pull things out, group similar items together (like all your shoes in one pile, shirts in another). This will make the next steps much easier and keep things feeling less chaotic.
Step 2: Deep Clean Your Closet Space
Now that your closet is completely empty and you can actually see the light of day, it’s time to roll up your sleeves and give it a thorough cleaning from top to bottom. Dust the shelves, wipe down the walls, sweep or vacuum the floor, and don’t forget those nooks and crannies that tend to collect mystery grime.
If your closet still looks a little tired after cleaning—stains, scuffs, or just a dingy vibe—consider giving it a fresh coat of white paint. Not only will this brighten up the space, but it’ll also make everything feel cleaner and more inviting. Plus, a blank slate is the perfect backdrop for an organized closet masterpiece.
Pro Tip
Add a scented sachet or a few cedar blocks to keep your newly cleaned closet smelling fresh and deterring moths. A little touch like this can make a big difference.
Step 3: Declutter with a Purpose
This step can feel like a challenge because it means making some tough decisions—but it’s also the most rewarding. Now that everything is out of the closet, it’s time to sort. The truth is, there’s no way all that stuff is going back in, so let’s buckle up and get it done!
Grab five containers (or bags, boxes, or bins—whatever you’ve got) and label them as follows:
Box #1: Keep
This is the hardest box because it forces you to be honest with yourself. The goal? Only keep items that fit well, bring you joy, and that you genuinely wear. What’s the test? Try it on. Stand in front of the mirror and ask yourself:
Does it fit?
Do I love it?
Have I worn it at least twice in the past year?
If the answer to any of these is “no,” it doesn’t belong here. Be brutally honest—clutter starts when we hold onto things “just in case.”
Box #2: Maybe:
Ah, the Maybe Box—a genius idea from one of your fellow readers. It’s not easy to say goodbye permanently. You will come across items that you’re just not sure about. Putting them into the Maybe Box is an easy way to transition. It’s not so much procrastination as empathy and kindness. Trust me; this works. The Maybe Box may be the one thing that keeps you motivated and in charge of this process.
Once filled, place the box in your garage, basement, or another out-of-the-way spot. Set a calendar reminder for six months from now. If you haven’t thought about or needed anything in that box by then, donate or toss the whole thing. Spoiler: You won’t miss it.
Box #3: Consign or Sell
Clothes that don’t work for you anymore (but are in great condition) can have a second life with someone else. Name-brand items or pieces with tags are perfect for consignment stores, online resale platforms like Poshmark, or even a yard sale. And remember, if it’s ugly to you, someone else might adore it. Your trash could be their treasure!
Box #4: Donate
Donate gently used items that aren’t quite consignment-worthy but are still in good shape. Places like the Salvation Army, Goodwill, or local shelters are great options. And don’t forget animal shelters—they’ll gladly take worn towels or blankets for pet care.
Feel-Good Bonus: You might even qualify for a tax deduction. But more importantly, you’re helping someone in need!
This is for items beyond saving—think clothes that are hopelessly stained, torn, or damaged beyond repair. Work quickly to avoid second-guessing yourself, and empty this box often to keep the momentum going.
Now that you’ve sorted and conquered, it’s time to bring order to your “Keep” pile. The key to a functional closet is smart categorization and arrangement.
1. Sort by Season, Type, and Use
Start by dividing everything by season (spring/summer vs. fall/winter) and type (shirts, pants, dresses, etc.). If possible, store out-of-season items elsewhere, like under the bed or in storage bins, to free up prime closet real estate.
2. Separate Workwear from Casual Clothes
Next, create two main categories: work/professional and casual attire. Within each category, group like items together: shirts, pants, sweaters, and so on.
3. Prioritize Accessibility
Now, within each group, divide by frequency of use. Keep the items you wear most often front and center, so you’re not digging for that favorite pair of jeans or go-to blazer every morning. Infrequently worn items can go toward the back or on higher shelves.
4. Group Like Items Together
For the ultimate organized closet, take it a step further:
Hang clothes by type and color for a clean, cohesive look (think all your white shirts together, then your blues, and so on).
Fold items like T-shirts, sweaters, and jeans neatly. Use a vertical “file folding” method for drawers—it not only saves space but also makes everything easier to see at a glance.
Use small bins or dividers to corral socks, belts, and accessories.
Use Smart Folding Hacks
Filing socks, for example, beats rolling them into a ball. Lay them flat, fold them in thirds, and stack vertically in a bin or drawer. It’s simple, effective, and—you guessed it—saves space.
Organizing doesn’t have to feel overwhelming. Think of this step as creating a system that makes your life easier every single day. Small tweaks here can make a huge difference!
Step 5: Add Organizational Helpers
While you don’t need fancy gadgets to get your closet under control, a few well-chosen organizational items can take your space from good to great. Think of these tools as the finishing touches that make staying organized easier and more enjoyable.
Shoes can be one of the trickiest things to manage in a closet. If you’re tight on space, consider a sturdy and compact shoe rack that fits your needs. A tiered rack is a great option for maximizing vertical space, and it’s budget-friendly, too.
Pro Tip: If closet space is limited, an over-the-door shoe organizer can save the day. Use it for shoes or even accessories like scarves and small bags.
Matching hangers may seem like a small detail, but trust me—it’s a game-changer. Uniform hangers not only make your closet look neat but also save space and keep clothes from slipping. My personal favorite? Velvet hangers. They’re durable, slim, and oh-so-elegant.
Adding shelves can completely transform your closet by giving you more storage options. Whether it’s for folded sweaters, bins, or bags, shelves help you maximize vertical space.
One excellent option is the ClosetMaid ShelfTrack system, which allows you to customize the setup to fit your needs. It even comes with a small shoe rack to make the most of every square inch.
I know—it’s easy for me to tell you to do all this! But trust me, I’ve been through the chaos of a cluttered closet myself. And while these steps take effort, the payoff is absolutely worth it. There’s something so satisfying about opening your closet and feeling calm, not chaos.
And remember: This isn’t a one-and-done deal. Staying organized takes regular upkeep—I do this at least twice a year. But once you’ve put in the work, keeping your space tidy becomes so much easier. So go ahead—take the plunge and start reaping the rewards of a beautifully organized closet!
Question: What’s your biggest closet-cleaning struggle—letting go of clothes or figuring out where to put everything? Share your tips or woes.
EverydayCheapskate™ is reader-supported. We participate in the Amazon Services LLC Associates Program and other affiliate advertising programs, designed to provide a means for us to earn from qualifying purchases, at no cost to you.
https://www.everydaycheapskate.com/wp-content/uploads/20250115-organized-closet-how-to.png8001200Mary Hunthttps://www.everydaycheapskate.com/wp-content/uploads/EC-Logo-by-Mary-Hunt-Tagline-Trimmed.pngMary Hunt2025-01-15 18:17:312024-03-23 08:46:09How to Organize a Closet: 5 Easy Steps for a Clutter-Free Wardrobe
Welcome to another round of Ask Me Anything—where your everyday dilemmas, curiosities, and (sometimes) marital disputes land in my inbox. You bring the questions, and I bring the answers—practical, tested, and ready to help. Today’s lineup includes whether or not you should grease down your kitchen drain (spoiler alert: you shouldn’t!), what to do when your balance transfer credit card’s interest rate skyrockets after your account is sold, and how to spot a government grant scam before it costs you.
You’ve sent in questions that had me nodding, laughing, and rethinking my own go-to advice. But hey, that’s the beauty of this little corner of the internet—we tackle life’s small (and not-so-small) problems together. Let’s get to it!
Contents
Here is a quick summary of the questions I’ll answer in today’s post. You can click on one to go straight to it or scroll down to read all.
Is It Okay to Dispose of Fats, Oils and Cooking Grease Down Kitchen Drain?
Dear Mary: Is there any problem with disposing cooking grease and oil down the kitchen drain, as long as one is careful to follow with very hot water? My wife and I are at odds on this and have agreed to let you settle the argument. Hope to hear back soon. We could use some harmony.
–Ben
Dear Ben: While I’m not exactly a marriage counselor (though I did write How to Debt-Proof Your Marriage—just saying), I’m happy to help settle this little spat. You didn’t say who’s on which side of the debate, but I’m glad for that—wouldn’t want to be accused of playing favorites!
Now, if you’re in a hurry and just want the bottom line: No, it is never okay to pour cooking grease, oil, or fats (FOGs, for short) down the kitchen drain, no matter how hot the water.
I know, I know. It might seem like a small thing, but trust me on this. According to American Water (the biggest water utility company in the U.S.), when those FOGs go down the kitchen drain, they cool off and turn into a thick sludge that clings to your pipes. Dish soap and garbage disposals aren’t going to do anything to break this stuff down. Over time, it builds up and can cause nasty blockages, backups, and even overflow problems. And the odor? Let’s just say, it’s not the kind of scent you want wafting through the house.
And let’s not even get started on the cost of fixing it. According to Angi, the average price to clean out a grease-clogged drain is around $275. Ouch! That’s a bill you could’ve avoided by just tossing the grease in the trash instead of pouring it down kitchen drain.
So, what can you do instead?
Scrape It: Let it cool, then use a rubber spatula to scrape the grease into the trash before washing the pan.
Foil and Bowl Trick: Line a bowl with foil, pour the grease in, let it cool, and toss the wrapped foil—no mess!
Plastic Bag Hack: Pour cooled grease into a resealable bag. Seal it up and toss it out.
Old Can Method: Pour grease into an empty can, let it harden, and throw the whole can in the trash.
Trust me, these methods are way cheaper than calling the plumber later for dealing with the mess caused by trying to grease down kitchen drain.
I hope this clears things up and restores peace to your household. I hope this clears things up and restores peace to your household. In fact, I think I hear the faint sound of harmony floating through your home now. If you ever need more tips (or a little marriage counseling, just kidding!), I’m here.
What Are the Best Affordable Alternatives to Royal Velvet Sheets?
Dear Mary: I found you on Facebook during the pandemic and have loved Everyday Cheapskate daily email and blog ever since. I bought a set of bed sheets you recommended from JCPenney. I absolutely love them, so much that I wash them and put them right back on the bed. I would like to purchase a second set, but sadly, I can no longer find them. Are there any others brands with comparable quality, comfort, and pricing that you can recommend, please? I’m not interested in knit sheets, by the way, I like soft, white sheets (not crisp percale).
–Diane
Dear Diane: Thanks for finding me! I believe you are referring to JCPenney’s Royal Velvet (I agree, they were the best ever) a line of bed linens that were discontinued a couple of years ago. Now JCP has brought Royal Velvet sheets back but under a different brand name, Wrinkle Guard.
While the brand name may be not quite as elegant as “Royal Velvet,” Wrinkle Guard is an excellent replacement. These 100% cotton sheets have the sateen weave (smooth and silky like Royal Velvet) as opposed to percale weave, which produces a more crisp feel.
I have prepared more details, links, and pricing on my picks for best inexpensive cotton bed sheets at here. Come visit!
Why the Shark Navigator Lift-Away is a Fan Favorite
Dear Mary: While my gal pals were out shopping for clothes, you’d find me in Electrics, checking out the vacuum cleaners! An odd quirk, but [my love for vacuum cleaners] has trailed behind me all these years.
In my lifetime, I have owned a myriad of vacs, always striving to find The One. Canisters, uprights, what-have-you. I’ve had them all, but none hit the mark.
Then I read your column about the Shark Lift-Away Navigator and my ears actually came to a point. The “Aha moment!” in all its glory. My vac nose told me this is The One.
I collared my hubby, and drove, madly to Walmart urging John to drive faster!
Long story short, I don’t even put the thing away! There it sits, proudly, grandly and just within reach.
Thanks for the info recommendation, and even if I discovered my Great White this late in life, I am still smiling. It is everything you’ve spoken of and so much more. Very best regards.
–Elsa
Dear Elsa: I’m happy to know that you and your Shark are getting along so well. For the price I just don’t think you can beat this vacuum. Now that I think about it I don’t think it can be beat at any price. I’m with you. It is The One! Thanks for writing. Your letter made me smile.
For my readers who are curious, I have written a lot about this vacuum including my most embarrassing experience when Sharky and I first met. Simply type the keyword “Shark” into the search bar by clicking the blue magnifying glass icon, and you’ll find everything you need!
What Can You Do When Your Credit Card Interest Rate Skyrockets?
Dear Mary: I am slowly paying off my debts but I got a shock today. One of my credit card companies (Company A) decided to sell my account to Company B. When I called they said Company A no longer carries accounts in my state. I accepted that. But Company B’s interest rate is 26.4 percent. Company A was 16 percent. They’ve changed my rate to 26.4 and not on just new purchases, but on my entire balance as well. Is that legal?
–Jon
Dear Jon: If you go back and reread the application you signed, in the fine print you will find something like “… terms of which may be changed at any time and for any reason.” While your chances of getting that interest rate reduced are slim, you do have a few options:
Negotiate: Call and in your most assertive-yet-courteous-manner suggest that you may take your business elsewhere unless they would like to lower the rate. Don’t hold your breath, but if your payment history is exemplary, they might do it to keep you as a customer.
Consider a Balance Transfer Credit Card: If that doesn’t work, consider moving the entire balance to a balance transfer credit card with a low interest rate, and ideally, no annual fee. Be sure to read the terms carefully, especially regarding any introductory period and potential fees. A good starting point for your search is IndexCreditCards.com, which compares a variety of balance transfer credit cards to help you find one with the best deal.
Pay Aggressively: If possible, increase your payments to reduce the balance faster, minimizing the impact of that higher interest rate. Every dollar saved in interest can be better used elsewhere.
Take control, weigh your options, and you’ll come out stronger financially.
Are Government Grants the Answer to Buying a Home or Getting Out of Debt?
Dear Mary: I’ve heard that I can get government grants to help buy a home and also get out of debt. Is that right and should I bite the bullet and shuck out $40 to buy the book that shows how? I’ve checked the library but they don’t have it. What do you think?
–Jolene
Dear Jolene: It sounds like you’ve been catching a little too much late-night TV—and those infomercials can be pretty convincing! But let’s break this down: if the government were handing out grants to pay off debt and buy homes, wouldn’t we all have mortgage-free houses and zero credit card bills by now? Sadly, this is a well-worn government grant scam. These folks prey on people’s hopes, promising “free money” and then walking away with your hard-earned cash—or in this case, your $40.
Here’s the truth: the Federal Trade Commission (FTC) has been chasing these government grant scams for years, but they’re like cockroaches—hard to squash entirely. Instead of falling for their traps, I’d recommend channeling your time and creativity into a proven method for tackling debt: work hard, repay what you owe, and don’t fall for the “easy money” schemes. Oh, and definitely get some rest!
For anyone interested, the FTC has a great resource on government grant scams with tips on how to avoid them and what to do if you’ve been targeted. Key takeaways include:
Grants don’t come out of the blue. Real grants require an application for a specific purpose. If someone contacts you about a “free government grant,” it’s a scam.
Never pay upfront fees. Real government grants don’t come with processing fees or require payments through gift cards, wire transfers, or cryptocurrency.
Check your sources. The only official list of government grants is free at grants.gov.
If you’ve already been targeted or paid money, act fast! Contact your payment provider (whether it’s a bank, gift card company, or wire transfer service) and report the fraud to the FTC at ReportFraud.ftc.gov.
Remember, Jolene: getting out of debt the right way might take longer, but it’s worth it—and it won’t cost you $40.
What Happened to KevianClean Leather Cleaner?
Dear Mary: I’ve been a fan of your leather care recommendations for years, especially your glowing praise of KevianClean. But recently I noticed it’s no longer available. Is there a replacement product you recommend? My leather seats and shoes are looking a little worse for wear, and I could use some guidance. Thanks!
–Dave
Dear Dave: Ah, KevianClean—how I’ve loved that product! Unfortunately, as you’ve noticed, it’s no longer available, which has left many of us in the lurch. But don’t worry, I’ve found a fantastic alternative that I’m thrilled to share with you–Armor All Leather Care Gel.
This product is an excellent substitute, and it’s much more affordable than the high-priced leather treatments we’ve seen elsewhere. It not only cleans but also conditions the leather, leaving it soft, supple, and protected—perfect for treating your car seats, shoes, or any leather item that needs a little TLC.
I’ve been using Armor All for about six months now, and I’ve been really impressed with how well it works. It’s just as effective as KevianClean, and I’m sure you’ll love how it brings back that fresh shine and feel to your leather!
I’m all ears! If you’d like to submit a question or share your thoughts, head over to the Ask Mary page for all the details. I’d love to hear from you!
EverydayCheapskate™ is reader-supported. We participate in the Amazon Services LLC Associates Program and other affiliate advertising programs, designed to provide a means for us to earn from qualifying purchases, at no cost to you.
https://www.everydaycheapskate.com/wp-content/uploads/20250109-ask-me-anything-mary-hunt-everyday-cheapskate-grease-down-kitchen-drain-balance-transfer-credit-card-government-grant-scam.png8001200Mary Hunthttps://www.everydaycheapskate.com/wp-content/uploads/EC-Logo-by-Mary-Hunt-Tagline-Trimmed.pngMary Hunt2025-01-09 11:11:382025-01-09 16:12:02Grease Down Kitchen Drain: Should You Really Do It? Plus Answers to Your Burning Questions
There’s something magical about a beautifully wrapped gift, isn’t there? The effort we put into wrapping shows the recipient that we care, turning even the simplest gift into a special experience. And the best part? You don’t have to spend a fortune to create show-stopping gift wrap!
Gift wrapping isn’t just about covering up what’s inside; it’s about building anticipation and showing care. A creatively wrapped gift can turn an ordinary moment into something memorable. It tells the recipient, “I thought about you,” before they even open it.
The holidays are full of magic and joy, and a beautifully wrapped present can add to that feeling. It’s not about spending more—it’s about adding a personal touch. Whether it’s using a sprig of greenery from your backyard or repurposing paper from last year, creative wrapping is a small effort that says, “You’re worth it.” Plus, it’s fun! Wrapping gifts with a little flair is a wonderful way to get into the holiday spirit and make your gifts truly unforgettable.
This holiday season, let’s think outside the box (pun intended) and get creative with our wrapping ideas. Whether you’re using everyday household items or giving a second life to leftover materials, these ideas will add a personal, festive touch to your holiday gifts—and maybe even start a new tradition.
Creative Wrapping Ideas for the Holidays
1. Wrapping with Kraft Paper
Kraft paper is a versatile, eco-friendly option that’s as stylish as it is practical. Its blank canvas makes it perfect for adding your own creative touches, whether you keep it simple with twine or go bold with colorful ribbon. For a rustic and elegant look, pair it with sprigs of greenery, dried flowers, or cinnamon sticks. You can also personalize it with stamps, hand-drawn designs, or even a heartfelt message written directly on the paper.
Inspired by traditional Japanese wrapping techniques, furoshiki fabric wraps are a beautiful and sustainable alternative to paper. These wraps are perfect for adding a touch of elegance to your gifts, especially when you choose festive patterns or luxurious fabrics like velvet or satin. Not only do they look stunning under the tree, but they’re also reusable, making them a gift in themselves! You can use scarves, bandanas, or even fabric remnants from old projects, turning an ordinary wrap into something thoughtful and eco-friendly.
Wrap gifts in old sheet music for a vintage and sophisticated feel that’s sure to delight any music lover. Not only does this wrap have a charming, nostalgic vibe, but it also tells a story, making it a meaningful part of the gift-giving experience. Whether you use classic holiday carols or your recipient’s favorite song, this idea adds a personal touch that goes beyond just the packaging. For an extra pop, add a ribbon or twine to keep it simple yet stylish.
4. Recycled Maps or Newspapers
Repurpose old maps or colorful sections of the newspaper to create unique and conversation-worthy wrapping that’s both eco-friendly and full of character. Whether you’re using a vintage map of a favorite destination or the vibrant pages of a Sunday newspaper, this wrapping idea adds an unexpected twist that’s sure to stand out. Plus, it’s a great way to recycle materials you already have at home, giving them a second life while making your gift wrapping even more meaningful. To add extra flair, tie it with twine or incorporate a cute tag for a personal touch.
5. Stamped Paper
Stamped paper is a fun and creative way to make your gift wrap truly one-of-a-kind. Simply grab some kraft paper and a few holiday-themed stamps—snowflakes, trees, or ornaments—and create your own custom design. The beauty of DIY stamped paper is that you can personalize it as much as you like, adding layers of charm with different colors or patterns. Plus, it’s a great way to use up leftover supplies or get the kids involved in the holiday fun. The result? A beautifully unique wrap that shows you put extra thought and care into every detail!
Nature-inspired wrapping is a beautiful way to bring the outdoors in and give your gifts a fresh, earthy feel. Adding elements like pinecones, sprigs of evergreen, or dried oranges not only enhances the festive charm but also adds texture and color to your presentation. These natural embellishments are not only easy to find, but they also evoke the cozy, wintery vibes of the season. For an extra touch, you can even tie in some twine or ribbon to secure your embellishments, creating a rustic yet refined look that’s perfect for holiday giving.
7. Burlap Wrap
Burlap wrap brings a warm, rustic charm to your gifts, making them look like something straight out of a cozy countryside home. The natural, textured look of burlap pairs beautifully with holiday themes, and you can personalize it in countless ways—whether by stenciling snowflakes or adding a splash of red ribbon. Burlap is also sturdy enough to hold heavier gifts, giving it a practical edge while still being stylish. This eco-friendly option not only looks great but adds an authentic, homemade touch that’s perfect for the holidays. Plus, it’s a simple, affordable way to add personality without a lot of effort.
Wooden crates are a fantastic way to turn your gift into a centerpiece that’s both charming and reusable. Their sturdy design makes them perfect for holding multiple items or heavier gifts, like a holiday baking kit or a DIY spa gift set. Add some shredded paper, fabric scraps, or even pinecones for a festive cushion, and finish it off with a bold ribbon or sprig of greenery for a farmhouse-style flourish. Not only does this wrapping add a unique, thoughtful touch, but the crate itself becomes part of the gift—ideal for storage, décor, or future crafting projects.
Question: What’s the most creative way you’ve ever wrapped a gift? Let me know down below in the comments section.
EverydayCheapskate™ is reader-supported. We participate in the Amazon Services LLC Associates Program and other affiliate advertising programs, designed to provide a means for us to earn from qualifying purchases, at no cost to you.
https://www.everydaycheapskate.com/wp-content/uploads/20241211-creative-gift-wrapping-ideas-for-the-holidays.png8001200Mary Hunthttps://www.everydaycheapskate.com/wp-content/uploads/EC-Logo-by-Mary-Hunt-Tagline-Trimmed.pngMary Hunt2024-12-10 21:24:502024-12-10 21:24:518 Creative Gift Wrapping Ideas for the Holidays
Ah, the blissful day when your young adult finally moves out. You revel in the newfound quiet, reclaim a closet or two, and might even consider turning that old bedroom into a hobby space. But just as you’re settling into this next phase, in walks your fully-grown child, suitcase in hand, declaring that they’re home again. Welcome to the world of “boomerang kids”—those delightful offspring who go off into the world only to return with remarkable accuracy right back to your front door.
What Are Boomerang Kids, and Why Are They Coming Back?
Boomerang kids—sounds cute, doesn’t it? Like something from a quirky cartoon. But in reality, it’s the term for adult children who leave home only to return, often with impeccable timing. Maybe it’s the rising cost of rent, job uncertainty, or a detour in their personal life. Whatever the reason, they’re back in their childhood room, and you’re suddenly back in your parenting role.
This isn’t just happening to you—it’s a growing trend. Economic shifts, skyrocketing living expenses, and even cultural changes mean more young adults are opting to come home to regroup. And while it’s great to have them close, navigating this new dynamic requires a balance of support, boundaries, and a whole lot of patience.
Setting Boundaries: Rules for a Harmonious Household
Having your adult child move back home can feel like a mix of nostalgia and whiplash. On one hand, you’re happy to offer a safe haven; on the other, your peaceful nest just got a little less peaceful. The key to making this work—for everyone—is setting clear boundaries right from the start.
Think of it as a roommate agreement but with a parenting twist. Establishing rules isn’t about being strict; it’s about ensuring respect, harmony, and maybe even a little sanity. Here are 10 practical rules to help you survive the boomerang phase without losing your mind—or your parking spot.
1. Payment: Their Fair Share
Let’s start with the big one—money. This time, your kiddo isn’t returning as a penniless teenager. They’re a working adult (or at least trying to be), so they should contribute financially. Whether it’s a portion of the rent, groceries, or even the WiFi bill, insist they pitch in. After all, the fridge doesn’t restock itself. And for the record, neither does Netflix.
2. Harmony: Respect the Original Dwellers
This is not some extended college dorm arrangement. The house rules—yours—are in full effect. You didn’t spend years painstakingly training this child, only to have them return and rewrite the household code. Boomerangs must respect the fact that they’re now guests in the home they once ruled. Your curfews, quiet hours, and general household manners aren’t suggestions—they’re the law.
3. Temporary Situation, Not a Forever Deal
The key here is to define this as a one-time, temporary arrangement. Both sides should agree on a start and end date—like a lease agreement without the legal drama. This keeps everyone focused on the fact that this is a pit stop, not a permanent station. Yes, life throws curveballs, but this isn’t a renewable lease. Set a clear end date and make sure it’s non-negotiable.
4. Laundry: A Strict No-Touch Policy
I know the temptation. Your kid is busy, and there’s that pile of laundry just begging for a mother’s touch. But resist! Boomerangs are responsible for their own clothes. Just because they’re back in your house doesn’t mean you’re resuming laundry duty. Let them experience the harsh reality of owning their laundry disasters.
5. Bills: Handle with Care—Theirs
Boomerangs often arrive with baggage in more ways than one, and by baggage, I mean bills. Do not—I repeat, do not—offer to pay these. Under no circumstances should they offload financial responsibilities onto you. If that means they take a second job or tighten their budget, so be it. Bills are a reality they’ll have to face on their own, and there’s no better time to learn that lesson than now.
6. Transportation: They’re on Their Own
You are not a personal Uber. They’re living under your roof, yes, but that doesn’t mean your car is part of the package. They’re old enough to figure out how to get from Point A to Point B without borrowing your car. They can manage their own transportation like any other adult if they want to go somewhere.
7. Parking: Street Savvy
Ah, parking. Boomerangs do not, under any circumstances, get the prime garage or driveway space if that means you or your spouse are pushed to park on the street. The Boomerang should park in the street. After all, they’re the one benefiting from this temporary return, so it’s only fair they get the less convenient spot.
8. Food: Get a Plan in Writing
Food is a surprisingly touchy subject. Who’s paying for it, who’s cooking, and who’s cleaning up? These are crucial conversations that should happen on day one. Boomerangs should contribute in some way—maybe they pitch in for groceries or handle a few meals each week. Whatever you decide, make sure it’s discussed and settled early.
9. Chores: Everyone Pitches In
Yes, they’re adults now, but that doesn’t mean they’re exempt from household duties. Create a chore list that’s detailed and specific—after all, we know how adept they are at finding loopholes. Maybe they’re in charge of taking out the trash or mowing the lawn. Whatever the chores, write them down and make sure everyone’s clear on who’s doing what.
10. Contract: Making It Official
All these rules? Write them up into a simple contract. You can even get it notarized if you’re feeling particularly official. A little formality keeps things clear, and everyone knows exactly what’s expected. This contract might be the key to maintaining a harmonious household and ensuring that this round-trip ticket is truly one-way when the time comes.
Stick to these rules, and you might just avoid reliving those teenage years all over again.
Question: Have you ever had a boomerang kid move back in? What house rules worked (or didn’t work) for your family?
https://www.everydaycheapskate.com/wp-content/uploads/20241204-boomerang-kids-young-adult-male-with-arm-around-father-smiling-moving-back-home.png8001200Mary Hunthttps://www.everydaycheapskate.com/wp-content/uploads/EC-Logo-by-Mary-Hunt-Tagline-Trimmed.pngMary Hunt2024-12-04 18:07:392024-12-04 18:07:39Boomerang Kids: When Leaving the Nest Turns into a Round-Trip Ticket
You probably already know that a vacuum sealer for food is great for keeping food fresher, but did you realize it can extend freshness up to five times longer than regular storage methods? Using a vacuum sealer mason jar kit can further enhance this by providing a versatile way to seal a variety of foods. In fact, a vacuum sealer for food can easily pay for itself in less than a year just by reducing food waste. In this post, we’ll explore how a vacuum sealer can help you save money, plus EC’s top-rated picks for affordable vacuum sealer bags, accessories, and machines.
When it comes to tackling the high cost of groceries, a vacuum sealer for food can be a game-changer. This handy device helps preserve food much longer, reducing waste and really stretching your food dollars.
Top 8 Ways to Save Money with a Vacuum Sealer
Before we get to the specifics of the vacuum sealing process, let me list the ways my vacuum sealer for food keeps our food costs under control—even as inflation continues to wreak havoc on the typical household. I am confident it can do the same for you.
Buy in Bulk: Save money by buying larger quantities at warehouse clubs or stocking up on sales. A vacuum sealer can keep food fresher longer, making perishables last up to five times longer. This makes loading up when the price is right a viable option.
Minimal Food Waste: Vacuum sealing helps keep groceries fresh, reducing waste, so we can stop throwing spoiled food into the garbage.
Keep Produce Fresher: Preserve your garden’s bounty by sealing and freezing vegetables, herbs, and fruits to enjoy long after the growing season.
Save Leftovers: They’re great for busy nights, but leftovers don’t last long in the fridge. Vacuum sealing keeps them fresh, so you don’t have to cook from scratch.
Prep Meals in Advance: Meal prep can save time and money. Vacuum-sealed prepped meals stay fresh longer in the fridge—and for months in the freezer.
Stave Off Stale. Vacuum sealing can keep dry goods—rice, pasta, beans, pet food, and more—fresh and pest-free.
Fresher Deli Items: Deli meats and cheeses spoil quickly. Vacuum sealing extends their shelf life, so you can use them at your own pace.
Cheap Cuts of Meat: Vacuum sealing helps a great marinade to penetrate meat faster, saving time and tenderizing cheaper cuts without sacrificing flavor.
EC Fan Review
“I could not recommend enough the FoodSaver vacuum sealer for food. It has been a lifesaver, saving me so much money and frustration as well. I remember before I got it, I would buy some meat, put it in the freezer, and go back later only to find it all freezer-burned so badly that I would have to throw it out. What a waste! Never again. Now I use my vacuum food sealer, and I can go back to it in a few months or even longer, and it is perfectly OK—no freezer burn at all. The vacuum process, combined with the right vacuum sealer bags, removes all the air and keeps the food fresh until I’m ready to use it. It has been a real money saver.”
–Arthur M.
Why a Vacuum Sealer for Food is a Game-Changer
A vacuum sealer for food is a handy little countertop machine that comes in different brands and sizes, with either a plug-in or rechargeable battery option.
Generally, the purpose of a vacuum food sealer is to remove all oxygen from a food item’s environment—oxygen is the enemy of fresh food and the culprit that causes it to rot.
To do this, you place the food item to be vacuum sealed into a vacuum sealer bag or an appropriate container, attach the bag or container to the machine, press a button, and it sucks out all of the air and then seals that bag or container seamlessly before any oxygen can sneak back in. There! Sealed. Generally, sealed items must be refrigerated unless they contain pantry staples like flour, pasta, or rice—items that do not typically require refrigeration.
The most well-known brand of vacuum sealing machines is FoodSaver, but there are also several top-rated options from other brands that have entered the market over the years, increasing competition.
Choosing the Right Vacuum Sealer Container: Bags, Jars, and Canisters
Vacuum Sealer Bags
Vacuum sealers for food typically use special vacuum sealer bags designed for vacuum sealing. FoodSaver, for instance, has its own brand of bags, but many off-brand machines can use FoodSaver bags too.
While vacuum-sealing bags can be reused, cutting them open makes them smaller each time, which can be tricky. These bags come in cut-to-size rolls or premade sizes, similar to how you buy ink and paper for your printer. You’ll need to keep a supply on hand, even if you reuse them once or twice.
Some machines work with reusable bags that don’t need to be cut open. These bags have zip-type closures and a valve that the machine uses to suck out the air, requiring a special attachment.
A challenge with vacuum sealer bags is avoiding crushing delicate items like chips, muffins, and bread. Here are some other options that work well.
Jars
Glass canning jars, like Mason or Ball jars, are ideal for use with a vacuum sealer mason jar attachment. You’ll need a special jar lid attachment, but jars are perfect for items like berries, chopped lettuce, and cereal. You can even vacuum seal liquids like milk, cream, and juice in glass canning jars. This method avoids the bag-cutting problem, doesn’t crush the contents, and both the jars and lids are reusable.
FoodSaver also makes reusable food containers with tight lids and valves for air removal. Earlier models had issues with cracking, but the newer ones are much improved, though they can be pricey.
Keep Your Vacuum Sealer Handy for Maximum Savings
For my vacuum food sealing machine to do the best job of keeping our food costs, it must be handy. For me that means out on the counter, plugged in or charged up and ready to go. If I keep my FoodSaver in a cupboard, requiring me to pull it out, lift it up, and plug it in, chances are great that I’ll skip it, “just this once.” Or forget that I even have the option. That means, for me, it must be out and ready to go at all times.
If you don’t have counter space or another option for storing your vacuum sealer for food, my advice is to make sure it is as handy and ready-to-go as possible.
Best Inexpensive Vacuum Sealer Recommendations
There are many vacuum food-sealing products out there, and a lot of it is junk. Buyer beware!
Team EC and I have narrowed the field to present our top-rated vacuum sealer recommendations, including Amazon links for more information. Of course, you may find these products elsewhere, so be sure to do your own due diligence.
Whether pro or beginner, this budget-friendly vacuum sealing kit includes everything you need except for mason jar sealing. It features a top-rated vacuum food sealer machine with a cutter, a cut-to-size bag roll, heat-seal bags, reusable sous vide bags, clips, an air suction hose, user manual, 2-year warranty, 30-day money-back guarantee, and lifetime technical support. Make sure to check out the reviews to see why this kit is considered one of the best on the market.
This is the most current and top-rated model of the FoodSaver machine that sits on my counter. I have used it nearly every day for more than eight years. This workhorse has a powerful motor, strong selling action, and has not given me any problems at all. It continues to be going strong.
The FoodSaver 4440 2-in-1 Automatic Vacuum Sealing System removes air, one of the main causes of mold and food spoilage, from bags and creates an airtight seal to lock in freshness. The built-in handheld sealer eliminates the need for additional attachments when sealing zipper bags and containers.
It comes with a large selection of bag rolls and premade rolls.
NOTE: While this machine includes the accessory hose, the jar sealing accessory is a separate purchase.
If you want the convenience of vacuum-sealed mason jars without juggling cords or pumps, this electric Mason jar vacuum sealer is a winner. It works with both wide-mouth and regular-mouth jars, and the kit comes with a standard mouth converter, five wide-mouth lids, five regular-mouth lids, and a user guide… basically everything you need to get started.
The best part? It’s cordless and hands-free. Just center the sealer on your jar lid, press the button, and let it evacuate the air for about 40 seconds. One click later, your jar is sealed, keeping food fresh a bit longer. No twisting hoses, no pumping by hand. Just simple, effective sealing.
Note: Mason jars themselves are not included, and vacuum-sealed jars with perishable food should be refrigerated. This method is great for short-term storage, but not a substitute for traditional water bath canning.
(Disclosure: This post includes an Amazon Creator Connections product. I may earn a small commission if you purchase through the link, at no additional cost to you.)
The FoodSaver vacuum sealer mason jar accessory kit is perfect for extending the freshness of sauces, mustards, jams, grains, and nuts by creating an airtight vacuum seal on both regular and wide-mouth mason-type jars. This BPA-free and dishwasher-safe kit ensures your food stays fresh longer, is odor-proof, and stain-resistant. It’s a must-have for anyone looking to preserve homemade goods and pantry staples efficiently and safely.
Turn the top valve on these FoodSaver containers to “Vacuum” and connect your handheld sealer for an airtight seal that locks in freshness to keep foods fresh longer in the fridge, freezer, or pantry. Or turn the valve to “Marinate” to marinate in minutes instead of hours.
These regular mouth mason jars are versatile and durable, ideal for canning high-acid foods like salsas and pickles, as well as low-acid foods like meats. They work well with a vacuum sealer mason jar kit to ensure long-lasting freshness. The airtight lids and bands maintain a tight seal, while the crystal-clear glass offers easy visibility, making them perfect for storing, serving drinks, and even DIY projects.
If there is one thing that will render your vacuum sealer for food useless, it is trying to cut corners with poor-quality vacuum sealer bags that split, tear, or otherwise fail to make a reliable seal. I rely on these Kirkland brand vacuum sealer bags that are compatible with most vacuum sealing systems, including all FoodSaver machines. Contents include 7 cut-to-fit rolls and 50 premade bags. This is a tremendous value for reliable, high-quality replacement bags.
Question: Have you tried vacuum sealing food at home? What’s your favorite thing to vacuum seal?
EverydayCheapskate™ is reader-supported. We participate in the Amazon Services LLC Associates Program and other affiliate advertising programs, designed to provide a means for us to earn from qualifying purchases, at no cost to you.
https://www.everydaycheapskate.com/wp-content/uploads/20240728-Vacuum-sealer-for-food-female-sealing-plastic-bag-of-zucchini.png8001200Mary Hunthttps://www.everydaycheapskate.com/wp-content/uploads/EC-Logo-by-Mary-Hunt-Tagline-Trimmed.pngMary Hunt2024-07-28 13:05:552026-03-14 17:13:41Best Inexpensive Vacuum Sealer for Food and 8 Ways It Will Slash Your Food Costs
Ready to clear out the clutter and simplify your life? Discover a hassle-free way to declutter your home while supporting meaningful causes with these organizations that offer free donation pickups. It’s not just about tidying up; it’s about making a positive impact by giving back. When you donate, your old household goods go to a new home where they will be used and appreciated. Plus, donations to charitable organizations are tax-deductible when you itemize.
Living in a tidy, organized home can help lower stress and make daily life smoother. The challenge often lies in figuring out what to do with all the items you want to clear out.
Hassle-Free Decluttering with Free Donation Pickups
Getting rid of things quickly can help prevent clutter from piling up. If you only have a small amount of stuff, dropping it off at a local charity or thrift store is a great option. But when you have multiple bags or large items, hauling everything to a donation center can be a real chore. That’s where these companies come in—they’ll pick up your donations right from your doorstep, free of charge. Plus, donations to charitable organizations are tax-deductible.
How to Schedule Your Free Donation Pickup
Scheduling a free donation pickup for your unwanted items is straightforward and convenient. Follow these steps to get started:
Choose a Charity or Organization: Select a charity or organization that offers donation pickup services in your area. Consider factors like the types of items they accept and their scheduling availability.
Check Eligibility and Guidelines: Review their website or contact them directly to ensure your items meet their donation guidelines. This step helps avoid any misunderstandings and ensures your donations are accepted.
Schedule Online or by Phone: Many charities offer online scheduling tools where you can select a date and time for pickup that fits your schedule. Alternatively, some organizations allow you to schedule over the phone. Have your donation items ready and provide any necessary details they may ask for.
Prepare Your Donations: On the scheduled pickup day, gather your items and place them in a designated spot outside your home. Make sure everything is clearly labeled and easily accessible for the pickup crew.
Receive Your Donation Receipt: After pickup, you’ll typically receive a donation receipt for tax purposes. This receipt acknowledges your charitable contribution and may be used to claim a tax deduction, so keep it in a safe place.
By following these steps, you can streamline the process of donating your items and support a meaningful cause with ease.
Organizations That Offer Free Donation Pickups
When considering which organization to donate to, explore their specific guidelines and availability for donation pickups. Each charity offers unique services and accepts varying items, ensuring your contributions align with their mission while simplifying your decluttering process.
For over 150 years, The Salvation Army has been helping people in need. This nonprofit organization operates in over 131 countries. Donated furniture is sold at low prices at Salvation Army Thrift Stores, and the funds support the organization’s alcohol and drug rehabilitation centers.
To schedule a free donation pickup, visit the Salvation Army donation site. Enter your zip code in the “Schedule a Free Pick-Up” field. You’ll be directed to the donation details page for your local center.
The Salvation Army generally accepts a variety of items, including clothing, shoes, toys, furniture, small appliances, household goods, cars, and books.
The VVA supports veterans and their families by funding programs through its thrift stores. They accept clothing, shoes, baby items, jewelry, bikes, small furniture and appliances, tools, kitchenware, and other household goods. Note that they do not take large furniture or appliances. To schedule a free donation pickup, call 1- 888-518-8387, or you can do this online at the VVA’s Clothing Donations site. Then, leave your items outside clearly marked for VVA pickup.
GreenDrop is not itself a charity but partners with local charities to collect donations. It operates in several states, including Alaska, Illinois, Washington D.C., Delaware, Hawaii, Maryland, Nevada, New Jersey, New York, Pennsylvania, and Virginia.
GreenDrop accepts clothing, shoes, household items, kitchenware, toys, games, sporting goods, small appliances, small furniture, and electronics. At its website, click on Schedule a Pickup to discover if you are in their service area, If so, you can schedule a free donation pickup online. Then pack your donations and collect your IRS tax receipt, which will be created by the non-profit organization that received your donations.
Big Brothers Big Sisters offers mentoring programs for youth and accepts donations in Massachusetts and Connecticut.
The organization’s Hartsprings program accepts clothing, shoes, books, small appliances, kitchenware, and household goods. You can schedule a free donation pickup (no mattresses or furniture, please) or find a donation drop off bin at the BBBS donation site using this link.
Habitat for Humanity helps families build and find affordable homes. Their ReStores accept donations of building supplies, tools, appliances, and furniture. Most locations offer free donation pickup for large items. Use their search tool to find your nearest store and arrange a pickup.
Habitat Restore generally accepts sofas, chairs, dining room tables, dressers, bed frames, coffee tables, end tables, filing cabinets, and bookshelves.
On a personal note, when my husband remodeled our kitchen, we donated all of the existing cabinets and appliances to Habitat Restore (the list above is not exhaustive). A big truck came and picked up all of the items because they were in good, working condition. We received an IRS tax receipt authorizing a tax deduction for the items’ fair market valu.
Pick Up My Donation is a kind of middleman that partners with local charities and thrift shops to keep donations in your community. At its website, enter your zip code and complete a questionnaire about your items. Pick Up My Donation will connect you with charities within a 15-mile radius to schedule a free donation pickup.
The Arc advocates for people with intellectual and developmental disabilities, accepting donations of clothing and household items at branches across the U.S. Check if your local branch offers pickups by searching your zip code on their website, and then contact them for details.
This organization can help make your decluttering efforts easier. It assures that your unwanted items find a new home while you support the organization’s great causes.
The Arc is accepting used vehicles, boats (with trailers), recreational vehicles, furniture and housewares, and clothing.
To schedule a free large furniture pickup along with up to 20 boxes and bags of donations, contact the local chapter. Or you can schedule online at this link.
This organization is a support arm for Vietnam Veterans of America, Veterans’ Voice of America, Special Olympics Texas, and Teen Challenge of Southern California. It offers counseling, housing for homeless vets, and medical care, using donations to make a real difference for Vietnam Vets and others living in America.
Unlike many major charity organizations that require scheduling donation pickups weeks in advance or have stopped offering pickup services altogether, Pickup Please can often collect your donation within 24 hours in many areas.
Generous donations of clothing, household goods, books, shoes, small appliances, electronics, and more, significantly impact the lives of individuals and families facing difficulties.
Pickup Please charities sell your donated items to private companies through an annual bidding process. This process generates most of the funding needed to support their local, state, and national programs. Donations make this support possible.
Currently, Pickup Please is accepting clothing, household goods, toys, electronics, books, exercise equipment, tools, small furnishings, bikes, musical instruments, small appliances, and almost anything else.
You can easily schedule a donation pickup using this online scheduler. Check the Pickup Please website for a location near you. Pickup Please will often come by for your donation within 24 hours, load up your donations, and level you an IRS tax deduction receipt.
NOTE: Pickup Please accepts only items that are small and light enough for one person to easily lift and carry.
Question: What’s the most unexpected item you’ve ever donated? Share your story below.
https://www.everydaycheapskate.com/wp-content/uploads/20240615-donation-boxes-with-assorted-items-declutter-free-donation-pickup.png8001200Mary Hunthttps://www.everydaycheapskate.com/wp-content/uploads/EC-Logo-by-Mary-Hunt-Tagline-Trimmed.pngMary Hunt2024-06-22 16:23:592024-06-22 16:25:14Ready to Declutter? These Companies Will Pick Up Your Donations for Free
Navigating the juggling act of modern life often feels like trying to keep multiple plates spinning at once. Amidst this whirlwind, one common struggle stands out: dinner time. Despite the chaos, there are quick easy dinners that can conquer the dinner dilemma and ensure that delicious, home-cooked meals grace your table—even on the busiest of weeknights. Read on for practical tips to make dinner time stress-free and enjoyable.
If you think yours is the only household that finds it nearly impossible to clothe, feed, and educate children, keep a clean house, care for aging parents, participate in church and community activities, keep regular paychecks rolling in—and also get dinner on the table at a reasonable time every single weeknight, I’ve got news for you: you are not alone!
Life’s hectic pace can make dinner time feel like a daunting challenge, especially on busy weeknights. But with a little planning and a handful of simple strategies, getting a delicious, home-cooked meal on the table is totally doable. Here are some practical tips to help you even when your schedule is packed—quick, easy dinners!
Tried and True Family Favorites for Quick Easy Dinners
No one knows your family better than you do. You know what foods and meals they like, and those they can barely tolerate. For now, concentrate on the former—foods, meals, menus you and the family like that you could prepare in your sleep; they are that simple.
Come up with your family’s favorite meals. Post them on a menu board and then keep that board where everyone can see it effortlessly. Repeat these quick, easy dinners every week—at least for the foreseeable future—as you get into a smooth-running dinner routine. Here’s an example:
Monday: Baked Chicken, Rice, Green Beans
Tuesday: Mac and Cheese, Apple Sauce, Petite Green Peas
Look at the benefits of having a simple seven-day dinner rotation. Putting that grocery list together would take you about five minutes. You and your family know how to make these meals; you’ve made them so often that it will be easy to share the actual cooking.
But perhaps the best thing about this kind of meal planning is that everyone already knows what’s for dinner. And if they forget, you have the answer.
Pro Tip
Of course, this kind of meal planning is flexible, and that’s the beauty of it. You can skip, substitute, or even change it up with leftovers. When you’re ready to change it up, you will easily create an all-new Weekly Dinner Menu Plan.
Don’t forget to check out the freebie download at the bottom of the blog post for your Weekly Dinner Menu Plan worksheet and five weeks of meal plans!
Meal planning is your best friend when it comes to saving time and reducing stress with quick, easy dinners. Spend a few minutes each week planning your meals and creating a grocery list. Knowing what’s for dinner ahead of time means you can avoid those last-minute scrambles.
Grab your favorite recipe book or scroll through your go-to cooking blogs, and get planning! With a little foresight and a dash of creativity, you’ll be amazed at how effortless mealtime can become.
Pro Tip
Start with a theme for each night, like Meatless Monday, Taco Tuesday, or Pasta Wednesday. This will narrow down your choices and make planning simpler.
Prepping ahead is like giving yourself a head start in the race towards a stress-free dinner. It’s all about putting in a little effort upfront to save you time and hassle later on. Spend a leisurely Sunday afternoon chopping veggies, marinating proteins, and cooking grains or pasta. Then, when Monday rolls around and you’re faced with a hectic schedule, all you have to do is reach into your fridge and pull out everything you need to whip up a delicious meal in no time.
Pro Tip
Store prepped ingredients in clear containers. This way, you can see everything at a glance, making it easier to grab what you need.
One-Pot Wonders: Quick Easy Dinners with Minimal Cleanup
One-pot meals are synonymous with quick, easy dinners. They minimize cleanup and usually require less hands-on time. Think soups, stews, casseroles, and sheet-pan dinners. These meals often involve throwing everything into one pot or pan and letting it cook, allowing you to focus on other tasks while dinner practically prepares itself.
With one-pot wonders in your recipe repertoire, you’ll breeze through dinner prep with ease and savor every moment spent around the table with your loved ones.
Pro Tip
Here’s a delicious idea to get you started: why not try a one-pot chicken and rice dish? Sauté chicken until golden brown, then add rice, your favorite veggies, and broth. Let everything simmer together until the rice is fluffy and the chicken is tender. Voila! Dinner is served, and you’re left with only one pot to clean—a true weeknight miracle!
Slow Cooker and Instant Pot Magic for Quick Easy Dinners
Ah, let’s talk about the unsung heroes of the kitchen—slow cookers and Instant Pots! These kitchen appliances are perfect for busy weeknights. Whether you’re a busy parent juggling work and family commitments or a seasoned home cook looking to streamline your dinner routine, these kitchen workhorses are sure to become your new best friends.
You can set up your slow cooker in the morning and come home to a ready meal or use an Instant Pot for quick, pressure-cooked dinners.
Pro Tip
Here’s a handy tip to make the most of your slow cooker or Instant Pot: opt for recipes that use ingredients you already have on hand or can easily substitute. This not only saves you time and money but also eliminates the need for a last-minute trip to the store. Whether it’s swapping out one type of protein for another or using up leftover veggies from the fridge, getting creative with your ingredients ensures that dinner is always just a button press away.
Batch Cooking and Freezing Tips for Quick Easy Dinners
Picture this: you spend a leisurely Sunday afternoon whipping up a big batch of your favorite soup, casserole, or pasta sauce. Then, instead of serving it all at once, you portion out the extras and stash them away in the freezer for later. Fast forward to a busy weeknight when time is tight and energy is low—you simply pull out a container of homemade goodness, heat it up, and dinner is served!
Pro Tip
Be sure to label your containers with the date and contents. This simple step makes it easy to keep track of what you have on hand and ensures that you use up older meals before they get lost in the freezer abyss. Plus, it helps prevent any mystery meals from lurking in the depths of your freezer!
Keep a repertoire of quick dinner recipes that you can rely on when time is tight. Think stir-fries, omelets, protein-packed salads, and sandwiches—dishes that are not only quick to make but also satisfying and nutritious. With just a few simple ingredients and minimal prep, you can whip up a mouthwatering meal in under 30 minutes, leaving you more time to relax and enjoy your evening.
Pro Tip
Here’s a tasty idea to add to your repertoire: a quick veggie stir-fry with tofu or chicken. Sauté your choice of veggies with garlic and ginger, add your protein of choice, and finish with a simple sauce made from soy sauce, sesame oil, and a splash of vinegar. In no time at all, you’ll have a flavorful and wholesome meal that’s sure to please even the pickiest of eaters.
Using Convenience Foods Wisely for Quick Easy Dinners
Let’s chat about using convenience wisely in the kitchen. We all have those days when time is short and energy is low, and the last thing we want to do is spend hours chopping veggies or waiting for a chicken to roast. That’s where store-bought shortcuts come in handy.
Things like pre-chopped veggies, rotisserie chicken, or canned beans can be a lifesaver when you’re short on time but still want to serve up a wholesome meal. These convenient options cut down on prep time without sacrificing flavor or nutrition, allowing you to get dinner on the table in a fraction of the time.
Pro Tip
Here’s a smart tip to keep in mind: when opting for convenience items, try to choose ones with minimal additives and preservatives. While these shortcuts can be a real time-saver, it’s always best to prioritize fresh and simple ingredients whenever possible. Not only do they taste better, but they’re also better for you in the long run.
Dinner time doesn’t have to be a solo effort. Getting everyone involved in the kitchen is not only a great way to lighten your load but also an opportunity to bond and create lasting memories with your loved ones. And the best part? Even young kids can get in on the action! Even young kids can help with simple tasks like washing veggies or setting the table. It’s moments like these that make cooking together so special and meaningful.
Pro Tip
Assign specific tasks based on each person’s age and ability. Whether it’s stirring a pot, chopping ingredients (under adult supervision, of course), or simply setting out plates and utensils, giving everyone a role to play not only makes the process faster but also teaches valuable cooking skills along the way. Plus, it’s a great way to foster a sense of teamwork and responsibility in the kitchen.
Balanced and Nutritious Yet Quick Easy Dinners
While aiming for balanced plates filled with protein, carbs, and veggies is important, it’s equally essential to keep things simple and stress-free. After all, a meal doesn’t have to be fancy to be nutritious and satisfying.
Take, for example, a humble grilled cheese sandwich paired with a crisp side salad. It’s a classic comfort food combination that ticks all the boxes—protein from the cheese, carbs from the bread, and vitamins and minerals from the veggies. Plus, it’s quick and easy to make, making it the perfect solution for busy weeknights when time is tight.
Pro Tip
Opt for whole grains and lean proteins whenever possible. Whole grains like brown rice or quinoa provide fiber and nutrients, while lean proteins like chicken or tofu help keep you feeling full and satisfied. By making these simple swaps, you can boost the nutritional value of your meals without sacrificing flavor or convenience.
Extend Yourself Grace for Quick Easy Dinners
On those nights when the stars just don’t align, it’s important to remember that it’s okay to cut yourself some slack. After all, dinner time should be about nourishing our bodies and souls, not adding extra stress to our already busy lives.
So, what’s the solution when things don’t go according to plan? Keep a list of go-to takeout spots or quick frozen meals that you enjoy. Whether it’s your favorite Mexican food joint or a stash of frozen lasagnas in the freezer, having a backup plan ensures that you can still enjoy a satisfying meal without all the fuss. The goal is to make dinner time as stress-free as possible, even if it means ordering pizza occasionally.
Pro Tip
Consider setting the table nicely and serving the food on real plates. It may seem like a small gesture, but it can make all the difference in turning a simple meal into a special occasion. Plus, it’s a great way to add a touch of elegance to an otherwise ordinary evening.
By incorporating these doable solutions into your routine, you can give preparing dinner top priority with less stress and more enjoyment, even on the busiest of weeknights. Remember, the goal is to nourish yourself and your loved ones without feeling overwhelmed.
Not your mom’s slow cooker: Smart technology allows you to cook a recipe to either a desired cooking time or specific temperature, before automatically switching to warm when it’s done
You do not have to be a super savvy chef to pull your family together each week for these light and simple, easy-to-prepare meals. Revised to reflect todays healthier diet, this revised edition explains how to plan ahead, spend less time at the supermarket, cut down on prep time, group similar kitchen tasks together to get them all done at once, make kitchen clean-up more manageable.
Struggling to stay organized with your weeknight dinners? This handy Weekly Dinner Menu Plan worksheet is designed to help you streamline your meal planning process and simplify your weeknight dinners. With space to jot down your family’s favorite meals and plan out your entire week’s worth of dinners, you’ll be able to breeze through grocery shopping and cooking with ease. Plus, we’ve included five weeks of sample meal plans to inspire you and take the guesswork out of what to cook. Download this free worksheet now and take the first step towards stress-free dinners and more quality time spent around the table with your loved ones!
Question: What’s your go-to dinner solution for busy weeknights? Share your favorite quick easy dinners with us!
EverydayCheapskate™ is reader supported. We participate in the Amazon Services LLC Associates Program as well as other affiliate advertising programs, designed to provide a means for publishers to earn fees by linking to Amazon.com and other affiliated sites. Thanks!
https://www.everydaycheapskate.com/wp-content/uploads/20240612-meal-planning.png8001200Mary Hunthttps://www.everydaycheapskate.com/wp-content/uploads/EC-Logo-by-Mary-Hunt-Tagline-Trimmed.pngMary Hunt2024-06-12 10:45:042024-06-12 10:45:04Doable Solutions to Quickly Get Dinner on the Table Even on Busy Weeknights
Crafting a home office that ignites productivity and creativity without draining your bank account? Absolutely achievable, and I’m here to show you just how straightforward it can be. Let’s make your home office dreams a budget-friendly reality together.
So, let’s talk about the new normal: working from home. As aggressive as employers’ push for their employees to get back to the workplace has become, most experts say the five-day commute is dead. In fact, Forbes Advisor is now reporting that by 2025, 32.6 million Americans will work remotely from home—be that a house, apartment, RV, dorm room, or perhaps even a corner in Dad’s garage!
The best way to successful working from home is to create a workspace that is not only functional but also sparks inspiration in a way that makes you look forward to getting up and going to the office. But here’s the thing—it doesn’t have to drain your bank account to create this kind of home workspace. In this post, I’m dishing out simple tips and down-to-earth ideas to create a welcoming, functional home office on a budget.
Working Remotely
The concept of remote work isn’t novel. However, the surge in companies embracing hybrid or fully remote work setups brought on by the pandemic has greatly expanded opportunities for working remotely. For many, this means working from home. And that means creating a new workspace or upgrading a current home office for optimal productivity. Immediately, that brings up factors like comfort, privacy, noise control, and lighting. Get all of them right, and you’ve set yourself up for success. And don’t worry. This need not cost a fortune. It really is possible to create an inviting, comfortable home office on a budget.
By selecting the right location, equipment, and atmosphere, you can create an engaging home office environment conducive to peak performance—all on a budget.
You Have a Budget
The idea of working from home has no doubt immediately conjured up all the money you won’t be spending now that you’ll be staying home—gasoline, morning drive-thru coffee, lunches, parking fees, subway credits, and work clothes, to name a few. And for now stop thinking of that as a tax-free bonus you’ll be able to pocket once you’ve relocated to your home. That is the money you have to set up, furnish, and maintain your home office.
The good news is that most of the expenses will be one-time on the front end. Then, as you become established, chances are very good you will benefit financially from this new remote work arrangement.
Location
The location of your work-from-home office is of the utmost importance. You need a dedicated space—designated for and respected as your office—with typical utilities of heat, ventilation, a restroom nearby, adequate electrical outlets, and excellent lighting.
Maintaining focus on your work can be challenging in a chaotic environment. Even minor movements from family members or roommates can disrupt your concentration while working from home. If you share your living space with others, it’s crucial to set up your home office in an area with minimal distractions.
Of course, the ideal space is an entire spare room with a door and window that you set aside exclusively as your home office. However, when that is not possible, opt for the most secluded and quiet spot you can figure out within the living space where you can maintain a clear distinction between work and personal life.
Dedicated space
The first step in creating a dedicated space within a living area is to visually and physically separate your office from the rest of the room. You want your office space to be as distraction-free as humanely possible.
A couple of inexpensive free-standing room dividers can be appealing and very useful without breaking the bank or making permanent room modifications. You have many choices, which you will see when you check out this simple search for “room dividers.” Below would be my choice, given its classic appearance, generous size, affordable price, and excellent reviews.
In homes where space is limited, overcrowding a room or corner with home office equipment and supplies can be less than ideal. Rather than spreading out horizontally, consider utilizing vertical space.
Maximize the vertical area in your designated workspace by selecting a desk with built-in shelves or adding wall-mounted shelves above or beside your desk. A pegboard can serve as a versatile storage solution for office supplies, unused equipment, and decorative items.
For additional storage, consider investing in a tall filing cabinet or vertical shelving units with bins or containers. These options can provide ample space for organizing sensitive documents, office essentials, and more.
Embrace your creativity and explore upward storage solutions to use your home office space effectively.
Ideally, your workspace will have a window or two, giving access to natural light. Studies suggest that natural light, whether in the morning or evening, can alleviate depression and enhance energy levels, alertness, mood, and productivity.
Utilize natural light whenever you can and supplement it with a variety of other light sources, such as task, overhead, and accent lights. Bright/daylight white lighting, such as a converted closet, can adequately light a windowless space.
Full-spectrum LED light delivers better brilliance and truer color for reading and performing detailed tasks. Mimicking natural daylight, the floor lamp below is flicker-free and equipped with an Optix lens to control glare while helping to reduce eye strain and fatigue—an excellent choice for office work.
As you begin your search, consider what you already have that can be repurposed and given new life in your new home office. Ask around. Your friends and neighbors just might be looking to get rid of office furnishings like desks, chairs, shelving, etc. Local thrift and furniture consignment stores, Facebook Marketplace, and Craigslist are also good places to find bargains on desks and other home office furnishings.
Desk
Your home office desk should be large enough to accommodate a laptop or desktop computer, monitor, and your specific creature comforts, such as a lamp, auxiliary speaker, and so forth. If your office quarters are super challenged for size, you may want to consider a wall-mounted fold-down table. While this means you’ll need to clear and fold away your desk every day at quitting time, that’s not a bad habit to acquire!
A roll-around cart makes for a neat and handy method for small office organization—a place to store your desk top items. I use this one, and think of it as my “desk drawers.” It is very sturdy and stable.
Some wise person once said, “Never buy the cheapest version of anything that separates you from the ground: tires, shoes, beds, and chairs.” Thankfully, individuals working from home now have access to a range of practical chair choices that offer excellent support when creating a home office on a budget.
For a tight budget, check out this Computer Desk Chair, which typically costs around $50. The chair’s overall design is ergonomic, with a backrest and lumbar support designed to fit the natural curve of your lower back. It provides comfortable support, which helps you maintain a relaxed posture during long hours of work. This chair has great reviews and comes in three colors, including black.
Another option in the $200 range is this Ergonomic DFLIVE chair, which includes breathable mesh, adjustable lumbar support and seat depth, and retractable footrest—great features for those who want to customize their sitting experience. The beautiful chair can also be used as a rocker.
Reading the reviews, you’ll discover that people with back pain and those who sit down for extended periods of time rave about this desk chair’s excellent features. It certainly deserves your consideration if you’re in the market for a good desk chair.
No products found.
Document storage
It’s crucial to keep sensitive professional documents separate from personal paperwork to avoid errors, unintentional destruction of vital documents, or inadvertent disclosure of confidential information.
Establish a dedicated area for work-related documents, including receipts, customer files, invoices, and other essential records. Whether you opt for an accordion file or filing cabinet, maintaining this separation is equally critical in your home office as it would be in a traditional workplace.
Beyond your home office essentials, such as furniture and computer gear, consider these other items and services that can enhance your remote working experience.
High-Speed Internet
In remote work-from-home scenarios, high-speed internet isn’t just a convenience; it’s a fundamental requirement. Unreliable internet connections can significantly hamper productivity, affecting your ability to participate in virtual meetings, handle calls, transfer files, and fulfill your job duties promptly. If you are not available when your management needs you, you may not have this wonderful work-from-home opportunity for long.
Fortunately, most areas have access to at least one internet service provider (ISP) offering high-speed internet packages. Aim for a minimum speed of 50Mbps, considering even faster options if multiple household members use the internet concurrently.
Blue light glasses
Given that your work likely involves prolonged screen time on computers and mobile devices, consider incorporating blue light glasses or contact lenses into your routine. Exposure to blue light from screens can lead to headaches, eye strain, dry eyes, and potential long-term vision issues like cataracts and age-related macular degeneration (AMD). Blue light-filtering eyewear is specifically designed to reduce the amount of blue light entering your eyes from electronic devices.
If high-speed internet or Wifi access isn’t available in your home, you can still work remotely by utilizing your mobile device’s Wifi hotspot. Before relying on this option, it’s wise to check with your phone service provider regarding data caps, usage limitations, and potential upgrade options.
Headphones
Noise-canceling headphones can significantly enhance your ability to concentrate and minimize distractions while working from home. Investing in a quality pair of noise-canceling headphones can help improve focus and productivity in your home office environment.
Standard office supplies such as paper, pens, scissors, paper clips, and stationery are essential for your remote work setup. Make sure your home office is equipped with these necessary items to make work easier—mirroring the convenience of a well-stocked office supply cabinet.
Get Started Creating an Inspiring Workspace
By selecting the right location, securing the right equipment, and creating the most enjoyable atmosphere, you really can create an engaging home office environment that encourages peak performance—all on a budget.
Remember, the key is to prioritize functionality, comfort, and inspiration while staying within your budget. With a little creativity and resourcefulness, you can transform any corner of your home into a productive and inviting workspace.
Question: Working from home presents unique challenges in maintaining motivation and productivity. How do you stay motivated and productive while working from home? Share your tips and tricks down below.
EverydayCheapskate™ is reader-supported. We participate in the Amazon Services LLC Associates Program and other affiliate advertising programs, designed to provide a means for us to earn from qualifying purchases, at no cost to you.
https://www.everydaycheapskate.com/wp-content/uploads/20240511-cozy-midcentury-modern-home-office-on-a-budget.png8001200Mary Hunthttps://www.everydaycheapskate.com/wp-content/uploads/EC-Logo-by-Mary-Hunt-Tagline-Trimmed.pngMary Hunt2024-05-10 23:40:532024-05-10 23:38:08How to Create a Home Office on a Budget: Creative Tips Practical Ideas
Getting organized isn’t easy. But staying organized can be even harder. A place for everything and everything in its place. That’s the mark of an organized home.
As a natural-born messie with a bent toward hoarding, I know the struggle. But I’ve learned the joy of decluttering and gaining control over my disorganized self—one drawer, cupboard, closet, room, vehicle at a time.
Today I want to update 26 of my best organizational helpers. I am certain they can help you organize your bathroom, bedroom, kitchen, handbag, and car, too. These organizers can quickly turn chaos to calm—precisely we need as we head into the New Year!
Makeup Organizer
This professional vanity makeup organizer is clear acrylic so you can see exactly what you have and exactly where everything is because it is large enough for everything to be assigned a space.
Holds makeup brushes, skin care products with lots of room for lipsticks, eyeliners, shadows, powders, and more. Large capacity. Includes 12 lipstick storage compartments, 4 open storage compartments and 6 drawers. The sections are interlocking so you can disassemble then make your own configuration as you want. Sleek, stylish, but also minimalistic in its design. Makes a beautiful addition to any vanity or counter. Easy to assemble, too.
https://www.everydaycheapskate.com/wp-content/uploads/71NgekuZVvL._AC_SL1500_-e1703775359699.jpg1105800Mary Hunthttps://www.everydaycheapskate.com/wp-content/uploads/EC-Logo-by-Mary-Hunt-Tagline-Trimmed.pngMary Hunt2023-12-27 13:44:362024-09-01 12:50:2226 Quality Items to Organize and Simplify Your Life
Would you be willing to accept a reduction in pay if you could work fewer hours to spend more time with your family? It is a lovely thought, but how realistic? Working less usually means earning less—hardly an option for most people. But that doesn’t mean you cannot take small steps to simplify your life. A little bit here and there, and before you know it, your efforts will add up to something significant.
Simplifying your life means keeping things simple. It means cutting out stuff you don’t really need so you’ve got more time to spend time doing what makes you happy. It’s about ditching the excess and keeping only what truly matters to you.
The late Anne Ortlund, in her book Disciplines of the Beautiful Woman, sums it up in two words: concentrate and eliminate. Identify what’s most important to you, and eliminate everything else. That’s the way to simplify your life.
1. Most important things
What’s important to you? What do you value most? Write down your top four or five. Memorize them so they become automatic filters that help you set priorities and make daily decisions.
2. Worry only as needed
If we’re not conscious of our thoughts, our worries can travel with us throughout the day.
There are tricks to tackle them head-on. For example, set aside a specific time just for worrying. When you give this a shot, you’ll see how much of your day is eaten up by those nagging worries and how often they’re just the same old tune playing on repeat.
Whether it’s a quick 5-minute session or a longer 15-minute one, dedicate that time to facing those worries head-on. And once the clock’s up, leave ’em behind and get on with your day.
Too much stuff leads to more stuff—and even more. All that stuff weighs us down, robbing our joy and precious time because everything becomes so complicated. Getting rid of clutter is a cheap, fast, and effective way to become physically and financially sound. It’s also the path to emotional and intellectual happiness. Dejunk your home one drawer, cupboard, closet, and room at a time. Expect to experience a new feeling of “lightness.”
We know the rule—everything has a place, everything in its place. Adhering to that ideal can be quite another matter.
But truth be told, once everything has a home, it’s easy to maintain a clean and functional space. Cleanup is quick and easy because it’s simple. Whatever it takes to reach the everything-has-a-place goal will be so worth the effort.
5. Track your money to simplify your life
Statistically, we know that money is leaking out of our lives at a rate of at least 10% if we are not keeping track of where it is going. One of the most helpful things you can do to simplify your money is to download a budget app.
Generally, a budget app allows you to aggregate your financial accounts so that you can easily see your financial situation. You can connect accounts, such as your mortgage, bank accounts, credit card accounts, investment accounts, retirement accounts, and more. Plus, it is free.
Just because it happens to be a convenient time for someone to call you doesn’t mean it’s convenient for you to answer. Let your calls go to voice mail. Every instant message does not deserve an instant response. Telling your phone who’s in charge will greatly simplify your life.
7. Learn to say no
This is actually one of the key habits for those trying to simplify their lives. If you can’t say no, you will take on too much.
8. Run the dishwasher once a day
In most homes, the dishwasher tends to fill up quickly. Here’s a workable routine that if it fits into your lifestyle, can bring simplicity and calm to your home:
Every morning, after breakfast, run the dishwasher and then empty it right before lunch. Now, you can put the dirty dishes from lunch and dinner directly into the dishwasher and go to bed with nothing in the sink.
9. Record it
Write down what you need to remember and forget everything else. Don’t allow your mind to dwell on things over which you have no control. You will never regret making this a new habit.
Is your closet about to explode? Can’t even close those jam-packed drawers? Simplify things by ditching stuff you never wear. Opt for a minimalist wardrobe with basic styles and a handful of colors that all play nice together.
Part of the reason we have such a love affair with shopping and consumerism is that we think we need to personally own everything we use.
Before you agree to complicate your life further with yet another possession, consider the alternatives. Ask yourself: Do I really need it? Don’t I have something already that will do just as well? Where will I keep it?
12. Stop paying for cable
Due to hidden fees on top of basic service, the average household cable package is now $217.42 per month, which is more than the monthly average U.S. household pays for all major utilities combined ($205.50). Cutting the cable is a good step toward simplifying your life and, quite frankly, something you may never regret. With so many free or at least cheaper options, you might not even miss cable TV at all.
13. Take a break
You may not realize how screen time is affecting your purchasing and lifestyle choices. If you are addicted to Instagram, YouTube, Pinterest, Facebook, and television in general, taking a break will simplify your life.
If you’re not willing to go cold turkey, at least disable notifications. Then limit the number of times each day that you check your various feeds. FOMO (fear of missing out) is a real thing that has no merit—it is a fake fear.
14. Drive a simple car
High-end, luxury automobiles are nice to drive but can complicate one’s life. Typically, they are gas-guzzlers and expensive to insure, register, maintain, and repair. It’s a simple step that may take a while to achieve, but it’s totally doable.
Light-colored, plush carpeting is beautiful but can be life-altering. It shows every speck, spot, fleck, and crumb. If you want your carpets to look good without having to spend all your free time spotting, vacuuming, de-flecking, and un-crumbing, go with something speckled, patterned, or multicolored.
16. Get up earlier
The best hour of the day is the one right before you normally get up. It may take you a few weeks to truly enjoy that hour right before dawn, but when you create the habit, you will be amazed by the simplicity that 60 quiet, stress-free minutes will add to your day.
17. Cultivate contentment
Decide to be happy with what you have. The social imperative that we must consume to be happy breeds dissatisfaction and nonfulfillment. The constant ratcheting up of standards demands that we constantly upgrade in order to keep up. It takes a conscious effort to desire less.
EverydayCheapskate™ is reader-supported. We participate in the Amazon Services LLC Associates Program and other affiliate advertising programs, which are designed to provide a means for publishers to earn fees by linking to Amazon.com and other affiliated sites. Thanks!
https://www.everydaycheapskate.com/wp-content/uploads/20240322-simplify-your-life-wood-credenza-books-bud-vase-white-wall.png8001200Mary Hunthttps://www.everydaycheapskate.com/wp-content/uploads/EC-Logo-by-Mary-Hunt-Tagline-Trimmed.pngMary Hunt2023-04-17 07:15:472024-03-08 10:37:0017 Ways to Simplify Your Life: How to Desire Less
When I tell you that I am a born-messy, for whom the years have magnified that trait, it is not with joy. Embarrassment would be more like it. Join me as I step into the confessional.
Faithful readers of this blog know that I often write about the power of organization to defeat clutter, a subject that has been proven to be a source of both physical and mental chaos.
First confession
I write about that subject primarily to lecture myself. Writing about it keeps the problem clear, ever present in my mind. Messies like myself can easily slip into denial. We see the problem, but we can quickly move it out of mental view. That makes procrastination part of the equation. Writing makes me think, and that keeps the problem front and center.
The master bedroom in our home includes a spacious walk-in closet with a door. I tell you this so you will understand how easy it is for me to close the door to make my problems disappear. Can’t see it, for now it doesn’t exist. That lets me slip into denial. I’ll do it later. Next weekend when I have time to go through things.
Next confession
In this closet, we have a chair where my husband used to sit to put on his socks. Over the years, my problem has escalated to the point the chair and all of the space surrounding it has become covered, as in “buried” in piles—piles the height of which could be measured in feet, not inches. Clothes. Junk. Horrible. Worse than that. From time to time, I would dig it out, reorganize, and promise to do better. But then I’d backslide into my horrible, old patterns and habits.
Finally, I could not take it any longer. I cleaned the closet. Purged. Did all the things I encourage you to do. But more than that, I gave myself a little talking-to.
My spoiled, bratty child self agreed with my more wise and mature adult self that I would never again drape, lay, hang, or pile anything on that chair. Nothing. Not even for a moment. We did a pinkie promise, a heartfelt, I-can’t-take-it-any-longer kind of commitment. Beyond that, she and I agreed that I would repeat this mantra to myself whenever tempted: Do the right thing, do it now.
As I write, it has been 16 months—24/7 485 days. And I have repeated the mantra 365,876 times. At least. From that day to now, that chair has had nothing on it, around it, or hanging from it. More than that, there has been nothing on the floor. Not even my shoes, not for a moment.
The mantra has been upgraded a bit. It’s more like, [sweetly spoken] Do the right thing … [then as a drill sergeant] DO IT NOOOOOW!!!!
Yes, I am ecstatic. The change has been epic. The closet—all of it, not only the chair—has remained as organized as it was on that day I completed the makeover and determined that I’d had enough and would change my ways.
You should expect a follow-up post some time in the future, the title of which shall be: The Kitchen.
Could you use an extra $1,600? You might want to take a look in your garbage. According to the nonprofit organization Feeding America, the average American family of four throws out $1,600 a year by tossing out produce that’s become more suitable for a biology project than human consumption!
Mind-boggling, right? Here’s a fun crash course on how to store fruits and vegetables so you can retrieve all that cash from the trash.
Start following these insanely simple tips, and you’ll be amazed to see far fewer of your food dollars (hopefully, none) in the garbage in the form of stinky, rotten produce.
https://www.everydaycheapskate.com/wp-content/uploads/Fresh-produce-counter.jpg8331310Mary Hunthttps://www.everydaycheapskate.com/wp-content/uploads/EC-Logo-by-Mary-Hunt-Tagline-Trimmed.pngMary Hunt2022-09-27 00:01:382020-04-08 20:06:32How to Store Fruits and Vegetables at Home to Remain Fresh Longer
As we navigate life’s twists and turns, one thing remains certain: every adult must have five legal documents—each one signed, dated, notarized as necessary, and kept in a safe place that someone else knows about and can retrieve at a moment’s notice. These crucial papers ensure that your wishes are honored and your loved ones are protected—no matter what life brings. Here’s a simple guide to the must-haves for your estate plan, including a will, healthcare directives, and more.
It’s been years since my husband and I sat for hours with an attorney specializing in estate planning. That was not the most pleasant thing I’ve ever done. We were young, and the idea of being old and planning for our respective deaths seemed ludicrous.
That meeting, together with nearly $2,500, made us the proud owners of a Family Trust and Estate Plan, which includes our individual five important legal documents that every adult must have—absolutely. I’m grateful to have gone through that ordeal, but in hindsight, I’m certain we could have avoided much of the stress and cut the cost, too.
Even if you’re sure you have all of your essential legal documents in order, please be certain about that. Did you get married? Have a baby? Buy a house? Life changes, laws change, and regulations get upgraded without notice. It’s possible your documents could use an update.
Wake-up Message
Recently, a letter from Jenny reminded me that we need to update the documents in our Estate Plan—our lives have in so many ways over the years. For starters, we moved to a new state.
Thankfully, we now have an option to do this ourselves—legally and properly—for a whole lot less than it cost us decades ago. More about that in a bit. But first, the letter that popped up in my virtual mailbag:
Dear Mary: I’m 50, married, and have two adult children. Our financial life is not complicated. I do not have a Will and know that I should. Can I put faith in a simple Will done by one of the large online companies or is it in my family’s best interest that I hire a lawyer? I have read your work for many years and appreciate your advice. Thank you. Jenny
Thank you for the trust you put in me, Jenny. That is something I highly value. My quick answer is that absolutely you and your husband need individual Wills plus four other legal documents each, too.
I have a resource to recommend to you, which will help you do this yourself—a reputable legal help organization I believe you can trust without reservation.
Will this preclude the need to hire an attorney? It could, but I cannot advise you on that because every situation is different.
I can tell you that you can do this yourself and you be well protected now with all of your information and desires written down in proper legal order—and have that to take to an attorney if or when you find that necessary.
The Big Five
There are legal documents every adult must have—each one signed, dated, notarized as necessary, and kept in a safe place that someone else knows about and can retrieve at a moment’s notice:
Will
Advanced Directive
Healthcare Power of Attorney
Durable Power of Attorney
Revocable or Family Trust
1. Will
A will is a legal document that designates who should receive your assets after death. It is not just for the elderly. Everyone, especially those with dependent children, must have a will. This allows you to name guardians for any dependent children. Without a will, the courts decide what happens to the assets and who is responsible for the kids. Your Will also names your executor—the person overseeing and protecting your interests if your estate needs to go to probate. Generally, your Will distributes the assets you hold and names an executor—the person who will handle the distribution and other affairs involved upon your death.
Some states recognize a “holographic will” if you just want to scribble something on a napkin and call it done. I do not recommend that, however. What a nightmare you would leave for your family that could lead to horrendous costs. Having no Will at all is even worse.
2. Advanced Directive
Also known as a Medical or Healthcare Directive, this states what you want to have happen concerning extraordinary measures to keep you alive should you be terminal or permanently unconscious. Your Advanced Directive states whether you want artificial support for breathing and eating, such as a ventilator and feeding tube. The Advanced (Medical) Directive ensures your wishes will be respected at the end of life and provides clarity and guidance to family members.
3. Healthcare Power of Attorney
Your Healthcare Power of Attorney steps in if you cannot make medical decisions yourself. It names the person you want to make those decisions on your behalf. I highly recommend that you name up to five people in successive order to make sure there is someone there who is authorized to make these decisions for you.
4. Durable Power of Attorney
Sometimes referred to as Power of Attorney for Finances, this is the document by which you designate one or more persons to handle the financial aspects of your life, should you become temporarily or permanently unable to do so because you are mentally or physically incapacitated. We’re talking about simple things you might not think of but could become very problematic if you are unable to communicate—things like picking up your mail, paying your bills, filing your taxes, moving money from one account to another, filing for Medicaid, Medicare, or Social Security; or any number of other issues pertaining to your finances.
5. Revocable Trust
This document gives your designated heir(s) immediate access and control of the assets you wish to pass to them upon your death, without the need to transfer ownership. You don’t have to be rich or have vast assets to benefit greatly with a Revocable or Family Trust. A life insurance policy, checking account, house, or any asset of value merits establishing a revocable trust. In this document, for which you will likely name yourselves as Trustee(s), you also name the successive Trustee upon your death.
There are other important advantages to this type of trust. For one thing, unlike a Will that becomes a matter of public record, a Trust is private. You may have an issue in your family that you don’t want to disclose to the public at large.
Without a trust, an estate must go through probate, a costly and lengthy process in which the court administers the distribution of the estate (your assets). And if the estate holds property in multiple states, it will have to go through probate in each state. Having all of your assets in a trust avoids probate. This document does other things as well, but this may be the most important.
Locate an attorney in your area that specializes in wills and estate planning. Make the appointment. You will likely be given a list of information and specific items you will need to bring with you to your appointment. This attorney will be prepared to create these documents based on all of the information you have gathered, together with your state’s best practices and laws.
DIY
Wait. Hear me out. With the right resources, you may be able to do this work yourself in a way that is legal, thorough, and quite possibly much easier (and cheaper) than the attorney option above. And with that, I have more than likely caused some in my audience to pull their hair out while shrieking in terror.
Let me be clear: I am not suggesting you open up a blank page in Word and just start typing out what you think will (pun intended) be suitable. NO! You must have the proper legal documents for your state. You need legal counsel. You need basically all that in a reliable format where you simply fill in the blanks.
Below, you will find the only DIY option that, in my opinion, meets the criteria mentioned, plus a lot more. And all of that for one flat rate that’s less these days than a single meal in a nice restaurant.
I recommend Quicken WillMaker & Trust 2025 from Nolo Press, a highly regarded and reputable online legal organization specializing in helping ordinary folks like you and me handle our basic legal needs.
Quicken WillMaker & Trust 2025 Plus Bundle includes dozens of forms starting with the big five documents mentioned above and also practical forms you can use every day to help run your home and keep your family safe, including authorizations and agreements, promissory notes, limited powers of attorney, and child and elder care forms, final arrangements, and lots more.
Quicken WillMaker & Trust 2025 Plus Bundle is compatible with the laws in every U.S. state (except for Louisiana*, U.S. Territories; not compatible with Canada). And boy is it easy to use—just fill in the blanks. And you can revise it in the future as necessary, without another big legal bill.
To be clear, once you make the purchase, you will not receive anything by mail. Nolo Press will email you the authorization link to download the entire Quicken WillMaker & Trust bundle onto your computer’s hard drive.
Then, in the privacy of your own home, you will be able to customize the five documents mentioned above—all before tomorrow morning or at your own pace. When the time comes, you can depend on those documents to be correctly prepared, completely legal, and simple for those you will designate to be in charge of your finances, health, and possessions. The forms can be used multiple times for one year from purchase, so that other adults in your household can also create their legal documents.
If you’re like me, you probably have a few things—okay, maybe a lot of things—scattered around that you need to keep track of. From accounts and passwords to your pets’ favorite snacks and the names of your kid’s teachers, life can feel like one big puzzle. That’s where The Nokbox comes in, and let me tell you, it’s like having a personal assistant who helps you organize everything that matters—before, during, and after life’s big transitions.
The Nokbox helps you store important information about your accounts, possessions, social media profiles, family details, pets, and even your personal history. If you haven’t yet gotten around to organizing your estate plan (no judgment here!), this is a great way to start. It doesn’t replace having a formal plan, but it’s definitely a step in the right direction. Plus, it’s an excellent resource for managing your everyday life, ensuring that all your bases are covered for those you love most.
*Because of Louisiana’s strict requirements, relying on a generic “Last Will and Testament” form is not wise. Failure to get the form right will result in an invalid document or lead to estate litigation due to Louisiana’s unique civil law system.
Nolo does offer this simple Willmaker for Louisiana residents that has been prepared and vetted by a team of attorneys. If you live in Louisiana and also wish to create your Durable Power of Attorney and Health Care Directive, see a Louisiana lawyer for help.
Everyday Cheapskate participates in the Amazon Services LLC Associates Program, an affiliate advertising program designed to provide a means for us to earn from qualifying purchases, at no cost to you.
https://www.everydaycheapskate.com/wp-content/uploads/legal-documents.jpg8331313Mary Hunthttps://www.everydaycheapskate.com/wp-content/uploads/EC-Logo-by-Mary-Hunt-Tagline-Trimmed.pngMary Hunt2022-06-28 00:01:002025-01-18 17:39:105 Essential Legal Documents Every Adult Must Have to Protect Your Family
A tension rod is one of the world’s most underrated tools. Used well, they can perform a variety of functions to corral clutter keeping one’s household spaces beautifully organized. Typically used to hang curtains, there are so many clever ways to put tension rods to good use. They’re easy to install and won’t leave marks on walls or in drawers, cupboards, and closets. And best of all? They’re surprisingly inexpensive—cheap!
What is a tension rod?
Typically used to hang a shower curtain, a tension rod is a metal or plastic rod that uses a spring mechanism to hold itself in place, as long as it’s positioned between two smooth, level surfaces. This type of rod does not require any hardware to install or specific know-how. It’s easy for almost anyone to install and use.
Tension rods work best on narrow windows and spaces, typically up to 48-inches. In wider spaces, a rod with a smaller diameter tends to sag in the center. Using a rod with a larger diameter (think, shower curtain rod), can help you span wider areas without sagging.
What size tension rod do I need?
You should use a rod that’s longer than what you need when fully expanded. For example, if you need to fill a 24-inch space, get a rod that can expand up to say 28-inches. Tension rods always indicate on the label or package the minimum and maximum length. Make sure you measure the space you’re planning to install the tension rod before you head for the store or website. Don’t guess.
Installing simple tension rods inside a drawer can keep things like spices or other food storage containers, clothes items, or desk supplies in place within a drawer.
Once you set tension rods in place, you can change your mind no problem. They are easily rearranged until you get it just right.
Make a Shelf
Image: Joe Lingman
By adding a tension rod inside a cupboard you can make good use of its vertical space.
To instantly double your spice cupboard’s capacity, all you have to do is put a tension rod at the back above the very back top row of spices. That makes the perfect space for your smaller spice jars, and you’ll be able to see your entire collection at once. Worried about balancing? Install two or more tension rods close together to make that back top row more stable. So easy!
Organize Accessories
Image: Pinterest
Install a tension rod in any nook or cranny where you have two secure parallel solid surfaces. Make sure the tension rod is secure.
Next, add simple S-hooks and let the organization begin!
You can hang all kinds of accessories such as purses, jewelry, scarves, belts, bags, hats, and more!
Double Undersink Space
Image: Pinterest
Is that mess under the sink driving you nuts? It’s so hard to see what’s in there, right? Here’s a very easy way to fix that. Get a sturdy tension rod.
Position the rod high enough so that when you hang spray bottles by their sprayer arms, they don’t interfere with other supplies and equipment you place on the floor of the cabinet. Now, organize everything to see how that works. If the rod is too low or perhaps too high to make this work well, adjust its location until it is perfect.
Make a Paper Towel Holder
Image: Pinterest
Can’t find a decent paper towel holder that’s the perfect size, will tuck away out of sight but not fall off every time you dare to use it? Here’s your solution.
Install a tension rod in the cabinet, vanity, or other location of choice where you have those sturdy side walls. Now slip on the paper towel roll as you change the toilet paper in the bathroom. So easy.
To change the roll, loosen the rod tension, slip off the old roll, and replace it with a new roll. Reinstall the rod and you’re good to go.
Resources
Tension rods are available in many places, such as dollar stores, Target, Walmart, Home Depot, and Lowes. They come in many sizes from as small as 12-inches up to 12 feet! As you shop, make sure you are matching quality with need.
Here are just a couple of the many online options:
Everyday Cheapskate participates in the Amazon Services LLC Associates Program, an affiliate advertising program designed to provide a means for us to earn from qualifying purchases, at no cost to you.
https://www.everydaycheapskate.com/wp-content/uploads/tensionrod3.jpg8331310Mary Hunthttps://www.everydaycheapskate.com/wp-content/uploads/EC-Logo-by-Mary-Hunt-Tagline-Trimmed.pngMary Hunt2022-06-17 09:13:352024-02-29 07:02:46Clever Ways to Use Inexpensive Tension Rods to Organize Small Spaces
“Sorry, my place is such a mess!” If you have to pull out that one every time you welcome friends or family into your house, it might be time to get organized. Marla Cilley, known as The Flylady, calls that C.H.A.O.S. … Can’t Have Anyone Over Syndrome!
Organization is an important aspect of any home. And we’re quite familiar with the rule: A place for everything and everything in its place. Right? The challenge is finding that place and then actually following through by making sure that place is regularly occupied!
https://www.everydaycheapskate.com/wp-content/uploads/organization-before-and-after.jpg8331310Mary Hunthttps://www.everydaycheapskate.com/wp-content/uploads/EC-Logo-by-Mary-Hunt-Tagline-Trimmed.pngMary Hunt2022-03-08 07:06:562023-12-08 09:09:1718 Clever Home Organization and Storage Tips, Tricks, and Hacks
I love to cook. And I enjoy inviting guests for dinner parties or more casual meals. What I hate is the big ugly mess that happens in the kitchen as I’m cooking and concentrating on getting everything on the table. My kitchen is right out there in the open for all to see, which is why I’ve come up with strategies to cook and keep the kitchen clean at the same time.
Begin with the end in mind
It’s a concept I learned from reading The 7 Habits of Highly Effective People by Stephen Covey. The first habit: begin with the end in mind. This has helped me so much, especially when setting out to cook and keep my kitchen clean at the same time.
I envision the meal all prepared, on the table with me enjoying it along with my guests. I see the kitchen clean, the sink empty, the stovetop splatter-free and shiny clean. Coffee and dessert are all sitting out, ready to be served at the appropriate time. Right there, a certain sense of calm and peace comes over me because I know where I’m going with all of this! I have a plan and a purpose.
Start clean
This means an empty dishwasher, empty, clean, and shiny sink, and cleared-off clean counters. Starting out with these three areas neat and tidy makes it doable to keep the kitchen clean through the entire process. You won’t believe the difference this makes!
Prep sink
This is an old restaurant trick and it is brilliant. Fill a sink or large bowl with hot water and a couple of squirts of dishwashing liquid. This is where you will be depositing cooking utensils as you are done with them—whisks, spatulas, spoons, tongs. Just drop them in the prep sink to soak. If you need it again, simply lift it out and give it a quick rinse and you’re good to go.
As you have downtime, for example when onions are sauteing or you’re waiting for water to boil, give all of the soaking utensils a quick scrub and rinse and put them back into the drawer ready to be used again. Empty and refill the prep sink as needed.
Caution: Anything that touches raw meat should not be dumped into the prep sink but rather cleaned and handled separately. Also, avoid putting knives into the prep sink for safety reasons. This is not the time you need to deal with cutting your hand on a sharp blade.
Garbage bowl
My garbage bowl is big and bright orange. That is by design because I want to see it and know exactly where it is at all times while I’m prepping and cooking.
My garbage bowl has a single purpose in my kitchen—to collect everything headed for the trash and recycle bin. I don’t want to be running back and forth to the kitchen trash area as I’m chopping, prepping, opening.
I keep my garbage bowl within arm’s reach no matter where I am in the kitchen. It goes with me as I’m cooking.
Everything to be disposed of goes into the garbage bowl—cans, shells, lids, cuttings, bones, fat, peelings, and so forth. If it’s not part of the meal and will be discarded, it lands in the garbage bowl to be separated later.
A garbage bowl saves me time, steps, and movement. It keeps me on task because it is not unusual for me to think of a dozen other things as I dash to the kitchen trash area with an empty can or onions skins. Big Orange keeps me focused and on task.
Also known as “prepping,” this means getting ingredients all chopped, cut, peeled, sliced, measured, and otherwise prepared first. Before the actual cooking begins. This is not easy for me because my nature is to jump in, get things done, and clean up later. But I have learned to befriend the process because the results are spectacular.
If you chop, measure, and portion out what you need ahead of time, you’ll reduce the mess created from a frantic scramble to measure and prep. Set out plates or small bowls (easy to wash up in the prep sink) that will contain all your ingredients as you go.
Pre-treat
Pre-treating is an amazing concept that makes it easy to semi-clean as you cook. It makes the final cleaning up—while the roast is roasting, the bread is baking, the salad is chilling—a breeze! My pretreatment is a wine bottle that sits at my sink at all times that is about 95% water and 5% Blue Dawn dishwashing liquid. It’s pretty because it has no labels.
My pretreatment bottle has become part of my kitchen decor. And I use it with abandon, refilling as needed. It could just as easily be contained in a spray bottle and kept under the sink.
I use this to pretreat just about anything as soon as it’s cool enough to do so. If a dish or pan cools off too much, things can start to cake on and become really tough to clean. And ugly! So I give these items a generous splash with this solution and let them soak until I have a few moments to get them into the dishwasher or I finish by handwashing. The goal is to get things cleaned and back into their storage spot.
Clean spills on the spot
Mostly I’m talking about the cooktop. Spills and splatters can quickly derail an otherwise clean kitchen. A fresh spill is a thousand times easier to clean than one that has become cooked- or baked-on. If you spill it, clean it up right away. This includes the on the floor, counter, and backsplash, too. A good splatter screen will help immensely with keeping the cooktop clean.
https://www.everydaycheapskate.com/wp-content/uploads/clean-kitchen-1.jpg8731310Mary Hunthttps://www.everydaycheapskate.com/wp-content/uploads/EC-Logo-by-Mary-Hunt-Tagline-Trimmed.pngMary Hunt2022-02-17 00:55:172023-12-13 13:29:38How to Cook and Keep the Kitchen Clean at the Same Time
As you know—and only because I write about it so much—I may as well be president of the Artisan-In-Five fan club for how the book and method of making homemade bread have rocked my world.
Back when I was first learning to make homemade artisan bread (it is so easy), I decided I needed bread bags not only to store partial loaves, but also for presentation. Let’s just say that when you bake bread, you have a lot of friends.
Turns out bread bags are quite inexpensive, purchased in bulk. And when I say bulk, I mean a case of 1,000 bread bags. I did. I bought a case of 15-inch, gusseted bread bags.
As I look back, I’m not sure what I was thinking. Apparently, the idea of 1,000 loaves of bread ever coming out of my kitchen was overshadowed by a (then) bargain-basement price of large bread and bakery poly bags when purchased in bulk. These slightly smaller bags are equally useful, for about half the price.
While I continue to bake bread as needed by my household of two people, I use one, maybe two, bread bags a week for bread. But for dozens of other uses around the house? These bags are the best thing since, well, sliced bread! Read more
https://www.everydaycheapskate.com/wp-content/uploads/120215image.jpg416555Mary Hunthttps://www.everydaycheapskate.com/wp-content/uploads/EC-Logo-by-Mary-Hunt-Tagline-Trimmed.pngMary Hunt2021-12-21 03:26:102020-08-27 10:41:4019 Clever Ways to Use Bread Bags that Have Nothing To Do with Bread
I have a theory that most of us would be more than willing to let go of the stuff that’s cluttering our homes if we knew these things would serve a worthwhile cause or help someone else—the good things, kitchen things, the highly useful possessions that we just don’t use. Check out these worthwhile solutions for most households’ seven biggest clutter problems.
Common Clutter
1. Vases, baskets, containers
And anything else that held flowers and gifts you have received. If they’re cracked or broken, no one wants them. Toss them.
For the rest, take those which are in “like-new” condition to the closest flower shop to be recycled. You’ll be gratefully received.
Keep this in mind: As you have possession of these things, they may appear to be more valuable and desirable than they really are. Once out of sight, they will become quickly out of mind. Within hours you’ll completely forget what it was you threw out.
2. Excess mugs, dishes, bakeware
No matter how pretty or potentially useful, if you do not use those items at least once each year, sell them to an antique dealer. Or give them to a local thrift shop or the church’s annual rummage sale.
If you’re fairly certain your items are generally desirable by your neighbors and local community, offer them on your community’s Freecycle.org site.
Knowing someone else will love and use these things should ease the pain of separation.
https://www.everydaycheapskate.com/wp-content/uploads/drawer-of-coffee-mugs.jpg8331310Mary Hunthttps://www.everydaycheapskate.com/wp-content/uploads/EC-Logo-by-Mary-Hunt-Tagline-Trimmed.pngMary Hunt2021-10-05 04:58:322024-02-02 18:36:107 Common Clutter Problems and How to Solve Them
If the paper monster has you buried under an avalanche of receipts, bank statements, ATM slips, investment records, paycheck stubs, and bills—the good news is you can probably throw most of it away without worry when you have a simple record keeping routine.
But before you fire up the shredder, you need to know what to keep and for how long.
Toss all you can
Monthly
Once you have recorded the amounts and reconciled your bank and credit card statements, you can shred ATM receipts, bank deposit slips, credit card receipts, and sales receipts at the end of each month.
Exception: Keep receipts for purchases that may be tax-deductible, those that involve a warranty, and any item whose replacement cost exceeds the deductible on your homeowners’ or renters’ insurance.
https://www.everydaycheapskate.com/wp-content/uploads/papers-tax-records-1.jpg8331310Mary Hunthttps://www.everydaycheapskate.com/wp-content/uploads/EC-Logo-by-Mary-Hunt-Tagline-Trimmed.pngMary Hunt2021-08-16 00:04:332021-05-12 12:55:06How to Store Important Documents and How Long To Keep Them
Many outdoor cleaning and storage solutions can be rather expensive, especially when compared to do-it-yourself or homemade alternatives. Here some of my favorite cleaning tips and storage solutions for the garage and patio that will give you the results you need without the costs you don’t.
Chalky Plastic White Chairs
If your white plastic lawn furniture has taken on that “chalky” dull, ugly finish, it’s disheartening when you’re not in a position to buy new ones. Good news! You may not have to. It’s going to take some arm muscle and a bit of time, but you can get rid of that chalky finish, which is evidence that the plastic has begun to degrade to get at least another season or two out of that furniture.
Caution: Do not go for steel wool or scouring powder if you don’t want to scratch up your chairs for good.
Instead, get out the baking soda and that can of car wax. First, wet down the chair with a soft wet sponge. Next, Liberally sprinkle baking soda all over it and rub the wet baking soda/water mix to cover the entire chair.
You may find it easiest to sprinkle baking soda on the wet sponge before rubbing down the chair. Either way, the baking soda paste will work some magic on the chalky finish. A good water rinse job, towel dry, and then a dab of car wax rubbed in with a soft cloth, then once dry, buffed to a shiny finish will seal the plastic again.
You’ll be amazed at how you’ve prolonged the life of your furniture!
Charcoal Starter
After the food has been cooked on the barbecue, don’t leave coals to burn out. With a shovel, scoop them up into an empty can and smother them by placing a non-flammable lid over the can. They can be used again.
https://www.everydaycheapskate.com/wp-content/uploads/white-plastic-patio-chairs.jpg8331310Mary Hunthttps://www.everydaycheapskate.com/wp-content/uploads/EC-Logo-by-Mary-Hunt-Tagline-Trimmed.pngMary Hunt2021-05-29 08:50:582023-08-30 12:55:31Quick and Easy Outdoor Cleaning and Storage Tips You Can Use
This website uses cookies to improve your experience while you navigate through the website. Out of these cookies, the cookies that are categorized as necessary are stored on your browser as they are essential for the working of basic functionalities of the website. We also use third-party cookies that help us analyze and understand how you use this website. These cookies will be stored in your browser only with your consent. You also have the option to opt-out of these cookies. But opting out of some of these cookies may have an effect on your browsing experience.
Necessary cookies are absolutely essential for the website to function properly. This category only includes cookies that ensures basic functionalities and security features of the website. These cookies do not store any personal information.
Any cookies that may not be particularly necessary for the website to function and is used specifically to collect user personal data via analytics, ads, other embedded contents are termed as non-necessary cookies. It is mandatory to procure user consent prior to running these cookies on your website.
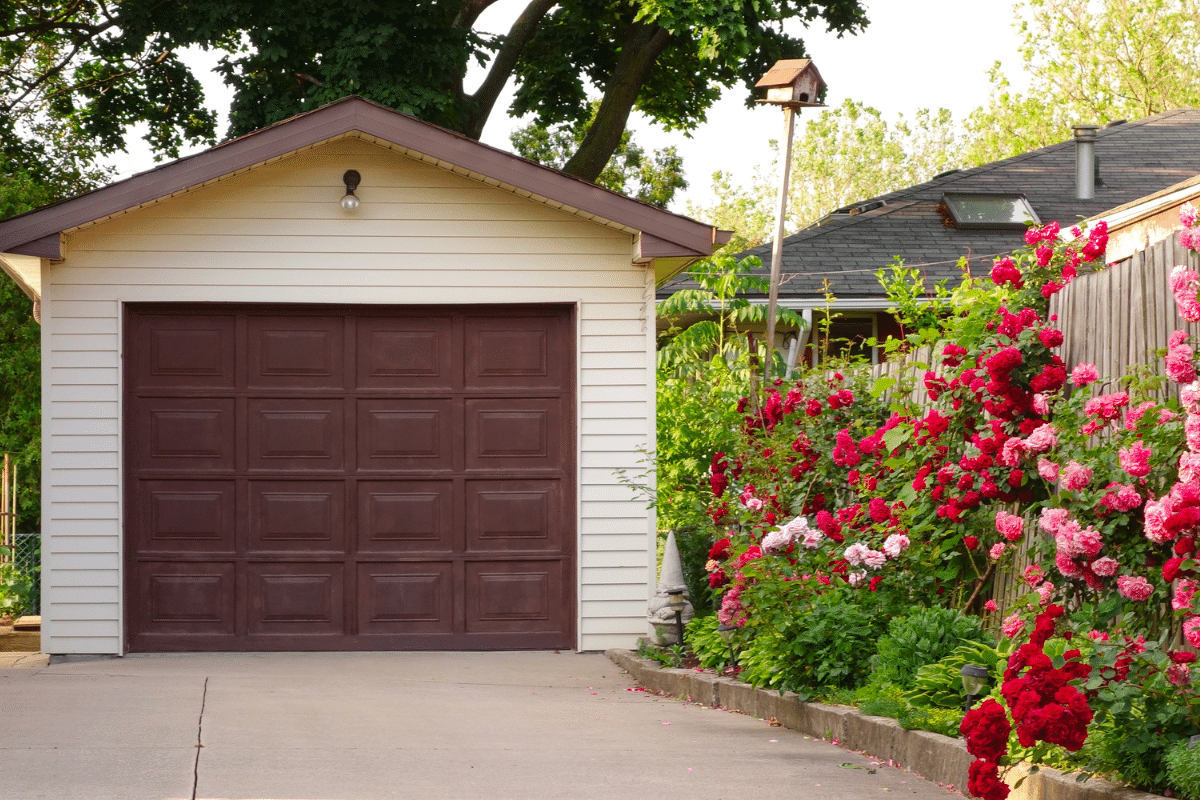
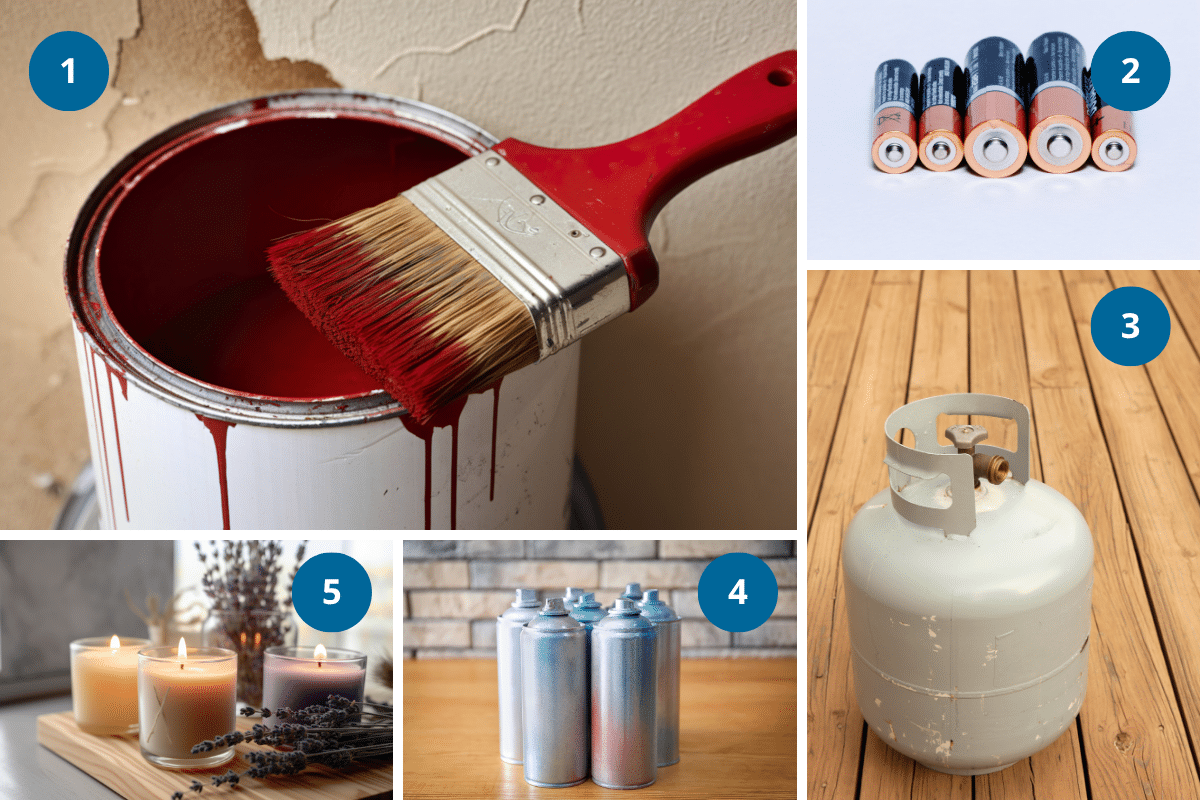

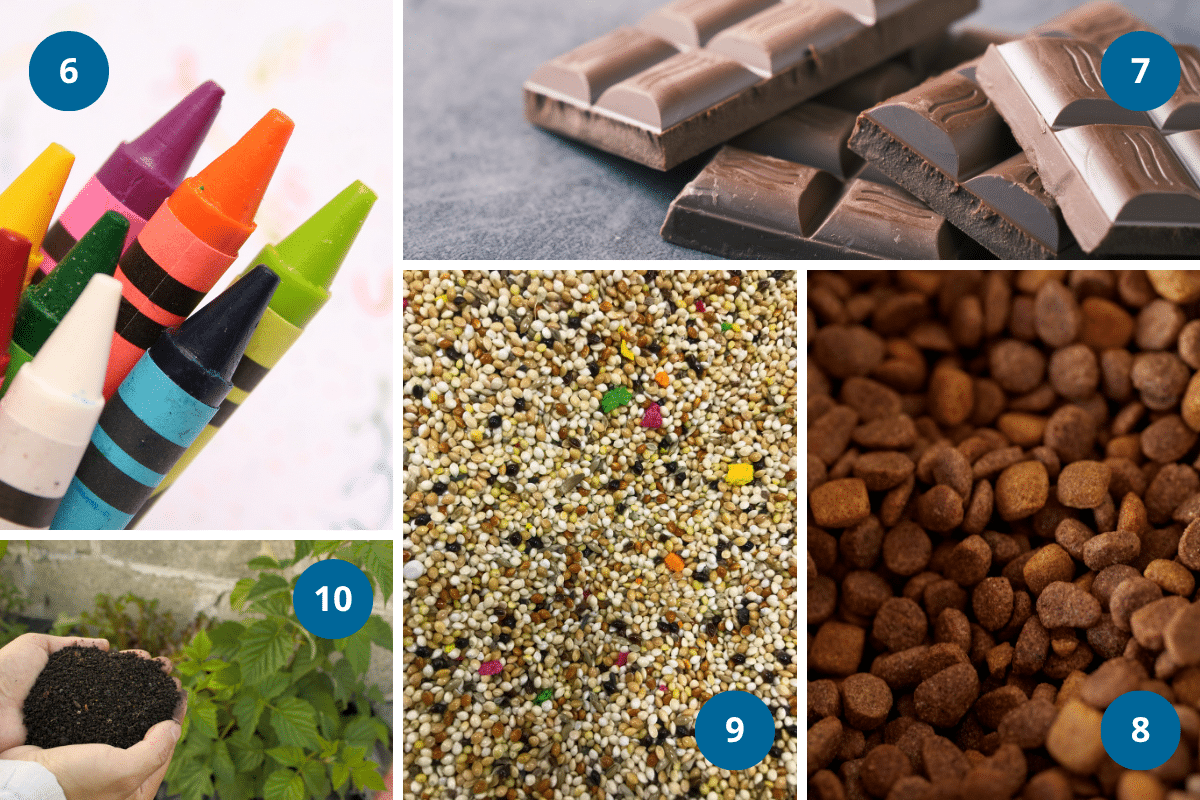
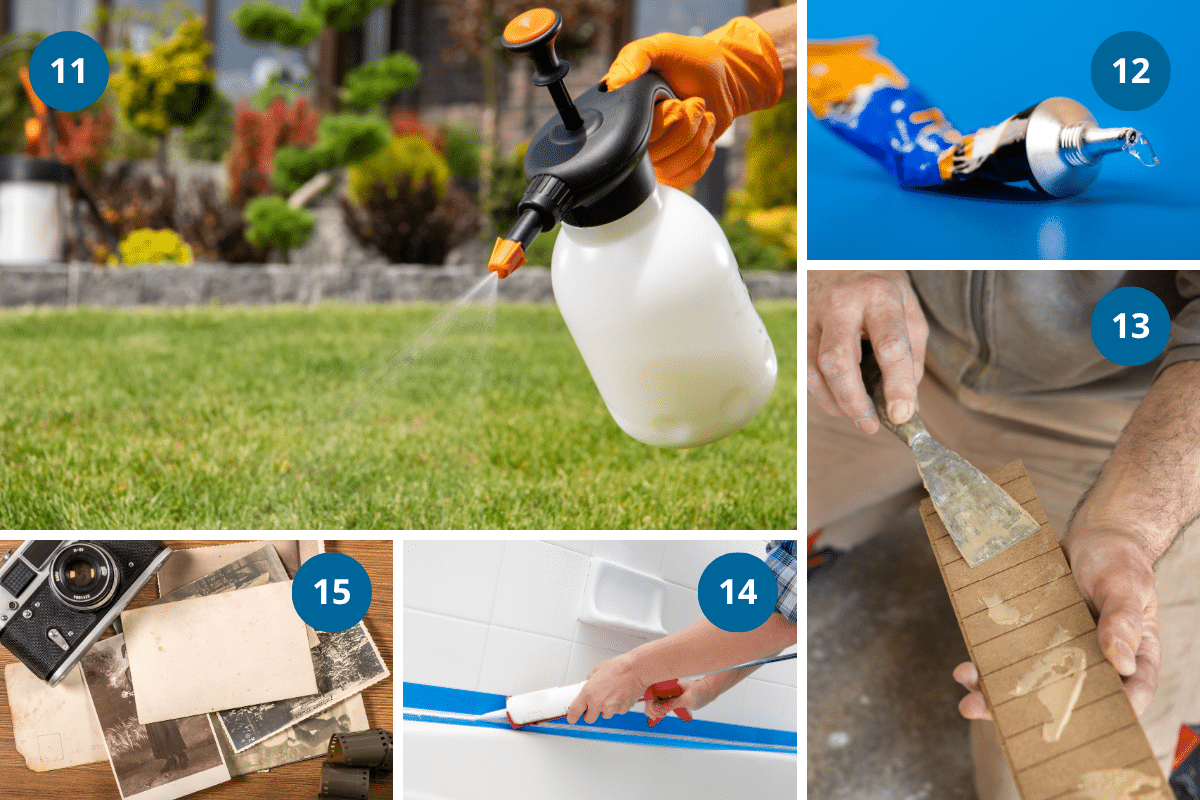
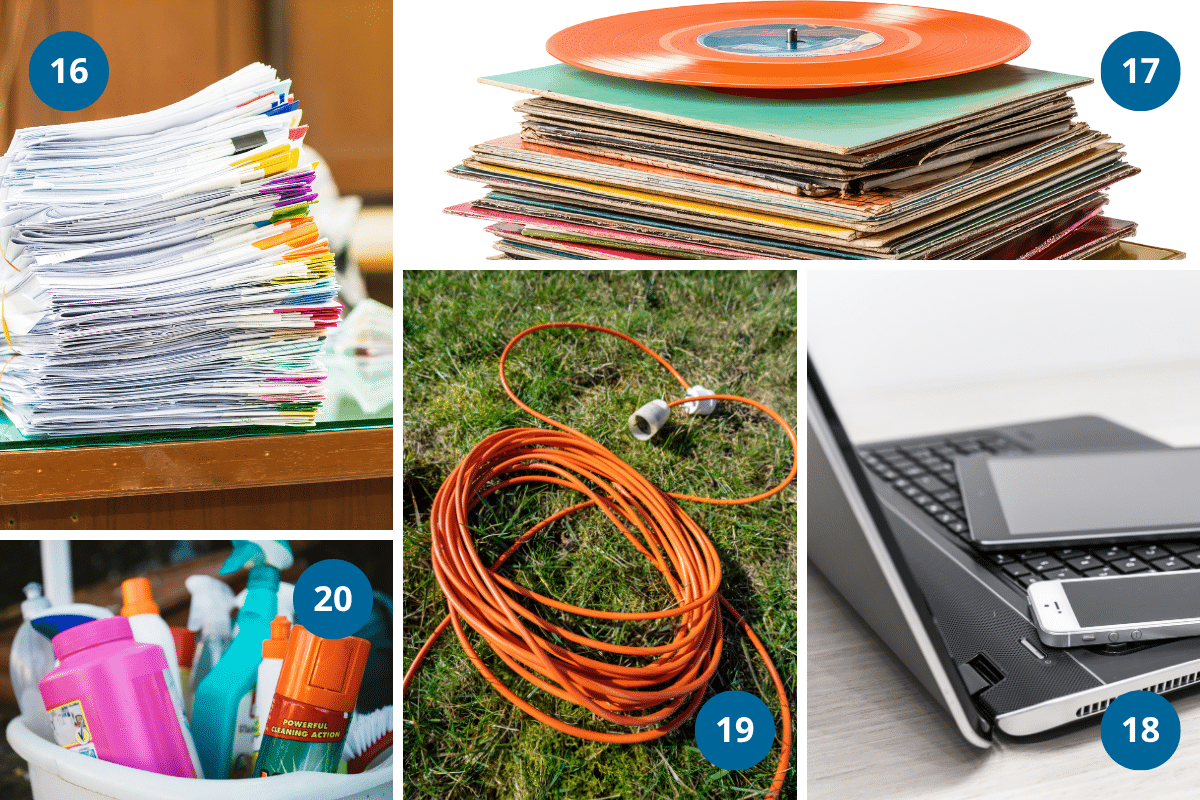


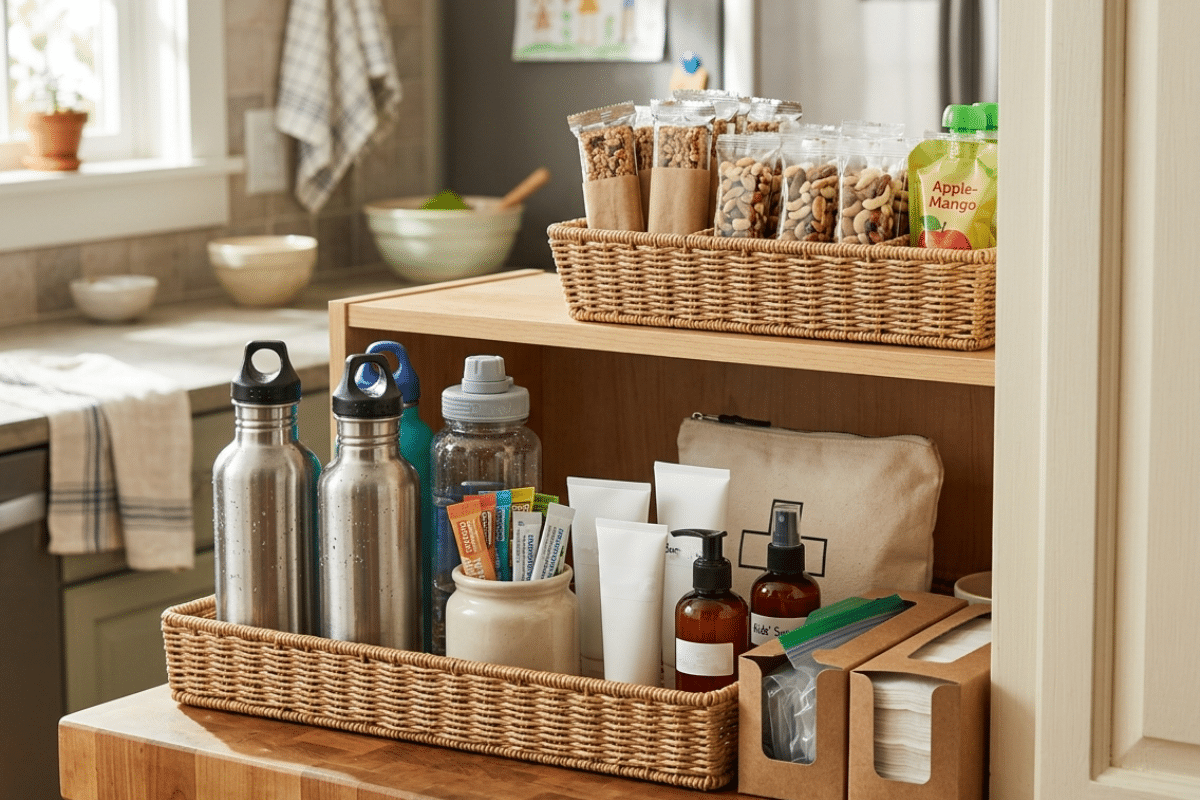


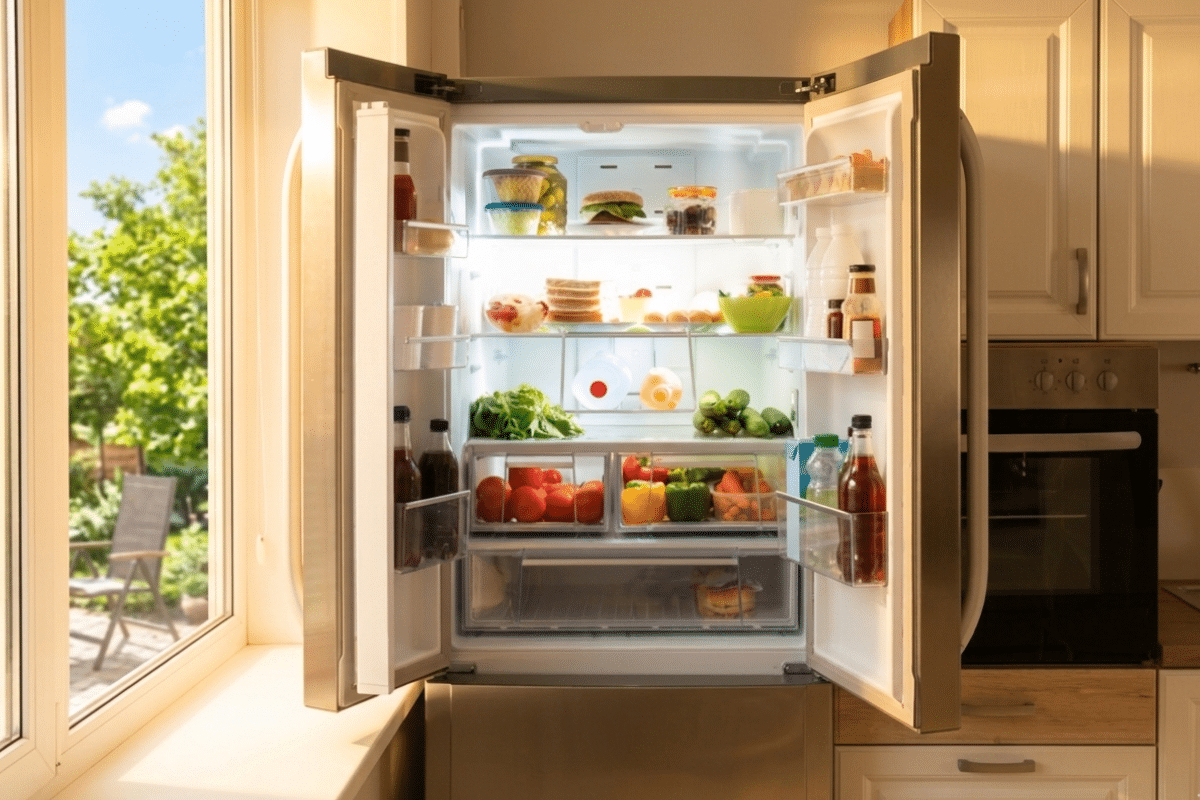
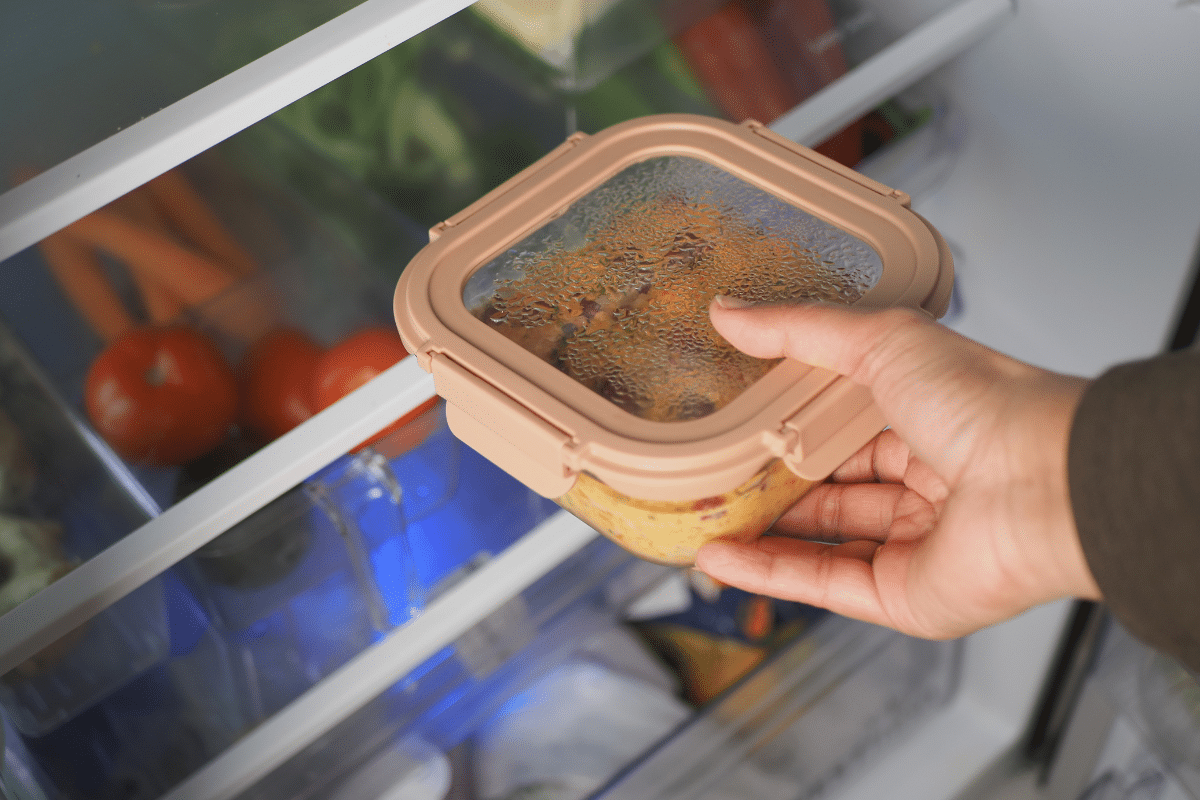
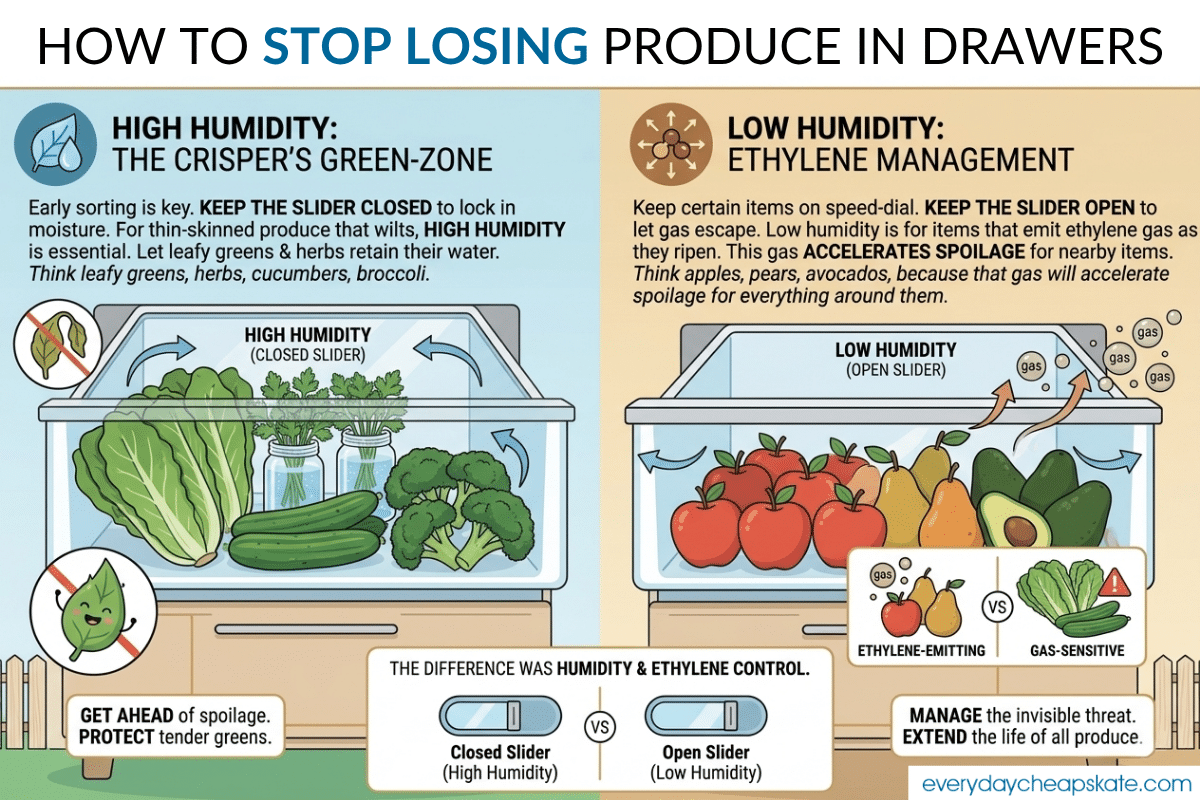


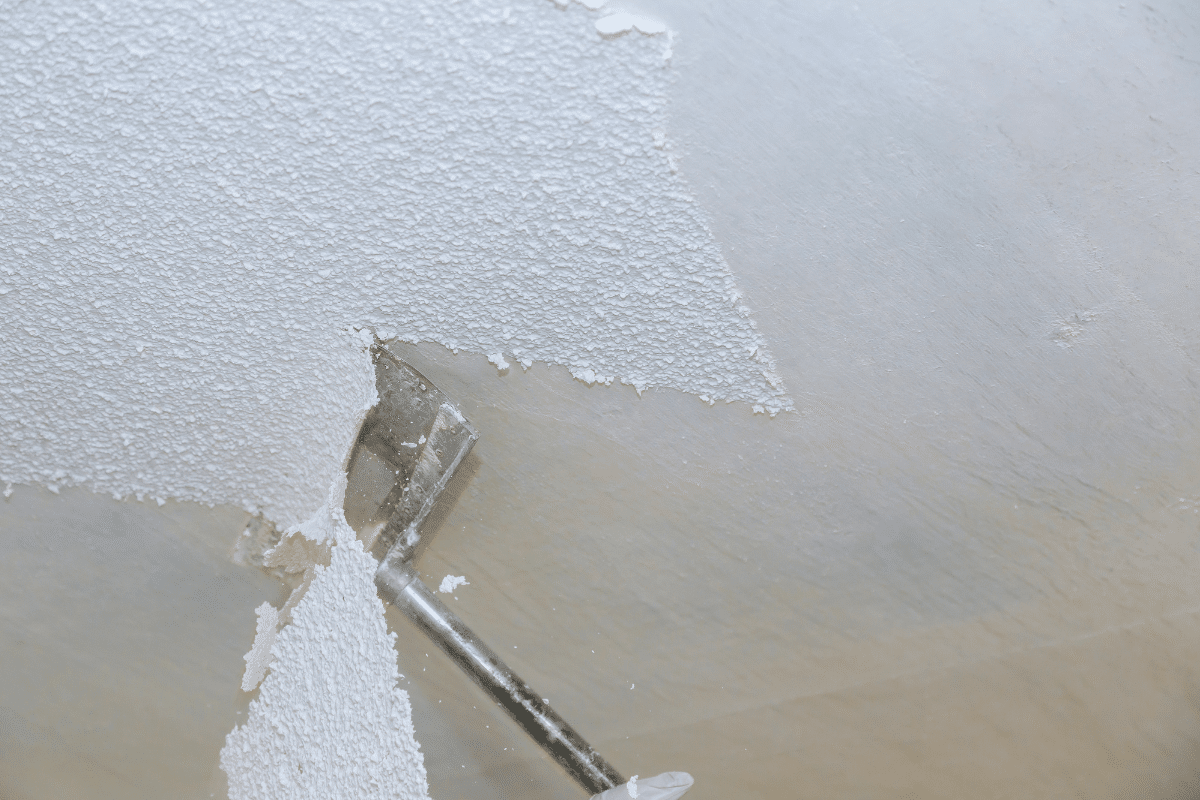
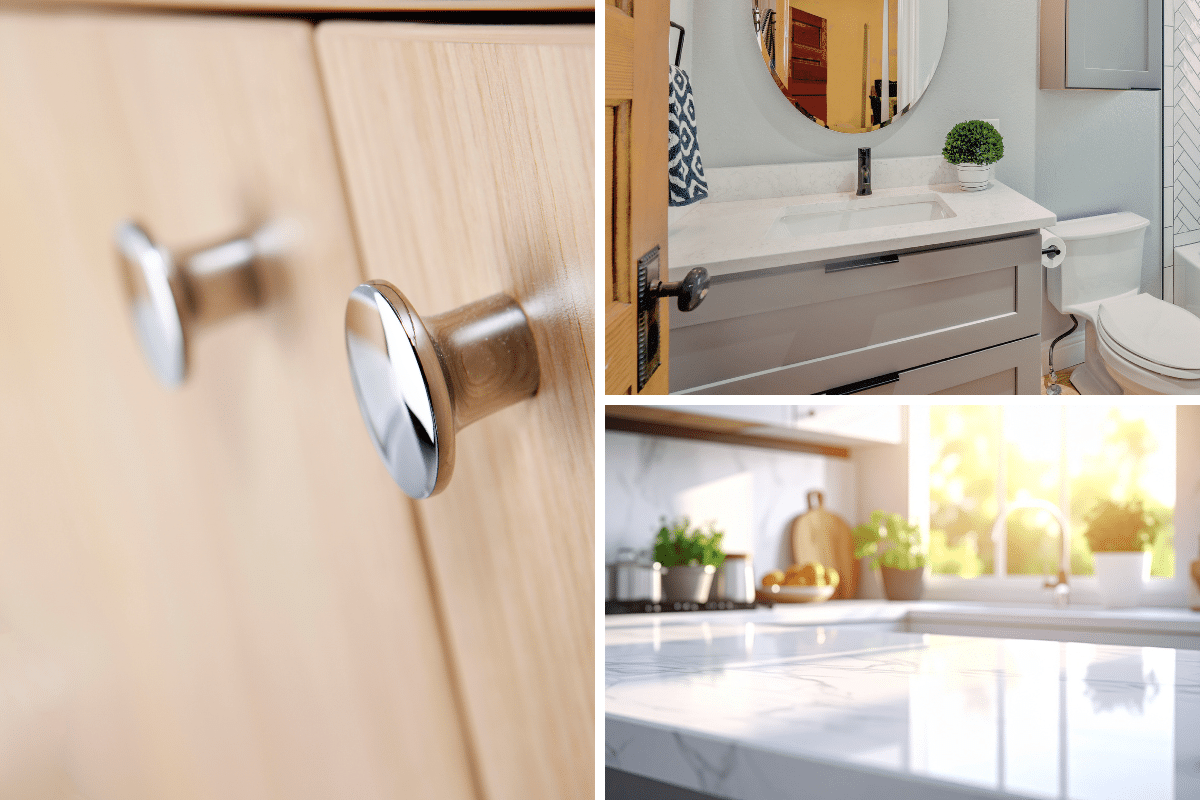

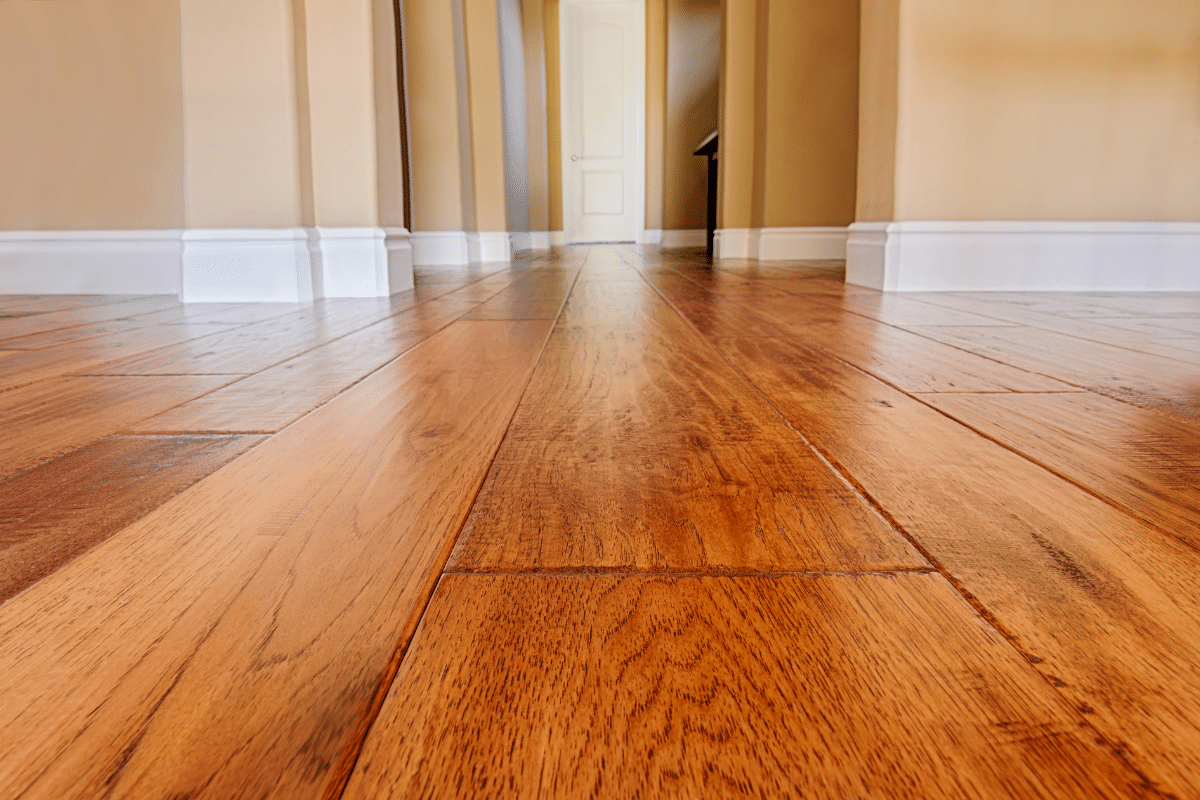

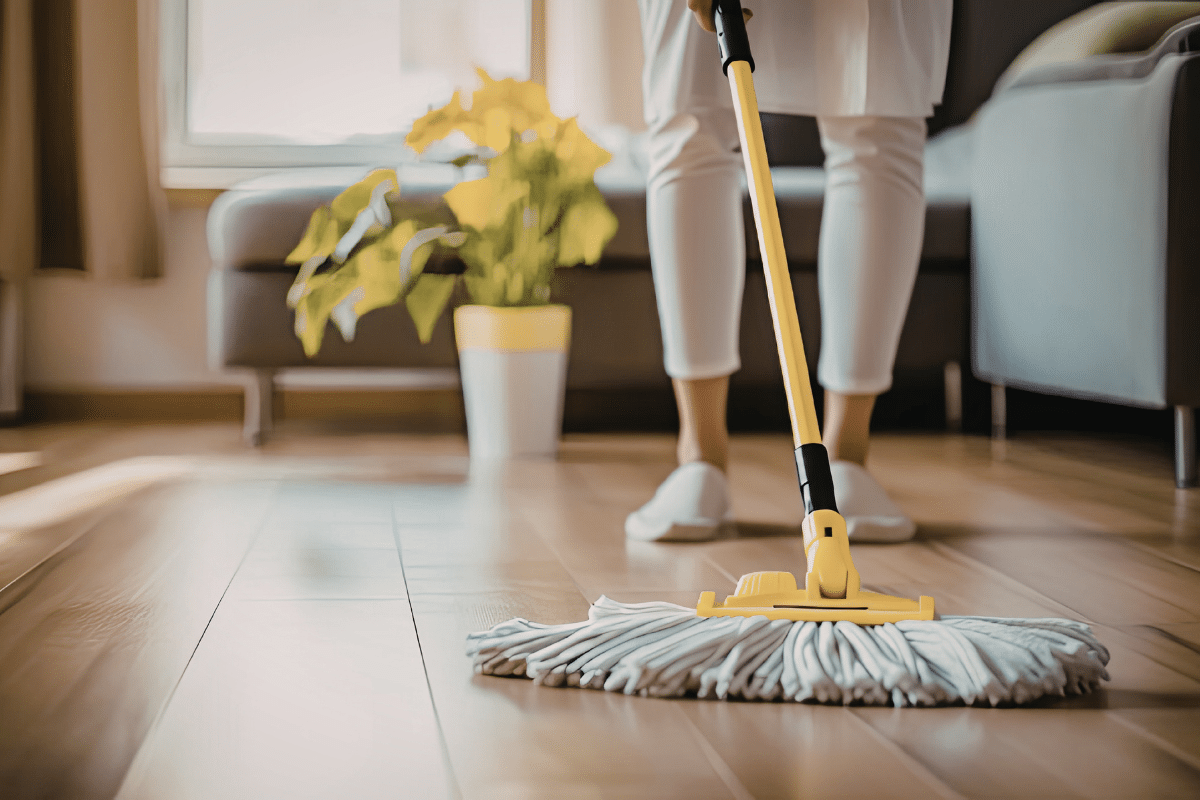


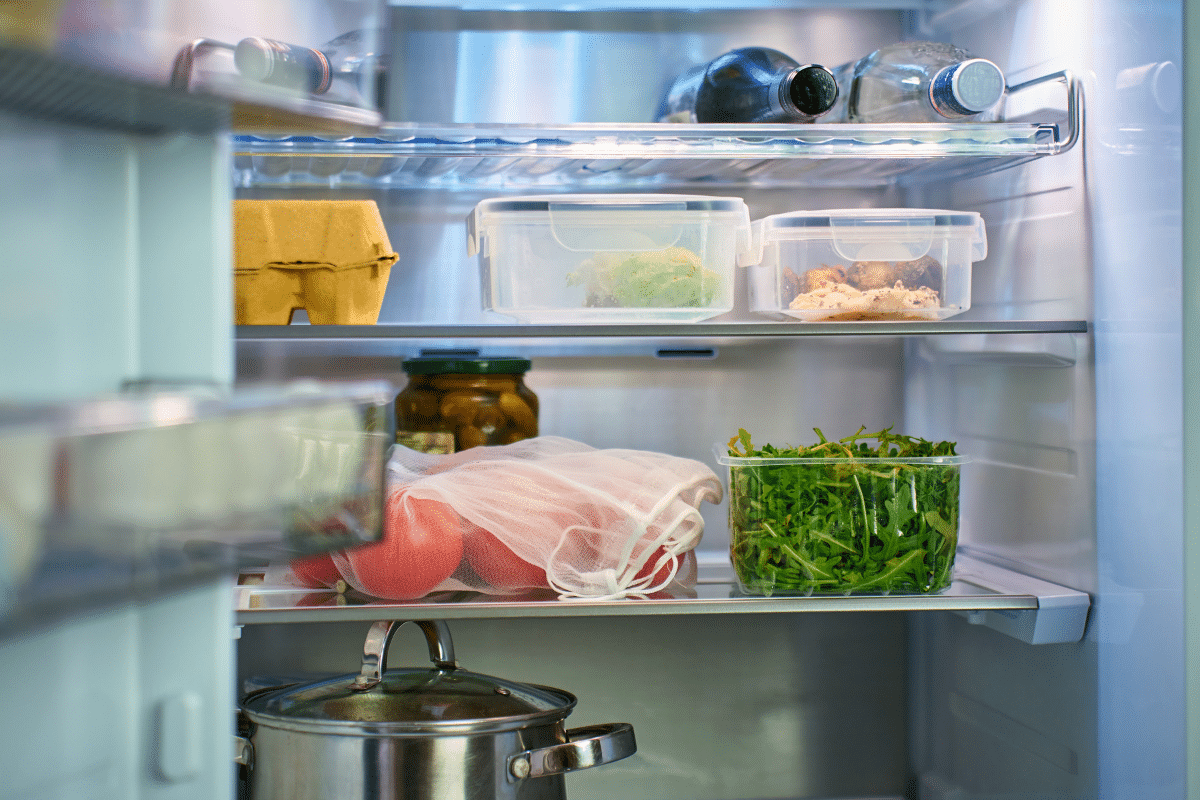
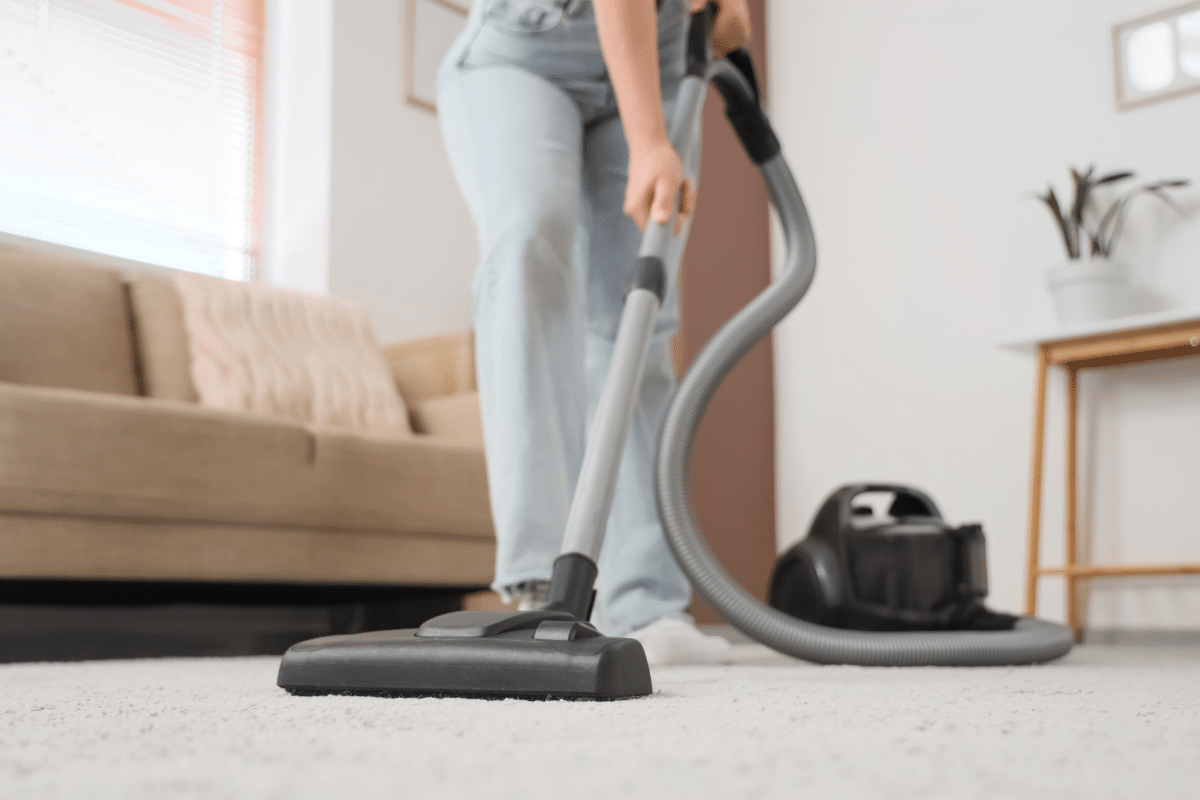
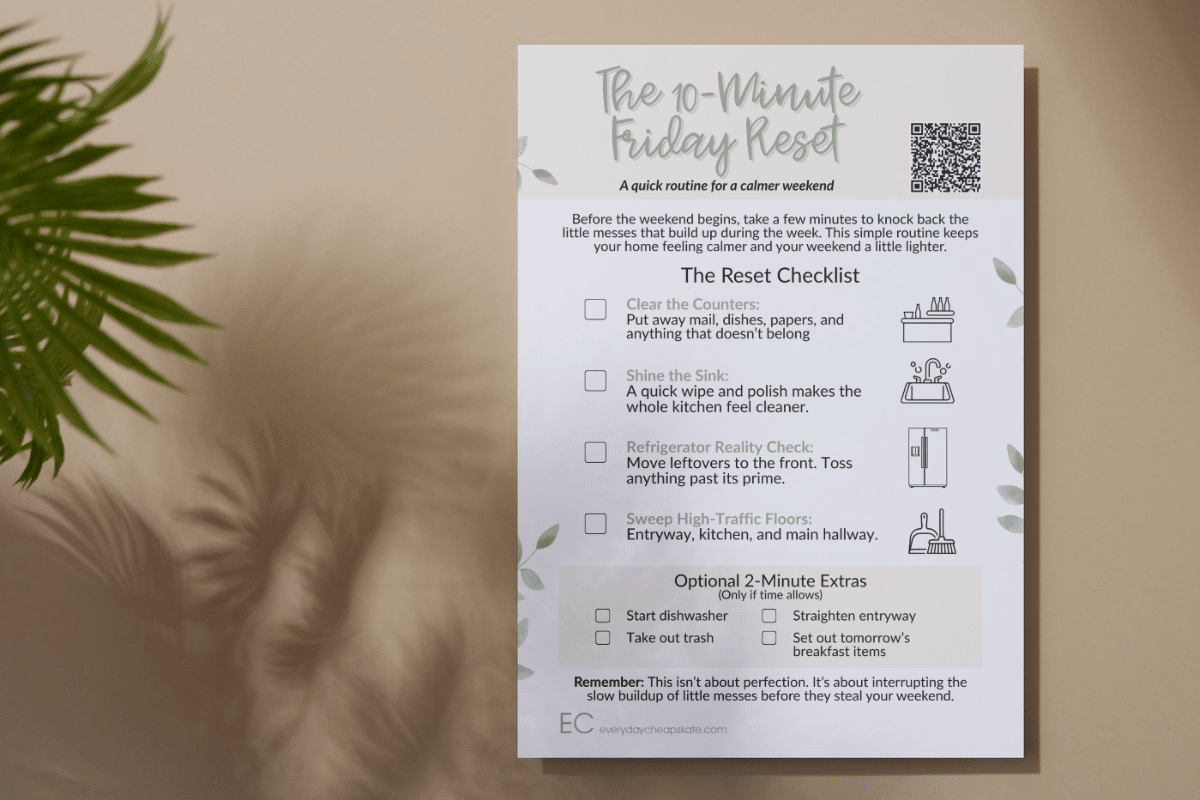


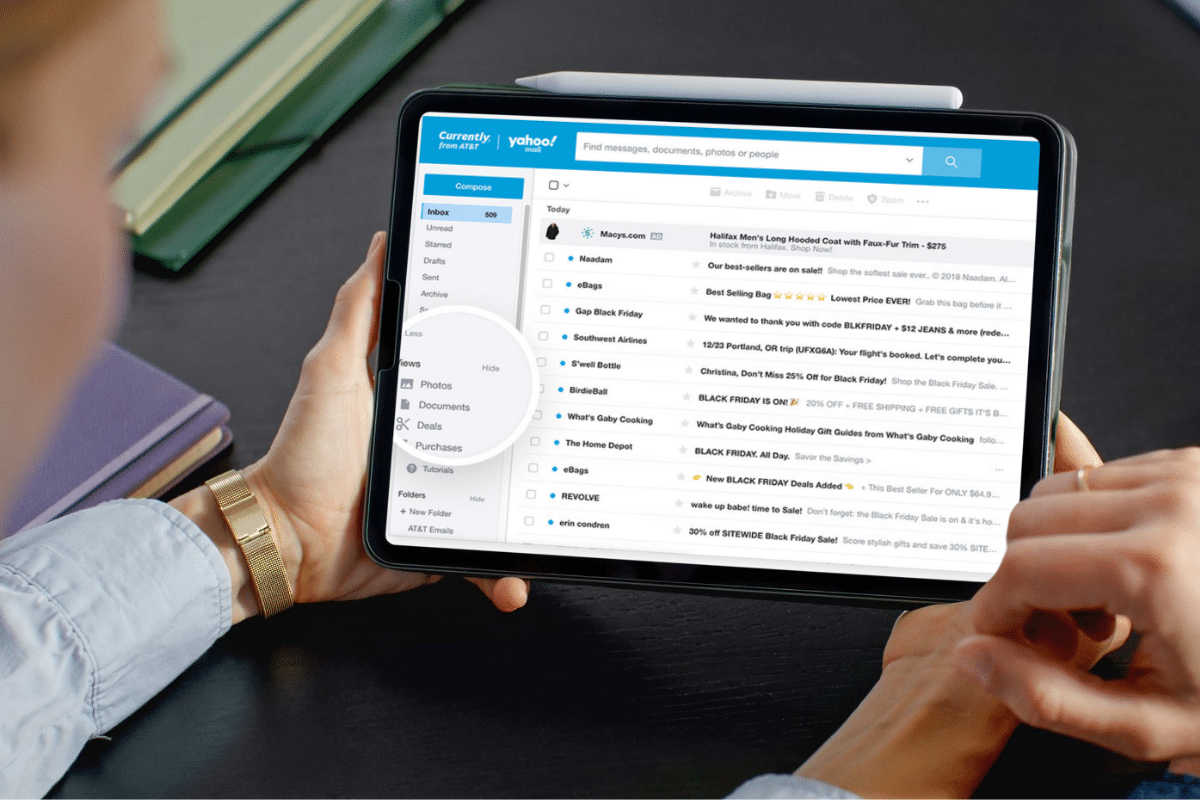


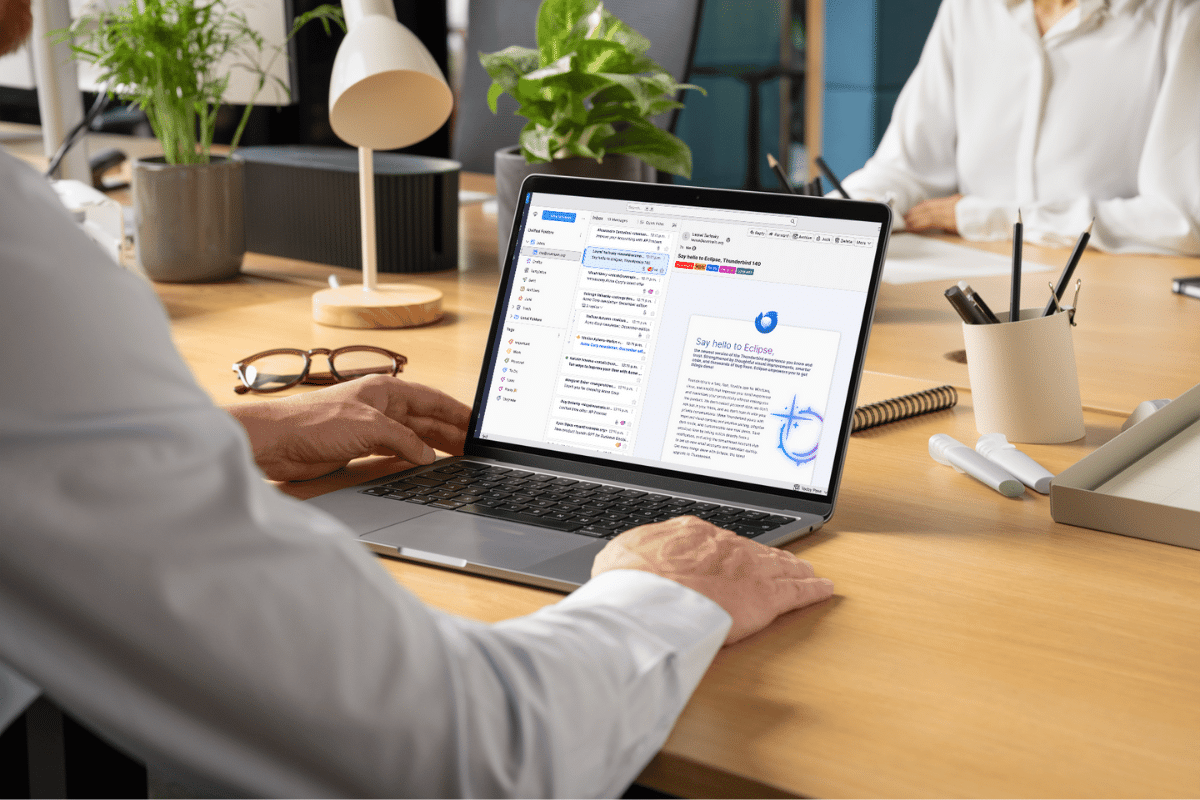


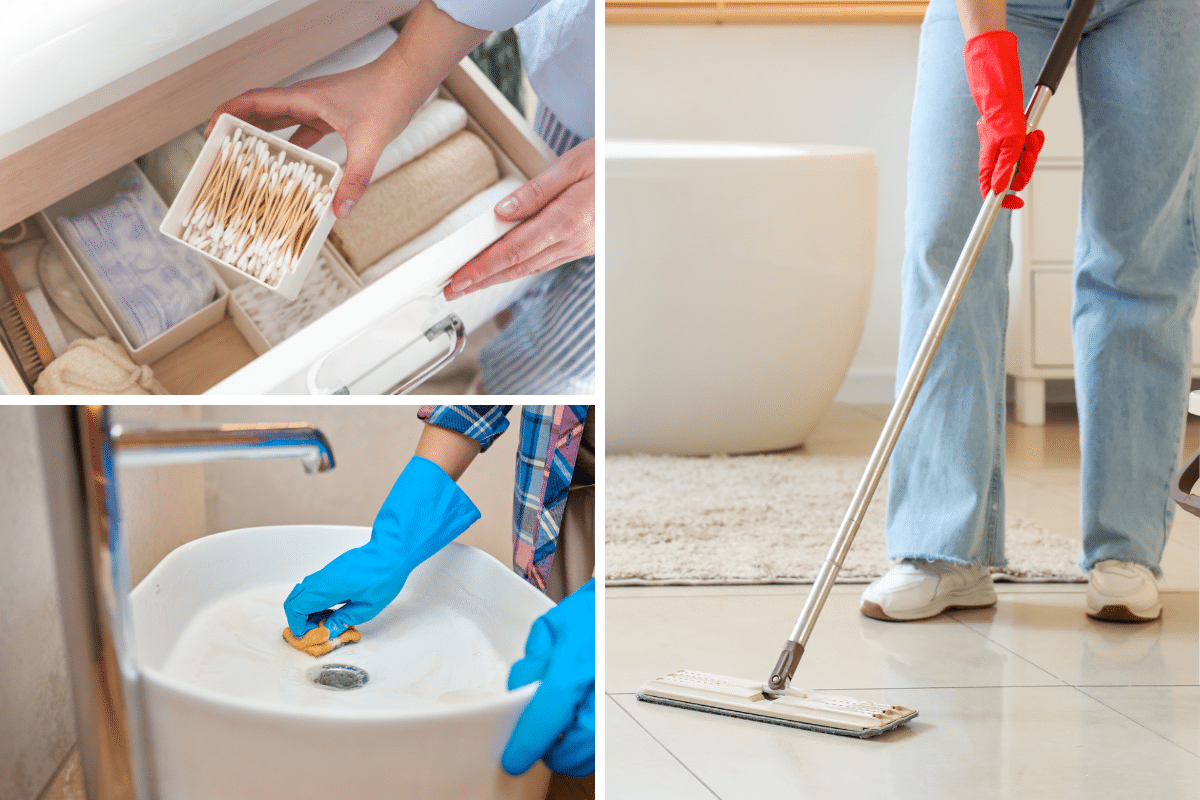
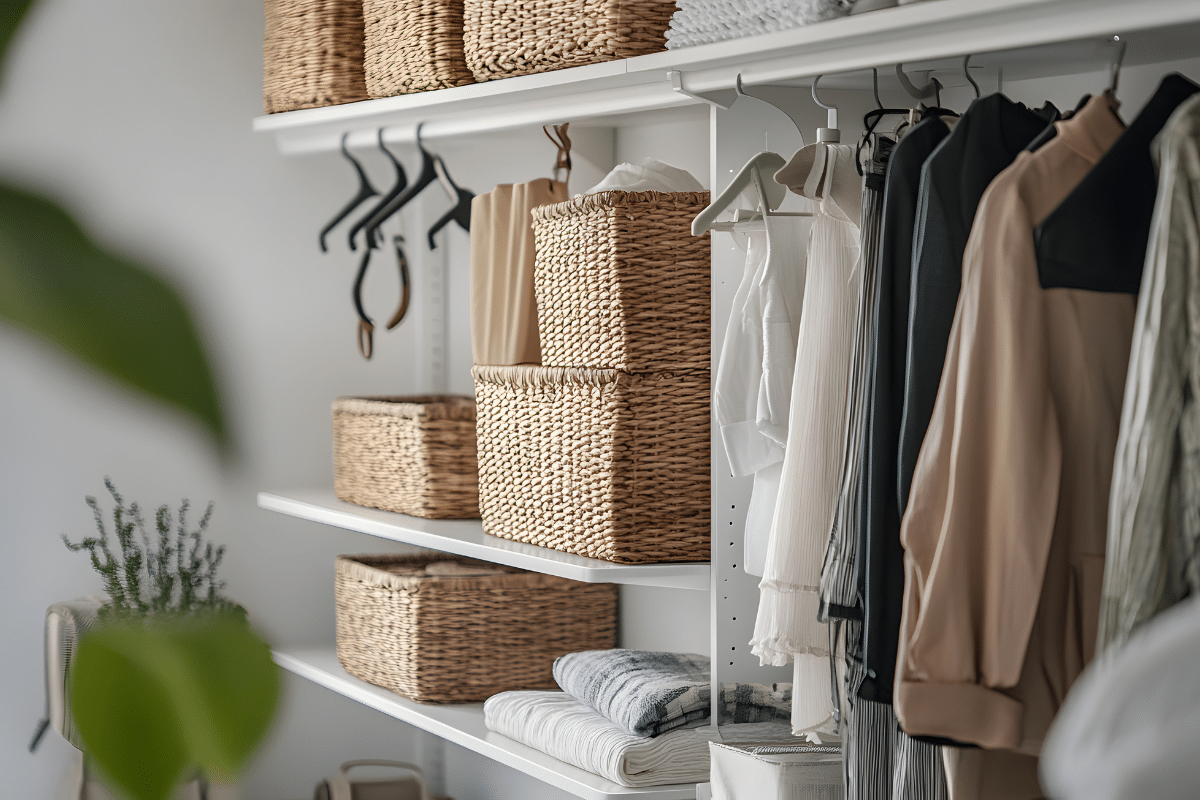


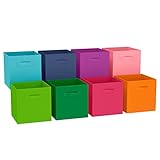


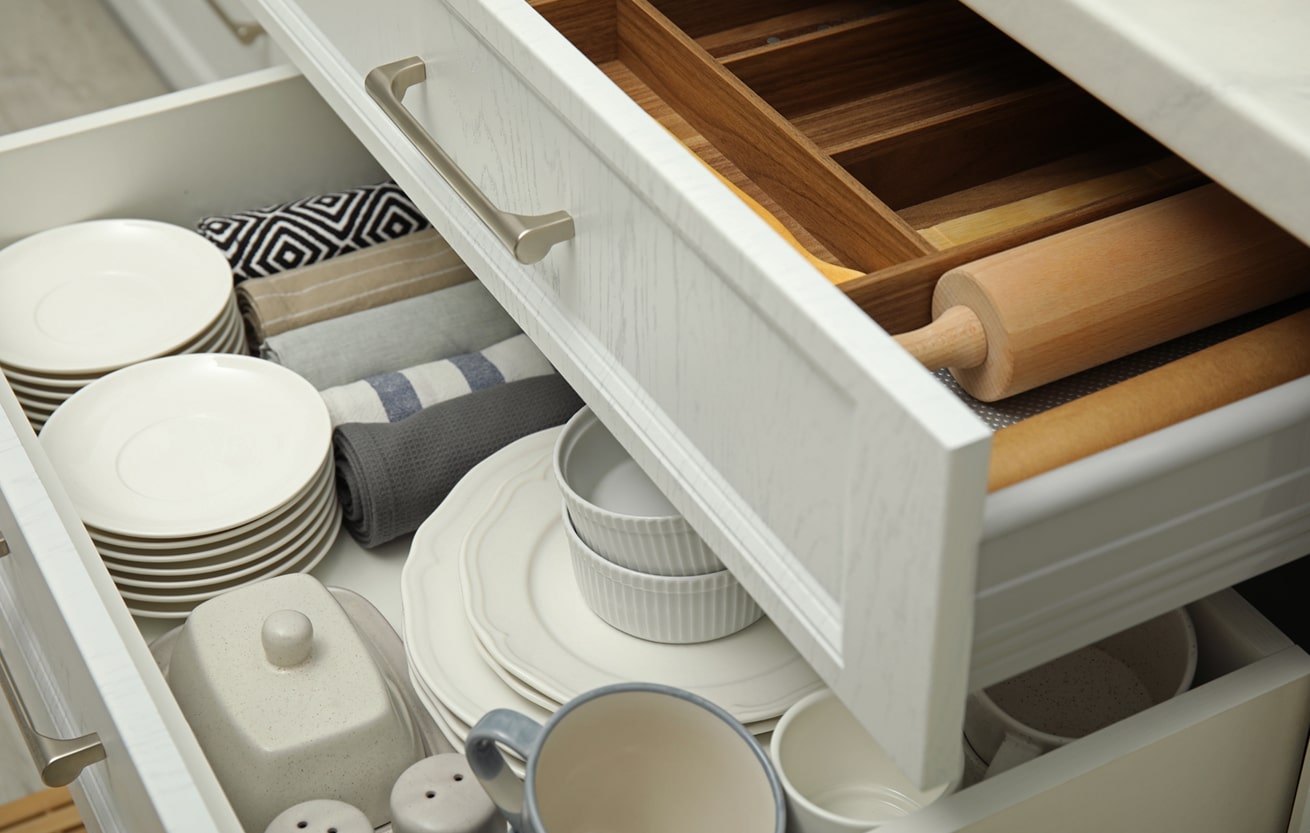


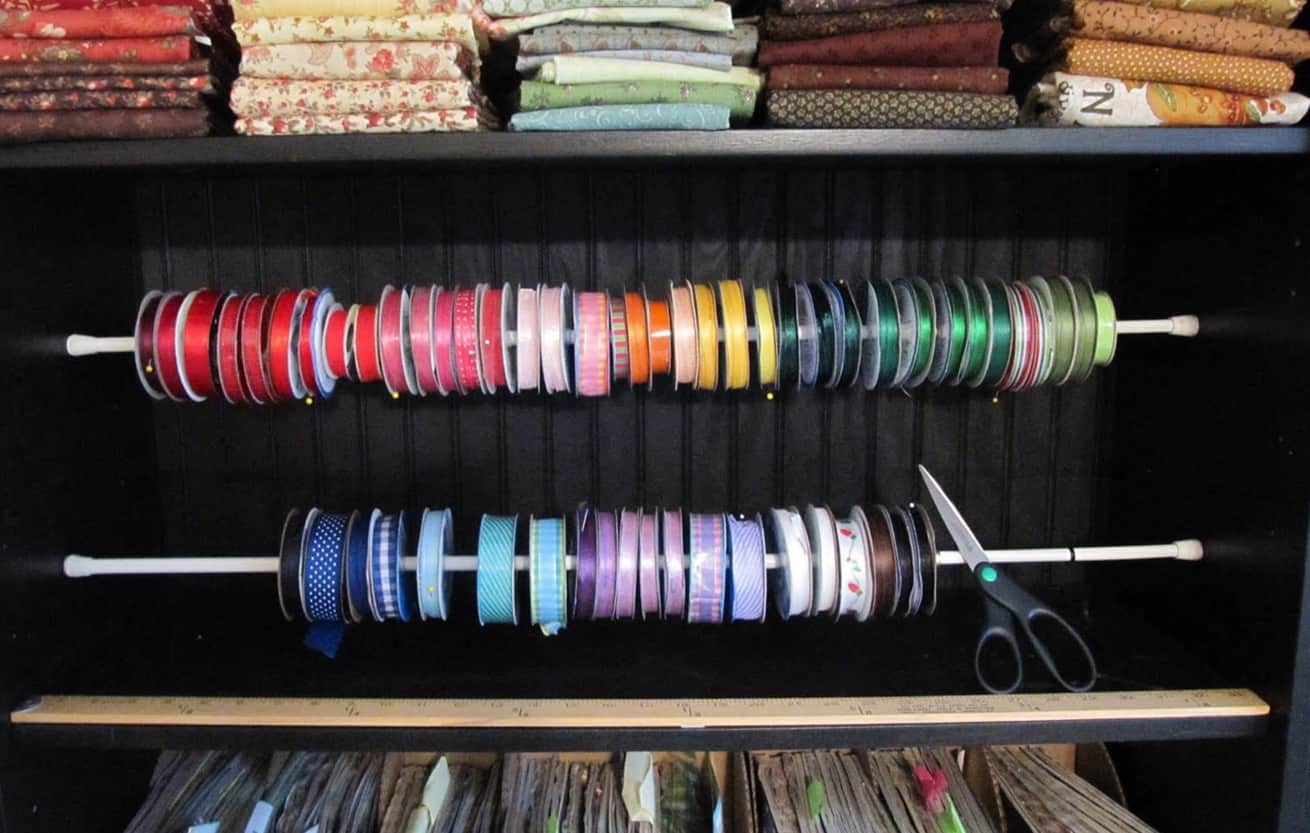


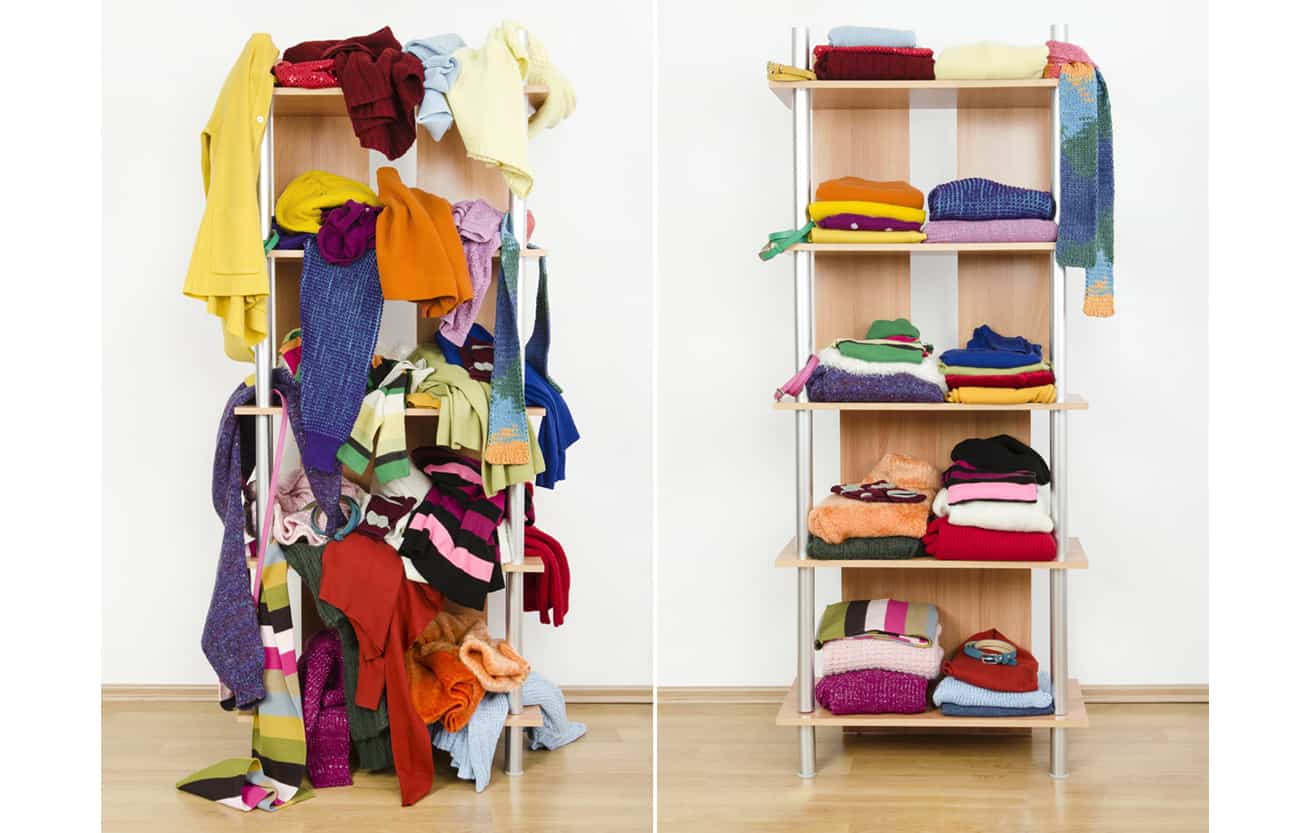
 My garbage bowl is