

Skip the Pro, Grab a Roller: Painting on a Cheapskate Budget

Painting your own walls isn’t glamorous, but DIY interior painting is one of the smartest projects for instant savings. Professional painters can charge thousands, while a weekend of sweat equity costs just a fraction—and still looks fantastic. With the right prep, paint, and tools, you can refresh your space without draining your bank account. Here’s how to tackle DIY interior painting on a budget and get pro-level results, cheapskate style.

Hiring a professional painter sounds dreamy. You sip iced tea while someone else wrestles with tarps, ladders, and the eternal mystery of cutting in a straight line at the ceiling. But then reality hits. The estimate arrives. Suddenly, those scuffed walls don’t look so bad after all.
Painting your own home isn’t glamorous, but it is one of the easiest (and most budget-friendly) DIY projects you can take on. Professional painters often charge between $2 and $6 per square foot. Do the math on just one average-sized living room, and you’re staring at a bill well over $1,000. Multiply that by two or three rooms, and it’s the cost of a vacation.
The ROI That Pays You Back in Color and Cash
It’s not just about saving a few bucks. Interior painting can boost home value by around $2,000, and exterior work can raise it 2–5%. Eighty percent of real estate agents say a fresh coat helps homes sell faster and for more money. That’s a weekend project paying off in dollars and pride.
Plus, paint lasts. Interior walls usually hold up 5–7 years (less in kitchens and baths), and exterior paint can last 5–15 years. That’s a long-term payoff for a weekend of sweat equity, a good playlist, and maybe a friend who owes you one.
If you’ve been staring at those walls thinking, “I should really do something about this,” consider this your sign: grab a roller and start saving.
Preparation: The Unskippable Step

Here’s the truth: Good painting is 80% prep and 20% actual painting. Skip prep, and you’ll be staring at peeling edges, rough patches, and weird bumps until the next time you cough up money for paint. A little patience here is the difference between “that looks DIY” and “wow, who did your walls?”
1. Patch the holes.
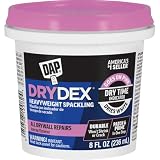
A tub of lightweight spackle and a flexible putty knife are worth their weight in gold. Nail holes, dents, and dings disappear in seconds. Let it dry, sand lightly, and you’ll have a smooth surface that makes your paint look professional.
2. Clean the walls.
Even if they look clean, walls collect dust, grease, and fingerprints. Kitchen walls are the worst culprits. A simple wipe-down with warm water and a drop of dish soap does the trick. Let the walls dry fully before you paint. Moisture is the enemy of smooth coverage.
3. Tape smart, not everywhere.
Painter’s tape is a tool, not a crutch. Use it where your brush control won’t cut it: baseboards, trim, or tricky corners. Too much tape just slows you down and costs extra. A good multi-pack of painter’s tape will cover the essentials.
Pro tip: Invest in a decent sanding block. It makes patching and smoothing at least 90% less frustrating than flimsy sandpaper sheets.
Prep work may not be glamorous, but it’s the step that protects your budget, your time, and your sanity. Get it right, and you’ll spend the next 5–7 years enjoying your paint job instead of noticing the spots you skipped.


Choosing Paint: Cheap Isn’t Always Cheaper

It’s tempting to grab the bargain-bin paint, but here’s the catch: cheap paint usually means more coats. More coats mean more gallons, more time, and more frustration. What looked like a $25 can of savings turns into a $150 headache once you’ve gone back for the third coat.
Invest in coverage.
Mid-tier and “one-coat coverage” paints (like Behr Marquee or Benjamin Moore Regal Select) are worth it, especially if you’re tackling darker shades or covering a dramatic color.
Pick the right finish.
This is where a lot of DIY painters go wrong:
- Flat / Matte hides imperfections but scuffs if you so much as look at it sideways. Best for ceilings.
- Eggshell / Satin is the sweet spot for most walls—durable, easy to wipe, and still forgiving of bumps.
- Semi-gloss / Gloss shines in high-moisture, high-use spaces like kitchens, bathrooms, or trim.
Time your buy.
Big-box stores like Home Depot, Lowe’s, and Ace Hardware run paint sales around major holidays. Memorial Day, Labor Day, and Black Friday are prime time. A gallon that normally costs $45 can drop to $25–30 if you buy smart.
Bonus tip: If eco-friendliness matters to you, look for low-VOC or zero-VOC paints. They’re better for indoor air quality, and brands like Sherwin-Williams Harmony or Behr Premium Plus make solid options.
Paint is one of those “buy better, cry once” products. Spend a little more upfront, and you’ll use fewer coats, save hours of rolling, and end up with a finish that actually lasts.
Tools of the Frugal Trade

You don’t need to drop a small fortune at the paint aisle to get pro-level results. A few smart tools will save you time, frustration, and, most importantly, money.
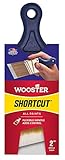
- Angled brush (2-inch): Your secret weapon for “cutting in” at ceilings, corners, and trim. A high-quality brush runs $7–$12 and is worth every penny. Cheap brushes shed bristles faster than a golden retriever in July.
- Roller with extension pole: Ladders are overrated. An extension pole lets you cover walls faster, keeps your back intact, and reduces the chance of a trip to the ER.
- Reusable trays and liners: Disposable trays look cheap, but keep replacing them and you’ll spend more over time. A sturdy tray with snap-in liners is easier on both your wallet and the planet.
- Drop cloths: You don’t need contractor-grade tarps. Old sheets or plastic tablecloths from the dollar store work just fine. Just skip newspaper. It bleeds through and sticks.
Skip the paint sprayer. Unless you’re painting barns for a living or auditioning for a circus act sprayers are more hassle than help. They waste paint, take forever to clean, and turn a small project into a production.
Pro tip: Clean your brushes and rollers right after use, even if you think you’ll just toss them. A $12 brush can last years if you rinse it properly.


Technique: Where the Savings Show

Painting is easy to start and hard to finish well. The difference between “freshly painted” and “nailed it” comes down to technique:
1. Cut in first.
Grab that angled brush and paint along trim, ceilings, and corners. Do small sections at a time so your brushwork blends seamlessly with the roller.
2. Roll in “W” shapes.
Load your roller, then roll a big “W” and fill it in without lifting too often. It keeps coverage even and helps avoid those streaky roller lines.
3. Keep a wet edge.
Move at a steady pace so each stroke blends into the next. If you stop mid-wall, you’ll earn yourself some lovely lap marks and not the kind you brag about.
4. Don’t drown the brush.
Dip only the bottom third of your bristles. It saves paint and cleanup.
5. Know when to step back.
Every 10–15 minutes, take a few steps back and check your wall in natural light. It’s the easiest way to catch misses before the paint dries.
Yes, your arms will ache. No, it’s not cardio. But by the time you’ve knocked out a room, you’ve saved the cost of a weekend fitness class and pocketed what a pro would charge.
DIY Painting Tricks That Save Time and Money

Floetrol is your friend.
This paint additive slows drying time so the paint has a chance to “lay down” smooth. Translation: fewer brush strokes, more pro finish. It’s a game-changer on doors and trim. Bonus hack: dab a little around the top of your brush near the handle to keep paint from creeping up and hardening on the bristles.
Wrap it up.
Taking a break (or calling it quits for the night)? Instead of cleaning everything, wrap brushes and rollers tightly in plastic wrap or a grocery bag, then stash them in the fridge (or freezer if it’s a long break). They’ll stay fresh for at least a day, sometimes longer.
Label lids.
Before you shelve that leftover paint, write the room name right on the lid. Saves you from the “is this Greige #4 or Mushroom Mist?” guessing game six months later.
Light it up.
A cheap work light or a lamp with the shade yanked off will expose those sneaky missed spots that hide in normal lighting. Fix them while the paint’s still wet and you’ll save yourself an awkward “touch-up patchwork quilt” later.
Work with gravity, not against it.
Paint in the order pros swear by: ceiling → walls → trim. That way, any drips get covered as you go, and you won’t be cursing gravity while fixing mistakes.
Extra credit: Keep a damp rag or baby wipes in your pocket while you paint. Spotted a drip on the floor, trim, or yourself? Wipe it right away and nobody has to know.


The Cleanup Nobody Loves

Cleanup feels like punishment, but skip it and you’ll be back at the store replacing brushes (and muttering under your breath about $18 “pro-grade” ones).
For water-based paint (latex)
Wash with warm, soapy water. A quick spin in a salad spinner (yes, really) gets the water out fast and keeps bristles fluffy.
For oil-based paint
Mineral spirits or paint thinner are the only way, but honestly? Unless you’re restoring grandma’s antique dresser, stick with water-based.
Brush hack
A brush comb—yes, it’s a real thing—keeps bristles from clumping and makes brushes last way longer.
Pro tip: Wrap the handles with painter’s tape before you start. When it’s cleanup time, peel off the tape and skip the scrubbing.


What You Actually Save
Let’s talk numbers (because feelings don’t pay the mortgage).
- Pro painter quote for a 12’x12’ room: $400–$600.
- DIY cost: about $60 for paint, $40 for brushes/rollers/tape (most of which you can reuse), and maybe $15 for spackle and sandpaper.
- Total DIY: $115.
- Savings: at least $285 per room.
Paint three rooms and you’ve just saved close to $900. That’s:
- A chunk off your mortgage or car payment.
- A weekend getaway or festival pass.
- Or, let’s be real, a big dent in your student loans or kids’ soccer fees.
Not bad for a weekend of “sweat equity.”
Bottom Line
Painting your own space won’t make you rich, but it’s one of the quickest, most budget-friendly ways to refresh your home. You spend less, gain serious bragging rights, and might even uncover a hidden knack for rolling walls without drips.
Beyond the money, think of it as weekend ROI: satisfaction from a job done well, a fresh environment that boosts your mood, and a little proof that yes, you can tackle DIY like a pro.
And if anyone asks how your walls look straight out of a magazine, just smile and say: “Trade secret.”
Question: What’s your biggest DIY painting fail or win? (Bonus points if you’ve got before-and-after photos!)
EverydayCheapskate™ is reader-supported. We participate in the Amazon Services LLC Associates Program and other affiliate advertising programs, designed to provide a means for us to earn from qualifying purchases, at no cost to you.

More from Everyday Cheapskate
 https://www.everydaycheapskate.com/wp-content/uploads/20261006-prime-big-deal-days-have-landed.png
800
1200
Mary Hunt
https://www.everydaycheapskate.com/wp-content/uploads/EC-Logo-by-Mary-Hunt-Tagline-Trimmed.png
Mary Hunt2026-10-05 11:01:432026-10-07 09:02:53EC’s Top Picks from Amazon Prime Big Deal Days 2026
https://www.everydaycheapskate.com/wp-content/uploads/20261006-prime-big-deal-days-have-landed.png
800
1200
Mary Hunt
https://www.everydaycheapskate.com/wp-content/uploads/EC-Logo-by-Mary-Hunt-Tagline-Trimmed.png
Mary Hunt2026-10-05 11:01:432026-10-07 09:02:53EC’s Top Picks from Amazon Prime Big Deal Days 2026 https://www.everydaycheapskate.com/wp-content/uploads/20261004-reduce-healthcare-costs-with-three-habits-healthy-couple-walking-in-autumn-leaves.png
800
1200
Mary Hunt
https://www.everydaycheapskate.com/wp-content/uploads/EC-Logo-by-Mary-Hunt-Tagline-Trimmed.png
Mary Hunt2026-10-04 23:08:572026-10-04 23:09:47How to Reduce Healthcare Costs With 3 Free Daily Habits
https://www.everydaycheapskate.com/wp-content/uploads/20261004-reduce-healthcare-costs-with-three-habits-healthy-couple-walking-in-autumn-leaves.png
800
1200
Mary Hunt
https://www.everydaycheapskate.com/wp-content/uploads/EC-Logo-by-Mary-Hunt-Tagline-Trimmed.png
Mary Hunt2026-10-04 23:08:572026-10-04 23:09:47How to Reduce Healthcare Costs With 3 Free Daily Habits https://www.everydaycheapskate.com/wp-content/uploads/20261004-woman-dreaming-about-her-financial-and-life-goals.png
800
1200
Mary Hunt
https://www.everydaycheapskate.com/wp-content/uploads/EC-Logo-by-Mary-Hunt-Tagline-Trimmed.png
Mary Hunt2026-10-04 12:50:422026-10-04 12:50:42She Lived in a Basement for $100 a Month. Here’s Why.
https://www.everydaycheapskate.com/wp-content/uploads/20261004-woman-dreaming-about-her-financial-and-life-goals.png
800
1200
Mary Hunt
https://www.everydaycheapskate.com/wp-content/uploads/EC-Logo-by-Mary-Hunt-Tagline-Trimmed.png
Mary Hunt2026-10-04 12:50:422026-10-04 12:50:42She Lived in a Basement for $100 a Month. Here’s Why. https://www.everydaycheapskate.com/wp-content/uploads/20241004-news-you-can-use-october-everyday-cheapskate-top-news-articles.png
800
1200
Mary Hunt
https://www.everydaycheapskate.com/wp-content/uploads/EC-Logo-by-Mary-Hunt-Tagline-Trimmed.png
Mary Hunt2026-10-04 01:04:052026-10-11 14:34:17News You Can Use • October 2026
https://www.everydaycheapskate.com/wp-content/uploads/20241004-news-you-can-use-october-everyday-cheapskate-top-news-articles.png
800
1200
Mary Hunt
https://www.everydaycheapskate.com/wp-content/uploads/EC-Logo-by-Mary-Hunt-Tagline-Trimmed.png
Mary Hunt2026-10-04 01:04:052026-10-11 14:34:17News You Can Use • October 2026 https://www.everydaycheapskate.com/wp-content/uploads/20261003-woman-hugging-elderly-mother-sandwich-generation-caring-for-aging-parents.png
800
1200
Mary Hunt
https://www.everydaycheapskate.com/wp-content/uploads/EC-Logo-by-Mary-Hunt-Tagline-Trimmed.png
Mary Hunt2026-10-03 10:47:222026-10-03 10:47:25Sandwiched Between Aging Parents and Adult Children
https://www.everydaycheapskate.com/wp-content/uploads/20261003-woman-hugging-elderly-mother-sandwich-generation-caring-for-aging-parents.png
800
1200
Mary Hunt
https://www.everydaycheapskate.com/wp-content/uploads/EC-Logo-by-Mary-Hunt-Tagline-Trimmed.png
Mary Hunt2026-10-03 10:47:222026-10-03 10:47:25Sandwiched Between Aging Parents and Adult Children https://www.everydaycheapskate.com/wp-content/uploads/20260927-impossible-lasagna-pie-recipe-with-wooden-serving-spoon-in-white-casserole-dish.png
800
1200
Mary Hunt
https://www.everydaycheapskate.com/wp-content/uploads/EC-Logo-by-Mary-Hunt-Tagline-Trimmed.png
Mary Hunt2026-09-28 09:38:592026-09-28 22:48:34Impossible Lasagna Pie: All the Flavor, None of the Noodles
https://www.everydaycheapskate.com/wp-content/uploads/20260927-impossible-lasagna-pie-recipe-with-wooden-serving-spoon-in-white-casserole-dish.png
800
1200
Mary Hunt
https://www.everydaycheapskate.com/wp-content/uploads/EC-Logo-by-Mary-Hunt-Tagline-Trimmed.png
Mary Hunt2026-09-28 09:38:592026-09-28 22:48:34Impossible Lasagna Pie: All the Flavor, None of the Noodles https://www.everydaycheapskate.com/wp-content/uploads/20260925-best-inexpensive-coffee-grinders-burr-manual-and-electric.png
800
1200
Mary Hunt
https://www.everydaycheapskate.com/wp-content/uploads/EC-Logo-by-Mary-Hunt-Tagline-Trimmed.png
Mary Hunt2026-09-25 11:06:342026-10-10 15:49:09The Best Coffee Grinder Upgrade That’s Actually Worth It
https://www.everydaycheapskate.com/wp-content/uploads/20260925-best-inexpensive-coffee-grinders-burr-manual-and-electric.png
800
1200
Mary Hunt
https://www.everydaycheapskate.com/wp-content/uploads/EC-Logo-by-Mary-Hunt-Tagline-Trimmed.png
Mary Hunt2026-09-25 11:06:342026-10-10 15:49:09The Best Coffee Grinder Upgrade That’s Actually Worth It https://www.everydaycheapskate.com/wp-content/uploads/20260920-small-money-mistakes-woman-sitting-at-her-laptop-reviewing-bills.png
800
1200
Mary Hunt
https://www.everydaycheapskate.com/wp-content/uploads/EC-Logo-by-Mary-Hunt-Tagline-Trimmed.png
Mary Hunt2026-09-20 11:34:162026-09-28 22:48:40Small Money Mistakes: How to Fix Them Before They Grow
https://www.everydaycheapskate.com/wp-content/uploads/20260920-small-money-mistakes-woman-sitting-at-her-laptop-reviewing-bills.png
800
1200
Mary Hunt
https://www.everydaycheapskate.com/wp-content/uploads/EC-Logo-by-Mary-Hunt-Tagline-Trimmed.png
Mary Hunt2026-09-20 11:34:162026-09-28 22:48:40Small Money Mistakes: How to Fix Them Before They Grow https://www.everydaycheapskate.com/wp-content/uploads/20260918-man-and-woman-signing-an-extended-warranty-in-a-car-dealership.png
800
1200
Mary Hunt
https://www.everydaycheapskate.com/wp-content/uploads/EC-Logo-by-Mary-Hunt-Tagline-Trimmed.png
Mary Hunt2026-09-18 15:23:432026-09-18 15:25:43Is an Extended Warranty Ever Worth It? The Truth for 2026
https://www.everydaycheapskate.com/wp-content/uploads/20260918-man-and-woman-signing-an-extended-warranty-in-a-car-dealership.png
800
1200
Mary Hunt
https://www.everydaycheapskate.com/wp-content/uploads/EC-Logo-by-Mary-Hunt-Tagline-Trimmed.png
Mary Hunt2026-09-18 15:23:432026-09-18 15:25:43Is an Extended Warranty Ever Worth It? The Truth for 2026Please keep your comments positive, encouraging, helpful, brief,
and on-topic in keeping with EC Commenting Guidelines
Last update on 2026-10-11 / Affiliate links / Images from Amazon Product Advertising API


Do you have tips for what to do if you have existing oil based paint on door trim and now are going to use water based paint? Thanks!
Yes! The trick is preparation. First clean the surface extremely well. I like using TSP. Then scuff with 180-220 grit sand paper. This will give some tooth for the new products to properly adhere to. Make sure you wipe everything down with a tack cloth. Then use a high quality coverage primer, like Kilz or Zinsser. Once fully cured per the manufacturer’s directions, a light sand and on goes your water based paint. It’s a bit of work but way less than stripping the oil-based paint.
Thank you! And thanks for your post. I’ve always been intimated to do the prep but your instructions are perfect for me!!
Do you have a tip for reducing the smell of freshly painted rooms? Hubby didn’t buy the no smell paint!
Oh, I hear you! Even the best intentions can’t always dodge that freshly painted smell. One trick that helps is setting out bowls of white vinegar or baking soda around the room. They absorb a surprising amount of odor. Running a fan or opening windows to get airflow going also makes a big difference. And if you’ve got some citrus peels lying around, toss those in bowls too. They add a little bonus “fresh” scent while the paint cures.
Beware of cheap roller sleeves. They usually leave lint. I really like the hot pink ones that Benjamin Moore sells. For bathrooms and kitchens oil-based paint is far superior to latex. It will hold up to the moisture far longer. Finally, I would like to recommend six-inch rollers for the novice painter. They really do nice work. Buy the ones with the blue diagonal thread from Home Depot. Happy Painting!
It’s not the popular opinion, but I paint the trim before the walls. It’s much easier to paint a straight line on the flat wall than on the small edges of trim.
I totally agree! I’ve also learned that painter’s tape is highly overrated, sticking too much to some surfaces, and not well enough to others. I save more time by simply being very careful.