
The Cheapest Thing in Your House Is the Thing You Already Own


I’ve developed a household rule that has saved me a ridiculous amount of money over the years: Before I replace anything, it gets one last chance to redeem itself.
The vacuum gets an examination. The cloudy glass gets vinegar. The sluggish showerhead gets an intervention.
Only after reasonable attempts at rehabilitation have failed do I pronounce the patient deceased and start shopping.
We’ve all picked up a replacement reflex. An item stops looking or performing the way it once did, and our brains leap immediately to: I need a new one.
Sometimes we do. But often what we really need is 15 minutes and the willingness to figure out what’s wrong.
Here are five household items worth giving another chance before you spend money replacing them.
1. Cloudy drinking glasses: Don’t give up just yet

Consider cloudy drinking glasses.
Before you replace them, find out whether you’re looking at permanent etching or simply mineral buildup from hard water. Here’s an easy test: Soak one cloudy glass in white vinegar for five minutes, then wash and dry it. If the cloudiness disappears or improves dramatically, you’ve found the culprit. Give the rest the same treatment.
For stubborn mineral deposits, try extending the soak to 15 minutes. Then wash with dish soap, rinse thoroughly and dry with a soft cloth.
But what if the vinegar does absolutely nothing?
You may be looking at etching, which is permanent damage to the glass surface. No amount of soaking, scrubbing or wishful thinking will reverse it.
The good news? Cloudy glasses that are otherwise intact and safe to use don’t necessarily need to go anywhere. They may not be company-worthy anymore, but they’ll hold iced tea just fine.
If hard water is the culprit, check your dishwasher’s detergent and rinse-aid instructions. Preventing that mineral film from returning is a whole lot easier than removing it over and over. And if the glasses aren’t the only things coming out less than sparkling, your dishwasher may need a look. Here’s what to check.
2. A sluggish showerhead? Start here
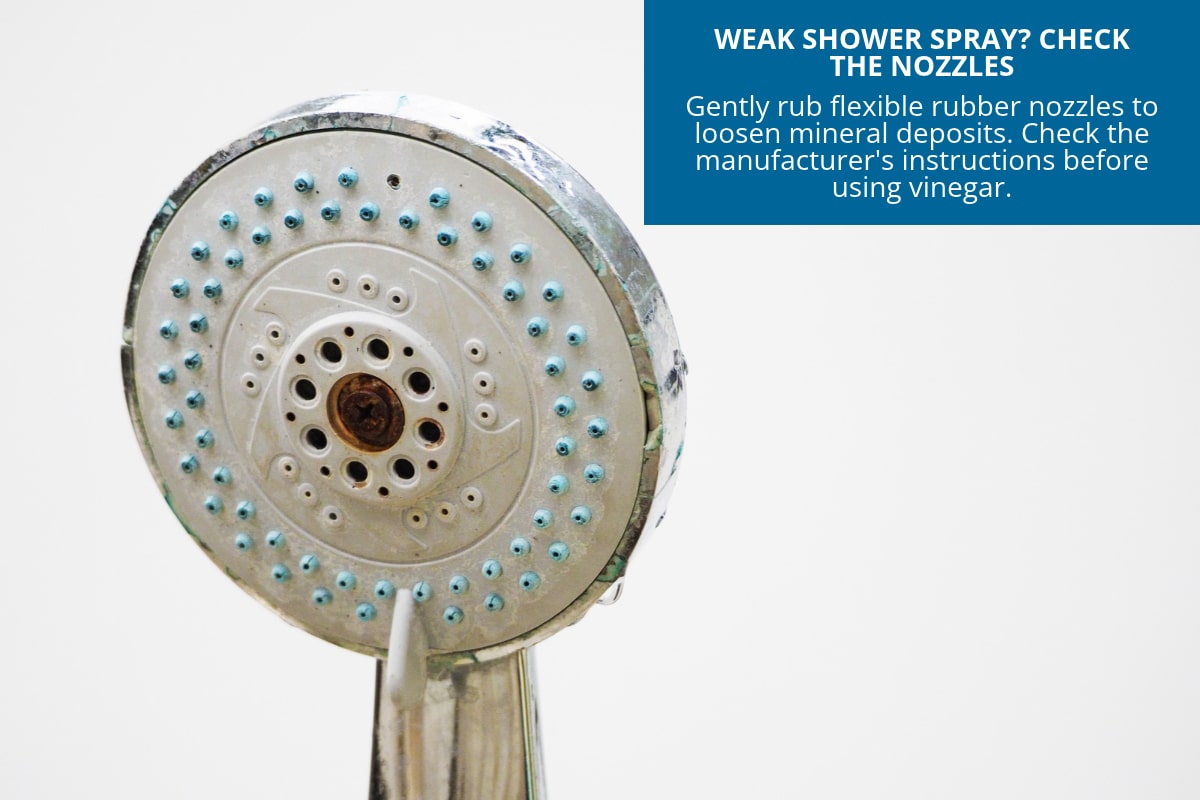
Next patient: the showerhead that has gone from an invigorating spray to something resembling a light drizzle.
Those little openings can become clogged with mineral deposits. Before you take anything apart, rub the nozzles gently with your fingers while the water runs. Many newer showerheads have flexible rubber nozzles designed to release mineral deposits that way. A few seconds of attention might be all they need.
If that doesn’t do it, remove the showerhead if it’s easy to do. Check the manufacturer’s care instructions before reaching for the vinegar. Some finishes, including certain nickel and brass finishes, don’t take kindly to it at all. If vinegar is allowed, follow the manufacturer’s dilution instructions and keep the soak to 30 minutes or less. If you’re not sure, skip the vinegar and use warm water and an old toothbrush instead. Rinse well and reinstall.
Congratulations. You may have just purchased a new showerhead for $0.
If yours has a removable filter screen, check it for grit, too. And one more thing: If the water pressure is weak at every faucet in the house, the showerhead may be entirely innocent. No sense putting it through a vinegar bath for a crime it didn’t commit.
3. Dingy towels: It might be your laundry routine
Dingy towels deserve a reprieve too.
Before deciding they’ve reached the end of their useful lives, consider how you’re washing them. More detergent does not produce cleaner laundry. Too much can leave residue behind, and fabric softener can coat towel fibers, reducing absorbency.
Sometimes the problem isn’t that your towels are worn out. They’re simply wearing too much laundry product.
Wash the towels using the warmest water their care labels allow and the correct amount of detergent for the load. Choose an extra rinse if your washer offers one to help remove leftover residue. And don’t cram every towel in the house into a single load.
For the next several washes, skip both liquid fabric softener and dryer sheets. They’re not doing your towels’ absorbency any favors.
You may have heard of “laundry stripping,” a soaking process intended to remove stubborn buildup. It has its place, but it isn’t where I’d start. An extra rinse, properly measured detergent and a few changes in laundry habits may solve the problem without all that fuss.
Of course, towels that are genuinely threadbare aren’t going to regain their youth in the washing machine. But before you retire them to the rag pile, make sure they’re actually worn out and not merely overloaded with products that were supposed to make them better.
4. Scratched wood furniture isn’t finished yet
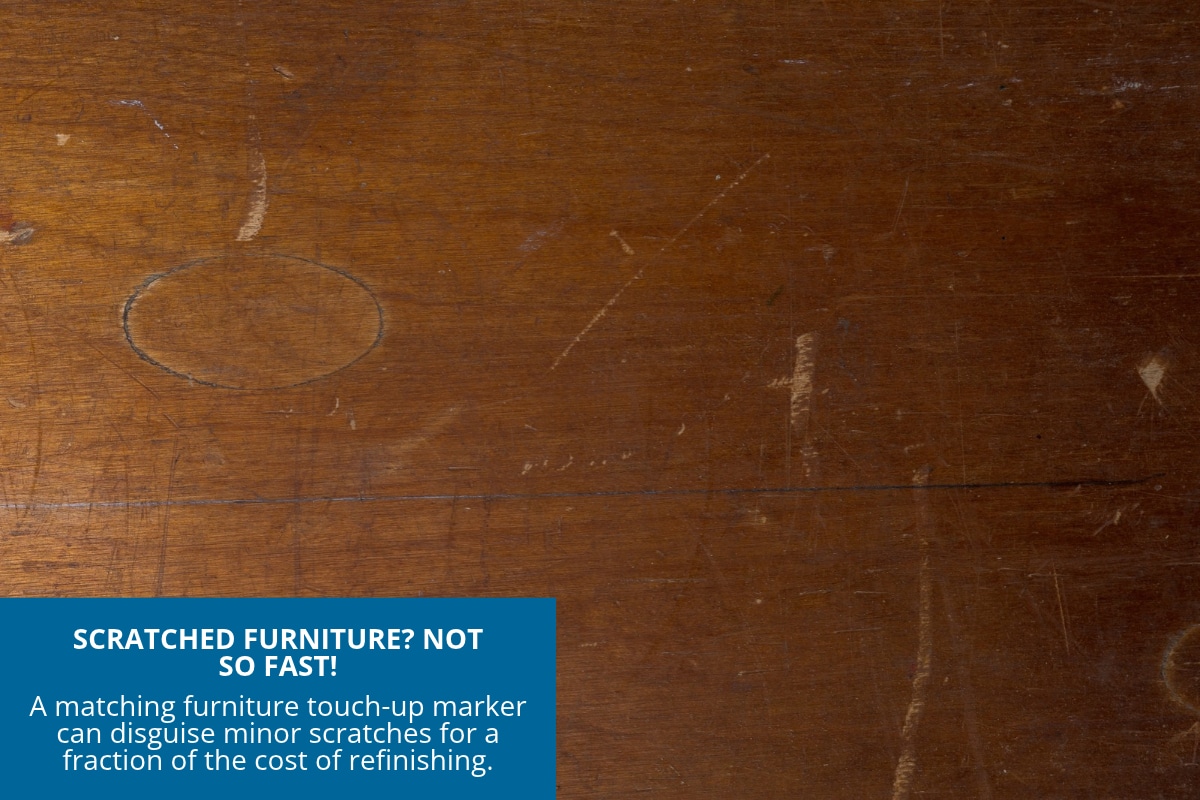
Wood furniture is another category where we can be awfully quick to pronounce a death sentence.
A small scratch does not necessarily mean a table needs refinishing, much less replacing. Furniture touch-up markers and wax repair sticks made for wood finishes can make minor scratches far less noticeable. Always test any product in an inconspicuous spot first.
We’re attempting a rescue here, not creating a larger emergency.
Before reaching for a repair product, clean the area gently with a soft cloth and a cleaner appropriate for the finish. Sometimes what looks like damage is simply dirt or residue caught along a scratch.
If the scratch is still visible, choose a touch-up marker that closely matches the surrounding wood. Start with a light application, follow the product directions and wipe away excess color before it dries where it doesn’t belong.
For a small gouge or deeper scratch, a matching wax repair stick may help fill the damaged area and make it less noticeable.
Neither product will repair loose joints, damaged veneer or major structural problems. But for ordinary surface scratches?
Sometimes a marker and a minute are all it takes.
And a few scratches aren’t a tragedy. Sometimes they’re just evidence that people have actually been living in the house.
5. A vacuum that’s lost suction: Check for a clog
And then we come to the vacuum cleaner.
Poor thing. It gets accused of being worn out when quite often it is simply constipated.
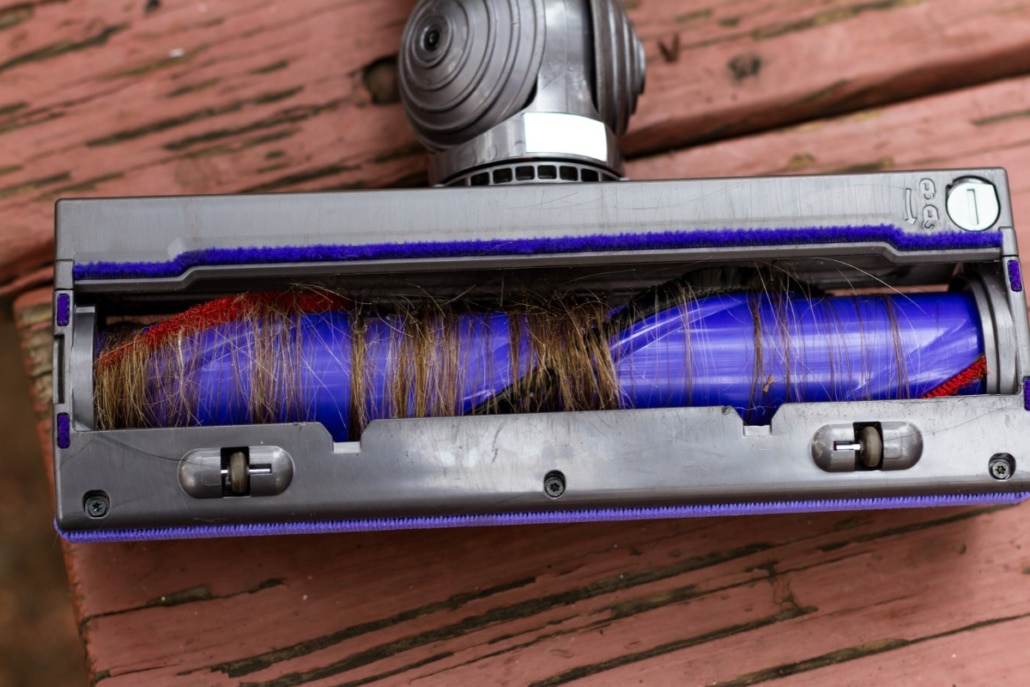
Unplug it first. Before replacing a vacuum that has lost suction, empty the canister or replace the bag. Check the hose for blockages. Inspect the brush roll for hair, thread and string wound around it.
Then follow the airflow path looking for the obstruction that has turned your formerly powerful vacuum into an expensive noise machine.
Don’t overlook the filters.
A vacuum can look perfectly fine on the outside while its filters are packed with dust. If yours has washable filters, clean them exactly as the manufacturer directs and let them dry completely before reinstalling them.
Not every filter is washable. Your owner’s manual gets the final word.
If yours is a Shark, I’ve written a whole guide on cleaning it and its filters, hidden clogs included.
One warning: If your vacuum overheats, smells like something’s burning or has damaged wiring, unplug it and stop using it. That’s beyond a cleaning problem.
But if the trouble is a full canister, dirty filter or wad of hair wrapped around the brush roll, you may be only minutes away from having your old vacuum back.
How to know when it’s really time to replace something
Not that everything can or should be repaired forever. There comes a time when appliances wear out, towels become threadbare, and furniture reaches the point where no marker on earth can save it. The trick is knowing the difference between worn out and temporarily misbehaving.
Before you give up on something, ask yourself three questions:
- Is it actually broken, or does it just need attention? Dirt, mineral deposits and clogged filters can make a perfectly good item look ready for retirement.
- Can I fix it safely with something I already own? Start there, before you spend a dime.
- Would a small part solve it? Sometimes a new filter or gasket is all that stands between you and a working appliance.
If a part is missing or damaged, don’t assume the entire item is a lost cause. I’ve rounded up places to find replacement parts for things you already own, including a few you’d never think to look.
Of course, not every repair makes sense. If the item is unsafe, the fix is beyond your skills or the repair costs nearly as much as a new one, let it go.
And here’s something we often forget: Replacing an item costs more than money.
First, you research. Then you compare. You read reviews. You shop or order. You wait for delivery. You unpack the new item, figure out what to do with the old one, and, if it’s an appliance, spend 45 minutes trying to understand why the manufacturer apparently hired an escape-room designer to write the instruction manual.
Sometimes fixing what you already own is faster than replacing it. So before you toss something because it has become cloudy, sluggish, dingy, scratched or weak, give it one last chance.
Clean it. Unclog it. Adjust it. Repair it.
You might discover that the cheapest replacement available is no replacement at all.
Question: What’s something you almost threw away, then managed to rescue? I’d love to hear about it in the comments.

More from Everyday Cheapskate
 https://www.everydaycheapskate.com/wp-content/uploads/20261030-Woven-basket-container-hidden-on-low-entry-shelf.png
800
1200
Mary Hunt
https://www.everydaycheapskate.com/wp-content/uploads/EC-Logo-by-Mary-Hunt-Tagline-Trimmed.png
Mary Hunt2026-10-30 19:04:092026-10-30 19:13:58Secret Storage Spots in Your Home You May Be Overlooking
 https://www.everydaycheapskate.com/wp-content/uploads/when-to-file-an-insurance-claim.png
800
1200
Mary Hunt
https://www.everydaycheapskate.com/wp-content/uploads/EC-Logo-by-Mary-Hunt-Tagline-Trimmed.png
Mary Hunt2026-10-29 12:47:092026-10-29 12:49:44Small Insurance Claim? 5 Questions to Ask Before You File
 https://www.everydaycheapskate.com/wp-content/uploads/20261025-Simple-anti-aging-skincare-routine-with-cleanser-vitamin-C-moisturizer-and-sunscreen.png
800
1200
Mary Hunt
https://www.everydaycheapskate.com/wp-content/uploads/EC-Logo-by-Mary-Hunt-Tagline-Trimmed.png
Mary Hunt2026-10-25 17:06:382026-10-25 21:22:53A Simple Anti-Aging Skincare Routine That Makes Sense
 https://www.everydaycheapskate.com/wp-content/uploads/20261024-A-cup-of-coffee-notebook-and-pen-on-a-table.png
800
1200
Mary Hunt
https://www.everydaycheapskate.com/wp-content/uploads/EC-Logo-by-Mary-Hunt-Tagline-Trimmed.png
Mary Hunt2026-10-24 13:13:592026-10-24 13:13:59What Is Frugal Living? It’s Probably Not What You Think
 https://www.everydaycheapskate.com/wp-content/uploads/20261023-Paper-calendar-and-digital-calendar-on-a-smartphone-side-by-side.png
800
1200
Mary Hunt
https://www.everydaycheapskate.com/wp-content/uploads/EC-Logo-by-Mary-Hunt-Tagline-Trimmed.png
Mary Hunt2026-10-23 11:55:302026-10-23 11:55:30Paper or Digital Calendar? Turns Out, You May Need Both
 https://www.everydaycheapskate.com/wp-content/uploads/20261017-Woman-opening-refrigerator-stocked-with-fresh-food-and-condiments.png
800
1200
Mary Hunt
https://www.everydaycheapskate.com/wp-content/uploads/EC-Logo-by-Mary-Hunt-Tagline-Trimmed.png
Mary Hunt2026-10-17 12:16:242026-10-17 12:16:24What Temperature Should a Refrigerator and Freezer Be?
 https://www.everydaycheapskate.com/wp-content/uploads/20261012-Woman-using-smartphone-while-checking-monthly-cellular-data-usage-on-laptop.png
800
1200
Mary Hunt
https://www.everydaycheapskate.com/wp-content/uploads/EC-Logo-by-Mary-Hunt-Tagline-Trimmed.png
Mary Hunt2026-10-12 10:51:112026-10-12 10:51:11Do You Really Need Unlimited Data? Check Before You Pay
 https://www.everydaycheapskate.com/wp-content/uploads/20261011-Woman-Adjusting-Smart-Home-Device-on-the-Wall-how-to-lower-your-electric-bill.png
800
1200
Mary Hunt
https://www.everydaycheapskate.com/wp-content/uploads/EC-Logo-by-Mary-Hunt-Tagline-Trimmed.png
Mary Hunt2026-10-11 23:01:562026-10-11 23:01:56Stop Chasing Pennies on Your Electric Bill. Do This
 https://www.everydaycheapskate.com/wp-content/uploads/20261007-red-present-sitting-in-autumn-leaves-Amazon-Prime-Big-Deal-Days-gifts.png
800
1200
Mary Hunt
https://www.everydaycheapskate.com/wp-content/uploads/EC-Logo-by-Mary-Hunt-Tagline-Trimmed.png
Mary Hunt2026-10-06 23:09:432026-10-06 23:09:43Christmas Shopping in October? These Prime Day Gifts Make Sense

Leave a Reply
Want to join the discussion?Feel free to contribute!