How to Make Beeswax Furniture Polish From Scratch

You know what’s expensive? Furniture polish. You know what’s more expensive? Replacing a dresser because years of commercial spray buildup slowly suffocated the wood. True story… I’ve been there. One day I’m dusting, the next I’m wondering why my grandmother’s side table looks like it’s wearing a plastic raincoat. That’s when I went back to basics and discovered this homemade beeswax furniture polish. Three ingredients. And it smells like a cozy cabin, not a hardware store.

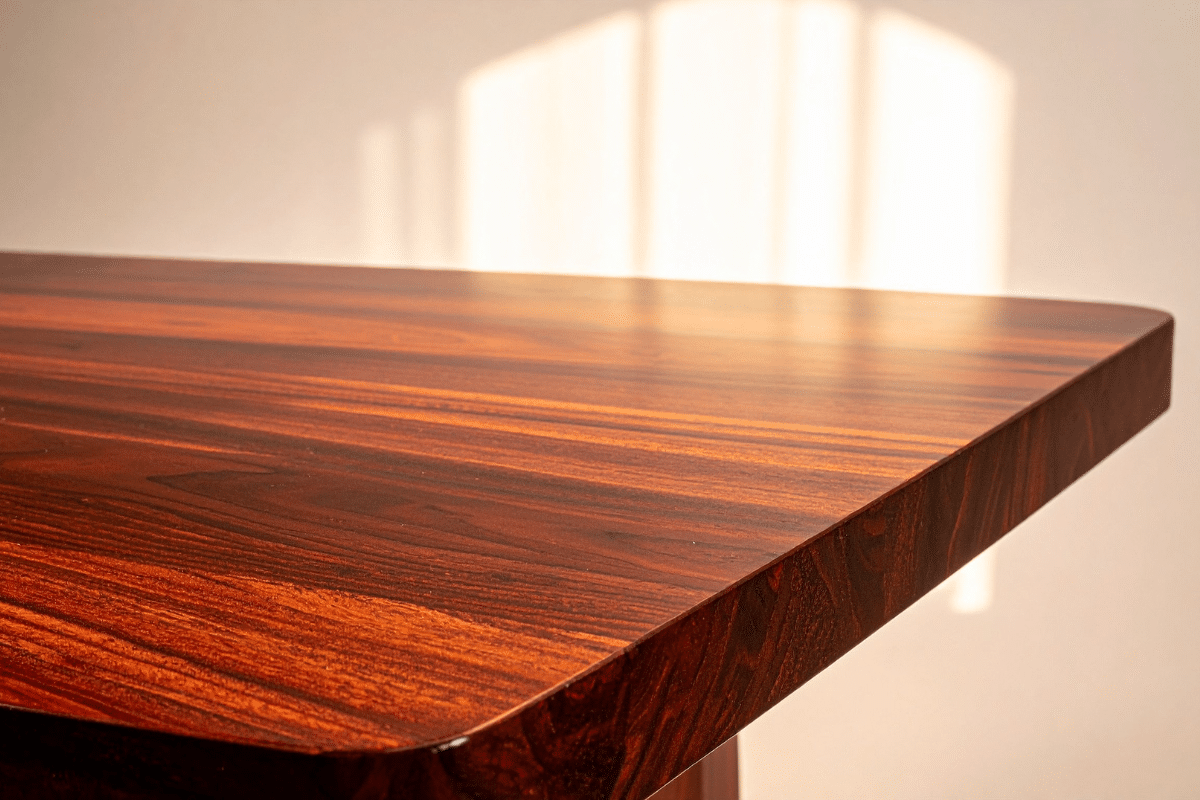
I used to think homemade polish was one of those things that sounds great in theory but requires more patience than I’ve got. Nope. This one practically makes itself. And once I saw how my wood furniture responded (it actually glowed!), I quietly felt a little smug about it.
This formula is especially great if you have kids, pets, or live somewhere humid. It creates a real barrier… the kind that laughs at water rings and fingerprints. Beeswax has been protecting wood for centuries for a reason.
What You’ll Need
- Beeswax (pellets melt faster and easier; highly recommend)
- Jojoba oil
- Essential oil, optional (lavender, lemon, or cedar all work beautifully)
- A double boiler (or a glass bowl set over a saucepan… same thing)
- A jar or airtight container for storing
That’s it. Beeswax pellets and jojoba oil are easy to find online or at most natural food stores.


How to Make It (and Use It)
This whole project takes maybe 15 minutes of real effort. The rest is just waiting and that part’s easy.
Melt the beeswax and jojoba oil together in a double boiler over gentle heat. Don’t rush it. Once it’s fully melted and smooth, pull it off the heat and stir in your essential oil if you’re using one. Pour it into your jar. It’ll look like liquid gold at this point. Don’t let it go to your head. Then leave it alone for about two hours.
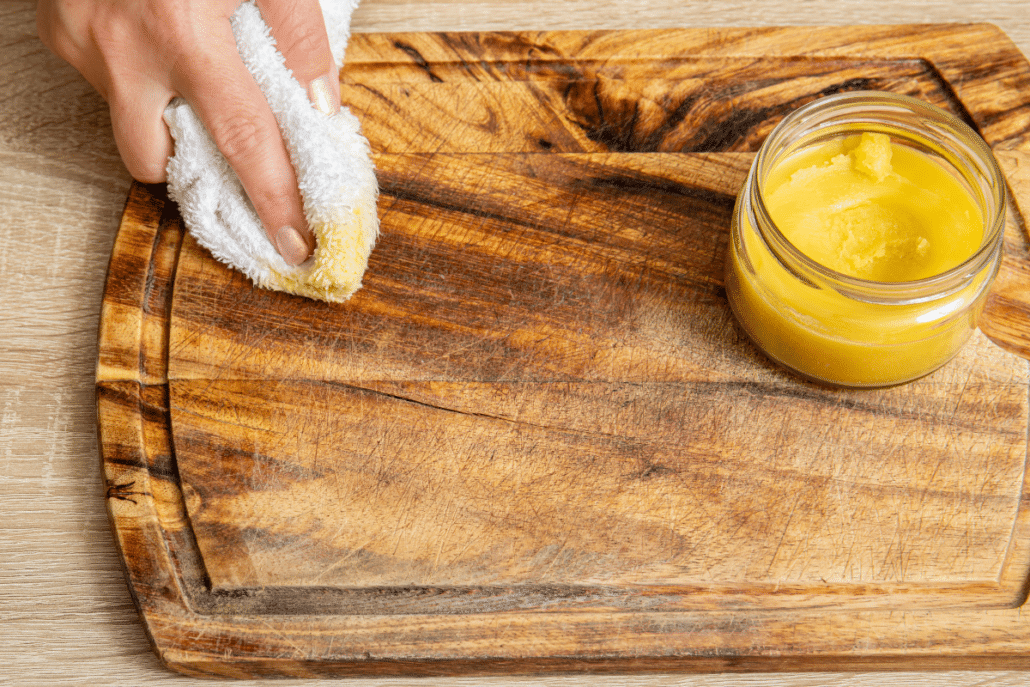
When it firms up into that creamy, scoopable consistency, it’s ready. To use it, rub a small amount into the wood following the grain, then buff with a dry cloth. Here’s the one thing worth knowing: if you let it sit for a few hours before buffing, the oils have time to really penetrate. You’ll feel the difference.
Best Practices: What to Use It On
This conditioner does a lot, but it’s not a one-size-fits-all. Here’s where it really shines:
- Hardwood furniture: Tables, dressers, chairs, bed frames. Any solid wood that looks dry, dull, or thirsty.
- High-traffic surfaces: Kitchen table, coffee table, the console that catches everything near your front door.
- Furniture in humid rooms: That beeswax barrier is genuinely protective in bathrooms or basements.
- Antique or heirloom pieces: Go gently and test a small spot first, but many older pieces respond beautifully to natural conditioning.
A few things to keep in mind: avoid using this on unfinished or raw wood without testing first. And if you’re not sure what finish your furniture has, do a small patch test in an inconspicuous spot. Better safe than sorry… especially with antiques.
Why Natural Is Worth It
Switching to a homemade polish isn’t just a money move, though it is that too. Here’s what you’re actually gaining:
- No chemical buildup: Commercial polishes often contain silicones and petroleum distillates that layer up over time, leaving that plastic-raincoat effect I mentioned. Beeswax conditions and protects without leaving anything behind you’ll regret later.
- Safer for your home: No harsh fumes, no synthetic fragrances masking who-knows-what. Just ingredients you can actually name.
- Genuinely better for wood: Jojoba oil penetrates deep into the grain and keeps wood from drying out and cracking. Beeswax seals that moisture in. Together they do what wood actually needs… not just what looks good for five minutes.
- Less waste: One jar lasts a long time. No aerosol cans headed to the landfill.
What It Costs to Make vs. Buy
Here’s where things get satisfying. Commercial furniture polish runs anywhere from $4–$7 for a basic aerosol spray up to $10–$14 for deep-conditioning waxes like Howard Feed-N-Wax or Old English, the products most comparable to what this recipe does.
This beeswax conditioner, by comparison:
- Beeswax: $0.87/oz; the recipe uses about 2.2 oz, so roughly $1.91
- Jojoba oil: $0.78/fl oz; the recipe uses 24 oz, so roughly $18.72
- Essential oil: $2.50/fl oz; optional, and you’re using just a few drops, so call it $0.50
Total: around $21 for a full batch, which yields significantly more polish than any store-bought jar, and lasts months with normal use. The jojoba oil is the upfront investment, but the per-use cost is where you win. Once you have a stash of ingredients, refills cost next to nothing.
One More Thing
Store your polish in a cool, dry spot and it’ll last for months. When you’re ready for a touch-up, just scoop, buff, done. No shaking, no spraying, no wondering what “petroleum distillates” are doing in your living room.
This is the kind of thing you make once and immediately text a friend about. Consider this me texting you.
DIY Beeswax Wood Polish
Materials
- ⅔ cup beeswax see notes
- 3 cups jojoba oil
- A few drops of essential oil for fragrance lavender, lemon, or orange work well (optional)
Instructions
- In a double boiler over medium heat, combine the beeswax and jojoba oil. Stir occasionally until the beeswax is fully melted and incorporated.
- If using, stir in a few drops of essential oil once the mixture is fully melted.
- Carefully pour the liquid into a jar or airtight container and let it cool for about 2 hours. The polish will solidify into a soft, creamy consistency.
- Scoop a small amount onto a clean cloth and rub it into the wood, working in the direction of the grain.
- Wipe away excess polish immediately or allow it to soak in for a few hours before buffing with a dry cloth for a deep, lasting shine.
Notes
- Beeswax is tough to remove from cookware. Use a disposable container (like a coffee can) over boiling water to create a makeshift double boiler. Keep that can for future beeswax projects.
- Storage: Keep in a cool, dry place to maintain consistency. If it hardens too much, gently warm the jar to soften the polish before use.
- Application Tip: Letting the polish sit on the wood for a few hours before buffing provides extra nourishment and protection, perfect for high-use furniture.
Question: What’s one cleaning or household product you make yourself and would never go back to buying? Share in the comments below.
EverydayCheapskate™ is reader-supported. We participate in the Amazon Services LLC Associates Program and other affiliate advertising programs, designed to provide a means for us to earn from qualifying purchases, at no cost to you.

More from Everyday Cheapskate
 https://www.everydaycheapskate.com/wp-content/uploads/20260705-Best-Coolers-for-Camping-Road-Trips-and-Beach-Days.png
800
1200
Mary Hunt
https://www.everydaycheapskate.com/wp-content/uploads/EC-Logo-by-Mary-Hunt-Tagline-Trimmed.png
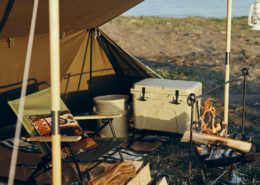
Mary Hunt2026-07-05 13:26:172026-07-05 13:26:17Best Coolers for Camping, Road Trips, and Beach Days
https://www.everydaycheapskate.com/wp-content/uploads/20260705-Best-Coolers-for-Camping-Road-Trips-and-Beach-Days.png
800
1200
Mary Hunt
https://www.everydaycheapskate.com/wp-content/uploads/EC-Logo-by-Mary-Hunt-Tagline-Trimmed.png
Mary Hunt2026-07-05 13:26:172026-07-05 13:26:17Best Coolers for Camping, Road Trips, and Beach Days https://www.everydaycheapskate.com/wp-content/uploads/20260705-how-to-keep-a-cooler-cold.png
800
1200
Mary Hunt
https://www.everydaycheapskate.com/wp-content/uploads/EC-Logo-by-Mary-Hunt-Tagline-Trimmed.png
Mary Hunt2026-07-05 13:19:502026-07-05 13:19:50How to Pack a Cooler That Stays Cold for 48 Hours
https://www.everydaycheapskate.com/wp-content/uploads/20260705-how-to-keep-a-cooler-cold.png
800
1200
Mary Hunt
https://www.everydaycheapskate.com/wp-content/uploads/EC-Logo-by-Mary-Hunt-Tagline-Trimmed.png
Mary Hunt2026-07-05 13:19:502026-07-05 13:19:50How to Pack a Cooler That Stays Cold for 48 Hours https://www.everydaycheapskate.com/wp-content/uploads/20260703-home-decor.png
800
1200
Mary Hunt
https://www.everydaycheapskate.com/wp-content/uploads/EC-Logo-by-Mary-Hunt-Tagline-Trimmed.png
Mary Hunt2026-07-03 20:46:552026-07-03 20:46:5510 Everyday Items You Never Think to Wash (But Should)
https://www.everydaycheapskate.com/wp-content/uploads/20260703-home-decor.png
800
1200
Mary Hunt
https://www.everydaycheapskate.com/wp-content/uploads/EC-Logo-by-Mary-Hunt-Tagline-Trimmed.png
Mary Hunt2026-07-03 20:46:552026-07-03 20:46:5510 Everyday Items You Never Think to Wash (But Should) https://www.everydaycheapskate.com/wp-content/uploads/20260630-a-lit-sparkler-with-an-american-flag-in-the-background-4th-of-july-hacks-tips-and-recipes.png
800
1200
Mary Hunt
https://www.everydaycheapskate.com/wp-content/uploads/EC-Logo-by-Mary-Hunt-Tagline-Trimmed.png
Mary Hunt2026-06-30 21:44:502026-06-30 21:44:5034 Fourth of July Recipes and DIY Hacks for a Stress-Free Holiday
https://www.everydaycheapskate.com/wp-content/uploads/20260630-a-lit-sparkler-with-an-american-flag-in-the-background-4th-of-july-hacks-tips-and-recipes.png
800
1200
Mary Hunt
https://www.everydaycheapskate.com/wp-content/uploads/EC-Logo-by-Mary-Hunt-Tagline-Trimmed.png
Mary Hunt2026-06-30 21:44:502026-06-30 21:44:5034 Fourth of July Recipes and DIY Hacks for a Stress-Free Holiday https://www.everydaycheapskate.com/wp-content/uploads/20260629-wooden-die-spell-july-with-patriotic-decor-in-background.png
800
1200
Mary Hunt
https://www.everydaycheapskate.com/wp-content/uploads/EC-Logo-by-Mary-Hunt-Tagline-Trimmed.png
Mary Hunt2026-06-29 21:07:092026-06-29 21:10:297 Best Things to Buy in July for Huge Summer Savings
https://www.everydaycheapskate.com/wp-content/uploads/20260629-wooden-die-spell-july-with-patriotic-decor-in-background.png
800
1200
Mary Hunt
https://www.everydaycheapskate.com/wp-content/uploads/EC-Logo-by-Mary-Hunt-Tagline-Trimmed.png
Mary Hunt2026-06-29 21:07:092026-06-29 21:10:297 Best Things to Buy in July for Huge Summer Savings https://www.everydaycheapskate.com/wp-content/uploads/20260628-Grilled-Peaches-with-Balsamic-and-Blue-Cheese-1.png
800
1200
Mary Hunt
https://www.everydaycheapskate.com/wp-content/uploads/EC-Logo-by-Mary-Hunt-Tagline-Trimmed.png
Mary Hunt2026-06-29 09:38:342026-06-29 09:38:34Summer Grilled Peaches with Balsamic and Blue Cheese
https://www.everydaycheapskate.com/wp-content/uploads/20260628-Grilled-Peaches-with-Balsamic-and-Blue-Cheese-1.png
800
1200
Mary Hunt
https://www.everydaycheapskate.com/wp-content/uploads/EC-Logo-by-Mary-Hunt-Tagline-Trimmed.png
Mary Hunt2026-06-29 09:38:342026-06-29 09:38:34Summer Grilled Peaches with Balsamic and Blue Cheese https://www.everydaycheapskate.com/wp-content/uploads/20260628-close-up-photo-a-woman-wearing-a-swimsuit-with-a-mild-sunburn.png
800
1200
Mary Hunt
https://www.everydaycheapskate.com/wp-content/uploads/EC-Logo-by-Mary-Hunt-Tagline-Trimmed.png
Mary Hunt2026-06-28 21:40:042026-06-28 21:40:04DIY After-Sun Spray That Cools and Soothes Skin
https://www.everydaycheapskate.com/wp-content/uploads/20260628-close-up-photo-a-woman-wearing-a-swimsuit-with-a-mild-sunburn.png
800
1200
Mary Hunt
https://www.everydaycheapskate.com/wp-content/uploads/EC-Logo-by-Mary-Hunt-Tagline-Trimmed.png
Mary Hunt2026-06-28 21:40:042026-06-28 21:40:04DIY After-Sun Spray That Cools and Soothes Skin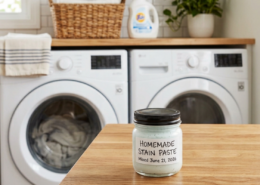 https://www.everydaycheapskate.com/wp-content/uploads/20260626-homemade-stain-paste-sitting-on-wooden-countertop-in-laundry-room-with-washer-and-dryer.png
800
1200
Mary Hunt
https://www.everydaycheapskate.com/wp-content/uploads/EC-Logo-by-Mary-Hunt-Tagline-Trimmed.png
Mary Hunt2026-06-26 17:41:192026-06-26 17:41:19Homemade Laundry Stain Paste That Works for Pennies
https://www.everydaycheapskate.com/wp-content/uploads/20260626-homemade-stain-paste-sitting-on-wooden-countertop-in-laundry-room-with-washer-and-dryer.png
800
1200
Mary Hunt
https://www.everydaycheapskate.com/wp-content/uploads/EC-Logo-by-Mary-Hunt-Tagline-Trimmed.png
Mary Hunt2026-06-26 17:41:192026-06-26 17:41:19Homemade Laundry Stain Paste That Works for Pennies https://www.everydaycheapskate.com/wp-content/uploads/20260625-a-rustic-wooden-christmas-tree-in-the-sand-on-the-beach.png
800
1200
Mary Hunt
https://www.everydaycheapskate.com/wp-content/uploads/EC-Logo-by-Mary-Hunt-Tagline-Trimmed.png
Mary Hunt2026-06-26 11:34:132026-06-26 11:36:44Christmas in June? Try This Amazon Prime Day Gift Guide
https://www.everydaycheapskate.com/wp-content/uploads/20260625-a-rustic-wooden-christmas-tree-in-the-sand-on-the-beach.png
800
1200
Mary Hunt
https://www.everydaycheapskate.com/wp-content/uploads/EC-Logo-by-Mary-Hunt-Tagline-Trimmed.png
Mary Hunt2026-06-26 11:34:132026-06-26 11:36:44Christmas in June? Try This Amazon Prime Day Gift GuidePlease keep your comments positive, encouraging, helpful, brief,
and on-topic in keeping with EC Commenting Guidelines
Last update on 2026-07-16 / Affiliate links / Images from Amazon Product Advertising API


I love your daily shower spray and dry shampoo recipes. Have made both for several years! Thanks for all your content. It’s SO helpful. I love all the things – new words, recipes, etc. etc. etc. !
Thank you, Kim. I love getting messages like these. Keeps me going!
Your resilient floor cleaner is the best. No strong perfumes, and have shared it with friends. So easy to make, and have been using it for a couple of years. Thanks !
Nancy, this makes me so happy and I love that you’ve been spreading the word! Thanks for sharing it around.
Do you suggest this same recipe for cutting boards?
Jen, yes! Beeswax and jojoba oil are actually a classic combo for cutting board care. Just make sure the board is clean and dry first, rub a little in, let it soak, and buff off the excess. Your boards will drink it right up.
One thing to keep in mind… skip the essential oils for anything food-contact. Stick to the beeswax and jojoba and you’re good to go.
Would this be good for sealing a new, raw-wood cutting board or bread board?
Mimi, perfect timing on this question! Yes… beeswax and jojoba oil are actually ideal for sealing raw wood. New boards are thirsty, so don’t be shy with the first coat. Let it soak in fully, then buff and repeat once or twice. That first seasoning really sets it up for the long haul.
Just leave out the essential oils since it’ll be touching food. Beeswax and jojoba only, and you’re golden.
Homemade beeswax is wonderful. How often?.. Once a month? Every two or three months? Please, spill the tea. Thanks.
Denise, okay, spilling! For most furniture, every 3–6 months is plenty. The wood will actually tell you. When it starts looking a little dull or dry, it’s asking for a treat.
High-use surfaces like cutting boards or a well-loved dining table might want a little more attention… maybe every 4–6 weeks. But honestly? There’s no wrong answer here. More isn’t harmful, just unnecessary. When in doubt, give it a buff and see how it looks.
Do you believe this to be food safe (thinking cutting boards and/or wooden spoons)?
Cristie, the beeswax and jojoba oil are totally food safe. Both are commonly used in food-grade wood conditioners. So yes, cutting boards and wooden spoons are fair game.
The one caveat: skip the essential oils if you’re using it on anything that touches food. Just beeswax and jojoba, and you’re in great shape.