
DIY Car Detailing: How to Save $150 and Get Your Car Sparkling Clean

Welcome to our ultimate guide on DIY car detailing. Instead of spending $150 at a professional car wash, you can achieve the same results with your own clean car kit. Follow our detailed steps, from gathering supplies to deep cleaning and waxing, and enjoy a sparkling clean car while saving money.
Why DIY Car Detailing Saves You Money
You know that feeling when you take your car to a professional detailer and watch $150 (or more!) disappear from your wallet? While it’s nice to have someone else do the work, the truth is, you can achieve the same sparkling results at home for a fraction of the cost. By putting together your own clean car kit and investing a little time, you’ll not only save money but also gain a sense of accomplishment. Plus, there’s something incredibly satisfying about seeing your car shine and knowing you did it yourself.
Let’s break down the savings:
- Professional Detailing Costs: Most professional car detailing services charge between $150 to $300 depending on the level of service and your location. That’s a hefty price tag for something you can do at home.
- DIY Supplies: With a few affordable products like car wash detergent, microfiber cloths, and a vacuum cleaner, you can put together a clean car kit for less than $50. Many of these items can be reused multiple times, making your cost per use even lower.
- Homemade Cleaners: Creating your own cleaning solutions with ingredients you probably already have at home is not only cost-effective but also better for the environment. My homemade window cleaner and upholstery cleaner recipes are just as effective as store-bought options, but at a fraction of the cost.
- Maintenance and Longevity: Regularly detailing your car yourself can help maintain its value by preventing wear and tear. This can save you money in the long run by avoiding costly repairs and keeping your car looking newer for longer.
So, roll up your sleeves, gather your clean car kit, and get ready to save some serious cash while enjoying the benefits of a beautifully detailed car. Trust me, once you see the results, you’ll wonder why you ever paid someone else to do it!
Essential Supplies for Your Clean Car Kit
To get your car looking its absolute best, you’ll need to gather a few key supplies. Think of it as assembling your very own clean car kit. Here’s a list of essentials that will make your DIY car detailing session a breeze:
- Trash can
- Full-size vacuum
- Window cleaner
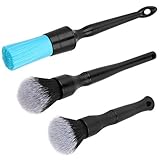
- Soft brush
- Stiff brush
- Car wash detergent
- Upholstery cleaner (DIY recipe here)
- Leather cleaner, as needed
- Water hose or pressure washer
- Sponge
- Microfiber mitt
- Microfiber towels
- Car wax
MORE: Once You Use Alvin Corn DIY Glass Cleaner You Will Never Look Back
Step-by-Step Guide to Car Detailing
Step 1: Pick a Location
Choose a spot where you have plenty of room on all sides of your car. The middle of the driveway is perfect. If you can access the lawn or another open space, that’s even better. If your only option is the curb, it’s not ideal, but we’ll make it work.
Step 2: Open the Doors
Open all the doors, including the trunk and glove box. You won’t be dealing with the engine, so keep the hood closed.
Step 3: Everything Out
Remove everything from every nook and cranny of your car. Move it all out! Place safety equipment needed for emergencies in one area of the lawn or driveway. Check the spare tire to make sure it’s in good working order.
Sort the items you remove: trash goes in the trash can, items that need to be taken to the house go in another pile, and items that belong in the garage go in yet another. Finally, gather the few items that will go back into the car.
For the glove box, keep only the Owner’s Manual, vehicle registration, service records, and other pertinent information. Everything else should go into the trash or a safe place in the house.
Step 4: Remove the Seats (Optional)
If it’s doable for your vehicle, removing the seats makes cleaning easier. Many newer models have seats that are easy to remove, but be cautious of electrical components and sensors. Read your owner’s manual first. If it doesn’t provide clear instructions, skip this step.
Step 5: Vacuum Like a Pro
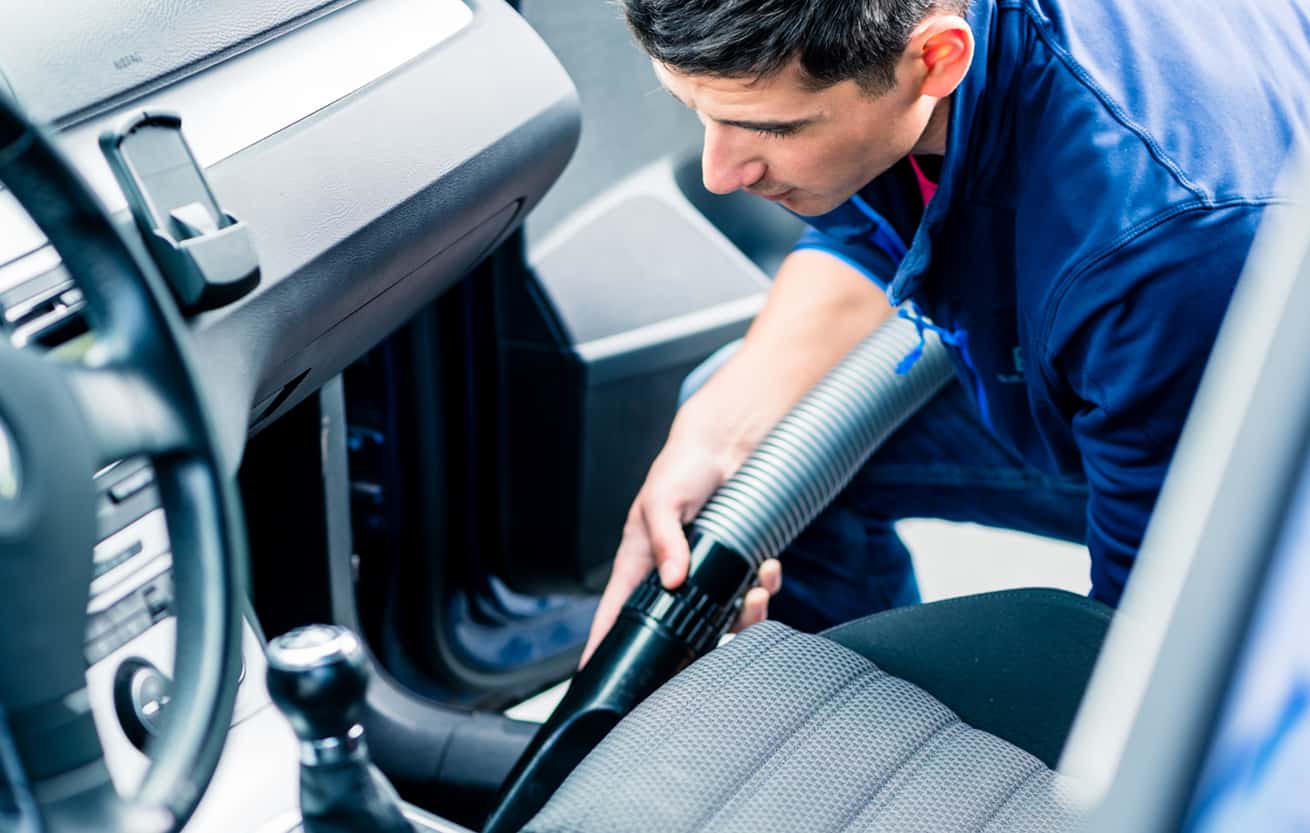
Use a full-size vacuum with attachments, especially the crevice tool. Vacuum slowly, taking your time to remove every bit of sand, salt, French fry, and debris. Empty the vacuum’s dirtbag or container and go over everything a second time.
Step 6: Clean the Carpet
Use your favorite carpet stain treatment and detergent to scrub the carpets in the car and trunk. Use a stiff brush to work out stubborn stains. Blot up as much dirty water as you can with a microfiber towel, then rinse with clean, cool water. Blot again until dry to the touch. Let the carpets air dry with the doors open, and follow with another vacuuming.
Step 7: Wash and Clean the Interior
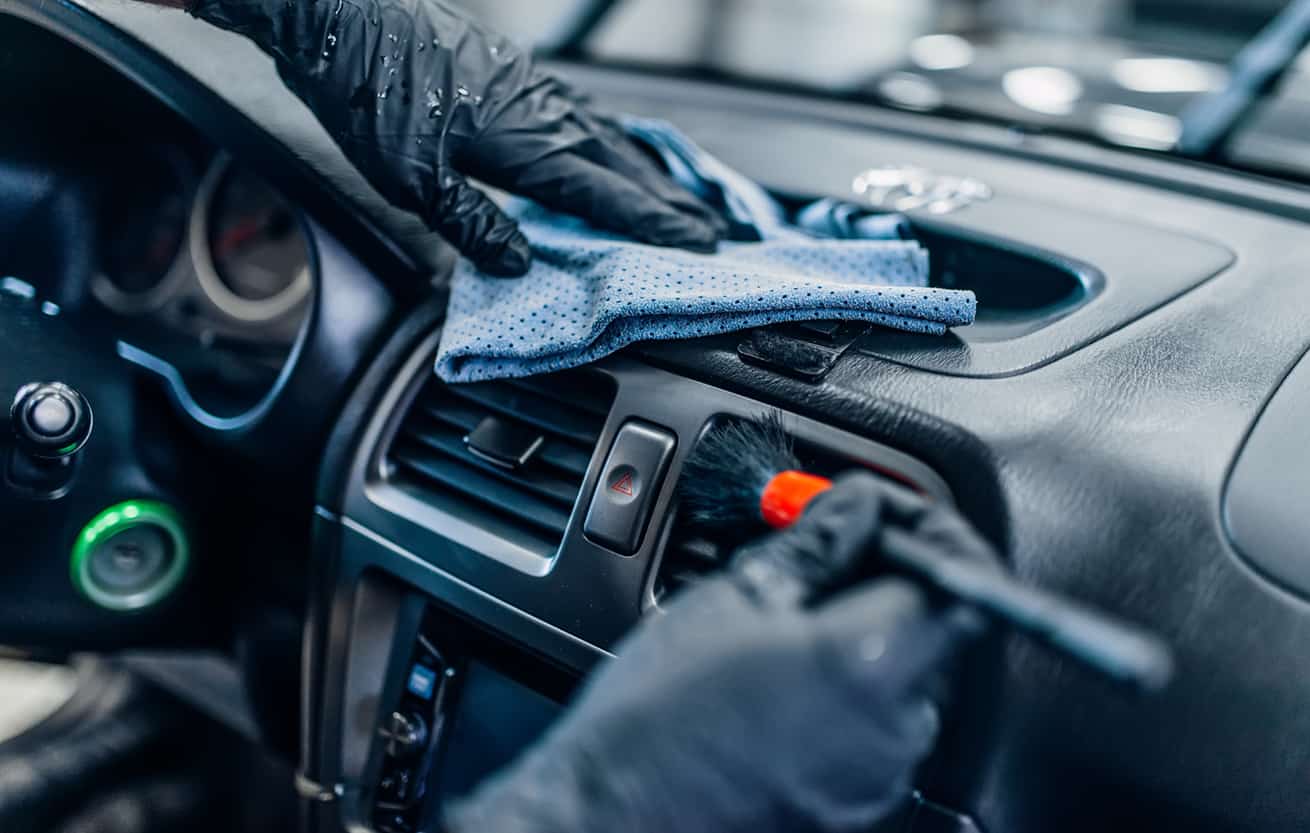
Use an all-purpose cleaner to clean the vinyl walls, doors, and dashboard. Avoid the headliner (ceiling). Use a cotton swab or soft brush around knobs and handles. Wipe dry with a damp microfiber towel. If you’ve removed the seats, this will be much easier. If not, it’s a bit more challenging, but you can do it!
Step 8: Wash the Inside Windows
Clean the inside windows with a good window cleaner and a clean, damp microfiber cloth or paper towels.
All-Purpose Homemade Window Cleaner
Make streak-free windows with this homemade cleaner. It uses simple ingredients you likely have at home.
Ingredients:
- ¼ cup isopropyl alcohol*
- ¼ cup white vinegar (5% acidity)
- 1 tbsp cornstarch
- 5 drops Blue Dawn dishwashing liquid
- 2 cups water
Instructions: Mix ingredients in a spray bottle. Shake well before use. Spray on windows and wipe clean with a cloth.
*Substitute rubbing alcohol with denatured alcohol or gin/vodka if needed.
Step 9: Clean the Upholstery
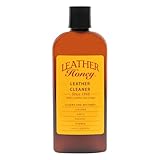
Vacuum the upholstered seats thoroughly. For leather seats, use a leather cleaner or conditioner like Leather Honey. For cloth seats, use a good upholstery cleaner or make your own using this recipe.
Step 10: Reassemble
If you removed the seats, reinstall them. Return emergency equipment to the trunk and necessary documentation to the glove box. Spray your favorite air freshener, and close the doors and windows.
Step 11: Wash the Exterior
If you removed floor mats, scrub them clean now. For vinyl mats covered in winter’s salt stains, use a 50-50 solution of water and white vinegar. Rinse well and allow to air dry.
Wash the outside of the car with warm water and car wash detergent, or a tablespoon or two of Blue Dawn dishwashing liquid. Use a microfiber mitt to loosen dirt. Clean the wheels with a brush or sponge. Rinse with a hose or pressure washer, then wipe dry with clean, damp microfiber cloths. Clean the outside windows with your favorite glass and mirror cleaner. Polish dry with a damp microfiber cloth.
Step 12: Wax the Exterior
If you’re up for it, now is a great time to wax the car. Follow the instructions on your favorite car wax container.
Consider This Car Wax
I recommend Meguiar’s Cleaner Wax paired with a good microfiber cloth. It cleans, polishes, and leaves a beautiful finish—all in one step.
And there you have it—a fresh, beautifully detailed car that you can be proud of!
Preventative Measures for a Tidy Car Interior
Discovering the right tools can make all the difference in maintaining a clean car interior. To complement your DIY car detailing efforts, consider incorporating preventative solutions like the Drive Bin XL. It’s not just a trash can—it’s a game-changer designed to keep your vehicle organized and free from clutter.
Shop Your Clean Car Kit Essentials
Explore and shop for all the essential items you need to maintain a clean and tidy car interior. From vacuums to cleaning detergents and everything in between, these products will help you achieve professional-level detailing results at home.


Question: What’s your favorite car cleaning hack that saves you time or money? Share your tips below and let’s help each other keep our cars sparkling clean.
EverydayCheapskate™ is reader-supported. We participate in the Amazon Services LLC Associates Program and other affiliate advertising programs, designed to provide a means for us to earn from qualifying purchases, at no cost to you.

More from Everyday Cheapskate
 https://www.everydaycheapskate.com/wp-content/uploads/20260722-easy-home-repairs-slow-sink-drain-squeaky-hinges-sticky-drawer.png
800
1200
Mary Hunt
https://www.everydaycheapskate.com/wp-content/uploads/EC-Logo-by-Mary-Hunt-Tagline-Trimmed.png
Mary Hunt2026-07-22 13:04:022026-07-22 13:04:0210 Small Home Annoyances You Can Fix in Under 15 Minutes Each
https://www.everydaycheapskate.com/wp-content/uploads/20260722-easy-home-repairs-slow-sink-drain-squeaky-hinges-sticky-drawer.png
800
1200
Mary Hunt
https://www.everydaycheapskate.com/wp-content/uploads/EC-Logo-by-Mary-Hunt-Tagline-Trimmed.png
Mary Hunt2026-07-22 13:04:022026-07-22 13:04:0210 Small Home Annoyances You Can Fix in Under 15 Minutes Each https://www.everydaycheapskate.com/wp-content/uploads/20260716-woman-on-phone-with-flat-tire-spare-roadside-car-emergency-kit.png
800
1200
Mary Hunt
https://www.everydaycheapskate.com/wp-content/uploads/EC-Logo-by-Mary-Hunt-Tagline-Trimmed.png
Mary Hunt2026-07-16 21:10:152026-07-16 21:10:15The 7-Item Emergency Car Kit Every Driver Needs (Cheaper Than One Tow)
https://www.everydaycheapskate.com/wp-content/uploads/20260716-woman-on-phone-with-flat-tire-spare-roadside-car-emergency-kit.png
800
1200
Mary Hunt
https://www.everydaycheapskate.com/wp-content/uploads/EC-Logo-by-Mary-Hunt-Tagline-Trimmed.png
Mary Hunt2026-07-16 21:10:152026-07-16 21:10:15The 7-Item Emergency Car Kit Every Driver Needs (Cheaper Than One Tow) https://www.everydaycheapskate.com/wp-content/uploads/20260714-car-dashboard-diy-car-interior-cleaning-wipes.png
800
1200
Mary Hunt
https://www.everydaycheapskate.com/wp-content/uploads/EC-Logo-by-Mary-Hunt-Tagline-Trimmed.png
Mary Hunt2026-07-14 13:45:172026-07-14 13:45:17DIY Car Interior Cleaning Wipes That Actually Work Well
https://www.everydaycheapskate.com/wp-content/uploads/20260714-car-dashboard-diy-car-interior-cleaning-wipes.png
800
1200
Mary Hunt
https://www.everydaycheapskate.com/wp-content/uploads/EC-Logo-by-Mary-Hunt-Tagline-Trimmed.png
Mary Hunt2026-07-14 13:45:172026-07-14 13:45:17DIY Car Interior Cleaning Wipes That Actually Work Well https://www.everydaycheapskate.com/wp-content/uploads/20260710-luxury-car-driving-down-mountain-highway-how-to-lower-car-insurance-premium-.png
800
1200
Mary Hunt
https://www.everydaycheapskate.com/wp-content/uploads/EC-Logo-by-Mary-Hunt-Tagline-Trimmed.png
Mary Hunt2026-07-10 17:46:132026-07-10 17:46:13How to Knock $200+ Off Your Car Insurance Bill (Without Switching Companies)
https://www.everydaycheapskate.com/wp-content/uploads/20260710-luxury-car-driving-down-mountain-highway-how-to-lower-car-insurance-premium-.png
800
1200
Mary Hunt
https://www.everydaycheapskate.com/wp-content/uploads/EC-Logo-by-Mary-Hunt-Tagline-Trimmed.png
Mary Hunt2026-07-10 17:46:132026-07-10 17:46:13How to Knock $200+ Off Your Car Insurance Bill (Without Switching Companies) https://www.everydaycheapskate.com/wp-content/uploads/20260705-how-to-keep-a-cooler-cold.png
800
1200
Mary Hunt
https://www.everydaycheapskate.com/wp-content/uploads/EC-Logo-by-Mary-Hunt-Tagline-Trimmed.png
Mary Hunt2026-07-05 13:19:502026-07-05 13:19:50How to Pack a Cooler That Stays Cold for 48 Hours
https://www.everydaycheapskate.com/wp-content/uploads/20260705-how-to-keep-a-cooler-cold.png
800
1200
Mary Hunt
https://www.everydaycheapskate.com/wp-content/uploads/EC-Logo-by-Mary-Hunt-Tagline-Trimmed.png
Mary Hunt2026-07-05 13:19:502026-07-05 13:19:50How to Pack a Cooler That Stays Cold for 48 Hours https://www.everydaycheapskate.com/wp-content/uploads/20260703-home-decor.png
800
1200
Mary Hunt
https://www.everydaycheapskate.com/wp-content/uploads/EC-Logo-by-Mary-Hunt-Tagline-Trimmed.png
Mary Hunt2026-07-03 20:46:552026-07-03 20:46:5510 Everyday Items You Never Think to Wash (But Should)
https://www.everydaycheapskate.com/wp-content/uploads/20260703-home-decor.png
800
1200
Mary Hunt
https://www.everydaycheapskate.com/wp-content/uploads/EC-Logo-by-Mary-Hunt-Tagline-Trimmed.png
Mary Hunt2026-07-03 20:46:552026-07-03 20:46:5510 Everyday Items You Never Think to Wash (But Should) https://www.everydaycheapskate.com/wp-content/uploads/20260630-a-lit-sparkler-with-an-american-flag-in-the-background-4th-of-july-hacks-tips-and-recipes.png
800
1200
Mary Hunt
https://www.everydaycheapskate.com/wp-content/uploads/EC-Logo-by-Mary-Hunt-Tagline-Trimmed.png
Mary Hunt2026-06-30 21:44:502026-06-30 21:44:5034 Fourth of July Recipes and DIY Hacks for a Stress-Free Holiday
https://www.everydaycheapskate.com/wp-content/uploads/20260630-a-lit-sparkler-with-an-american-flag-in-the-background-4th-of-july-hacks-tips-and-recipes.png
800
1200
Mary Hunt
https://www.everydaycheapskate.com/wp-content/uploads/EC-Logo-by-Mary-Hunt-Tagline-Trimmed.png
Mary Hunt2026-06-30 21:44:502026-06-30 21:44:5034 Fourth of July Recipes and DIY Hacks for a Stress-Free Holiday https://www.everydaycheapskate.com/wp-content/uploads/20260628-close-up-photo-a-woman-wearing-a-swimsuit-with-a-mild-sunburn.png
800
1200
Mary Hunt
https://www.everydaycheapskate.com/wp-content/uploads/EC-Logo-by-Mary-Hunt-Tagline-Trimmed.png
Mary Hunt2026-06-28 21:40:042026-06-28 21:40:04DIY After-Sun Spray That Cools and Soothes Skin
https://www.everydaycheapskate.com/wp-content/uploads/20260628-close-up-photo-a-woman-wearing-a-swimsuit-with-a-mild-sunburn.png
800
1200
Mary Hunt
https://www.everydaycheapskate.com/wp-content/uploads/EC-Logo-by-Mary-Hunt-Tagline-Trimmed.png
Mary Hunt2026-06-28 21:40:042026-06-28 21:40:04DIY After-Sun Spray That Cools and Soothes Skin https://www.everydaycheapskate.com/wp-content/uploads/20260626-homemade-stain-paste-sitting-on-wooden-countertop-in-laundry-room-with-washer-and-dryer.png
800
1200
Mary Hunt
https://www.everydaycheapskate.com/wp-content/uploads/EC-Logo-by-Mary-Hunt-Tagline-Trimmed.png
Mary Hunt2026-06-26 17:41:192026-06-26 17:41:19Homemade Laundry Stain Paste That Works for Pennies
https://www.everydaycheapskate.com/wp-content/uploads/20260626-homemade-stain-paste-sitting-on-wooden-countertop-in-laundry-room-with-washer-and-dryer.png
800
1200
Mary Hunt
https://www.everydaycheapskate.com/wp-content/uploads/EC-Logo-by-Mary-Hunt-Tagline-Trimmed.png
Mary Hunt2026-06-26 17:41:192026-06-26 17:41:19Homemade Laundry Stain Paste That Works for PenniesPlease keep your comments positive, encouraging, helpful, brief,
and on-topic in keeping with EC Commenting Guidelines
Last update on 2026-07-31 / Affiliate links / Images from Amazon Product Advertising API


my husband and i lost our cars to underbody rust within a week of each other. i will gladly pay the $12 to have my car washed at the mobil station. the $12 wash cleans the salt off the underbody of the car, adds a protective coating and the water used to wash the car is caught and recycled. pennsylvania american water charges are through the roof and going to the car wash is cheaper in the long run. the detailing, thanks to you, i can do at home
any recommendations to remove pine sap on vehicle paint ??
First try simple 70% isopropyl alcohol using a microfiber cloth to gently rub away the sap. If it’s stubborn, let some IPA soak on the area for a bit to loosen it up. If you are dealing with a vertical area, hand sanitizer can also work. If it’s been on the paint a while and it’s particularly stubborn, I like the Goo Gone products and they make one especially for automotive use. Both IPA and Goo Gone will strip any protective coating like wax so once you’ve removed the sap, make sure you hit the area with wax to keep that layer of protection up.
Would the Window Cleaner recipe above work for windshield washer fluid? If not, what recipe would you recommend for the windshield washer reservoir? Thank you in advance!
Hi Brian … No, because of the corn starch. That could clog the nozzles. But be of good of cheer! Here is a fabulous Windshield Washer Fluid recipe that is safe in ever way. And it won’t freeze (because of the alcohol) so it is 4-seasons friendly:
Homemamde Windshield Washer Fluid
3 cups rubbing alcohol
1 tablespoon liquid soap, like Blue Dawn
10 cups water
1-2 drops blue food coloring (optional)
Pour ingredients in gallon-size plastic jug. Shake thoroughly to mix. Use in place of commercial windshield washer fluid in your car’s windshield washer reservoir. Always shake prior to adding to reservoir. The alcohol speeds the drying time and prevents the windows from freezing or cracking in the winter. The blue food coloring lets you know in a glance that it is not water. Car windows can also be washed using this solution.
Love the upholstery cleaner recipe and will try it on some interior upholstery I need to clean — I use Fels Naptha all the time to get out stubborn stains on clothes. Question — after you whip the upholstery cleaner up, what do you do? Does it sit on the upholstery and get vacuumed up in a wet vac? Allowed to dry then vacuumed?
BTW — I use your column hints all the time. When a problem comes up you are my first source of how to fix it, clean it, organize it, etc. Plus the column is a fun read all the time!!
Ah, thanks Eileen! You have encouraged me (I needed that!) As for the upholstery cleaner, once whipped up use it as you would any cleaner on upholstery. You can use it with a damp cloth, rubbing it into the stain or area you want to clean. I always follow with a damp clean cloth to “rinse” it away. I don’t like to leave any residue behind as that will become a dirt magnet in the future.
A question for Mary: In the “list of items needed,” car wash detergent is listed. In the list of steps, it says to make the exterior detergent using water and Dawn. We have often wondered if Dawn was safe to use in a car wash solution. It looks like it is, but you could you please confirm that? Thank you!
Yes Blue Dawn is absolutely 100% safe to clean cars … inside and out.
One thing to add is to clean the wheel wells. If you live in a northern climate or a dusty environment, they can get really dirty. A spring cash wash, once the salt is gone, can help with the underbody.
I duct tape a sturdy drinking straw to the vacuum hose and get in those tiny nooks and crannies, using an old toothbrush to loosen anything stuck on. just a teeny OCD… 😉
I agree with Eileen that Mary is my go to source. <3 Also, I've heard using silly putty gets those tight areas clean and sounds fun!