
The Easiest Homemade English Muffin Bread You’ll Ever Bake


Here’s one of the simplest ways to stretch your grocery budget this week: bake bread. Before you roll your eyes, stay with me. This homemade English muffin bread requires no kneading, no fancy techniques, and no bakery degree. For about $3, you’ll have the equivalent of 24 English muffins and when you pull those golden loaves from the oven and see those nooks and crannies, you’re going to feel like an absolute genius.

If you’ve read 7 Money Rules for Life, you know Rule #1 sounds almost too simple: Spend less than you earn.
But here’s the part that matters. “Spend less than you earn” is not the same thing as “don’t spend more than you earn.” The second version lets you hover at zero. The first one requires a margin.
You need a gap… a real one between what comes in and what goes out. That gap is where debt shrinks. It’s where emergency funds grow. It’s where options live. And options are freedom.
Growing that gap doesn’t usually happen with one dramatic change. It happens in small, repeatable decisions. Like bread.
Why Homemade English Muffin Bread Saves Money
A package of English muffins can run $4 to $6, depending on where you shop. This recipe makes the equivalent of 24 for about $3 total, roughly 13 cents each when you buy ingredients wisely (I purchase flour and yeast in bulk because we use them often).
That difference might seem modest. But repeat it week after week, across multiple grocery staples, and you’re no longer talking about pennies. You’re talking about momentum.
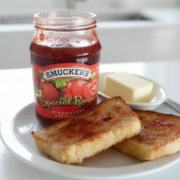
English Muffin bread is sturdy enough for sandwiches and unbelievable for grilled cheese. Toasted with butter and jam, it is pure heaven. It outperforms the packaged version in both taste and cost.
And yes, when you slice into those nooks and crannies, you’ll feel like a genius all over again.
What You’ll Need to Make English Muffin Bread
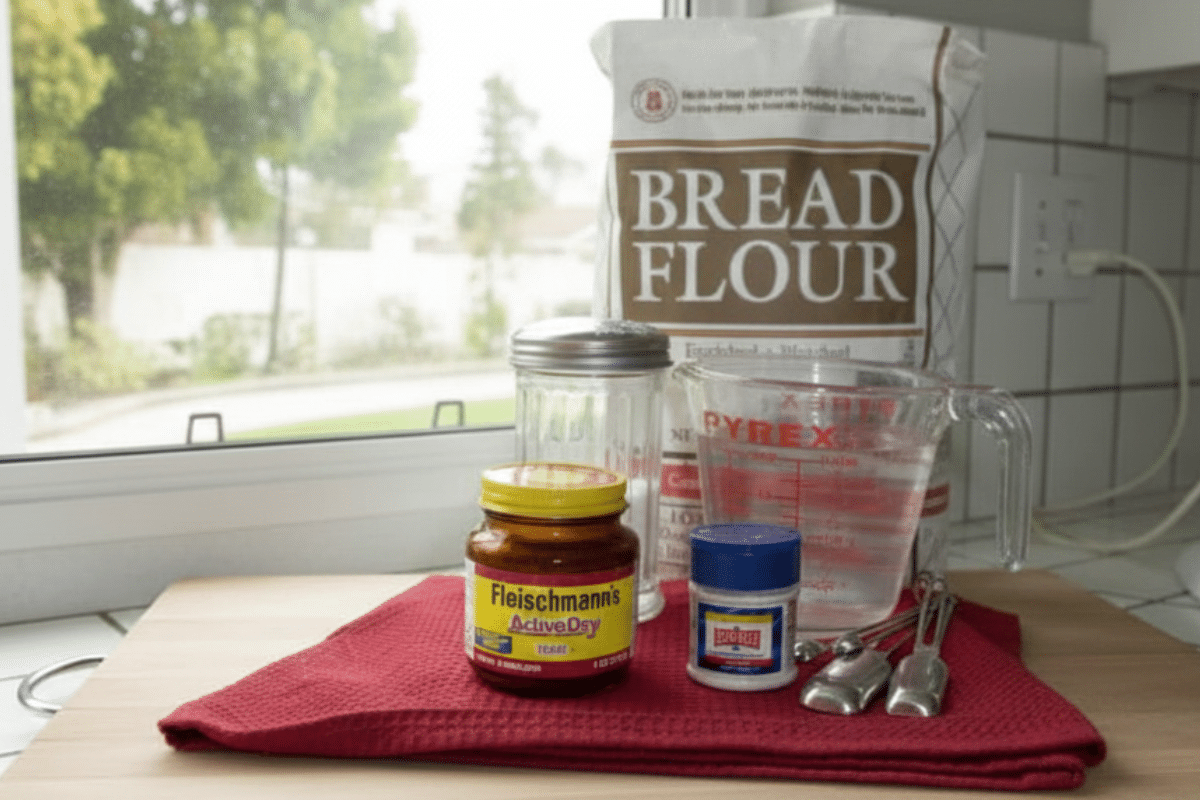
The beauty of this homemade English muffin bread is how uncomplicated it is. Just pantry basics doing what they’ve done for generations.: Here’s what you’ll need
Warm Water
Think comfortably warm bathwater, not hot. Too hot can kill the yeast. Too cool and it just sits there doing nothing. If you have a thermometer, aim for about 105–110°F. If you don’t, test it with your wrist. It should feel warm but not uncomfortable.
Water activates the yeast and hydrates the flour, creating that soft, slightly sticky dough that gives you those signature nooks and crannies.
Active Dry or Rapid-Rise Yeast
Either works beautifully here. Active dry yeast may take a few extra minutes to wake up. Rapid-rise (instant) yeast works a bit faster and can be mixed right in with the dry ingredients.
If you bake often, buying yeast in a jar or vacuum-packed brick is dramatically cheaper than individual packets. Store it in the freezer to extend its life. It keeps for months.
No yeast? This isn’t a good recipe to substitute with baking powder. Yeast is what creates the texture we’re after.
Salt
Salt strengthens the gluten structure and balances the yeast activity. Without it, bread tastes flat and rises too aggressively.
Regular table salt works fine. If using kosher salt, you may need slightly more by volume since the crystals are larger.
Sugar
Just a small amount. It feeds the yeast and helps with browning. The bread won’t taste sweet. You can substitute honey, maple syrup, or coconut sugar. Even skipping it entirely will still produce bread, though the rise may be slightly slower.
Bread Flour (or All-Purpose Flour)
Bread flour gives you a taller loaf and chewier texture because it has a higher protein content. That stronger gluten network helps trap the air bubbles which means better nooks and crannies. All-purpose flour works just fine if that’s what you have. The loaf may be slightly softer and not quite as tall, but still delicious.
Want to experiment? You can replace up to 1–2 cups with whole wheat flour for a heartier loaf. For a lighter texture when using whole wheat, consider adding a tablespoon of vital wheat gluten if you have it.
This recipe is naturally dairy-free as written. If you brush the top with butter at the end (which I highly recommend for flavor and color), you can easily swap in olive oil or a plant-based alternative if needed.
That’s it. Five simple ingredients. When basic things work this well, you don’t need anything fancy… just a bowl, a spoon, and the willingness to try.
How to Make Homemade English Muffin Bread
This is one of those rare bread recipes that feels almost suspiciously easy. No kneading. No shaping. No flour-covered countertops.
1. Mix… and Stop
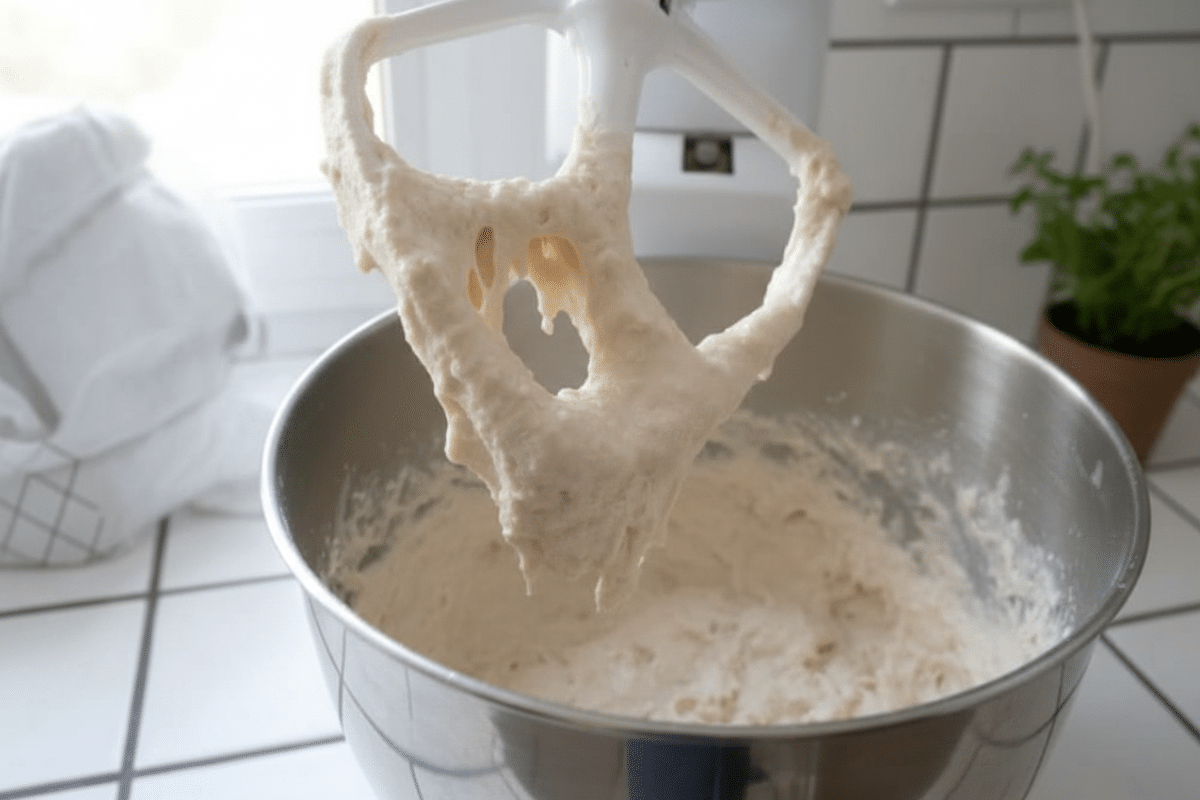
Place all the ingredients in a large bowl and mix just until everything is incorporated. That’s it. You’re not developing gluten here with elbow grease. You’re simply combining.
The dough will be very wet and sticky, closer to thick batter than traditional bread dough. Resist the urge to add more flour. That sticky texture is what creates those beautiful nooks and crannies later.
You can use a stand mixer with a paddle attachment, or a sturdy wooden spoon and a little arm strength. Either works perfectly.
2. First Rise… Let It Do Its Thing
Cover the bowl with a damp towel and let the dough rise until doubled, about one hour.
If your kitchen runs cool, place the bowl in a slightly warm (turned off) oven with just the light on. Yeast loves a cozy environment.
You’ll know it’s ready when the dough looks puffed and airy.
3. Spoon Into Pans
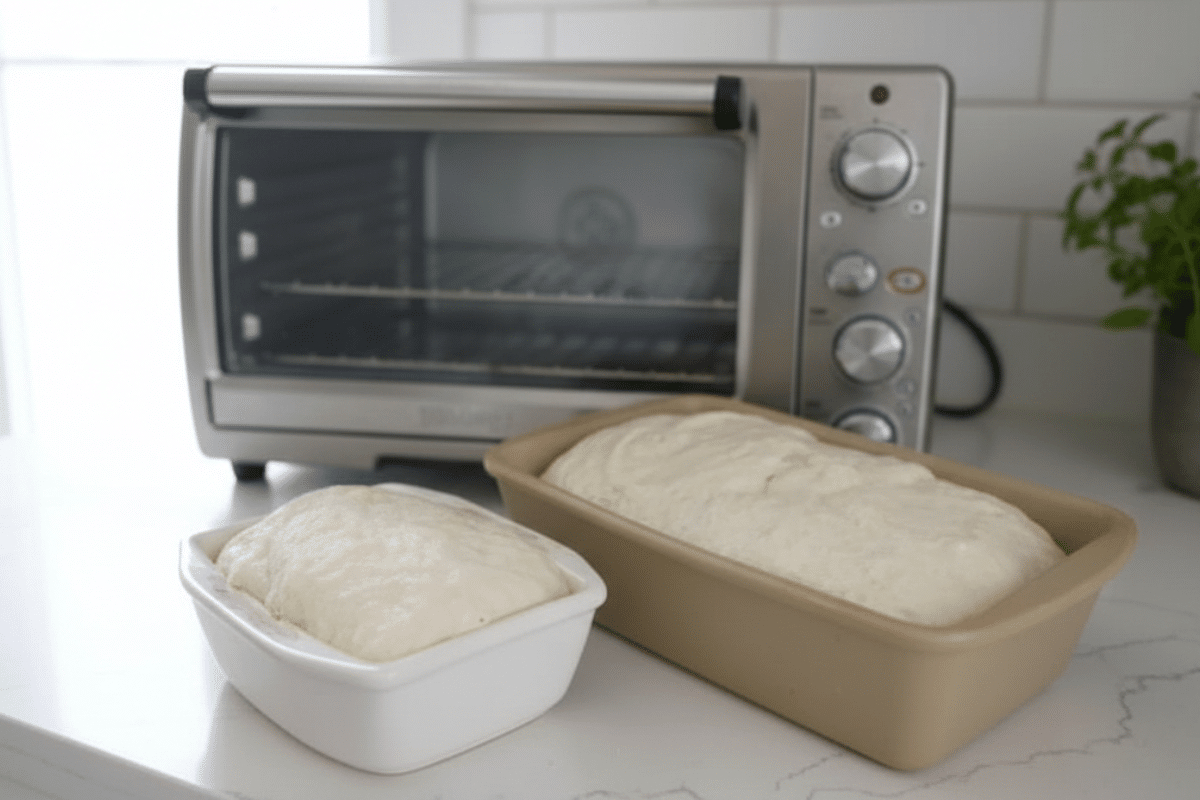
Grease your loaf pans generously. This is not the time to be stingy.
Spoon the dough into the pans. It will still be sticky and loose. Smooth the tops lightly with a spatula if you like, but perfection is not required.
Let the dough rise again until it reaches the top of the pans. This second rise is what gives you that tall, sliceable loaf.
If you’d like fewer loaves, you can easily cut the recipe in half. It adapts beautifully.
4. Bake to Golden Perfection
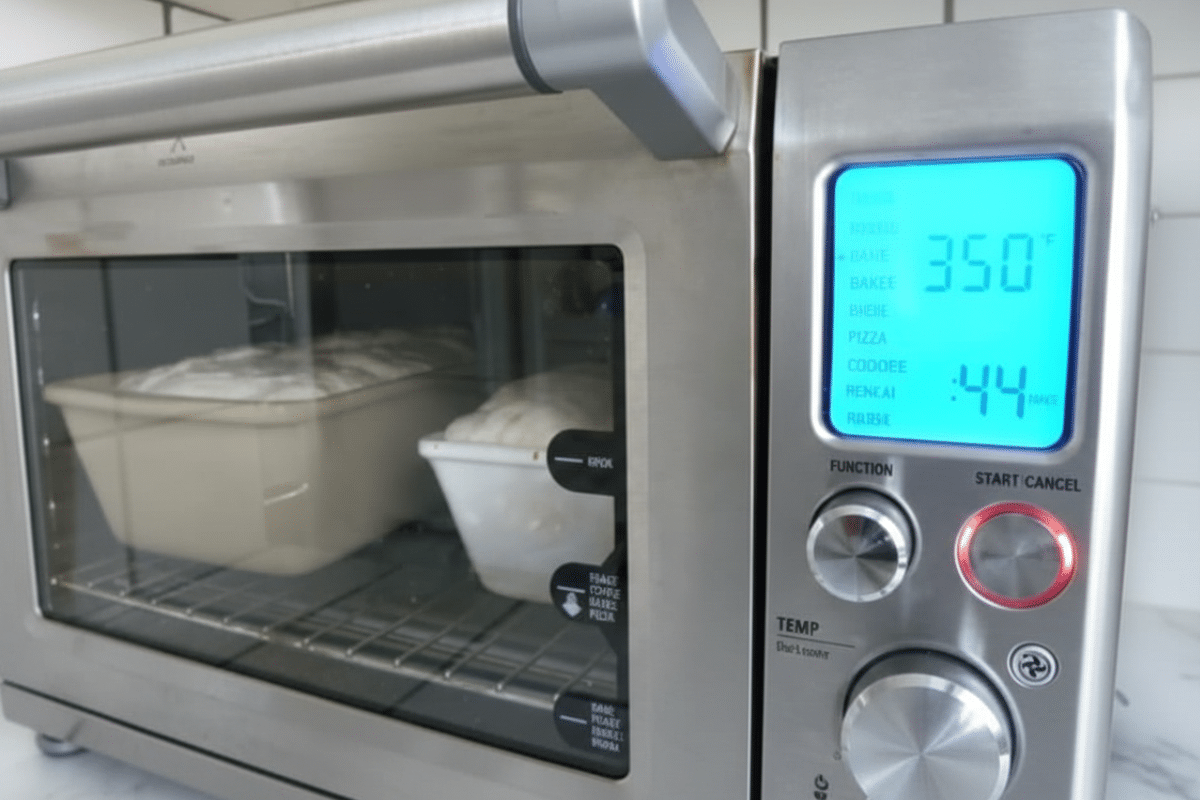
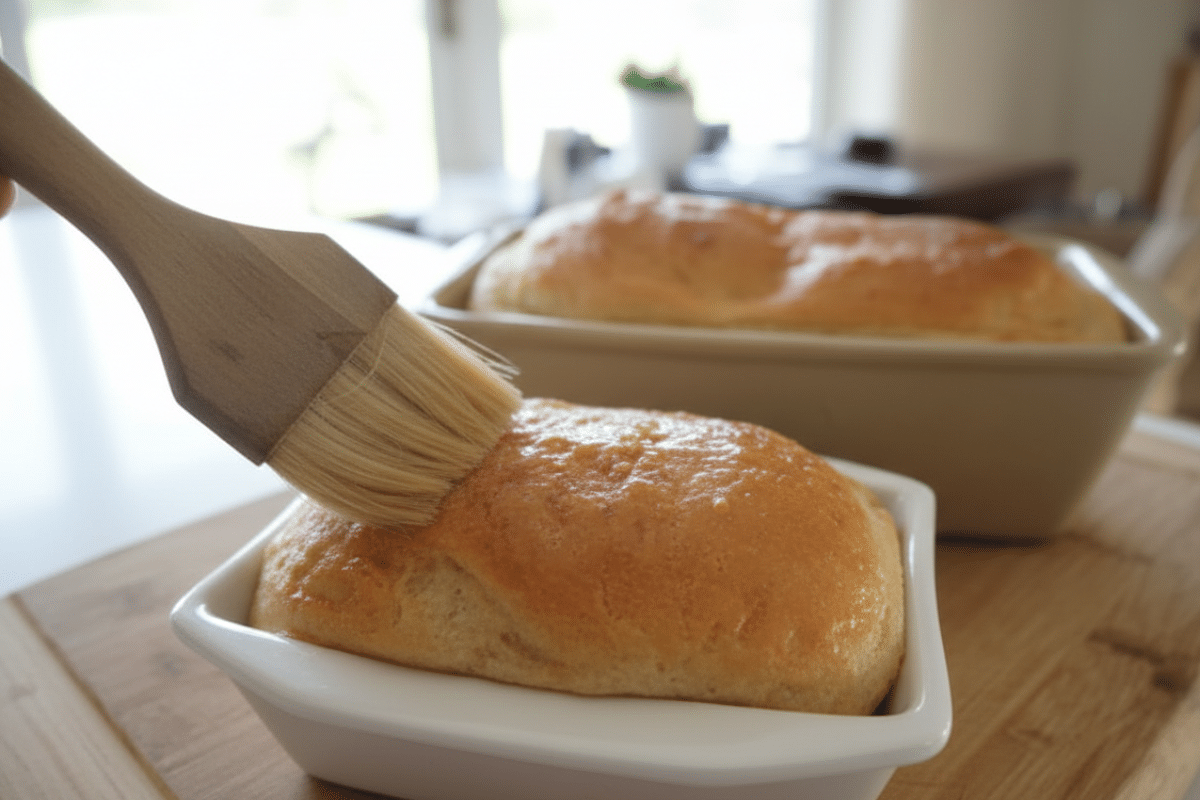
Bake in a preheated 350°F oven for 35 minutes. (That’s my beautiful countertop Breville Smart Oven!)
Then brush the tops with melted butter and return to the oven for another 10 minutes. That final step gives you a golden, slightly crisp crust. If you prefer a dairy-free option, olive oil works just fine for brushing.
The bread should sound slightly hollow when tapped and register about 190–200°F internally if you’re using a thermometer.
5. Cool (Yes, Really)
Let the loaves cool in the pans for 10–15 minutes before removing them to a rack. Then allow them to cool completely before slicing.
This part requires restraint. Cutting too soon can make the interior gummy because the steam hasn’t finished redistributing. Give it time. Your patience will be rewarded.
Once cooled, slice and toast. That’s when the nooks and crannies really shine.
How to Store and Freeze English Muffin Bread
This homemade English muffin bread is wonderfully moist, which means storage matters. Once the loaves are completely cool (and I do mean completely), store them at room temperature in a tightly sealed plastic bag for up to three days. That keeps the texture soft without drying out those precious nooks and crannies.
If you prefer a lower-plastic option, wrap the loaf in a clean tea towel and place it inside a bread box or loosely closed container. Just know it may firm up a bit faster which, honestly, is not a tragedy because it toasts beautifully.
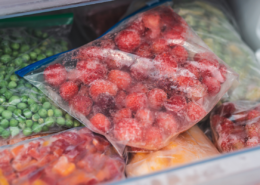
For longer storage, freezing is your friend. Here’s the smart move: slice the bread before freezing. Stack the slices, slip them into a freezer-safe bag, and press out as much air as possible. Now you can pull out exactly what you need… one slice for avocado toast, two for grilled cheese, no waste and no thawing a whole loaf.
To use, pop frozen slices straight into the toaster. No defrosting required. They’ll taste like you baked them yesterday.
And when you pull that first toasted slice out and see those little air pockets catching melted butter? That’s when it hits you. This wasn’t just about saving a few dollars.
It was about proving to yourself, once again, that you absolutely know what you’re doing.
Homemade English Muffin Bread
Ingredients
- 5½ cups warm water about 105–110°F
- 6¾ teaspoons active dry or rapid-rise yeast equal to three ¼-oz packets
- 2 tablespoons salt
- 3 tablespoons granulated sugar
- 11 cups bread flour all-purpose flour may be substituted
- Melted butter for brushing tops optional
Instructions
- In a large bowl, combine warm water, yeast, salt, sugar, and flour. Mix just until incorporated. The dough will be very wet and sticky. This is exactly what you want. Do not add extra flour.
- Cover the bowl with a damp towel and allow the dough to rise at room temperature until doubled in size, about 1 hour.
- Generously grease four 9x5-inch loaf pans. Spoon the sticky dough evenly into the pans, filling each about halfway.
- Let the dough rise again in the pans until it reaches the top edge. This usually takes about 45–60 minutes, depending on kitchen temperature.
- Preheat oven to 350°F. Bake for 35 minutes.
- Brush tops with melted butter and return to oven for an additional 10 minutes, until golden brown.
- Allow loaves to cool in pans for 10–15 minutes. Remove from pans and cool completely on a rack before slicing. Yes, this takes patience. It’s worth it.
Notes
Nutrition
Question: What’s one grocery item you’ve started making at home instead of buying? Share in the comments below.
EverydayCheapskate™ is reader-supported. We participate in the Amazon Services LLC Associates Program and other affiliate advertising programs, designed to provide a means for us to earn from qualifying purchases, at no cost to you.

More from Everyday Cheapskate
 https://www.everydaycheapskate.com/wp-content/uploads/20260721-frozen-bags-of-produce-strawberries-raspberries-peas-peppers.png
800
1200
Mary Hunt
https://www.everydaycheapskate.com/wp-content/uploads/EC-Logo-by-Mary-Hunt-Tagline-Trimmed.png
Mary Hunt2026-07-21 12:14:122026-07-21 12:14:14Freeze Summer Produce Now to Taste It All Winter Long
https://www.everydaycheapskate.com/wp-content/uploads/20260721-frozen-bags-of-produce-strawberries-raspberries-peas-peppers.png
800
1200
Mary Hunt
https://www.everydaycheapskate.com/wp-content/uploads/EC-Logo-by-Mary-Hunt-Tagline-Trimmed.png
Mary Hunt2026-07-21 12:14:122026-07-21 12:14:14Freeze Summer Produce Now to Taste It All Winter Long https://www.everydaycheapskate.com/wp-content/uploads/20260720-slow-cooker-hot-weather-meals-salads-plus-pico-de-gallo-recipes.png
800
1200
Mary Hunt
https://www.everydaycheapskate.com/wp-content/uploads/EC-Logo-by-Mary-Hunt-Tagline-Trimmed.png
Mary Hunt2026-07-20 21:12:192026-07-20 21:15:463 Slow Cooker Summer Salads for Hot Weather Dinners
https://www.everydaycheapskate.com/wp-content/uploads/20260720-slow-cooker-hot-weather-meals-salads-plus-pico-de-gallo-recipes.png
800
1200
Mary Hunt
https://www.everydaycheapskate.com/wp-content/uploads/EC-Logo-by-Mary-Hunt-Tagline-Trimmed.png
Mary Hunt2026-07-20 21:12:192026-07-20 21:15:463 Slow Cooker Summer Salads for Hot Weather Dinners https://www.everydaycheapskate.com/wp-content/uploads/20260717-a-woman-holding-a-crate-of-cucumbers.png
800
1200
Mary Hunt
https://www.everydaycheapskate.com/wp-content/uploads/EC-Logo-by-Mary-Hunt-Tagline-Trimmed.png
Mary Hunt2026-07-17 10:11:072026-07-17 10:13:44Cucumbers Galore? Here’s What to Do With Every Single One
https://www.everydaycheapskate.com/wp-content/uploads/20260717-a-woman-holding-a-crate-of-cucumbers.png
800
1200
Mary Hunt
https://www.everydaycheapskate.com/wp-content/uploads/EC-Logo-by-Mary-Hunt-Tagline-Trimmed.png
Mary Hunt2026-07-17 10:11:072026-07-17 10:13:44Cucumbers Galore? Here’s What to Do With Every Single One https://www.everydaycheapskate.com/wp-content/uploads/20260713-what-to-pack-for-kids-lunchboxes-young-boy-and-girl-eating-a-banana-and-a-sandwich.png
800
1200
Mary Hunt
https://www.everydaycheapskate.com/wp-content/uploads/EC-Logo-by-Mary-Hunt-Tagline-Trimmed.png
Mary Hunt2026-07-13 21:54:132026-07-13 21:54:13Back-to-School Lunch Ideas for a Week (No Boring Sandwiches)
https://www.everydaycheapskate.com/wp-content/uploads/20260713-what-to-pack-for-kids-lunchboxes-young-boy-and-girl-eating-a-banana-and-a-sandwich.png
800
1200
Mary Hunt
https://www.everydaycheapskate.com/wp-content/uploads/EC-Logo-by-Mary-Hunt-Tagline-Trimmed.png
Mary Hunt2026-07-13 21:54:132026-07-13 21:54:13Back-to-School Lunch Ideas for a Week (No Boring Sandwiches) https://www.everydaycheapskate.com/wp-content/uploads/20260609-refreshing-glasses-of-iced-tea-with-fresh-lemon-slices-and-ice-best-way-to-make-tea.png
800
1200
Mary Hunt
https://www.everydaycheapskate.com/wp-content/uploads/EC-Logo-by-Mary-Hunt-Tagline-Trimmed.png
Mary Hunt2026-07-09 18:30:102026-07-09 18:30:10The Best Way to Make Iced Tea? Depends What You’re After
https://www.everydaycheapskate.com/wp-content/uploads/20260609-refreshing-glasses-of-iced-tea-with-fresh-lemon-slices-and-ice-best-way-to-make-tea.png
800
1200
Mary Hunt
https://www.everydaycheapskate.com/wp-content/uploads/EC-Logo-by-Mary-Hunt-Tagline-Trimmed.png
Mary Hunt2026-07-09 18:30:102026-07-09 18:30:10The Best Way to Make Iced Tea? Depends What You’re After https://www.everydaycheapskate.com/wp-content/uploads/20260707-creamy-whipped-frozen-coffee-drink-on-balcony-with-whipped-cream.png
800
1200
Mary Hunt
https://www.everydaycheapskate.com/wp-content/uploads/EC-Logo-by-Mary-Hunt-Tagline-Trimmed.png
Mary Hunt2026-07-07 10:09:112026-07-07 10:09:11I Stopped Buying $7 Frappuccinos. Here’s What I Make Now
https://www.everydaycheapskate.com/wp-content/uploads/20260707-creamy-whipped-frozen-coffee-drink-on-balcony-with-whipped-cream.png
800
1200
Mary Hunt
https://www.everydaycheapskate.com/wp-content/uploads/EC-Logo-by-Mary-Hunt-Tagline-Trimmed.png
Mary Hunt2026-07-07 10:09:112026-07-07 10:09:11I Stopped Buying $7 Frappuccinos. Here’s What I Make Now https://www.everydaycheapskate.com/wp-content/uploads/20260705-Best-Coolers-for-Camping-Road-Trips-and-Beach-Days.png
800
1200
Mary Hunt
https://www.everydaycheapskate.com/wp-content/uploads/EC-Logo-by-Mary-Hunt-Tagline-Trimmed.png
Mary Hunt2026-07-05 13:26:172026-07-05 13:26:17Best Coolers for Camping, Road Trips, and Beach Days
https://www.everydaycheapskate.com/wp-content/uploads/20260705-Best-Coolers-for-Camping-Road-Trips-and-Beach-Days.png
800
1200
Mary Hunt
https://www.everydaycheapskate.com/wp-content/uploads/EC-Logo-by-Mary-Hunt-Tagline-Trimmed.png
Mary Hunt2026-07-05 13:26:172026-07-05 13:26:17Best Coolers for Camping, Road Trips, and Beach Days https://www.everydaycheapskate.com/wp-content/uploads/20260703-home-decor.png
800
1200
Mary Hunt
https://www.everydaycheapskate.com/wp-content/uploads/EC-Logo-by-Mary-Hunt-Tagline-Trimmed.png
Mary Hunt2026-07-03 20:46:552026-07-03 20:46:5510 Everyday Items You Never Think to Wash (But Should)
https://www.everydaycheapskate.com/wp-content/uploads/20260703-home-decor.png
800
1200
Mary Hunt
https://www.everydaycheapskate.com/wp-content/uploads/EC-Logo-by-Mary-Hunt-Tagline-Trimmed.png
Mary Hunt2026-07-03 20:46:552026-07-03 20:46:5510 Everyday Items You Never Think to Wash (But Should) https://www.everydaycheapskate.com/wp-content/uploads/20260630-a-lit-sparkler-with-an-american-flag-in-the-background-4th-of-july-hacks-tips-and-recipes.png
800
1200
Mary Hunt
https://www.everydaycheapskate.com/wp-content/uploads/EC-Logo-by-Mary-Hunt-Tagline-Trimmed.png
Mary Hunt2026-06-30 21:44:502026-06-30 21:44:5034 Fourth of July Recipes and DIY Hacks for a Stress-Free Holiday
https://www.everydaycheapskate.com/wp-content/uploads/20260630-a-lit-sparkler-with-an-american-flag-in-the-background-4th-of-july-hacks-tips-and-recipes.png
800
1200
Mary Hunt
https://www.everydaycheapskate.com/wp-content/uploads/EC-Logo-by-Mary-Hunt-Tagline-Trimmed.png
Mary Hunt2026-06-30 21:44:502026-06-30 21:44:5034 Fourth of July Recipes and DIY Hacks for a Stress-Free Holiday

Recipe is delicious; however, that was way too much flour. I used about 9.5 cups and it was still too much. I will make this again next week and use less for more nooks and crannies.
To answer your question about what’s one I make at home instead of buying…that’s yogurt and the second item would be kombucha. Both are easy and big money savers. Thanks for this article on English Muffin Bread, I’ll be giving it a try this week.
I’ve been making this bread for years . Everybody loves it and I’ve shared the recipe countless times !
Here’s a hint. If you don’t want to purchase bread flour, you can purchase gluten separately and just add it.
What size bread pans is this designed for?
Four 9 x 5 loaf pans, as noted in the recipe.
Anyone try this using gluten free all purpose flour?
I make my own gf bread using a similar recipe to Mary’s that I found on the King Arthur Baking website. It uses all the same ingredients here, plus a little xanthum gum, and produces a wet, sticky dough. It’s a great recipe and really easy to make.
Thank you!
I was just going to ask the same question! Tired of paying $6-7 a loaf for it and it doesn’t even taste great!
I agree. The only really good gf bread I’ve found is Sam’s Choice available only at Walmart. I’ve also found Trader Joe’s gf white sandwich bread for <$5/loaf makes excellent toast.
What ingredient makes this English muffin bread. Looks like a regular bread recipe.
It is not an ingredient, but a style of bread. You may be familiar with Thomas’ English Muffins, known for their “nooks and crannies.” It mimicks that, and when toasted tasted quite like an English muffin.
I cooked in a 12 muffin pan after determining that the volume was 1/8 of the volume of four loaf pans. It turned out well, but I had to use twice as much water to get the dough to look right. In other words I needed the same volume of water as flour.
you don’t have to ‘wrap’ the bread slices for the freezer, but merely place a plastic wrap piece or parchment paper between the slices
Sprinkle a little cornmeal in greased pan it will.really be like English muffin bread.
Good idea, Sandy!
Great tip! Thx!
Sounds awesome. Can I use King Arthur Whole Wheat Flour?
Hi, I have found you can’t do a 1:1 substitute and still get the desired result if the recipe is not calling for all wheat. The whole wheat will make a denser bread. What I have done quite often with success is substitute 1C of the all purpose or bread flour with 1 Cup Whole Wheat, while keeping the rest of the recipe original. I get a light wheat flavor without taking away the entire texture of the original bread. I have done this when making actual English muffins without any issue. I have also substituted a cup of pumpernickel (rye) flour in recipes and it works pretty good as well. Sometimes you just have to experiment. Or check out recipes at King Arthur or Bob’s Red Mill.
This bread is amazing and doesn’t last long at our house. At Christmas, I gave several loaves paired with a jar of homemade jam. I have had many compliments!
I have not tried this recipe yet. I am wondering how you feel about whole wheat flour, Mary?
I’ve got 2 loaves in oven right now!! Love it.
When my new mixer arrives, this recipe will be used!
Thanks so much for the Colorado wildfire update and your safety. Prayers!
Love this recipe! Best English Muffin bread I’ve ever made. I use half the recipe to make two full loaves. It gets eaten within a day or two so I never have to worry about how to store it. I’ve also frozen one loaf and it freezes and thaws really well with no compromise to texture or flavor.
Wondering how many mini-loaves this recipe might make? Thought it would make a great Christmas gift with a jar of homemade jam!
Honestly, I don’t know as I have never made all minis from one batch. If you discover the answer, let us know!
OMG!!! So so good, and extremely easy to make. A definite keeper.
Hello Mary, can you tell me if these proportions are correct for making just one loaf? I clicked on print and adjusted for one loaf, but the digital numbers were something I needed to convert.
Water – 11 oz
One packet yeast
1.5 tsp salt
2 ¼ tsp sugar
2 ¾ cup bread flour
I’m going to try this in my bread maker. Wish me luck! I’ll check back later for your answer. 🙂
I have not tested reducing the recipe to one loaf. We’ll be interested to know how this turned out for you!
Can whole wheat flour be substituted for part of the flour called for in the ingredients?
I have not tried that, KatieQ, but I’m confident that will work. I’d go easy … maybe 1/4 wheat, 3/4 all purpose at least to experiment. Let us know how that turns out!
Can you add raisins and cinnamon?
Sure! That sounds amazing. I’d toss the raisins in a little flour before adding to help them stay put and not all sink to the bottom.
This is probably the best bread that I’ve ever made. I was in Heaven smelling it bake and just as much in Heaven when eating it.
Definitely will be made often.
Most of the bread purchased from the store tasted like paper and had no texture. Having saved this recipe from when it was posted I decided to try it. Couldn’t believe English Muffin Bread for sandwiches. This bread is so good and easy to make. I just took another batch out of the oven and am going to share with some friends. BLT sandwiches on this bread are yummy.
This bread is terrific! Easy to make and tastes great.
This bread is so good! The only problem is that you will want to eat too much bread. So give a loaf away to save yourself!
Joyce
Mixed yeast and sugar and water for the half recipe and then added the salt and flour. It was a dry dough, not sticky. I used 5-1/2 c bread flour.
The freshness of your flour, the temperature & rate of humidity in your house & kitchen, & the weather outside (include humidity rate outside) all play important roles in working with yeast & flour. These factors could account for your non-sticky, dry dough.
This is my new favorite bread. I halved the recipe because I only had 2 loaf pans. I used all purpose flour and it came out perfect. I am now addicted. Thank you!
One more thought from Costa Rica… my husband loves the bread!
We live in Costa Rica in the northern rainforest, far from San José. I thought a large city would have bread flour but have not found it anywhere. So I use AP or whole Wheat for all my breads. This bread was everything you said it was…easy, delicious, a tender English muffin! Thank you for sharing!
I love this recipe but also use regular bread from the grocery store for sandwiches. I wrap each slice individually in plastic wrap and place the slices back in the wrapper and freeze them. I only take out what I need and the slices don’t stick together.
That’s a great idea, Kay! Since we are only two, I have to put half a loaf of bread in the freezer. I never thought of wrapping them individually to make it easier. Thank you!
Was also wondering if half recipe would work in bread maker?
Yes, you will see in the post that I was using 1/2 recipes to make that one large and one small loaf.
I’m wondering too, if it can be made in the bread maker. I’m going to give it a try with fingers crossed!
What are your loaf pans, ceramic? I’ve never seen a small square one like that, can you give a name and link?
I couldn’t tell you what brand or even when I got those. I’ve had them forever. I did a quick search and found these by OXO. It’s a great brand and very affordable. These are ceramic coated metal and come in a variety of shapes and uses.
Loaf Pan – https://amzn.to/4kR9rjf
Square Pan – https://amzn.to/4c8PH8A
Made it in the bread maker. It came out good but I halved the recipe and it was still a bit too much dough for my bread maker. Spilled over the side just a bit. Not enough to cause a problem. Will make it again in the bread maker.
I have been making this since the last time you posted it, and my husband LOVES it! He doesn’t want to eat “store bought” toast any more… he just wants that “good bread” for his toast! Thank goodness this is so simple and easy, and I can freeze one loaf while we work on the other. By the way, I don’t even use a mixer. I have a bread dough “mixer” utensil that works just fine, and is super easy to clean. Thanks for this great recipe!
work in breadmaker?