How to Grow An Edible Garden Just About Anywhere
Wish you could grow an edible garden, but you just don’t have any place to do that? I’ve got good news. Even if you rent and your landlord won’t allow you to dig up part of the property—no problem.
Even if you don’t have time to tend a full-size garden; even if you don’t have time or resources to build square-foot boxes. Even in a small garden, you can grow lots and lots of different vegetables and enjoy a great harvest for your effort. Nothing quite compares to cooking with vegetables that you’ve grown yourself.
You don’t need acreage, a big yard, or “perfect” conditions. In fact, you really don’t need any yard at all. You can get started today growing your own food in myriad ways. It’s easy, too!
On a Windowsill
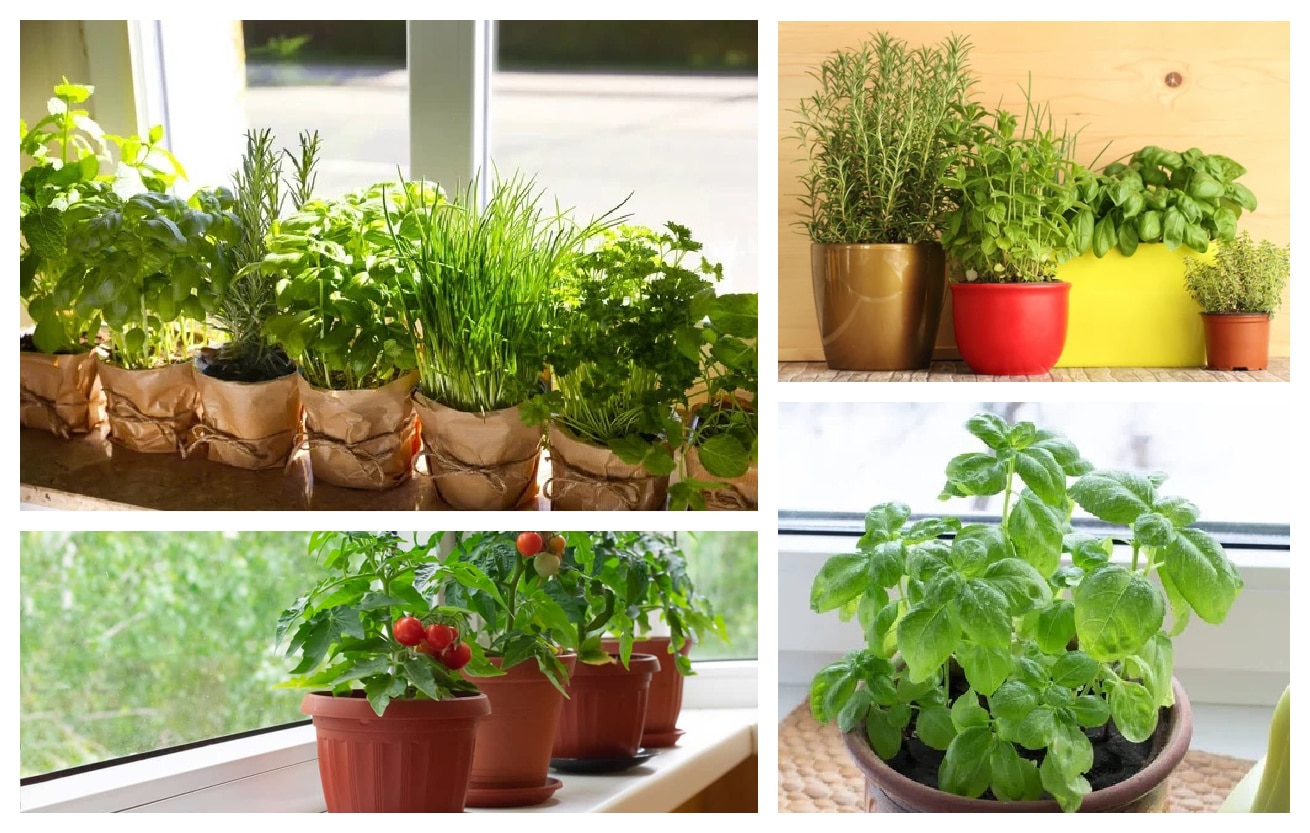
So you don’t have a deck, a patio, or back yard. Or maybe you have all of them but no desire whatsoever to garden outdoors. Got a window with a sill? You can grow a windowsill garden! Get ready for a new adventure.
This means that even if you are an apartment-dweller, you can find the space to grow food and beautify your space at the same time. All it takes is a well-lit windowsill, some pots, plants, and a good attitude. The rest is going to take care of itself.
You will need to select the right spot, the right container and the right plants, but that’s easy. Take a look at How to Grow a Windowsill Herb Garden, From Planting to Harvesting, and you’ll be window-gardening in no time at all!
On a Deck or Patio
Even in a small space like a deck or patio, you can grow many different vegetables and enjoy an amazing harvest for your efforts. There is nothing quite like making meals with herbs and vegetables that you have grown yourself—that you can harvest fresh, right outside your back door.
Check out these 11 tips for growing vegetables on a deck or patio.
In a Pot
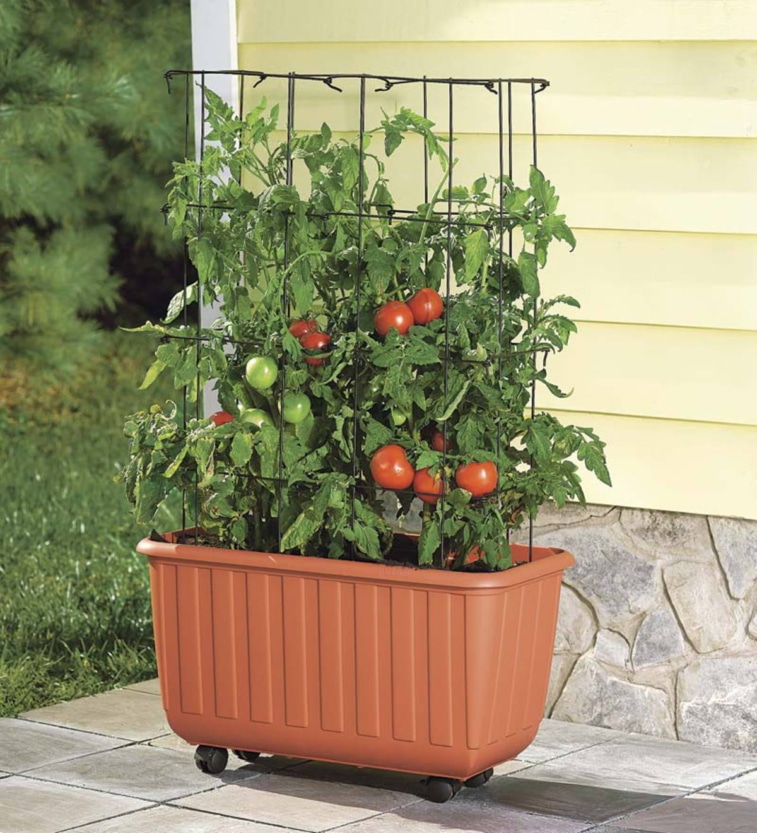 You really can grow an amazing amount of food in a pot or two—I’m talking peppers, cucumbers, tomatoes, and all kinds of herbs. The pot can be plastic, wood, or terra cotta. And here’s the nice thing—you can move pots according to how much sun they need—or shade.
To get the low down on the right kind of soil to use and exact how-tos, check out this great tutorial with video, How to Grow a Plentiful Container Vegetable Garden, from our friends and Better Homes and Gardens. You’re going to love this!
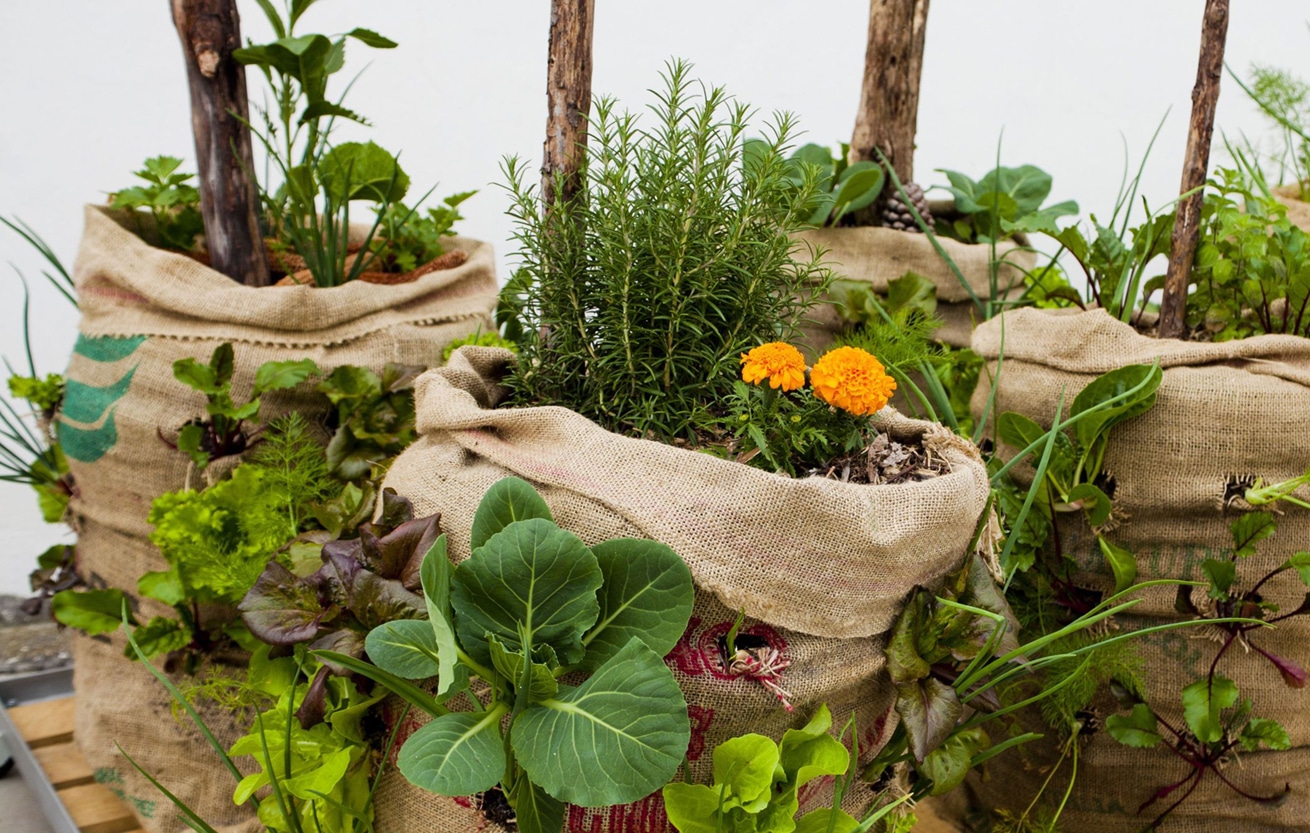
In a Plastic Trash Bag
Seriously, you can grow a garden in a trash bag. The easiest way to get started growing stuff in plastic bags is with potatoes. To get started you’ll need a heavy-duty black trash bag, a shovel, a knife, potting soil, “seed” potatoes, and agricultural sulfur—available online or at any garden center.
Find a complete step-by-step tutorial for how to get your bag planted and growing at Grow Bags For Potatoes: Tips For Growing Potatoes In Bags.
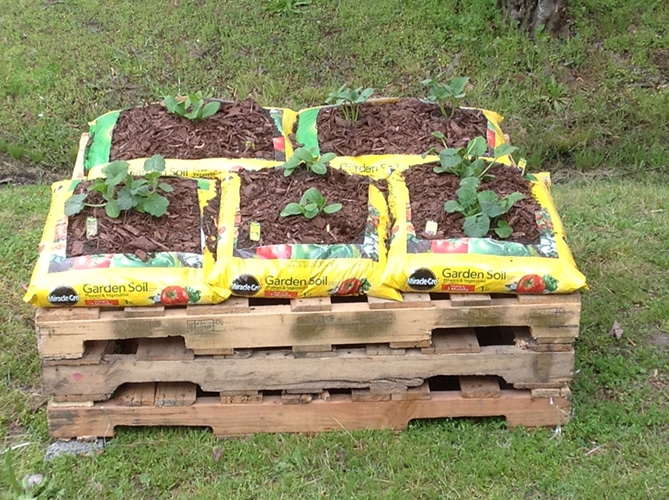
How to Grow a Bag Garden
-
 Place a bag of purchased top soil out in an area that gets full sun and is convenient for watering.
 - Using a utility knife, cut several slits in the bag to allow for drainage.
- Flip the bag over, so it lies flat on its other side. Manipulate the soil until it is smooth and level inside the bag. Bags are often stacked flat on pallets in stores and maintain that shape, and have a consistent 4-inch soil depth unless you stand them on end.
- Cut a rectangular window about 2 inches in from the edges of the bag on all sides with your utility knife; discard the piece of plastic in the center. The frame of plastic around the edges will help the soil and moisture stay in the bag.
- Sprinkle a handful of slow-release fertilizer across the topsoil (fertilizer that is not labeled as already containing plant food). Work it in lightly with a hand trowel.
- Plant seeds such as lettuce, Swiss chard, beets, or bush peas in early spring when temperatures are still cool. Follow spacing recommendations on the seed packet, though you can generally plant slightly closer. You can sow a full packet of lettuce seed in one bag-garden, or 1/2 packet of beet or bush snap pea seeds. Plant two seed potatoes per bag or 12 onion starts, also in early spring.
- Plant one tomato plant per bag, or plant two peppers or sow half a packet of bush bean seeds per bag when the soil temperature is consistently above 70 degrees Fahrenheit. The soil in the bags may warm more quickly than standard garden soil , particularly if it is on a hard surface that absorbs warmth such as concrete or asphalt.
- If placing the bag on the ground, you might want to cover it with mulch to improve the appearance of your makeshift garden , help the bag retain moisture and insulate plant roots against summer heat.
- Water regularly, providing at least 1 inch of water per week, or whenever the top inch of soil is dry.
 Place a bag of purchased top soil out in an area that gets full sun and is convenient for watering.
Fun Gardening Tips
Once you get going, here are a collection of random gardening tips to further your success and enjoyment for all size gardens from acreage to windowsills.
Clean nails
Keep dirt out from under your fingernails by scratching a bar of soap before beginning. When you’re finished, wash your hands thoroughly. The soap will wash cleanly from under your fingernails.
Railroad ties
Avoid using railroad ties in or around your vegetable garden. The chemicals used as preservatives to keep the wood from rotting are now thought to be toxic and harmful.
Make-it-yourself
Control powdery mildew with milk. Dilute 1 part milk in 9 parts water and spray on the plants.
Master’s touch
Gently brush your hands across your tiny seedlings several times a day. This stimulates them to grow slightly slower, resulting in stronger, sturdier stems.
Free weed “cloth”
Use newspapers as weed barriers when creating a new bed. They are printed with soy ink and decompose nicely, and are simple to replace once decomposed. Use black and white pages only, not the slick colored advertisements or colored pages. Once in place, cover the newsprint with mulch.
Free mulch
Coffee and tea grounds make excellent mulch around acid-loving plants. Caffeine is a natural fertilizer, but don’t overdo it as too much could promote excessive leaf growth and diminished fruit production. In the case of tea grounds, you can leave them in the tea bag provided it’s made of paper, silk, or muslin. Bury it in the soil to provide nourishment for plants and a tasty treat for worms. Just be sure to remove the tags first. They take a long time to break down and may be plastic coated.
Perfect seed starters
Cardboard egg cartons make excellent seed starters. Punch a hole in the bottom for drainage, fill with potting soil, plant your seeds and watch them flourish!
Consider conditions
When choosing plants for your yard or garden, analyze your specific sunlight, soil, and climate first. Choose plants accordingly. Any garden center will have the personnel to answer questions and help make appropriate selections.
Mosquito-repelling plants
Citronella, Lemon Eucalyptus, Cinnamon, Castor, Rosemary, Lemongrass, Cedar, Peppermint, Clove, Geranium, Verbena, Pennyroyal, Lavender, Basil, Thyme, and Garlic.
Potting soil, please
Don’t use garden soil as potting soil in containers. Its quality and texture is variable; it may drain poorly or be too loose and drain too quickly. It is also more likely to contain diseases, weed seeds, and insects. Do it right the first time using a standard potting soil, and you won’t be disappointed.
Project headstart
Soak seeds to get a jump on the season. Before germinating, seeds need to drink up moisture, just as if drenched by spring rains. Once they become plump and swollen, the little embryo inside will begin to grow, signaling that it’s ready to be planted.
Seedling protectors
Keep cutworms away from seedlings with the cardboard centers of toilet paper rolls. Cutworms, which are moth caterpillars, creep along the soil surface, eating tender stem bases of young seedlings and cut sprouts off at the roots. That cardboard tube will protect seedlings from these predators.
There’s something soothing and satisfying about getting your hands dirty and watching stuff grow!
Published 3-27-22; Revised, Updated, Republished 1-30-24
FPirst published: 3-16-17; Revised: 5-20-20
Everyday Cheapskate is an independent and free publication service supported by advertising. We may receive a small payment from an affiliate if you click a link to purchase a product. You may see a post that is sponsored by the maker of the product, and we receive a fee for the post. We care about the content we publish, and we really do want to make things more affordable for all.
Everyday Cheapskate participates in the Amazon Services LLC Associates Program, an affiliate advertising program designed to provide a means for us to earn fees by linking to Amazon affiliated sites.

More from Everyday Cheapskate
 https://www.everydaycheapskate.com/wp-content/uploads/20260717-a-woman-holding-a-crate-of-cucumbers.png
800
1200
Mary Hunt
https://www.everydaycheapskate.com/wp-content/uploads/EC-Logo-by-Mary-Hunt-Tagline-Trimmed.png
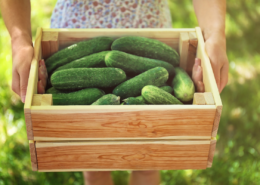
Mary Hunt2026-07-17 10:11:072026-07-17 10:13:44Cucumbers Galore? Here’s What to Do With Every Single One
https://www.everydaycheapskate.com/wp-content/uploads/20260717-a-woman-holding-a-crate-of-cucumbers.png
800
1200
Mary Hunt
https://www.everydaycheapskate.com/wp-content/uploads/EC-Logo-by-Mary-Hunt-Tagline-Trimmed.png
Mary Hunt2026-07-17 10:11:072026-07-17 10:13:44Cucumbers Galore? Here’s What to Do With Every Single One https://www.everydaycheapskate.com/wp-content/uploads/20260714-car-dashboard-diy-car-interior-cleaning-wipes.png
800
1200
Mary Hunt
https://www.everydaycheapskate.com/wp-content/uploads/EC-Logo-by-Mary-Hunt-Tagline-Trimmed.png
Mary Hunt2026-07-14 13:45:172026-07-14 13:45:17DIY Car Interior Cleaning Wipes That Actually Work Well
https://www.everydaycheapskate.com/wp-content/uploads/20260714-car-dashboard-diy-car-interior-cleaning-wipes.png
800
1200
Mary Hunt
https://www.everydaycheapskate.com/wp-content/uploads/EC-Logo-by-Mary-Hunt-Tagline-Trimmed.png
Mary Hunt2026-07-14 13:45:172026-07-14 13:45:17DIY Car Interior Cleaning Wipes That Actually Work Well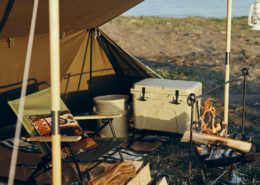 https://www.everydaycheapskate.com/wp-content/uploads/20260705-Best-Coolers-for-Camping-Road-Trips-and-Beach-Days.png
800
1200
Mary Hunt
https://www.everydaycheapskate.com/wp-content/uploads/EC-Logo-by-Mary-Hunt-Tagline-Trimmed.png
Mary Hunt2026-07-05 13:26:172026-07-05 13:26:17Best Coolers for Camping, Road Trips, and Beach Days
https://www.everydaycheapskate.com/wp-content/uploads/20260705-Best-Coolers-for-Camping-Road-Trips-and-Beach-Days.png
800
1200
Mary Hunt
https://www.everydaycheapskate.com/wp-content/uploads/EC-Logo-by-Mary-Hunt-Tagline-Trimmed.png
Mary Hunt2026-07-05 13:26:172026-07-05 13:26:17Best Coolers for Camping, Road Trips, and Beach Days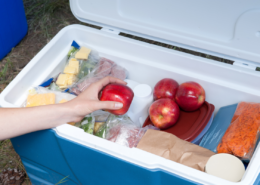 https://www.everydaycheapskate.com/wp-content/uploads/20260705-how-to-keep-a-cooler-cold.png
800
1200
Mary Hunt
https://www.everydaycheapskate.com/wp-content/uploads/EC-Logo-by-Mary-Hunt-Tagline-Trimmed.png
Mary Hunt2026-07-05 13:19:502026-07-05 13:19:50How to Pack a Cooler That Stays Cold for 48 Hours
https://www.everydaycheapskate.com/wp-content/uploads/20260705-how-to-keep-a-cooler-cold.png
800
1200
Mary Hunt
https://www.everydaycheapskate.com/wp-content/uploads/EC-Logo-by-Mary-Hunt-Tagline-Trimmed.png
Mary Hunt2026-07-05 13:19:502026-07-05 13:19:50How to Pack a Cooler That Stays Cold for 48 Hours https://www.everydaycheapskate.com/wp-content/uploads/20260630-a-lit-sparkler-with-an-american-flag-in-the-background-4th-of-july-hacks-tips-and-recipes.png
800
1200
Mary Hunt
https://www.everydaycheapskate.com/wp-content/uploads/EC-Logo-by-Mary-Hunt-Tagline-Trimmed.png
Mary Hunt2026-06-30 21:44:502026-06-30 21:44:5034 Fourth of July Recipes and DIY Hacks for a Stress-Free Holiday
https://www.everydaycheapskate.com/wp-content/uploads/20260630-a-lit-sparkler-with-an-american-flag-in-the-background-4th-of-july-hacks-tips-and-recipes.png
800
1200
Mary Hunt
https://www.everydaycheapskate.com/wp-content/uploads/EC-Logo-by-Mary-Hunt-Tagline-Trimmed.png
Mary Hunt2026-06-30 21:44:502026-06-30 21:44:5034 Fourth of July Recipes and DIY Hacks for a Stress-Free Holiday https://www.everydaycheapskate.com/wp-content/uploads/20260628-close-up-photo-a-woman-wearing-a-swimsuit-with-a-mild-sunburn.png
800
1200
Mary Hunt
https://www.everydaycheapskate.com/wp-content/uploads/EC-Logo-by-Mary-Hunt-Tagline-Trimmed.png
Mary Hunt2026-06-28 21:40:042026-06-28 21:40:04DIY After-Sun Spray That Cools and Soothes Skin
https://www.everydaycheapskate.com/wp-content/uploads/20260628-close-up-photo-a-woman-wearing-a-swimsuit-with-a-mild-sunburn.png
800
1200
Mary Hunt
https://www.everydaycheapskate.com/wp-content/uploads/EC-Logo-by-Mary-Hunt-Tagline-Trimmed.png
Mary Hunt2026-06-28 21:40:042026-06-28 21:40:04DIY After-Sun Spray That Cools and Soothes Skin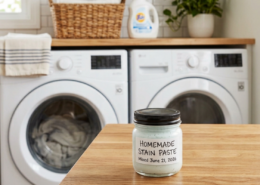 https://www.everydaycheapskate.com/wp-content/uploads/20260626-homemade-stain-paste-sitting-on-wooden-countertop-in-laundry-room-with-washer-and-dryer.png
800
1200
Mary Hunt
https://www.everydaycheapskate.com/wp-content/uploads/EC-Logo-by-Mary-Hunt-Tagline-Trimmed.png
Mary Hunt2026-06-26 17:41:192026-06-26 17:41:19Homemade Laundry Stain Paste That Works for Pennies
https://www.everydaycheapskate.com/wp-content/uploads/20260626-homemade-stain-paste-sitting-on-wooden-countertop-in-laundry-room-with-washer-and-dryer.png
800
1200
Mary Hunt
https://www.everydaycheapskate.com/wp-content/uploads/EC-Logo-by-Mary-Hunt-Tagline-Trimmed.png
Mary Hunt2026-06-26 17:41:192026-06-26 17:41:19Homemade Laundry Stain Paste That Works for Pennies https://www.everydaycheapskate.com/wp-content/uploads/20260618-retriever-labrador-on-white-rug-in-bright-contemporary-living-room-pet-stains-and-odors.png
800
1200
Mary Hunt
https://www.everydaycheapskate.com/wp-content/uploads/EC-Logo-by-Mary-Hunt-Tagline-Trimmed.png
Mary Hunt2026-06-18 23:08:332026-06-18 23:08:33Homemade Pet Stain Remover That Stops Repeat Accidents
https://www.everydaycheapskate.com/wp-content/uploads/20260618-retriever-labrador-on-white-rug-in-bright-contemporary-living-room-pet-stains-and-odors.png
800
1200
Mary Hunt
https://www.everydaycheapskate.com/wp-content/uploads/EC-Logo-by-Mary-Hunt-Tagline-Trimmed.png
Mary Hunt2026-06-18 23:08:332026-06-18 23:08:33Homemade Pet Stain Remover That Stops Repeat Accidents https://www.everydaycheapskate.com/wp-content/uploads/20260615-how-to-get-rid-of-the-smell-in-the-ice-cooler-chest.png
800
1200
Mary Hunt
https://www.everydaycheapskate.com/wp-content/uploads/EC-Logo-by-Mary-Hunt-Tagline-Trimmed.png
Mary Hunt2026-06-15 20:59:282026-06-15 20:59:28How to Clean and Deodorize Your Cooler So It Doesn’t Stink
https://www.everydaycheapskate.com/wp-content/uploads/20260615-how-to-get-rid-of-the-smell-in-the-ice-cooler-chest.png
800
1200
Mary Hunt
https://www.everydaycheapskate.com/wp-content/uploads/EC-Logo-by-Mary-Hunt-Tagline-Trimmed.png
Mary Hunt2026-06-15 20:59:282026-06-15 20:59:28How to Clean and Deodorize Your Cooler So It Doesn’t Stink

Thank you Mary. Really helpful as always. I can’t wait to get started. Why is this so fun?I 🙂
I found growing tomatoes in a bucket from home depot was better for me. It allows for deep roots and a tomato cage will fit and support the bush. I drilled holes in the bottom for drainage. The buckets give you the advantage of portability.
We take part in a community garden. We are given a plot that is 14 ft x 14 ft. It comes with a water spigot closeby (several scattered throughout) . The ground is plowed up and composted in the spring so it’s ready to plant. We pay $45 and receive our bounty all summer long. Many cities have such a community garden available if you apply early enough.
I was hoping you had a idea to keep Opossums from eating your tomatoes.
I live in Southern California and we have opossums that come on to my patio and eat tomatoes. I haven’t been able to grow tomatoes in years!
It’s the sunny part that prevents me from doing this. I have a front porch and small back yard, both very shaded. We did the indoor planter with the sunlamp for a couple years for herbs but got tired of dealing with it.