
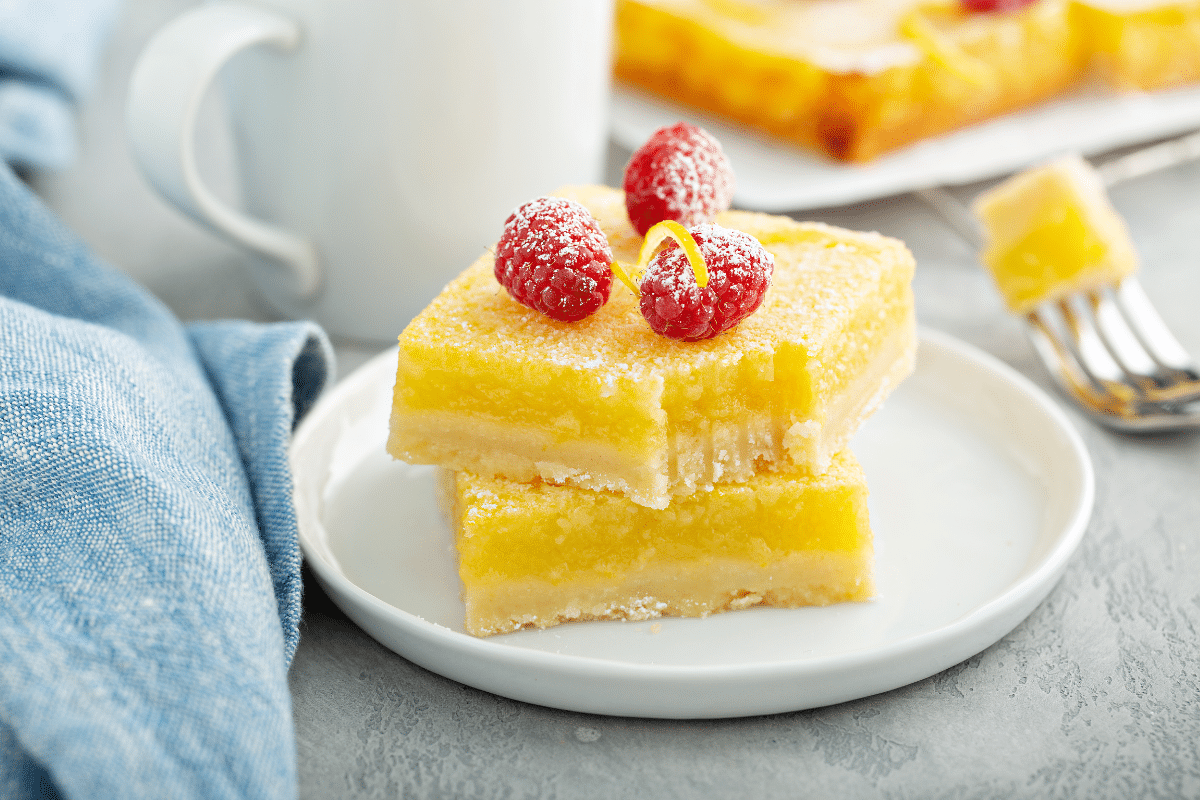
The Lemon Bar Recipe You’ll Bake Again and Again


I’ve learned there are two kinds of recipes: the ones you try once and forget, and the ones you end up making so often you don’t even need the recipe anymore. These lemon bars? Definitely the second kind. They’re simple, no-nonsense, and they don’t leave you with a pile of dishes or a list of ingredients you have to hunt down. And this time of year, when lemons are everywhere, it feels like a little nudge to stop walking past them at the store and actually bring a few home.

March is one of the best times to grab lemons. They’re juicy, flavorful, and usually a good value, too. If you’ve been waiting for a reason to bake something fresh and simple, this is it.
Living in California, I got a little spoiled. Lemons were always around, and I treated them more like kitchen extras than something special. That changed quickly after I moved. Now, when I see a bowl of good lemons, I don’t let them sit there. I put them to work.
A Little Backstory (And a Lot of Lemons)
Years ago, after a trip back to California to visit my son, I came home with 35 pounds of Meyer lemons. Thirty-five. Pounds.
His tree was overflowing. No fuss, no pampering, just doing its thing like it had something to prove. Meanwhile, I was stuffing lemons into my suitcase like a woman on a mission.
Friends got lemons. My freezer got lemon juice. My kitchen turned into a citrus factory.
And somewhere in the middle of all that, this lemon bar recipe earned a permanent spot in my rotation.
Why These Lemon Bars Work
Here’s what I appreciate most about this recipe: no guesswork, no drama.
The crust holds together, so you’re not chasing crumbs all over the pan when you cut it. The filling sets the way it should, with no runny surprises in the middle. And the flavor hits that sweet spot: bright and lemony without making your eyes water.
It’s a recipe you can count on. Whether you’re making something simple for the weekend, bringing a dessert to share, or just finally doing something with those lemons on the counter, this one shows up and does its job.
What You’ll Need
Before you start, here’s a quick rundown of what matters, what you can swap, and where you’ve got a little wiggle room.
- All-purpose flour: This gives both the crust and filling structure. Nothing fancy needed here. A 1:1 gluten-free blend works well if that’s what you keep on hand.
- Unsalted butter (room temperature): This is what makes the crust tender and rich. Room temp matters. It mixes easier and gives you that “press-in” dough without a fight. Only have salted butter? Use it and just skip the added salt.
- Confectioners’ sugar (powdered sugar): Used in the crust for a softer, more delicate texture than regular sugar. It also gives that classic light dusting on top.
- Vanilla extract: Just a small amount, but it rounds out the flavor and keeps the crust from tasting flat. Optional, but recommended. If you leave it out, you’ll still be fine… just slightly less depth.
- Salt? Don’t skip it. A little salt balances the sweetness and makes the lemon flavor pop instead of fall flat.
- Eggs + one extra yolk: These give the lemon layer structure and that smooth, custard-like texture. The extra yolk adds richness without making it heavy.
- White sugar: Sweetens the filling and helps create that delicate, slightly crackly top. Nothing fancy needed here.
- Fresh lemon juice: This is where the magic happens. Fresh juice gives you that clean, bright flavor you just can’t fake.
- Lemon zest: This is your flavor booster. Zest adds intensity without extra liquid, which keeps the filling from getting too loose. No zester? Use the fine side of a box grater. Just avoid the bitter white pith.
Pro Tip: Get More Juice from Your Lemons
If your lemons feel a little firm, give them a quick roll on the counter using gentle pressure. This helps break down the fibers so they release more juice. Short on time? Pop the lemon in the microwave for 10–15 seconds. You’ll get more juice with less effort and save your hands a workout in the process.
Step-by-Step Instructions (No Fuss Version)
1. Start with the crust.
Preheat your oven to 350°F and lightly oil an 8×8-inch baking dish.
Mix the flour and butter until it looks like crumbly dough. Don’t overthink it. You’re just bringing it together. Stir in the powdered sugar, vanilla, and salt, then press it evenly into the pan.
Pro Tip: Slightly damp fingers make this part much easier and keep the dough from sticking to you instead of the pan.
Bake for about 22 minutes, until the edges are just turning lightly golden. If it still looks pale all over, give it another minute or two. You want it set before adding the filling.
2. Make the lemon filling.
While the crust bakes, whisk the eggs and extra yolk until combined. Add the sugar and flour and whisk until smooth. No lumps.
Stir in the lemon juice and zest and keep whisking for a minute or two. The mixture should look smooth and slightly thickened.
Pour the filling over the warm crust as soon as it comes out of the oven. No need to wait. This helps everything set up properly.
3. Bake again.
Return the pan to the oven and bake for about 25 minutes.
You’re looking for a center that’s set (not jiggly) and a top that has a thin, slightly crackly layer. If the middle still moves when you gently shake the pan, give it a few more minutes.
4. Let them cool completely.
Set the pan aside and let the bars cool all the way before cutting. This is what gives you clean slices instead of a sticky situation.
If you cut too soon, they’ll fall apart. They’ll still taste good, but they won’t look like lemon bars.
Pro Tip: Run a knife under hot water, wipe it dry, and slice. Clean edges, every time.
5. Finish and serve
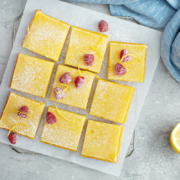
Dust lightly with powdered sugar and cut into squares.
Serve as-is, or stash a few in the fridge for later. They hold up well, which makes them a good make-ahead option when you want something ready without thinking about it twice.
Easy Variations (Pick Your Favorite Twist)
If you like having options (or just want to use what you already have), here are a few simple ways to tweak these without overcomplicating things:
- Sweeter, softer bite: Add an extra tablespoon of sugar to the filling. This takes the edge off the lemon and gives you a slightly softer, more dessert-like bar.
- More tang: Increase the lemon juice by 1–2 teaspoons and reduce the sugar just a bit. You’ll get a brighter, sharper flavor without throwing off the texture.
- Gluten-free: Swap in a 1:1 gluten-free flour blend. No other changes needed. The bars still hold together nicely.
- Berry swirl: Drop small spoonfuls of raspberry puree over the filling before baking, then gently swirl with a knife or toothpick. Don’t overdo it or you’ll lose that clean lemon flavor.
Why This Recipe Earns a Spot in Your Rotation
This is one of those recipes that quietly proves its worth. It doesn’t require anything fancy, it doesn’t take over your afternoon, and it turns out the way you hoped it would.
It’s simple enough to make on a regular day, but still feels like something you’d be proud to set out for others. And it’s flexible, whether you’re working with a full bowl of lemons or just a couple you don’t want to waste, it gets the job done.
And if you ever find yourself in the slightly ridiculous position of having more lemons than you know what to do with… I can confirm, this is a very good place to start.
Classic Lemon Bars
Ingredients
- 1 cup all-purpose flour
- 1/2 cup unsalted butter room temperature
- 1/4 cup confectioners’ sugar
- 1/4 teaspoon vanilla extract
- 1/4 teaspoon salt
- 2 large eggs
- 1 large egg yolk
- 1 cup white sugar
- 2 tablespoons all-purpose flour
- 1/4 cup freshly squeezed lemon juice
- 1 tablespoon freshly grated lemon zest
- 1 teaspoon confectioners’ sugar
Instructions
- Preheat oven to 350°F. Lightly oil an 8x8-inch baking dish.
- Mix flour and butter until crumbly. Stir in confectioners’ sugar, vanilla, and salt. Press evenly into the pan using slightly damp fingers to prevent sticking.
- Bake 22 minutes, until edges are lightly golden. Remove from oven.
- Whisk eggs and yolk, then add sugar and 2 tablespoons flour until smooth. Stir in lemon juice and zest. Pour over warm crust.
- Return pan to oven and bake 25 minutes, until center is set and top has a delicate, crackly finish.
- Let bars cool fully before slicing. Rushing this will cause them to fall apart.
- Dip knife in hot water before cutting for clean edges. Dust with confectioners’ sugar and cut into 16 squares.
Notes
Nutrition
Question: If you give these a try, I’d love to hear. Do you like your lemon desserts a little sweeter, or do you go all in on that bright, tangy flavor?

More from Everyday Cheapskate
 https://www.everydaycheapskate.com/wp-content/uploads/20260720-slow-cooker-hot-weather-meals-salads-plus-pico-de-gallo-recipes.png
800
1200
Mary Hunt
https://www.everydaycheapskate.com/wp-content/uploads/EC-Logo-by-Mary-Hunt-Tagline-Trimmed.png
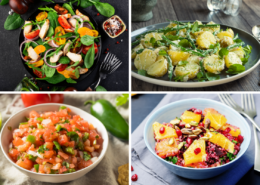
Mary Hunt2026-07-20 21:12:192026-07-20 21:15:463 Slow Cooker Summer Salads for Hot Weather Dinners
https://www.everydaycheapskate.com/wp-content/uploads/20260720-slow-cooker-hot-weather-meals-salads-plus-pico-de-gallo-recipes.png
800
1200
Mary Hunt
https://www.everydaycheapskate.com/wp-content/uploads/EC-Logo-by-Mary-Hunt-Tagline-Trimmed.png
Mary Hunt2026-07-20 21:12:192026-07-20 21:15:463 Slow Cooker Summer Salads for Hot Weather Dinners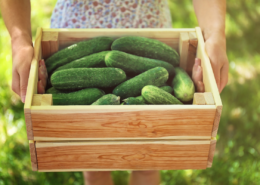 https://www.everydaycheapskate.com/wp-content/uploads/20260717-a-woman-holding-a-crate-of-cucumbers.png
800
1200
Mary Hunt
https://www.everydaycheapskate.com/wp-content/uploads/EC-Logo-by-Mary-Hunt-Tagline-Trimmed.png
Mary Hunt2026-07-17 10:11:072026-07-17 10:13:44Cucumbers Galore? Here’s What to Do With Every Single One
https://www.everydaycheapskate.com/wp-content/uploads/20260717-a-woman-holding-a-crate-of-cucumbers.png
800
1200
Mary Hunt
https://www.everydaycheapskate.com/wp-content/uploads/EC-Logo-by-Mary-Hunt-Tagline-Trimmed.png
Mary Hunt2026-07-17 10:11:072026-07-17 10:13:44Cucumbers Galore? Here’s What to Do With Every Single One https://www.everydaycheapskate.com/wp-content/uploads/20260713-what-to-pack-for-kids-lunchboxes-young-boy-and-girl-eating-a-banana-and-a-sandwich.png
800
1200
Mary Hunt
https://www.everydaycheapskate.com/wp-content/uploads/EC-Logo-by-Mary-Hunt-Tagline-Trimmed.png
Mary Hunt2026-07-13 21:54:132026-07-13 21:54:13Back-to-School Lunch Ideas for a Week (No Boring Sandwiches)
https://www.everydaycheapskate.com/wp-content/uploads/20260713-what-to-pack-for-kids-lunchboxes-young-boy-and-girl-eating-a-banana-and-a-sandwich.png
800
1200
Mary Hunt
https://www.everydaycheapskate.com/wp-content/uploads/EC-Logo-by-Mary-Hunt-Tagline-Trimmed.png
Mary Hunt2026-07-13 21:54:132026-07-13 21:54:13Back-to-School Lunch Ideas for a Week (No Boring Sandwiches) https://www.everydaycheapskate.com/wp-content/uploads/20260609-refreshing-glasses-of-iced-tea-with-fresh-lemon-slices-and-ice-best-way-to-make-tea.png
800
1200
Mary Hunt
https://www.everydaycheapskate.com/wp-content/uploads/EC-Logo-by-Mary-Hunt-Tagline-Trimmed.png
Mary Hunt2026-07-09 18:30:102026-07-09 18:30:10The Best Way to Make Iced Tea? Depends What You’re After
https://www.everydaycheapskate.com/wp-content/uploads/20260609-refreshing-glasses-of-iced-tea-with-fresh-lemon-slices-and-ice-best-way-to-make-tea.png
800
1200
Mary Hunt
https://www.everydaycheapskate.com/wp-content/uploads/EC-Logo-by-Mary-Hunt-Tagline-Trimmed.png
Mary Hunt2026-07-09 18:30:102026-07-09 18:30:10The Best Way to Make Iced Tea? Depends What You’re After https://www.everydaycheapskate.com/wp-content/uploads/20260707-creamy-whipped-frozen-coffee-drink-on-balcony-with-whipped-cream.png
800
1200
Mary Hunt
https://www.everydaycheapskate.com/wp-content/uploads/EC-Logo-by-Mary-Hunt-Tagline-Trimmed.png
Mary Hunt2026-07-07 10:09:112026-07-07 10:09:11I Stopped Buying $7 Frappuccinos. Here’s What I Make Now
https://www.everydaycheapskate.com/wp-content/uploads/20260707-creamy-whipped-frozen-coffee-drink-on-balcony-with-whipped-cream.png
800
1200
Mary Hunt
https://www.everydaycheapskate.com/wp-content/uploads/EC-Logo-by-Mary-Hunt-Tagline-Trimmed.png
Mary Hunt2026-07-07 10:09:112026-07-07 10:09:11I Stopped Buying $7 Frappuccinos. Here’s What I Make Now https://www.everydaycheapskate.com/wp-content/uploads/20260705-Best-Coolers-for-Camping-Road-Trips-and-Beach-Days.png
800
1200
Mary Hunt
https://www.everydaycheapskate.com/wp-content/uploads/EC-Logo-by-Mary-Hunt-Tagline-Trimmed.png
Mary Hunt2026-07-05 13:26:172026-07-05 13:26:17Best Coolers for Camping, Road Trips, and Beach Days
https://www.everydaycheapskate.com/wp-content/uploads/20260705-Best-Coolers-for-Camping-Road-Trips-and-Beach-Days.png
800
1200
Mary Hunt
https://www.everydaycheapskate.com/wp-content/uploads/EC-Logo-by-Mary-Hunt-Tagline-Trimmed.png
Mary Hunt2026-07-05 13:26:172026-07-05 13:26:17Best Coolers for Camping, Road Trips, and Beach Days https://www.everydaycheapskate.com/wp-content/uploads/20260703-home-decor.png
800
1200
Mary Hunt
https://www.everydaycheapskate.com/wp-content/uploads/EC-Logo-by-Mary-Hunt-Tagline-Trimmed.png
Mary Hunt2026-07-03 20:46:552026-07-03 20:46:5510 Everyday Items You Never Think to Wash (But Should)
https://www.everydaycheapskate.com/wp-content/uploads/20260703-home-decor.png
800
1200
Mary Hunt
https://www.everydaycheapskate.com/wp-content/uploads/EC-Logo-by-Mary-Hunt-Tagline-Trimmed.png
Mary Hunt2026-07-03 20:46:552026-07-03 20:46:5510 Everyday Items You Never Think to Wash (But Should) https://www.everydaycheapskate.com/wp-content/uploads/20260630-a-lit-sparkler-with-an-american-flag-in-the-background-4th-of-july-hacks-tips-and-recipes.png
800
1200
Mary Hunt
https://www.everydaycheapskate.com/wp-content/uploads/EC-Logo-by-Mary-Hunt-Tagline-Trimmed.png
Mary Hunt2026-06-30 21:44:502026-06-30 21:44:5034 Fourth of July Recipes and DIY Hacks for a Stress-Free Holiday
https://www.everydaycheapskate.com/wp-content/uploads/20260630-a-lit-sparkler-with-an-american-flag-in-the-background-4th-of-july-hacks-tips-and-recipes.png
800
1200
Mary Hunt
https://www.everydaycheapskate.com/wp-content/uploads/EC-Logo-by-Mary-Hunt-Tagline-Trimmed.png
Mary Hunt2026-06-30 21:44:502026-06-30 21:44:5034 Fourth of July Recipes and DIY Hacks for a Stress-Free Holiday https://www.everydaycheapskate.com/wp-content/uploads/20260629-wooden-die-spell-july-with-patriotic-decor-in-background.png
800
1200
Mary Hunt
https://www.everydaycheapskate.com/wp-content/uploads/EC-Logo-by-Mary-Hunt-Tagline-Trimmed.png
Mary Hunt2026-06-29 21:07:092026-06-29 21:10:297 Best Things to Buy in July for Huge Summer Savings
https://www.everydaycheapskate.com/wp-content/uploads/20260629-wooden-die-spell-july-with-patriotic-decor-in-background.png
800
1200
Mary Hunt
https://www.everydaycheapskate.com/wp-content/uploads/EC-Logo-by-Mary-Hunt-Tagline-Trimmed.png
Mary Hunt2026-06-29 21:07:092026-06-29 21:10:297 Best Things to Buy in July for Huge Summer Savings

Wonderful lemon squares. I’m making my second batch right now and think the recipe is easy to follow and it turns out great
Mary, thank you for this recipe. Lemon bars are my husband’s all-time favorite! So I’m going to make these, but I know we’ll ( he will) go through them quickly. Can this recipe be doubled or even tripled?
Yes! And you can even quadruple!