
Chicken Still the Backbone of the Frugal Kitchen (with RECIPES)
With the price of beef skyrocketing, now more than ever, chicken continues to claim its place as the backbone of the frugal kitchen. And why not? By comparison and even though the cost of all food is going up across the board, chicken is still much less expensive than beef or pork. It’s healthy, delicious, and useful right down to and including the bones.

Don’t pay full-price
Chicken is always on sale somewhere. If you don’t want to store-hop, you can always find some cut of meat, fish, and poultry on sale in your favorite market. Eat what’s on sale and if it’s a loss-leader (that means priced dirt-cheap below the store’s cost, to entice people through the door), stock up for the coming weeks.
Buy whole chickens
The most frugal way to buy chicken is whole, then cut them up yourself. You’ll not only save money, but chicken tastes much better when cooked with the skin and bones.
A whole, organic bird usually costs less per pound than precut, skinned, and boned parts—and it tastes so much better. It is not difficult to cut up a chicken once you understand the simple steps. Here is a video tutorial or if you prefer written instructions with pictures.
Roast whole chicken
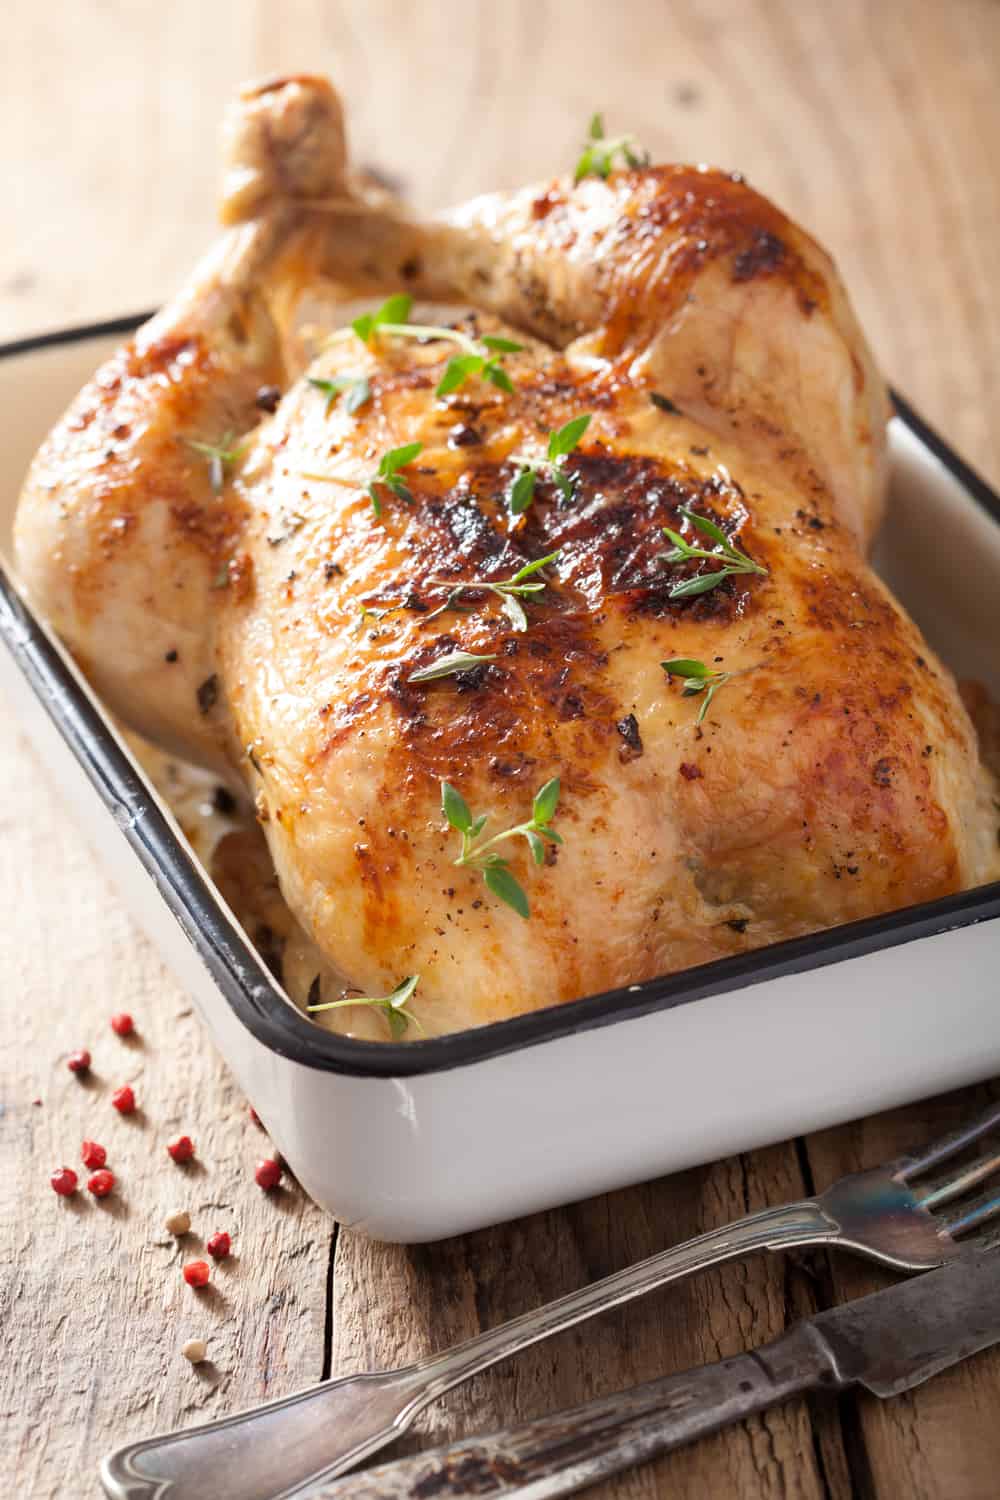
Preheat oven to 450 F. In the meantime, remove everything from the cavity and rinse the chicken, inside and out.
Dry with paper towels or a clean cloth. Season well with salt and pepper; fresh thyme if you have it.
Place one-half a rib of celery and half of a whole onion inside the cavity. Set the chicken breast-side-up in a baking dish or roasting pan.
Put the chicken into the oven and reduce the temperature to 400 F. Set a timer for 1 hour and do not open the oven door.
After an hour, check if the chicken is done by inserting an instant-read thermometer in the thickest part of its thigh. The internal temperature should be 165 F. for the chicken to be done. If you’re under, put it back in to cook for another 5 to 10 minutes and check it again.
Let the bird rest for about 15 minutes. Carve and enjoy.
3-way chicken
Whether you buy a whole raw chicken or a rotisserie chicken (still $4.99 at Costco, but for how long?) from the deli counter, you are looking at three— maybe even four—meals from that one bird.
Dinner #1: Roast chicken (more to come on this in a bit).
Dinner #2: Chicken pot pie, chicken sandwiches, chicken stir-fry, chicken burritos, or chicken salad using the meat you removed from the carcass following Dinner #1.
Dinner #3: Chicken soup made from the carcass of the bird.
- RELATED: Rotisserie Chickens to the Rescue
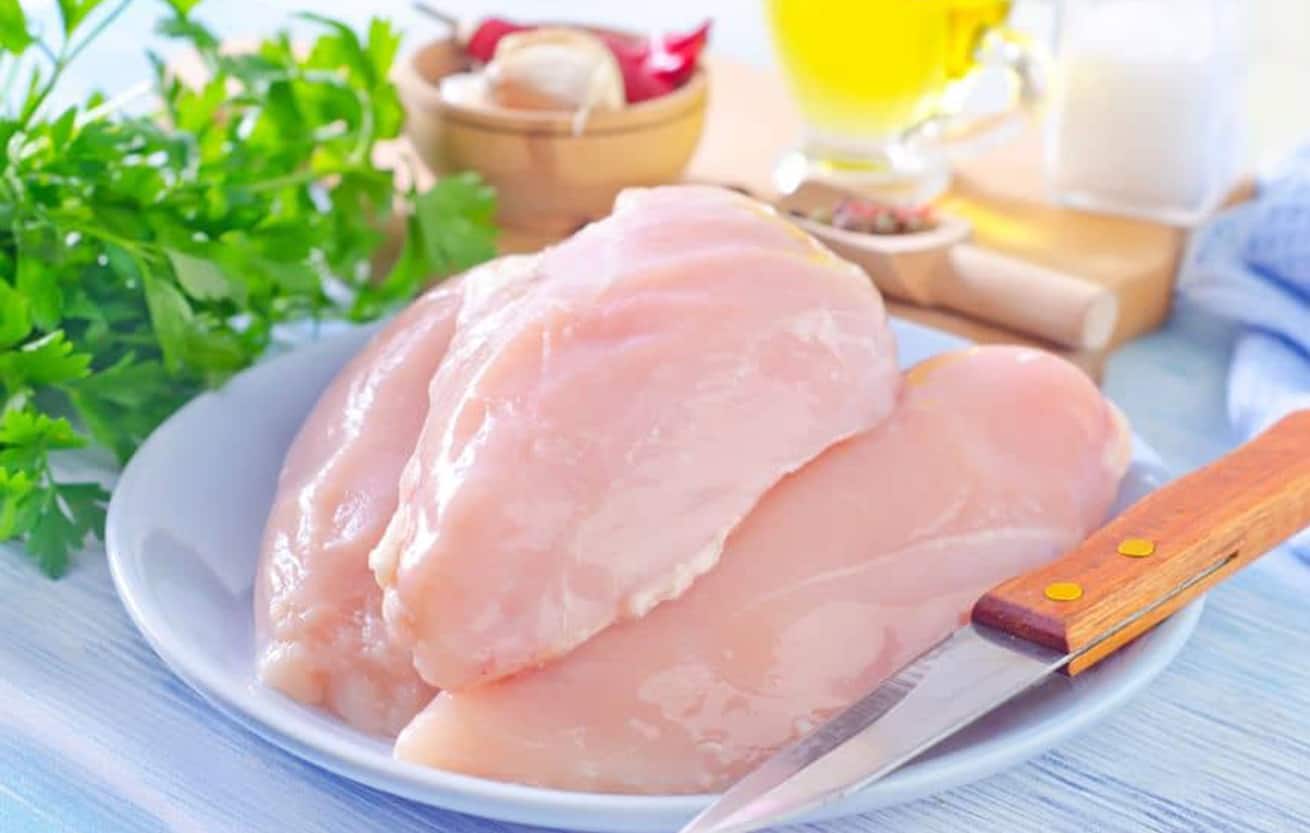
How to store raw chicken

- According to the USDA and U.S. Food and Drug Administration, raw chicken (regardless of if it’s whole; in pieces such as breasts, thighs, drumsticks, and wings; or ground) should be stored for no longer than one to two days in the refrigerator.
If the chicken was previously frozen, this timeline begins after the meat is fully defrosted. If you’re unsure whether you’ll get to cooking that raw chicken before this timeline is up, your best bet is to freeze it.
RELATED: Supermarket Chicken Labeling—What Does it All Mean?
How to freeze raw chicken
Freezing chicken in the original packaging is fine for up to two months. For longer freezing—up to 9 months—over-wrap packages with foil, plastic wrap, freezer paper, or plastic bags. For ease in defrosting, separate and wrap individual pieces or servings prior to freezing, so you only have to thaw the quantity you need for the meal you’re preparing.
For safety’s sake, you don’t need to remove chicken breasts from the grocery store packaging before freezing. But for flavor and preserving the moisture inside those chicken breasts, it’s best to repackage.
The best at-home packaging method is vacuum-sealing with a machine (like FoodSaver), which removes air from the packaging and heat-seals the edges of the bag.
No machine? You’ve still got options.
Freezer bags
Place chicken breasts in freezer bags and manually push out as much air as possible before zipping them closed.
Re-package
If you want to leave the chicken in the package it came in, the USDA advises that you wrap the container in aluminum foil, plastic wrap, or freezer paper. This helps add a barrier between the chicken and the air in the freezer.
The goal is to prevent freezer burn, which can happen when chicken is exposed to freezer air and becomes dehydrated and oxidized.
Freezer burn
If your frozen chicken breasts have spots of freezer burn, it’s okay to trim those spot off, once thawed. But if the whole breast looks gray and leather-like, toss it.
RELATED: Two Recipes on the Menu Every Week at My House
How to safely thaw chicken
The ideal and safest way to thaw chicken is in the refrigerator. This allows the meat to slowly defrost so that it has time to reabsorb the ice crystals that formed between the fibers, which gives it a better texture once cooked. Allow approximately five hours per pound thawing time.
This method does involve foresight, however, as it will take about 24 hours for a whole chicken to be completely thawed and ready for cooking.
For faster thawing, you can defrost using the cold-water method, by putting the poultry in an airtight bag and placing it in a bowl or sink full of cold water and changing the water every half hour. And never use hot water, since it can stimulate bacterial growth. This method can take anywhere between one and three hours, depending on the size and thickness of the chicken.
How to make chicken stock
Here’s my favorite method.
- Put the bones and skin from a chicken carcass into a large pot.
- Add vegetables like celery, onion, carrot, and parsley. Cover with water.
- Add a full teaspoon of salt and 1/2 teaspoon ground pepper. Bring to a boil and immediately reduce heat to barely simmer.
- Place lid on the pot, but off to the side a bit.
- Allow it to simmer, partially covered for at least 4 hours, 6 is better. Check occasionally and skim off any foam that comes to the surface.
- Remove bones and vegetables and pour the stock through a sieve. Refrigerate tightly sealed in glass jars.

Crispy Baked Chicken Thighs
Ingredients
For the Chicken:
- 6 bone-in skin-on chicken thighs (about 2.25 lbs)
- Salt and freshly ground black pepper to taste
- 1 tablespoon vegetable oil or avocado oil/ghee for a higher smoke point
For the Optional Teriyaki Sauce:
- ¼ cup soy sauce
- ¼ cup brown sugar
- ¼ cup mirin or a mix of honey and rice vinegar
- ¼ cup water
Instructions
For the Chicken:
- Preheat oven to 425°F. Generously season both sides of the chicken with salt and pepper.
- Heat oil in a 12-inch cast-iron or heavy nonstick skillet over high heat until shimmering but not smoking. Place chicken thighs skin-side down and cook without moving for 2 minutes.
- Reduce heat to medium-high and continue cooking, skin-side down, for 12 minutes. Occasionally adjust the thighs and rotate the pan for even browning.
- Transfer the skillet to the oven uncovered and bake for 13 minutes. Watch closely—you want sizzling, not smoking!
- Flip the chicken skin-side up and bake for another 5 minutes until the skin is deeply crispy and the meat is cooked through.
- Remove from the oven and let rest for 5 minutes before serving.
- Optional: Drizzle with Teriyaki Sauce and serve with steamed white or brown rice for a restaurant-quality meal.
For the Teriyaki Sauce (Optional):
- In a wide saucepan over high heat, mix soy sauce, brown sugar, mirin, and water. (A larger pan helps it reduce faster!)
- Bring to a boil, then reduce heat to a gentle simmer. Let it cook until the sauce thickens and reduces by half (about 10 minutes).
- It should be lightly syrupy. Let cool before serving.
Notes
- Mirin Substitute: If you don’t have mirin, use a mix of 1 tbsp honey + 1 tbsp rice vinegar for a similar flavor.
- Oil Alternatives: Avocado oil or ghee work well due to their high smoke points.
- Low-Sodium Option: Use low-sodium soy sauce to reduce salt content.
- Pat the chicken dry with paper towels before seasoning to help the skin crisp up.
- Don't move the chicken too soon. Letting it sit undisturbed helps create a deep golden crust.
- Skin-side down first is the key. This allows the fat to render slowly for maximum crispiness.
- Storage: Leftovers can be stored in an airtight container in the fridge for up to 4 days.
- Reheating: Reheat in a 375°F oven for 10-12 minutes to maintain crispiness. Avoid microwaving, as it will make the skin soggy.
- Serve over steamed rice with teriyaki sauce for an easy meal.
- Pair with roasted vegetables, a fresh salad, or even mashed potatoes.
Nutrition

Chicken À L'Orange
Ingredients
- 8 shallots
- 2 tablespoons olive oil divided
- ¼ teaspoon kosher salt plus ¼ teaspoon more for the glaze
- ¼ teaspoon black pepper plus ¼ teaspoon more for the glaze
- 1 whole chicken cut into 10 pieces (2 drumsticks, 2 thighs, 2 wings, 2 breasts each halved)
- ½ cup orange marmalade
- 1 tablespoon white wine vinegar
- 1 tablespoon fresh rosemary chopped
Instructions
- Heat oven to 425°F.
- In a large shallow roasting pan, toss the shallots with 1 tablespoon olive oil and ¼ teaspoon each salt and pepper. Spread into an even layer.
- In a large bowl, whisk together the marmalade, vinegar, rosemary, remaining 1 tablespoon olive oil, and ¼ teaspoon each salt and pepper.
- Add the chicken pieces to the bowl and toss until every piece is fully coated in the glaze.
- Nestle the chicken pieces skin side up among the shallots in the roasting pan.
- Roast for 25 to 30 minutes, until the chicken is golden brown and a meat thermometer inserted into the thickest part reads 165°F.
- Serve with fresh steamed green beans and crusty bread.
Notes
Nutrition
Everyday Cheapskate participates in the Amazon Services LLC Associates Program, an affiliate advertising program designed to provide a means for us to earn fees by linking to Amazon affiliated sites.

More from Everyday Cheapskate
 https://www.everydaycheapskate.com/wp-content/uploads/20260703-home-decor.png
800
1200
Mary Hunt
https://www.everydaycheapskate.com/wp-content/uploads/EC-Logo-by-Mary-Hunt-Tagline-Trimmed.png
Mary Hunt2026-07-03 20:46:552026-07-03 20:46:5510 Everyday Items You Never Think to Wash (But Should)
https://www.everydaycheapskate.com/wp-content/uploads/20260703-home-decor.png
800
1200
Mary Hunt
https://www.everydaycheapskate.com/wp-content/uploads/EC-Logo-by-Mary-Hunt-Tagline-Trimmed.png
Mary Hunt2026-07-03 20:46:552026-07-03 20:46:5510 Everyday Items You Never Think to Wash (But Should) https://www.everydaycheapskate.com/wp-content/uploads/20260630-a-lit-sparkler-with-an-american-flag-in-the-background-4th-of-july-hacks-tips-and-recipes.png
800
1200
Mary Hunt
https://www.everydaycheapskate.com/wp-content/uploads/EC-Logo-by-Mary-Hunt-Tagline-Trimmed.png
Mary Hunt2026-06-30 21:44:502026-06-30 21:44:5034 Fourth of July Recipes and DIY Hacks for a Stress-Free Holiday
https://www.everydaycheapskate.com/wp-content/uploads/20260630-a-lit-sparkler-with-an-american-flag-in-the-background-4th-of-july-hacks-tips-and-recipes.png
800
1200
Mary Hunt
https://www.everydaycheapskate.com/wp-content/uploads/EC-Logo-by-Mary-Hunt-Tagline-Trimmed.png
Mary Hunt2026-06-30 21:44:502026-06-30 21:44:5034 Fourth of July Recipes and DIY Hacks for a Stress-Free Holiday https://www.everydaycheapskate.com/wp-content/uploads/20260629-wooden-die-spell-july-with-patriotic-decor-in-background.png
800
1200
Mary Hunt
https://www.everydaycheapskate.com/wp-content/uploads/EC-Logo-by-Mary-Hunt-Tagline-Trimmed.png
Mary Hunt2026-06-29 21:07:092026-06-29 21:10:297 Best Things to Buy in July for Huge Summer Savings
https://www.everydaycheapskate.com/wp-content/uploads/20260629-wooden-die-spell-july-with-patriotic-decor-in-background.png
800
1200
Mary Hunt
https://www.everydaycheapskate.com/wp-content/uploads/EC-Logo-by-Mary-Hunt-Tagline-Trimmed.png
Mary Hunt2026-06-29 21:07:092026-06-29 21:10:297 Best Things to Buy in July for Huge Summer Savings https://www.everydaycheapskate.com/wp-content/uploads/20260628-Grilled-Peaches-with-Balsamic-and-Blue-Cheese-1.png
800
1200
Mary Hunt
https://www.everydaycheapskate.com/wp-content/uploads/EC-Logo-by-Mary-Hunt-Tagline-Trimmed.png
Mary Hunt2026-06-29 09:38:342026-06-29 09:38:34Summer Grilled Peaches with Balsamic and Blue Cheese
https://www.everydaycheapskate.com/wp-content/uploads/20260628-Grilled-Peaches-with-Balsamic-and-Blue-Cheese-1.png
800
1200
Mary Hunt
https://www.everydaycheapskate.com/wp-content/uploads/EC-Logo-by-Mary-Hunt-Tagline-Trimmed.png
Mary Hunt2026-06-29 09:38:342026-06-29 09:38:34Summer Grilled Peaches with Balsamic and Blue Cheese https://www.everydaycheapskate.com/wp-content/uploads/20260625-a-rustic-wooden-christmas-tree-in-the-sand-on-the-beach.png
800
1200
Mary Hunt
https://www.everydaycheapskate.com/wp-content/uploads/EC-Logo-by-Mary-Hunt-Tagline-Trimmed.png
Mary Hunt2026-06-26 11:34:132026-06-26 11:36:44Christmas in June? Try This Amazon Prime Day Gift Guide
https://www.everydaycheapskate.com/wp-content/uploads/20260625-a-rustic-wooden-christmas-tree-in-the-sand-on-the-beach.png
800
1200
Mary Hunt
https://www.everydaycheapskate.com/wp-content/uploads/EC-Logo-by-Mary-Hunt-Tagline-Trimmed.png
Mary Hunt2026-06-26 11:34:132026-06-26 11:36:44Christmas in June? Try This Amazon Prime Day Gift Guide https://www.everydaycheapskate.com/wp-content/uploads/20260624-why-does-my-ice-taste-weird-soda-tea-lemonade-juice.png
800
1200
Mary Hunt
https://www.everydaycheapskate.com/wp-content/uploads/EC-Logo-by-Mary-Hunt-Tagline-Trimmed.png
Mary Hunt2026-06-24 17:10:532026-06-24 17:10:53Why Does My Ice Taste Weird? Here’s the Answer
https://www.everydaycheapskate.com/wp-content/uploads/20260624-why-does-my-ice-taste-weird-soda-tea-lemonade-juice.png
800
1200
Mary Hunt
https://www.everydaycheapskate.com/wp-content/uploads/EC-Logo-by-Mary-Hunt-Tagline-Trimmed.png
Mary Hunt2026-06-24 17:10:532026-06-24 17:10:53Why Does My Ice Taste Weird? Here’s the Answer https://www.everydaycheapskate.com/wp-content/uploads/20260622-a-single-car-garaged-with-beautiful-flowers-along-landscape-beds-things-ruined-by-heat-in-the-garage.png
800
1200
Mary Hunt
https://www.everydaycheapskate.com/wp-content/uploads/EC-Logo-by-Mary-Hunt-Tagline-Trimmed.png
Mary Hunt2026-06-22 20:24:432026-06-22 20:24:4325 Things Summer Heat Can Ruin in Your Garage
https://www.everydaycheapskate.com/wp-content/uploads/20260622-a-single-car-garaged-with-beautiful-flowers-along-landscape-beds-things-ruined-by-heat-in-the-garage.png
800
1200
Mary Hunt
https://www.everydaycheapskate.com/wp-content/uploads/EC-Logo-by-Mary-Hunt-Tagline-Trimmed.png
Mary Hunt2026-06-22 20:24:432026-06-22 20:24:4325 Things Summer Heat Can Ruin in Your Garage https://www.everydaycheapskate.com/wp-content/uploads/20260621-amazon-prime-day-2026-is-coming-everyday-cheapskate-mary-hunt-guide-for-cheapskates.png
800
1200
Mary Hunt
https://www.everydaycheapskate.com/wp-content/uploads/EC-Logo-by-Mary-Hunt-Tagline-Trimmed.png
Mary Hunt2026-06-21 15:48:502026-06-21 15:48:50The Cheapskate’s Guide to Winning Prime Day 2026
https://www.everydaycheapskate.com/wp-content/uploads/20260621-amazon-prime-day-2026-is-coming-everyday-cheapskate-mary-hunt-guide-for-cheapskates.png
800
1200
Mary Hunt
https://www.everydaycheapskate.com/wp-content/uploads/EC-Logo-by-Mary-Hunt-Tagline-Trimmed.png
Mary Hunt2026-06-21 15:48:502026-06-21 15:48:50The Cheapskate’s Guide to Winning Prime Day 2026 https://www.everydaycheapskate.com/wp-content/uploads/20260622-prime-day-is-here-crockpot-steamer-blackstone-griddle.png
800
1200
Mary Hunt
https://www.everydaycheapskate.com/wp-content/uploads/EC-Logo-by-Mary-Hunt-Tagline-Trimmed.png
Mary Hunt2026-06-21 12:11:092026-06-26 16:46:21Your Guide to the Best Amazon Prime Day Deals of 2026
https://www.everydaycheapskate.com/wp-content/uploads/20260622-prime-day-is-here-crockpot-steamer-blackstone-griddle.png
800
1200
Mary Hunt
https://www.everydaycheapskate.com/wp-content/uploads/EC-Logo-by-Mary-Hunt-Tagline-Trimmed.png
Mary Hunt2026-06-21 12:11:092026-06-26 16:46:21Your Guide to the Best Amazon Prime Day Deals of 2026

The high heat for 2 minutes & then med-high heat for 12 minutes was too high on my stove. Then, the skillet in the oven @ 425 degrees was over the top. By the time it was smoking it was too late. It set off my smoke alarm. I have cleaned and cleaned, but can still smell the smoke.
Of course you should always adjust for your specific situation—altitude, oven calibration, etc. Can I encourage you to try again? Just turn the temps down!
Thanks for the info!
I always have trouble with #6 — Remove bones and vegetables and pour the stock through a sieve. –
This is the part that is the most work! Do you have an article on how to make that easier? Thanks again, Mary!
Use a ladle to transfer the stock to the sieve. Might take a few more minutes, but quite doable.
Hope that helps!
I have an easier recipe/technique for chicken thighs that I learned from Chef Jacques Pepin. All you need is a cast iron skillet. 2 or 4 chicken thighs (depending upon number of folks your feeding). Sprinkle salt into cast iron fry pan and pre-heat on top of stove (medium heat). Make sure pan is VERY hot. Place chicken thighs in fry pan, skin side down. Cover. Allow to cook thoroughly…no need to turn over. When thigh is pierced with tip of knife and no blood juices appear…thighs are done. Beautifully crispy skin (crunchy) and succulent, juicy thighs. Credit goes to Jacques Pepin.