
Quick Guide: How to Clean a Steam Iron


Wondering how to clean a steam iron without the hassle? Whether it’s spitting brown spots on your clothes or the soleplate’s gunked up, we’ve got you covered. This quick guide will walk you through simple steps to clean a steam iron inside and out, so you can keep it working like new with just a few common household items.
Regularly cleaning your steam iron isn’t just a good habit—it’s essential for keeping it performing at its best. Over time, mineral deposits and gunk can build up inside the iron and on the soleplate, leading to poor steam output, uneven heat distribution, and even stains on your clothes. A clean steam iron not only ensures smoother gliding but also helps it last longer, saving you from the hassle and expense of replacing it prematurely. So, if you want your clothes to look crisp and your iron to work like new, routine cleaning is a must!
As always, check the owner’s manual before proceeding with any cleaning process.
Step-by-Step Guide to Cleaning the Soleplate
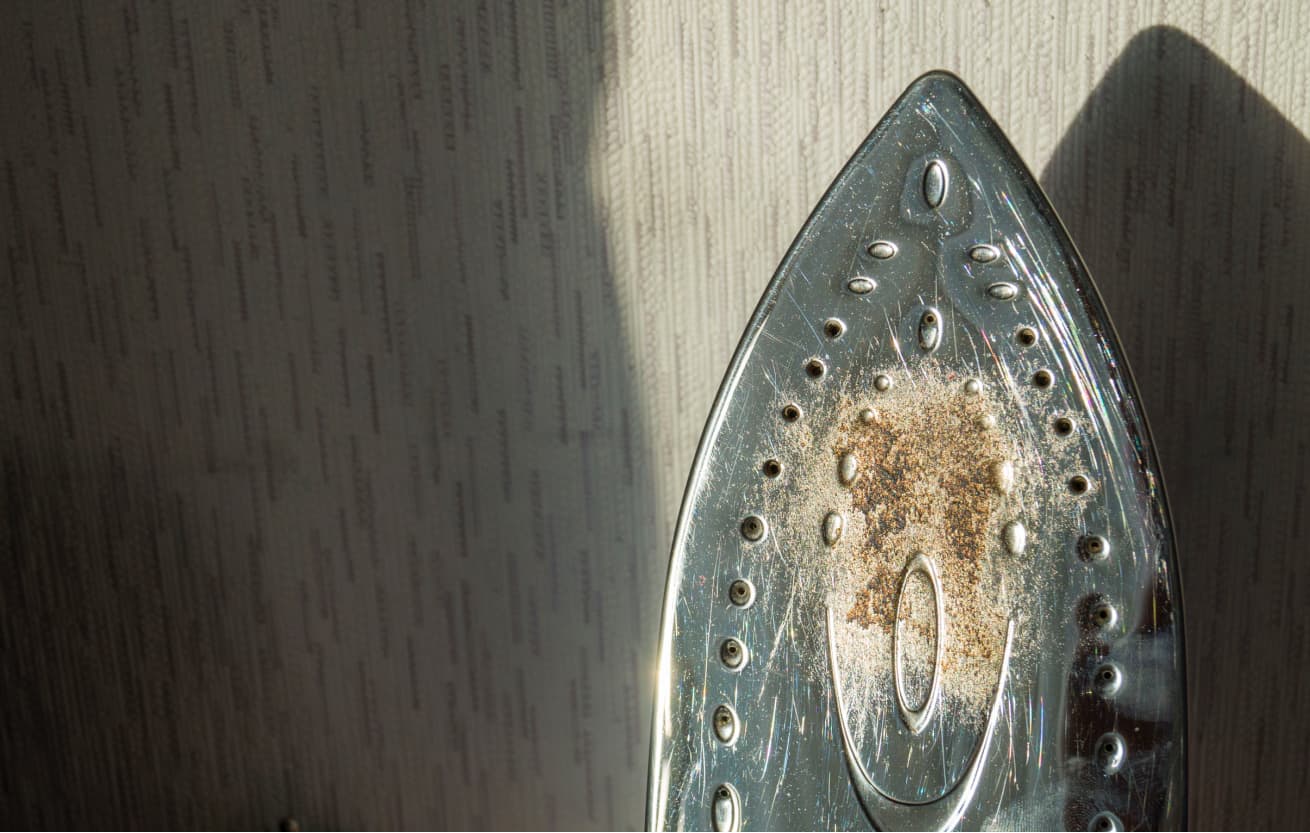
The soleplate of your steam iron—the flat, heated surface with tiny steam holes—can become a mess over time. Scorched stains from ironing the wrong side of fusible interfacing or repeated use of spray starch can build up, turning your once-smooth iron into a fabric-damaging nightmare.
A dirty steam iron won’t glide smoothly, leaving streaks and stains on your clothes instead of pressing them to perfection. While you might find all kinds of advice out there, from baking soda and vinegar pastes to heat-and-scrape methods, this foolproof technique is fast, easy, and mess-free.
Even if your iron’s soleplate isn’t looking too bad, give this method a try. It’ll keep your iron gliding like new, making the chore of ironing a lot more satisfying.
What You’ll Need:
- One new, unused dryer sheet
- Two paper towels
- An empty steam iron (Steam: Off)
- A hot iron (set to its highest temperature)
Instructions:
- Prep your ironing board: Lay two clean paper towels on your ironing board. This will keep things tidy.
- Heat the iron: Crank your steam iron up to its hottest setting. It might smoke a little as residue burns off—that’s okay!
- Clean with the dryer sheet: Place the dryer sheet on one of the paper towels. Gently iron the dryer sheet for about 30 seconds, then switch to the paper towel to wipe away the gunk. Go back and forth until the soleplate is completely clean and shiny.
Your iron should now glide effortlessly, just like it did when it was brand new.
Pro Tip
Did you know that many newer steam irons are designed to use tap water? Always check your owner’s manual first. Some manufacturers still recommend distilled water, but others warn that using distilled water might even void your warranty. A quick look at the manual can save you from potential issues down the road.
How to Remove Build-Up from the Inside of Your Steam Iron
Over time, your steam iron can develop stubborn build-up inside the water chamber and steam holes, causing it to spit, sputter, and perform poorly. Here’s how to clean a steam iron from the inside out, using just a few simple ingredients.
What You’ll need:
- Plain white vinegar (5% acidity)
- Tap water
- Measuring cup
Step 1: Check the Manual
Before diving in, check your iron’s owner manual. Some manufacturers might have specific cleaning instructions, and you don’t want to void the warranty if it’s still active.
Step 2: Mix the Solution
In a measuring cup, combine equal parts white vinegar and tap water. Pour this mixture into the cool, unplugged iron’s water chamber, filling it to the maximum fill line.
Step 3: Heat and Steam
Plug in the iron and set it to the highest steam setting. Leave the iron in an upright position on your ironing board for about 10-15 minutes. Don’t leave it unattended.
Step 4: Steam and Empty
Hold the iron so that the soleplate is parallel to the ironing board, and let it steam until the water reservoir is empty. It may take a few cycles for the vinegar to break down the hard-water scale and mineral build-up.
Step 5: Rinse and Repeat
Refill the reservoir with more vinegar and water. Unplug the iron and take it to the sink. Shake it to loosen any remaining gunk inside, then turn it upside down over the sink to pour out the liquid. You might see flakes of build-up come out—keep repeating until the liquid runs clear.
Step 6: Final Rinse
Rinse the water chamber thoroughly with clean water several times to ensure all traces of vinegar are gone. Now your steam iron is ready to perform like new again!
How to Clean a Steam Iron with the Self-Cleaning System
If you’re lucky enough to own a steam iron with a built-in self-cleaning or “anti-calc” feature, you’ve got an easy way to keep your iron in top shape. Just follow these simple steps to make sure your iron stays clean and ready to go:
Step 1: Prep the Iron
Start by unplugging your iron and turning the steam setting to the lowest option or off entirely. Fill the water reservoir to the max line with clean tap water.
Step 2: Heat it Up
Set your iron to the highest temperature and plug it in. Let it heat up for about 10 minutes until it’s sizzling hot. Then, unplug it—safety first!
Step 3: Activate the Self-Cleaning Feature
Hold the iron over a sink, with the soleplate parallel to the basin. Switch the steam setting to the self-clean or anti-calc option, and hold it there. Give the iron a little shake and tilt it around to help dislodge any gunk. You’ll see hot water and steam shooting out through the steam holes—this is the iron giving itself a deep clean. Once it’s done, set the steam level back to zero.
Step 4: Dry and Polish
Plug the iron back in and heat it up just enough to dry out the soleplate. Once dry, unplug the iron and let it cool completely. To finish, rub the soleplate with a dry cloth to remove any lingering residue, and give it a quick polish with a dryer sheet. Your iron will be good as new!
Maintaining Your Steam Iron for Long-Lasting Performance
To keep your steam iron working like a dream, regular maintenance is key. Both the inside and the soleplate need a little TLC to stay in top shape. But how often should you clean your iron? It really depends on how much you use it. As a general rule, aim to clean your steam iron once a month or after about 30 reservoir fill-ups. Regular care ensures your iron stays efficient, prolongs its life, and keeps your clothes looking flawless.
FAQ
How can I clean a burnt iron?
There are myriad ways to do that, but none as easy and non-messy as using an new, unused dryer sheet. See the article above for complete details.
How can I clean a burnt iron with toothpaste?
Non-gel toothpaste can be buffed onto an iron to help remove burnt marks. The paste’s slightly abrasive nature helps to polish the marks away without damaging the plate. Make sure you use a cotton swab to clean any residue of toothpaste from the steam vents/holes in the soleplate.
Why is my iron spitting out brown stuff?
If your iron’s steam function is leaving brown spots on your clothing, it’s time to clean the steam vents and water reservoir. Run a white vinegar-water solution through the reservoir until you see steam flowing properly.
Question: Do you regularly clean your steam iron, or is it one of those ‘I’ll get to it someday’ tasks? Share your best iron-cleaning tips below.

More from Everyday Cheapskate
 https://www.everydaycheapskate.com/wp-content/uploads/20260722-easy-home-repairs-slow-sink-drain-squeaky-hinges-sticky-drawer.png
800
1200
Mary Hunt
https://www.everydaycheapskate.com/wp-content/uploads/EC-Logo-by-Mary-Hunt-Tagline-Trimmed.png
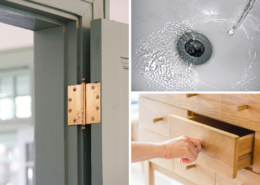
Mary Hunt2026-07-22 13:04:022026-07-22 13:04:0210 Small Home Annoyances You Can Fix in Under 15 Minutes Each
https://www.everydaycheapskate.com/wp-content/uploads/20260722-easy-home-repairs-slow-sink-drain-squeaky-hinges-sticky-drawer.png
800
1200
Mary Hunt
https://www.everydaycheapskate.com/wp-content/uploads/EC-Logo-by-Mary-Hunt-Tagline-Trimmed.png
Mary Hunt2026-07-22 13:04:022026-07-22 13:04:0210 Small Home Annoyances You Can Fix in Under 15 Minutes Each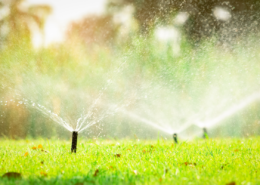 https://www.everydaycheapskate.com/wp-content/uploads/20260717-how-to-read-your-water-bill-sprinklers-on-a-residential-lawn.png
800
1200
Mary Hunt
https://www.everydaycheapskate.com/wp-content/uploads/EC-Logo-by-Mary-Hunt-Tagline-Trimmed.png
Mary Hunt2026-07-18 10:46:312026-07-18 10:46:31How to Read Your Water Bill and Lower Your Monthly Costs Now
https://www.everydaycheapskate.com/wp-content/uploads/20260717-how-to-read-your-water-bill-sprinklers-on-a-residential-lawn.png
800
1200
Mary Hunt
https://www.everydaycheapskate.com/wp-content/uploads/EC-Logo-by-Mary-Hunt-Tagline-Trimmed.png
Mary Hunt2026-07-18 10:46:312026-07-18 10:46:31How to Read Your Water Bill and Lower Your Monthly Costs Now https://www.everydaycheapskate.com/wp-content/uploads/20260716-woman-on-phone-with-flat-tire-spare-roadside-car-emergency-kit.png
800
1200
Mary Hunt
https://www.everydaycheapskate.com/wp-content/uploads/EC-Logo-by-Mary-Hunt-Tagline-Trimmed.png
Mary Hunt2026-07-16 21:10:152026-07-16 21:10:15The 7-Item Emergency Car Kit Every Driver Needs (Cheaper Than One Tow)
https://www.everydaycheapskate.com/wp-content/uploads/20260716-woman-on-phone-with-flat-tire-spare-roadside-car-emergency-kit.png
800
1200
Mary Hunt
https://www.everydaycheapskate.com/wp-content/uploads/EC-Logo-by-Mary-Hunt-Tagline-Trimmed.png
Mary Hunt2026-07-16 21:10:152026-07-16 21:10:15The 7-Item Emergency Car Kit Every Driver Needs (Cheaper Than One Tow) https://www.everydaycheapskate.com/wp-content/uploads/20260705-Best-Coolers-for-Camping-Road-Trips-and-Beach-Days.png
800
1200
Mary Hunt
https://www.everydaycheapskate.com/wp-content/uploads/EC-Logo-by-Mary-Hunt-Tagline-Trimmed.png
Mary Hunt2026-07-05 13:26:172026-07-05 13:26:17Best Coolers for Camping, Road Trips, and Beach Days
https://www.everydaycheapskate.com/wp-content/uploads/20260705-Best-Coolers-for-Camping-Road-Trips-and-Beach-Days.png
800
1200
Mary Hunt
https://www.everydaycheapskate.com/wp-content/uploads/EC-Logo-by-Mary-Hunt-Tagline-Trimmed.png
Mary Hunt2026-07-05 13:26:172026-07-05 13:26:17Best Coolers for Camping, Road Trips, and Beach Days https://www.everydaycheapskate.com/wp-content/uploads/20260703-home-decor.png
800
1200
Mary Hunt
https://www.everydaycheapskate.com/wp-content/uploads/EC-Logo-by-Mary-Hunt-Tagline-Trimmed.png
Mary Hunt2026-07-03 20:46:552026-07-03 20:46:5510 Everyday Items You Never Think to Wash (But Should)
https://www.everydaycheapskate.com/wp-content/uploads/20260703-home-decor.png
800
1200
Mary Hunt
https://www.everydaycheapskate.com/wp-content/uploads/EC-Logo-by-Mary-Hunt-Tagline-Trimmed.png
Mary Hunt2026-07-03 20:46:552026-07-03 20:46:5510 Everyday Items You Never Think to Wash (But Should) https://www.everydaycheapskate.com/wp-content/uploads/20260630-a-lit-sparkler-with-an-american-flag-in-the-background-4th-of-july-hacks-tips-and-recipes.png
800
1200
Mary Hunt
https://www.everydaycheapskate.com/wp-content/uploads/EC-Logo-by-Mary-Hunt-Tagline-Trimmed.png
Mary Hunt2026-06-30 21:44:502026-06-30 21:44:5034 Fourth of July Recipes and DIY Hacks for a Stress-Free Holiday
https://www.everydaycheapskate.com/wp-content/uploads/20260630-a-lit-sparkler-with-an-american-flag-in-the-background-4th-of-july-hacks-tips-and-recipes.png
800
1200
Mary Hunt
https://www.everydaycheapskate.com/wp-content/uploads/EC-Logo-by-Mary-Hunt-Tagline-Trimmed.png
Mary Hunt2026-06-30 21:44:502026-06-30 21:44:5034 Fourth of July Recipes and DIY Hacks for a Stress-Free Holiday https://www.everydaycheapskate.com/wp-content/uploads/20260629-wooden-die-spell-july-with-patriotic-decor-in-background.png
800
1200
Mary Hunt
https://www.everydaycheapskate.com/wp-content/uploads/EC-Logo-by-Mary-Hunt-Tagline-Trimmed.png
Mary Hunt2026-06-29 21:07:092026-06-29 21:10:297 Best Things to Buy in July for Huge Summer Savings
https://www.everydaycheapskate.com/wp-content/uploads/20260629-wooden-die-spell-july-with-patriotic-decor-in-background.png
800
1200
Mary Hunt
https://www.everydaycheapskate.com/wp-content/uploads/EC-Logo-by-Mary-Hunt-Tagline-Trimmed.png
Mary Hunt2026-06-29 21:07:092026-06-29 21:10:297 Best Things to Buy in July for Huge Summer Savings https://www.everydaycheapskate.com/wp-content/uploads/20260628-Grilled-Peaches-with-Balsamic-and-Blue-Cheese-1.png
800
1200
Mary Hunt
https://www.everydaycheapskate.com/wp-content/uploads/EC-Logo-by-Mary-Hunt-Tagline-Trimmed.png
Mary Hunt2026-06-29 09:38:342026-06-29 09:38:34Summer Grilled Peaches with Balsamic and Blue Cheese
https://www.everydaycheapskate.com/wp-content/uploads/20260628-Grilled-Peaches-with-Balsamic-and-Blue-Cheese-1.png
800
1200
Mary Hunt
https://www.everydaycheapskate.com/wp-content/uploads/EC-Logo-by-Mary-Hunt-Tagline-Trimmed.png
Mary Hunt2026-06-29 09:38:342026-06-29 09:38:34Summer Grilled Peaches with Balsamic and Blue Cheese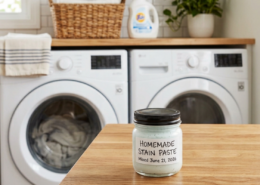 https://www.everydaycheapskate.com/wp-content/uploads/20260626-homemade-stain-paste-sitting-on-wooden-countertop-in-laundry-room-with-washer-and-dryer.png
800
1200
Mary Hunt
https://www.everydaycheapskate.com/wp-content/uploads/EC-Logo-by-Mary-Hunt-Tagline-Trimmed.png
Mary Hunt2026-06-26 17:41:192026-06-26 17:41:19Homemade Laundry Stain Paste That Works for Pennies
https://www.everydaycheapskate.com/wp-content/uploads/20260626-homemade-stain-paste-sitting-on-wooden-countertop-in-laundry-room-with-washer-and-dryer.png
800
1200
Mary Hunt
https://www.everydaycheapskate.com/wp-content/uploads/EC-Logo-by-Mary-Hunt-Tagline-Trimmed.png
Mary Hunt2026-06-26 17:41:192026-06-26 17:41:19Homemade Laundry Stain Paste That Works for Pennies

Speaking of steam irons-I have a sunbeam iron, with all the extras -7 years old-and all the letters are rubbed off -no way to tell the temp or setting. Any ideas?
I wish that someone would explain to me why using tap water is good/necessary for steam irons. I’m talking about more than the blanket statement that the iron was somehow made to use water from the tap. We have extremely hard water. Over the years it’s destroyed our plumbing fixtures and appliances, including my irons. For health reasons we rejected a whole-house water softener system that uses salt and purchased a saIt-free system, but that didn’t help and was a waste of money. I recently had to purchase a new iron after many failed attempts to remove the mineral buildup both inside and out of my old one. I read the instruction manual for the new iron, and the only concession it made to hard tap water was to use a half and half mix of tap and distilled water. To me, this only postpones the inevitable. And I’m tempted to suspect it’s just planned obsolescence on the part of the manufacturer. So, I’m going to use distilled water exclusively in my new iron. Since tap water would certainly ruin it, even if mixed with distilled, I figure I have nothing to lose.
I would refer you to the owner manual. Follow the manufacturer’s instructions. There’s a reason they include that with the product.
What brand of dryer sheet was used to clean the soleplate? I used a Downey dryer sheet on a Black and Decker iron and it burned/melted the dryer sheet. Now instead of a little gunk, I’ve got a lot of gunk. I had replaced it do to the initial build-up so I’m not dead in the water, just bummed out. Looking on the bright side, now it’s a garage project iron.
…. or as needed 😉