
7 Easy DIY Fixes to Lower Heating Bills This Winter


You don’t have to choose between a comfortable house and a heating bill that makes you swallow hard. Before you price replacement windows or a fancy thermostat, start with the little things: a worn door sweep, tired weatherstripping, a window that never quite seals. These seven doable fixes help you tackle the obvious trouble spots first, without spending money on problems you may not have.

There’s a special kind of irritation that comes from paying to heat your home and then feeling cold air sneaking in around the front door.
We’re paying for that warm air. It should at least have the decency to stay inside.
The first step isn’t buying anything. It’s figuring out where those drafts are coming from. A careful look around the house can turn up small problems you can fix with a few inexpensive supplies and an afternoon.
And you don’t need to be particularly handy. Here are seven easy DIY ways to cut heating costs this winter.
1. Replace worn weatherstripping around doors and windows
Start with the front door. Close it and run your hand slowly around the edges. Feel a draft? That’s your first clue.
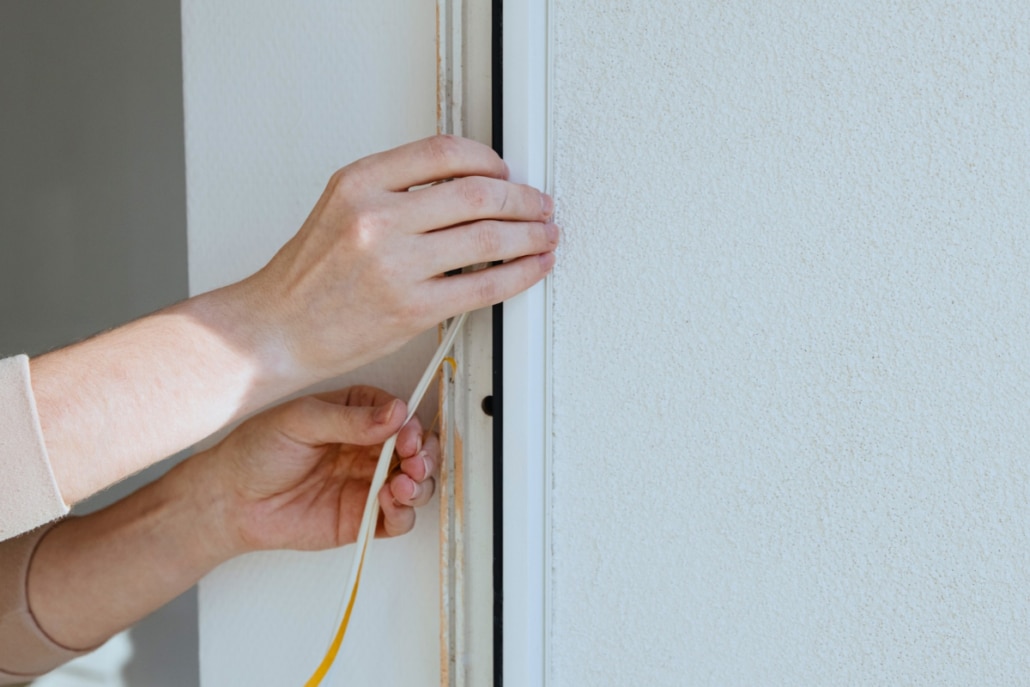
Weatherstripping is the flexible material that seals the gaps around doors and windows when they’re closed. Over time, it can crack, flatten, peel away or disappear altogether. Fortunately, replacing it is one of the easiest jobs around.
Open the door and inspect the weatherstripping along the top and sides. If it’s damaged or missing, remove the old material, clean the surface and install new weatherstripping according to the package directions.
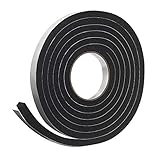
Self-adhesive foam tape is inexpensive and easy to apply, but it isn’t right for every door or window. Match the replacement material to the gap and the way the door or window operates.
Measure before buying, and make sure everything still opens, closes and latches properly afterward.
No need to replace perfectly good weatherstripping just because it’s old. If it’s doing its job, leave it alone.
2. Fix the gap under your exterior doors

Here’s an easy test: Close your front door and look along the bottom.
Can you see daylight? Feel a draft along the floor?
That gap lets heated air out and cold air in.
Many exterior doors have an adjustable threshold, the strip along the floor beneath the door. Depending on the design, you may be able to adjust it using screws along the top. Make small adjustments until the bottom of the door seals properly without scraping or becoming difficult to open.
If the rubber or vinyl strip on the bottom of the door, called the door sweep, is worn out, replacing it may solve the problem.
Not ready to tackle either project? A draft stopper placed against the bottom of the door can provide temporary relief. You can buy one, make one or simply roll up a towel.
Just don’t let a draft stopper interfere with opening a door you may need to use in an emergency.
3. Seal small cracks and gaps with caulk
Weatherstripping works where things move. Caulk works where they don’t.
Mix them up and you can make a sticky mess of a perfectly good window.
Walk around your home and look for gaps where window frames meet walls, around exterior door trim and where pipes pass through walls beneath kitchen and bathroom sinks.
Small cracks can often be sealed with interior or exterior caulk. For larger openings, you may need foam backer rod or a low-expansion sealant. Read the label to make sure you’re using the right product for the location and materials.
And please don’t start spraying expanding foam into every opening you find. Never block ventilation openings or seal around hot flues, chimneys or fuel-burning equipment with ordinary caulk or foam. Those areas require special attention and often a professional.
According to the U.S. Department of Energy, caulking and weatherstripping are simple, effective ways to seal air leaks and reduce wasted energy.
Not glamorous. But neither is an unnecessarily high heating bill.
4. Check electrical outlets on exterior walls
Here’s one you might not think of. Outlets and light switches on exterior walls can let cold air in through gaps around their electrical boxes.
If you notice a draft around an outlet or switch plate, an inexpensive foam gasket designed for that purpose may help. These thin, precut pieces fit behind the decorative cover plates.
Turn off the power at the circuit breaker and verify it’s off before removing a cover plate. Don’t remove the electrical device itself or touch any wiring. Then install the correctly sized gasket and replace the cover plate.
Never stuff loose insulation or spray foam into an electrical box. If an outlet is damaged, loose, discolored or unusually warm, leave it alone and call a qualified electrician.
This isn’t a project that will transform every home’s heating bill. But if you’re feeling cold air around those covers, it’s an inexpensive problem worth fixing.
5. Give drafty windows a temporary winter coat
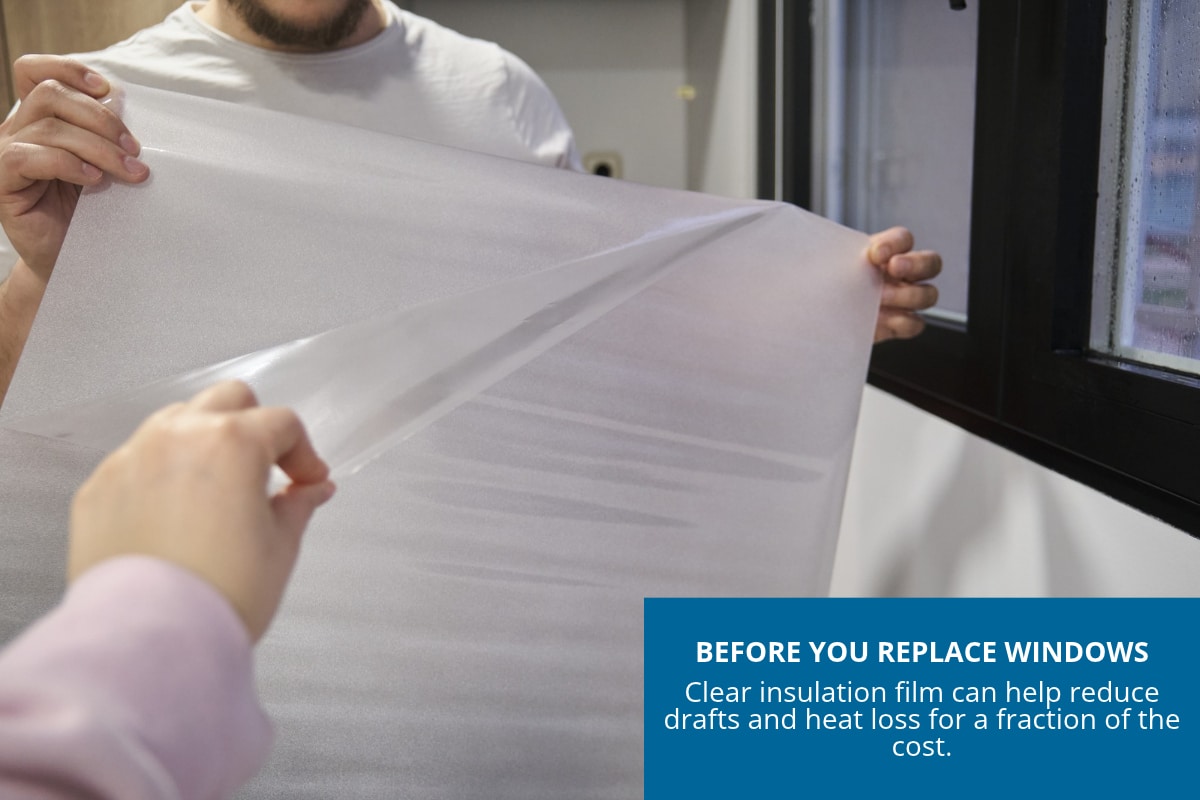
Before you decide you need replacement windows, try a much cheaper option: window insulation film.
These kits use clear plastic film and adhesive tape to create an additional barrier over the inside of a window. Many are designed to be tightened with a hair dryer for a smoother finish. Installed correctly, the film can help reduce drafts and heat loss, especially around older windows.
Choose a kit designed for your type of window, clean the surfaces thoroughly and follow the manufacturer’s instructions.
One caution: Don’t cover a window you might need as an emergency exit. Watch for moisture or condensation problems, too.
And before buying anything, try something even simpler. Open your curtains or blinds when winter sunshine can warm the room. Close them when the sun goes down to help reduce heat loss through the glass.
Free heat from the sun? I’ll take it.

6. Make better use of the thermostat you already own
I have nothing against programmable and smart thermostats. They’re convenient, and for some households, they can help reduce wasted energy. But start with the one you already have.
If your heating system allows for energy-saving temperature setbacks, try turning the heat down a little when you’re sleeping or away from home. Start with a small adjustment and see what works for your household.
There’s no magic temperature everyone must tolerate. Your comfort, health needs, climate and heating equipment all matter.
The Department of Energy says thermostat setbacks can reduce heating and cooling costs, but the results depend on your home and heating system.
Have a heat pump?
Be especially careful with big temperature changes. Some heat pumps operate most efficiently with relatively steady settings, and large setbacks can trigger expensive auxiliary heat. Follow your system manufacturer’s guidance or ask your HVAC technician about the best settings.
If you regularly forget to adjust the temperature, a compatible programmable thermostat might be worth buying. Otherwise, keep your money.
While you’re checking the thermostat, take a look at the heating system’s air filter, too. Replace it when needed, following the manufacturer’s directions, and make sure furniture and rugs aren’t blocking the supply and return vents.
And while you’re at it, check your ceiling fans. Many have a reverse setting that helps circulate warm air in winter. I’ve explained which way your ceiling fan should turn in summer and winter so you don’t have to guess.
7. Stop sending warm air up the chimney
A traditional wood-burning fireplace can be lovely on a cold evening. It’s considerably less lovely when the fire is out and the open chimney keeps letting heated indoor air escape.
If you have a wood-burning fireplace with a manually operated damper, make sure it’s closed when the fireplace isn’t in use and the fire and embers are completely out and cool.
Never close the damper while a fire is burning or embers are still producing smoke.
Gas fireplaces and gas-log systems are different. Some require the damper to remain open. Follow the manufacturer’s instructions, and never block a chimney, flue or vent serving a fuel-burning appliance.
If your fireplace is especially drafty or you suspect the damper isn’t sealing properly, have a qualified chimney professional inspect it before installing a chimney plug or draft blocker. If you do use one, remove it before every fire.
And make sure your home’s smoke and carbon monoxide alarms are working properly.
A lower heating bill is nice. A safe home is nonnegotiable.
What if your house still feels cold?
Let’s say you’ve replaced worn weatherstripping, sealed the obvious cracks and adjusted the thermostat.
But the house is still drafty, and the heating bill makes you wince.
It may be time to look beyond the quick fixes.
Not enough insulation, leaky ducts and bigger air leaks can all make a house harder to heat. But don’t assume you need to spend thousands of dollars without knowing what’s wrong.
Start by finding out where the heat is actually going.
The ENERGY STAR DIY guide to sealing and insulating can help you identify common trouble spots and decide what deserves attention.
If the problem isn’t obvious, consider a professional home energy assessment before spending money on major improvements.
Sometimes what looks like a window problem is really an insulation or air sealing problem around the windows you already have.
And if you haven’t given the rest of your house a good once-over for winter, my complete home winterization checklist covers the other maintenance tasks worth tackling before freezing weather arrives.
If you’d like more ways to reduce household energy costs, I’ve also covered how to lower your electric bill with changes that actually matter.
What if you can’t afford your heating bill?
Sometimes a few dollars’ worth of weatherstripping isn’t enough to solve the problem.
If you’re struggling to keep up with heating costs, contact your utility company and ask about payment assistance, hardship programs or available energy-efficiency services.
You may also qualify for the federal Low Income Home Energy Assistance Program (LIHEAP), which helps eligible households pay heating and cooling bills. Eligibility and available benefits vary by state.
Another possibility is the Weatherization Assistance Program, which helps qualifying households improve their homes’ energy efficiency. Both homeowners and renters may be eligible. For renters, the weatherization provider must obtain the landlord’s written permission before work begins.
USAGov explains how to find and apply for heating-bill and weatherization assistance.
Don’t wait until you’re facing a disconnection notice to find out what help is available.
Start with one draft
You don’t have to tackle all seven projects this weekend.
Start with the draft under the front door. Check the weatherstripping. Look around the window frames.
Fix the obvious problems first, then decide whether anything else deserves your time or money.
If you’d like another way to stay comfortable without heating the entire house quite so much, take a look at my experience with heated mattress pads. They’ve made a real difference in our house.
Nobody’s asking you to live in an icebox. The idea is to stop paying for warmth that slips out the door before you’ve had a chance to enjoy it.
Question: What’s the simplest thing you’ve done to make your home warmer in winter? I’d love to hear what worked for you.
EverydayCheapskate™ is reader-supported. We participate in the Amazon Services LLC Associates Program and other affiliate advertising programs, designed to provide a means for us to earn from qualifying purchases, at no cost to you.

More from Everyday Cheapskate
 https://www.everydaycheapskate.com/wp-content/uploads/20261105-Christmas-shopping-list-and-closed-wallet-beside-a-laptop-on-a-kitchen-table.jpg
800
1200
Mary Hunt
https://www.everydaycheapskate.com/wp-content/uploads/EC-Logo-by-Mary-Hunt-Tagline-Trimmed.png
Mary Hunt2026-11-05 16:57:582026-11-05 16:57:58How to Win the Battle Over Holiday Shopping Temptation
 https://www.everydaycheapskate.com/wp-content/uploads/20261103-Close-up-of-vacuum-roller-with-hair-wrapped-around-brush.jpg
800
1200
Mary Hunt
https://www.everydaycheapskate.com/wp-content/uploads/EC-Logo-by-Mary-Hunt-Tagline-Trimmed.png
Mary Hunt2026-11-03 10:39:102026-11-03 10:39:10The Cheapest Thing in Your House Is the Thing You Already Own
 https://www.everydaycheapskate.com/wp-content/uploads/20261030-Woven-basket-container-hidden-on-low-entry-shelf.png
800
1200
Mary Hunt
https://www.everydaycheapskate.com/wp-content/uploads/EC-Logo-by-Mary-Hunt-Tagline-Trimmed.png
Mary Hunt2026-10-30 19:04:092026-10-30 19:13:58Secret Storage Spots in Your Home You May Be Overlooking
 https://www.everydaycheapskate.com/wp-content/uploads/when-to-file-an-insurance-claim.png
800
1200
Mary Hunt
https://www.everydaycheapskate.com/wp-content/uploads/EC-Logo-by-Mary-Hunt-Tagline-Trimmed.png
Mary Hunt2026-10-29 12:47:092026-10-29 12:49:44Small Insurance Claim? 5 Questions to Ask Before You File
 https://www.everydaycheapskate.com/wp-content/uploads/20261027-personalized-pricing-digital-shelf-label-shopping.png
800
1200
Mary Hunt
https://www.everydaycheapskate.com/wp-content/uploads/EC-Logo-by-Mary-Hunt-Tagline-Trimmed.png
Mary Hunt2026-10-27 11:25:242026-10-27 11:25:24Could You Be Paying More Than the Next Shopper?
 https://www.everydaycheapskate.com/wp-content/uploads/20261025-Simple-anti-aging-skincare-routine-with-cleanser-vitamin-C-moisturizer-and-sunscreen.png
800
1200
Mary Hunt
https://www.everydaycheapskate.com/wp-content/uploads/EC-Logo-by-Mary-Hunt-Tagline-Trimmed.png
Mary Hunt2026-10-25 17:06:382026-10-25 21:22:53A Simple Anti-Aging Skincare Routine That Makes Sense
 https://www.everydaycheapskate.com/wp-content/uploads/20261024-A-cup-of-coffee-notebook-and-pen-on-a-table.png
800
1200
Mary Hunt
https://www.everydaycheapskate.com/wp-content/uploads/EC-Logo-by-Mary-Hunt-Tagline-Trimmed.png
Mary Hunt2026-10-24 13:13:592026-10-24 13:13:59What Is Frugal Living? It’s Probably Not What You Think
 https://www.everydaycheapskate.com/wp-content/uploads/20261023-Paper-calendar-and-digital-calendar-on-a-smartphone-side-by-side.png
800
1200
Mary Hunt
https://www.everydaycheapskate.com/wp-content/uploads/EC-Logo-by-Mary-Hunt-Tagline-Trimmed.png
Mary Hunt2026-10-23 11:55:302026-10-23 11:55:30Paper or Digital Calendar? Turns Out, You May Need Both
 https://www.everydaycheapskate.com/wp-content/uploads/20261017-Woman-opening-refrigerator-stocked-with-fresh-food-and-condiments.png
800
1200
Mary Hunt
https://www.everydaycheapskate.com/wp-content/uploads/EC-Logo-by-Mary-Hunt-Tagline-Trimmed.png
Mary Hunt2026-10-17 12:16:242026-10-17 12:16:24What Temperature Should a Refrigerator and Freezer Be?
Please keep your comments positive, encouraging, helpful, brief,
and on-topic in keeping with EC Commenting Guidelines
Last update on 2026-11-21 / Affiliate links / Images from Amazon Product Advertising API


put on a sweater.
I had the Weatherization Assistance Program people out to my house to see what could be done to help keep my heating bills down.
They used spray insulation foam in my basement where the cement blocks met the hardwood all the way around and I definitely noticed the difference last winter season.
Other things I’d done in years past was have my windows replaced with double pane replacements which also helped.
I do have the sweep guard on my front door with weather stripping all around the door. It really does keep the cold outside.
I used to use an electric blanket at night but discovered with all that I’d done my home stays warm in winter and cool in summer.
My heating bills are lower and that makes me happy that I’ve done what I can to keep the heating bills lower.
I have an older home with the usual leaks. When living in England I noticed my neighbors heated only the rooms they were in and basically just took the chill off the rest. We wore more clothes inside to keep warm. I learned from them and now have the plastic on all the windows, heavier curtains, and have put curtain rods over the exterior doors and have taken the fluffy blankets and cut slits in the top to run the rods through. The curtains are pulled back to enter and exit but it was amazing what a difference that made. I also have a heated throw to use in my chair for reading and watching TV. My electric company also has a program where they follow your bills for a year and then divide that amount by 12 and you pay that same amount year round. Much easier to manage than low bills in the summer and high ones in the winter.