

The Complete Guide to Winterizing Your Home This Fall

Every fall, I make the same list. Every winter, I find out what I skipped. This year, I’m not risking it, and neither should you. Here’s my complete checklist for how to winterize your home, in the order it actually matters, so you skip the January repair bill and keep that money in your own pocket.

I know exactly which hose I forgot to disconnect last November. It sat there, full of water, attached to the spigot like nothing bad could ever happen to it. Then came the first hard freeze. Then came the phone call to a plumber. Then came a repair bill that made me sit down.
That’s the thing about winterizing your house. None of it is hard. None of it takes very long. And every single year, somebody skips a step and pays for it in January, usually more than they would’ve paid to just do the thing in October.
So let’s not be that somebody this year. Here’s the full list, in the order that actually matters: the stuff that saves you real money first, the nice-to-haves last. Give yourself one weekend. I promise it’s cheaper than the alternative.
Priority 1: The weekend before first freeze
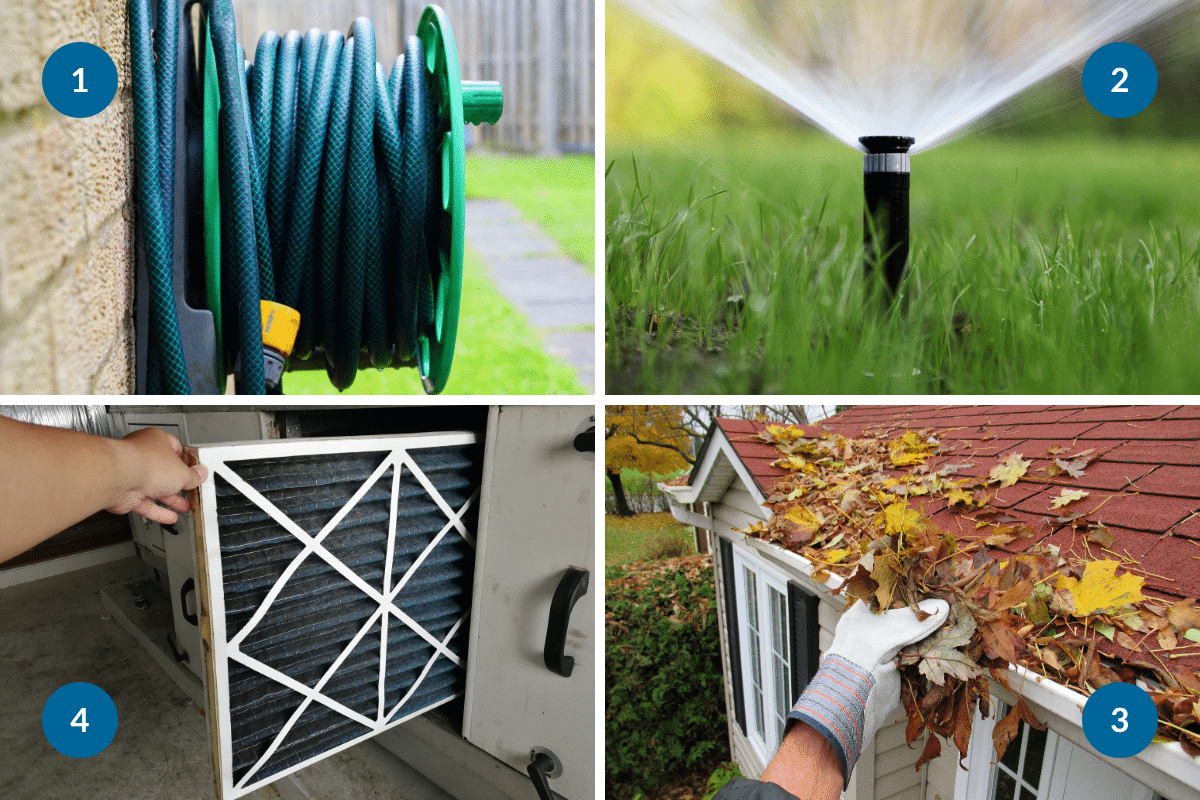
These four things prevent the damage that actually hurts. Do these before anything else on this list.
1. Drain and disconnect your outdoor hoses
A hose left connected to the spigot freezes solid, and that ice has nowhere to go but back into the pipe in your wall. I’ve seen the repair bills. They run $500 to $3,000. The fix costs you ten minutes: disconnect, drain, coil, store. While you’re out there, turn off any interior shutoff valves for exterior spigots, and slap on a $5 foam cover for good measure.
2. Winterize the sprinkler system
Water sitting in irrigation lines freezes and splits the pipe and you won’t find out until spring, when your yard turns into a swamp. Blow out the lines with an air compressor set between 40 and 80 PSI. Not your thing? An irrigation company will do it for about $75. Compare that to a $2,000 repair and it’s not even a decision.
3. Clean the gutters
Twice. Once in early October, and again after the last leaves come down. Clogged gutters send water behind the fascia, where it freezes into an ice dam and works its way into your roof, your walls, and eventually your ceiling. That’s a $2,000 to $10,000 repair, versus an afternoon with a ladder or $75 to $150 if you’d rather someone else be the one up there. Run a hose through the downspouts afterward to make sure everything actually flows.
4. Change the furnace filter, and book the tune-up
A dirty filter makes your whole system work harder, and “harder” translates directly into a heating bill that’s 10 to 20 percent higher all season. Filters run $5 to $20. Change one every one to three months and just put it on your calendar so you stop forgetting. And schedule the professional tune-up now while HVAC companies still have room on the schedule and aren’t charging emergency rates. Nobody wants to find out their furnace is dying at 2am on Christmas Eve. Trust me on this one.
Priority 2: The next weekend
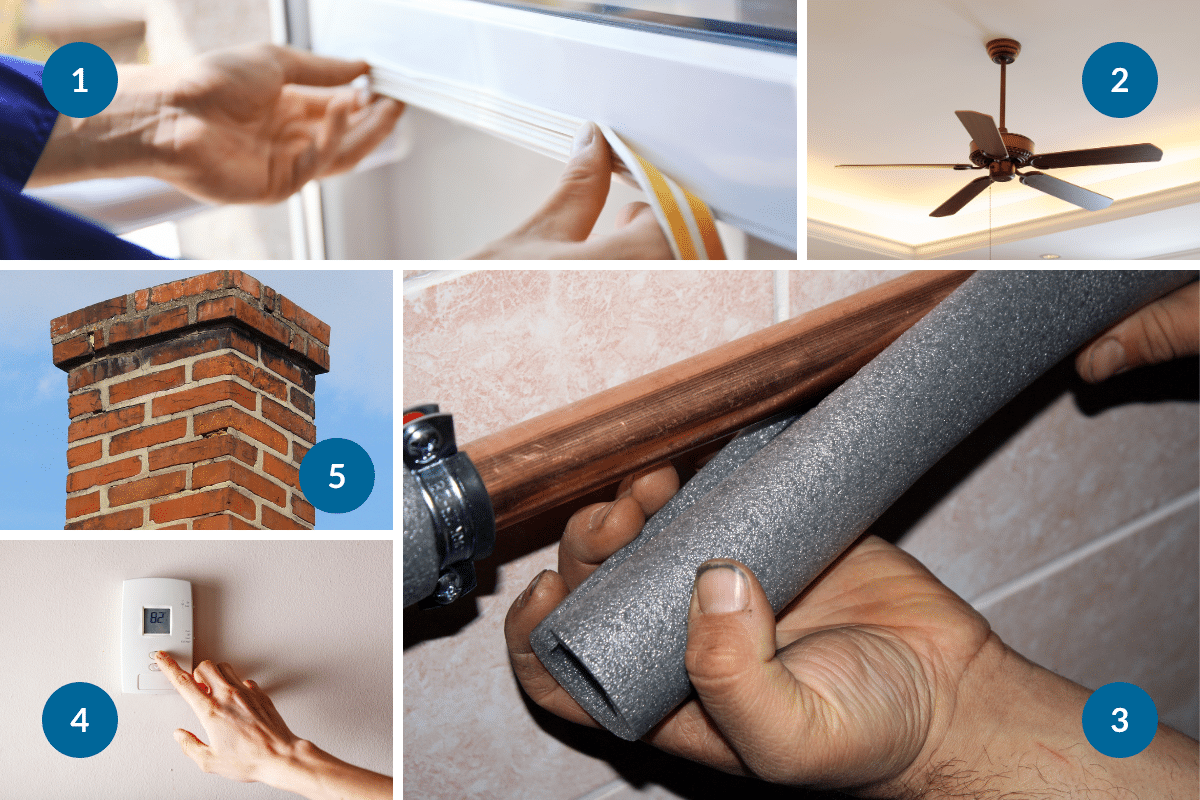
Not urgent. Still worth real money.
1. Seal the drafts
Leaky windows and doors can account for a quarter to a third of your heat loss which is wild when you think about how cheap the fix is. Hold a lit stick of incense near your window and door frames on a breezy day. Wherever the smoke wobbles, that’s your leak. Weatherstripping, caulk, window film, a door sweep… none of it costs more than $80 total, and you’ll get $100 to $300 back over the season.
2. Flip your ceiling fans
There’s a little switch on the base. In winter, you want the blades turning clockwise on low. That pushes the warm air that’s pooled up near your ceiling back down where you’re actually sitting. Free. Thirty seconds. Do it today.
3. Wrap your pipes
Any pipe running through an unheated space (think: basement, crawl space, garage) should get a foam sleeve. They’re a couple dollars for a six-foot piece at the hardware store. Slit it, snap it over the pipe, tape it shut. This is the difference between a normal Tuesday and a burst pipe during a cold snap.
4. Program the thermostat
Aim for 62 to 65°F while you’re out or asleep, and 68 to 70°F while you’re home and awake. Letting the house coast a little cooler when nobody’s there to feel it isn’t deprivation. It’s just money you don’t have to spend. A programmable or smart thermostat can shave 10 to 15 percent off your heating bill without you thinking about it again.
5. Check the chimney
If you use it, get it inspected and cleaned ($150 to $250) once a year, no exceptions. Creosote fires happen more than people realize, and this isn’t the place to gamble. Don’t use the fireplace? Close the damper anyway. An open damper is basically a hole in your roof.
Priority 3: Nice-to-have
Not urgent. Worth doing if you’ve got the time and the itch to keep going.
- Weatherproof the rim joists in the basement or crawl space. That’s where a shocking amount of cold air sneaks in.
- Insulate the attic hatch. A $10 piece of foam board on the back of it stops more heat loss than you’d guess.
- Start the snow blower now. Check the oil, add fuel stabilizer, and find out today whether it runs… not during the first storm, when every repair shop in town is backed up for a week. Sharpen the shovels and stock the ice melt while you’re at it.
- Test every smoke and CO detector, and replace the batteries. Winter is peak season for carbon monoxide poisoning, thanks to furnaces and fireplaces running nonstop. If any detector is past its tenth birthday, replace the whole unit.
- Walk the perimeter and look up. Missing shingles, sagging spots, damaged flashing… catch it now. Not confident doing this yourself? A roofer will look for $100 to $200. Cheap insurance against a much worse conversation later.
What to leave to the professionals
I love a good DIY project as much as anyone, but some of this isn’t the place to save five bucks and lose five hundred:
- The annual furnace inspection
- Chimney cleaning
- Any major roof repair
- Ice dam removal after the ice has already formed (This is a job for a professional, because a DIY attempt can do more damage to your roof than the ice dam itself.)
- Pipe insulation in a crawl space you genuinely can’t get into safely
Here’s the math that convinced me a long time ago: a $150 preventive visit versus a $2,500 emergency one. The only difference is timing.
Question: So tell me… what’s the one winterizing task you mean to do every single year and somehow never get to? Confess in the comments. Maybe admitting it here is what finally gets it done this year.
EverydayCheapskate™ is reader-supported. We participate in the Amazon Services LLC Associates Program and other affiliate advertising programs, designed to provide a means for us to earn from qualifying purchases, at no cost to you.

More from Everyday Cheapskate
 https://www.everydaycheapskate.com/wp-content/uploads/20241004-news-you-can-use-october-everyday-cheapskate-top-news-articles.png
800
1200
Mary Hunt
https://www.everydaycheapskate.com/wp-content/uploads/EC-Logo-by-Mary-Hunt-Tagline-Trimmed.png
Mary Hunt2026-10-04 01:04:052026-10-04 22:10:11News You Can Use • October 2026
https://www.everydaycheapskate.com/wp-content/uploads/20241004-news-you-can-use-october-everyday-cheapskate-top-news-articles.png
800
1200
Mary Hunt
https://www.everydaycheapskate.com/wp-content/uploads/EC-Logo-by-Mary-Hunt-Tagline-Trimmed.png
Mary Hunt2026-10-04 01:04:052026-10-04 22:10:11News You Can Use • October 2026 https://www.everydaycheapskate.com/wp-content/uploads/20261003-woman-hugging-elderly-mother-sandwich-generation-caring-for-aging-parents.png
800
1200
Mary Hunt
https://www.everydaycheapskate.com/wp-content/uploads/EC-Logo-by-Mary-Hunt-Tagline-Trimmed.png
Mary Hunt2026-10-03 10:47:222026-10-03 10:47:25Sandwiched Between Aging Parents and Adult Children
https://www.everydaycheapskate.com/wp-content/uploads/20261003-woman-hugging-elderly-mother-sandwich-generation-caring-for-aging-parents.png
800
1200
Mary Hunt
https://www.everydaycheapskate.com/wp-content/uploads/EC-Logo-by-Mary-Hunt-Tagline-Trimmed.png
Mary Hunt2026-10-03 10:47:222026-10-03 10:47:25Sandwiched Between Aging Parents and Adult Children https://www.everydaycheapskate.com/wp-content/uploads/20260927-impossible-lasagna-pie-recipe-with-wooden-serving-spoon-in-white-casserole-dish.png
800
1200
Mary Hunt
https://www.everydaycheapskate.com/wp-content/uploads/EC-Logo-by-Mary-Hunt-Tagline-Trimmed.png
Mary Hunt2026-09-28 09:38:592026-09-28 22:48:34Impossible Lasagna Pie: All the Flavor, None of the Noodles
https://www.everydaycheapskate.com/wp-content/uploads/20260927-impossible-lasagna-pie-recipe-with-wooden-serving-spoon-in-white-casserole-dish.png
800
1200
Mary Hunt
https://www.everydaycheapskate.com/wp-content/uploads/EC-Logo-by-Mary-Hunt-Tagline-Trimmed.png
Mary Hunt2026-09-28 09:38:592026-09-28 22:48:34Impossible Lasagna Pie: All the Flavor, None of the Noodles https://www.everydaycheapskate.com/wp-content/uploads/20260925-best-inexpensive-coffee-grinders-burr-manual-and-electric.png
800
1200
Mary Hunt
https://www.everydaycheapskate.com/wp-content/uploads/EC-Logo-by-Mary-Hunt-Tagline-Trimmed.png
Mary Hunt2026-09-25 11:06:342026-09-28 22:48:36The Coffee Grinder Upgrade That’s Actually Worth It
https://www.everydaycheapskate.com/wp-content/uploads/20260925-best-inexpensive-coffee-grinders-burr-manual-and-electric.png
800
1200
Mary Hunt
https://www.everydaycheapskate.com/wp-content/uploads/EC-Logo-by-Mary-Hunt-Tagline-Trimmed.png
Mary Hunt2026-09-25 11:06:342026-09-28 22:48:36The Coffee Grinder Upgrade That’s Actually Worth It https://www.everydaycheapskate.com/wp-content/uploads/20260918-man-and-woman-signing-an-extended-warranty-in-a-car-dealership.png
800
1200
Mary Hunt
https://www.everydaycheapskate.com/wp-content/uploads/EC-Logo-by-Mary-Hunt-Tagline-Trimmed.png
Mary Hunt2026-09-18 15:23:432026-09-18 15:25:43Is an Extended Warranty Ever Worth It? The Truth for 2026
https://www.everydaycheapskate.com/wp-content/uploads/20260918-man-and-woman-signing-an-extended-warranty-in-a-car-dealership.png
800
1200
Mary Hunt
https://www.everydaycheapskate.com/wp-content/uploads/EC-Logo-by-Mary-Hunt-Tagline-Trimmed.png
Mary Hunt2026-09-18 15:23:432026-09-18 15:25:43Is an Extended Warranty Ever Worth It? The Truth for 2026 https://www.everydaycheapskate.com/wp-content/uploads/20260917-fall-cleaning-checklist.png
800
1200
Mary Hunt
https://www.everydaycheapskate.com/wp-content/uploads/EC-Logo-by-Mary-Hunt-Tagline-Trimmed.png
Mary Hunt2026-09-17 17:11:012026-09-28 22:48:45Fall Cleaning Checklist: 15 Overlooked Spots to Clean
https://www.everydaycheapskate.com/wp-content/uploads/20260917-fall-cleaning-checklist.png
800
1200
Mary Hunt
https://www.everydaycheapskate.com/wp-content/uploads/EC-Logo-by-Mary-Hunt-Tagline-Trimmed.png
Mary Hunt2026-09-17 17:11:012026-09-28 22:48:45Fall Cleaning Checklist: 15 Overlooked Spots to Clean https://www.everydaycheapskate.com/wp-content/uploads/20260913-how-to-winterize-your-home-snowy-driveway-suburban-home.png
800
1200
Mary Hunt
https://www.everydaycheapskate.com/wp-content/uploads/EC-Logo-by-Mary-Hunt-Tagline-Trimmed.png
Mary Hunt2026-09-13 15:32:142026-09-28 22:48:55The Complete Guide to Winterizing Your Home This Fall
https://www.everydaycheapskate.com/wp-content/uploads/20260913-how-to-winterize-your-home-snowy-driveway-suburban-home.png
800
1200
Mary Hunt
https://www.everydaycheapskate.com/wp-content/uploads/EC-Logo-by-Mary-Hunt-Tagline-Trimmed.png
Mary Hunt2026-09-13 15:32:142026-09-28 22:48:55The Complete Guide to Winterizing Your Home This Fall https://www.everydaycheapskate.com/wp-content/uploads/20260830-best-sound-machine-for-better-sleep-woman-hiding-under-comforter.png
800
1200
Mary Hunt
https://www.everydaycheapskate.com/wp-content/uploads/EC-Logo-by-Mary-Hunt-Tagline-Trimmed.png
Mary Hunt2026-09-10 09:51:452026-09-28 22:48:58Best Sound Machine for Better Sleep: 3 Honest Picks
https://www.everydaycheapskate.com/wp-content/uploads/20260830-best-sound-machine-for-better-sleep-woman-hiding-under-comforter.png
800
1200
Mary Hunt
https://www.everydaycheapskate.com/wp-content/uploads/EC-Logo-by-Mary-Hunt-Tagline-Trimmed.png
Mary Hunt2026-09-10 09:51:452026-09-28 22:48:58Best Sound Machine for Better Sleep: 3 Honest Picks https://www.everydaycheapskate.com/wp-content/uploads/20260906-best-can-openers-manual-electric-luxury.png
800
1200
Mary Hunt
https://www.everydaycheapskate.com/wp-content/uploads/EC-Logo-by-Mary-Hunt-Tagline-Trimmed.png
Mary Hunt2026-09-06 18:07:432026-09-06 18:10:39The Best Can Openers That Actually Work (And Won’t Quit on You)
https://www.everydaycheapskate.com/wp-content/uploads/20260906-best-can-openers-manual-electric-luxury.png
800
1200
Mary Hunt
https://www.everydaycheapskate.com/wp-content/uploads/EC-Logo-by-Mary-Hunt-Tagline-Trimmed.png
Mary Hunt2026-09-06 18:07:432026-09-06 18:10:39The Best Can Openers That Actually Work (And Won’t Quit on You)

If you have a camper, winterize it. This isn’t something we forget, but it’s not on your list and it IS crucial to do it prior to freezing weather. We have a camping trailer, and the winterization process takes an hour or two at most. If you’re not sure how to winterize YOUR camper, look it up on the website of your camper’s make/model. There are also Youtube videos that walk you through the process.
I have forgotten hoses before & have been fortunate. One thing I have always done – when school got out in May, I always scheduled my chimney cleaning/wood stove inspection AND furnace service to be done in June. Beat the rush!
Smart!!