
The Ultimate Trick for How to Clean Shower Grout Mold

Moldy shower grout is not only an eyesore but can also be a health hazard. If you’ve been wondering how to clean shower grout mold effectively, the good news is that you don’t need fancy chemicals or expensive products to tackle it. With just bleach, baking soda, and a little plastic wrap, you can easily remove even the most stubborn mold from your grout.

I’ll admit, I’ve come across plenty of strange cleaning hacks in my time (looking at you, mayonnaise on water rings), and yes, this one involving bleach, baking soda, and plastic wrap raised an eyebrow too. But guess what? It actually works!
If you notice unsightly dark spots on your shower grout, it’s time to start cleaning. This simple DIY solution doesn’t just clean your grout—it leaves it looking so fresh, you might find yourself staring at your shower like it’s a work of art.
Why Mold Grows in Shower Grout
Shower grout is like a five-star resort for mold—plenty of moisture, warmth, and porous surfaces for it to cling to and thrive. Left unchecked, it can spread faster than you realize, turning your once-pristine bathroom into a moldy mess. Beyond being an eyesore, mold can pose health risks, especially for those with allergies or respiratory issues. The good news? With the right tools and a little know-how, you can eliminate mold in no time.
Safety First: Precautions You Should Take
Before you dive into tackling that stubborn grout mold, let’s talk safety. Bleach is a powerful cleaner, but it demands respect.
- Ventilation is key: Make sure you’re working in a well-ventilated space. Open windows, prop open doors, and turn on fans to keep those fumes moving out, not lingering around.
- Protect yourself: Wear gloves to shield your hands, safety goggles to keep splashes at bay, and, if you’re sensitive to bleach fumes, a respirator mask for extra protection.
- Spot test first: Avoid any surprises by testing the solution on a hidden patch of grout. This ensures it won’t cause discoloration or damage to your tile. It’s better to play it safe than end up with a mismatched grout disaster.
The DIY Grout Mold Removal Paste
Believe it or not, banishing grout mold doesn’t require fancy products—just three simple things you likely already have at home: bleach, baking soda, and plastic wrap.
To make this miracle paste, combine:
- 1/4 cup bleach
- 3/4 cup baking soda
Mix these together until you achieve a consistency like pancake batter—thick, creamy, and able to cling to vertical grout lines without running down the wall. If it feels too runny, add a little more baking soda; if it’s too thick, a splash more bleach will do the trick. The key is to make sure it’s just right to stay put while it works its magic.
How to Apply the Grout Paste
Grab a toothbrush or a small paintbrush. Apply a generous layer of paste directly to the moldy areas, making sure every crevice is well-covered.
Next, cover the treated sections with plastic wrap. This traps the bleach’s moisture, preventing it from drying out and allowing it to penetrate the mold.
Patience is key—let the paste sit for 30 to 60 minutes, depending on how stubborn the mold is. For those extra gnarly spots, aim closer to the hour mark.
Rinsing & Finishing Touches
Once the wait time is up, peel back a corner of the plastic wrap and do a quick test—wipe away some of the paste to see if the mold comes off. If it does, you’re finished! Use a damp cloth or sponge to gently wipe away the remaining paste, and rinse thoroughly with clean water to ensure no bleach residue lingers.
If the mold is still hanging on for dear life, don’t worry. Reapply the plastic wrap and give it another hour.
When you’re done, be sure to dry the area completely. Mold thrives in moisture, so eliminating dampness is key to keeping it from making a comeback.
Preventing Mold Regrowth
Now that you’ve won the grout battle, let’s talk about keeping it mold-free for the long haul.
- Seal the deal: Consider applying a grout sealer to make your grout less porous and less inviting to mold.
- Daily diligence: After each shower, take a moment to wipe down the tiles and grout with a towel or squeegee to remove excess water.
- Improve airflow: Ventilation is key. Use an exhaust fan or crack open a window during and after showers to reduce humidity.

DIY Grout Mold Removal Paste
Materials
- 1/4 cup bleach
- 3/4 cup baking soda
- Plastic wrap
Instructions
- Mix the Paste: In a small bowl, combine 1/4 cup bleach and 3/4 cup baking soda. Stir until the mixture forms a thick, pancake batter-like consistency.
- Apply the Paste: Using a toothbrush or small paintbrush, generously apply the paste to moldy grout areas.
- Seal with Plastic Wrap: Cover the treated areas with plastic wrap to keep the paste moist and allow it to penetrate the mold.
- Let it Sit: Allow the paste to rest for 30–60 minutes, depending on the severity of the mold.
- Test & Rinse: Peel back the plastic wrap and check if the mold wipes away. If it does, wipe away the paste with a damp cloth or sponge and rinse thoroughly with clean water.
- Repeat if Necessary: For stubborn mold, reapply the plastic wrap and wait an additional hour before rinsing.
- Dry the Area: Use a towel to dry the grout completely to prevent mold from returning.
Notes
- Always work in a well-ventilated space. Open windows and use fans if possible.
- Wear protective gloves, safety goggles, and a respirator if you're sensitive to bleach fumes.
- Test the paste on an inconspicuous area first to ensure it doesn’t discolor your grout.
- To prevent mold regrowth, apply a grout sealer, improve ventilation, and regularly wipe down your shower after use.
Question: What’s the weirdest cleaning hack you’ve ever tried—and did it work? Share your grout-cleaning wins (or fails) with us.
EverydayCheapskate™ is reader-supported. We participate in the Amazon Services LLC Associates Program and other affiliate advertising programs, designed to provide a means for us to earn from qualifying purchases, at no cost to you.

More from Everyday Cheapskate
 https://www.everydaycheapskate.com/wp-content/uploads/20260705-Best-Coolers-for-Camping-Road-Trips-and-Beach-Days.png
800
1200
Mary Hunt
https://www.everydaycheapskate.com/wp-content/uploads/EC-Logo-by-Mary-Hunt-Tagline-Trimmed.png
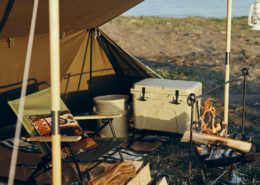
Mary Hunt2026-07-05 13:26:172026-07-05 13:26:17Best Coolers for Camping, Road Trips, and Beach Days
https://www.everydaycheapskate.com/wp-content/uploads/20260705-Best-Coolers-for-Camping-Road-Trips-and-Beach-Days.png
800
1200
Mary Hunt
https://www.everydaycheapskate.com/wp-content/uploads/EC-Logo-by-Mary-Hunt-Tagline-Trimmed.png
Mary Hunt2026-07-05 13:26:172026-07-05 13:26:17Best Coolers for Camping, Road Trips, and Beach Days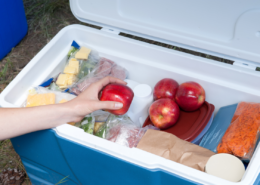 https://www.everydaycheapskate.com/wp-content/uploads/20260705-how-to-keep-a-cooler-cold.png
800
1200
Mary Hunt
https://www.everydaycheapskate.com/wp-content/uploads/EC-Logo-by-Mary-Hunt-Tagline-Trimmed.png
Mary Hunt2026-07-05 13:19:502026-07-05 13:19:50How to Pack a Cooler That Stays Cold for 48 Hours
https://www.everydaycheapskate.com/wp-content/uploads/20260705-how-to-keep-a-cooler-cold.png
800
1200
Mary Hunt
https://www.everydaycheapskate.com/wp-content/uploads/EC-Logo-by-Mary-Hunt-Tagline-Trimmed.png
Mary Hunt2026-07-05 13:19:502026-07-05 13:19:50How to Pack a Cooler That Stays Cold for 48 Hours https://www.everydaycheapskate.com/wp-content/uploads/20260703-home-decor.png
800
1200
Mary Hunt
https://www.everydaycheapskate.com/wp-content/uploads/EC-Logo-by-Mary-Hunt-Tagline-Trimmed.png
Mary Hunt2026-07-03 20:46:552026-07-03 20:46:5510 Everyday Items You Never Think to Wash (But Should)
https://www.everydaycheapskate.com/wp-content/uploads/20260703-home-decor.png
800
1200
Mary Hunt
https://www.everydaycheapskate.com/wp-content/uploads/EC-Logo-by-Mary-Hunt-Tagline-Trimmed.png
Mary Hunt2026-07-03 20:46:552026-07-03 20:46:5510 Everyday Items You Never Think to Wash (But Should) https://www.everydaycheapskate.com/wp-content/uploads/20260630-a-lit-sparkler-with-an-american-flag-in-the-background-4th-of-july-hacks-tips-and-recipes.png
800
1200
Mary Hunt
https://www.everydaycheapskate.com/wp-content/uploads/EC-Logo-by-Mary-Hunt-Tagline-Trimmed.png
Mary Hunt2026-06-30 21:44:502026-06-30 21:44:5034 Fourth of July Recipes and DIY Hacks for a Stress-Free Holiday
https://www.everydaycheapskate.com/wp-content/uploads/20260630-a-lit-sparkler-with-an-american-flag-in-the-background-4th-of-july-hacks-tips-and-recipes.png
800
1200
Mary Hunt
https://www.everydaycheapskate.com/wp-content/uploads/EC-Logo-by-Mary-Hunt-Tagline-Trimmed.png
Mary Hunt2026-06-30 21:44:502026-06-30 21:44:5034 Fourth of July Recipes and DIY Hacks for a Stress-Free Holiday https://www.everydaycheapskate.com/wp-content/uploads/20260629-wooden-die-spell-july-with-patriotic-decor-in-background.png
800
1200
Mary Hunt
https://www.everydaycheapskate.com/wp-content/uploads/EC-Logo-by-Mary-Hunt-Tagline-Trimmed.png
Mary Hunt2026-06-29 21:07:092026-06-29 21:10:297 Best Things to Buy in July for Huge Summer Savings
https://www.everydaycheapskate.com/wp-content/uploads/20260629-wooden-die-spell-july-with-patriotic-decor-in-background.png
800
1200
Mary Hunt
https://www.everydaycheapskate.com/wp-content/uploads/EC-Logo-by-Mary-Hunt-Tagline-Trimmed.png
Mary Hunt2026-06-29 21:07:092026-06-29 21:10:297 Best Things to Buy in July for Huge Summer Savings https://www.everydaycheapskate.com/wp-content/uploads/20260628-Grilled-Peaches-with-Balsamic-and-Blue-Cheese-1.png
800
1200
Mary Hunt
https://www.everydaycheapskate.com/wp-content/uploads/EC-Logo-by-Mary-Hunt-Tagline-Trimmed.png
Mary Hunt2026-06-29 09:38:342026-06-29 09:38:34Summer Grilled Peaches with Balsamic and Blue Cheese
https://www.everydaycheapskate.com/wp-content/uploads/20260628-Grilled-Peaches-with-Balsamic-and-Blue-Cheese-1.png
800
1200
Mary Hunt
https://www.everydaycheapskate.com/wp-content/uploads/EC-Logo-by-Mary-Hunt-Tagline-Trimmed.png
Mary Hunt2026-06-29 09:38:342026-06-29 09:38:34Summer Grilled Peaches with Balsamic and Blue Cheese https://www.everydaycheapskate.com/wp-content/uploads/20260628-close-up-photo-a-woman-wearing-a-swimsuit-with-a-mild-sunburn.png
800
1200
Mary Hunt
https://www.everydaycheapskate.com/wp-content/uploads/EC-Logo-by-Mary-Hunt-Tagline-Trimmed.png
Mary Hunt2026-06-28 21:40:042026-06-28 21:40:04DIY After-Sun Spray That Cools and Soothes Skin
https://www.everydaycheapskate.com/wp-content/uploads/20260628-close-up-photo-a-woman-wearing-a-swimsuit-with-a-mild-sunburn.png
800
1200
Mary Hunt
https://www.everydaycheapskate.com/wp-content/uploads/EC-Logo-by-Mary-Hunt-Tagline-Trimmed.png
Mary Hunt2026-06-28 21:40:042026-06-28 21:40:04DIY After-Sun Spray That Cools and Soothes Skin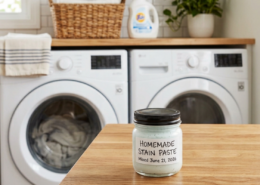 https://www.everydaycheapskate.com/wp-content/uploads/20260626-homemade-stain-paste-sitting-on-wooden-countertop-in-laundry-room-with-washer-and-dryer.png
800
1200
Mary Hunt
https://www.everydaycheapskate.com/wp-content/uploads/EC-Logo-by-Mary-Hunt-Tagline-Trimmed.png
Mary Hunt2026-06-26 17:41:192026-06-26 17:41:19Homemade Laundry Stain Paste That Works for Pennies
https://www.everydaycheapskate.com/wp-content/uploads/20260626-homemade-stain-paste-sitting-on-wooden-countertop-in-laundry-room-with-washer-and-dryer.png
800
1200
Mary Hunt
https://www.everydaycheapskate.com/wp-content/uploads/EC-Logo-by-Mary-Hunt-Tagline-Trimmed.png
Mary Hunt2026-06-26 17:41:192026-06-26 17:41:19Homemade Laundry Stain Paste That Works for Pennies https://www.everydaycheapskate.com/wp-content/uploads/20260625-a-rustic-wooden-christmas-tree-in-the-sand-on-the-beach.png
800
1200
Mary Hunt
https://www.everydaycheapskate.com/wp-content/uploads/EC-Logo-by-Mary-Hunt-Tagline-Trimmed.png
Mary Hunt2026-06-26 11:34:132026-06-26 11:36:44Christmas in June? Try This Amazon Prime Day Gift Guide
https://www.everydaycheapskate.com/wp-content/uploads/20260625-a-rustic-wooden-christmas-tree-in-the-sand-on-the-beach.png
800
1200
Mary Hunt
https://www.everydaycheapskate.com/wp-content/uploads/EC-Logo-by-Mary-Hunt-Tagline-Trimmed.png
Mary Hunt2026-06-26 11:34:132026-06-26 11:36:44Christmas in June? Try This Amazon Prime Day Gift Guide

I read recently vinegar kills the mold spores and bleach only removes the discoloration, that was confusing due earlier education of bleach killing the mold spores. I would love your opinion. I use many of your ideas, suggestions and recommendations for my reference points.
My research reveals that either vinegar and chlorine bleach will kill spores in mold and mildew. You need a good detergent with surfactants (can’t get a more surfactant-rich product than Blue Dawn) to remove the stain.