
How to Do a Home Manicure Like a Pro (No Salon Needed!)


I’ll be honest—I used to drop a small fortune on salon manicures, thinking I was investing in strong, beautiful nails. Instead? I ended up with dry cuticles, peeling polish, and a nagging regret every time I swiped my card. Turns out, the secret to gorgeous, healthy nails isn’t a pricey appointment—it’s the right routine. After years of trial, error, and more broken nails than I care to admit, I finally figured out how to do a home manicure that works. And the best part? It saves me time, money, and frustration.

If I could get back all the money I’ve spent on salon manicures, I’d probably have enough to fund a luxury spa day—or at least a seriously impressive nail polish collection. And yet, for all that effort, my nails were still a mess. My cuticles? Snipped, nipped, ripped, and clipped into oblivion. I tried expensive lotions, potions, and every so-called miracle treatment out there, but nothing worked long-term.
Just when I was about to give up and accept my fate (hello, forever-dry cuticles), I put together a simple yet powerful home manicure routine—one that transformed my nails and has kept me out of the salon ever since. I’ve followed this process for years, and I can confidently say: this is the perfect home manicure routine for anyone dealing with weak, peeling nails and sad, dry cuticles.
A DIY manicure is easier than you think, and with the right tools and products, you can achieve salon-quality results at home—for a fraction of the price. Not only will you save money, but you’ll also be in total control of your nail health, avoiding harsh chemicals, excessive filing, and the dreaded chipped polish two days later.
Essential Tools & Products for a Perfect Home Manicure
My routine for a perfect home manicure requires just one tool and five key products—and trust me, they’re worth every penny. While the initial cost might seem a little steep, this set of essentials will pay for itself in just a month or two—and keep your nails looking flawless for far longer.
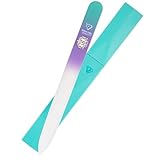
1. Glass Nail File

Bona Fide Beauty Czech Glass Nail File with Case
The secret to smooth (as a baby’s bum), strong nails. This little wonder prevents peeling and splitting by sealing the edges as you file—unlike traditional emery boards that can make things worse. I use mine daily to keep jagged edges at bay.
2. Nail & Cuticle Oil

OPI ProSpa Nail and Cuticle Oil
I’ve tried every cuticle oil, cream, and potion out there, and this is the only one that works. It’s a miracle in a bottle for dry, cracked cuticles. To start, apply it twice daily for two weeks, then once a day for maintenance. Healthy cuticles = stronger nails.
This oil is not used in the manicure itself (the 6 steps that follow). It is instead to be used to get your cuticles healthy and then to keep them that way.

3. Primer

OPI Infinite Shine 1 ProStay Primer


5. Nail Lacquer

OPI Nail Lacquer Nail Polish, Lincoln Park After Dark
Of all the polishes I’ve tested, this one holds up best. It doesn’t get thick too quickly, and when paired with the other products on this list, it lasts for days without chipping. Bonus: O.P.I. has hundreds of shades to choose from. My personal favorite? Lincoln Park After Dark—please, O.P.I., never discontinue it!

6. Top Coat

Seche Vite Dry Fast Top Coat
Seche Vite, the iconic fast-dry top coat that’s been a favorite since 1991, locks in color with a flawless shine. This topcoat is pure magic. Apply it right over wet polish, and it dries everything lightning fast while leaving a high-gloss finish. If you hate waiting for polish to dry, this is the solution you’ve been looking for.
No products found.
(Disclosure: This post includes an Amazon Creator Connections product. I may earn a small commission if you purchase through the link, at no additional cost to you.)
That’s it! Six simple products for the perfect home manicure. And here’s a thought: bundle them up in a cute box or basket, and you’ve got a fabulous gift idea for Mother’s Day, bridal showers, graduations, or birthdays. Here’s a quick way to grab everything in one place: I’ve put together an Amazon list with all the essentials to save you time. No hunting down each item—just click, browse, and you’re set. You can even include the instructions in the basket using the print button below.
How to Do a Home Manicure Like a Pro
Before jumping in, prep is key! If you haven’t already, start using OPI ProSpa Nail and Cuticle Oil at least twice daily for a week or two before your first home manicure—or until your cuticles are soft and healthy. Massage the oil in and gently push back your cuticles with your fingers. Keep this up at least once daily for long-term nail health.
Step 1: Shape and Prep
Lightly file and shape your nails with a glass file until smooth. Remove any old polish, then wash your hands and nails with soap. Dry thoroughly.
Step 2: Prime for Long-Lasting Color
Brush on two or three coats of OPI Infinite Shine ProStay Primer, avoiding your cuticles. It dries instantly and disappears—but trust me, it’s working behind the scenes to prevent chipping and extend wear.
Step 3: Strengthen Your Nails
Apply two coats of OPI Nail Envy Nail Strengthener to give your nails extra durability. Let dry for about five minutes.
Step 4: Apply Your Color
Brush on two coats of OPI Nail Lacquer in your favorite shade. Let dry for about 5 to 10 minutes between coats.
Step 5: Lock in Strength
Add one more coat of OPI Nail Envy Nail Strengthener to reinforce your nails and extend the life of your manicure.
Step 6: Seal and Shine
Finish with one coat of Seche Vite Dry Fast Top Coat—yes, right over the still-wet polish! It locks everything in place and speeds up drying time. Just remember, while it sets instantly, it stays soft for about an hour, so take it easy.
This routine might look like a lot of steps, but it’s quick, easy, and totally worth it. With the right products and a little practice, you’ll never need to book a salon appointment again!
Maintaining Your Manicure for Long-Lasting Results
Want to make that perfect home manicure last? Apply an addition coat of OPI Nail Envy Nail Strengthener every day or two—right over your existing polish. I take it a step further by reapplying a coat or two of polish and sealing it with Seche Vite as needed. This simple trick keeps my manicure looking fresh for up to two weeks—which, for me, is nothing short of a miracle.
And here’s the unexpected bonus: When my cuticles are healthy and my nails look polished, I feel better. I’m more put together, more confident—and I swear, even my writing flows better. Funny how something so small can have such a big impact, right?
The Best No-Mess Polish Remover
When it’s time to remove nail polish, I want zero hassle and no spills. The last thing I need is a bottle tipping over and wreaking havoc on my countertop. And let’s be honest—I also don’t have time to scrub at my nails for ages.

Cutex Care Swipe & Go Non-Acetone Nail Polish Remover Pads
That’s why I love Cutex Swipe and Go Nail Polish Remover Pads. One pad is all it takes to wipe away polish from all ten nails—quick, easy, and mess-free. No drips, no wasted product, just clean nails in seconds. If you haven’t tried them yet, you’re in for a game-ch—uh, I mean, a seriously great upgrade.

The Cost of Salon vs. Home Manicures—Is It Worth the Switch?
Let’s talk numbers. A professional salon manicure can set you back $40 to $65 per visit—plus tip. That means if you get your nails done every two weeks, you’re spending anywhere from $1,000 to $1,600 per year just to keep those fingers looking fabulous. Ouch.
Now, let’s compare that to the one-time cost of the essential tools and products I use for a perfect home manicure:
- Glass File: $12.99
- ProSpa Nail & Cuticle Oil: $17.39
- OPI Infinite Shine 1 ProStay Primer: $13.99
- OPI Nail Envy Nail Strengthener: $19.95
- OPI Nail Lacquer Polish: $11.99
- Seche Vite Dry Fast Top Coat: $9.99
- Cutex Swipe & Go Remover Pads (10 ct): $8.99
Grand total: 95.29
For less than the cost of two salon manicures, you can invest in all the tools you need to create salon-quality nails at home—again and again. And the best part? These products last for months, meaning your home manicure habit will pay for itself in no time.
Plus, let’s not forget the added perks: no waiting for an appointment, no awkward small talk with a nail tech (unless you enjoy that, of course), and complete control over your nail health.

Salon-Quality DIY Manicure at Home
Materials
Instructions
Step 1: Shape and Prep
- File nails gently with a glass file to shape and smooth edges.
- Remove old polish and wash hands thoroughly.
Step 2: Prime for Long-Lasting Color
- Apply 2-3 coats of OPI Infinite Shine ProStay Primer.
- Avoid cuticles and let dry instantly.
Step 3: Strengthen Your Nails
- Apply two coats of OPI Nail Envy Nail Strengthener.
- Allow to dry for about five minutes.
Step 4: Apply Your Color
- Apply two thin coats of OPI Nail Lacquer.
- Let dry 5-10 minutes between coats.
Step 5: Lock in Strength
- Apply one more coat of OPI Nail Envy Nail Strengthener.
Step 6: Seal and Shine
- Finish with one coat of Seche Vite Dry Fast Top Coat while polish is still wet.
- Let set for one hour before using hands extensively.
Notes
- Cuticle Prep is Key: Start using OPI ProSpa Nail & Cuticle Oil daily at least one week before your manicure for best results.
- Maintain Your Manicure: Reapply OPI Nail Envy Nail Strengthener every day or two for extended wear.
- Quick Polish Removal: Use Cutex Swipe & Go Remover Pads for easy, mess-free polish removal.
Question: What’s your go-to nail polish color? Whether you love bold reds, neutrals, or fun glitter shades, drop your favorite in the comments!
EverydayCheapskate™ is reader-supported. We participate in the Amazon Services LLC Associates Program and other affiliate advertising programs, designed to provide a means for us to earn from qualifying purchases, at no cost to you.

More from Everyday Cheapskate
 https://www.everydaycheapskate.com/wp-content/uploads/20260723-budget-homework-station-young-boy-studying-at-kitchen-dining-table.png
800
1200
Mary Hunt
https://www.everydaycheapskate.com/wp-content/uploads/EC-Logo-by-Mary-Hunt-Tagline-Trimmed.png
Mary Hunt2026-07-23 10:53:402026-07-23 10:53:41How to Set Up a Homework Station Your Kids Will Actually Use
https://www.everydaycheapskate.com/wp-content/uploads/20260723-budget-homework-station-young-boy-studying-at-kitchen-dining-table.png
800
1200
Mary Hunt
https://www.everydaycheapskate.com/wp-content/uploads/EC-Logo-by-Mary-Hunt-Tagline-Trimmed.png
Mary Hunt2026-07-23 10:53:402026-07-23 10:53:41How to Set Up a Homework Station Your Kids Will Actually Use https://www.everydaycheapskate.com/wp-content/uploads/20260722-easy-home-repairs-slow-sink-drain-squeaky-hinges-sticky-drawer.png
800
1200
Mary Hunt
https://www.everydaycheapskate.com/wp-content/uploads/EC-Logo-by-Mary-Hunt-Tagline-Trimmed.png
Mary Hunt2026-07-22 13:04:022026-07-22 13:04:0210 Small Home Annoyances You Can Fix in Under 15 Minutes Each
https://www.everydaycheapskate.com/wp-content/uploads/20260722-easy-home-repairs-slow-sink-drain-squeaky-hinges-sticky-drawer.png
800
1200
Mary Hunt
https://www.everydaycheapskate.com/wp-content/uploads/EC-Logo-by-Mary-Hunt-Tagline-Trimmed.png
Mary Hunt2026-07-22 13:04:022026-07-22 13:04:0210 Small Home Annoyances You Can Fix in Under 15 Minutes Each https://www.everydaycheapskate.com/wp-content/uploads/20260714-car-dashboard-diy-car-interior-cleaning-wipes.png
800
1200
Mary Hunt
https://www.everydaycheapskate.com/wp-content/uploads/EC-Logo-by-Mary-Hunt-Tagline-Trimmed.png
Mary Hunt2026-07-14 13:45:172026-07-14 13:45:17DIY Car Interior Cleaning Wipes That Actually Work Well
https://www.everydaycheapskate.com/wp-content/uploads/20260714-car-dashboard-diy-car-interior-cleaning-wipes.png
800
1200
Mary Hunt
https://www.everydaycheapskate.com/wp-content/uploads/EC-Logo-by-Mary-Hunt-Tagline-Trimmed.png
Mary Hunt2026-07-14 13:45:172026-07-14 13:45:17DIY Car Interior Cleaning Wipes That Actually Work Well https://www.everydaycheapskate.com/wp-content/uploads/20260706-negotiate-medical-bills-female-nurse-with-calculator-and-ipad-negotiating-a-bill.png
800
1200
Mary Hunt
https://www.everydaycheapskate.com/wp-content/uploads/EC-Logo-by-Mary-Hunt-Tagline-Trimmed.png
Mary Hunt2026-07-06 21:19:252026-07-06 21:19:25How to Negotiate Medical Bills and Cut Costs 30-50%
https://www.everydaycheapskate.com/wp-content/uploads/20260706-negotiate-medical-bills-female-nurse-with-calculator-and-ipad-negotiating-a-bill.png
800
1200
Mary Hunt
https://www.everydaycheapskate.com/wp-content/uploads/EC-Logo-by-Mary-Hunt-Tagline-Trimmed.png
Mary Hunt2026-07-06 21:19:252026-07-06 21:19:25How to Negotiate Medical Bills and Cut Costs 30-50% https://www.everydaycheapskate.com/wp-content/uploads/20260705-Best-Coolers-for-Camping-Road-Trips-and-Beach-Days.png
800
1200
Mary Hunt
https://www.everydaycheapskate.com/wp-content/uploads/EC-Logo-by-Mary-Hunt-Tagline-Trimmed.png
Mary Hunt2026-07-05 13:26:172026-07-05 13:26:17Best Coolers for Camping, Road Trips, and Beach Days
https://www.everydaycheapskate.com/wp-content/uploads/20260705-Best-Coolers-for-Camping-Road-Trips-and-Beach-Days.png
800
1200
Mary Hunt
https://www.everydaycheapskate.com/wp-content/uploads/EC-Logo-by-Mary-Hunt-Tagline-Trimmed.png
Mary Hunt2026-07-05 13:26:172026-07-05 13:26:17Best Coolers for Camping, Road Trips, and Beach Days https://www.everydaycheapskate.com/wp-content/uploads/20260705-how-to-keep-a-cooler-cold.png
800
1200
Mary Hunt
https://www.everydaycheapskate.com/wp-content/uploads/EC-Logo-by-Mary-Hunt-Tagline-Trimmed.png
Mary Hunt2026-07-05 13:19:502026-07-05 13:19:50How to Pack a Cooler That Stays Cold for 48 Hours
https://www.everydaycheapskate.com/wp-content/uploads/20260705-how-to-keep-a-cooler-cold.png
800
1200
Mary Hunt
https://www.everydaycheapskate.com/wp-content/uploads/EC-Logo-by-Mary-Hunt-Tagline-Trimmed.png
Mary Hunt2026-07-05 13:19:502026-07-05 13:19:50How to Pack a Cooler That Stays Cold for 48 Hours https://www.everydaycheapskate.com/wp-content/uploads/20260703-home-decor.png
800
1200
Mary Hunt
https://www.everydaycheapskate.com/wp-content/uploads/EC-Logo-by-Mary-Hunt-Tagline-Trimmed.png
Mary Hunt2026-07-03 20:46:552026-07-03 20:46:5510 Everyday Items You Never Think to Wash (But Should)
https://www.everydaycheapskate.com/wp-content/uploads/20260703-home-decor.png
800
1200
Mary Hunt
https://www.everydaycheapskate.com/wp-content/uploads/EC-Logo-by-Mary-Hunt-Tagline-Trimmed.png
Mary Hunt2026-07-03 20:46:552026-07-03 20:46:5510 Everyday Items You Never Think to Wash (But Should) https://www.everydaycheapskate.com/wp-content/uploads/20260630-a-lit-sparkler-with-an-american-flag-in-the-background-4th-of-july-hacks-tips-and-recipes.png
800
1200
Mary Hunt
https://www.everydaycheapskate.com/wp-content/uploads/EC-Logo-by-Mary-Hunt-Tagline-Trimmed.png
Mary Hunt2026-06-30 21:44:502026-06-30 21:44:5034 Fourth of July Recipes and DIY Hacks for a Stress-Free Holiday
https://www.everydaycheapskate.com/wp-content/uploads/20260630-a-lit-sparkler-with-an-american-flag-in-the-background-4th-of-july-hacks-tips-and-recipes.png
800
1200
Mary Hunt
https://www.everydaycheapskate.com/wp-content/uploads/EC-Logo-by-Mary-Hunt-Tagline-Trimmed.png
Mary Hunt2026-06-30 21:44:502026-06-30 21:44:5034 Fourth of July Recipes and DIY Hacks for a Stress-Free Holiday https://www.everydaycheapskate.com/wp-content/uploads/20260629-wooden-die-spell-july-with-patriotic-decor-in-background.png
800
1200
Mary Hunt
https://www.everydaycheapskate.com/wp-content/uploads/EC-Logo-by-Mary-Hunt-Tagline-Trimmed.png
Mary Hunt2026-06-29 21:07:092026-06-29 21:10:297 Best Things to Buy in July for Huge Summer Savings
https://www.everydaycheapskate.com/wp-content/uploads/20260629-wooden-die-spell-july-with-patriotic-decor-in-background.png
800
1200
Mary Hunt
https://www.everydaycheapskate.com/wp-content/uploads/EC-Logo-by-Mary-Hunt-Tagline-Trimmed.png
Mary Hunt2026-06-29 21:07:092026-06-29 21:10:297 Best Things to Buy in July for Huge Summer SavingsPlease keep your comments positive, encouraging, helpful, brief,
and on-topic in keeping with EC Commenting Guidelines
Last update on 2026-07-31 / Affiliate links / Images from Amazon Product Advertising API


I have been doing my own gel polish manicures for 13 years. I have to redo them about every two weeks, because they grow so fast! Otherwise, the polish lasts and lasts. Regular nail polish gets chipped, etc. within one day. Gel doesn’t chip.
My manicures so far all have bubbles in them. Any suggestions ? Is it too oily?
The oil does not make my cuticles soft. The actually get brittle and split. My nails do seem much stronger. The strengthener by itself is a nice hard clear coat.
The Primer has a new name and does not disappear, but stays shiny. I don’t know if it is still needed. Hmmmm…..I wonder where the other posts are?
I have weak nails and they break all the time. I have to keep them short.
I have found Nailtiques formula 3 to be the best for my nails. Unfortunately They were hit by a huge storm in Florida that destroyed their plant. A word on the glass file. I love them too, but they MUST be Austrian crystal. A regular cheap glass file just loses it’s coating. In my humble experience, OPI chips quite quickly. Both my daughters and I much prefer Sally Hansen. Mary is spot-on about Seche Vite top coat, it’s amazing! They also have Seche Vive, which is supposed to give the look of gel polish. It is very shiny! Thanks for letting me add my 2 cents.
I was using Pretty Nails to remove polish. Had a sponge and you just put you nail in and soaked/rubbed it on the sponge. Worked great, but hard to find. Not sure if they still make it.
Dear Mary, How do I remove acrylic powder dip nails without further damaging my nails? I’d love to try your method, but this is standing in my way. It will take me weeks with horrible looking nails until they practically fall off or I can peel them off. I generally do this right after Christmas and then do a 4 month break before starting up again.
Soak them in acetone. Find this with the nail polish removers in your drugstore. Or you can get it online. BTW, some nail polish removers are actually 100% acetone, so read the labels.The pros do this removal process by soaking a piece of cotton ball in acetone then laying it on the nail and wrapping it tightly (fingernail and soaked cotton) in a piece of foil. It needs to soak for may 10 minutes or longer. But this will soften the “dip” so you can just wipe it away.
Do you need to wait in between the coats of polish, or just one wait (e.g. apply second coat over wet first coat. Also I looked for a clear OPI Infinite Shine 2 polish and didn’t see one on Amazon. I have a clear OPI Top Coat. Can I use that for the two coats of Infinite Shine 2 polish? or should I just stick with the Nail Envy and leave out the Infinite Shine 2 step altogether??
Yes OPI Top Coat would work the same.
Thanks Mary. My self manicures never last more than one day before chipping. I used these products and your tips and the result is marvelous. Going on one week with not a chip anywhere.
Thanks
This is great, Jean!
The elephant in the room…as we age our hands become crepey, boney and veiny. Why draw attention to them with bright nail polish, rings and bracelets? How about some tips on how to improve (without expensive procedures done in a doctor’s office)? By the way, time to give your nails a rest. Buff them instead of polish. Also I take biotin with keratin and my nails grow very fast and strong.
I just discovered Kiss press on nails. I have had so many compliments from women asking me where I got my nails done. They come in numerous colors and are so easy to apply and last for weeks. I have washed, floors, windows, dishes daily without an issue. You can buy on Amazon or any drugstore or Walmart for amount 5-6.00 dollars for 30 nails. It’s so much easier than nail polish.
Hi Mary,
I love your post. Works great!
I followed your advice and your recommendations many times in the past. I have never been disappointed.
Thank you for being there.
Stay healthy!
I’ve already purchased my hair color from Walmart. I usually see how long I can go without obviously needing to color my hair. The longest I’ve gone is about 2 1/2 months. I use a half of a box of hair color for touching up my roots. I should have five applications at this rate. Hopefully that will be enough to see me through? My nails? Not too worried as I work from home and live on a farm so pretty nails would look pretty silly on me digging in dirt. Gloves are hard to work in.
My nails are the worst; especially my cuticles. I have very dry skin and my cuticles get very thick. The cuticle nipper that is used at the salon makes my nails look fabulous but I can’t use one of these on myself, so I get regular manicures. Would love to break the habit, though.
This has been a game changer for me. I have 2 nails that split as soon as they reach the ‘skin’ and begin to split from prior damage to the nail-beds. After the last 9 months of following these steps, my nails look great! I give glass nail files as gifts to many people, since I am so happy with the results.
Thanks, Mary!
How do you apply the products without getting your fingers messy? Even the 3 strokes tip everyone always mentions doesn’t work for me. I love nail polish, but I don’t love the mess or effort it takes to look right and stay clean!
I’ve found wearing magnifying eyeglasses while doing my nails makes it SO much easier not to get polish on my skin. I also use these glasses for finework crafts (ie jewelry making).
After years of using drying no-acetone nail polish remover, I found the best smelling and moisturizing polish remover. And, you can buy it on Amazon! It is Karma Naturals Nail Polish Remover – Soybean Oil & Lavender. The smell is so good and your nails feel soft afterwards.
Will it remove gel nail polish?
I absolutely love the process! I have been purchasing the items for gifts for friends and family. I would love a PDF that could be printed to accompany them with your instructions. I didn’t want to “steal the glory” by making one up without your permission.
Question>> On step 3 do you dry each coat for 5 min.?
Question 2>> On step 4 do you apply anything between the polish coats?
Thanks
I have tried steps 1-6 and the results are great. I just wanted to make sure I was passing the info onto others in the proper way.
I ordered all the items through your direct link to Amazon. I must be doing something wrong as my nail polish continue to chip and now comes off in thick sheets. Anyone offer suggestions as I spent $50+ on these products.
Kathleen, I suggest that you rough your nails a bit with the glass file before applyling Chip Skip. That seems to help others who have particularly oily skin, that can translate to oily nails as well. Hope that helps. Also $50 worth of product will last for many manicures.
I finally ordered all the items, and gave myself a manicure according to your directions. That was 9 days ago and my nails still look beautiful – no chipping or wearing away on the tips. I’ve never had a manicure (even professional) last perfectly for more than a couple of days. AMAZING! Tonight I’m going to put another coat of polish and Nail Envy on to see how long this will last. Thank you so much for your post 🙂
I excitedly ordered the OPI Nail Envy Nail Strengthener after reading your article, with high hopes for it strengthening my thin, weak nails. However, when I received it, I saw in the ingredient list that it contains formaldehyde, which is a known human carcinogen. 🙁 I never would’ve expected to find that in a product that’s applied directly to nails and cuticles. So disappointed to not be able to use this product that I’d had such high hopes for. I’m hoping I can return it – if not, I’ll have to take the loss and throw it out. 🙁
Tried this method and after a few stops top find all of the products now have the best do our yourself manicure ever. Thanks
At last someone else who loves Seche Vite as much as I do; I have used it for years!
Wonderful information. Do you have a specific product for removing the polish?
I’ve become intolerant of nail polishes on my fingers, but not my toes (TG!) over the years. So now I just file and use either Smith’s Rosebud salve or Doctor Burt’s Res-Q-Ointment EVERY night. This works for me. I tried using vitamin e capsules, but they were a little messy. I broke all of the glass files my mother-in-law gave me, so I never got comfortable using them. What I have noticed is as I get older, the nails don’t grow as fast and they used to and they are not as paper thin as they were when I was younger. I remember pre-natal vitamins made my nails the greatest during the childbearing years.
Could this be my answer? I have not ever been able to use nail polish without it making my dry, splitting, peeling nails worse. I tried professionals and that’s even worse. Never tried acrylic, but did try gel and that was awful. I tried OPI polish alone with the same result. Maybe, just maybe, this formula could be the answer to my problem(s). I have dry skin all over, so there are usually hangnails, but I found a nice little clipper to get those before I rip them off into the quick…lol. Thank you so much for this article.
GREAT MOTHER’S DAY GIFT IDEA!!! Thanks a million. My mother and I both love nail polish. She will be thrilled when I send her a beautiful box filled with these goodies. And I have been so busy, I had not even thought of Mother’s Day yet. (I know, I know . . .)
Was wondering if you have a special product to remove the polish.
I have used the OPI Nail Envy for several years with out much else. People regularly comment on how nice my nails look and ask where I go to get my nails done. $15 is what I usually pay for a bottle that lasts about a third of the year. If you can only do one of these products – I suggest this one!
Oh and I made your Coffee cake last night with the Master Mix – Rave Reviews from the office once again!
Thank You!
You are absolutely right! My nails, that are frightfully thin will actually grow out with OPI Nail Envy!
Thanks for the tips. My salon trips are few and far between, and the last one made me swear off entirely. I can do everything they did myself better and cheaper.
How do you remove the polish?
What do you do with the cuticle oil? DD’s skin around the bottom of her nails is red and sore and the skin is “shredding” (for want of a better word).
If you don’t mind me chiming in here, I had the same problem with cuticles. I put the oil on every night before bed, just a drop on each nail and lightly rub into the cuticle. I also used cuticle nippers to remove any dead skin. The oil soaks in as you sleep. Makes the skin soft and hydrated so it does not peel. I also had to discipline myself to stop picking at it. That was the hardest part, lol! Using a had cream several times a day helps too. Starting her on good habits early in life will keep her hands healthy throughout her life. Good luck! She is lucky to have such a good mom!
Thanks Pam. We will try those suggestions.
Mary, you are reading my mind! It is a bit scary but oh, so rewarding! You are fast becoming my go-to advisor for almost everything!