
The Absolute Best Way to Clean Your Microwave Oven


Microwave ovens make life so much easier—until they become a crusty, splattered mess inside! If cleaning your microwave feels like a daunting chore, don’t worry. With just a few common household items like vinegar or lemons, and the power of steam, you can tackle even the toughest grime. This effortless cleaning method saves time and leaves your microwave sparkling clean and smelling fresh.

There are few things more disgusting than opening a microwave oven to find cooked-on extraneous matter clinging to every surface. Or unfortunate food explosion. The way to avoid this, of course, is to clean the appliance thoroughly after every use.
Uh-huh. Sure. But let’s get real. A microwave with frequent use, whether at home or at work, doesn’t get a thorough cleaning every single time—after every use. It’s going to get dirty so it’s good to know how to clean a microwave oven almost effortlessly. With acetic steam!
Why Regular Microwave Cleaning Matters
A clean microwave isn’t just about appearances (though who doesn’t love a sparkling appliance?). Regular cleaning can actually make your microwave more efficient by preventing buildup that absorbs energy and slows cooking. Plus, keeping it clean helps avoid lingering odors—no one wants their coffee to taste like last week’s spaghetti and meatballs.
But the importance of a clean microwave goes beyond convenience. Studies have shown that microwave door handles are hotspots for bacteria. In one swab study, nearly half of microwave handles tested in office kitchens had ATP counts over 300. ATP (adenosine triphosphate) indicates how dirty a surface is, and anything above 300 is considered a health hazard. Think about how many hands touch that door daily—yikes!
Inside the microwave, spills and splatters can harbor bacteria like E. coli, especially if you’ve defrosted raw meat or reheated leftovers. These spills can also create a buffet for bacterial growth, leading to bad odors, a potential fire hazard, and grime that only gets harder to clean the longer it sits.
Cleaning your microwave regularly isn’t just a chore—it’s a simple way to keep your kitchen safer, your food fresher, and your appliance running like new.
Supplies You Need to Clean a Microwave

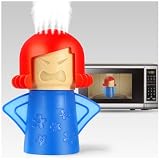
Sure, you could grab an AngryMama™ for a dose of kitchen humor and a helping hand, She’s a fun addition to your cleaning routine, but don’t let her grumpy charm distract you from the face that you probably already have everything you need to tackle even the grimiest microwave. Why spend money on a single-use gadget when good ol’ vinegar, lemon, and steam are ready to work their magic?
Here’s what you’ll need to clean your microwave the tried-and-true way:
- Microwavable Glass Bowl or Measuring Cup: A sturdy, heat-safe container is key to holding your cleaning solution while the steam works its wonders.
- Water: Just tap water will do—it’s the base for creating steam.
- White Vinegar and/or Lemon: Choose one or mix both. Vinegar is a powerhouse for cutting through grime and neutralizing odors, while lemon adds a pleasant, fresh scent (and extra grease-fighting power). No lemons? Bottled lemon juice works just as well.
- Wooden Spoon, Chopstick, or Skewer: This is your safety trick. Placing a wooden utensil in the bowl prevents superheating, which can make water dangerously volatile in the microwave.
- Sponge or Soft Scrub Pad: For wiping away the softened grime and baked-on messes after steaming.
- Clean Cloth or Paper Towel: Use these to dry the interior and buff it to a sparkling finish.
Step-by-Step Guide to Cleaning a Microwave with Steam

Step 1: Prepare
Start by removing any dishes or food containers from the microwave. Leave the round glass tray and that handy gizmo underneath (the rotating mechanism) right where they are for now—you’ll tackle those later. Trust me, they’re much easier to clean after the steam treatment.
Step 2: Mix Your Cleaning Solution
Here’s what you’ll need:
- 1 cup white vinegar, OR 1-2 lemons, OR both
- 1 cup water
This isn’t rocket science—no need for precise measurements. If you have vinegar, great. Lemons? Awesome. Both? Even better! Just eyeball the amounts and pour the ingredients into a microwave-safe glass bowl or measuring cup.
If you’re using lemons, slice them, squeeze the juice into the container, and toss in the rinds for extra cleaning power. Both vinegar and lemon juice are packed with acids (acetic and citric) that cut through grease and grime like pros. Bonus: lemons leave a lovely fresh scent.
Safety Tip
Stick a wooden spoon, chopstick, or skewer into the bowl. This helps prevent “superheating,” a rare but risky occurrence where water can suddenly boil over when disturbed.
Place the container in the microwave and get ready for some steam-cleaning magic!
Step 3: Microwave on High for 5–10 Minutes
The tougher the mess, the longer you’ll want the solution to work its steamy magic. Let it heat until the mixture is bubbling and the microwave is full of steam, but don’t let it boil dry. Keep an eye on it—your goal is steam, not evaporation!
Step 4: Carefully Remove the Container
Using an oven mitt or potholder (the container will be HOT), carefully remove it from the microwave. Notice how the inside is now dripping with steam—nature’s way of loosening stubborn grime.
Step 5: Remove the Tray and Mechanism
Take out the glass tray and rotating gizmo (if removable) and place them in the sink. If the mechanism is fixed, don’t worry—you can clean it in place.
Step 6: Wipe Down the Interior
While the microwave is still warm and steamy, grab a sponge, soft cloth, or paper towel and wipe down every surface:
- The ceiling (yes, spills end up there too!)
- The vents
- The walls and floor
- The door (inside and out)
The steam should have softened all that baked-on splatter, making cleanup a breeze. Pay extra attention to corners and crevices where gunk likes to hide.
Step 7: Clean the Tray and Mechanism
Give the glass tray and rotating gizmo a good scrub in the sink using warm soapy water. If they’re extra dirty, let them soak for a bit. Dry them thoroughly and pop them back into the microwave once everything is sparkling clean.
Step 8: Final Touches
You’re almost there! Give the inside one last wipe with a clean cloth or paper towel to ensure you’ve removed any lingering moisture. It’s important to get rid of all the dampness to prevent any mold or mildew from developing. Don’t forget the exterior. Give the outside a quick once-over with a mild cleaner to keep things looking fresh. You can also wipe the vents on top and sides to ensure there’s no dust buildup, which can reduce efficiency.
Maintenance Tips
Now, let’s talk maintenance to keep your microwave from getting that grungy again. Regularly wipe down the door, handle, and keypad with a gentle cloth. These areas can collect a surprising amount of grime, and staying on top of it with a quick wipe every few days will save you a lot of elbow grease down the road.
And, one last pro tip: Every few months, pull the microwave out and give the back and vents a thorough cleaning. A dusty vent can cause your microwave to overheat or work harder than it needs to, shortening its lifespan.
With a little regular upkeep, your microwave will stay clean and efficient—ready for anything.
Safety Tips for Microwave Cleaning
Here’s something you might not know about microwave safety—superheating. It’s a surprisingly common occurrence that can be dangerous if you’re not careful. Let me share a story to illustrate how serious it can be.
A man, just trying to heat up a simple cup of water for his instant coffee, popped his mug in the microwave. When the timer went off, he grabbed the cup, only to realize the water hadn’t boiled. But before he could even think twice, the water exploded right in his face. The result? Severe burns that left permanent scarring and damage to his eye. It was a painful reminder of why we need to be cautious.
What happened here is called superheating. It’s when liquid—whether water, vinegar, or anything else—is heated too quickly in the microwave. This can happen, especially if you’re using a brand-new cup or bowl. The liquid heats faster than the bubbles needed for boiling can form. Without those bubbles, the liquid doesn’t release the heat like it’s supposed to, and it keeps getting hotter—well beyond its boiling point. A simple nudge or disturbance is enough to trigger an explosion of boiling hot liquid.
So, how do we prevent this? The best tip is simple: always add something non-metallic to your cup or bowl—like a wooden stir stick or chopstick. This helps diffuse the energy as the liquid heats and keeps things from getting dangerously out of hand.
A big thank you to Steve Spangler for shedding light on this important safety tip through his science blog!

How to Clean a Microwave with Vinegar, Lemon, and Steam
Materials
- 1 cup white vinegar or 1–2 lemons
- 1 cup water
Instructions
- Prepare the Microwave: Remove any items from the microwave, but leave the glass tray and rotating piece inside.
- Mix the Cleaning Solution: In a microwave-safe bowl or measuring cup, combine 1 cup of water, 1 cup of white vinegar (or the juice of 1–2 lemons), and throw the lemon rinds in too. Stir if using lemon juice.
- Add a Safety Stick: Place a wooden spoon, chopstick, or skewer into the bowl to prevent superheating (which can cause a dangerous microwave explosion).
- Steam It: Place the bowl into the microwave and heat on high for 5–10 minutes. The time will vary depending on how dirty your microwave is.
- Carefully Remove the Bowl: Use oven mitts or potholders to take out the bowl. The microwave should be filled with steam, which will have loosened the grime.
- Wipe Down the Inside: While the microwave is still hot, use a sponge, cloth, or paper towel to wipe down the interior surfaces (walls, vents, floor, and door).
- Clean the Glass Tray: Take the glass tray and rotating piece out, clean them in the sink, wipe dry, and place them back in the microwave.
Notes
Question: What’s the weirdest mess you’ve ever found in your microwave? Share your cleaning hacks or horror stories below.
EverydayCheapskate™ is reader-supported. We participate in the Amazon Services LLC Associates Program and other affiliate advertising programs, designed to provide a means for us to earn from qualifying purchases, at no cost to you.

More from Everyday Cheapskate
 https://www.everydaycheapskate.com/wp-content/uploads/20260705-Best-Coolers-for-Camping-Road-Trips-and-Beach-Days.png
800
1200
Mary Hunt
https://www.everydaycheapskate.com/wp-content/uploads/EC-Logo-by-Mary-Hunt-Tagline-Trimmed.png
Mary Hunt2026-07-05 13:26:172026-07-05 13:26:17Best Coolers for Camping, Road Trips, and Beach Days
https://www.everydaycheapskate.com/wp-content/uploads/20260705-Best-Coolers-for-Camping-Road-Trips-and-Beach-Days.png
800
1200
Mary Hunt
https://www.everydaycheapskate.com/wp-content/uploads/EC-Logo-by-Mary-Hunt-Tagline-Trimmed.png
Mary Hunt2026-07-05 13:26:172026-07-05 13:26:17Best Coolers for Camping, Road Trips, and Beach Days https://www.everydaycheapskate.com/wp-content/uploads/20260705-how-to-keep-a-cooler-cold.png
800
1200
Mary Hunt
https://www.everydaycheapskate.com/wp-content/uploads/EC-Logo-by-Mary-Hunt-Tagline-Trimmed.png
Mary Hunt2026-07-05 13:19:502026-07-05 13:19:50How to Pack a Cooler That Stays Cold for 48 Hours
https://www.everydaycheapskate.com/wp-content/uploads/20260705-how-to-keep-a-cooler-cold.png
800
1200
Mary Hunt
https://www.everydaycheapskate.com/wp-content/uploads/EC-Logo-by-Mary-Hunt-Tagline-Trimmed.png
Mary Hunt2026-07-05 13:19:502026-07-05 13:19:50How to Pack a Cooler That Stays Cold for 48 Hours https://www.everydaycheapskate.com/wp-content/uploads/20260703-home-decor.png
800
1200
Mary Hunt
https://www.everydaycheapskate.com/wp-content/uploads/EC-Logo-by-Mary-Hunt-Tagline-Trimmed.png
Mary Hunt2026-07-03 20:46:552026-07-03 20:46:5510 Everyday Items You Never Think to Wash (But Should)
https://www.everydaycheapskate.com/wp-content/uploads/20260703-home-decor.png
800
1200
Mary Hunt
https://www.everydaycheapskate.com/wp-content/uploads/EC-Logo-by-Mary-Hunt-Tagline-Trimmed.png
Mary Hunt2026-07-03 20:46:552026-07-03 20:46:5510 Everyday Items You Never Think to Wash (But Should) https://www.everydaycheapskate.com/wp-content/uploads/20260630-a-lit-sparkler-with-an-american-flag-in-the-background-4th-of-july-hacks-tips-and-recipes.png
800
1200
Mary Hunt
https://www.everydaycheapskate.com/wp-content/uploads/EC-Logo-by-Mary-Hunt-Tagline-Trimmed.png
Mary Hunt2026-06-30 21:44:502026-06-30 21:44:5034 Fourth of July Recipes and DIY Hacks for a Stress-Free Holiday
https://www.everydaycheapskate.com/wp-content/uploads/20260630-a-lit-sparkler-with-an-american-flag-in-the-background-4th-of-july-hacks-tips-and-recipes.png
800
1200
Mary Hunt
https://www.everydaycheapskate.com/wp-content/uploads/EC-Logo-by-Mary-Hunt-Tagline-Trimmed.png
Mary Hunt2026-06-30 21:44:502026-06-30 21:44:5034 Fourth of July Recipes and DIY Hacks for a Stress-Free Holiday https://www.everydaycheapskate.com/wp-content/uploads/20260629-wooden-die-spell-july-with-patriotic-decor-in-background.png
800
1200
Mary Hunt
https://www.everydaycheapskate.com/wp-content/uploads/EC-Logo-by-Mary-Hunt-Tagline-Trimmed.png
Mary Hunt2026-06-29 21:07:092026-06-29 21:10:297 Best Things to Buy in July for Huge Summer Savings
https://www.everydaycheapskate.com/wp-content/uploads/20260629-wooden-die-spell-july-with-patriotic-decor-in-background.png
800
1200
Mary Hunt
https://www.everydaycheapskate.com/wp-content/uploads/EC-Logo-by-Mary-Hunt-Tagline-Trimmed.png
Mary Hunt2026-06-29 21:07:092026-06-29 21:10:297 Best Things to Buy in July for Huge Summer Savings https://www.everydaycheapskate.com/wp-content/uploads/20260628-Grilled-Peaches-with-Balsamic-and-Blue-Cheese-1.png
800
1200
Mary Hunt
https://www.everydaycheapskate.com/wp-content/uploads/EC-Logo-by-Mary-Hunt-Tagline-Trimmed.png
Mary Hunt2026-06-29 09:38:342026-06-29 09:38:34Summer Grilled Peaches with Balsamic and Blue Cheese
https://www.everydaycheapskate.com/wp-content/uploads/20260628-Grilled-Peaches-with-Balsamic-and-Blue-Cheese-1.png
800
1200
Mary Hunt
https://www.everydaycheapskate.com/wp-content/uploads/EC-Logo-by-Mary-Hunt-Tagline-Trimmed.png
Mary Hunt2026-06-29 09:38:342026-06-29 09:38:34Summer Grilled Peaches with Balsamic and Blue Cheese https://www.everydaycheapskate.com/wp-content/uploads/20260628-close-up-photo-a-woman-wearing-a-swimsuit-with-a-mild-sunburn.png
800
1200
Mary Hunt
https://www.everydaycheapskate.com/wp-content/uploads/EC-Logo-by-Mary-Hunt-Tagline-Trimmed.png
Mary Hunt2026-06-28 21:40:042026-06-28 21:40:04DIY After-Sun Spray That Cools and Soothes Skin
https://www.everydaycheapskate.com/wp-content/uploads/20260628-close-up-photo-a-woman-wearing-a-swimsuit-with-a-mild-sunburn.png
800
1200
Mary Hunt
https://www.everydaycheapskate.com/wp-content/uploads/EC-Logo-by-Mary-Hunt-Tagline-Trimmed.png
Mary Hunt2026-06-28 21:40:042026-06-28 21:40:04DIY After-Sun Spray That Cools and Soothes Skin https://www.everydaycheapskate.com/wp-content/uploads/20260626-homemade-stain-paste-sitting-on-wooden-countertop-in-laundry-room-with-washer-and-dryer.png
800
1200
Mary Hunt
https://www.everydaycheapskate.com/wp-content/uploads/EC-Logo-by-Mary-Hunt-Tagline-Trimmed.png
Mary Hunt2026-06-26 17:41:192026-06-26 17:41:19Homemade Laundry Stain Paste That Works for Pennies
https://www.everydaycheapskate.com/wp-content/uploads/20260626-homemade-stain-paste-sitting-on-wooden-countertop-in-laundry-room-with-washer-and-dryer.png
800
1200
Mary Hunt
https://www.everydaycheapskate.com/wp-content/uploads/EC-Logo-by-Mary-Hunt-Tagline-Trimmed.png
Mary Hunt2026-06-26 17:41:192026-06-26 17:41:19Homemade Laundry Stain Paste That Works for Pennies https://www.everydaycheapskate.com/wp-content/uploads/20260625-a-rustic-wooden-christmas-tree-in-the-sand-on-the-beach.png
800
1200
Mary Hunt
https://www.everydaycheapskate.com/wp-content/uploads/EC-Logo-by-Mary-Hunt-Tagline-Trimmed.png
Mary Hunt2026-06-26 11:34:132026-06-26 11:36:44Christmas in June? Try This Amazon Prime Day Gift Guide
https://www.everydaycheapskate.com/wp-content/uploads/20260625-a-rustic-wooden-christmas-tree-in-the-sand-on-the-beach.png
800
1200
Mary Hunt
https://www.everydaycheapskate.com/wp-content/uploads/EC-Logo-by-Mary-Hunt-Tagline-Trimmed.png
Mary Hunt2026-06-26 11:34:132026-06-26 11:36:44Christmas in June? Try This Amazon Prime Day Gift GuidePlease keep your comments positive, encouraging, helpful, brief,
and on-topic in keeping with EC Commenting Guidelines
Last update on 2026-07-22 / Affiliate links / Images from Amazon Product Advertising API


Dear, Dear Mary:
I am so grateful for all you wonderful and absolutely “useful” information you have given us over the years.
ONE QUESTION: Could u put, instead of a cup of water/lemon – a soaking (Water & Lemon) TOWEL – in the microwave. That way decreasing any explosion????? Halena
I suppose you could provided that towel was super drenched. But if you put a piece of lemond rind in with the water/lemon you will prevent an explosion. That will break the surface tension of water alone, which is the real culprit.
I love your info, but I wish it could be pinned to Pinterest!
I love, love, love your tips. I blew up butter in my new microwave. Now the stainless back of microwave looks well stained with dark spots now. Adding to the pain, it is built in and even standing on a chair I can’t reach the back to scrub it. I did purchase a handy plastic little guy with holes in his head which can be used to steam the microwave clean as you describe. It works but still those dark spots.
I accidently found that a cup of boiled water (forgot that I wanted a cuppa) sitting in the microwave for a few extra minutes steamed it all up enough to wipe it down to sparkly clean. But the lemons in the water would make for a nice addition!