
Top DIY Appliance Service Tips for a Smooth-Running Home

It was Christmas Eve, and our refrigerator decided to play the ultimate prank by hitting 70°F. With guests due any minute, I was in full-on panic mode. That’s when I discovered the lifesaving power of DIY appliance service. A little quick maintenance, and we narrowly avoided a holiday disaster. This experience drove home the importance of regular appliance upkeep—something that can save you a lot of headaches and money down the road.
In a flash, I was at my computer, typing in the make and model of our fridge on RepairClinic.com. There it was—a detailed list of possible reasons for our cooling crisis.
Following the step-by-step instructions, we dug deep, right to the coils hidden under the fridge, covered in eight years’ worth of gunk. It wasn’t long before we had everything cleaned up and cooling like new again.
The big takeaway from that near-miss? Just like your car, major appliances need routine care to stay in top shape. A little DIY appliance maintenance goes a long way in keeping things running smoothly and extending the life of your home’s hardest-working helpers.
Why DIY Appliance Service Matters
We often take our home appliances for granted—until they suddenly stop working at the worst possible moment. But here’s the thing: just like your car, your appliances need regular care to keep running smoothly.
By taking the time to perform simple maintenance tasks, you can prevent major breakdowns, save a bundle on repairs, and extend the lifespan of your appliances. Imagine catching a minor issue with your dishwasher or washing machine before it turns into a flood of problems—literally. Routine DIY service not only keeps your appliances operating at peak efficiency but also keeps your home safe from unexpected disasters.
And let’s not forget the financial benefits. A little time spent cleaning refrigerator coils or replacing worn-out washing machine hoses can save you hundreds, if not thousands, in repair costs. Plus, when you handle the service yourself, you avoid the hassle of waiting for a repair technician and paying those steep service fees.
But it’s not just about avoiding costs; it’s about empowerment. Learning how to care for your appliances gives you control over your home’s comfort and functionality. You’ll gain the confidence to tackle minor repairs and maintenance tasks, knowing that you’re protecting your investment and keeping your household running smoothly.
Jump to appliance:
Step-by-Step Guide to Refrigerator Coil Cleaning

Keeping your refrigerator’s coils clean is one of the easiest and most effective ways to ensure it runs efficiently—saving you money on energy bills and avoiding costly repair calls. Believe it or not, clogged condenser coils are responsible for a whopping 70% of refrigerator service calls! But instead of shelling out $90 an hour (plus parts) to a repair technician, you can tackle this task yourself in just a few simple steps.
1. Gather Your Supplies
You’ll need a vacuum with a brush attachment, a coil cleaning brush, and a damp cloth. Make sure to unplug your refrigerator before you get started—safety first!
2. Locate the Coils
Refrigerator coils are usually located either at the back of the fridge or underneath it. Check your owner’s manual if you’re not sure where to find them.
3. Vacuum Away Dust and Debris
Using the brush attachment on your vacuum, gently remove any dust, dirt, and pet hair from the coils. Follow up with a coil cleaning brush to reach any stubborn spots. The cleaner those coils, the better your fridge can maintain its cool—and that means less strain on the appliance and more money in your pocket.
4. Clean the Door Gasket
While you’re in maintenance mode, don’t forget the door gasket. Mix a mild detergent with water and wipe down the gasket to remove any grime. To ensure a tight seal, close the door on a dollar bill. If the bill slips out easily, it’s time to replace the gasket. A good seal means less cold air escapes, which keeps your fridge working efficiently.
5. Keep the Door Closed
Every time you open the refrigerator door, cold air escapes and warm, humid air rushes in. Make it a habit to keep the door closed as much as possible to maintain the interior temperature without overworking the compressor.
By cleaning your refrigerator coils every few months and maintaining a good door seal, you’re not just keeping your appliance in tip-top shape—you’re also extending its lifespan and saving yourself from unnecessary repair bills. A little DIY maintenance goes a long way!
DIY Tips to Keep Your Dishwasher Running Smoothly

Your dishwasher is a workhorse in the kitchen, but like any appliance, it needs regular TLC to keep performing at its best. Here are some practical DIY tips to help you avoid costly repairs and ensure your dishwasher keeps delivering spotless results.
1. Inspect and Repair Dish Rack Tines
Over time, the tines on your dish rack can rust, and while it might seem like a minor issue, rust particles can wreak havoc on your dishwasher’s pump and seals, leading to hidden leaks or even pump failure. The good news? You don’t have to replace the entire dish rack.
A tine repair kit, available from the manufacturer or on Amazon, is a quick and affordable fix. These kits come in various colors, so you can match your existing rack, making the repair nearly invisible. However, if the dish rack is beyond saving, it’s best to replace it to prevent further damage to your dishwasher.
2. Regularly Clean the Filter
If your dishwasher isn’t cleaning dishes like it used to, the culprit might be a clogged filter. Many people don’t realize that dishwashers have filters that require regular cleaning—ideally, once a week. When food debris and hard water deposits build up, your dishwasher’s performance can take a nosedive.
To clean the filter, locate it (your user manual can help if you’re unsure), remove it, and rinse it under running water. For stubborn gunk, a soft-bristled brush will do the trick. This simple task can make a world of difference in the cleanliness of your dishes.
3. Deep Clean Your Dishwasher Monthly
A clean dishwasher equals cleaner dishes, so make it a habit to give your appliance a deep clean at least once a month. Here’s how:
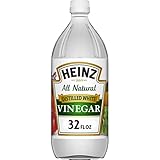
- Vinegar: Place a bowl or large cup of white vinegar on the top rack of an empty dishwasher and run it on the hottest, longest cycle. The vinegar will break down any grease, grime, and mineral deposits, leaving your dishwasher sparkling clean.
- Citric Acid: For a more powerful clean, try citric acid. You can use citric acid crystals or even a packet of unsweetened lemon-lime Kool-Aid powder. Fill the detergent cup(s) and run the dishwasher empty on the hottest cycle. Citric acid effectively cleans the jets, filters, and connecting hoses, ensuring optimal performance.
- Commercial Cleaner: If you prefer a ready-made solution, a product like Affresh Dishwasher Cleaner is designed to tackle the toughest buildup. Just follow the package instructions for a thorough clean.
By incorporating these simple maintenance tasks into your routine, you’ll extend the life of your dishwasher, improve its efficiency, and keep it running smoothly for years to come. Regular care not only saves you from unexpected repair bills but also ensures your dishes come out sparkling clean every time.


How to Service Your Range Stovetop for Optimal Performance

Your stovetop is the heart of your kitchen, but to keep it running efficiently, regular maintenance is a must. One key area often overlooked is the stovetop drip bowls. These essential components help your burners heat evenly, but when they’re dirty, they can drag down your cooktop’s performance.
1. Clean or Replace Drip Bowls Regularly
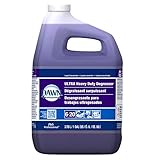
Over time, drip bowls can become caked with grease and food residue, which not only looks unsightly but also reduces the heating efficiency of your burners. To keep them in top shape, clean them regularly using a heavy-duty degreaser. Goo Gone Kitchen Degreaser is a great option for cutting through stubborn grime, or you can opt for Dawn Heavy Duty Degreaser—both make light work of this tough task.
2. Never Use Foil to Line Drip Bowls
It might be tempting to cover drip bowls with foil to catch spills and make cleanup easier, but resist the urge! Lining drip bowls with foil can short-circuit your burners, leading to costly repairs or even a complete cooktop replacement. Instead, focus on regular cleaning to maintain their shine and functionality.
By incorporating these simple maintenance steps, you’ll not only extend the life of your stovetop but also ensure that it’s always ready to deliver optimal cooking performance. Regular care can make a big difference, turning a potential energy hog into an efficient kitchen powerhouse.

Maintaining Your Humidifier: Simple Steps for Better Air Quality

Keeping your whole-house humidifier in top shape isn’t just about efficiency—it also protects your wood furniture and flooring from dry air damage and helps reduce airborne viruses, bacteria, and mold. Regular upkeep ensures your home’s air stays healthy and comfortable.
Mineral deposits like calcium can build up over time, diminishing your humidifier’s performance. To keep things running smoothly, replace filters and pads annually, even if they still look fine. Set a calendar reminder to stay on top of this crucial task. Always turn off the power and water supply before starting any DIY service.
Types of Furnace-Mounted Humidifiers and Their Maintenance Needs:
- Reservoir/Drum-Style Humidifiers: Budget-friendly but need monthly cleaning with a vinegar solution to prevent mold. Replace foam pads if they show signs of wear.
- Flow-Through/Drip-Style Humidifiers: Reliable with less maintenance, but check and clean evaporator pads monthly. Replace them annually for optimal performance.
- Steam-Style Humidifiers: High-end and precise, requiring annual inspection and descaling. Ensure all parts are clean and functional.
For a detailed guide on maintaining your humidifier, check out The Spruce. Their step-by-step resource is a valuable addition to your home maintenance routine!
Air Conditioner Service: What You Should Do Regularly

To keep your air conditioner running efficiently and extend its lifespan, regular maintenance is key. Start by cleaning or replacing the air filter every month, especially during peak cooling seasons. A clean filter helps your unit operate smoothly and can significantly enhance its efficiency.
Annual Cleaning
Don’t forget to give the evaporator and condenser coils an annual cleaning. Dust and debris can build up, reducing your system’s performance and efficiency.
Filter Replacement Made Easy
Finding the right filter for your air conditioner has never been simpler, thanks to subscription services like Filterbuy, Filtrete, and FilterTime. Just enter your unit’s model number, set up an account, and these services will deliver the perfect filter right to your door every three months. This way, you stay on top of your maintenance schedule without the hassle of remembering to replace the filter yourself.
Regular upkeep of your air conditioner not only ensures it works efficiently but also saves you from costly repairs down the line. For a cool and comfortable home, make these simple tasks part of your routine!
Dryer Safety: The Importance of Routine Service

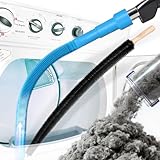
Keeping your dryer in top shape isn’t just about efficiency—it’s crucial for your safety. Start by cleaning the lint filter after every load to ensure optimal airflow. But don’t stop there—once a year, it’s essential to clean the entire exhaust duct to prevent dangerous lint buildup and reduce the risk of fire.
If you’ve ever noticed your dryer taking forever to get clothes dry, you might be dealing with more than just a clogged lint trap. Lint can accumulate deeper inside the machine and in the dryer vent line, leading to inefficiency and potential hazards. I had this problem with my stacked appliances and found a dryer vent cleaner kit to be a game-changer. It made cleaning the dryer vent quick and easy, pulling out tons of lint and improving efficiency.
Washing Machine Service: Preventing Water Damage in Your Home

Washing machines are responsible for over $150 million in water damage across U.S. homes each year. Picture this: a flood of hundreds of gallons of water pouring from your laundry room, soaking floors and damaging furniture. It sounds dramatic, but it’s a reality for many homeowners, often due to neglected washing machine hoses.
To avoid such a disaster, check your water inlet hoses—those connecting your machine to the hot and cold faucets—at least once a year. These hoses, which can degrade from age, chemicals, and calcium buildup, often go unnoticed until it’s too late. Even “new” hoses could be aging in a warehouse before they reach you.
If you haven’t replaced your hoses recently, add it to your to-do list this weekend. Most experts recommend replacing them every three to five years. You have two options: affordable rubber hoses for around $5 each or more durable braided stainless steel hoses for about $15 each. While stainless steel offers better performance, it’s not foolproof—both types can fail if not installed correctly.
Installing new hoses is straightforward, much like attaching a garden hose. However, improper installation—like sharp kinks or bends—can lead to premature hose failure. Take your time to ensure a proper, leak-free installation to keep your washing machine running smoothly and protect your home from potential water damage.
Need a Hand with Home Repairs?
If you’re tackling home repairs or appliance maintenance and need some extra guidance, look no further than NaturalHandyMan.com and RepairClinic.com. These fantastic resources offer detailed diagnostics, step-by-step repair instructions, and practical maintenance tips to help you handle a variety of household tasks and keep your appliances in top shape.
Question: What’s your go-to DIY appliance service hack? Share your best tips for keeping your appliances in top shape.
EverydayCheapskate™ is reader-supported. We participate in the Amazon Services LLC Associates Program and other affiliate advertising programs, designed to provide a means for us to earn from qualifying purchases, at no cost to you.

More from Everyday Cheapskate
 https://www.everydaycheapskate.com/wp-content/uploads/20260705-how-to-keep-a-cooler-cold.png
800
1200
Mary Hunt
https://www.everydaycheapskate.com/wp-content/uploads/EC-Logo-by-Mary-Hunt-Tagline-Trimmed.png
Mary Hunt2026-07-05 13:19:502026-07-05 13:19:50How to Pack a Cooler That Stays Cold for 48 Hours
https://www.everydaycheapskate.com/wp-content/uploads/20260705-how-to-keep-a-cooler-cold.png
800
1200
Mary Hunt
https://www.everydaycheapskate.com/wp-content/uploads/EC-Logo-by-Mary-Hunt-Tagline-Trimmed.png
Mary Hunt2026-07-05 13:19:502026-07-05 13:19:50How to Pack a Cooler That Stays Cold for 48 Hours https://www.everydaycheapskate.com/wp-content/uploads/20260703-home-decor.png
800
1200
Mary Hunt
https://www.everydaycheapskate.com/wp-content/uploads/EC-Logo-by-Mary-Hunt-Tagline-Trimmed.png
Mary Hunt2026-07-03 20:46:552026-07-03 20:46:5510 Everyday Items You Never Think to Wash (But Should)
https://www.everydaycheapskate.com/wp-content/uploads/20260703-home-decor.png
800
1200
Mary Hunt
https://www.everydaycheapskate.com/wp-content/uploads/EC-Logo-by-Mary-Hunt-Tagline-Trimmed.png
Mary Hunt2026-07-03 20:46:552026-07-03 20:46:5510 Everyday Items You Never Think to Wash (But Should) https://www.everydaycheapskate.com/wp-content/uploads/20260630-a-lit-sparkler-with-an-american-flag-in-the-background-4th-of-july-hacks-tips-and-recipes.png
800
1200
Mary Hunt
https://www.everydaycheapskate.com/wp-content/uploads/EC-Logo-by-Mary-Hunt-Tagline-Trimmed.png
Mary Hunt2026-06-30 21:44:502026-06-30 21:44:5034 Fourth of July Recipes and DIY Hacks for a Stress-Free Holiday
https://www.everydaycheapskate.com/wp-content/uploads/20260630-a-lit-sparkler-with-an-american-flag-in-the-background-4th-of-july-hacks-tips-and-recipes.png
800
1200
Mary Hunt
https://www.everydaycheapskate.com/wp-content/uploads/EC-Logo-by-Mary-Hunt-Tagline-Trimmed.png
Mary Hunt2026-06-30 21:44:502026-06-30 21:44:5034 Fourth of July Recipes and DIY Hacks for a Stress-Free Holiday https://www.everydaycheapskate.com/wp-content/uploads/20260629-wooden-die-spell-july-with-patriotic-decor-in-background.png
800
1200
Mary Hunt
https://www.everydaycheapskate.com/wp-content/uploads/EC-Logo-by-Mary-Hunt-Tagline-Trimmed.png
Mary Hunt2026-06-29 21:07:092026-06-29 21:10:297 Best Things to Buy in July for Huge Summer Savings
https://www.everydaycheapskate.com/wp-content/uploads/20260629-wooden-die-spell-july-with-patriotic-decor-in-background.png
800
1200
Mary Hunt
https://www.everydaycheapskate.com/wp-content/uploads/EC-Logo-by-Mary-Hunt-Tagline-Trimmed.png
Mary Hunt2026-06-29 21:07:092026-06-29 21:10:297 Best Things to Buy in July for Huge Summer Savings https://www.everydaycheapskate.com/wp-content/uploads/20260628-Grilled-Peaches-with-Balsamic-and-Blue-Cheese-1.png
800
1200
Mary Hunt
https://www.everydaycheapskate.com/wp-content/uploads/EC-Logo-by-Mary-Hunt-Tagline-Trimmed.png
Mary Hunt2026-06-29 09:38:342026-06-29 09:38:34Summer Grilled Peaches with Balsamic and Blue Cheese
https://www.everydaycheapskate.com/wp-content/uploads/20260628-Grilled-Peaches-with-Balsamic-and-Blue-Cheese-1.png
800
1200
Mary Hunt
https://www.everydaycheapskate.com/wp-content/uploads/EC-Logo-by-Mary-Hunt-Tagline-Trimmed.png
Mary Hunt2026-06-29 09:38:342026-06-29 09:38:34Summer Grilled Peaches with Balsamic and Blue Cheese https://www.everydaycheapskate.com/wp-content/uploads/20260628-close-up-photo-a-woman-wearing-a-swimsuit-with-a-mild-sunburn.png
800
1200
Mary Hunt
https://www.everydaycheapskate.com/wp-content/uploads/EC-Logo-by-Mary-Hunt-Tagline-Trimmed.png
Mary Hunt2026-06-28 21:40:042026-06-28 21:40:04DIY After-Sun Spray That Cools and Soothes Skin
https://www.everydaycheapskate.com/wp-content/uploads/20260628-close-up-photo-a-woman-wearing-a-swimsuit-with-a-mild-sunburn.png
800
1200
Mary Hunt
https://www.everydaycheapskate.com/wp-content/uploads/EC-Logo-by-Mary-Hunt-Tagline-Trimmed.png
Mary Hunt2026-06-28 21:40:042026-06-28 21:40:04DIY After-Sun Spray That Cools and Soothes Skin https://www.everydaycheapskate.com/wp-content/uploads/20260626-homemade-stain-paste-sitting-on-wooden-countertop-in-laundry-room-with-washer-and-dryer.png
800
1200
Mary Hunt
https://www.everydaycheapskate.com/wp-content/uploads/EC-Logo-by-Mary-Hunt-Tagline-Trimmed.png
Mary Hunt2026-06-26 17:41:192026-06-26 17:41:19Homemade Laundry Stain Paste That Works for Pennies
https://www.everydaycheapskate.com/wp-content/uploads/20260626-homemade-stain-paste-sitting-on-wooden-countertop-in-laundry-room-with-washer-and-dryer.png
800
1200
Mary Hunt
https://www.everydaycheapskate.com/wp-content/uploads/EC-Logo-by-Mary-Hunt-Tagline-Trimmed.png
Mary Hunt2026-06-26 17:41:192026-06-26 17:41:19Homemade Laundry Stain Paste That Works for Pennies https://www.everydaycheapskate.com/wp-content/uploads/20260625-a-rustic-wooden-christmas-tree-in-the-sand-on-the-beach.png
800
1200
Mary Hunt
https://www.everydaycheapskate.com/wp-content/uploads/EC-Logo-by-Mary-Hunt-Tagline-Trimmed.png
Mary Hunt2026-06-26 11:34:132026-06-26 11:36:44Christmas in June? Try This Amazon Prime Day Gift Guide
https://www.everydaycheapskate.com/wp-content/uploads/20260625-a-rustic-wooden-christmas-tree-in-the-sand-on-the-beach.png
800
1200
Mary Hunt
https://www.everydaycheapskate.com/wp-content/uploads/EC-Logo-by-Mary-Hunt-Tagline-Trimmed.png
Mary Hunt2026-06-26 11:34:132026-06-26 11:36:44Christmas in June? Try This Amazon Prime Day Gift Guide https://www.everydaycheapskate.com/wp-content/uploads/20260624-why-does-my-ice-taste-weird-soda-tea-lemonade-juice.png
800
1200
Mary Hunt
https://www.everydaycheapskate.com/wp-content/uploads/EC-Logo-by-Mary-Hunt-Tagline-Trimmed.png
Mary Hunt2026-06-24 17:10:532026-06-24 17:10:53Why Does My Ice Taste Weird? Here’s the Answer
https://www.everydaycheapskate.com/wp-content/uploads/20260624-why-does-my-ice-taste-weird-soda-tea-lemonade-juice.png
800
1200
Mary Hunt
https://www.everydaycheapskate.com/wp-content/uploads/EC-Logo-by-Mary-Hunt-Tagline-Trimmed.png
Mary Hunt2026-06-24 17:10:532026-06-24 17:10:53Why Does My Ice Taste Weird? Here’s the AnswerPlease keep your comments positive, encouraging, helpful, brief,
and on-topic in keeping with EC Commenting Guidelines
Last update on 2026-07-11 / Affiliate links / Images from Amazon Product Advertising API


I was told by a friend that after you clean your refrigator seals to put a thin layer of vaseline on it.(just wear gloves)
It makes the seals like new. No more leaks.
I have been doing this for a long time.
It works.
My son and daughter in love live in an apartment, their maintenance guy uses a leaf blower to blow through the dryer filter (indoors) and the lint blows outside. It also cleans the vent hose very well. Don’t forget to check the vent cover outside, sometimes the louvers get stuck shut.
And…I bought a hand held vaccuum that I use every time for the lint screen to vacuum off the lint and I use the dryer sheet to take off the lint on the screen. I have both very old washer and dryer that came with my house that I bought 3 years ago. I had a repairman come over and check the dryer and he said “you have dinosaurs here” I laughed so hard – if they work – I am keeping them! I agree if you take care of your appliances, they will last a very long time!
We always keep our appliances clean and unplug them when not in use. We use a lot of older appliances and have been able to fix them by following instructions online or by getting advice from hardware stores. Appliances with digital parts are not easy to repair. My wash machine and dryer are from the 80s and we love them. They work great and we have replaced parts several times. I think we paid less than $20 for them 10 years ago.
You have to remember to keep them clean of dust and animal hair if you have animals. We keep the lint filter vacuumed out and keep the washer clean inside also. We have been able to get at least 20 years out of our appliances and we are very happy about that.