
Homemade Artisan Bread—Amazingly Easy and So Delicious!


The year 2007 was a good one for me for numerous reasons. Here’s one: It’s the year I got good at baking homemade bread thanks to a simple discovery that would go on to revolutionize the world of home baking.
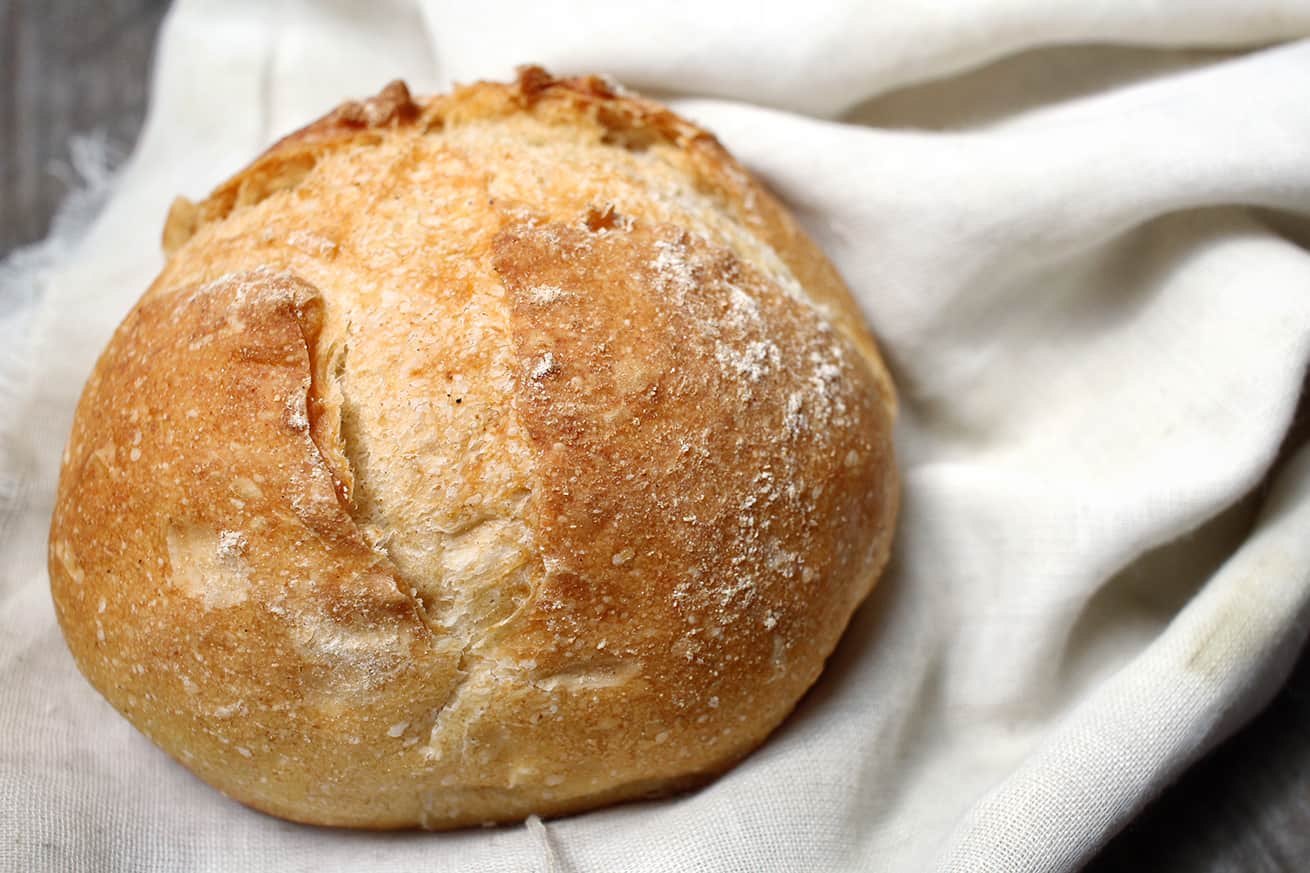
Presented in their book, Artisan Bread in Five Minutes a Day, authors Jeff Hertzberg, M.D. and Zoë Franḉois stated that anyone with an oven, flour, yeast, salt, and water could make authentic, artisan bread in just five minutes a day.
Within hours of getting my hands on that book, I was onboard. My first attempt at making homemade bread was ridiculously easy. And so successful I shocked myself and my family!
A more delicious loaf of artisan bread I cannot buy anywhere. And why would I, when I could now make it myself for about $.50 a loaf in just five minutes a day?
I must admit that the exact terminology, “five minutes,” might be a stretch, but here’s how that term has come to be: Jeff and Zoë have honed this method to taking about 15 minutes to mix up a big batch of bread dough, which after its first rise, sits in the refrigerator for up to two weeks.
When you’re ready to bake a loaf, it takes all of about five minutes to reach into the container, tear off a pound or so of dough, shape it, and get it oven-ready. That’s where the “five minutes a day” comes into play. It’s the amount of daily labor required.
I have used the method, but not baked every single day, since 2007. My husband could only dream of such a thing, that’s how much he loves this rustic, homemade French bread. It reminds us of our trips to Paris and the neighborhood bakeries where Parisienne’s stop in every day to pick up a fresh loaf.
Master Recipe Instructions
(Full printable recipe with ingredients and instructions below)
Pour warm water (about 100 F., which is just slightly warm to the touch) into a large container that has a lid.
Add the yeast and salt.
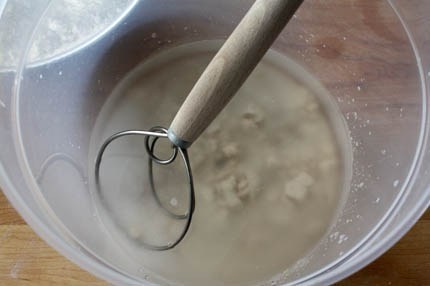
Using a large wooden spoon or “dough whisk,” mix to incorporate but don’t worry about getting it to completely dissolve.
Mix in all-purpose flour, adding it all at one time.
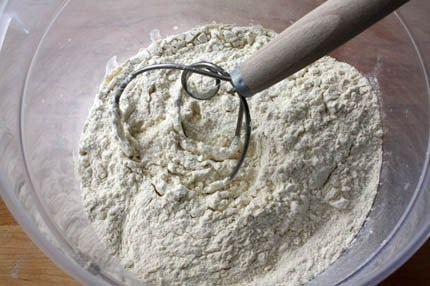
Don’t knead! It’s not necessary.
You’re finished when everything is uniformly moist without dry patches.
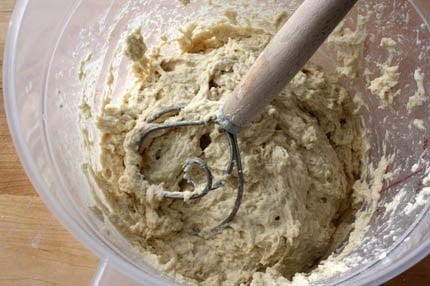
You can do this with an electric stand or hand mixer, although that too is not necessary. Mixing by hand is perfectly fine.
Cover with a lid that fits well to the container but can be cracked open so it’s not completely airtight.
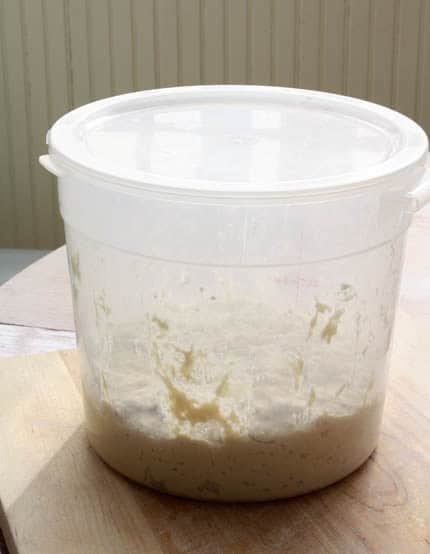
If you’re using a bowl, cover it loosely with plastic wrap. Towels don’t work as they stick to this very wet dough. Set the container on the counter and allow the dough to rise at room temperature until it starts to collapse (flatten on top), about 2 hours. Just walk away and let it rise.
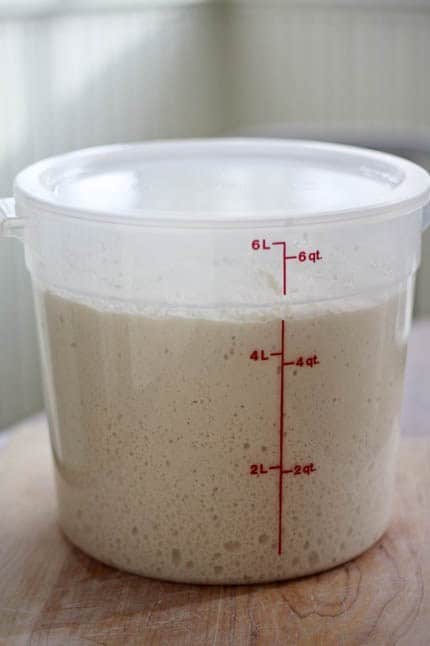
Next, without punching it down, move the container to the refrigerator. Leave the lid in place (slightly cracked) and keep refrigerated, to be used over the next 14 days.
Baking Day
Prepare a pizza peel by dusting it generously with cornmeal and/or flour; or cover with a piece of parchment paper. Set aside.
Move the container of dough from the refrigerator to the counter and dust the top of the dough with flour while the dough remains in the container.
Now, pull up and cut off a 1-pound hunk of dough (grapefruit size) and set on a floured work surface. Move the container back to the refrigerator.
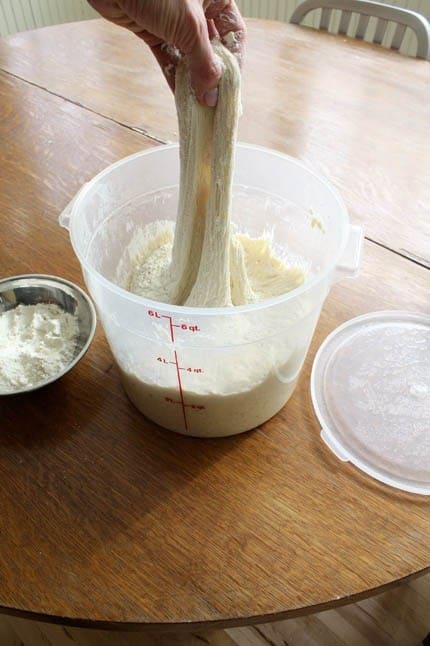
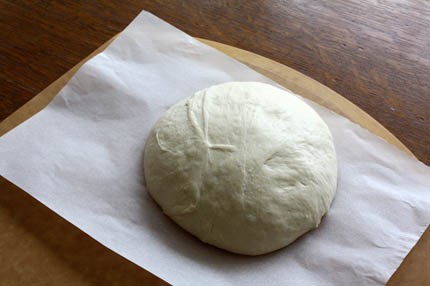
Dust your hands with flour. Gently stretch the surface of the piece of dough around to the bottom, rotating the ball a quarter-turn as you go. Dusting flour will mostly fall off and that’s OK.
The correctly shaped loaf will be smooth on the top with the bottom looking like a collection of bunched-up ends. Good. This process should take less than one minute. Set the loaf on the prepared pizza peel to rest for about 40 minutes. It will become wider but not necessarily taller. Also correct.
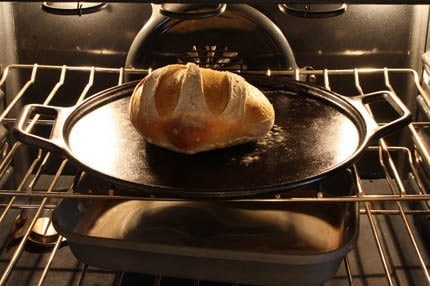
Preheat baking stone, set on a rack near the middle of the oven, to 450F, at least 30 minutes before baking. (I have two baking stones—love them both!—the one pictured below is cast iron.)
Place an empty metal broiler tray, or similar (but not glass), for holding water on any oven shelf that won’t interfere with the bread rising while baking. Set a cup of water within easy reach of the oven. Relax while the dough rests and the baking stone gets sizzling hot.
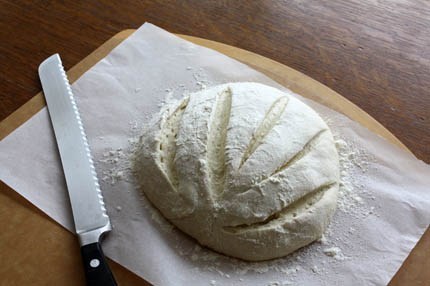
After 40 minutes or so, liberally dust the top of the dough with flour. Using a sharp knife or kitchen shears, slash 1/2-inch cuts into the dough in any design you like. Just make sure you make at least four deep cuts. Leave the flour in place for baking. You can tap it off later, before eating.
Slide the loaf (including the parchment paper it’s sitting on if using) onto the hot baking stone. Quickly but carefully pour the water from the top into the broiler tray and close the oven quickly. This will create a burst of steam.
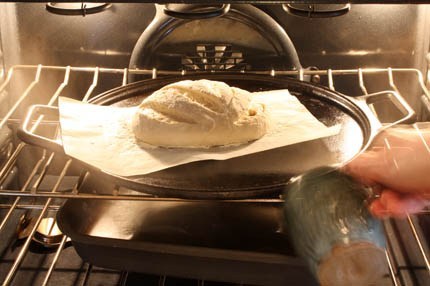
Bake for 30 to 35 minutes, or until the internal temperature of the loaf, measured with an instant-read thermometer, reads anywhere from 205F to 210F.
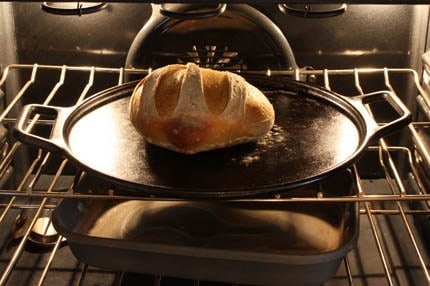
Use the pizza peel to remove the loaf to a cooling rack. Admire your work. Wait for two hours (if you can) before slicing into fresh bread. This gives it time to cool inside and at the same time fully develop its flavors.
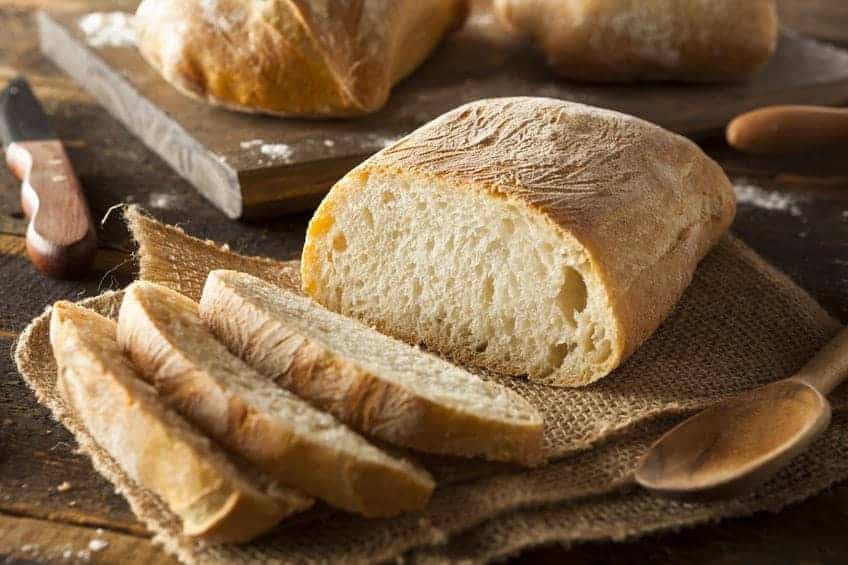
Store the remaining dough in the refrigerator for up to 14 days. One batch using this recipe should make four loaves, slightly less than one pound each. This recipe can be halved, doubled, or tripled depending on the size of the dough container you have available.
10 Things I Wish I’d Put into My Books
The following just in from Jeff Hertzberg, author of Artisan Bread in Five Minutes a Day:
“It’s been 17 years since I published my first bread cookbook, meaning I’ve spent more than 17 years learning, tweaking, experimenting with, and obsessing about bread. I included many of those discoveries and realizations in the next seven books, but needless to say I’ve thought a lot about what I’d do differently if I had it to do all over again. As author James McBride once said, “If I had known so many people were going to read that book, I would’ve written a better book.” Just kidding—I still stand by my original recipes, tips, and techniques. But if I knew then what I know now, read HERE what I would’ve included …
Tools and Resources
While 5-Minute Artisan Bread can be made using the tools and equipment most of us have already, we all know that using the right tools for the right job makes any job easier and produces the best results.
Here are some of the “right tools” I have acquired over the years and use to make 5-Minute Artisan Bread.
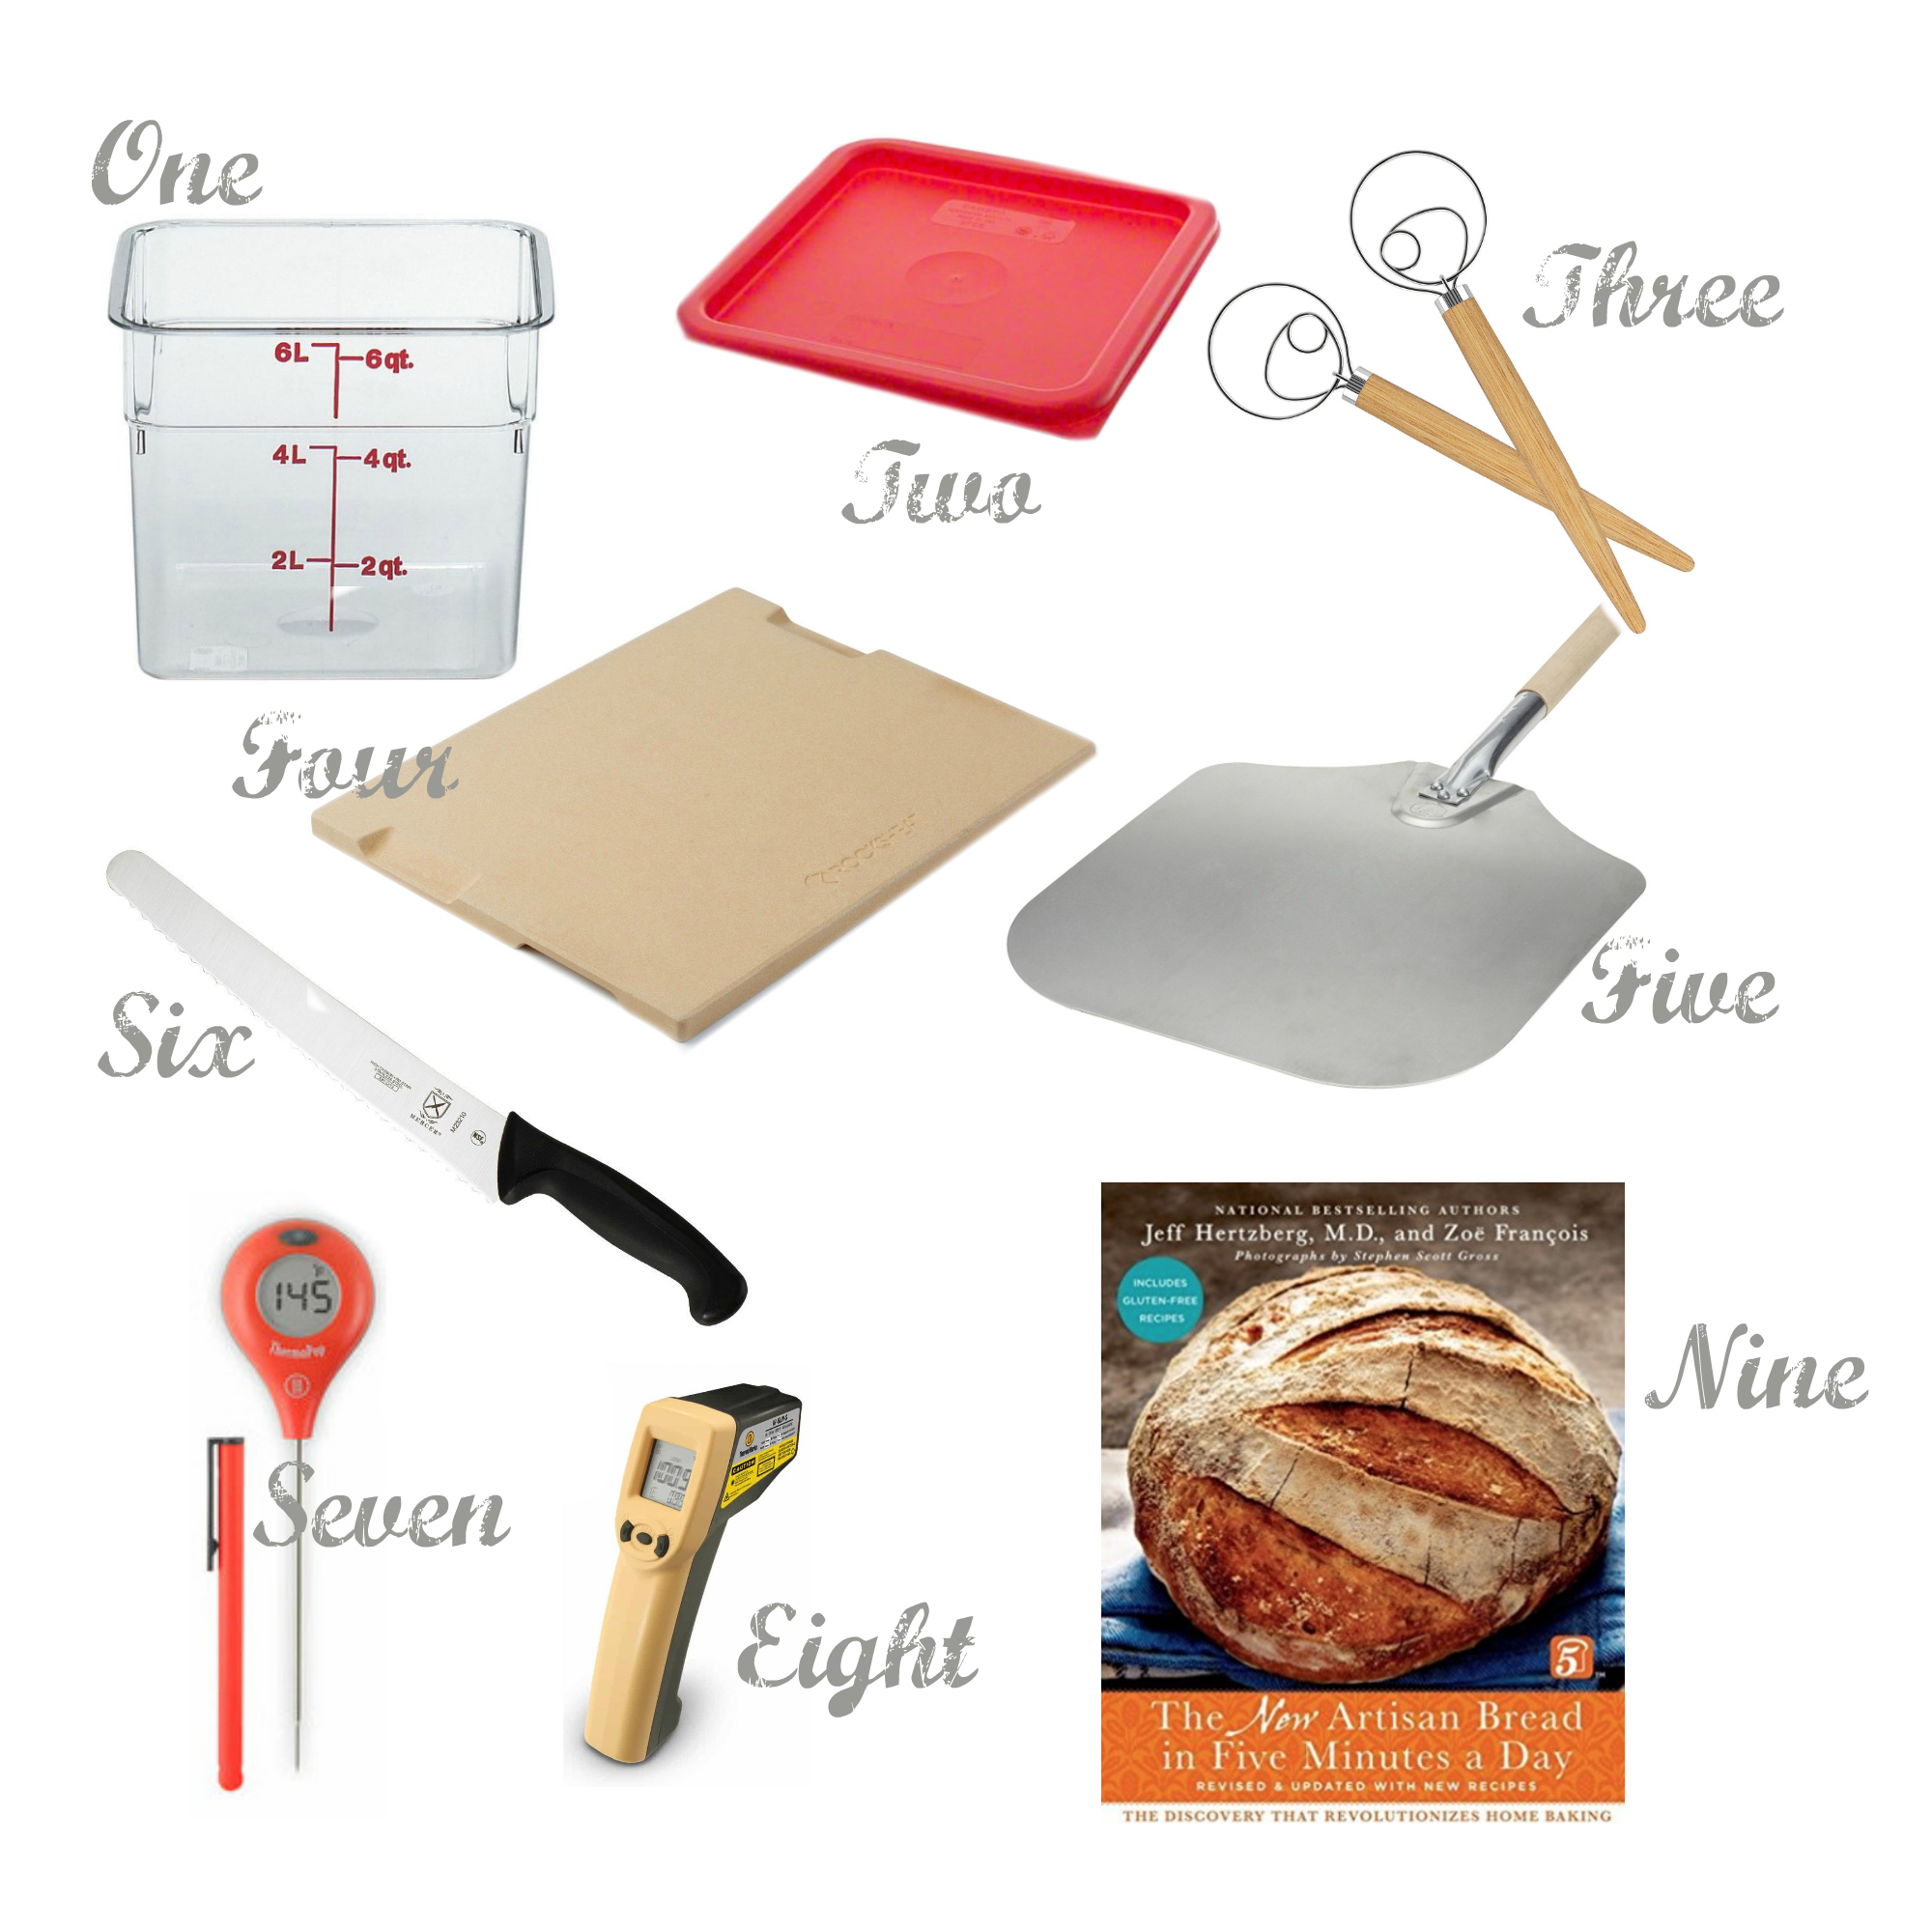
1. Dough container
While I have several containers of different shapes and sizes, this Cambro 6-qt Clear Polycarbonate Square Food Container with Lid is absolutely ideal for five-minute artisan bread dough. It will hold a double batch and is dishwasher safe. I like that it’s clear so I can see what’s going on inside. And being square, it fits well in the refrigerator. Caution: Sometimes this container comes with the lid, most often it does not. Check carefully!

2. Container Lid
This is the lid If your Cambro-type container does not have a lid (it used to require a separate purchase) this fits the 6-qt. Cambro food container. It fits snugly but can be loosened by simply not attaching one of the corners. Double-check. You don’t want to end up with no lid, nor do you want two lids!

Use-what-you-have: You can use any large food-grade container; even a plastic bucket that has a lid will work or a large bowl with plastic wrap, provided it will fit in the refrigerator.
3. Dough whisk
This dough whisk is such an awesome tool. There’s something about the design and the way the whisk part is shaped that makes mixing bread dough by hand a breeze.

Use-what-you-have: A long-handled wooden spoon will work to get the job done. Just make sure everything is evenly “wet” before you put the lid on the container and set it out for that first rise.
4. Baking stone
Also called a pizza stone, this is the secret to baking fabulous artisan bread. It makes the bottom crust crisp and heats the dough evenly. I’ve cracked so many baking stones in my life in an attempt to get the thing hot enough, so I was leery to give this highly rated Rocksheat Baking and Grilling Stone a try. But I’m glad I did because it’s all it’s, well … cracked up to be! A beautiful product that really delivers. Currently available in the round option. I also use and enjoy my cast iron baking stone.
Use-what-you-have: You can rest the formed loaf on a baking sheet prepared with butter, parchment paper, or a silicone mat. Then just place the baking sheet on the oven rack when ready to bake without heating it in the oven prior to adding the dough. You results will vary.

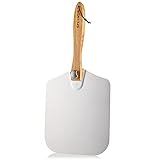
5. Pizza peel
This giant “spatula” known as a pizza peel is so useful for baking bread! First, you use it to slide the oven-readied dough into the screaming hot oven and onto the baking stone; then use it to reach in and retrieve that finished beautiful loaf of bread. I store mine on top of the refrigerator which puts it out of sight for all but the tall.
Use-what-you-have: Parchment paper works. Either flour the paper well and add a generous amount of cornmeal so you can actually slide the dough off the paper, or set the dough—paper and all onto the oven rack. Just make sure you remove the parchment paper after 20 mins. of baking so the bottom of the bread can get crisp. Warning: this method is tricky.
6. Bread knife
Your first loaf of artisan bread is going to scream “good bread knife please!” Done well, that bread will have a very crisp crust. A typical chef’s knife will simply tear it up. A typical serrated knife should be better, but not be sharp enough to give you the control needed for beautiful results. This Mercer Culinary Millennia 10-Inch Wide Bread Knife is not only the best bread knife out there (my opinion, but you can trust me on this), it’s an amazing knife at an unbelievable price. Use it for bread only and never put it in the dishwasher.
Use-what-you-have: If you have a bread knife, use it. If not, use the sharpest knife available to cut your finished loaf.

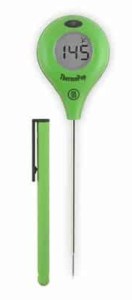
7. Instant-read thermometer
You’ll want to eventually get a highly-rated, reliable thermometer (most out there are so unreliable it hurts). Thermoworks ThermoPop fits the bill. Replaceable lithium battery.
Use-what-you-have: Any food thermometer will give you an idea of the correct temperature. Probably better than guessing, although a precise thermometer is ideal.
8. Infrared thermometer
Soon you are going to want to know the exact temperature of your preheated oven and the temperature of the baking stone surface. Jeff and Zoë estimate that most home ovens are “off” by as much as 75 degrees. You need a precise oven temp to make the best bread. An infrared thermometer gun (NOT for body temperature) is without a doubt the way to go.

9. The Book
In 2013, Jeff and Zoë released the completely updated and expanded (with color photos), The New Artisan Bread in Five Minutes a Day. I donated my original edition to the library as I didn’t need both. But I need this new one desperately.
Not only does it have so many ways to use this versatile dough to make homemade bread (amazing recipes), it has tips and tricks galore.
For example, I live at 5,280 feet above sea level. That changes the way my bread turns out. But no worries. Jeff and Zoë have included detailed instructions for how to adjust the recipe using more water, less yeast, and bread flour in place of all-purpose flour, to accommodate those of us who live way up high in the shadow of the Rocky Mountains. Hey, someone needs to live here!
Really, this is a beautiful textbook for every 5-minute homemade bread baker. Your long-term success depends on it.

First published 2007; Updated Again! & Republished by popular demand: 04-18-24
Everyday Cheapskate participates in the Amazon Services LLC Associates Program, an affiliate advertising program designed to provide a means for us to earn fees by linking to Amazon affiliate, with no cost to you.
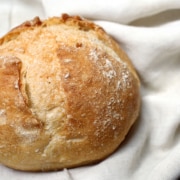
Homemade Artisan French Bread
Ingredients
- 3 cups lukewarm water 100 F or below
- 1 tablespoon granulated yeast (0.35 oz.; 10 grams)
- 1 to 1½ tablespoon Kosher salt (0.6 to 0.9 oz.; 17 to 25 grams)
- 6½ cups all-purpose flour (2 lbs.; 910 grams)
- cornmeal or parchment paper for the pizza peel
Instructions
- Warm the water slightly. It should feel just slightly warmer than body temperature or about 100 F.
- Add the warm water to a 6-quart bowl or preferably lidded container. (If you don't have a lid, you can use plastic wrap instead.)
- Add yeast and salt to the water and stir to mix. Don't worry about getting it all to dissolve.
- Add all the flour at once. Using a large wooden spoon or “dough whisk,” mix to incorporate but don’t worry about getting it to dissolve completely.
- Cover with a lid that fits well to the container but can be cracked open so it's not completely airtight. Or cover loosely with plastic wrap.
- Allow to rise on the counter at room temperature until it begins to collapse (or at least flattens on top), about 2 hours.
- Leaving the cover slightly ajar, set container in the refrigerator, where it can remain ready to use for up to 14 days. Do not punch down this dough.
- On baking day set baking stone on lower oven rack and preheat oven to 450F.
- Prepare pizza peel or baking sheet with cornmeal or parchment paper to prevent your loaf from sticking, and so that you can slide it onto the baking stone.
- Set the loaf on the pizza peel and allow it to rest uncovered and rise for about 40 minutes.
- Place an empty metal broiler tray or another pan (NOT GLASS!) for holding water on any oven rack that won't interfere with the bread.
- Carefully, slide the dough from the peel onto the preheated baking stone (or baking sheet if you do not have a baking stone). Bake for about 30 minutes (use a food thermometer to check internal temp, which should be at least 195 F., or as dark as you prefer.
- Remove from the oven to a cooling rack. For best results, allow cooling fully for 2 hours before serving. It's not easy to wait, but this will make all the difference in texture and taste.
- Yield: This dough will yield about four 1-pound loaves.
- Store the remaining dough in the refrigerator with lid attached loosely. The dough will remain useful for up to 14 days. And expect the flavor to develop and improve during this time!
- When your dough bucket is finally empty, or nearly, it's time to make more dough. Don't clean or wash the bucket. The aged dough that remains on the sides of the container will give your new batch a head start on sourdough flavor!
Nutrition
Photo credits: ArtisanBreadinFive.com

More from Everyday Cheapskate
 https://www.everydaycheapskate.com/wp-content/uploads/20261016-Crispy-potato-cakes-made-with-leftover-mashed-potatoes.png
800
1200
Mary Hunt
https://www.everydaycheapskate.com/wp-content/uploads/EC-Logo-by-Mary-Hunt-Tagline-Trimmed.png
Mary Hunt2026-10-16 15:54:382026-10-16 15:54:38Got Leftover Mashed Potatoes? Try These 5 Smart Ideas
https://www.everydaycheapskate.com/wp-content/uploads/20261016-Crispy-potato-cakes-made-with-leftover-mashed-potatoes.png
800
1200
Mary Hunt
https://www.everydaycheapskate.com/wp-content/uploads/EC-Logo-by-Mary-Hunt-Tagline-Trimmed.png
Mary Hunt2026-10-16 15:54:382026-10-16 15:54:38Got Leftover Mashed Potatoes? Try These 5 Smart Ideas https://www.everydaycheapskate.com/wp-content/uploads/20261015-Sweet-pepper-and-onion-relish-in-a-white-bowl-with-crackers-and-fresh-red-bell-peppers.png
800
1200
Mary Hunt
https://www.everydaycheapskate.com/wp-content/uploads/EC-Logo-by-Mary-Hunt-Tagline-Trimmed.png
Mary Hunt2026-10-15 13:14:022026-10-15 13:14:02Sweet Pepper Onion Relish (Perfect Over Cream Cheese)
https://www.everydaycheapskate.com/wp-content/uploads/20261015-Sweet-pepper-and-onion-relish-in-a-white-bowl-with-crackers-and-fresh-red-bell-peppers.png
800
1200
Mary Hunt
https://www.everydaycheapskate.com/wp-content/uploads/EC-Logo-by-Mary-Hunt-Tagline-Trimmed.png
Mary Hunt2026-10-15 13:14:022026-10-15 13:14:02Sweet Pepper Onion Relish (Perfect Over Cream Cheese) https://www.everydaycheapskate.com/wp-content/uploads/20261012-Woman-using-smartphone-while-checking-monthly-cellular-data-usage-on-laptop.png
800
1200
Mary Hunt
https://www.everydaycheapskate.com/wp-content/uploads/EC-Logo-by-Mary-Hunt-Tagline-Trimmed.png
Mary Hunt2026-10-12 10:51:112026-10-12 10:51:11Do You Really Need Unlimited Data? Check Before You Pay
https://www.everydaycheapskate.com/wp-content/uploads/20261012-Woman-using-smartphone-while-checking-monthly-cellular-data-usage-on-laptop.png
800
1200
Mary Hunt
https://www.everydaycheapskate.com/wp-content/uploads/EC-Logo-by-Mary-Hunt-Tagline-Trimmed.png
Mary Hunt2026-10-12 10:51:112026-10-12 10:51:11Do You Really Need Unlimited Data? Check Before You Pay https://www.everydaycheapskate.com/wp-content/uploads/20261011-Woman-Adjusting-Smart-Home-Device-on-the-Wall-how-to-lower-your-electric-bill.png
800
1200
Mary Hunt
https://www.everydaycheapskate.com/wp-content/uploads/EC-Logo-by-Mary-Hunt-Tagline-Trimmed.png
Mary Hunt2026-10-11 23:01:562026-10-11 23:01:56Stop Chasing Pennies on Your Electric Bill. Do This
https://www.everydaycheapskate.com/wp-content/uploads/20261011-Woman-Adjusting-Smart-Home-Device-on-the-Wall-how-to-lower-your-electric-bill.png
800
1200
Mary Hunt
https://www.everydaycheapskate.com/wp-content/uploads/EC-Logo-by-Mary-Hunt-Tagline-Trimmed.png
Mary Hunt2026-10-11 23:01:562026-10-11 23:01:56Stop Chasing Pennies on Your Electric Bill. Do This https://www.everydaycheapskate.com/wp-content/uploads/20261007-red-present-sitting-in-autumn-leaves-Amazon-Prime-Big-Deal-Days-gifts.png
800
1200
Mary Hunt
https://www.everydaycheapskate.com/wp-content/uploads/EC-Logo-by-Mary-Hunt-Tagline-Trimmed.png
Mary Hunt2026-10-06 23:09:432026-10-06 23:09:43Christmas Shopping in October? These Prime Day Gifts Make Sense
https://www.everydaycheapskate.com/wp-content/uploads/20261007-red-present-sitting-in-autumn-leaves-Amazon-Prime-Big-Deal-Days-gifts.png
800
1200
Mary Hunt
https://www.everydaycheapskate.com/wp-content/uploads/EC-Logo-by-Mary-Hunt-Tagline-Trimmed.png
Mary Hunt2026-10-06 23:09:432026-10-06 23:09:43Christmas Shopping in October? These Prime Day Gifts Make Sense https://www.everydaycheapskate.com/wp-content/uploads/20261006-prime-big-deal-days-have-landed.png
800
1200
Mary Hunt
https://www.everydaycheapskate.com/wp-content/uploads/EC-Logo-by-Mary-Hunt-Tagline-Trimmed.png
Mary Hunt2026-10-05 11:01:432026-10-07 09:02:53EC’s Top Picks from Amazon Prime Big Deal Days 2026
https://www.everydaycheapskate.com/wp-content/uploads/20261006-prime-big-deal-days-have-landed.png
800
1200
Mary Hunt
https://www.everydaycheapskate.com/wp-content/uploads/EC-Logo-by-Mary-Hunt-Tagline-Trimmed.png
Mary Hunt2026-10-05 11:01:432026-10-07 09:02:53EC’s Top Picks from Amazon Prime Big Deal Days 2026 https://www.everydaycheapskate.com/wp-content/uploads/20261004-reduce-healthcare-costs-with-three-habits-healthy-couple-walking-in-autumn-leaves.png
800
1200
Mary Hunt
https://www.everydaycheapskate.com/wp-content/uploads/EC-Logo-by-Mary-Hunt-Tagline-Trimmed.png
Mary Hunt2026-10-04 23:08:572026-10-04 23:09:47How to Reduce Healthcare Costs With 3 Free Daily Habits
https://www.everydaycheapskate.com/wp-content/uploads/20261004-reduce-healthcare-costs-with-three-habits-healthy-couple-walking-in-autumn-leaves.png
800
1200
Mary Hunt
https://www.everydaycheapskate.com/wp-content/uploads/EC-Logo-by-Mary-Hunt-Tagline-Trimmed.png
Mary Hunt2026-10-04 23:08:572026-10-04 23:09:47How to Reduce Healthcare Costs With 3 Free Daily Habits https://www.everydaycheapskate.com/wp-content/uploads/20241004-news-you-can-use-october-everyday-cheapskate-top-news-articles.png
800
1200
Mary Hunt
https://www.everydaycheapskate.com/wp-content/uploads/EC-Logo-by-Mary-Hunt-Tagline-Trimmed.png
Mary Hunt2026-10-04 01:04:052026-10-19 09:46:10News You Can Use • October 2026
https://www.everydaycheapskate.com/wp-content/uploads/20241004-news-you-can-use-october-everyday-cheapskate-top-news-articles.png
800
1200
Mary Hunt
https://www.everydaycheapskate.com/wp-content/uploads/EC-Logo-by-Mary-Hunt-Tagline-Trimmed.png
Mary Hunt2026-10-04 01:04:052026-10-19 09:46:10News You Can Use • October 2026 https://www.everydaycheapskate.com/wp-content/uploads/20261003-woman-hugging-elderly-mother-sandwich-generation-caring-for-aging-parents.png
800
1200
Mary Hunt
https://www.everydaycheapskate.com/wp-content/uploads/EC-Logo-by-Mary-Hunt-Tagline-Trimmed.png
Mary Hunt2026-10-03 10:47:222026-10-03 10:47:25Sandwiched Between Aging Parents and Adult Children
https://www.everydaycheapskate.com/wp-content/uploads/20261003-woman-hugging-elderly-mother-sandwich-generation-caring-for-aging-parents.png
800
1200
Mary Hunt
https://www.everydaycheapskate.com/wp-content/uploads/EC-Logo-by-Mary-Hunt-Tagline-Trimmed.png
Mary Hunt2026-10-03 10:47:222026-10-03 10:47:25Sandwiched Between Aging Parents and Adult ChildrenPlease keep your comments positive, encouraging, helpful, brief,
and on-topic in keeping with EC Commenting Guidelines
Last update on 2026-10-19 / Affiliate links / Images from Amazon Product Advertising API


Thanks for the great recipe and detailed explanation. I do have one question, though. When I cold ferment my pizza dough, it’s always advised not to keep it more than 5 days, or else the dough will grow progressively sour. Does that not happen with this dough over 15 days of keeping it (in the fridge)?
Thanks!
It shouldn’t be a problem if you follow this recipe and storage instructions. Enjoy!
Game changer when I (often) make this recipe. Instead of using the water, quickly toss ice cubes into the bottom of the oven just as you shut the door. Depending on how many loaves I’m baking at a time, I usually use 12 or more. Instant steam!
Can this recipe be used for gluten free bread as well by exchanging flour?
The authors of Artisan Bread in Five Minutes have a gluten-free option in a subsequent book. With their permission I will add that to the post. Check back in a bit!
How can this be called bread in 5 minutes. I eyeballed the time fragments and it added up to almost 4 hours from start to finish first time. Then it seems like the next time you have to let it rise and heat up the oven too for 30 minutes plus the baking time. definitely more than 5 minutes. Am I missing something?
The authors and creators of the technique explain that once you have that dough in the fridge, it takes about 5 mins active effort get a loaf into the oven.
I made this bread in Reno,NV at 5,300 ft. I was a bit worried that the altitude would effect the result, but it perfect and with so little effort. Can’t wait to make another batch.
Looks wonderful. Wish I wasn’t celiac. I miss bread after finding out how allergic to wheat I am. Growing up in a Sicilian family I have had to find recipes for everything familiar to me. Haven’t found a good gluten free bread recipe so I wonder if I can substitute gluten free flour mix for this one? And at $8 to $10 for a little loaf is not feasible for me. Any suggestions?
The book referenced in the post (#9 The Book) contains a number of gluten-free options complete with specific instructions and tips! Yes, you can make artisan bread gluten-free!
Here it is: The New Artisan Bread in Five Minutes a Day
What temperature should the oven be? Any suggestions on baking if I don’t have a peel or a baking stone?
I also wanted to ask if the missing parts of the recipe can be added. There seems to be steps missing in the baking section.
Fixed.
You can use any baking sheet. The results will vary, but I have done this is great success. Rather than greasing that sheet, using a piece of parchment paper (add the sheet right before you set the loaf on it, rather than allowing it to sit on the sheet during preheat).
What temp should the oven be?
450 F, bake for 30 mins.
Several steps were left out of instructions after adding the warm water. I’m familiar with bread baking so I know what comes next. I’m not sure a novice would know.
The Master Recipe and instructions are taken exactly as presented in Artisan Bread in Five Minutes a Day, authors Jeff Hertzberg, M.D. and Zoë Franḉois. I have followed this exactly for many years now. Turns out perfectly ever time. I invite you to offer your additional instructions, with the clear understanding that they do not come from Jeff and Zoe.
There are steps missing in the recipe atvthe bottom and the printed one
It has been fixed!
Has anyone tried this recipe with whole wheat flour (or partial whole wheat)? I’d love to know how turned out!
I’m taking your breadmaking challenge. BTW, on your recommendation, I bought the dough whisk for something else. It is a wonderful tool and very versatile. I like using it with cookies, because it doesn’t break the chocolate chips.
I’ve been making this bread for a few years now, and also love it. However, we have mostly stopped using white flour in any product, and try to only use 100% whole wheat. Luckily for us, there’s a recipe for this bread in the book linked in the post using 100% whole wheat flour! I use white whole wheat (I prefer Wheat Montana’s Prairie Gold wheat berries) that I buy and grind as needed. I also bought the Danish dough whisk from someone’s recommendation shortly after I started making these breads and it’s so much easier than a spoon. There are many recipes for no-knead breads out there-King Arthur Flour/Baking Company has a No-Knead Harvest Bread recipe that is delicious, but does use both bread flour and wheat flour, so I don’t make that too often anymore. No-knead bread is an easy bread, anyone can make it, and it’s well worth making, no matter which recipe you use. It’s also a good bread to get your feet wet on if you want to start making bread, but are new to the process.
This bread helped get us through the Covid lockdown and keep everyone happy. I had my church group over this week, made all four loaves, and there was not a crumb left. I love, love, love this bread. (But we can’t wait two hours to eat it – we like it warm straight from the oven with lots of butter.)
LOVE this. I sometimes only make half and can make 3 small baguettes for just the two of us. So quick and easy. Ive used the other recipes for artisan bread and this one tastes better to us. Has anyone used it for making pizza??? Think I’ll try it today.
Can rapid yeast be used
Hi Mary,
I love your column and read it daily. This bread looks
wonderful. I am on a gluten free diet. Do you think gluten
free flour could be used?
Mary my husband has memory issues because of a concussion. The Dr we went to told us preservatives in our food is really bad for the brain. Bread was at the top of the list. Saw your post about the 5 minutes a day now make all our bread. Would not buy bread ever again
But what happens to the parchment paper, I think it would burn?
The parchment paper will turn a deep beige, but not burn. I use a similar recipe with a pre-heated dutch oven lined with parchment paper, also 450 degrees to heat the pan and to cook. Parchment paper has not burned.
Can I make crusty rolls by cutting off smaller pieces?
Hey man! Great post but I really wanted to just ask about your blog. Is this wordpress by chance? I really like the design.
Yes, it is.
I too have made this and truly no fail. Delicious and really impresses those you gift it too.
Easy to make and really good. I used the pans and containers I had on hand, and the result was still amazing.
Hi! If you use self rising flour, can you get away with not using yeast?
Thank you,
Janie
No, I would not recommend that. If you are unable to use yeast, consider a no-yeast bread recipe I added to one of the comments below. Check that out!
Mary, after reading about the book in Everyday Cheapskate several years ago, I ordered one and have never looked back! Having that dough in my fridge, ready to go is a godsend (especially now in the midst of this pandemic). We had a couple of weeks where commercial bread could not be found on grocery shelves in our area and I was able to supply friends & neighbors with bread & rolls, what a blessing!
That is awesome, Becky! It is one of the best baking things I’ve ever learned. Fresh, homemade bread never grows old 🙂
A sour dough recipe would be great, too.
I’m working on this. Making sourdough from scratch is quite an art! But I’m making super progress so hang on little while longer 🙂
MARY, NO ‘THAT’ IS THE BREAD I WOULD LOVE TO MAKE FROM SCRATCH….LOVE IT!
Mary, in these hoarding days, most of us cannot find yeast anywhere. Could you offer a basic quick bread or batter bread recipe? Love your emails, use your advice all the time!!
Teresa in Arizona
Hi Teresa … Good suggestion! And yes yeast seems to be in very short supply. However, I was able to order SAF from Amazon yesterday, and at a decent price. And my supermarket has it in stock, too, so don’t lose heart.
In the meantime, here is my favorite no-yeast bread recipe. It is quite amazing. If you try it, let us know how that goes!
No-Yeast Bread
4 cups all-purpose flour
1 tablespoon sugar, double this amount if desired
1 1/2 teaspoon baking powder
1 1/2 teaspoon baking soda
1 1/2 cup water, room temperature
2 teaspoons vinegar (cider or white)
1 tablespoon butter, melted
Preheat the oven to 400 degrees F.
In a bowl, stir together the flour, sugar, baking powder, and baking soda. In a 2-cup measuring cup, combine the water and vinegar. While stirring, add the water mixture to the flour mixture. Stir the mixture until a dough forms.
Turn the dough out onto a floured surface. Knead the dough for 2-3 minutes to make sure all the ingredients are incorporated.
Shape the dough into a flat, round disk no more than 1 1/2 inches high. Place the dough on a baking sheet or pizza pan. Dip a sharp knife into flour then cut an “X” or “#” on top of the loaf.
Place the pan in the oven and bake at 400 degrees F for 30-40 minutes or until golden brown and the crust is firm. If desired—and I highly recommend it—brush the top of the loaf with milk halfway through the baking time for a softer crust.
When the bread is done, remove it from the oven and while still hot brush it with the melted butter. The butter adds flavor as well as softens the crust.
Don’t know what I did wrong but the big wet mess of ‘never turned into dough’ just went in the trash 🙁
Hard to say without details i.e., did you measure or weigh the flour? Did you measure or eyeball the water? At what point did you declare this a fail? Do you live in a humid area? Did you consider adding a bit more flour? It’s not an exact science … and adding more flour or more water depending on the situation will do wonders!
I make this all the time- plain, cheese, herb. sprinkle w/ bagel seasoning, sesame and/or poppy seeds etc. Per Zoe and Jeff (and how I do it mostly) IF you want to use your kitchen aid mixer use the paddle (not the dough hook). Also you can bake it in a dutch oven. Make sure your knob is stainless steel (NOT plastic). Use 5+quart dutch oven. Preheat the pot with the lid on to 500°F for about 20 minutes. By following recipe Mary posted, #15: pick up the parchment paper with slashed dough on it and CAREFULLY set it in HOT dutch oven. Cover and put in oven for 15 minutes. Remove cover, lower temperature to 450 and bake for 15-20 minutes based on size. Cool as stated in #18 above
And yes, that works really well, too!