
The Surprising Joy of Home Canning You’ll Love


Remember when your grandma lined her pantry shelves with rows of sparkling jars, each one filled with jam, tomatoes, or pickles? Well, you can do that too (minus the apron with ruffles, unless that’s your thing). Home canning is making a comeback, and for good reason: it saves money, cuts waste, and keeps summer flavors alive through the winter. Whether you’re brand-new or just rusty, I’ve got step-by-step tips and beginner-friendly recipes you’ll love. Ready to give it a try?

Key Points
- Home canning is making a comeback—saving money, reducing food waste, and preserving peak flavor year-round.
- Water bath canning is a simple, beginner-friendly method for high-acid foods like jams, pickles, and tomatoes.
- With the right tools and tested recipes, anyone can safely stock a pantry full of shelf-stable, homemade goodness.
So, you planted a garden, lucked out with a backyard fruit tree, scored big at a produce sale, or joined a CSA. Fantastic! But now you’re looking at baskets of peaches, piles of tomatoes, or cucumbers galore and thinking, okay… now what?
You’ve got options:
- Eat your way through the harvest before it spoils;
- Share the bounty with friends and neighbors;
- Or, my personal favorite, preserve it so you can enjoy the flavors of summer in the middle of January. Bonus: homemade gifts straight from your pantry shelves.
That’s where home canning comes in. Specifically, water bath canning—a simple preservation method that’s enjoying a serious comeback. It’s not complicated, but it does require a step-by-step process to make sure everything stays safe and delicious. You’ll start by sterilizing jars, then filling them with your jam, salsa, or fruit, and finally giving them a second boil to lock in freshness.
Here’s why it works: the heat-processing creates a tight seal that keeps air and unwanted microorganisms out while killing off anything that might spoil your food. Think of it as nature’s pause button. You’re stopping bacteria, yeast, and mold in their tracks while preserving peak flavor.
And the payoff? Rows of gleaming jars that let you relive summer long after the garden’s gone dormant. A little time now means tomato soup that actually tastes like tomatoes in January, or a spoonful of peach jam that transports you right back to July.
If you’re new to canning, start simple: fruits, jams, pickles, and tomatoes. These high-acid foods don’t require a pressure canner and are nearly foolproof for beginners. Add in a few basic tools and your favorite fresh produce, and you’ll be amazed at how quickly you’ll feel like a pantry pro.
Essential Canning Equipment for Beginners
With just a handful of tools, you’ll be ready to turn fresh produce into shelf-stable jars of goodness. Here’s what you’ll need:
New Canning Jars

Ball Wide Mouth Mason Jars 16 oz. (12 Pack)
Skip the old pickle jars you’ve been saving (tempting, I know). For safe canning, you need tempered jars designed specifically for the job. These come with two-piece lids and are built to withstand the repeated heating and cooling of the canning process. The best part? You can reuse the jars for years. Just replace the lids each season. Look for Ball or Kerr jars at supermarkets, hardware stores, or big-box stores like Walmart and Target.
Large Covered Water Bath Canner

Prep•N•Cook by McSunley 21.5Qt Induction Stainless Steel Water Bath Canner
A proper canner is deep enough to submerge jars with at least an inch of water over the top. Most come with a rack to keep jars off the direct heat at the bottom, but here’s a hack: if you’ve got a tall stockpot, you can improvise with a round wire cooling rack.
Jar Lifter

PrepWorks Spring Loaded Jar Lifter
Sure, you could try to wrestle hot jars out with regular tongs, but trust me, you don’t want to. A jar lifter grips the jars securely, keeping your hands away from boiling water.
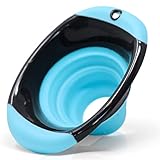
Wide-Mouth Canning Funnel

Collapsible Silicone Food Funnel for Mason Jars
A wide-mouth funnel helps you ladle jam, fruit, or salsa neatly into jars without drips or burns. It’s one of those small things that saves your sanity makes you feel like a pro.
Non-Metallic Spatula

11 inch Silicone Spatulas, 4 Pack
Air bubbles love to hide in your jars, and this tool helps you release them before sealing. If you don’t have a spatula, a plastic knife or even a chopstick works perfectly.
Linens

Bumble Soft Highly Absorbent Kitchen Dish Cloths
Keep a clean dishcloth handy for wiping rims. This ensures a tight seal. You’ll also want a thick dish towel or absorbent mat to set hot jars on as they cool.
Step-by-Step Guide to Water Bath Canning

Canning may feel like a big project, but once you’ve done it, you’ll wonder why you waited so long. Follow these steps in order, and you’ll end up with safe, sealed jars you can enjoy for months to come.
1. Wash Your Equipment
Start fresh: wash jars, lids, and screw bands in hot, soapy water. Rinse well and drain.
2. Sterilize the Jars, Lids, and Rings
Place jars and lids in a large pot of water and bring it to a boil for 10 minutes. Turn the heat to low and keep jars hot until you’re ready to fill them.
Skip the “creative recycling” here. That old mayo jar might be great for leftovers, but it won’t give you a reliable seal for canning. Stick to proper canning jars with two-piece lids. They’re designed to keep your food safe.
3. Make the Recipe
Use a tested canning recipe (like the ones below or from trusted sources). For your first try, start with jam or fruit in syrup—high-acid foods are beginner-friendly and almost foolproof.
4. Remove the Jars from the Pot
Carefully lift out a hot jar (empty the water back into the pot so it’s ready for later). Place it on a cutting board or towel—never straight on a cold counter, which can crack glass.
5. Fill the Jars
Set your funnel in the jar opening. Ladle in your prepared food, leaving the headspace your recipe calls for (usually ¼ to ½ inch).
6. Release Air Bubbles
Slide a sterilized, non-metal tool (like a spatula or chopstick) along the inside edge to release trapped air. This helps ensure a proper seal.
7. Clean the Rims
Wipe jar rims and threads with a damp cloth. Even a tiny bit of food can keep the lid from sealing properly.
8. Apply Lids and Rings
With tongs, place a hot lid on each jar and screw the ring on until it’s finger-tight. Don’t crank down too hard. The ring’s job is just to hold the lid in place while sealing.
9. Process the Jars
Return filled jars to the pot, making sure they’re covered by at least 1 inch of water. Cover, bring to a rapid boil, and process for the time your recipe specifies. Keep the boil rolling the entire time.
10. Cool the Jars
Turn off the heat. Remove the lid and let jars sit in the water for 5 minutes before lifting them out. Place on a towel to cool for 24 hours.
11. Test for Seals
Check lids: they should be slightly concave and not spring back when pressed. Any that didn’t seal? No problem. Reprocess them right away or refrigerate and enjoy within a few days.
12. Label and Store
Mark jars with the contents and date. Store in a cool, dark, dry place for up to a year.
Delicious Home Canning Recipes to Try
Once you’ve got the basics down, it’s time for the fun part… choosing what to can! Here are two tried-and-true favorites that make fantastic first projects.
Blushing Peach Jam

A dreamy mix of peaches and raspberries with just a whisper of almond. This jam is as pretty as it is delicious: bright, sweet, and just a little tangy. Slather it on a warm biscuit in January and suddenly summer doesn’t feel so far away.
Why you’ll love it:
- Beginner-friendly and almost foolproof.
- Gorgeous color (perfect for gifting).
- A little almond extract gives it a flavor boost that tastes gourmet.
Get the full Blushing Peach Jam recipe here →
Caramel Apple Jam

Imagine apple pie filling meets caramel sauce. That’s this jam. It’s cozy, spiced, and addictive. Spread it on toast, swirl it into oatmeal, or warm it slightly and drizzle it over vanilla ice cream. Instant fall in a jar.
Why you’ll love it:
- Uses everyday ingredients you probably already have.
- Doubles as a dessert topping (not just for toast!).
- A perfect “thank you” or holiday gift.
Get the full Caramel Apple Jam recipe here →
Common Mistakes to Avoid When Canning

Canning is simple once you know the basics, but there are a few mistakes that can turn a pantry full of promise into a risky science experiment.
1. Using Untested Recipes
Pinterest is fun for ideas, but when it comes to canning, “Grandma’s recipe” or a random blog post may not cut it. The USDA has strict, tested guidelines for a reason. Botulism isn’t something you can see, smell, or taste. Even a tiny taste of contaminated food can be deadly.
2. Adding Too Much Thickener
It’s tempting to make your jam extra-jiggly, but too much cornstarch, flour, or other thickeners can prevent heat from circulating properly inside the jar. That means your food may not be safely processed.
3. Forgetting to Adjust for Altitude
Water boils at different temperatures depending on where you live. If you don’t adjust processing times for your altitude, you risk under-processing. Check your local elevation (Google Maps will tell you in seconds) and adjust as your recipe directs.
4. Overfilling Jars
It feels efficient to pack just a little more in, but jars need “headspace” so the food can expand while heating and create a proper seal. Skip this step, and you’ll end up with leaky jars or failed seals.
5. Rushing the Cooling Process
It’s late, you’re tired, and you just want to be done. But moving jars too quickly or fiddling with the lids can break the seal. Let them cool on a towel, undisturbed, for 12–24 hours. The “ping” of a sealing lid is your reward.
6. Reusing Old Jars or Lids
That thrift-store jar may be cute, but it’s not always safe for canning. Old jars can develop tiny cracks, and used lids don’t always seal. Always use canning-specific jars and brand-new lids. You can reuse rings until they’re rusty or bent.
Additional Resources
Want to dig deeper or try new recipes? These resources will set you up with solid, trustworthy information and gear to make canning a whole lot easier.
Online Guides
- Pick Your Own: This treasure trove helps you locate local pick-your-own orchards and farms, plus offers step-by-step instructions for canning peaches, plums, cherries, nectarines, and even pie fillings. You’ll also find tons of jelly, jam, and veggie canning recipes. pickyourown.org
- National Center for Home Food Preservation: Run by the University of Georgia, this site is the gold standard for home food preservation. You’ll find free self-study courses, troubleshooting guides, and answers to pretty much every “what if?” question that pops into your head mid-recipe. nchfp.uga.edu
- USDA Complete Guide to Home Canning (PDF): This 193-page guide is free to download and covers everything you need to know about safe home canning. It’s the government-issued “rule book,” and while it may not be a page-turner, it’s the most reliable reference you’ll find. Download here →
Books Worth Adding to Your Shelf
- Ball Complete Book of Home Preserving by Judi Kingry: The “canning bible” for many home preservers. Packed with clear instructions, safety tips, and 400 recipes, from classics to creative flavor twists. Great for both beginners and experienced canners. Available here →
- Canning for a New Generation by Liana Krissoff: If you’re looking for modern flavors and inspiration, this one delivers. Expect approachable, tested recipes with fun pairings (think pickled blueberries or cardamom plum jam). The updated edition adds 50 new recipes that feel fresh and adventurous without sacrificing safety. Available here →
Tools to Get You Started
- Norpro Canning Essentials Kit: Includes long tongs, a jar lifter, a magnetic lid lifter, an extra-wide funnel, a bubble remover, and a jar wrench… basically everything you need besides the jars and the canner itself. You can find this kit (or similar versions) at Amazon, Walmart, or Target. Available here →


Question: What’s the one fruit or veggie you wish you could bottle up and enjoy all year long? Share your favorites in the comments below.
EverydayCheapskate™ is reader-supported. We participate in the Amazon Services LLC Associates Program and other affiliate advertising programs, designed to provide a means for us to earn from qualifying purchases, at no cost to you.

More from Everyday Cheapskate
 https://www.everydaycheapskate.com/wp-content/uploads/20260619-delicious-creamy-no-churn-vanilla-ice-cream-scoop-and-loaf-pan.png
800
1200
Mary Hunt
https://www.everydaycheapskate.com/wp-content/uploads/EC-Logo-by-Mary-Hunt-Tagline-Trimmed.png
Mary Hunt2026-06-19 18:42:402026-06-19 18:42:413-Ingredient No-Churn Vanilla Ice Cream (No Machine Needed)
https://www.everydaycheapskate.com/wp-content/uploads/20260619-delicious-creamy-no-churn-vanilla-ice-cream-scoop-and-loaf-pan.png
800
1200
Mary Hunt
https://www.everydaycheapskate.com/wp-content/uploads/EC-Logo-by-Mary-Hunt-Tagline-Trimmed.png
Mary Hunt2026-06-19 18:42:402026-06-19 18:42:413-Ingredient No-Churn Vanilla Ice Cream (No Machine Needed) https://www.everydaycheapskate.com/wp-content/uploads/20260618-retriever-labrador-on-white-rug-in-bright-contemporary-living-room-pet-stains-and-odors.png
800
1200
Mary Hunt
https://www.everydaycheapskate.com/wp-content/uploads/EC-Logo-by-Mary-Hunt-Tagline-Trimmed.png
Mary Hunt2026-06-18 23:08:332026-06-18 23:08:33Homemade Pet Stain Remover That Stops Repeat Accidents
https://www.everydaycheapskate.com/wp-content/uploads/20260618-retriever-labrador-on-white-rug-in-bright-contemporary-living-room-pet-stains-and-odors.png
800
1200
Mary Hunt
https://www.everydaycheapskate.com/wp-content/uploads/EC-Logo-by-Mary-Hunt-Tagline-Trimmed.png
Mary Hunt2026-06-18 23:08:332026-06-18 23:08:33Homemade Pet Stain Remover That Stops Repeat Accidents https://www.everydaycheapskate.com/wp-content/uploads/20260616-close-up-of-watermelon-feta-salad-with-mint-and-lime.png
800
1200
Mary Hunt
https://www.everydaycheapskate.com/wp-content/uploads/EC-Logo-by-Mary-Hunt-Tagline-Trimmed.png
Mary Hunt2026-06-16 17:44:142026-06-16 17:44:14Watermelon Feta Salad with Mint for Summer Cookouts
https://www.everydaycheapskate.com/wp-content/uploads/20260616-close-up-of-watermelon-feta-salad-with-mint-and-lime.png
800
1200
Mary Hunt
https://www.everydaycheapskate.com/wp-content/uploads/EC-Logo-by-Mary-Hunt-Tagline-Trimmed.png
Mary Hunt2026-06-16 17:44:142026-06-16 17:44:14Watermelon Feta Salad with Mint for Summer Cookouts https://www.everydaycheapskate.com/wp-content/uploads/20260615-how-to-get-rid-of-the-smell-in-the-ice-cooler-chest.png
800
1200
Mary Hunt
https://www.everydaycheapskate.com/wp-content/uploads/EC-Logo-by-Mary-Hunt-Tagline-Trimmed.png
Mary Hunt2026-06-15 20:59:282026-06-15 20:59:28How to Clean and Deodorize Your Cooler So It Doesn’t Stink
https://www.everydaycheapskate.com/wp-content/uploads/20260615-how-to-get-rid-of-the-smell-in-the-ice-cooler-chest.png
800
1200
Mary Hunt
https://www.everydaycheapskate.com/wp-content/uploads/EC-Logo-by-Mary-Hunt-Tagline-Trimmed.png
Mary Hunt2026-06-15 20:59:282026-06-15 20:59:28How to Clean and Deodorize Your Cooler So It Doesn’t Stink https://www.everydaycheapskate.com/wp-content/uploads/20260613-chicken-a-lorange-recipe-in-roasting-pan-with-shallots-and-orange-marmalade.png
800
1200
Mary Hunt
https://www.everydaycheapskate.com/wp-content/uploads/EC-Logo-by-Mary-Hunt-Tagline-Trimmed.png
Mary Hunt2026-06-13 20:59:292026-06-13 20:59:29Duck à l’Orange Is Fancy. This Chicken Version Is Better.
https://www.everydaycheapskate.com/wp-content/uploads/20260613-chicken-a-lorange-recipe-in-roasting-pan-with-shallots-and-orange-marmalade.png
800
1200
Mary Hunt
https://www.everydaycheapskate.com/wp-content/uploads/EC-Logo-by-Mary-Hunt-Tagline-Trimmed.png
Mary Hunt2026-06-13 20:59:292026-06-13 20:59:29Duck à l’Orange Is Fancy. This Chicken Version Is Better. https://www.everydaycheapskate.com/wp-content/uploads/20260612-laundry-stripping-stack-of-white-towels.png
800
1200
Mary Hunt
https://www.everydaycheapskate.com/wp-content/uploads/EC-Logo-by-Mary-Hunt-Tagline-Trimmed.png
Mary Hunt2026-06-12 16:57:242026-06-12 16:59:18Laundry Stripping: The Surprising Fix for Dingy Sheets, Gray Towels, and Sad-Looking Underwear
https://www.everydaycheapskate.com/wp-content/uploads/20260612-laundry-stripping-stack-of-white-towels.png
800
1200
Mary Hunt
https://www.everydaycheapskate.com/wp-content/uploads/EC-Logo-by-Mary-Hunt-Tagline-Trimmed.png
Mary Hunt2026-06-12 16:57:242026-06-12 16:59:18Laundry Stripping: The Surprising Fix for Dingy Sheets, Gray Towels, and Sad-Looking Underwear https://www.everydaycheapskate.com/wp-content/uploads/20260611-June-prep-to-save-time-and-money-this-summer-beach-ball-in-pool.png
800
1200
Mary Hunt
https://www.everydaycheapskate.com/wp-content/uploads/EC-Logo-by-Mary-Hunt-Tagline-Trimmed.png
Mary Hunt2026-06-11 22:51:312026-06-11 22:51:31What I Prep Once in June to Save Time and Money All Summer
https://www.everydaycheapskate.com/wp-content/uploads/20260611-June-prep-to-save-time-and-money-this-summer-beach-ball-in-pool.png
800
1200
Mary Hunt
https://www.everydaycheapskate.com/wp-content/uploads/EC-Logo-by-Mary-Hunt-Tagline-Trimmed.png
Mary Hunt2026-06-11 22:51:312026-06-11 22:51:31What I Prep Once in June to Save Time and Money All Summer https://www.everydaycheapskate.com/wp-content/uploads/20260610-how-to-cool-down-your-house-at-night-bed-with-window-and-view.png
800
1200
Mary Hunt
https://www.everydaycheapskate.com/wp-content/uploads/EC-Logo-by-Mary-Hunt-Tagline-Trimmed.png
Mary Hunt2026-06-10 18:37:072026-06-10 18:37:07The 10-Minute Nighttime Reset That Cools Down Your House
https://www.everydaycheapskate.com/wp-content/uploads/20260610-how-to-cool-down-your-house-at-night-bed-with-window-and-view.png
800
1200
Mary Hunt
https://www.everydaycheapskate.com/wp-content/uploads/EC-Logo-by-Mary-Hunt-Tagline-Trimmed.png
Mary Hunt2026-06-10 18:37:072026-06-10 18:37:07The 10-Minute Nighttime Reset That Cools Down Your House https://www.everydaycheapskate.com/wp-content/uploads/20260607-woman-grocery-shopping-pushing-cart-with-apples-and-cauliflower.png
800
1200
Mary Hunt
https://www.everydaycheapskate.com/wp-content/uploads/EC-Logo-by-Mary-Hunt-Tagline-Trimmed.png
Mary Hunt2026-06-09 23:20:292026-06-09 23:20:29How to Read a Grocery Store Sale Cycle (And Stop Overpaying)
https://www.everydaycheapskate.com/wp-content/uploads/20260607-woman-grocery-shopping-pushing-cart-with-apples-and-cauliflower.png
800
1200
Mary Hunt
https://www.everydaycheapskate.com/wp-content/uploads/EC-Logo-by-Mary-Hunt-Tagline-Trimmed.png
Mary Hunt2026-06-09 23:20:292026-06-09 23:20:29How to Read a Grocery Store Sale Cycle (And Stop Overpaying)Please keep your comments positive, encouraging, helpful, brief,
and on-topic in keeping with EC Commenting Guidelines
Last update on 2026-06-20 / Affiliate links / Images from Amazon Product Advertising API


Canning brings me such joy! I love canning meats in a jar (MS Pot Roast, Beef Burgundy, Beef Stroganoff, chipotle, shredded chicken, etc.). And I’m in heaven when picking berries in an open field or in the woods. My favorite tool when canning is a steam juicer/canner. Processing juice from berries to can juice, jam or jelly is so enjoyable with this setup. Happy canning AND eating goodness!
I have been canning since I was about six years old. When my mom passed away, I inherited her 500 canning jars. Since I have retired back to the farm, I have the luxury of using wide mouth jars for canning, peaches, standard mouth jars for canning cherries and apricots and pretty little jars for my jams. I have been experimenting with using monk fruit sweetener instead of sugar. Because it is not a preservative, the fruits don’t last more than a year, but at least I’m not getting any additional sugar.
used to love canning! still have all my waterbath stuff, never learned pressure canning – mom was nurse – horror stories of blowing up (know they’re safer now). but tho I’d love to be doing it again due to prices etc, I wonder at my age (76) if its really worth it for hubs and self? 6 yrs ago I put up applesauce, pie filling, applebutter – but he wont eat it – only storebought.l…what a waste!!!
Canning has become so popular that finding canning lids have become the new hoarding craze-impossible to find them in the stores in our area.
I do a fair amount of canning myself & have two things to share. First the jar lids. Tattler makes reusable rubber rings & lids. Great if you’re canning for yourself. I’ve had mine for several years now & they’re still great. Second, the deep water bath. There steamer canners where you use less than 2 inches of water. Works on the same principle & you steam for the usual amount of time. Again, I’ve been using mine for several years & love it!
When I was growing up we canned a lot….my job because my hands were small was to wash the jars, and then grandma would have oven set to 250 to keep them warm, the lids and rings gently simmered in warm water on the stove. God Bless SureJell!!, we made so many jellies and so as to keep from wasting the pulp, we would then go back and make jam. I loved Black Raspberry Jelly best, and then for savory, I loved Pickled beets best!!! :0) Anyone else remember “Leatherbritches”? I called them sewed-up beans. Yellow Wax green beans, white Quilting Thread (it was thicker) you tied a knot (after you threaded the sterile needle) in the end of the thread , and slid the needle through each bean until you had enough to make a “mess”. It used to be one of my requested birthday dinners. I ate them with meatloaf and homemade potato salad.
I love to can anything around that is ripe, it started when I was about 5. My mom taught me how to make applesauce but the jars exploded to the ceiling. Not sure why to this day, but she showed me again around 10, we made raspberry jam. I’ve been hooked ever since, it’s so nice to go get a jar of whatever, salsa, jam, venison and put together a quick simple meal. Don’t let your failures hold you back, try, try, try again.
Excellent article! I’ve canned all my (long) life. The only thing I would add is to leave about an inch of space between your cooling jars and cover them with a dish towel to avoid cooling too quickly.
I should have added you can bounce a spoon, right side up and held lightly by the handle tip, on each lid to check for a good seal. If sealed, the bounced spoon will “ding” and if not it will “thunk”.
I have canned for many years and recommend removing the “ring” after 24 hours provided the seal is still secure. In humid climates the ring can rust and make it extremely difficult to remove when you are ready to eat your tasty treats.
I have, what most people claim, is one of the best dill pickle recipes. I don’t know where my wife came up with it but it is simple.
My problem is I’m such a ludlite that I don’t know the best way to share it with you.
If you’re curious or you would like to have the recipe, let me know.
Your faithful disciple,
Bill
Hi Bill … Send it to me by email: mary@ everydaycheapskate .com (be sure to close those spaces). I’ll find a way to share it with everyone! Thanks. Hmm .. disciple? I like that 🙂
I would love the pickle recipe!
I too would love to have the easy pickle canning recipe. I have not yet started canning. I live in an apt which has a very small kitchen. But when I move I will have a larger kitchen and start canning!
Thank you Mary!!!!!
Your articles make my day! How many of us remember our mothers and grandmothers canning jam and fruit–in the days before air conditioning? How many of us remember bare produce departments in the winter? I remember craving lettuce! Keep it up, Mary! Love and air hugs!