
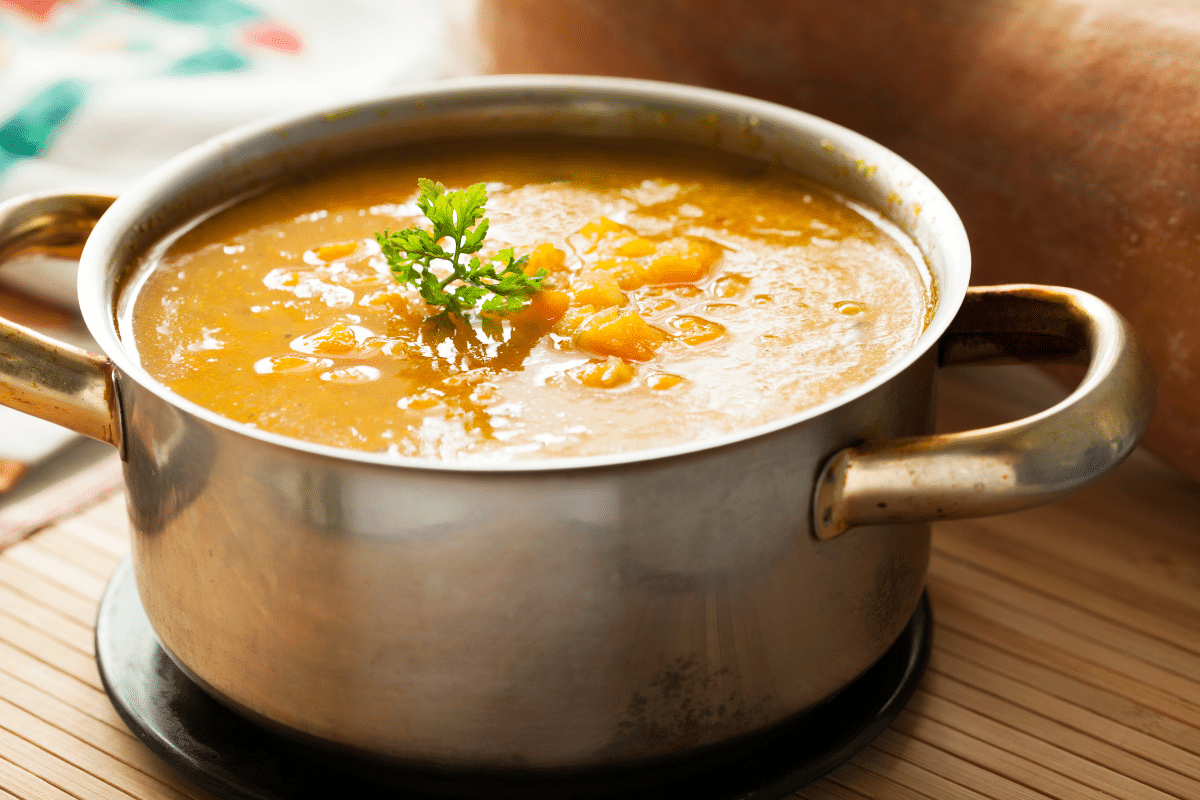
3-Ingredient Butternut Squash Soup in 20 Minutes

Some days you want soup that tastes like you spent the afternoon lovingly tending a pot on the stove without actually sacrificing your afternoon, your patience, or a fingertip. This 3-ingredient butternut squash soup is exactly that kind of recipe. It’s fast, flexible, and just fancy enough to make people assume you worked harder than you did. No peeling. No wrestling a rock-hard squash. No explaining yourself.

A friend turned me on to this semi-homemade soup years ago, and I was skeptical, because “shortcut” recipes don’t always deliver. This one does. The flavor base is already solid, the frozen squash adds body and depth without watering things down, and a little maple syrup nudges everything into that cozy, winter-soup sweet spot. It tastes intentional, balanced, and comforting… not like you cut corners, but like you knew exactly where you could.
This isn’t Thomas Keller’s legendary butternut squash soup with brown butter. That one is wonderful… and also takes over two hours, requires refrigeration, and assumes you enjoy breaking down a winter squash like you’re auditioning for a cooking show. This soup is for real life when you want something genuinely good and you want it tonight.
The Smart Shortcut That Saves Time (and Sanity)
Let’s talk about the butternut squash itself. If you’ve ever tried to peel and cube one, you know it can feel less like cooking and more like negotiating with a small, stubborn log. People on the internet seriously debate whether a chainsaw, cleaver, or minor explosives are the safest approach and honestly, I get it.
That’s why frozen butternut squash cubes deserve more respect. They’re already peeled, chopped, and ready to go. You still get the flavor and texture you want. This 3-ingredient butternut squash soup recipe leans into that shortcut unapologetically because good food doesn’t have to be hard, and dinner doesn’t need to double as an upper-body workout.
What You’ll Need
If you can open a carton and a freezer bag, you’re already halfway there. These ingredients are simple, forgiving, and easy to adapt.
- Prepared butternut squash soup: This is your foundation and the reason the recipe works so well. Look for a refrigerated or shelf-stable butternut squash soup with a short ingredient list and no strong competing flavors. You want “clean and squash-forward,” not heavily spiced. If the soup already contains salt, go easy at the end and adjust gradually. I find Pacific Butternut Squash Soup in a quart-size box at my supermarket, KingSoopers, and also at Trader Joe’s. There are other brands.
- Frozen butternut squash cubes: These thicken the soup naturally and give it that just-made texture without peeling, cubing, or wrestling a squash that clearly doesn’t want to cooperate. If you insist on using fresh squash, soften it first (boiling or roasting works) before adding it to the pot, or you’ll be waiting far longer than 20 minutes.
- Pure maple syrup: A small amount rounds out the savory flavors and enhances the natural sweetness of the squash. Be sure it’s real maple syrup, not pancake syrup. If you’re out, honey works in a pinch, and brown sugar will do. Just use a lighter hand.
- Heavy cream (optional, but lovely): This is what takes the soup from good to exceptional. A splash adds richness and a silky finish. For dairy-free options, coconut milk or cashew cream work beautifully and still keep the soup cozy and satisfying.
- Salt and pepper: Season at the very end. Different soups start with different salt levels, so taste first, then adjust. A few turns of freshly ground pepper go a long way here.
How to Make 3-Ingredient Butternut Squash Soup
Follow these steps for your 3-ingredient butternut squash soup, and you’ll have a comforting, rich meal in no time.
Step 1: Heat the Soup and Squash
Pour the prepared butternut squash soup into a medium saucepan or soup pot and add the frozen squash cubes straight from the freezer. Bring it to a gentle boil, then immediately reduce the heat to low. Let it cook uncovered until the squash is tender, about 15 minutes. Stir occasionally and check as you go. You’re giving the squash time to soften and blend in without turning the whole thing into baby food.
Step 2: Blend Until Smooth
Once the squash is tender (about 15 minutes), it’s time to blend. An immersion blender is the easiest option and keeps cleanup minimal, but a regular blender works just fine. Just blend in batches and vent the lid so steam can escape.
Step 3: Season to Taste
Add salt and pepper gradually, tasting as you go. Many prepared soups already contain seasoning, so start light and adjust only if needed.
Step 4: Add Cream (Optional)
If you’re using cream, stir it in now. Even a small amount adds richness and gives the soup that velvety texture.
Step 5: Finish with Maple Syrup
Finish with a drizzle of maple syrup… not enough to make it sweet, just enough to round out the edges and make the squash taste more like itself.
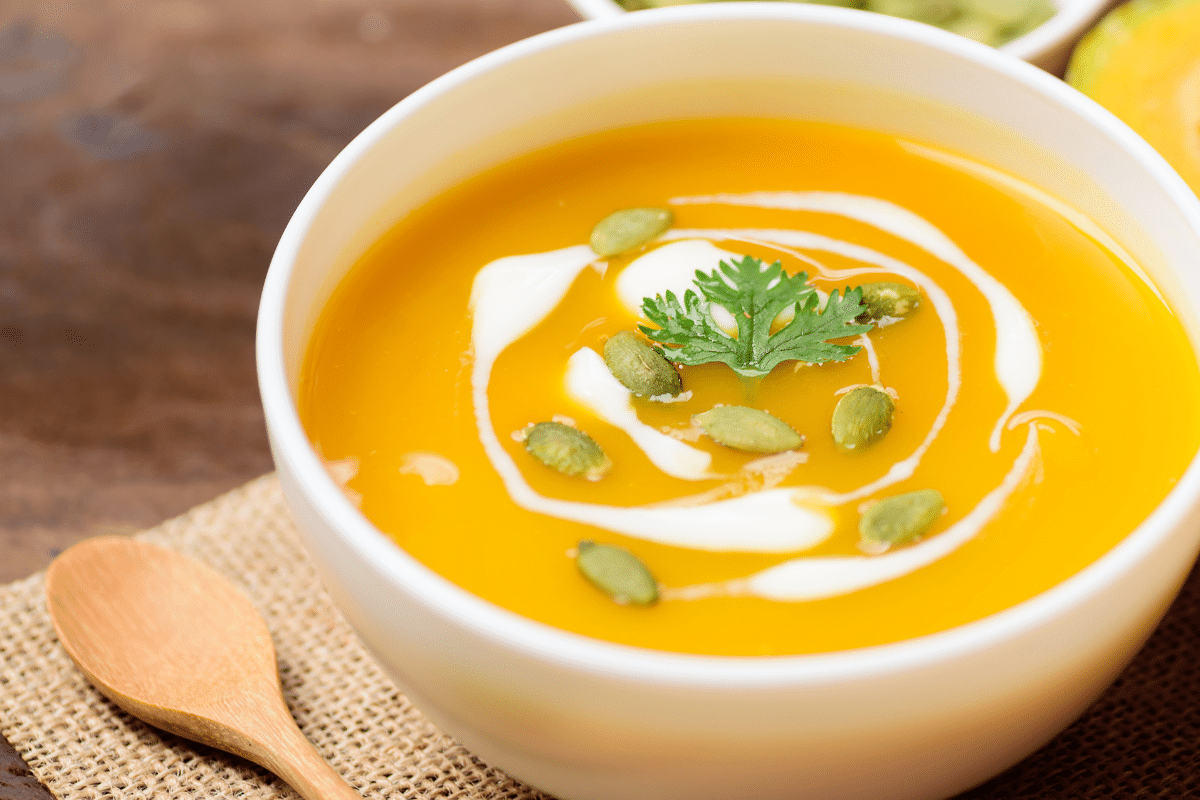
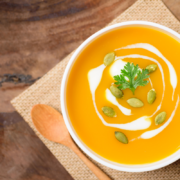
Ladle into bowls and top with a dollop of sour cream and a handful of pepitas (pumpkin seeds) or croutons. Then sit back and enjoy the fact that this simple little soup has everyone convinced you’re a culinary genius.
Frozen Squash vs. Fresh: What Really Matters
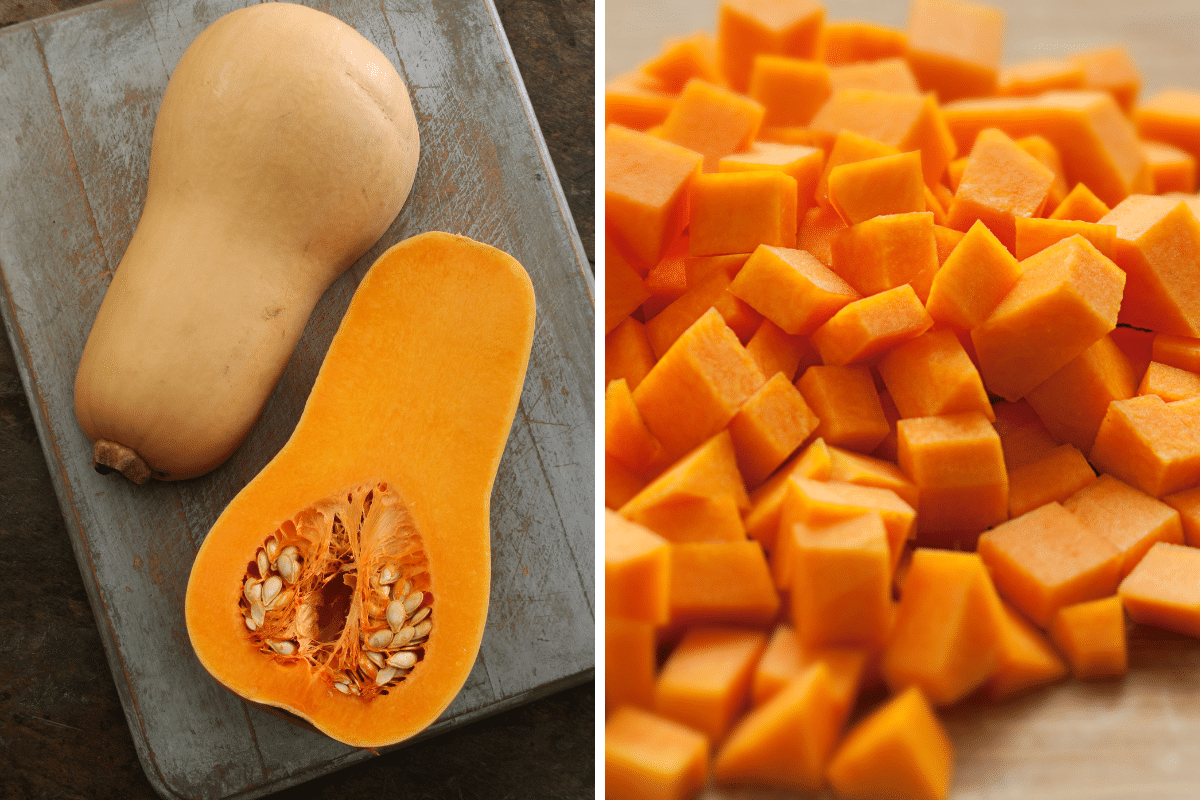
Let’s clear something up right away: frozen squash is not the “sad backup option.” In many cases, it’s the smarter one, especially for soup.
Frozen squash is typically picked at peak ripeness, then flash-frozen almost immediately. That timing matters. It locks in nutrients before they have a chance to fade during transport, storage, or that week it sits in your fridge while you forget it exists. Nutritionally speaking, frozen squash often holds its own against fresh and sometimes even wins.
Fresh squash absolutely has its place. If you’re roasting cubes, tossing them into salads, or want that caramelized edge and firmer bite, fresh is the way to go. When it’s in season and you’re using it right away, the flavor can be slightly sweeter and more complex.
The tradeoff? Fresh squash takes time. Peeling, seeding, chopping and then cooking long enough to soften. If you enjoy that process, great. If not, frozen lets you skip straight to the good part.
Storage, Freezing, and Make-Ahead Tips
This 3-ingredient butternut squash soup is a planner’s dream. It stores well, freezes beautifully, and reheats without complaint.
Storing in the Refrigerator
Once the soup has cooled, transfer it to an airtight container and tuck it into the fridge. It’ll keep well for 4 to 5 days. When reheating, warm it gently on the stovetop and add a splash of water or broth if it’s thickened up. Soups tend to do that when they rest. Nothing to worry about.
Freezing for Later
If you want to freeze it, let the soup cool completely first. This helps prevent icy crystals and keeps the texture smooth. For best results, freeze the soup without cream or coconut milk, then stir that in when you reheat. Soups with dairy can sometimes separate after freezing.
Portion it into single servings using whatever you have… mason jars, freezer containers, silicone cubes, or even heavy-duty freezer bags. Just be sure to leave about an inch of space at the top so the soup has room to expand. Laid-flat freezer bags are especially handy. They freeze into tidy, stackable sheets that don’t take over the freezer.
For best flavor and texture, use frozen soup within 3 months, though it will keep up to 6 months if well sealed.
Reheating Frozen Soup
The easiest option is to thaw it overnight in the refrigerator. Short on time? Set the container in a bowl of warm water or use the microwave’s defrost setting. Reheat gently on the stovetop, stirring often. If the soup looks separated or thicker than you remember, whisk it well and add a little broth, cream, or coconut milk to bring it back to life.
Bottom line: this soup doesn’t just make dinner easy tonight. It quietly sets you up for a cozy, no-effort meal down the road. And that’s always worth five extra minutes now.
3-Ingredient Butternut Squash Soup
Ingredients
- 1 quart prepared butternut squash soup see Notes
- 1 10-ounce bag frozen butternut squash cubes
- 2 tablespoons pure maple syrup or more to taste
- 1/4 cup heavy cream optional (see Notes)
- Salt and pepper to taste
Instructions
- Pour the prepared butternut squash soup into a medium saucepan or soup pot. Add the frozen squash cubes.
- Bring the soup to a boil, then immediately reduce the heat to low. Cook uncovered, stirring occasionally, until the squash is tender... about 15 minutes. You want soft, not obliterated.
- Purée the soup using an immersion blender right in the pot, or carefully transfer it to a standard blender and blend until smooth. Season lightly with salt and pepper.
- Stir in the heavy cream, if using. This step is optional, but it does add a lovely, velvety finish.
- Stir in the maple syrup. Start with 2 tablespoons, then taste and adjust if needed.
- Serve and enjoy. You’re done, Einstein. Serve with a dollop of sour cream and a handful of croutons, and accept the compliments with grace.
Notes
Nutrition
Question: What’s your favorite kitchen shortcut that saves time without sacrificing flavor? Share in the comments below.

More from Everyday Cheapskate
 https://www.everydaycheapskate.com/wp-content/uploads/20260717-a-woman-holding-a-crate-of-cucumbers.png
800
1200
Mary Hunt
https://www.everydaycheapskate.com/wp-content/uploads/EC-Logo-by-Mary-Hunt-Tagline-Trimmed.png
Mary Hunt2026-07-17 10:11:072026-07-17 10:13:44Cucumbers Galore? Here’s What to Do With Every Single One
https://www.everydaycheapskate.com/wp-content/uploads/20260717-a-woman-holding-a-crate-of-cucumbers.png
800
1200
Mary Hunt
https://www.everydaycheapskate.com/wp-content/uploads/EC-Logo-by-Mary-Hunt-Tagline-Trimmed.png
Mary Hunt2026-07-17 10:11:072026-07-17 10:13:44Cucumbers Galore? Here’s What to Do With Every Single One https://www.everydaycheapskate.com/wp-content/uploads/20260713-what-to-pack-for-kids-lunchboxes-young-boy-and-girl-eating-a-banana-and-a-sandwich.png
800
1200
Mary Hunt
https://www.everydaycheapskate.com/wp-content/uploads/EC-Logo-by-Mary-Hunt-Tagline-Trimmed.png
Mary Hunt2026-07-13 21:54:132026-07-13 21:54:13Back-to-School Lunch Ideas for a Week (No Boring Sandwiches)
https://www.everydaycheapskate.com/wp-content/uploads/20260713-what-to-pack-for-kids-lunchboxes-young-boy-and-girl-eating-a-banana-and-a-sandwich.png
800
1200
Mary Hunt
https://www.everydaycheapskate.com/wp-content/uploads/EC-Logo-by-Mary-Hunt-Tagline-Trimmed.png
Mary Hunt2026-07-13 21:54:132026-07-13 21:54:13Back-to-School Lunch Ideas for a Week (No Boring Sandwiches) https://www.everydaycheapskate.com/wp-content/uploads/20260609-refreshing-glasses-of-iced-tea-with-fresh-lemon-slices-and-ice-best-way-to-make-tea.png
800
1200
Mary Hunt
https://www.everydaycheapskate.com/wp-content/uploads/EC-Logo-by-Mary-Hunt-Tagline-Trimmed.png
Mary Hunt2026-07-09 18:30:102026-07-09 18:30:10The Best Way to Make Iced Tea? Depends What You’re After
https://www.everydaycheapskate.com/wp-content/uploads/20260609-refreshing-glasses-of-iced-tea-with-fresh-lemon-slices-and-ice-best-way-to-make-tea.png
800
1200
Mary Hunt
https://www.everydaycheapskate.com/wp-content/uploads/EC-Logo-by-Mary-Hunt-Tagline-Trimmed.png
Mary Hunt2026-07-09 18:30:102026-07-09 18:30:10The Best Way to Make Iced Tea? Depends What You’re After https://www.everydaycheapskate.com/wp-content/uploads/20260707-creamy-whipped-frozen-coffee-drink-on-balcony-with-whipped-cream.png
800
1200
Mary Hunt
https://www.everydaycheapskate.com/wp-content/uploads/EC-Logo-by-Mary-Hunt-Tagline-Trimmed.png
Mary Hunt2026-07-07 10:09:112026-07-07 10:09:11I Stopped Buying $7 Frappuccinos. Here’s What I Make Now
https://www.everydaycheapskate.com/wp-content/uploads/20260707-creamy-whipped-frozen-coffee-drink-on-balcony-with-whipped-cream.png
800
1200
Mary Hunt
https://www.everydaycheapskate.com/wp-content/uploads/EC-Logo-by-Mary-Hunt-Tagline-Trimmed.png
Mary Hunt2026-07-07 10:09:112026-07-07 10:09:11I Stopped Buying $7 Frappuccinos. Here’s What I Make Now https://www.everydaycheapskate.com/wp-content/uploads/20260705-Best-Coolers-for-Camping-Road-Trips-and-Beach-Days.png
800
1200
Mary Hunt
https://www.everydaycheapskate.com/wp-content/uploads/EC-Logo-by-Mary-Hunt-Tagline-Trimmed.png
Mary Hunt2026-07-05 13:26:172026-07-05 13:26:17Best Coolers for Camping, Road Trips, and Beach Days
https://www.everydaycheapskate.com/wp-content/uploads/20260705-Best-Coolers-for-Camping-Road-Trips-and-Beach-Days.png
800
1200
Mary Hunt
https://www.everydaycheapskate.com/wp-content/uploads/EC-Logo-by-Mary-Hunt-Tagline-Trimmed.png
Mary Hunt2026-07-05 13:26:172026-07-05 13:26:17Best Coolers for Camping, Road Trips, and Beach Days https://www.everydaycheapskate.com/wp-content/uploads/20260703-home-decor.png
800
1200
Mary Hunt
https://www.everydaycheapskate.com/wp-content/uploads/EC-Logo-by-Mary-Hunt-Tagline-Trimmed.png
Mary Hunt2026-07-03 20:46:552026-07-03 20:46:5510 Everyday Items You Never Think to Wash (But Should)
https://www.everydaycheapskate.com/wp-content/uploads/20260703-home-decor.png
800
1200
Mary Hunt
https://www.everydaycheapskate.com/wp-content/uploads/EC-Logo-by-Mary-Hunt-Tagline-Trimmed.png
Mary Hunt2026-07-03 20:46:552026-07-03 20:46:5510 Everyday Items You Never Think to Wash (But Should) https://www.everydaycheapskate.com/wp-content/uploads/20260630-a-lit-sparkler-with-an-american-flag-in-the-background-4th-of-july-hacks-tips-and-recipes.png
800
1200
Mary Hunt
https://www.everydaycheapskate.com/wp-content/uploads/EC-Logo-by-Mary-Hunt-Tagline-Trimmed.png
Mary Hunt2026-06-30 21:44:502026-06-30 21:44:5034 Fourth of July Recipes and DIY Hacks for a Stress-Free Holiday
https://www.everydaycheapskate.com/wp-content/uploads/20260630-a-lit-sparkler-with-an-american-flag-in-the-background-4th-of-july-hacks-tips-and-recipes.png
800
1200
Mary Hunt
https://www.everydaycheapskate.com/wp-content/uploads/EC-Logo-by-Mary-Hunt-Tagline-Trimmed.png
Mary Hunt2026-06-30 21:44:502026-06-30 21:44:5034 Fourth of July Recipes and DIY Hacks for a Stress-Free Holiday https://www.everydaycheapskate.com/wp-content/uploads/20260629-wooden-die-spell-july-with-patriotic-decor-in-background.png
800
1200
Mary Hunt
https://www.everydaycheapskate.com/wp-content/uploads/EC-Logo-by-Mary-Hunt-Tagline-Trimmed.png
Mary Hunt2026-06-29 21:07:092026-06-29 21:10:297 Best Things to Buy in July for Huge Summer Savings
https://www.everydaycheapskate.com/wp-content/uploads/20260629-wooden-die-spell-july-with-patriotic-decor-in-background.png
800
1200
Mary Hunt
https://www.everydaycheapskate.com/wp-content/uploads/EC-Logo-by-Mary-Hunt-Tagline-Trimmed.png
Mary Hunt2026-06-29 21:07:092026-06-29 21:10:297 Best Things to Buy in July for Huge Summer Savings https://www.everydaycheapskate.com/wp-content/uploads/20260628-Grilled-Peaches-with-Balsamic-and-Blue-Cheese-1.png
800
1200
Mary Hunt
https://www.everydaycheapskate.com/wp-content/uploads/EC-Logo-by-Mary-Hunt-Tagline-Trimmed.png
Mary Hunt2026-06-29 09:38:342026-06-29 09:38:34Summer Grilled Peaches with Balsamic and Blue Cheese
https://www.everydaycheapskate.com/wp-content/uploads/20260628-Grilled-Peaches-with-Balsamic-and-Blue-Cheese-1.png
800
1200
Mary Hunt
https://www.everydaycheapskate.com/wp-content/uploads/EC-Logo-by-Mary-Hunt-Tagline-Trimmed.png
Mary Hunt2026-06-29 09:38:342026-06-29 09:38:34Summer Grilled Peaches with Balsamic and Blue Cheese

Where is the seed bump located on the butternut squash?
The seed bump is the rounded, bulb-shaped bottom of the butternut squash. That’s where all the seeds are.
The long neck above it has no seeds at all… just solid squash.
I’m puzzled! I never thought of pealing a squash. I always baked it first (stabbing a knife into the seed bump so the steam could escape) and cutting it open when it was cooked. From there, I removed the seeds and cut the “meat” into whatever sized pieces I would need next.
I saves so much time! Is there a down side I missed?
No, your method works great. This recipe just skips the prep time needed when using fresh whole squash. Go back and check out the paragraph on fresh vs frozen. That’s the great thing about this recipe, you can adapt to your needs and uses. Enjoy!
I would like to recommend using Splenda Sugar free evaporated milk instead of the half and half. It is expensive, but works like “Eagle Brand” and ought to work if someone needs a sugar-light option.